Do-it-yourself calculation of rafters: we use a calculator for calculating roof rafters in our work
Read also
The rafter system is the "skeleton" of any roof structure. The reliability, quality and durability of the roof made directly depends on the correctness of its manufacture and installation. If desired, you can handle the arrangement of the truss system yourself. Do you want to know how? Check out the following guide!
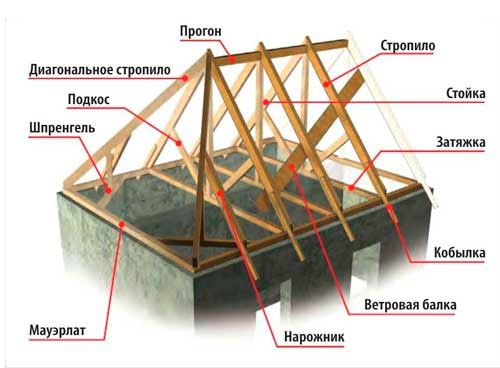
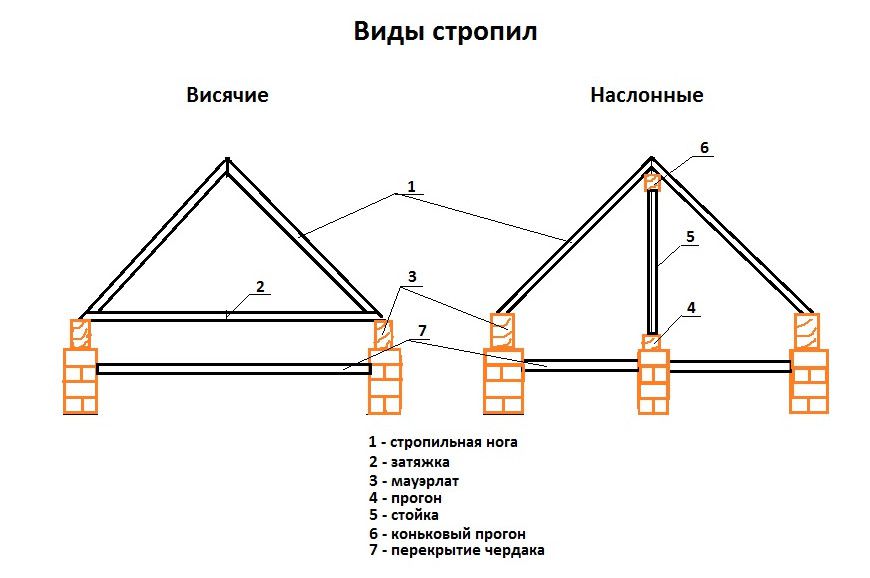
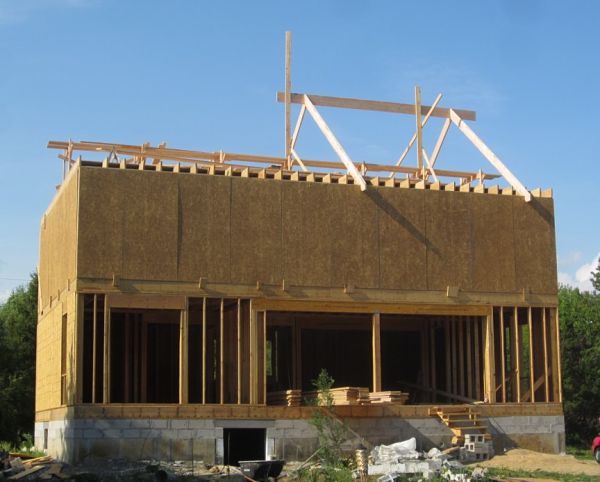
There are layered and hanging truss systems. According to statistics, layered structures are most often used. When arranging such a system, they run into the Mauerlat. The function of the central part is performed by a simple ridge run. To increase the strength of the system, supporting beams are mounted.
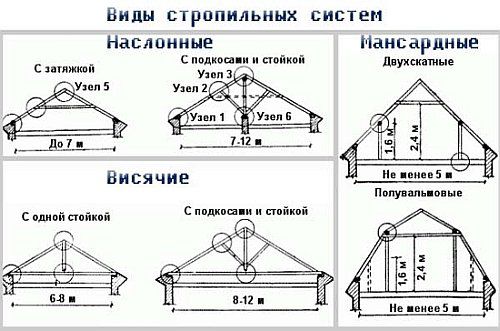
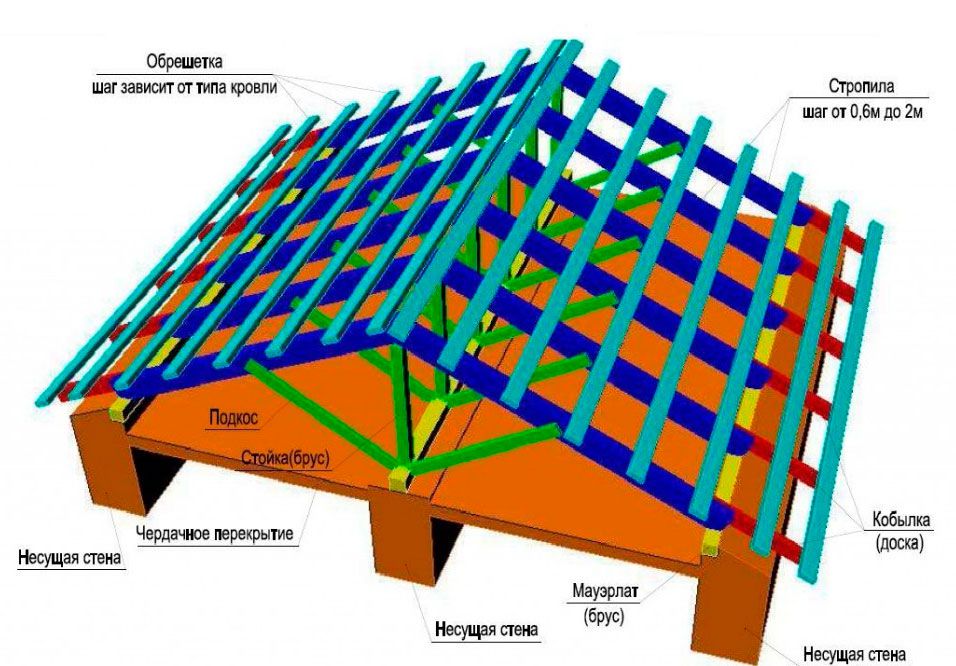
In the case of hanging rafters, the design of the system is completed with additional racks that contribute to the optimal distribution of the load over the entire area of the roof structure.
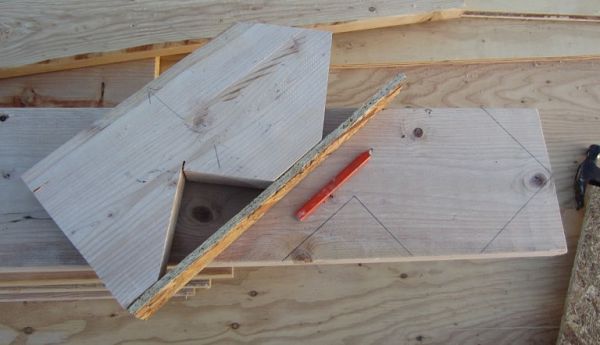
We take an additional pair of nails and fix the angle set between the boards. This template is ready. Additionally fix it with a cross bar. To ensure that the set slope angle of the roof slope does not change under the influence of loads, fasten the crossbar with self-tapping screws.
Be extremely careful when creating a template. Even due to the slightest deviations, the entire structure can deteriorate.
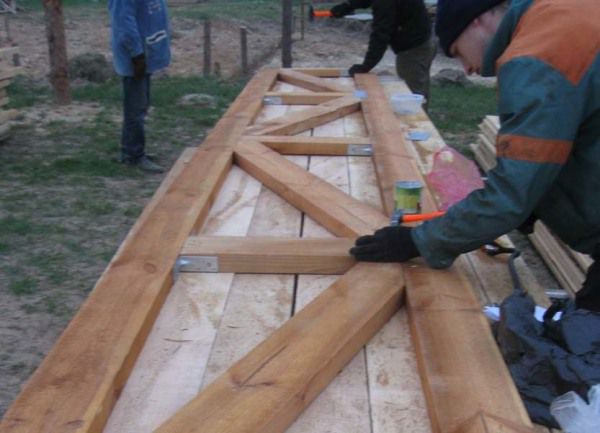
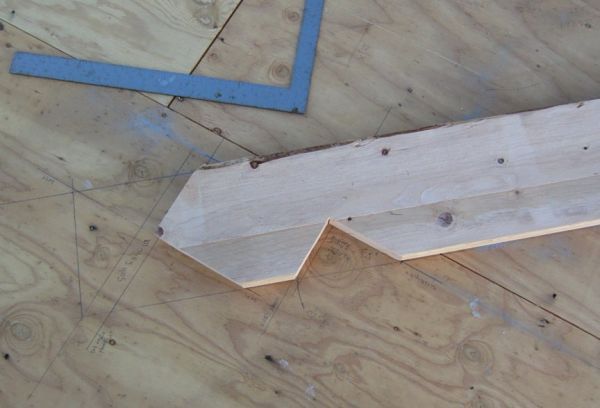
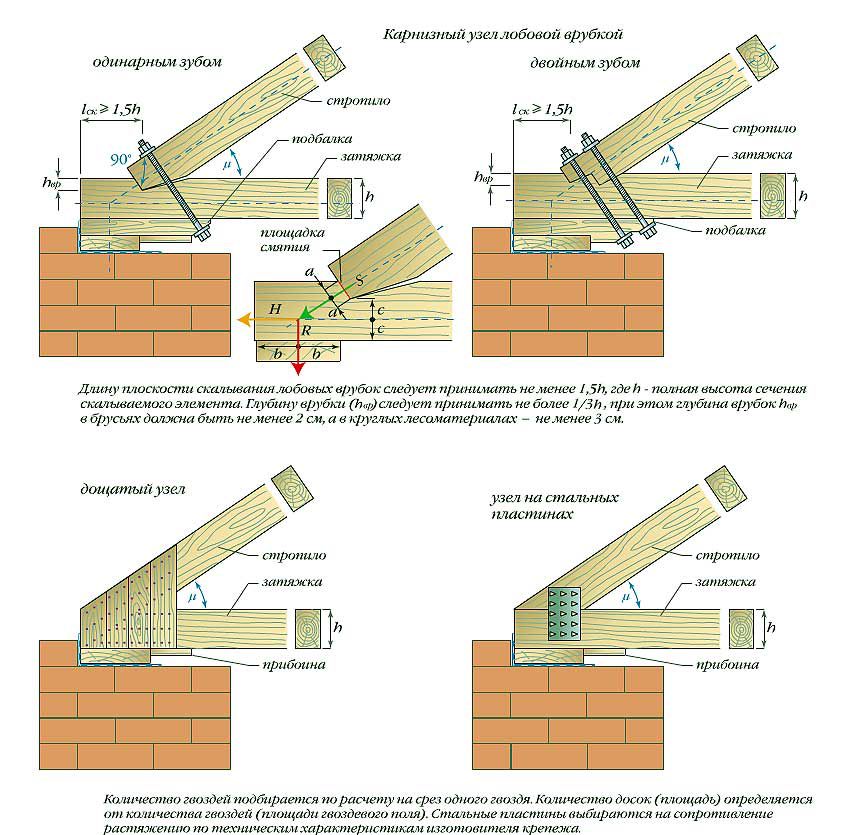
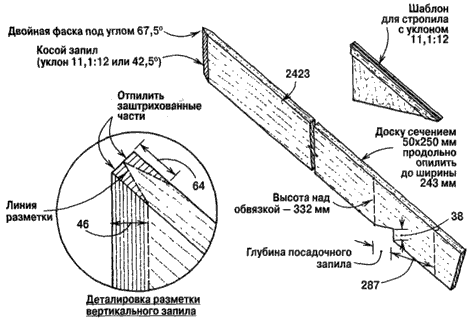
Next, we make a new template for preparing mounting cuts on the system elements. Use plywood 0.5 cm thick. Use a 2.5 cm board for reinforcement. Select the dimensions of the cuts taking into account the cross section of the rafters used.
Using ready-made templates, we make cuts and begin to assemble the farm.
Video - Gable roof truss system
Farm assembly order
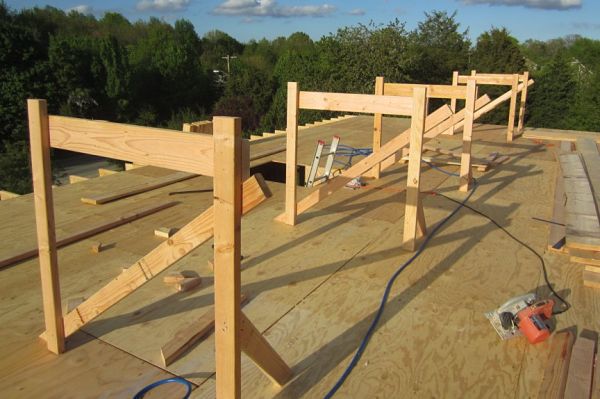
The design includes supporting legs and connecting components. The farm looks like a triangle. Perform the work in the specified sequence, and the finished structure will be able to adequately transfer all incoming
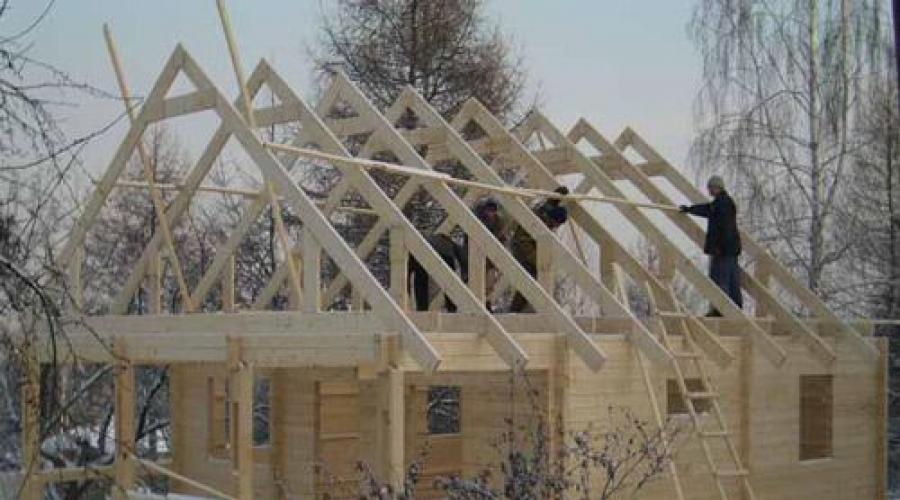
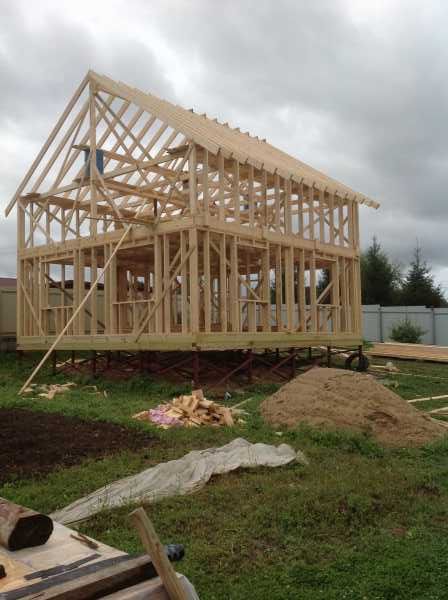
The farm can be done on the ground with a further rise up or directly on the roof. The first option is simpler and more convenient to implement.

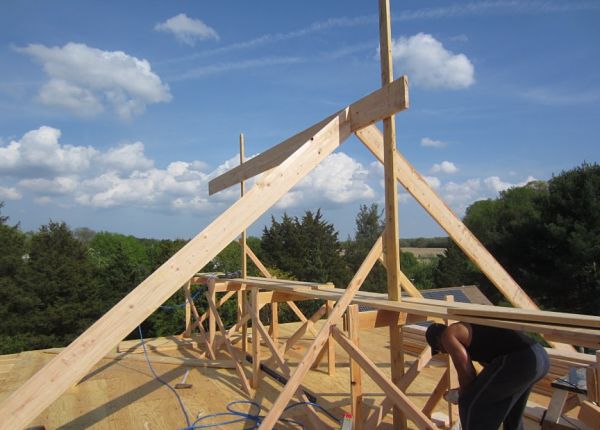
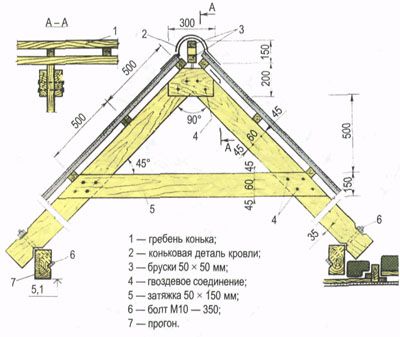
We assemble the truss truss in the following order. First, we cut the prepared material to the desired size, join the bars with the upper edges and fasten them with screws. To prevent the appearance of cracks in the bonding points, we pre-drill holes in the bars with a diameter slightly smaller than the size of the fasteners.
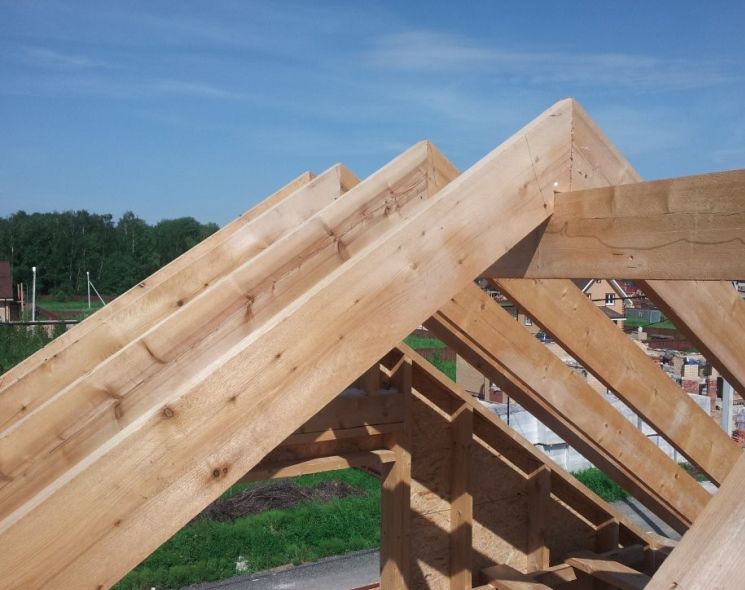
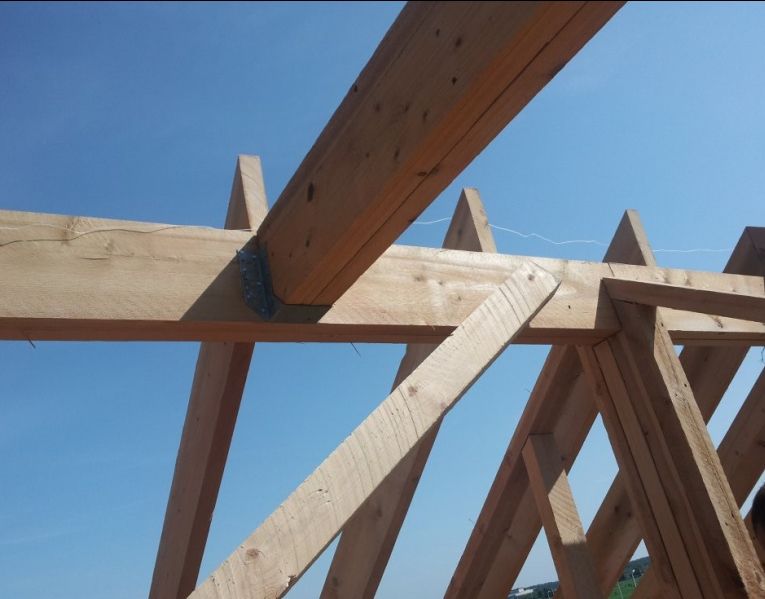
We also use a crossbar to connect the rafter legs. Fixing is carried out half a meter below the upper point of fastening of the elements. Crossbars will increase the rigidity of the structure and eliminate the risk of deflection. We fasten the crossbar in recesses, previously equipped in the rafters by cutting.
If necessary, the rafters are cut at an angle, if this is required by the features of the equipped roof structure.
Roof truss installation
We install roof trusses in the following sequence:
- we mount extreme farms;
- fix the central trusses.
When installing extreme trusses, we adhere to the following important rules:
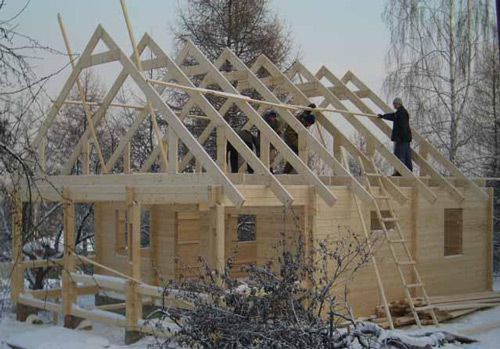
After completing the installation of the outer trusses, we proceed to fixing the central and subsequent structures, if their placement is provided for by the project. The optimal truss installation step is 100 cm.
To fix the central rafter triangle, we use temporary jibs. After the visor is installed, the jibs can be removed. Recommendations for fastening the central and other trusses are the same as in the case of the outer structures.
After installing all the structural elements, we proceed to fastening the battens and further arrangement of the roofing system: moisture, heat and vapor barrier, as well as installation of the selected finishing coating.
Successful work!