How to cut the rafters correctly?
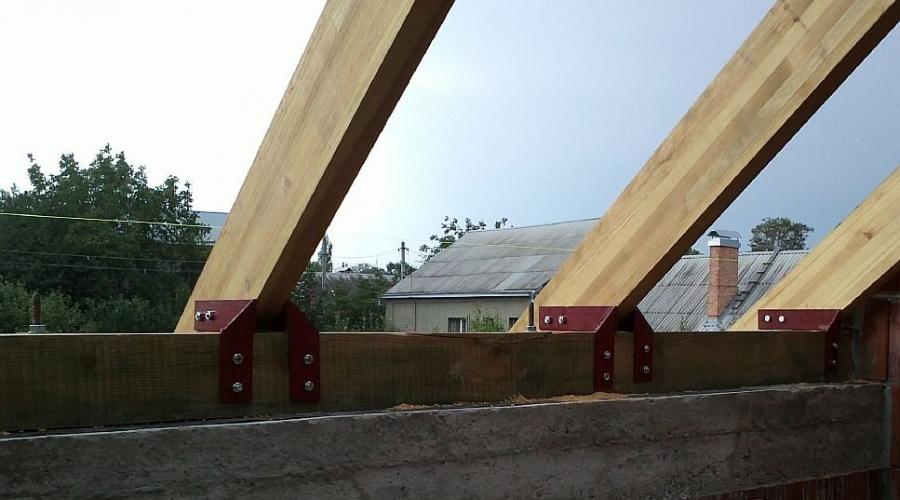
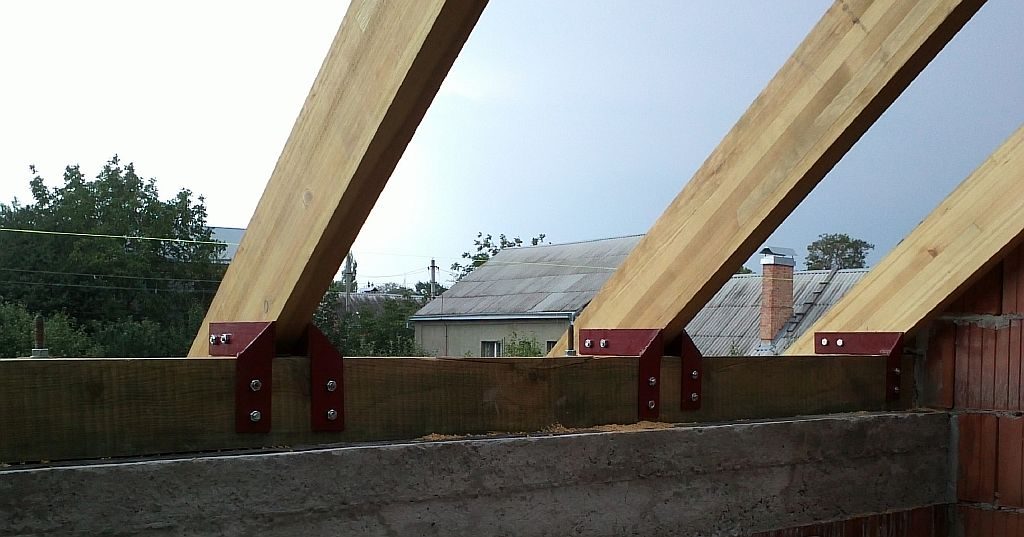
When building a truss system, to ensure the reliability of the structure, it is important to monitor every detail. Particular attention is paid to the attachment point of the rafter to the Mauerlat. It is in this place that the main part of the load is transferred to the load-bearing walls. At the same time, it is important not only how to fix what to use, but also washed down the accuracy. After all, if the board is not fully supported, then it can break and lead to the collapse of the roof. In the article, we will consider how to cut down the rafters and what methods exist for this.
Depending on the design solution, the presence of internal walls and the calculated load, various types of fastening are used. Each of them implies its own version of the preparation of rafters for docking with the Mauerlat. The three main attachment methods are listed below:
- hard;
- layered;
- sliding.
We will not consider the latter option, since when using it, it will not be necessary to make cuts. It is usually used when constructing a roof on houses made of timber. It is most suitable, as wooden walls shrink over time. Because of this, the truss system can change the geometry and leaks will appear.
In other options, you will have to make accurate cuts. You will need accurate measuring instruments, a construction pencil and an electric or chainsaw.
The strength of the roof depends not only on how the cuts were made correctly. Consider the following tips:
- For rafters, select high-quality materials, since even if you make accurate cuts, the bar may not withstand the load. You can’t save here, because this part takes all the load on itself.
- Mounting points with Mauerlat must be free of wood defects, such as knots. Although they are stronger than wood, turbulences form around them, which break at the slightest load.
- When installing a roof, do not hesitate to ask for help, as this is a dangerous and responsible business.
A well-made junction of the rafter leg and the Mauerlat guarantees a long service life of the structure.
Cutting out a seat

It is important to understand that it is impossible to perform a perfect gash on a construction site. The reasons may be different: lack of high-precision tools, uneven position of the Mauerlat, uncomfortable position, and so on. Therefore, relative to the design value, the slope angle of the ramp may change. Here, the main thing is to maintain a single line of position of the rafters.
The easiest way to make the same washed down on the rafters is to use a template. True, this option is not suitable in all cases, so often the roofs are uneven. Then you have to calculate the angle and place of cutting on each rafter individually.
For the basis of the template, take a piece of board, a piece of fiberboard or plywood, even thick cardboard will do. On the workpiece, draw a line from the bottom edge at a distance of no more than a third of the width of the rafter. The same line must be drawn on all the bars that you plan to cut. The fact is that it is not recommended to cut deeper because of the loss of strength. Next, mark the points at which the rafter will be adjacent to the Mauerlat, make a perpendicular line relative to the previous line.
Now let's move on to making a template by determining the angles of the vertical and horizontal parts of the notch. To do this, attach the workpiece to the end of the Mauerlat, keeping the slope of the future roof. Opposite the corner should be the intersection point of the lines that were made before. Draw the lines of the triangle and cut out the resulting template.
Before transferring the markup to the rafters, check the accuracy of the finished product. Walk along the roof and check the degree of abutment along the entire length of the Mauerlat. Make adjustments if necessary, but don't expect perfection. Drops of 2-3 mm are acceptable.

The maximum concentration is important so as not to go beyond the outlined boundaries. If you are not confident in your own abilities, then use a hand tool. So you reduce the percentage of marriage and the time for rework.
The second cut is made with an ax, as the power saw can be stuck. It also requires skill and strength. It is important to make sure that the ax is quite sharp, then the case will be argued better and chips can be avoided.
Finally, check the resulting file with the template and make adjustments if necessary. After that, you can install the finished rafter leg or make seats on the remaining parts.
Cutting for a direct joint with Mauerlat
An easier option is to make a butt joint. To do this, you need to determine the location of the cut and the angle of its inclination. For this purpose, two options can be applied: theoretical and practical.
For the theoretical method, you need to be well versed in geometry and calculate the desired angle on paper. Divide the distance from the ridge to the eaves by the length of the rafter. So, you will get the cosine of the required angle. In order to transfer it to the workpiece, you can use either a miter saw or a special square.
If you don't have a special tool on hand, make a simple template. Take a durable material, such as chipboard. On the sheet, mark 500 mm along the bottom edge, then determine the tangent of the required angle and multiply by the measured length. So, you get the second side of a right triangle. After marking all the borders and cutting out the workpiece, get the desired angle. The sawn parts can be mounted immediately or wait until the whole set is made.
In practice, you can easily mark up a separate rafter by attaching it to the design position. To do this, set the beam so that its lower part is flush with the Mauerlat. Draw a horizontal line from the corner to the bottom of the rafter, it should be strictly parallel to the wall. Now you can safely saw off with any tool at hand and install the part. The rest will serve as a template for the remaining rafters only if the base is even.
Knowledge of geometry helps not only in determining the angle of the washed down rafter leg, but also in determining the height of the roof, the length of individual elements, and so on.