Preparation of plaster mortar. How to prepare a mortar for wall plaster. How to mix with cement mix
Plastering walls is no easy task. The quality of the finishing of the walls directly depends on it. If you decide to do this work with your own hands, then we will tell you how to prepare a mortar for plaster, the proportions in which must be strictly observed. Otherwise, you can get not a smooth, even and durable surface, but a loose, porous layer of mortar, ready to fall off at any moment.
In the article we will answer questions about the composition and proportions of the mixture based on various components, we will talk about the requirements for mortars for plaster, as well as about the types of various modifying additives.
Buy ready mix or make your own
In this matter, the main role is played by the finishing area, as well as the physical and financial capabilities of the owners.
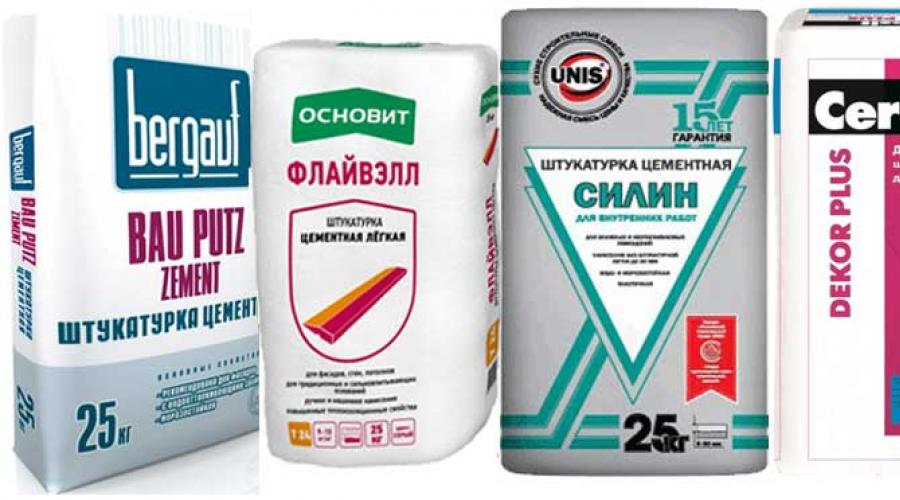
- Ready plaster mix.

The composition, in addition to the main selected and high-quality components (cement, sand), includes many special additives - modifiers, plasticizers that improve the working and operational qualities of the plaster.
But the price of such a mixture is much higher than that of a do-it-yourself solution. Therefore, it is unprofitable to use ready-made plaster on a large area. But if you need to finish a small surface, then it is better to purchase a ready-made composition. You don’t have to buy all the components separately, charge the mortar mixer, and it will take less time.
- Do-it-yourself plaster mixture.

When you have to finish a large brick or foam block house, then to reduce the cost of work, the owners usually prefer to prepare the plaster mixture on their own. Cement, sand are bought, a small mortar mixer is installed, and little by little, in portions, a solution is prepared.
In this case, you have to work with your hands and spend some amount of personal time. But as they say, "your work does not count."

When working independently, it is necessary to strictly observe the proportions of the mortar for wall plastering, otherwise there is a risk of reworking all the work already at the application stage. Even worse, if a low-quality solution begins to fall off at the stage of finishing, fine finishing.
It is possible to correct such a marriage only with the complete removal of the applied plaster and replacing it with a new layer. And this, as you know, additional and considerable costs.
Types of cement mortar, requirements, proportions
There are few types of mixtures, but each requires separate consideration, as it has its own unique characteristics. They differ in the presence of various additional components in the solution.
So, the plaster mixture can be:

Used for leveling and finishing. Such a mixture is compatible with any rough surfaces, except for concrete, due to weak adhesion to the latter.
This mixture is mainly used for rough plaster; for finishing, sand of a very fine fraction is needed. The mixture remains "alive" for an hour, after which the technical parameters deteriorate.
- Lime-cement.

Used for finishing brick or concrete surfaces. Lime gives the solution plasticity, which facilitates its application and stretching. It also increases the vapor permeability and strength of the solution, extends the "survivability" of the mixture up to 3 hours.
In addition, lime has bactericidal properties, on walls covered with lime mortar, mold will never form, fungus and microorganisms will not appear. But the proportions of lime mortar for plaster must be observed in order to avoid lime stains on the walls.
Lime "efflorescence" will bring a lot of trouble when finishing, since not all paints or putties are compatible with this material.
- Gypsum-cement.

It is applied to the improved plaster of walls. Gives an even, durable layer that can be easily sanded. It sets quickly, so it is not recommended to prepare a large amount of solution at once.
If it is necessary to prepare a lot of mortar, then setting retarders are used to extend the "life" of the plaster mixture. They are already present in ready-made mixtures.
Important! In mixtures prepared independently, depending on the air temperature, the type and quality of the surface, the type of room, it is necessary to add special components. Properly selected mineral fillers, polymeric additives or plasticizers will make the solution more plastic, frost- or heat-resistant, enhance adhesive and astringent properties.

Cement-sand and lime mortars are used for interior or exterior walls (see How exterior walls are plastered) exposed to moisture, gypsum-cement mixtures are used only for interior work in dry rooms.
Requirements for the components of the solution
The composition of any plaster solution includes three main components: cement, sand and water. The strength and durability of the applied layer, as well as the quality of grinding and subsequent finishing, directly depend on their quality.
So:
- Cement.

- This is a binder component that plays a major role in the formation and hardening of the solution, giving the mixture strength and water resistance.
- The proportions for the preparation of the plaster mortar are standard. it is recommended to use Portland cement or Portland slag cement at least M300.
- It depends on the brand what proportions of cement and sand for plastering will need to be taken: the higher the brand, the more parts of sand need to be added per unit of cement.
- This material also has a shelf life, the fresher the cement, the better the performance. It is advisable to purchase it in paper bags and store it in a dry place.
Cement is not afraid of frost, but from high humidity, the hardening process can begin right in the package.
- Sand.

This material is the filler of the plaster mixture, it determines the strength, weight, thermal conductivity and density of the solution.
- When interacting with cement, sand creates a monolithic layer with the properties of solid rock.
- For rough plaster, fine-grained ravine sand is taken, in which a small presence of clay is allowed.
- If there is a lot of impurities, then the solution is able to settle and delaminate. It will have to be constantly mixed, and it is still difficult to work with it, as the ability of the mixture to stick and level is reduced.

For an improved layer, river sand is best - or ordinary, but clean, sifted through a fine sieve, washed from impurities. And again, we must not forget about the proportions - cement-lime plaster will turn out to be of higher quality if the sand in it does not contain clay impurities, and the amount of filler does not exceed the required volume.
- Water.

- The liquid for the solution must be clean, free of oil impurities, various organic and chemical contaminants, debris.
- All impurities after evaporation of the liquid will remain in solution and can significantly affect the quality of further finishing.
- Oil stains will show through the plaster or wallpaper, the paint will peel off in this place. The same can happen from the presence of chemical impurities. Therefore, experts recommend using clean, better drinking water.
- When mixing with water, the cement setting process begins in the plaster mixture, therefore, after kneading, the solution must be worked out within 1 hour.
Longer storage of the mixture reduces the technical characteristics of the material, and complicates the work.
Proportions of components for different types of solution

Any instruction requires strictly observing the proportions of cement and sand for wall plastering, so that the work is quick and pleasant, and the result is pleasing with strength and reliability.
If there are no plasticizing additives, then to improve the plastic properties of the solution, the masters advise adding a little neutral liquid soap or soap solution:
- In the cement-sand mixture, the composition of the main components should be as follows:
| Grade of cement | Cement/sand, parts | Produced brand of mortar |
| M300 | 1/3,5 | M100 |
| 1/2,5 | M150 | |
| M400 | 1/4,5 | M100 |
| 1/3 | M150 | |
| M500 | 1/5,5 | M100 |
| 1/4 | M150 |

Water is added to the mixture gradually, with constant stirring. The solution is brought to the consistency of thick sour cream.
Important! Too plastic mortar will lie unevenly on the wall, drain, and when leveled, it will reach for the tool. A hard mixture will stick to the trowel, making it difficult to throw it on, and when it dries, it will shrink and crack. You can recognize a normal solution by immersing a trowel, the mixture should leave a thin layer on it without adhering lumps.

- Lime mortar for plaster, proportions:
| Grade of cement | Cement/lime/sand, parts | Produced brand of mortar |
| 1/0,3/4 | M75 | |
| 1/0,2/3,5 | M100 | |
| 1/0,1/2,5 | M150 | |
| 1/0,5/5,5 | M75 | |
| 1/0,4/4,5 | M100 | |
| 1/0,2/3 | M150 | |
| 1/0,8/7 | M75 | |
| 1/0,5/5,5 | M100 | |
| 1/0,3/4 | M150 |

When cement-lime plaster is used in the decoration, the proportions of lime in the composition of the solution are small, so it is better to purchase ready-made lime paste at a hardware store. It is rather problematic to prepare the necessary component with your own hands, the term for slaking and aging lime is about a month using a special technology.
An improperly prepared or unripened mass can destroy the plaster mortar and nullify all work.

Modifying additives
Separately, it is necessary to talk about additives in the plaster mortar, with them the mixture will acquire some important properties necessary both for applying and treating surfaces, and for their further operation.
Here, too, it is important to maintain the proportions for wall plaster: each package contains detailed instructions for using the additive, and it must be strictly followed:
- Setting accelerators or retarders.

These are components that act on the crystal lattice of the binder and regulate the time of its formation (setting).
It is desirable to make them, for example, in a gypsum-cement mixture to extend its "survivability". In this case, casein or bone glue serves as such an additive.
- Additives to increase plasticity.

These substances, getting into the solution with water, form a lot of bubbles, due to which the liquid evaporates less and is absorbed into the surface, which means it stays in the mixture much longer. They are recommended for simple, traditional cement-sand mortars that quickly lose water and delaminate.
- Antifreeze additives.

Basically, it includes various special salts that slow down and even exclude for some time the freezing of water in the solution, which means that they reduce the risk of losing the positive qualities of the mixture when the air temperature drops.
I must say that they operate mainly up to -5 degrees. At a lower temperature, plastering work cannot be carried out, here no additives will save the mixture from freezing.
- Strength additives.

They can be of two types: some work in tandem with a binder, by means of chemical action they increase its properties; others act independently, personally perform a reinforcing function.
The second type is called fiber, which may consist of waste glass, pulp or metal production. Fiber is sold in the form of small chips or polymer threads, which, getting into the solution, intertwine and give the plaster additional strength.
Conclusion

If the surface of the walls turned out to be not too smooth, do not be upset - all the small irregularities will be hidden by the finishing putty. The main thing is that the plaster itself is strong, does not crumble, does not crack and does not fall off.
By correctly determining the composition and calculating the proportions of the plaster, you will get a high-quality and durable coating that will not require repairs for many years. And after looking at the photos and videos in this article, you will get answers to other questions that concern you.
But if you are still not confident in your abilities, and do not risk plastering the walls yourself, then we recommend inviting specialists who will do this work quickly, beautifully and efficiently.
Plaster is an integral part of the finishing of walls and ceilings. How long we do not need cosmetic repairs depends on its quality. The quality of the plaster mixture itself, and then the plaster coating, depends on the composition.
Cement plaster mixes
Cement plaster mixtures can be divided into two types:
- Cement-sand, used for leveling and finishing any surfaces, except for concrete. Adhesion with such a base for cement plaster is poor.
- Cement-lime, used in the decoration of brick, concrete and ceramic surfaces
Both plaster compositions necessarily include special polymeric additives and mineral fillers, which make the finished mixture more plastic, heat and frost resistant, and enhance its astringent and adhesive properties.

We prepare plaster
You can make a plaster mortar from a ready-made mixture, or you can do it yourself. We add medium fraction sand and a little liquid soap to the composition of the cement mortar, which prolongs the time of working with the mortar.
Below are the proportions of cement mortar for plaster. The composition of the cement-sand mixture:
- 1 part cement;
- 3 parts sand;
- water to the consistency of thick sour cream;
- liquid soap

The composition of the cement-lime mixture:
- 1 part cement;
- 3 - 5 parts of sand;
- 1 part of lime dough (one part of quicklime + three parts of water. Pour lime with warm water, wait for the reaction to start, add more water and mix. Close and let ripen for one day. Then dilute with water to a liquid state, drain into the prepared pit, in a day we pour sifted sand on top, and on top of the earth. The maximum layer of sand and earth is half a meter. In the pit, lime is aged from 15 to 20 days, after this period, lime dough is obtained, which is used in the preparation of plaster cement-lime mortar.);
- liquid soap or soap solution.

The preparation of a cement mortar for plaster consists in mixing sand and cement in the required proportions. The resulting dry mixture is gradually poured either into water or milk of lime, add liquid soap. By appointment, we adjust the amount of liquid - for spraying walls, a weaker solution is required, for rough plastering of walls after spraying - a thicker one.
To prepare a cement mortar for wall plastering, it is enough to know the exact proportions of cement, filler and liquid, as well as follow simple rules.
- We take a clean box with a flat, smooth bottom.
- We pour clean sifted sand to the bottom.
- Pour cement on top.
- Thoroughly mix the dry mixture, then level it with a rake.
- We repeat point 4 several times.
- We carefully look at the finished mixture, it should be a uniform color.

Advice. Prepare the working mixture in small quantities. After forty to fifty minutes, it will seize and begin to lose its properties, and the coating will turn out to be of poor quality.
There are three types of ready-made plaster mixes prepared from factory dry ones. Their quality is determined by the trowel lowered into the container with the finished mixture.
- Fatty. Too sticky, strongly sticks to the trowel. As it dries, it will crack and shrink. We adjust the ratio of the finished mixture and the filler, adding it and stirring thoroughly until we get the desired consistency.
- Normal. A thin layer of cement mortar remains on the trowel.
- Skinny. The presence of the mixture is barely noticeable on the trowel. In this case, the ratio of dry mix and liquid must be corrected towards cement by adding it and stirring thoroughly.
In the photo in this article you can see how to properly knead the solution.
Advice. When preparing this kind of mixture for plaster, use only slaked lime. Quicklime, when water is added, will enter into an uncontrolled reaction with it and it is not a fact that it will be completely extinguished. In the future, the remaining pieces of unslaked lime will come into contact with moisture, which will lead to gaps in the plaster coating.
Plaster mixtures, where there is little cement and too much sand, have little plasticity and are very inconvenient to use, therefore the optimal ratio of cement and sand is 1: 3. We use cement brand M400, it gives the best result.
Application of cement plasters
Cement-based plaster mixtures are considered universal, as they can be used for both indoor and outdoor work, they are resistant to moisture, and have good vapor permeability. You need to know that such a mixture dries for about 4 weeks. But it must be processed no later than an hour after application.
Advice. The layer of plaster on the outer walls of the building should be twice as thin as on the inner ones. Thus, the normal vapor permeability of the walls is observed, fungus does not form on them and condensate does not collect.

In addition to the correct composition and kneading of the plaster mixture, it is necessary to properly prepare the base, otherwise all the work will go down the drain and everything will have to be started anew.
Here are some tips for preparing the base (using a brick wall as an example).
- It is necessary to level the surface and peel off the dried cement (if any).
- Then we carefully embroider the seams of the brickwork (if there are any voids and notches, we leave it as it is).
- We remove dust, if there are greasy stains - wash them off, wipe the surface with a damp sponge and let dry.
- We cover the base with a primer and let it dry.
- We prepare the mixture for plaster and proceed to the application. We work from the bottom up and from right to left.
- After about 40 minutes, we proceed to the final alignment.
Advice. It is not recommended to work at temperatures above + 25 and below +5 degrees, as well as in rainy weather. If you still had to plaster in hot weather, it is recommended to moisten the finished surface regularly to avoid premature drying and cracking.
Starting to repair, you need to decide for yourself how much effort you are willing to spend on it. Perhaps the best solution for you would be to buy ready-made cement mixtures from well-known manufacturers.
The most reliable way with which you can qualitatively level the walls is plastering. Plaster allows you to prepare the base of the outer and inner walls for finishing. Previously, to prepare a solution for plastering walls with your own hands, classic ingredients were used mixed with water in the correct proportion. It was only cement and sand.
The modern market for building and finishing materials is full of ready-made mixtures that only need to be diluted with water. However, the rules for mixing the mortar will vary depending on the composition of the plaster. How do cement, clay and lime mortars differ from each other, and how to mix them correctly?
]The easiest way to get a beautiful front lawn
Of course, you have seen the perfect lawn in the movies, on the alley, and perhaps on the neighbor's lawn. Those who have ever tried to grow a green area in their area will no doubt say that this is a huge job. The lawn requires careful planting, care, fertilization, watering. However, only inexperienced gardeners think so, professionals have long known about the innovative tool - liquid turf AquaGrazz.
The composition of the plaster
Each plaster solution has its own components, mixed in various proportions:

- clay and sand in a ratio of 1 to 2 (5) - the number of shares of sand depends on how viscous the clay turned out;
- a solution consisting of three components - clay, lime and sand - is mixed in a ratio of 1: 0.4: 4;
- clay, cement and sand plaster is mixed in a ratio of 1:0.3:4.
All of the listed types of plasters are mixed with water, the amount of liquid directly depends on what viscosity you need.
What is required for work
To mix different plaster compositions, you will need one or more binders (cement, lime, clay or gypsum), filler (most often this role is played by sand) and water. When mixing all the components, you should be guided by the exact ratio of the proportions of the composition. However, this is not the only thing to consider: the quality of the plaster is affected by such a concept as fat content. Most often this applies to lime and clay plasters.

In this case, the concept of "fat content" is in no way connected with its literal meaning: it is a parameter by which the amount of the binder component is determined - sufficient or excessive. By fat content, plaster compositions are divided into three types - fatty, normal and skinny.
- The disadvantage of greasy plaster is that it shrinks too much when it dries, which leads to cracks in the surface.
- Too lean mortar is also covered with cracks, but for a different reason - it does not adhere well to the surface and gradually begins to move away from the base.
It is difficult to determine the level of fat content of plaster by eye; this requires some experience. When kneading the composition, check how strongly the plaster sticks to the tool. The stronger the solution sticks, the greasy the plaster, but skinny plaster, on the contrary, will stick very poorly or not at all.
cement mortar

To properly prepare the plaster composition from cement, you need to perform several stages of work:
- First of all, the sand is dried and sifted until there is not a single lump left in it. Important: reddish sand should not be added to the plaster, as it is of poor quality. If you do not want to bother with sifting, you can use quarry sand, it is already clean and crumbly.
- The second and last step is mixing. Pour cement and sand in a ratio of 1 to 4 into a container of a suitable size and mix thoroughly. To avoid the appearance of lumps, pour water into the composition gradually. However, such plaster will be extremely difficult to stir on your own if you need too much mortar. For such volumes, you will have to rent a concrete mixer.
Important: to obtain high quality plaster, you must use cement not lower than M400. With the use of cheaper and lower quality cement, the walls will simply crumble.Lime mortar for walls

Making such a plaster is somewhat more difficult than a classic cement mortar. Lime plaster hardens much more slowly, so you have to resort to some tricks.
Important: only slaked lime is suitable for the preparation of lime mortar.
Stages of work:- Grind the lime so that in the end there is a homogeneous mass without lumps.
- Pour sand in proportions of 3 to 1 in relation to lime.
- Thoroughly mix the dry plaster and begin to gradually pour in water until a solution of the desired density is obtained. Ready plaster should not be stored for longer than a day - it will be unsuitable for further use.
- In order for lime plaster to harden faster and have better adhesion, a little gypsum should be added to it. But in this case, it is better to stir the composition in small quantities, since it will harden very quickly - almost instantly after application.
Important: do not overdo it with the amount of water. Too much liquid will only worsen the quality of the plaster.
Clay plaster mortar

No less than lime and cement, natural clay is also used. The main thing is not to buy liquid clay for plastering, because it will eventually slide down from the wall. To make a solution of high quality, you will need a large number of ingredients - clay, sand, cement and lime. Stages of preparation:
- Soak the clay in water for 6 hours and add new water regularly as soon as you see that the top layer has begun to dry out. You should get clay of medium density.
- Pour pre-sifted or quarry sand in a ratio of 2 to 1. Sometimes the amount of sand needs to be increased to four parts.
- To strengthen the mortar, add 0.2 parts of cement and mix well.
Not all plaster solutions are suitable for outdoor use, some are used only for interior wall decoration. The technology of using mixtures depends on their composition.
Where is plaster used?

Depending on the climate, the level of humidity, the place where the plaster is applied, different solutions are used:
- Lime and lime-gypsum plasters are best suited for leveling indoor surfaces. Such walls turn out to be literally “breathing” - depending on the change in the level of humidity, they either store moisture or give it back. As a result, the microclimate in the room is constantly regulated and maintained in the normal range.
- Cement-sand plaster is used for exterior finishing work, and is also used in rooms with too high humidity - in the kitchen, bathroom, bath, etc. Such plaster not only levels the surface of the outer walls, but also holds them together, making them stronger . Cement-sand mortars are used for finishing stone fences and garages.
- Pure lime plaster is well suited for processing window slopes, it is much more effective than cement plaster, because it has better thermal insulation parameters. For example: the thermal conductivity of lime plaster and cement plaster is 0.86 and 1.3, respectively.
- Clay plaster is often used to decorate stoves, pipes and fireplaces. At the same time, the nearest space around the furnace is plastered with a clay-sand composition, and the thermal surfaces are plastered with a solution of clay and lime.
Surface preparation for plastering

Plaster of any type should be applied only on a previously prepared base, otherwise the results of the work will not please you - the plaster will fall off the wall or ceiling along with the decorative coating.
- In brickwork, all protrusions from the joints must be removed, and the bricks themselves must be completely cleaned of dust, dirt and cement residues.
- Before starting work, notches must be applied to the surface of building blocks.
- If earlier there was already plaster on the base, it must be completely beaten off or only the top layer should be removed - depending on the condition of the coating.
Calculation of plaster consumption
Before starting work, it is important to know exactly how much plaster is needed - this will help save money by avoiding overspending of the material. There are two main factors that are important to consider when calculating the volume of plaster:
- Curved walls. If it so happened that the walls in the same room are different in length and width (and this is not uncommon, for example, in panel houses), they must be leveled, which will require a much larger amount of plaster. It will also be necessary to increase the volume of the mixture if there is a need to close cracks and potholes.
- The composition of the plaster itself. Since different mixtures have their own consistency, the consumption per 1 sq. meter will be different.
Method for calculating plaster
First of all, you need to determine the required coating thickness. You should first prepare the base by removing all parts that are loose or crumble. When the wall is ready, use a laser level and determine the level by placing beacons around the perimeter of the room. If there is no laser, use a weight (an ordinary washer will do) on a strong thread. Next, measure the degree of deviation from the resulting line at 4 points, add the resulting data and divide by 4.

Standard plaster mixes are based on a layer of 1 cm per 1 sq. meter. It is enough to calculate the area of \u200b\u200bthe walls that require plastering. Multiply the resulting dimensions by the average thickness of the plaster calculated earlier. At the same time, always buy mixtures with a small margin, since the actual consumption of plaster may differ from what you counted. Get a couple of packs more, but no more.
Some features of plaster mixtures:- The lime composition is warmer and practically not susceptible to the appearance of mold and fungi.
- Cement plasters are moisture resistant and have great strength.
- Gypsum in the composition of lime mortars increases their strength and quality of adhesion to the surface, but greatly reduces the time of use.
- Clay plaster mortars are the least durable of all, but they perfectly withstand very high temperatures.
When carrying out finishing work, outdoor or indoor, be guided by the choice of plaster based on the highest priority qualities. Then the plaster will last a very long time, and over time there will be no surprises in the form of cracks or crumbling walls.
Plastering is the most elementary and obligatory way to prepare the walls for further finishing work. In the distant past, such work was carried out using the same technology and the same materials.
But now the construction market has changed so much and is so diverse that it is necessary to more carefully approach the choice of building materials and correctly observe the proportional ratio of all components.
The quality and duration of life of the entire finished surface depends on how correctly the solution for wall plastering is prepared.
Plaster is a kind of basis, and the success of all subsequent work depends on the strength and quality of its composition.

Next, we will talk in more detail about how to prepare a plaster mortar, what proportions must be observed when preparing the composition, and what types of plaster mortars are used for interior work, so that subsequent processing is carried out lightly.
Classification of varieties of solutions

There are 2 types of mortar for wall plastering: skinny and greasy.
The composition of the lean mixture is characterized by a low content of binders. Although it does not burst, it does not differ in special strength.
The greasy solution, on the contrary, is characterized by a high content of a binder, is easily covered with cracks and lends itself to high shrinkage.
That is why pay special attention to what proportions of the binder component and sand are observed in the composition of the mixture.
Here are the approximate proportions of how to prepare the most suitable mortar for plaster:
- Lime mortar
To prepare such a composition, you need sand, the amount of which depends on the fat content of lime. It is worth kneading it on the day when the work is planned.
- Clay mortar
Its preparation is similar to the previous type of mortar, but to increase the strength, it is customary to add lime, gypsum or cement to it.
- A mixture of clay and lime
For its preparation, the following proportions are used: 1 part of clay, 0.3 parts of lime and ≈4.5 parts of sand.
- A mixture of lime and gypsum
Such a composition has a low level of hardening, so it is better to add alabaster, cement or gypsum to it and immediately use it for finishing work.
- Gypsum-clay mortar
Here it is better to adhere to the following proportions: 1 part of clay, 4 parts of sand, part of gypsum (the amount of sand is also affected by the fat content of the clay).
- Cement-clay mixture
To prepare it, you need to mix 1 part of clay with 0.2 cement and add sand from 3 to 5 parts.
- cement mortar
To work with such a solution, it is necessary to take 1 part of cement, from 2 to 5 parts of sand, 0.1 parts of lime. A similar composition seizes after 35-40 minutes.
- Cement-lime mixture
The kneading of such a solution is carried out according to the same technology as the cement one, only lime milk is mixed here instead of water.
As you can see, there are a lot of varieties of various plaster mixtures, so each of them is used for certain works.
For exterior decoration, cement with various impurities is most often used, which does not lend itself to natural disasters and has a high level of strength.
If you need a composition for sealing cracks, it is better to choose gypsum-based plaster. It is white and almost invisible on light surfaces, it is easy and even to lay with your own hands, it is covered with paint without any problems.
What are the features of the mortar for plaster?

Before you start mixing the solution, all the components must be sifted with your own hands through a construction sieve. If all proportions are observed correctly, the plaster mass should turn out to be of a homogeneous consistency, fit well on the surface and not burst after drying.
As we have already said, plaster mixtures come in several types of fat content, which can be determined using a paddle when mixing the ingredients:
- if the mass is too oily, it will adhere well to the mixer, and this can be corrected by adding aggregates;
- if the proportions were maintained correctly and the mass does not stick very much, the fat content of such a solution is normal;
- if the mass does not linger on the mixer at all, we have a lean mixture in which additional binders or sand must be added.
What is a plasticizer for?

A plasticizer is a substance that is added to building mixtures to make them elastic. Plasticizers help raise the level of fluidity without using excess liquid.
To prepare such a plaster mortar, a plasticizer, filler and water are used. All these components are thoroughly mixed to a homogeneous consistency.
A plasticizer-based substance suitable for further work is considered to be a mixture that sticks to a spatula with a thin film, with which it is kneaded.
Depending on the amount of plasticizer added, the plaster can harden and turn to stone after a few minutes or hours.
Plasticizers come in 2 states: liquid or powder. Both options are easy to work with and dilute with plain water.
The proportions of the plasticizer each manufacturer indicates are different, and they depend on the amount of other components that make up the mixture. Its proportions, as a rule, are about 1%, that is, ≈1 kg of plasticizer is needed per 100 kg of cement.
How to determine the concentration of plaster?

When you combine all the components in the right proportions and knead the plaster mortar with your own hands, you will need to make sure that its consistency is correct.
If the batch is very thick, the walls may crack over time, and if it is liquid on the contrary, the walls will get dirty.
Too thick consistency can be diluted with water and achieve the required density with your own hands, and dry brick can be put into the liquid mass, which will absorb excess moisture.
Please note that the entire plaster mixture must be used in a timely manner, and only if necessary, make a new batch. The mixture must be applied mechanically in an even layer or with your own hands using a medium-sized spatula.
When the plastering process is completed, the surface must be well dried and only after complete drying begin grouting. Here it is important to guess the exact period of time so that the solution does not harden too much, but also does not cling.
If one applied layer seems not enough for you, you can repeat the coating, but wait 24 hours until the layer “rests”.
When the grout is done, you can proceed to puttying the structures, which will give them the necessary smoothness.
Proportional ratios when mixing the solution

Preparing plaster for wall application
As mentioned earlier, the whole point of how to make a plaster mortar with your own hands correctly lies in the proportions of the components. These ratios are shown in the tables below.
The composition of the cement mortar
| Grade of cement | Cement/lime/sand ratio | |||||
| Produced brand of mixture | ||||||
| 150 | 100 | 75 | 30 | 25 | 10 | |
| 400 | 1:0,2:3 | 1:0,4:4,5 | 1:0,5:5,5 | 1:0,9:8 | — | — |
| 1:0:3 | 1:0:4,5 | 1:0:5,5 | — | — | — | |
| 300 | 1:0,1:2,5 | 1:0,2:3,5 | 1:0,3:4 | 1:0,6:6 | 1:1:10 | — |
| 1:0:2,5 | 1:0:3 | 1:0:4 | 1:0:6 | 1:1:9 | — | |
| 200 | — | — | 1:0,1:2,5 | 1:0,3:4 | 1:0,8:7 | 1:0,8:7 |
| — | — | 1:0,2:2,5 | 1:0:4 | — | 1:1:9 | |
The composition of the solution of lime
The composition of the gypsum mixture
| Material | Plaster layer thickness (mm) | |||||||
| 15 | 20 | 25 | 30 | 35 | 40 | 50 | 60 | |
| Lime (l) | 12 | 16 | 20 | 24 | 28 | 32 | 40 | 48 |
| Gypsum (kg) | 6,4 | 8,5 | 10,6 | 12,1 | 13 | 13,4 | 15 | 17 |
| Water (l) | 7 | 9 | 11 | 13 | 13 | 14 | 15 | 17 |
What factors affect material consumption?
Before you start plastering, you need to determine exactly how much mixture you need to finish a particular area. Such knowledge will help you save building materials and avoid unnecessary waste.
Wall plastering is one of the oldest and most effective ways of leveling and decorating surfaces. The modern construction market offers a huge number of different solutions for plastering walls, but the purchase of dry or already diluted mixtures with water can cost a significant amount. To save money, you can prepare the plaster yourself.
Necessary tools and materials for work
The preparation of plaster mortars begins with the preparation of the following tools:
- Mixing container (a regular plastic bucket will do).
- Containers for dosing components.
- Trowel for manual mixing, drill, rotary hammer with mixer attachment or concrete mixer for machine mortar preparation.
From the materials you will need:
- Binder (clay, lime, cement).
- Filler (sand, stone chips or flour, sawdust).
- Water.
- Special additives to increase plasticity, viscosity, water resistance, if necessary.
 Preparation of cement plaster for rough finish
 This material is most often used for rough finishing of internal and external walls of residential premises. It is durable, moisture resistant and has a long service life, but at the same time it is difficult to work with it due to its large weight. In addition, it may take up to 14 days for the cementitious compounds to completely dry and set strength. This type of plaster should be done according to the following instructions:
- Sand sifting. This procedure is carried out before preparing a solution for plastering walls, using a large sieve. It is necessary to identify and remove stones, lumps of clay and sand, which are unacceptable in the plaster mix.
- Mixing dry ingredients. It is necessary to measure 1 portion of cement grade M400 and higher and 4 portions of sand, then pour them into a common container and mix thoroughly with a hand tool, since using a drill at this stage will lead to the formation of a huge amount of dust.
- Adding water. The liquid must be added in small portions, constantly stirring it with a mixer. In the end, you should get a homogeneous mixture, the consistency of which will resemble thick sour cream. For machine plaster, the composition should be more liquid. Then the container is left for 10-15 minutes and mixed again.
- Addition of plasticizers and other special components. These substances are added at the very end in the proportions indicated by the manufacturer. At the end, the solution is mixed again, after which they begin to apply.
On a note! Cement-based solutions dry for a rather long time, so you can immediately prepare a large portion of the material, which is enough for the entire wall or a significant fragment of it. It is allowed to mix the finished composition with a mixer from time to time so that it remains homogeneous.
To increase the strength of the material, lime is sometimes added to it. Such a solution is prepared in the same way as cement, but after mixing the main components, you need to take 2 servings of lime and dilute it with water in a separate container, then mix thoroughly. The result should be the so-called lime dough, which resembles ordinary batter in consistency. Then the diluted lime is added to the mixture of sand and cement, and only after that water and other components are added.

Instructions for mixing lime compositions
This material has been widely used in the past. Its main advantage is relatively low cost and high mechanical strength. The preparation of a plaster mortar of this type is as follows.
If quicklime is used, it will take considerable time to slake it. To do this, dry lime is poured into a container, after which cold water is poured into it. As a result, a violent reaction will occur, which will be accompanied by heating and splashing, so the mixture in the container should occupy no more than 40% of the volume. Wear protective clothing and goggles when pouring liquid. After completion of the reaction, the mixture is closed and left to infuse for 2 weeks.
After that, you need to grind the slaked lime so that there are no lumps left in it. To do this, use a sieve through which the material is ground. Before diluting the material with water, a small amount of sand is added to the lime container, and then mixed. Sifted sand is added to a homogeneous mixture in the amount of 3 shares per 1 share of lime dough. Pour the material in small portions, constantly stirring and adding a little water. The result should be a solution with the density of thick sour cream.
Important! Such mixtures dry out within 12-14 hours, so you need to do the plaster in such an amount that is used at a time. You also need to constantly clean the mixer nozzle after each mixing of the plaster.
Lime-gypsum materials

The manufacturing process of this material looks exactly the same as the one described above, but instead of adding 3 shares of sand, you need to make a gypsum mortar. The consistency, as always, should be like sour cream. 1 share of gypsum must be diluted with water, then add the mixture to the previously prepared lime dough. At the end, everything is thoroughly mixed with a drill with a mixer nozzle. Depending on the required strength, you can add a little more water or add a small amount of sand.
Should know! Compositions with the presence of gypsum dry out very quickly, so before starting cooking, you need to divide the wall into sections of 1 square meter and prepare as much mortar as needed to process this area.
In this case, the main component is alumina. Such plaster has been used for several millennia. The preparation of the simplest solution is as follows:

- Before making a mortar for plaster, alumina is placed in a container and water is added, and then left for 4-5 hours.
- The prepared clay is thoroughly mixed and sand is poured into it. The proportions of the mortar for wall plastering are 1:3. It is necessary to dilute the plaster in stages, in small portions.
- Immediately after the final mixing, the solution can be applied to the walls.
Only in such a solution can you constantly add water to maintain the required consistency. In the case of other mixtures, this is strictly prohibited.
You can also cook with the addition of the following materials:
- Lime paste. It is added before the sand. The ratio is as follows: for 1 share of clay you need 0.5 shares of lime and 3 sand.
- Cement. It is mixed with clay, while the proportions of plaster solutions are 0.2: 1, after that, mixed with 3 parts of sand.
- Gypsum. This material will require 0.25 shares per 1 clay. First, these components are mixed, then sand is added. Such a mixture seizes a few minutes after the preparation of the mortar is completed, and hardens in 30 minutes.
This material is used for both starting and finishing surfaces. It grabs quickly and weighs little, so working with it is not difficult. But gypsum is hydrophilic, so it cannot be used for finishing wet rooms.

There are several options for making a solution, but the first step is the same for everyone - mixing the dry ingredients. Cooking methods:
- Mix 3 parts crushed chalk and 1 part gypsum, then add a small amount of wood glue. Add water and stir. Recall that the consistency is the same for all mixtures, despite the fact that the composition of the plaster is different.
- 2 parts of gypsum, part of drying oil and 0.1 shares of NF-1 desiccant are mixed in containers, water is added, mixed.
- 1 part of the usual plaster mixture, 1 part of sawdust, 4 parts of gypsum are mixed and diluted with water.
Should know! To extend the drying time, PVA glue is added to the solutions, its share can be no more than 2% of the finished mass. The composition of the mortar for plaster can be slightly changed, depending on the required quality of the coating.
Additional components
To give wall plaster solutions some properties or improve existing ones, the following substances are added to plasters:

In the composition of the plaster, you can add no more than 10% of the above materials from the total mass.
In order for the plaster to meet all the requirements, during its manufacture, the following recommendations must be followed:

They are made according to all the rules and in any case will be of better quality than cooked at home. Therefore, if the home master does not have experience and is not ready to spend a lot of time and effort on cooking, it is better not to try to save money, but immediately buy liquid or dry plasters in a hardware store.