Laying porcelain stoneware on the floor with your own hands: video and step by step instructions
Among the flooring materials in the construction market, porcelain stoneware occupies an honorable niche. A material that externally imitates natural stone is able to transform both a living space and an open space, giving it a touch of sophistication and nobility. Laying porcelain stoneware on the floor with your own hands is a simple process that anyone can master.
Options and methods of laying porcelain stoneware
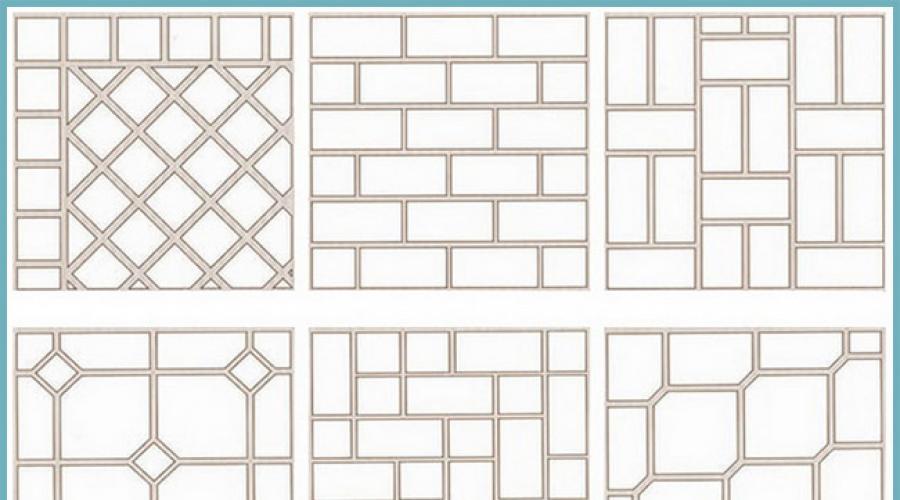
Porcelain stoneware slabs on the building materials market are distinguished by a variety of sizes and textures. there are more than a dozen, but still the most widespread are:
- Brickwork;
- Network;
- Checkers;
- honeycombs;
- Labyrinth.
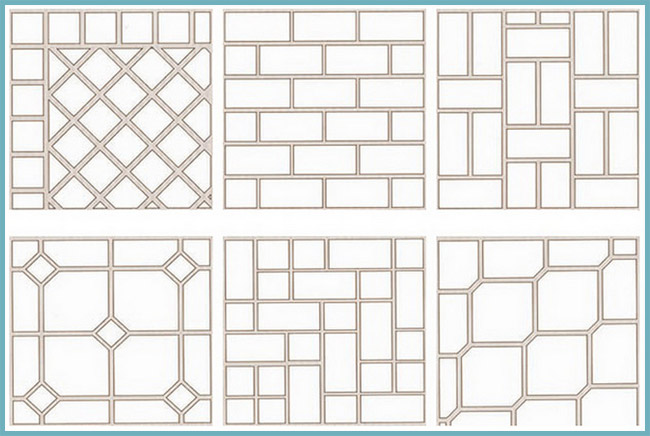
Ways of laying porcelain stoneware
Combined options with the use of tiles of different sizes and textures look interesting. When composing combinations, it should be borne in mind that light shades of the coating can visually expand the space. But when decorating small rooms, you should not “abuse” wide and large ornaments, since the large size of porcelain stoneware, even if light colors, can visually reduce the room.
There are two ways to lay out porcelain stoneware slabs:
- On a pre-built raised floor. To do this, a supporting structure is assembled from the connected racks, on which the floor covering is subsequently laid. A rather complicated method is used only by experienced craftsmen.
- Adhesive laying. A more affordable way that does not involve the construction of additional structures. An easy-to-execute method can easily be mastered by anyone who has only basic construction skills.
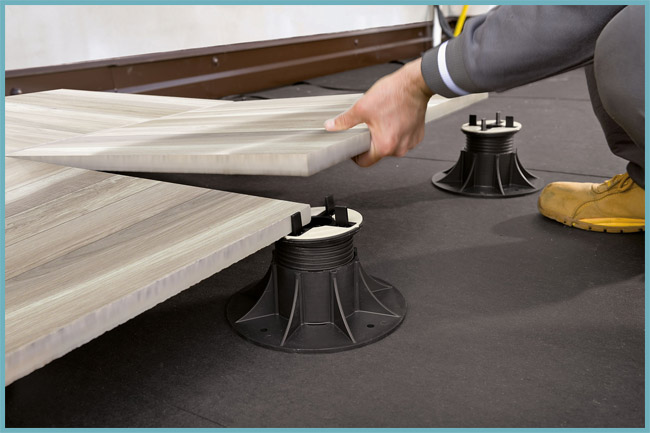
Installation of a raised floor from porcelain stoneware
Work procedure
Laying porcelain tiles on your own can only be carried out if the temperature regime is observed - not lower than 0 ° C, and at a humidity not exceeding 80%. Failure to comply with the conditions adversely affects the quality of the adhesive base of the coating. To do this, when working in wet rooms, you should take care of the arrangement of waterproofing in advance.
Material selection
To determine the required volume of materials, it is advisable to make a plan of the surface on which porcelain stoneware will be laid. Then estimate how many tiles are required to cover 1 sq.m of area and calculate the volume of material, making an increase of 10% to cover possible calculation errors and accidental breaking of tiles during transportation. A great way to calculate everything in detail is to use ours. When purchasing porcelain tiles, it is worth checking the conformity of the pattern and the identity of the shades of the batch.
Porcelain tiles
From materials it is also worth buying:
- Primer for floors;
- Silicone sealant.
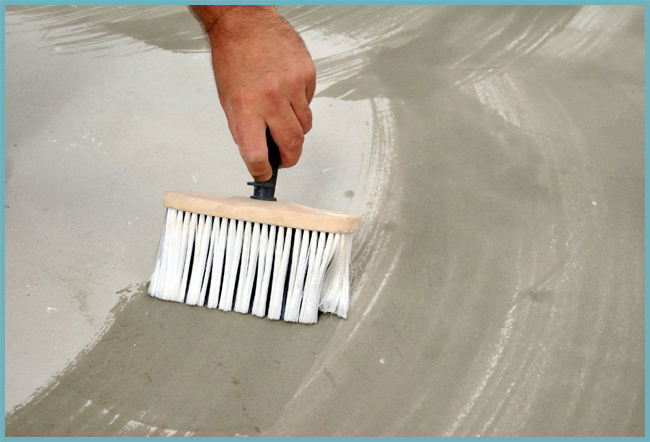
A deep penetration primer will help not only remove dust from the floor, but also increase the adhesion area of \u200b\u200bthe adhesive to the base.
Among the tools for laying tiles you will need:
- Cutter and tile cutter;
- Alcohol marker for marking tiles;
- Building level;
- Roulette and pencil;
- Rubber mallet;
- Cross-marks;
- Scraper with rubber nozzle;
- Profile for external corners.

A set of necessary tools
To apply the composition, you will also need a notched trowel. When choosing a tool, be guided by the dimensions of the tile. So, for laying products with a size of 10x10 cm, it is convenient to use a spatula with a tooth length of 8 mm.
Foundation preparation
Porcelain tiles are a bright representative of materials that require the arrangement of a perfectly even base. The working surface must be free of cracks, voids and dirt. If the base has a glossy surface, it must be sanded, small flaws should be smoothed out, and the non-waterproof coating should be washed off. It is necessary to remove dust and dirt not only from the floor of the room, but also to clean the walls of the room with a vacuum cleaner.
Tip: Pay special attention to the joints of the floor and walls, as well as places where signs of mold and mildew are noticed. It is not enough just to cover them with cement. The affected areas of the coating must be removed by hollowing out a whole piece.
If these conditions are not observed, one should be prepared for the fact that during operation, cracks will form on the surface of porcelain stoneware due to the difference in stresses.
Subfloor preparation
Concrete screed is an ideal base for porcelain stoneware.
Laying porcelain stoneware slabs on a wooden floor can only be done if all rotten logs have been previously removed, and weakly fixed parts are additionally fixed with self-tapping screws. It is highly undesirable to use nails to fix wooden elements, since this type of fastener weakens over time.
Regardless of the type of base, the surface under this type of flooring must be covered with a primer. It is applied in a thin layer, filling small pores in the floor.
Selection and preparation of glue
To fix porcelain stoneware slabs, it is worth choosing adhesive mixtures based on polymer components. They are able to provide a reliable and durable connection of the base floor with the coating. These can be compositions for gluing porcelain tiles, large-format tiles, natural stone and glass mosaics. ()
Mounting tiles with glue
Some craftsmen use cement mortar for this purpose, but, as practice shows, it is not able to fix the tiles firmly enough.
To get a high-quality binding material, you should follow a number of recommendations:
- Strictly observe the proportions indicated on the package. Do not experiment with mixture additives.
- The dry mixture should be poured into a container with water. This will prevent the formation of lumps.
- Stir the ingredients until the liquid mixture acquires a homogeneous structure.
Attention: Keep in mind that the adhesive composition retains its properties only for 3-4 hours. The hardened mixture can not be re-diluted with water and cannot be used, otherwise it will adversely affect the quality of the coating, leading to its deformation.
Material laying
The technology of laying porcelain stoneware slabs with your own hands does not imply special skills. The main thing is to follow the sequence of work and follow the recommendations of the masters.
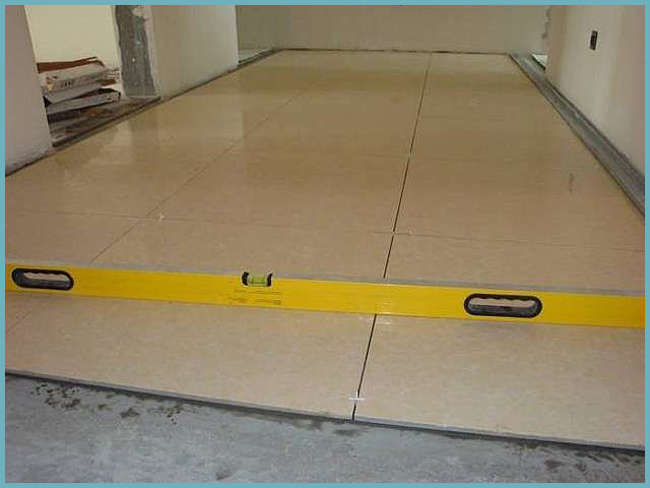
Checking the evenness of the surface with a level
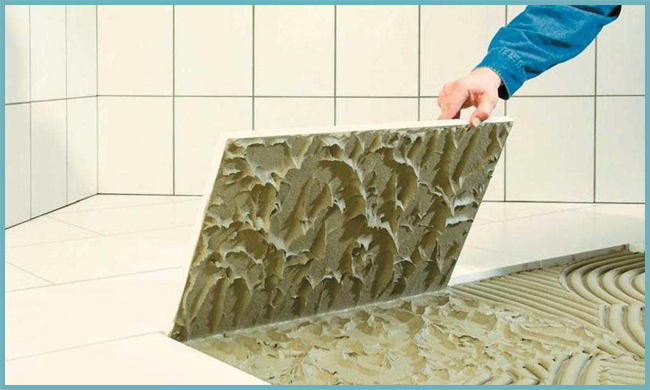
- Glue is applied to the base in small areas, laying it out with a notched trowel. The adhesive thickness is 5 mm. The coverage area should be approximately equal to the area of 1-2 tiles. To simplify the process, the surface can be pre-marked into sections with a marker or chalk, focusing on the selected laying pattern.
- A little glue is also applied to the area of \u200b\u200bthe wall adjacent to the floor. Some tilers recommend applying the compound to the back of the tile as well.
Video: laying ceramic granite
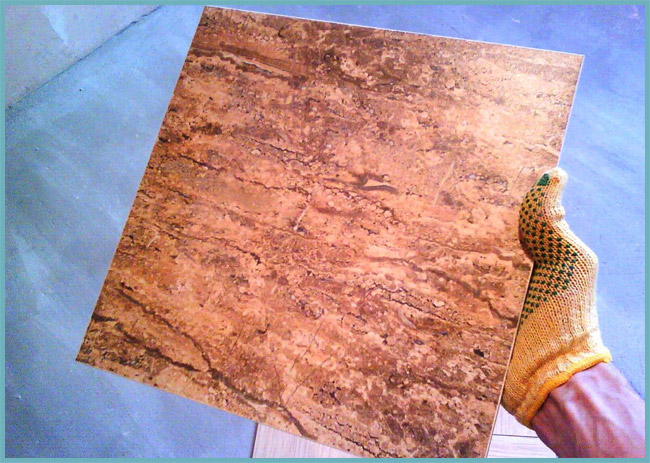
- The tiles are laid, maintaining a horizontal plane, guided by the building level. Laying starts from the corner of the wall, moving towards the front door. It is advisable to work with porcelain tiles with gloves so that the sharp edges of the material and the rough adhesive composition do not damage the delicate skin of the hands.
The size of the tile joint is determined by the interior design, because it plays an important role in creating a complete image of the coating. On average, the size of a suture cross can vary from 2 mm to 8 mm. It is also very often used for seamless laying of porcelain stoneware, well, this is if it