Do-it-yourself tiling in the bathroom
Few people thought about why laying tiles in the bathroom is actually more expensive than, for example, in the kitchen. It seems that the price per square meter does not change. But this is where the mark-ups for complexity begin - or something else. All masters call it differently, but they ask for a higher amount - this is undoubtedly. The explanation for this is quite simple.
In a bathroom of any size, it is quite difficult to clad the walls, as there are many kinds of obstacles. For starters, this is the bath itself. Without it, the speed of work would increase significantly. What is a bathroom without a bath, you think? Yes, very wonderful. You can put, for example, a shower. One obstacle for laying tiles will be less. The master will only have to calmly veneer four even walls. And you don’t have to think about drops, interfaces of planes or seams.
For a deeper, more detailed understanding of the process of laying tiles in the bathroom, let's take a look at everything in order.
Wall preparation
This stage is quite simple theoretically. It is necessary to clean the walls of plaster and everything that may interfere with the cladding process. The main thing here is to prepare the most even and clean surface so that the tile adheres well, reliably, and firmly to the surface.
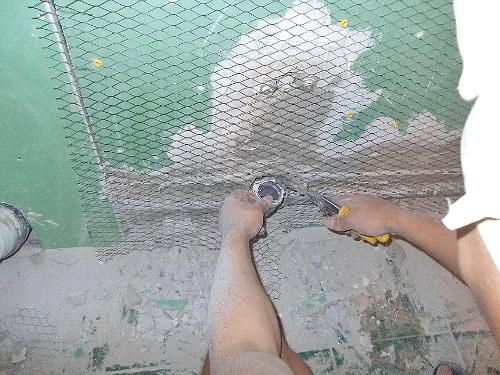
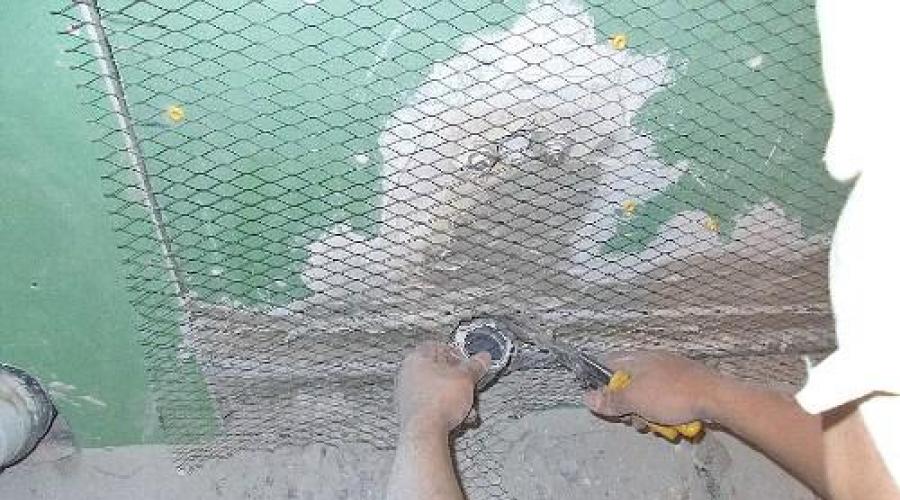
To increase adhesion, as well as enhance the strength of the base, reinforcement is carried out with a metal plaster mesh with a cell size of about two by two centimeters. The mesh is attached to the surface to be lined with the help of driven dowels. In order to fix everything even better, it is recommended to buy washers. Only here it is important to correctly place the dowel relative to the plaster mesh, then the washers will not be needed.
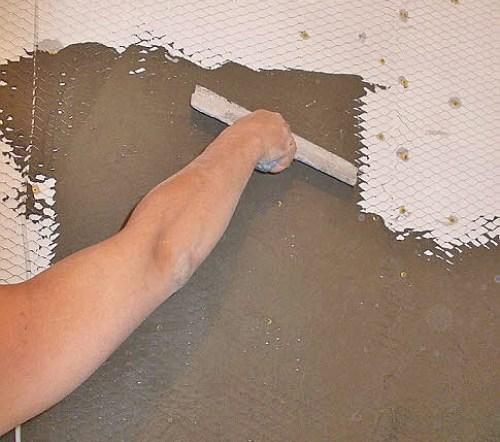
It is not worth laying tiles on a bare mesh. First, apply a thin layer of plaster. At the same time, keep in mind that here it is not necessary to plaster in the full sense of the word. It can be more called a putty, as the substance is simply glued to the wall. Use tile adhesive for this. Before attaching the mesh, prime the surface with a deep penetration primer. This will give greater strength and reliability to the wall. So not a single piece of concrete or stone will fall off. Another bonus of such a study is that all the dust comes off the surface thanks to the primer. After all this, leave the bathroom for a day to dry everything properly.
In order to avoid difficulties in sealing the seam between the bathtub, as well as the walls, it is best to install the bathtub first. This is a rather difficult and important stage. It should be set clearly, it is important to control all planes.
After the bathroom is installed, it will become the so-called landmark from which you need to start when laying the first row of tiles. You should start from the top of the bathroom, and not from the floor or from the second row. In other words, the first row of tiles is actually the third row, counting from the bottom.
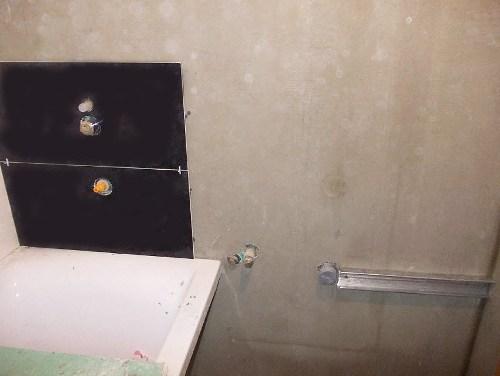
After that, the plane of the bath with the help of a level (hydraulic or laser) should be transferred to all the walls of the bathroom. Any part of the surface must have a mark that coincides with the installation plane of the bath itself. According to the marks, a guide profile is laid, which creates a support for the first row of tiles. Profile - similar to that used for drywall constructions.
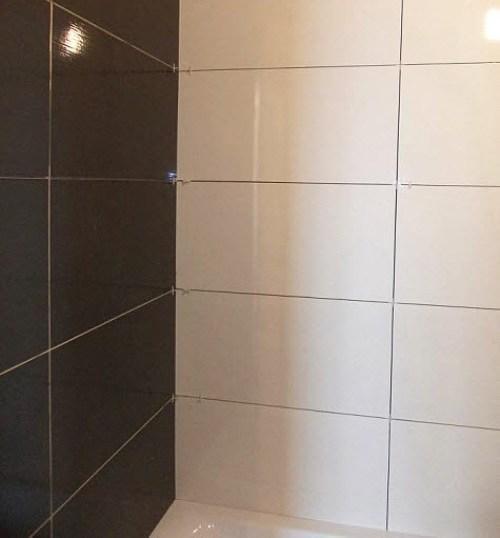
Only after all these works have been carried out, you can start laying the so-called first row of tiles. Just keep in mind that tiling in the bathroom is not done separately on each wall. Due to the fact that various obstacles can interfere, the tiles should be laid in a ring. First we loop the first row, then the second and so on. If laid gradually, you may encounter a common amateur mistake. You will get a mismatch of the seams of the first and last walls. Therefore, make sure that everything is even, starting from the very first row, or, more correctly, the “ring”.
Ring after ring - and face a new obstacle. Frieze. Usually the size of the tile and the frieze differs by half a millimeter. This factory error can have a very, very negative effect on all further tiling. The seams can go astray from the next row. In this case, it is necessary to “play” with the seams so that the gaps and errors in the seams do not look so noticeable. By the way, the crosses that are used when laying tiles have a conical shape. If you insert more or less cross into the seam, you can change the width to tenths of a millimeter. This is the delicate game of seams.
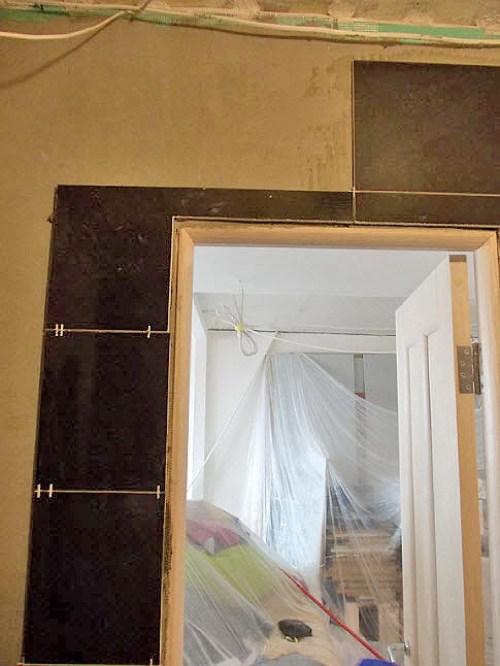
It is quite difficult to work at the doorway. It is important to correctly calculate the location of the tiles to the left and right of the opening - up to a millimeter. If you consider this an unnecessary trifle, then then the tiles above the door will not fit together as expected. As a result, you will spend even more time and effort undermining the edges of the tile. And in the end, it’s not a fact that the fit that you pay so much attention to will look decent. As a result, there will be a great risk that the work will be spoiled.
An alternative option for jumping a doorway for "dummies" is quite complicated. First, the tile is laid up to the top on one side, then above the door, and the second side goes from top to bottom. Real masters consider this an almost impossible mission. It is easier and better to calculate everything properly initially and lay the tiles according to the rules, that is, from the bottom up. In order not to suffer for a long time and do everything professionally, it is worth getting either a plane builder. This will greatly facilitate the work.
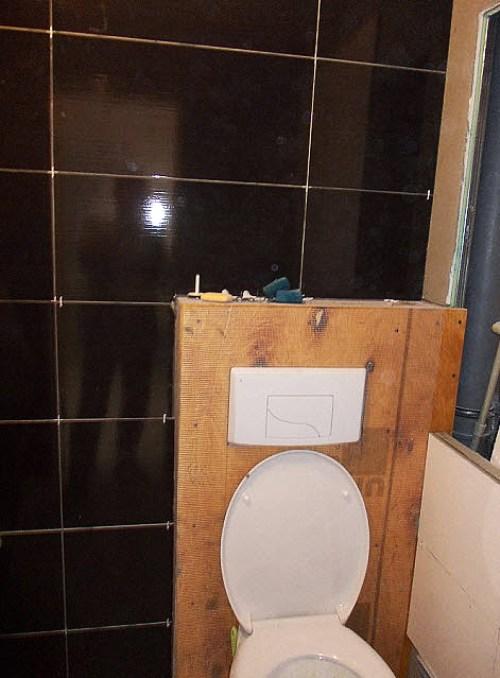
Another nuance is the laying of tiles in a room with all kinds of niches, ledges, inspection hatches. All this can be left for last, but our goal is to do everything with high quality. Therefore, everything must be done in sequence. If you get to any recess, you need to make it, you got a revision hatch - you need to deal with this moment as well.
Laying tiles at the bottom of the wall
The lower part of the room should be tiled last. The work will take two stages. First, the profiles supporting the tiles must be rearranged one row lower, lay the second row from the floor. Then lay the tiles on the floor. And the bottom row, the first, or pruning, must be laid out after the flooring has dried.
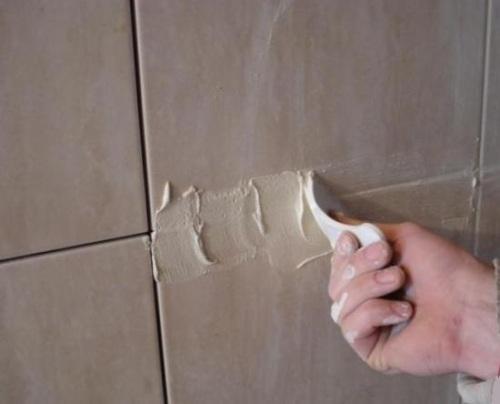
So, this is the laying of tiles in the bathroom. Finally, you only need to wipe the seams, but this is not so difficult when compared with what work has already been done.
The grout must be diluted strictly according to the instructions, it is important to observe the specified proportions. After the composition is ready, arm yourself with a rubber spatula and press the grout into the seams.
When the surface dries a little, you need to take a simple piece of electrical cable and go through the seams with the end. It is important to put the finishing touches to make everything look beautiful and flawless. And in the end, the matter is already quite small - you need to wash the walls and hand over the work.
After you have learned the whole process “from the inside”, there will apparently not be any questions why laying tiles in the bathroom is more expensive.