Do-it-yourself flexible tile laying
One of the significant advantages of a flexible roof is the relative ease of its installation. Nevertheless, there are still some features of working with this roofing, and we will talk about them in this article. Having mastered the simple technology of work, you can easily prepare the base and lay the tiles with high quality.
In general, the installation of flexible shingles is quite simple, from the tools you will need a hammer, a sectional knife, a spatula and a glue gun.
Foundation preparation
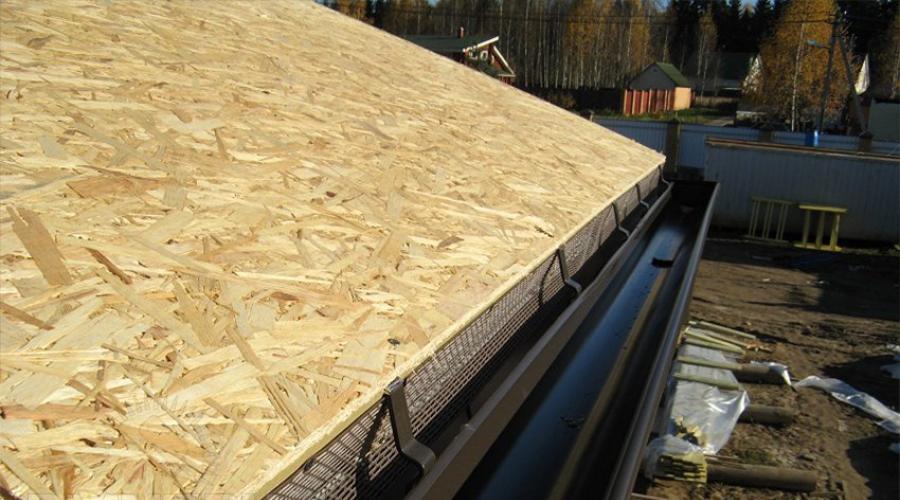
The base for a flexible roof must be solid and have a high modulus of elasticity. To do this, OSB or moisture-resistant plywood with a thickness of at least 9 mm is laid on the rafters. The step of the lathing under the coating should not exceed 90-120 cm, in other cases it is necessary to increase the thickness of the slabs or plywood to 20 mm, or use a counter-lattice. It has the added benefit of optimizing the ventilation of the under-roof space and preventing the formation of condensation in the roof pie.
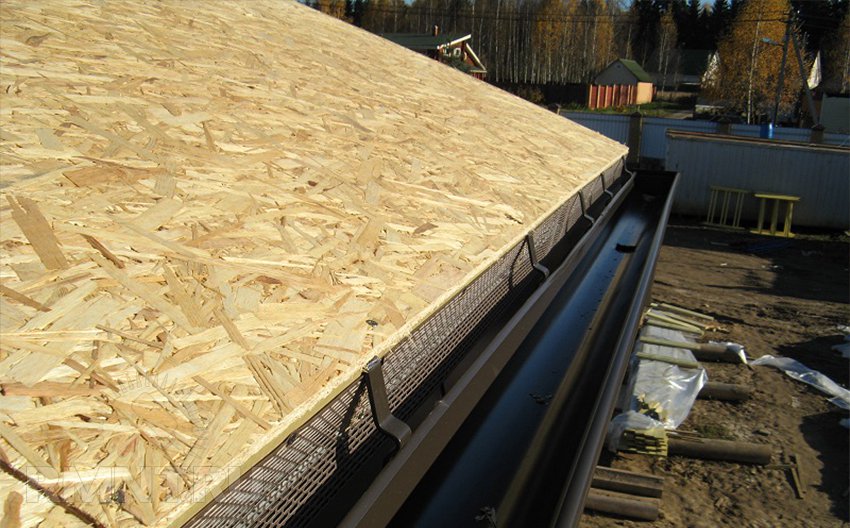
At the joints, a height difference of more than 2 mm is not allowed; it is also important that there is a 3-4 mm thermal gap between the plates. Any violations of the correct geometry: deviation from flatness, non-parallelism of the eaves to the ridges, curvature of the valleys do not prevent the laying of shingles, but in one way or another they affect the appearance of the coating.
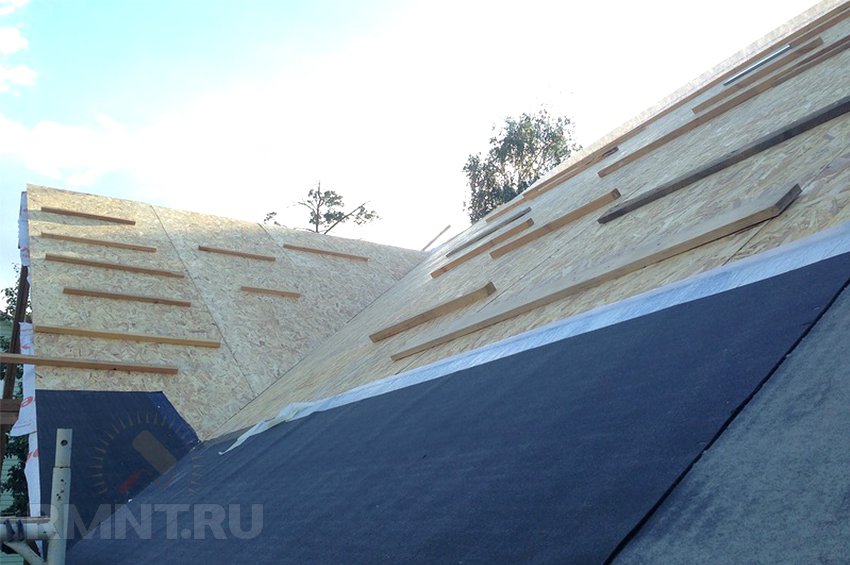
Underlayment carpet flooring
A solid crate must be cleaned of dirt and covered with a lining carpet, which serves as an additional layer of waterproofing and a buffer layer that prevents the accumulation of migrating moisture.
Lining carpet - a rolled material that is rolled out over the entire surface of the roof with a slope of up to 30 °. On steeper slopes, it is allowed to protect only the most vulnerable places: cornices, ridges, gable overhangs and junctions.
With continuous laying on slopes with a slight slope, the roll is rolled out horizontally, starting from the cornices. Each layer is stretched and nailed over the upper edge with roofing nails in 15-20 cm increments, releasing the carpet from the eaves and gable overhangs by 2-3 cm. The nails should have a length of 1-1.5 cm more than the thickness of the solid crate and flash it through.
After laying the carpet, remove the protective films from the edges of the overlap and lightly press the edges with an adhesive backing. On steep slopes, for convenience, you can roll the carpet vertically, nailing it at the top. If the length of the carpet is not enough, it can be extended by connecting the lining with an overlap of 15 cm and gluing the joint with bituminous glue.
Valley processing
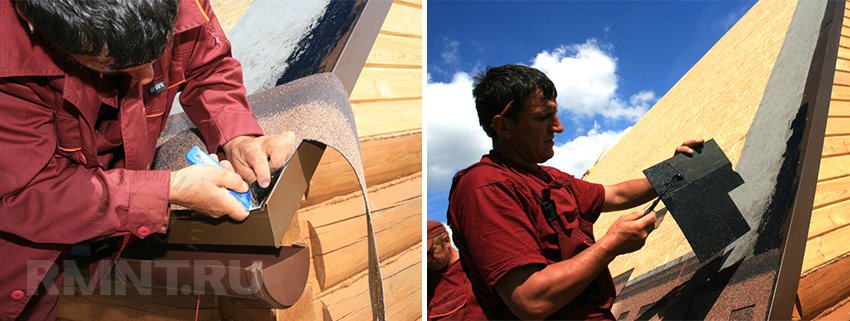
If there are valleys on the roof, laying the carpet should begin with them. The roll is rolled out in the direction of the valley and the edges are fixed with nails in increments of 20-30 cm. The carpet strips on the slopes are laid over the lining of the valley by 15 cm and cut obliquely parallel to the line of its center. Places of overlap must be treated with bituminous glue and pressed well against each other.
Tiling also starts from the valleys. After mounting the planks on the cornices, a special valley carpet is rolled out along the inner surface of the valley, which has the color and texture of the tile. It is carefully leveled and the side edges are fastened with nails every 10-15 cm. The lower part is cut with a knife along the line of the cornice tiles and glued to the metal bar.
Laying the starting row
Tiling starts from the eaves. First, a cornice L-shaped bar is stuffed along the entire lower perimeter, which closes the junction of the cornice overhang and the edge of the lining carpet bent down. The planks are laid with an overlap of 5-7 cm and nailed with roofing nails in two rows with a step of 8-12 cm. 3 nails.
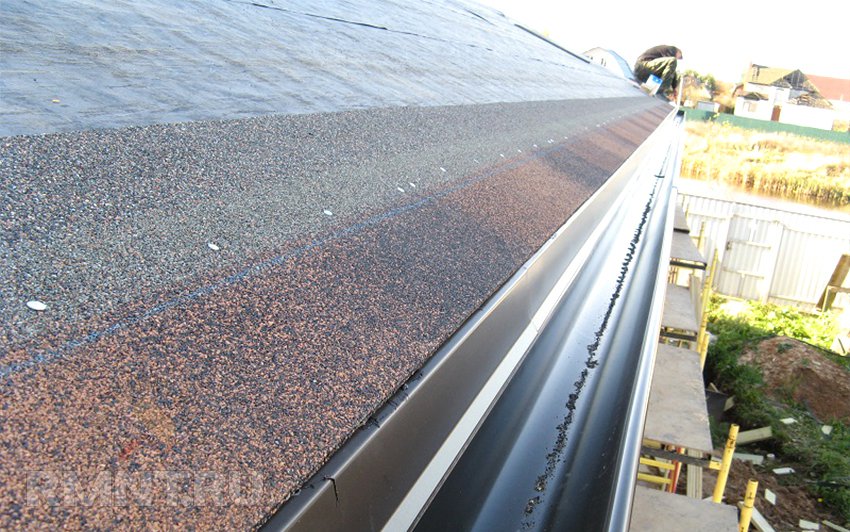
This is followed by laying the starting row of tiles with cornice shingles or tape. They have a smooth edge, which is placed with an indent of 1-2 cm from the edge of the overhang. The lower surface of the cornice tiles is adhesive: it is simply pressed against the cleaned and degreased metal strips, it is not necessary to fasten it with nails.
Ordinary tile
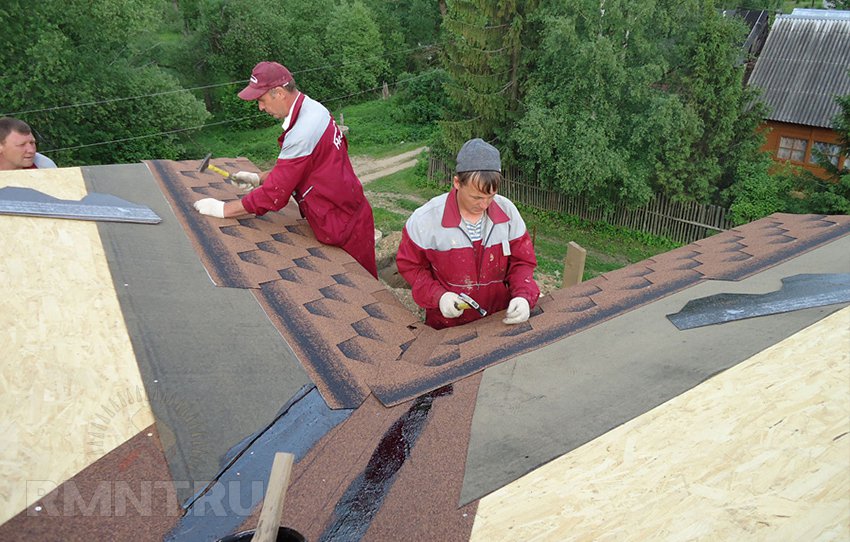
Shingles of ordinary tiles are laid, starting from the outer edge of the eaves. It is necessary to mix tiles from 4-5 packs to avoid possible deviations in color. Before laying, the protective film is removed from the teeth of the shingle, exposing the adhesive backing.
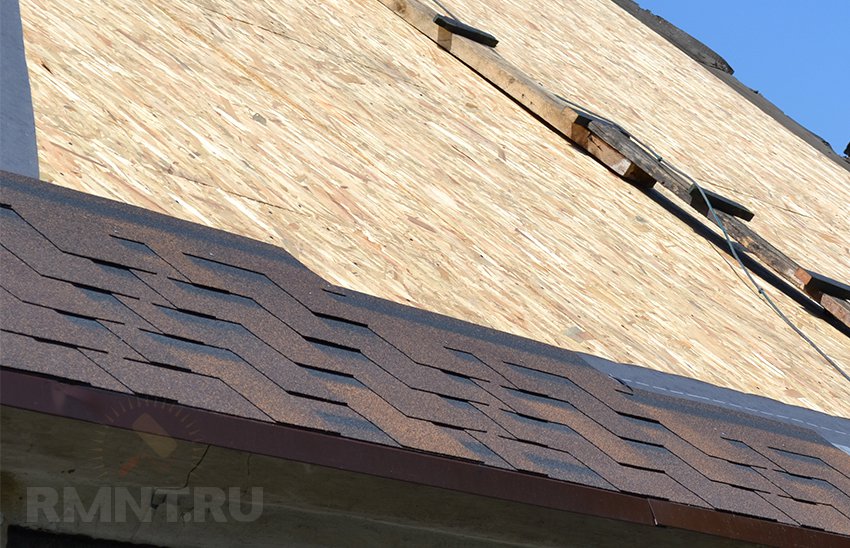
The first row of shingles is laid on top of the eaves row so that the edges of the teeth are 1-2 cm higher than the edge. Each shingle of an ordinary shingle is nailed 3-4 cm above the protrusion of the teeth so that the nail also presses the previous row. Each subsequent row of tiles is laid with teeth flush with the upper edge of the cutouts of the previous row. The side edges of the shingles are joined without overlap, some manufacturers even have lock cutouts on the edges.
The ends of ordinary tiles on the gable overhangs are cut flush with the edge and fixed with bituminous glue. In the valleys, the edges of ordinary tiles are cut obliquely so that the edge is 12 cm from the center and the overlap is also glued to the full width.
Mounting and sealing of terminals, connections
The best option to join the chimney well is to knock down a 15-20 cm high plywood neck around it. A gap of several millimeters is needed between the wall and the masonry so that the roof with the neck can move relative to the well. The upper edge of the neck is nailed to the masonry with quick installation.
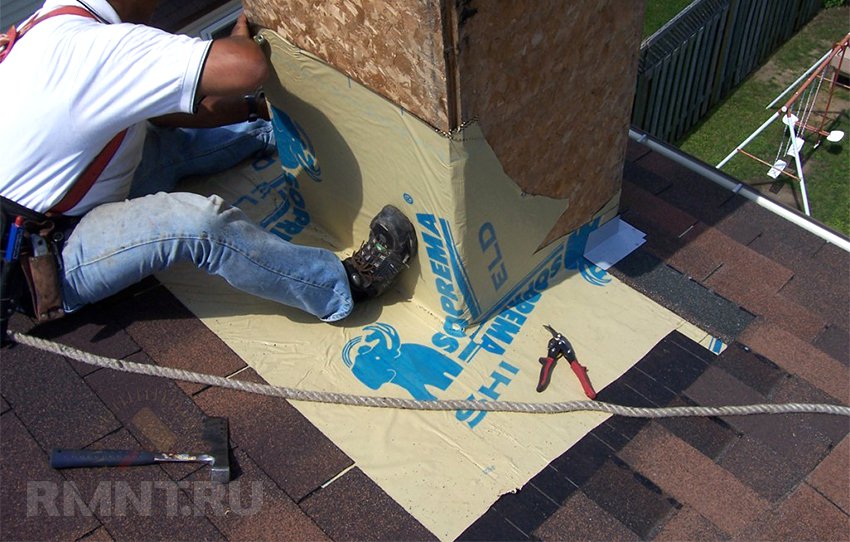
The surface of the neck is covered with bituminous glue and lined with sections of the valley carpet, letting it over ordinary tiles and wrapping corners of 15 cm. The metal lining of the well is lowered to a level of 2-3 cm from the roof surface, thus blocking the neck gap. Similarly, multi-tiered roofs adjoin to the gables.
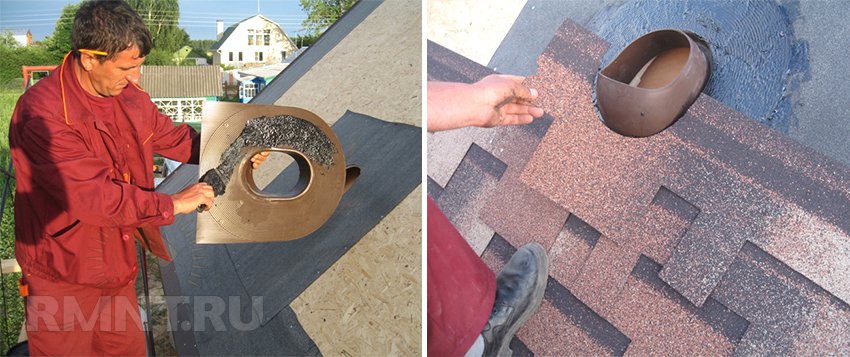
For the installation of ventilation outlets from the attic and the layer of the roofing cake, special rubber cuffs are used. They are planted on bituminous glue on top of the carpet, then again coated with glue and covered with ordinary tiles, making cutouts in it as accurately as possible. The ends at the junction are thoroughly sealed with bituminous glue.
Wind bars and skates
Cornices or wind slats can be used as a frame for gable overhangs. The first ones are mounted on top of the lining carpet along with the trim of the cornice overhangs. There is no need to trim the planks at the corners: they are overlapped and the corner is fixed with five nails. Thus, the framing of the cornices and wind overhangs is the same.

This is not very convenient when there is a thick end of the roof sheathing that needs to be closed. In this case, special wind bars are used. They have a U-shaped or L-shaped shape, the height of the bar is selected according to the thickness of the end. On the upper corner, there may be a side for framing overhangs with a triangular glazing bead at the end.
Such planks are fixed over ordinary tiles, smearing with glue 2/3 of the distance from the edge, which will be covered with metal. Wind strips are attached to the end with self-tapping screws for corrugated board.
After laying ordinary tiles, they are cut on skates end-to-end without overlap, and then the connection is closed with ridge tiles. In the presence of hip skates, they start with them, laying the petals from the bottom up. For most manufacturers, ridge shingles are pieces of cornice shingles or tape. They are laid with an overlap of 5-7 cm, nailing one edge, which will be closed by the petal of the next row.

Features of winter installation
Tiles may only be laid in dry weather at an air temperature of +5...12 °C, depending on the manufacturer's requirements. It is allowed to lay tiles at a lower temperature, but for this it is necessary to withstand the roofing elements at a temperature of +20 ° C for a day before laying. When installing tiles, it is necessary to warm up each new shingle and the surface of the previous row in the place where the adhesive base adheres with a building hair dryer.
In most cases, it makes sense to use the so-called "greenhouse" in winter. This is a galvanized profile frame built around a building or a specific section of the roof. The frame is covered with a sealed dome made of polyethylene film. To maintain the desired temperature, an electric or gas heat gun is used.