Tiles on the floor for the kitchen: we understand the types, materials and installation
Stylish floor tiles
Attention! The surface should not be slippery, especially if wet. This is what keeps the room safe.

Style
Important! An important role in the organization of this space is played not only by functionality, but also by its aesthetic appearance. It is important to remember that a woman who spends a lot of time on should feel cozy and comfortable, and no little things should distract her attention and annoy her.
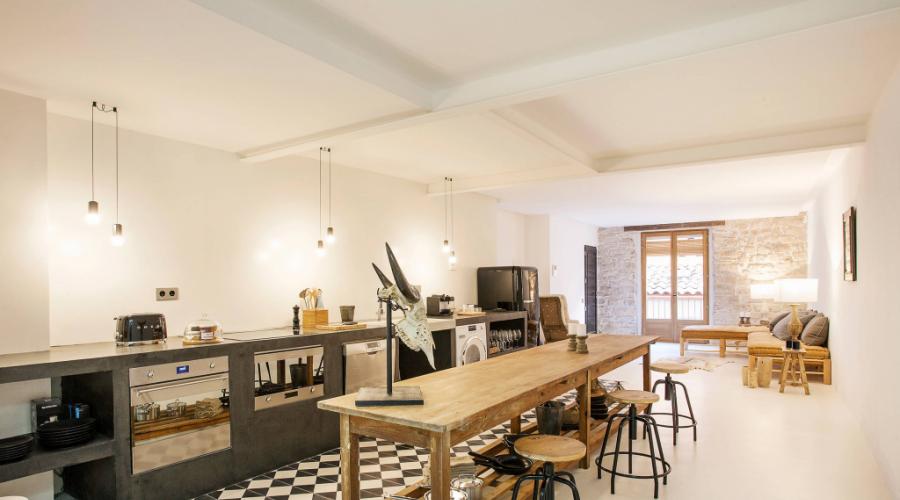
The same applies to the rest of the family, who often look into the kitchen and it is here that they gather together for a meal. Therefore, it is better to work out every detail of the interior, including its lower part - the floor. It should be in harmony with other elements. In this case, it is also better to give preference to tiles. Today, manufacturers offer a wide range of products from which each buyer can find something suitable for himself. The tile varies in shape - it can be large or small squares and even rectangles.
The main difference in design is the color scheme. On sale you can find classic colors:
- white;
- ;
- brown.

The tile in the form of honeycombs looks very impressive


Bright colors are also popular. The background can be plain or have stains of a different shade. You can find different types of ornaments and images. Manufacturers also produce products imitating brick, different types of wood and stones. The choice of design matches the style of the room.

Styling materials
If you decide to use kitchen floor decoration tile, then in addition to it you will have to purchase a number of tools and tools that will be needed for installation. First of all, buy a special adhesive, with which the fragments will be attached to the base. Manufacturers in a competitive environment strive to produce special products. But each of them achieves this in different ways. Some focus on quality, while others focus on price.


Advice! In order for the work done to serve you as long as possible, you should not save on masonry glue. But chasing the most expensive brands is also not necessary.
The adhesive you use must have the following properties:
- moderate plasticity, which does not depend on density and allows you to form an even layer;
- the consistency ensures the filling of voids between the plates and the base, which will certainly extend the life of the tile;
- resistance to the impact of different masses;
- high drying rate, especially when choosing large squares.


These features will simplify the laying process. With this tool, your work will be more accurate and accurate.
Advice! The mixture is placed not only under the plates, but also fills the seams between them. Therefore, in order for the coating to last longer and be easier to care for, pay special attention to resistance to temperature extremes and moisture, as well as the presence of antifungal properties.
Tools needed for DIY tiling
In addition to glue, you will also need a minimal set of repair tools. You can buy them at a hardware store.
| Tool | purpose |
|---|---|
| notched trowel | intended for applying and leveling the mixture; |
| rubber spatula | allows you to remove excess from the surface without damaging it; |
| tile cutter | can be rented if you do not plan to do repairs of a similar nature in other places. Very rarely only whole squares are used, in most cases some of them need to be cut to a certain size; |
| Building level | will allow you to form a perfectly flat surface; |
| rubber mallet | designed to set the square in a certain position; |
| Roulette for measuring area, | thanks to which the number of plates is calculated; |
| Trowel mesh | designed to refine the seams, leveling their surface, getting rid of excess; |
| Drill, whisk or construction mixer | used to dilute the solution; |
| Plastic crosses | are installed between the plates for organizing seams. |

Also, you better prepare a container for mixing ingredients, work clothes, water and other materials at hand.
Laying
![]()
Advice! Tiles can be called universal for the floor in the dining room and food preparation areas, but its main drawback is the high cost. In this regard, the services of a specialist in its masonry are not cheap. Therefore, it is much more economical to do it yourself.
In order to facilitate this process, we will consider in detail how to install.
Preparatory work
If you are not working in a new, newly built room, then it is guaranteed to already have some kind of floor. In this connection, the first step is its dismantling. How it is carried out depends on the type of coverage. If this is, then a nail puller may be needed, if it is a construction knife, and for this you will need a hammer and chisel.
Important! As a rule, the base has certain irregularities. This may be due to the remnants of old mixtures that cannot be removed, or to the resulting depressions and notches. Therefore, the next step is to level the surface.
You will also need a leveler, which is a long, flat tool that looks like a large ruler. It can be made of wood, plastic or iron. With this tool, the solution is straightened and placed in a smooth layer. After drying, the area is covered with a primer.


When the base is ready, you can knead the solution. To do this, you need the glue itself, liquid and a mixer (a drill with a special nozzle). The ratio of dry to liquid is indicated, as a rule, in the instructions on the package.

Mounting
The laying process is very important, so carefully follow all the necessary steps so that the area comes out perfectly flat. As a rule, it is placed on glue, but in some cases mastic can be used.
Important! The adhesive is applied to the substrate in a medium layer using a notched trowel. It is also applied on the reverse side.
