Roof junction strip
Atmospheric precipitation is enemy No. 1 for a pitched roof. Water is collected from the entire roof area and rushes down in a stream, with additional force acting on oncoming obstacles: walls and pipes. The roofing in these places violates its integrity, forming joints. An abutment bar is used to protect the joint.
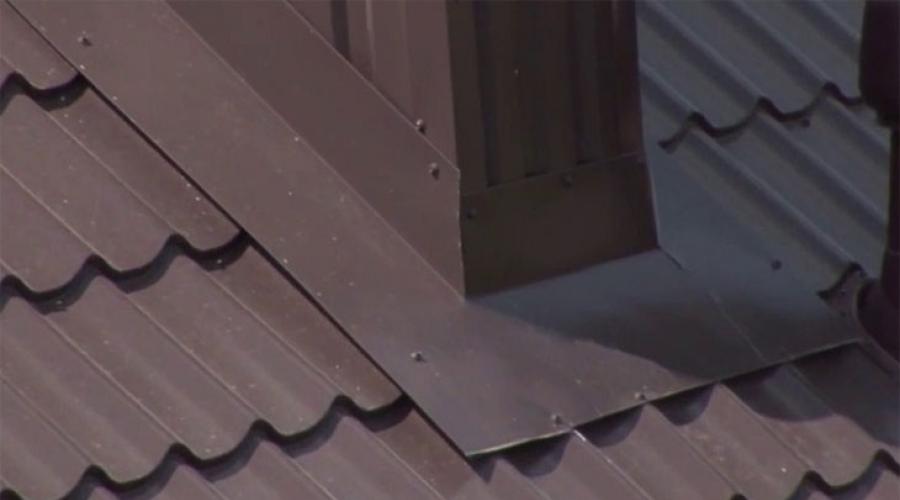
As a rule, round joints are used for pipes. The junction bar is used on rectangular surfaces, such as chimneys, ventilation shafts. This part is attached on each side and looks like a triangle. Depending on the installation technology, there are two types:
- top;
- lower.
Plank designs and mounting technologies
 To begin, consider the installation technology of corrugated board and metal tiles, which provides for joints with internal and external aprons:
 - Before laying the roof covering, an internal apron is laid around the chimney using the bottom strips. Their design differs from the upper ones by the presence of longitudinal bends of the edge.
- First, the part is laid from the low side (under the pipe), then the sides, and lastly from the top (above the pipe). The folded edge is directed upwards in order to create a barrier to moisture. A water-removing tie is arranged below - a sheet with curved edges.
- Each plank is first applied to the wall, on which its upper edge is marked. A strobe is punched along this strip. It is cleaned of dust, the bend of the edge of the vertical part is inserted into it and filled with sealant. The horizontal and vertical part of the part is attached to the crate and the wall with self-tapping screws.
- Next, the roofing is laid.
- On top of the sheets of corrugated board and metal tiles, an external apron is laid in the same order. The design of the bar is a corner without edge bends.
 Video: This technology is quite reliable, but, on the other hand, it provides for additional metal consumption. Therefore, the technology of laying one apron is often used:
- The roofing is laid first. A sheet of corrugated board or metal tiles does not fit the entire length of the roof slope, but only up to the upper edge of the pipe.
- A lower apron (top bar) is placed on top of the sheets, then side parts and lastly an upper apron (bottom bar). The surface of the brickwork is chiselled for the bending device on the vertical part. After mounting the strips, all seams are covered with sealant. Self-tapping screws are used as fastening.
- A part of a sheet of corrugated board or metal tile is placed on the remaining part of the roof from the ridge to the upper edge of the pipe.
 Or, for example, a plank with diagonal edges has the right to exist. It diverts rain streams in different directions, protecting the corner joints from getting wet.
  The slats are completely different when constructing a roof made of soft bituminous tiles or rolled materials.
- The connection to the chimneys and roof parapets begins with the installation of a triangular rail, which will raise the edge of the roofing carpet to create a counter-slope, which is a natural barrier to precipitation.
- Next is the installation of the roofing. A valley carpet is laid on top of the tiles in the corner joint.
- The plank protects only the upper edge of the junction from moisture ingress between the brickwork and the roofing material. From one end it is bent at an angle of 45o towards the wall, from the other end it is bent in the form of a drip. For additional waterproofing, silicone sealant is used.
- The thickness of the plate can correspond to the thickness of the sheets of corrugated board or metal tiles, but it is better to take the material no more than 0.55 mm. Such parts bend better, and therefore take the shape of an angle well.
- The strobe is carried out using a grinder to a depth of 15 mm. Dust generated during the chasing process is best washed off with water. Otherwise, it will interfere with the adhesion (adhesion) of silicone sealant and masonry.
- Silicone sealant should be applied to a dry surface.
- one-component;
- elastic;
- moisture resistant;
- withstands UV radiation;
- high adhesion with concrete and brick.