Do-it-yourself shed roof for a bath - how to lay it correctly
The final structure of the bath building is the roof, which is very important to design correctly. The bath roof performs a protective function during precipitation and strong winds.
With self-construction of a bath from a large selection of roofs, a shed construction is the simplest. In addition, it performs excellent thermal insulation functions.
When building a shed roof in a bathhouse with your own hands, it is very important to avoid mistakes and inaccuracies. We will consider all the significant points when choosing a shed roof structure, and we will also try, using the video in this article, to explain in as much detail as possible how to properly lay such a roof.
Benefits of a shed roof
Single slope roof construction has a number of advantages:
- This type of roof does not need a support system, it is supported by the foundation of the building;
- Minimum material consumption;
- Ease of installation of the roof structure;
- Acceptable price for construction;
- Sufficient resistance to prolonged rains and winds;
- Possibility of carrying out repair work;
- Durability.
The construction of a shed structure is carried out much faster than the construction of other types of roofs. A flat roof surface can withstand loads and serve as an additional floor of an open-air building, where you can spend your free time without risk to life and health.
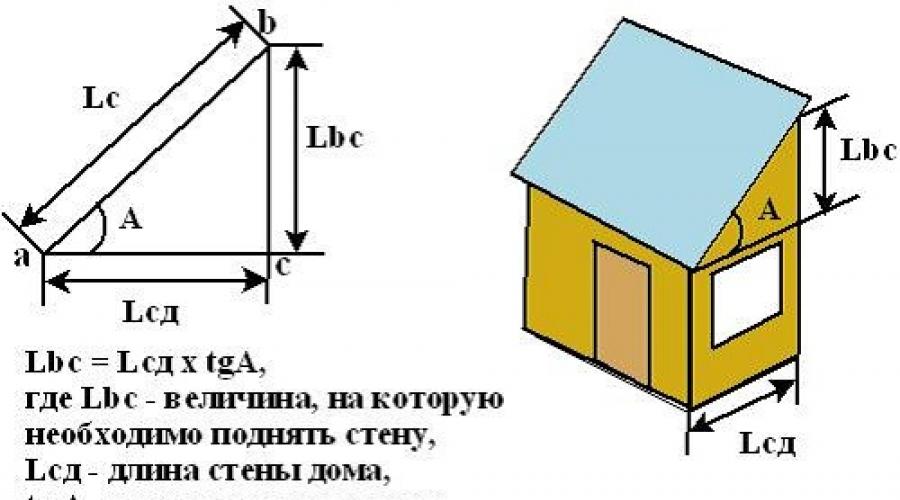
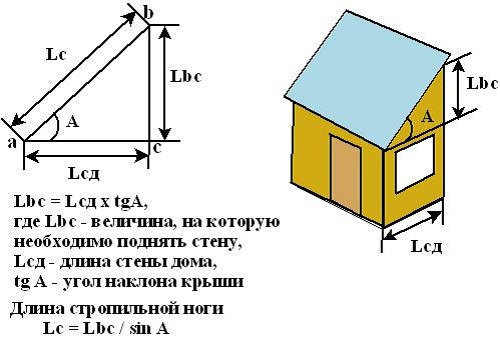
Slope calculation
Before calculating the slope of the structure, it is necessary to determine the materials.
The construction of a shed roof can be carried out from the following material:
- Slate;
- Tiles;
- metal profile;
- Metal tiles;
- Ondulina;
- Ruberoid.
The calculation depends on the ability of the roofing material to withstand precipitation. For example, on a tile or on a slate, water and snow do not linger in the same way as on a metal profile. The ability of the surface to quickly shed precipitation will determine the level of safety of the structure, as a thick layer of snow can damage the roof.
Note!
When using rolled material, the angle of inclination of the roof ranges from 5º to 10º.
For a slate roof, a slope of 20º is sufficient, and for a tile roof, an angle of 25º-35º is recommended.
Also, when calculating the slope, the area on which the bath will be built should be taken into account.
If a bath with a shed roof is planned on a windy area, it is permissible to make the angle of inclination a little less. If the construction takes place in a poorly ventilated area, the roof slope should have a greater slope.
Choosing materials and tools
To carry out all the work you will need the following materials and tools:
- Wooden bars;
- Slate nails;
- Rough boards;
- Slate;
- Nails;
- Hydrobarrier.
So, a shed roof for a bath determines the presence of the following tool when building it with your own hands:
- A hammer;
- Axe;
- Sharp knife;
- Construction stapler with staples;
- Hacksaw.
The construction of a shed roof requires the presence of wooden beams. For you need a bar for 12, the rafters are recommended to be made from a bar for 10, and for the crate, you need 50x50 mm rails.
After the design has been designed, the material and tools have been prepared, the installation of a shed roof can begin.
Shed roof construction
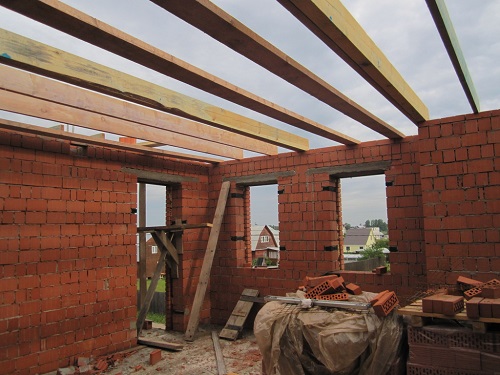
It is worth noting that shed roofs for a bath are considered the simplest in design, which relies on the base of the bath, with a slope angle that depends on the height difference of the walls. Shed roof can be with or without an attic. If the attic is not included in the plans, then the roofing surface and the bath ceiling can be connected.
The roof of a bath building with an attic is distinguished not only by its aesthetic appearance, but also by its excellent thermal insulation qualities, which is especially important in the winter season.
The device of the upper part of the bath without an attic significantly saves building materials, however, the use of such a bath in winter will cost a pretty penny due to low thermal insulation.
If you decide to cover the bath in the old fashioned way with turf, which has fairly good thermal insulation qualities, then this step-by-step instruction will help you with this:
- Initially, lay a waterproofing layer on the floor in the form of an ordinary polyethylene film;
- Then turf is laid on the waterproofing layer;
- The first layer is placed with the roots up;
- The next one is placed root down, which gives the roof an unusual effect.
Advice!
So that from the turf the slope should be 10-15 degrees.
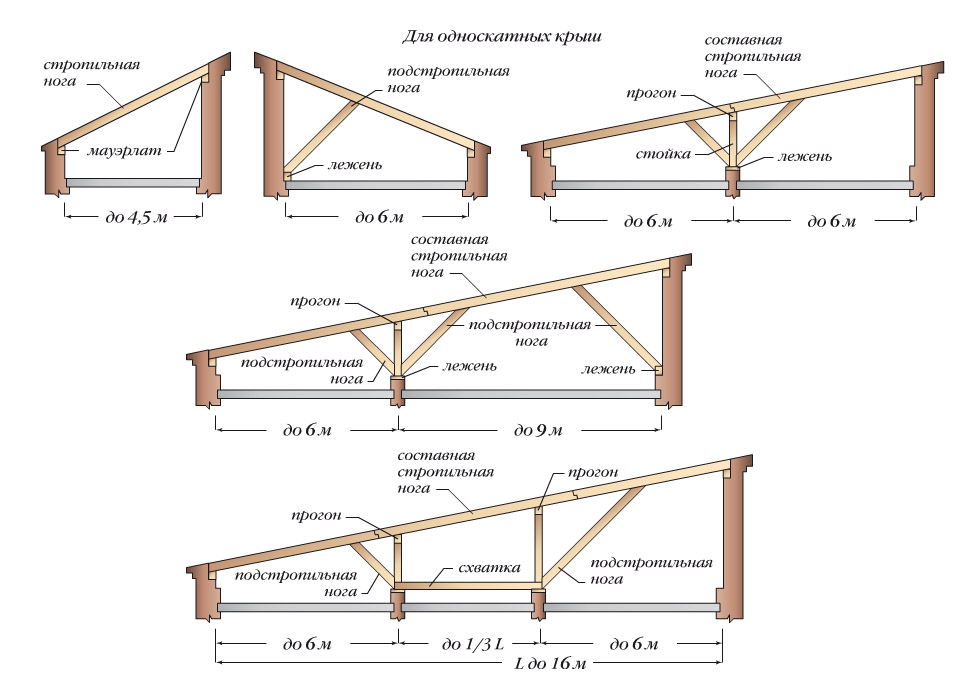
The single-sided design is the easiest to install.
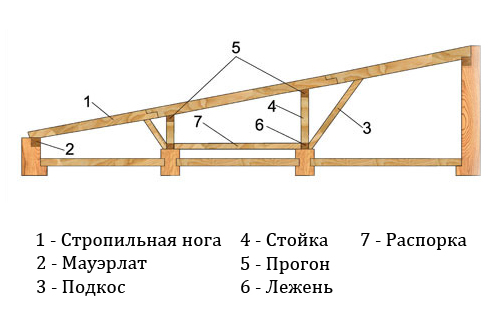
As you know, the design of the bath roof consists of a bearing part and a top. At the same time, the load-bearing component of the roof includes rafters, ceilings, girders, and the roof is a crate, hydro, heat and vapor barrier layers and a coating.
Note!
The truss frame of the bath roof can be constructed on the ground.
Preparatory work
The device of the truss system requires preparatory work:
- The ends of the rafter leg measuring 2800x100x40 mm should initially be cut at an oblique angle. Prepare edged boards for the base with a size of 4400x100x50 mm.
- It is also necessary to take care of the presence of a crossbar board, which is used as a stiffener.
Installation of the truss structure
After the truss system has been assembled on the ground, it must be installed on the bath floor. Before starting the installation of the truss structure, it is necessary to build a crate that will support the roofing material.
When using such roofing materials as roofing material and ondulin, the crate must be continuous, made with boards more than 20 mm thick. The strength of the structure depends on the length of the boards, but when installing them, it is recommended to monitor the joints, they should not match, but vary, so the frame will be more reliable.
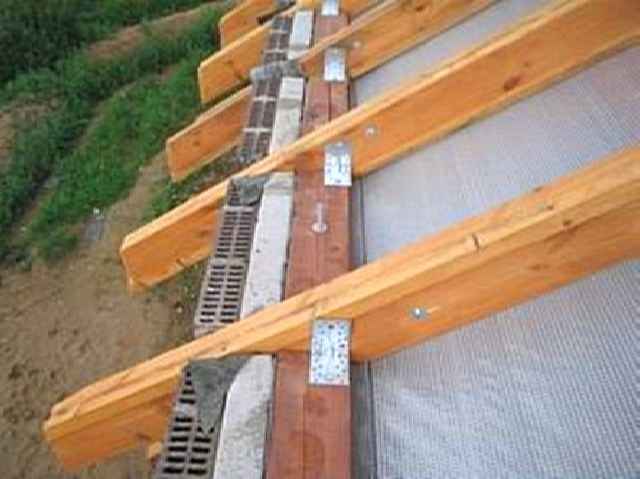
Laying beams
The beams are installed along the perimeter, namely along the upper wall trim, while it is necessary to observe the level of attachment of the support beams. Supports are controlled using the building level. If the beams protrude beyond the walls, then an additional support column must be installed.
Laying the truss structure on the supports
The truss structure is installed on the support beams at a distance of one meter from each other. We fix the rafters with metal brackets.
Note!
When using roll material, the flooring of the coating is overlapped with a width of 5-10 cm.
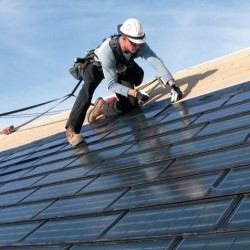
Roofing material
One of the last steps in installing a pitched roof is laying the roofing material. After assembling the truss structure, installing the frame on the ceiling and installing the crate, we proceed to the direct laying of the material on the roof. We attach slate or tiles to the crate with special nails with a hat.
All wooden elements are treated with a special agent against fungus, insects and fire. Between the skin and the insulation, a vapor barrier layer is installed without fail, which will protect the insulation from unnecessary moisture; a special membrane film is perfect for this purpose. (see also article)
Finally
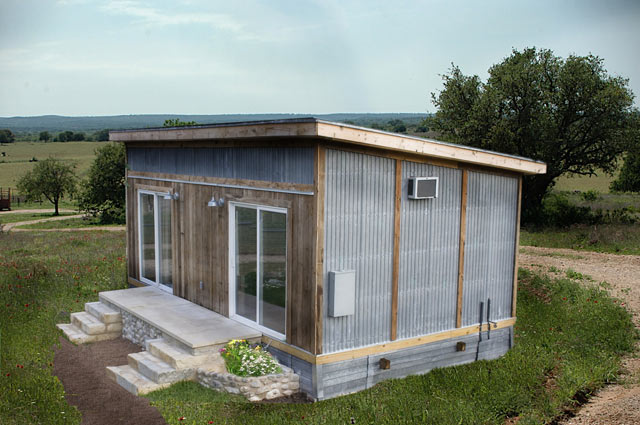
Russian bath and shed roof today, this combination can often be found in summer cottages and suburban areas. Surely you already understood that if you want to build a bathhouse, the simplest and most economical option would be to choose a design with a pitched roof.
Roofing is a rather important stage in the construction of a bathhouse, which requires special attention and accuracy. Self-construction of a roof is within the power of even a builder who is not wise with experience, the main thing is to comply with all the rules and nuances in construction. Good luck!