Frontal and cornice drip strip for metal roofing
Each element of the metal tile roofing kit has its own purpose and it is unacceptable to exclude it from the coverage. The cornice strip for metal tiles plays a very significant role in the construction of the roof. Although the area of these elements is small, they provide protection and integrity of the entire roofing. The cornice strip itself, as the final element, protects the wooden load-bearing structures from the penetration of moisture and wind load. All roofing elements made of metal tiles must be mounted on the basis of the developed technological maps. The absence of a cornice strip can lead to moisture ingress into the under-roof space and lead to dampness on the walls of the building. Wooden roof elements may also rot. There are two types of eaves strips: frontal (or L-level) and cornice drips for metal tiles.
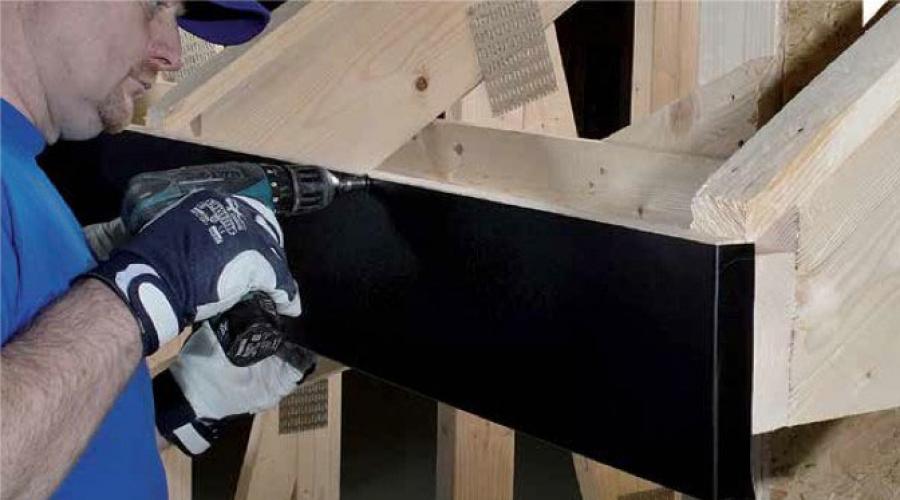
The L bar protects the frontal board from moisture and serves as an additional support for the drain clamps and the filing of the eaves of the roof. It is fastened before installing the cornice strip with self-tapping screws with a pitch of 35-40 cm and an overlap of at least 5 cm. The dimensions of such strips can be standard or made to order. The material is the same as that of the metal tile. Various colors are available at the request of the customer. The plank emphasizes the contours of the roof, so it must be mounted perfectly even. In some cases, in order to eliminate the unevenness of the bar, it is mounted together with a special metal chamfer (see video). Such a bar is clearly shown below.

Eaves strip drip
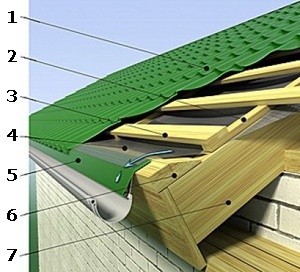
The cornice strip-dropper protects that part of the roof, which is adjacent to the drain. The drip plate also provides drainage of moisture and condensate from the roof and from the under-roof space into the drain. Installation of the cornice strip is carried out after the installation of the frontal board, which is nailed to the end of the rafters with galvanized nails. Then an L-bar is attached to the frontal board. In order for the cornice strip to have an aesthetic appearance as the final part of the roof, the frontal board and the strip must be mounted evenly. Installation of planks is carried out with an overlap of 5 cm after laying all waterproofing materials. Then the roof eaves are hemmed with a tongue-and-groove board or siding. At the same time, it is very important to ensure the free flow of air under the roof. The bent lower part of the plank must necessarily overlap the adjacent part of the gutter to prevent rainwater from entering past the gutter. All moisture that forms on the vapor barrier must be directed along the cornice strip into the drain. This is one of the most important conditions for the competent installation of this roof element (see video). It is impossible to release a hydro-barrier film into the drain, as it will collapse under the influence of sunlight and water will fall under the roof itself. Usually, gutter brackets are installed before installing the cornice strip. Then, the bar itself is installed on top of the brackets, which is fastened with screws to the frontal or cornice board in increments of 30–35 cm. The most complete picture of the drip cornice bar can be obtained from the figure below.
 - counter grating
- crate
- Waterproofing
- eaves plank
- metal tile
- Initial crate
- rafters

- Steel sheet
- Zinc coating (275 g/m²)
- Anti-corrosion coating
- Primer
- Polymer coating (polyurethane, polyester, plastisol, etc.)
- Protective varnish