Do-it-yourself metal roof
The roof made of metal tiles is very popular among consumers. If you are going to make such a roof, you should know that its installation must be carried out in strict accordance with all standards and instructions. Otherwise, errors and violations will appear after a sufficiently long time and such a roof will have to be redone again. To prevent this, clearly follow all the steps that will be outlined below.
We will create a plan to track the progress of the work.
- Calculation of the amount of metal tiles.
- Rafter system.
- Installation of the cornice board.
- Installing the front board and filing the overhang.
- Installation of gutter hooks.
- Laying waterproofing and installation of counter-lattices.
- Installation of planks around the chimney, ridge, skylights.
- Mounting the eaves.
- Installation of the bottom valley.
- Laying an apron around the chimney pipe.
- Laying sheets of metal.
- End plate installation.
- Upper valley installation.
- Installation of ridge battens and external corners.
- Gutter installation.
- Roof grounding.
- Post-assembly work (cleaning, repainting).
Let's consider each item in detail.
1. Calculation of the amount of metal tiles
Metal tiles are sold in sheets. Each such sheet has a full and usable width. The useful width is always 8-12 cm shorter than the full width. That is why only the useful width of the sheet is considered.
To calculate the required number of sheets, the maximum length of the horizontal slope is divided by the useful width of the sheet. The result is rounded up.
The length of the sheet is calculated as follows:
- Measure the length of the slope from the eaves to the ridge;
- Take into account the overhang from the cornice, which is 5 cm;
- Consider the total overlap of all sheets, which is 15 cm for each row;
- All previous points add up.
When everything is calculated, we choose the optimal length of the sheet: it is from 4 to 4.5 meters. Also note that at the junction of another slope, the length of the sheet is chosen so that the sheet covers all the bevels in the row. If the places for cutting the sheets fall on the region of the wave drop, then this phenomenon will lead to damage to the sheets in the future. If there are two sheets in one row, then the length of the bottom one should be a multiple of the vertical step of the wave plus 15 cm for overlap.
If there are two sheets, then the lengths will be calculated as follows: the total length is divided by two. The bottom sheet will be the same length as the previous value. And the length of the top sheet will be equal to the total length minus the length of the bottom sheet. These values must be corrected with the table of forbidden lengths.
2. Rafter system
Rafters can be used with two sections: 15x5 and 10x5 cm. But the distance between them is selected from 60 to 90 cm. If you want to use long distances, then you will need to use a crate (additional transverse boards).
The moisture content of the wood should not exceed 22%. Do not forget to treat the tree with a fire-fighting and antiseptic agent.
To make the roof rectangular, measure again the length of all slopes diagonally. Remember that the minimum roof slope should not exceed 14 degrees.
3. Installation of the cornice board
The cornice board is made in order to give the entire structure the required rigidity. It is mounted under the hook of the gutter in the grooves that are made in the rafters.
4. Installing the frontal board and filing the overhang
The frontal board is installed to the end of the rafters with galvanized nails. Such a board will serve as reinforcement and additional protection for the structure.
For proper installation of the overhang hemming, provide the necessary ventilation under the roof. To do this, it will be enough to leave ventilation gaps. The lining is made from siding, lining, corrugated board and spotlights. Instead of spotlights, you can use ordinary lamps.
To create a filing on the wall, a beam is nailed at the level of the bottom of the frontal board. Next, transverse bars are stuffed between the frontal board and the first horizontal bar. On top of the resulting crate, a hemming material is attached.
Between the crate and the filing should be the very gaps that were mentioned earlier. These gaps are closed with the usual fine-mesh mesh from birds and insects.
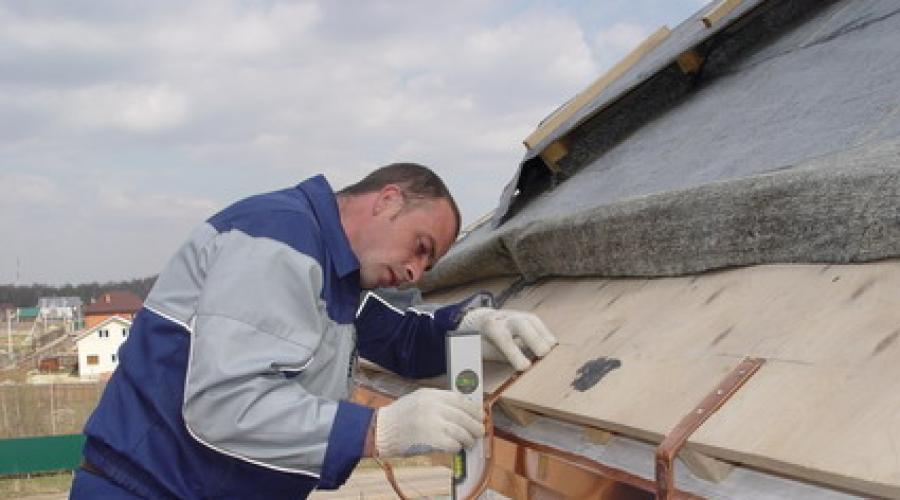
5. Installation of gutter hooks
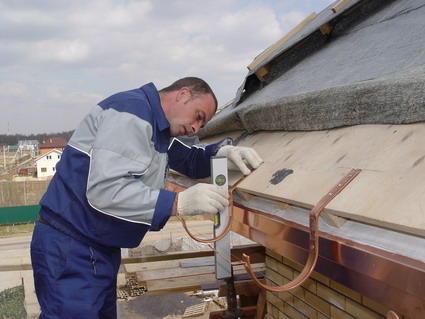 All gutters are planted on long hooks. They are attached either to the rafters or to the cornice board itself. This must be done before laying the metal tile. The pitch of the hooks must match the pitch of the rafters. Previously, grooves are cut in the rafters for the legs of the hooks. Then they are bent into the grooves made and screwed with screws into the end of the rafters or from above.
In the case when the metal tile is already laid, they do this: they use not long, but short hooks that are installed on the frontal board.
6. Laying waterproofing and mounting the counter-lattice
The metal tile is not able to provide sufficient dryness of the material under the roof. Accordingly, from temperature drops, condensate begins to accumulate there. Such processes lead to mold and rotting of wood, as well as to corrosion of metal parts of the structure. To prevent this from happening, you need to clearly follow three rules: waterproofing, ventilation, steam and heat insulation.
We calculate ventilation
The area of all ventilation gaps should be 0.01% of the roof area.We distribute these gaps as follows:
- Proportional to the area of the slopes. Let's say the roof area is 200 square meters. m. The slopes are 100 square meters. m, 70 sq. m and 30 sq. m. Then the ventilation gaps will be distributed as follows: 1 sq. m, 0.7 sq. m and 0.3 sq. m.
- The air inflow area near the eaves should be equal to the air outflow area near the ridge. That is, we divide each slope area in half and get the area of \u200b\u200bthe ventilation slot.
Air flow will be provided by:
- Ventilation gaps in the filing of the eaves;
- Gaps between waterproofing and roofing, thermal insulation and waterproofing;
- Gap around the ridge.
Waterproofing
 Under no circumstances should bitumen-based materials be used for waterproofing! The principle of waterproofing is to prevent dirt and moisture from getting under the roof, but at the same time allow steam to escape freely into the ventilated gap.
The film of waterproofing material is located in a horizontal plane from the eaves to the ridge. It is better to lay it with an overlap, which is 15 cm. The film is fastened with a construction stapler, and the overlap places are isolated with adhesive tape.
The film should be rolled out so that the overlap does not fall on wooden structures. Pay attention to the side on which you roll out the film: if you lay it on the wrong side, then it will not fulfill its function.
Be sure to put a film with sag between the rafters: they should be about 2 cm. The sag is needed in order to eliminate tension and breaks in case of temperature changes.
There are three types of waterproofing films:
- Classic.
- superdiffusion membranes.
- anti-condensation materials.
7. Installation of strips around the chimney, ridge, roof windows
The initial crate, that is, the lower one, should be with a section that is one wave height larger than all the others. It is laid parallel to the eaves. The step between the first crate and the second should be 28 cm, and between the subsequent ones - 35 cm.
In order for the ridge plank to be well fixed, fill under the attachment point (on top of the rafters) two more boards located 5 cm apart.
In the places where the slopes join (valleys), around the roof windows and the chimney there is a continuous crate.
8. Installation of the eaves strip
This bar is attached over the hooks of the gutter in an interference fit so that it does not ring in strong winds. For an overlap along the length, even 10 cm is enough. The bar is screwed in with galvanized self-tapping screws to the cornice and frontal boards.
9. Installation of the lower valley
 The lower valleys must be installed at the junction of the slopes at negative angles. Under them, a continuous crate is made with boards having a cross section of 15 × 2.5 cm. On both sides of the joint axis, continue the crate by 30 cm, put waterproofing along a wooden gutter and fix the lower valley with self-tapping screws in increments of 30 cm. Please note: the lower edge should be on top of the eaves boards. The overlap at a horizontal joint should be 10 cm. In the case of a flat corner, another layer of waterproofing material is laid along the valley, and a porous self-expanding sealant is laid between the valley and the metal tile.
10. Laying the apron around the chimney pipe
The inner part of the junction of the chimney to the roof surface must be equipped as follows:
- Choose the color and size of the strap;
- In the chimney, make a strobe 1.5 cm deep with a slope upwards;
- Bring the waterproofing 5 cm directly onto the pipe, gluing its cut with adhesive tape to the pipe;
- Wrap the pipe outlet with Ecobit film.
Decorative "apron" is made only after laying the metal tile. External junction strips are placed on the pipe, their upper part is inserted into the strobe and filled with heat-resistant sealant. The lower part of the bar is attached to the crate with self-tapping screws.
To make ventilation, some distance must be left from the rafters to the pipe.
If you don't want damp bricks to crack from overheating, wrap them with polymer-coated steel sheets, leaving 2 cm of ventilation space.
11. Laying sheets of metal tiles and arranging dormers and skylights
 Before installation, fix the logs along which you will lift the sheets to the roof. Shoes for walking on the roof must be soft, otherwise the coating of the metal tile may be damaged.
To prevent water from accumulating at the joints of the roof, a capillary groove should be made on each sheet of metal tiles in advance. But on sale there are also such sheets on which such a groove has already been applied.
After laying the first sheet, the laying of other sheets begins: both to the left of the first sheet and to the right. The main criterion for choosing a direction is convenience. Usually, it is most convenient to start laying to the valley between a slope or an oblique ridge.
If you put sheets from right to left, then each subsequent sheet should cover one wave of the previous one and close the groove on the left side. If the laying is done the other way around, then when the groove is covered, the edge of the next sheet is placed under the wave of the previous sheet.
There are several types of laying metal tiles:
- Laying in one row;
- Multi-row laying;
- Laying on triangular slopes;
- Laying on a rectangular slope.
Laying in one row
After the first sheet, laying is carried out from right to left. When the first sheet is aligned along the end and the cornice, it is temporarily fixed with a self-tapping screw in the center of the sheet (near the ridge), then the second sheet is placed on top, leveled relative to the first, fastened together. So four more sheets are laid, which are aligned with a whole block along the eaves and attached to the crate. The very last sheet in the row is not attached to the crate until the next block is unfolded and aligned.
Multi-row laying
 When the first sheet is laid and aligned along the end and cornice, after it go from right to left. Then the second sheet is laid on top of the first and fastened to the screws at the ridge. Two sheets are again aligned and fastened together with self-tapping screws. The third sheet is laid to the left of the first, they are fastened again and the fourth sheet is laid directly above the third. Such a block is aligned along the end and cornice and attached to the crate.
Laying on triangular slopes
Before starting work, mark the center of the slope and draw an axis through it. Next, mark the same axis on the sheet and combine these lines on the sheet and slope. The sheet is attached to the ridge with a self-tapping screw. From the first sheet in two directions, laying is done according to the same principle that was considered in the previous versions. But on oblique ridges, you will need to cut the sheets.
Laying on a rectangular slope
If you go from right to left, then each next sheet will be superimposed on the previous one. If you move from left to right, then each next sheet will be placed under the previous one.
These four sheets are fastened with self-tapping screws, and then attached to the crate. There will be a thickening at the docking point. To remove it, straighten the capillary groove a little or cut off part of the corner. Thus, when fastened, the sheets will form a rectangle.
General laying rules:
- The sheet is attached to the deflection of the wave, where it is adjacent to the crate;
- To the first crate, the bottom sheets are attached above the step through the wave;
- To the rest of the crates, the sheets are attached from below, as close as possible to the step;
- From the end board, sheets are attached to each wave;
- Absolutely all sheets attract to each crate;
- In places of overlap, in order to make a vertical overlap, the sheets are fastened together with a self-tapping screw in a wave recession.
12. Mounting the end plate
The end plate is an additional and decorative element. It is she who will protect the metal tile from wind and hanging, and the tree from moisture. Lay the waterproofing on top of the board, and close the edge with an end plate. It is installed from the cornice to the ridge and fastened with screws to the board.
Due to the difference in height, it will tightly press against the metal tile: this is exactly what will eliminate the rattle in the wind. Make an overlap of 10 cm. The end plank should overlap the uppermost crest of the wave, then water will not get under the metal tile. You can also fold the edges of the sheet up.
13. Installation of the upper valley
The upper valley is designed to give an aesthetic appearance to the joints, as well as to drain water from the inner corner at the junction of two slopes. It is fastened with screws. They should not fall into the middle of the lower valley, as the waterproofing can be damaged. A self-expanding insulation is laid between the metal tile and the upper valley.
14. Installation of ridge battens and external corners
 The waterproofing film under the ridge must have a gap along its entire length. The width must be at least 20 cm. You can also lay additional waterproofing on the crate so that it covers the bottom layer of waterproofing. The ridge is fastened through the wave to the upper ridge with ridge screws into the crate. From the ends it is closed with plugs. The ridge is built up by overlapping stiffeners.
15. Installation of gutters
At the very beginning, the hooks for the drains were already made, so now only the pipes need to be installed.
In order for the water to drain easily, make the slope of the gutter: 5 mm per meter of length. To calculate the number of funnels, keep in mind that one pipe receives water from only 10 meters of gutter and from 120 square meters. m roof.
Cut a V-shaped hole in the gutter 10 cm wide. The distance from the top edge of the gutter to the hole should be 1.5 cm, but the distance between the funnel and the end of the gutter should be 15 cm.
The funnel is put directly on the gutter and fastened with the rolled side to its outer side. Funnel clamps bend inside the gutter. Next, install the end caps.
Then you need to install the cornice bar. Its lower edge should fall into the gutter, which will prevent the frontal board from getting wet.
Waterproofing is removed under the bar, which will ensure the flow of water directly into the gutter.
16. Roof grounding
It is better to ground the roof separately from the lightning rod, which will prevent the danger of electric shock when touching the roof.
17. Post-assembly work (cleaning, painting)
After all work, the roof should be cleaned of debris. If there are scuffs or scratches, then they need to be painted over so that there is no corrosion. After three months, make a broach of self-tapping screws.
In the future, the roof should be cleaned with a soft brush, water jet or a rag.