Cornice plank, types of cornice planks, installation, useful tips
Among the additional roofing elements, a special place is occupied by a cornice strip. On the roof area, this element occupies an insignificant space, however, the main protective function and maintaining the integrity of the roof from moisture falls precisely on the eaves bar. What do you need to know when installing this element so that the "bar does not sunk"?
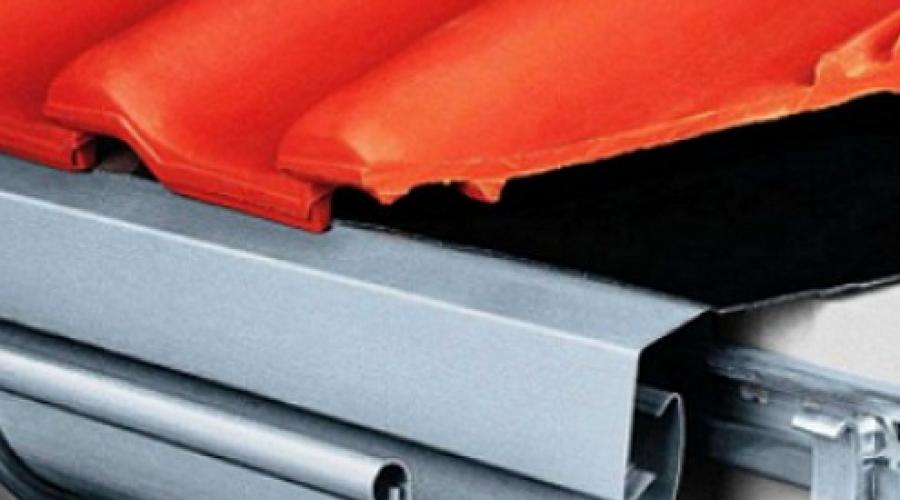
What does the cornice plank look like
The cornice strip is manufactured industrially on sheet-bending equipment. In most cases, the bar has a standard configuration, differing only in the angle of the shelf.
The width of the vertical plane and the dimensions of the cornice strips depend on the design of the truss system, and logically repeat the angle of inclination of the roofing sheet.
The length of the finished product can reach two to three meters, and the dimensions of flat shelves and edges are 80x60x10 mm or 100x60x20 mm, the thickness of the plank sheet is 0.4-0.6 mm.
It is along the bend of the two planes of the plank that water drips freely into the drainage system, bypassing the reliable rear - the frontal eaves of the roof. Recall that the bar has a second name - a drip.
Do not confuse the design of the end and cornice strips. The differences between the slats are in the method and place of attachment.
The end plate protects the side edge between the eaves of the house and its ridge.
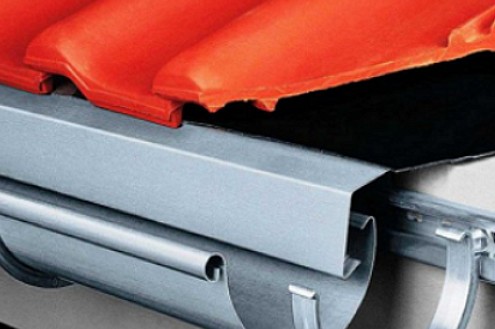
Traditionally, drip strips are installed under the waterproofing layer on the crate with an overlap and the hanging edge is led into the gutter.
For each type of roofing cloth, their installation technology is distinguished, however, the design of the cornice strip for soft roofing and metal roofing is the same.

Installation of eaves for various types of roofing
corrugated roof plank
The installation of a roof from profiled sheets begins with the installation of a plank. A prerequisite for the installation of a cornice strip for corrugated board is its location below the waterproofing carpet. In this case, moisture or condensate running down the waterproofing film must fall on the plank and then break into the drainage system.

Initially, end boards are installed on the roof slopes. The topmost board is installed above the crate and a bar is attached to this board. Additionally, a breathable seal is mounted under the corrugated board for the natural removal of water vapor. The planks are overlapped and fastened using self-tapping screws or galvanized bolts.
Helpful Hints
metal roof plank
Installation of the eaves strip for metal tiles is carried out before laying the sheets. Initially, the frontal (cornice) board is installed to the ends of the truss system.

The cornice board can be installed in special grooves for galvanized fasteners.

Then prepare the support for filing the overhang. The filing is carried out using a tongue-and-groove board and a support bar. The next step is to install the attributes of the drainage system. The eaves plank is installed between the flooring of the sheets over the gutter mount.

Fasteners are self-tapping screws screwed into the frontal (cornice) board in increments of 30 cm.
More detailed information on the installation of a drainage system and a drip is presented in the video.
roofing plank made of soft materials
The cornice strip for soft roofing can have a bend of 100-130 degrees. Therefore, it is selected depending on the slope of the roof slopes. The dropper is mounted along the edge of the roof in a vertical downward direction.

This condition applies to all types of soft roofing: rolled, flexible tiles or roofing membranes.

The roof space of the crate is equipped with holes for ventilation and air passage through the aeration channels. The base of the cornice strip for tiles is fixed to the crate and gable protective strips are installed on the edges of the crate. Then they process and install the carpet under the valley, having previously smeared the edges with bituminous mastic.

It is recommended to glue a soft roofing material onto the installed plank, and then lay the ordinary tiles. It is necessary to arrange soft tiles so that the tiles of the first row "capture" most of the roof. The subsequent ordinary tiles are laid with a shift. The edges of the tiles at the ends are glued especially carefully.

The plank for soft roofing is mounted with an overlap (with a minimum edge width of 2 cm) and fixed in a zigzag manner. Roofing nails are used for fastening, the fastening step reaches 10-15 cm.
How to install a dropper on a tile with your own hands is shown in this video.
Helpful Hints
For a roof made of corrugated board or metal tiles, the base of the plank is fixed to the crate. The lower edge of the plank is directed to the installed gutter box or gutter vertically or at an angle. The drop radius from the wall plane can be 45 degrees.

After adding water to the bar and visually tracing the passage of drops, the placement of the dropper is selected under the exit of water drops. You can slightly lower or shorten the slope and location until the drip is completely fixed.

Drop Aprons
A healthy alternative to a metal eaves strip when constructing a roof made of soft coatings are decorative dropper aprons, which are a twisted sweep coating. The outer layer of aprons is a steel galvanized polymer coating 0.7 mm thick.

Mounting such a dropper is a real pleasure: I glued it with special mastic, unfolded the “self-assembly” and laid it out at the place of attachment. Perhaps these promising materials will find their fans when installing a "capricious" bar.

Thus, the process of installing a drip for any type of roof can be done independently.