How to lay tiles in the bathroom with your own hands
Everyone knows that the best surface finish in the bathroom is ceramic tile. No other finishing material can fully replace it and last as long in this “wet” room. It gained its popularity due to a number of advantages:
- moisture resistance, and the possibility of using detergents for cleaning;
- mechanical strength. It is successfully used even as a floor finish that takes constant loads, not to mention walls;
- durability. Tile is one of the most durable types of finishes, its service life is calculated in decades, so the next repair will not have to be done soon;
- the possibility of quick cleaning even with the use of cleaning agents. For the bathroom, this parameter is especially relevant, because it should always be clean here, and there are many sources of pollution;
- a wide range of shapes and colors, making it possible to realize any design solutions.
With all its positive qualities, the tile also has a drawback - time-consuming and expensive installation. Of course, it will be expensive if you entrust it to specialists. If you take a chance and do the laying yourself, you can save a lot of money, especially following all the recommendations, it will not be so difficult to do this. How to lay tiles in the bathroom with your own hands is described in detail in this article.
The installation method depends on the design intent, the shape of the bathroom and the level of skill of the installer. It is necessary to decide on it at the initial stage, so that it is possible to correctly and accurately determine the consumption of the finishing material. The main calculation parameter is the area of the finishing surface, to which a 5% margin is added, but the laying method also plays an important role.
So, styling happens:
- straight when the tiles are arranged horizontally or vertically in a row, and the seams of one row coincide with the seams of the next. This is the simplest and most common way. If you choose a rectangular tile and lay it out in straight masonry, the ceiling will visually rise, and the room will seem more spacious. Straight masonry is universal, and yet it is more suitable for rectangular rooms. If there is no installation experience, but you want to try to do the finishing yourself, then there is only one answer to the question “how to lay tiles in the bathroom”: using the direct laying method;
- diagonal when square-shaped tiles are arranged diagonally. Such styling looks more interesting and can hide minor irregularities on the surface of the walls, but it can only be trusted to specialists. Usually used in square rooms;
- in the form of a chessboard when tiles of two contrasting colors are stacked in a checkerboard pattern. This finish is suitable for square-shaped rooms;
- offset, at which one row is shifted to the side relative to the second. This method resembles straight laying and is more suitable for rectangular rooms. For it, it is recommended to use tiles in the form of rectangles with an aspect ratio of 2: 1 (for example, 60x30 cm), which helps to more accurately determine the offset step of each subsequent row;
- mosaic. Mosaic is not just a tile, but a real ceramic panel, consisting of small parts of different sizes. Its installation requires experience in laying tiles, so it is usually trusted by the masters.
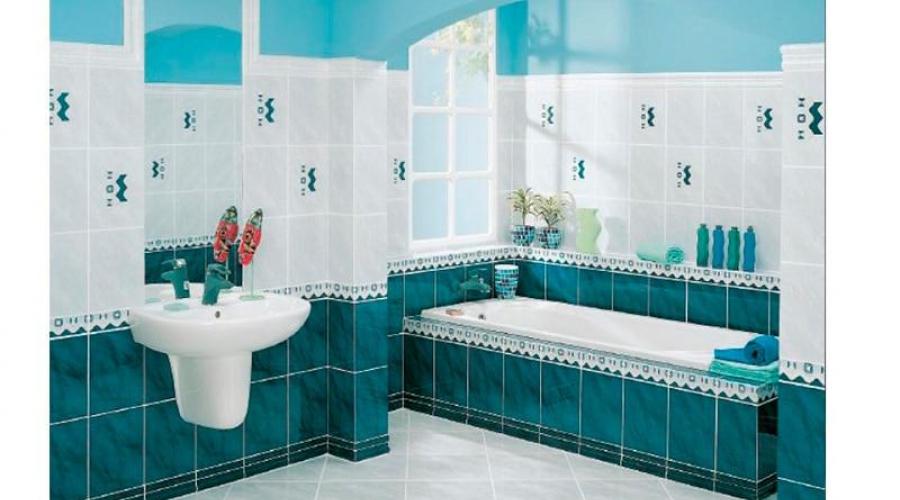
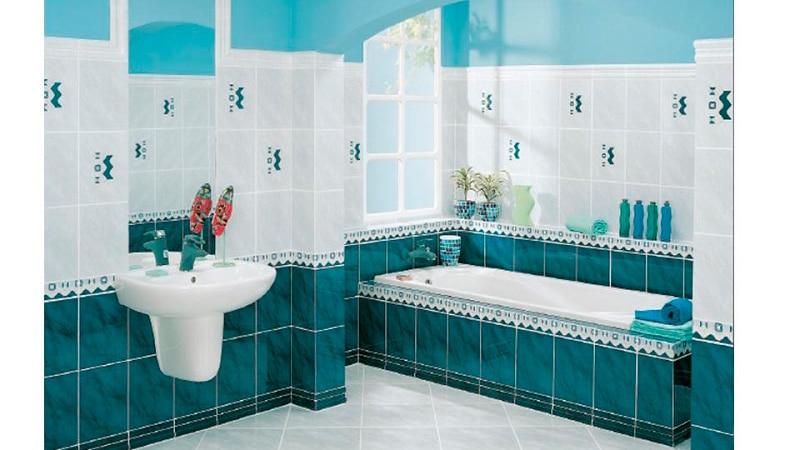
Despite the fact that some methods are quite difficult to perform, master classes can help you understand their technology, and perhaps everything will turn out to be much easier than it seemed before. Sometimes the design solutions chosen for cladding require the use of a specific installation method. If the design option you like provides for a type of finish, such as a mosaic, you should not refuse it just because of the complexity of the work. Sometimes a detailed study of the question of how to properly lay out the tiles in the bathroom is quite enough. The design, the photo of which is given below, shows that even the most complex types of finishes can be brought to life, and not necessarily by professionals.
Tile laying plan
How to lay tiles in the bathroom? First, a detailed plan of the surface is made, made to scale, with all the tiles applied to it. It will allow you to accurately determine the sequence of installation, the placement of various decorative elements, if any. On the plan, it is convenient to determine the center of the wall or ceiling, to “place” the tiles so that they are located symmetrically, and at the same time there are no too narrow gaps in the corners. Such a scheme greatly simplifies the calculation of finishing consumption.
We lay tiles with our own hands
Materials and tools for laying tiles
How to lay tiles in the bathroom yourself and what is needed for this? Despite the fact that the laying process is not easy, it will require the simplest tools and a minimum of materials. To prepare the adhesive mixture, you will need a container of sufficient volume and a drill with a nozzle for stirring it. Glue is purchased in the form of a dry powder, to which water is added before use in the proportions indicated on the package. It is applied to the surface with a spatula or other similar tool. For cutting tiles, a grinder, a tile cutter, as well as tongs are used, the edges are processed with a corundum bar. During the laying process, the position of the tiles is controlled by the building level, and the width of the joints is controlled by plastic crosses. For the final stage, a grout is used, which fills the seams. Excess glue or grout is removed with a sponge.
Preparatory work
The base for tiles, whether it be a wall, floor or even a ceiling, must be smooth and clean, so it requires separate preparation. A properly prepared surface is the key to reliable adhesion of the cladding to the base and, as a result, a durable and beautiful finish.
To begin with, all the old finishes are completely removed from the base, even if it looks quite strong and reliable. There is no guarantee that it will last a long time and will not begin to crumble under the weight of a new tile, so it is better to be safe. After dismantling the finish, the surface is cleaned of debris and dust, after which its verticality (for walls) or horizontality (for the floor) is checked by the building level. Most likely, it will not turn out to be ideal, so it will have to be additionally leveled with plaster.
Tiles can be laid only after the leveling layer has dried, that is, after 2 weeks. Before installation, the plastered surface is primed with a special compound that increases its moisture resistance and improves adhesion to the finish. When choosing a primer, you need to take into account the fact that it will be used in a "wet" room.
Ceramic tile laying technology
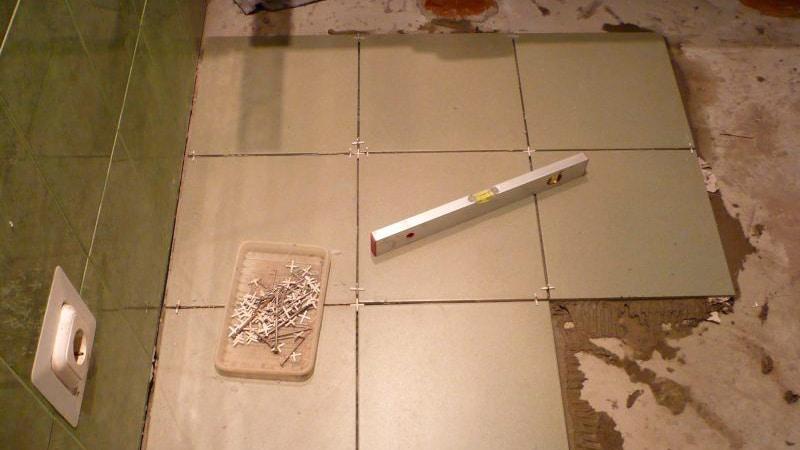
The main rule of how to lay floor tiles in the bathroom is to constantly monitor the position of the tiles with the help of a level and be as accurate as possible when working.
It is advisable to start laying from places that will subsequently be closed. If the work is done for the first time, one way or another there will be errors, and it is better if they are not visible. Installation is carried out from the bottom up. The first (lowest) row is laid out “dry”, that is, the tiles are simply applied to the surface in order to visually assess their position. Often at the end of the row there is a gap that is filled not with the whole tile, but with part of it. If the width of such a gap is less than 25 mm, the row must be shifted or amended in the overall layout. The tile joints must not coincide with the joints of the base slabs. Mark the position of the first and last tiles with a pencil on the surface. Using a level or plumb line, a line is marked along which the row will be laid.
A small nuance: it is always easier to finish a row with a whole tile, and cut the first one if necessary.
Tile adhesive sets quickly, so it must be prepared in portions and applied quickly. The installation process takes place in stages. First, a small area with a height equal to four tiles is marked with chalk, on which a layer of glue is applied. A tile is applied to the base, pressed and held for some time, until it is securely fixed. At the same time, its position is necessarily checked by the level, the slightest deviations from the vertical or horizontal are immediately corrected.
Special plastic crosses are inserted between the tiles. With their help, you can easily get the desired thickness of the seams, the same over the entire area of \u200b\u200bthe masonry.
A special adhesive for tiles was noted in the list of necessary materials, but sometimes in articles and recommendations on the topic “how to lay tiles in the bathroom with your own hands”, ordinary cement mortar appears instead. It has a low price, but it is undesirable for novice masters to use it. Firstly, to prepare it, you need to know the necessary proportions of its components, and secondly, it is more difficult to work with it. So it is much easier and faster to purchase a ready-made dry mix and simply dilute it with water.
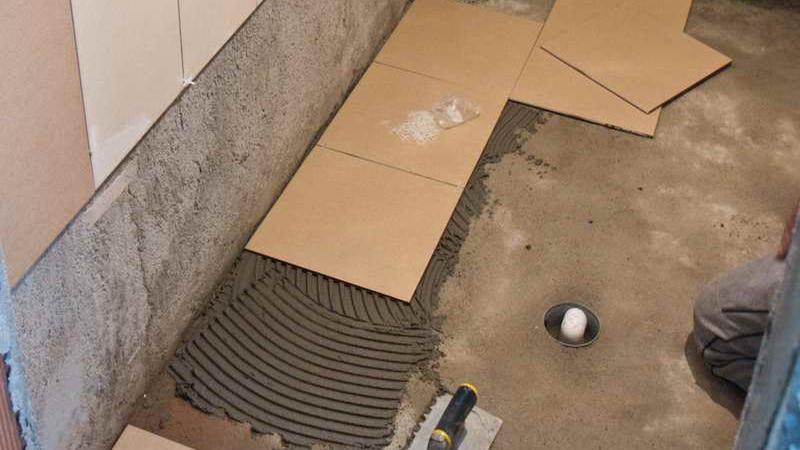
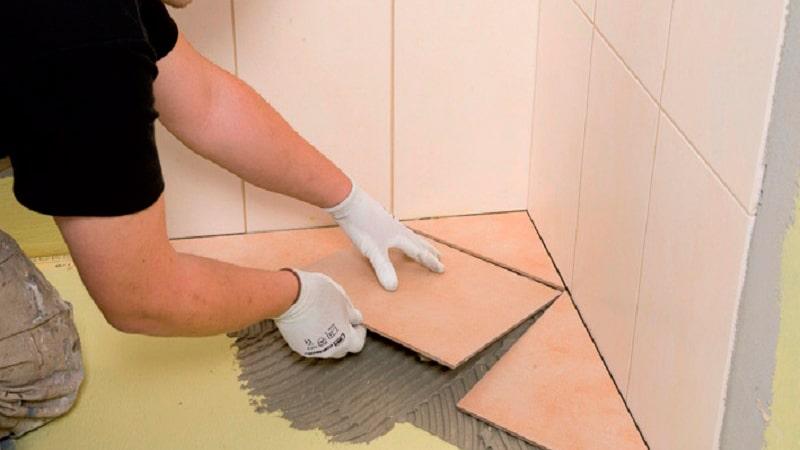
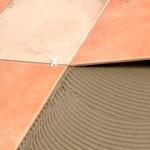
Glue is applied to the base. For this, special tools are used - on the packaging of mixtures you can often find recommendations for their choice. If there are no recommendations, the spatula with teeth along the edge is used by default. They scoop up glue and evenly apply it to the base in an even layer. The glue should not drain at the same time, but you should not make it too thick either. The tile is pressed tightly against the base, but the main thing here is to know the measure, because ceramics are a fragile material. In this case, excess glue will be squeezed out from behind the edges of the tile. It is easy to remove it with an ordinary sponge until it hardens, but if some of it remains and dries up, a plastic or wooden spatula is used for cleaning, but in no case a metal one. Adhesives usually set quickly, but you still need to be careful with glued tiles so you don't accidentally move them.
The bathroom always has pipe outlets, as well as windows, doors and other obstacles in the way of installation. To get around them, you need to cut the tiles to the desired shape or size with a grinder or tile cutter. You will also need special tongs used to break ceramics. It is they who will be able to give the desired shape to the tile when bypassing the pipe.
We overwrite the seams
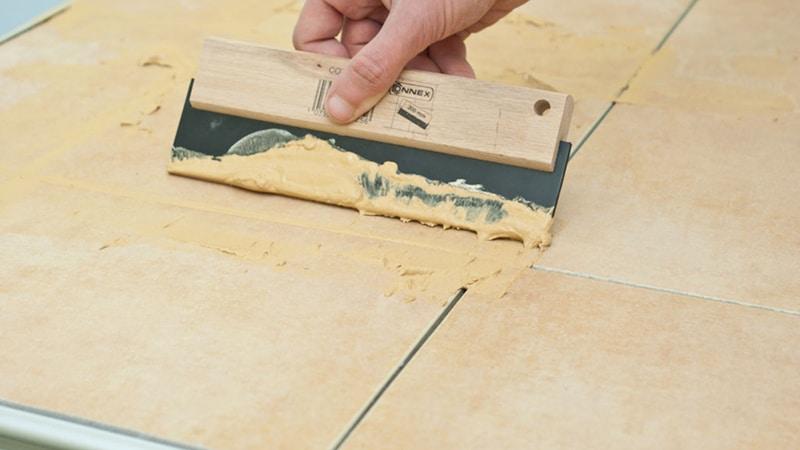
After the tiles are laid and the glue dries, the crosses are removed from the joints, and the joints themselves are filled with a special compound - grout. This is done using a tool such as a rubber trowel. When it moves diagonally along the surface of the tile, the grout mixture enters the gaps, forming a sealed and moisture-resistant layer.
Grouting on the bathroom floor
The seams dry quickly enough, and the excess grout that remains on the tile is easily washed off with a sponge moistened with water.
When carrying out repairs with their own hands, many are frightened by the process of laying ceramic tiles. It is generally accepted that this particular work should be performed exclusively by professionals due to its complexity. Tiling is a really complex process that requires maximum attention and accuracy, and yet it is quite possible to cope with it without outside help.
 How to lay tiles in the bathroom with your own hands
  How to lay tiles in the bathroom
 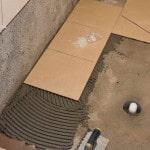 We lay the tiles on the floor with our own hands
 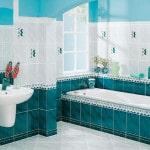 We lay tiles with our own hands
 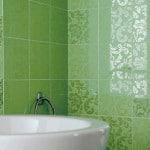 Bathroom tiling
 How to lay tiles in the bathroom on the floor with your own hands
 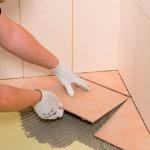 We lay tiles on the floor with our own hands
 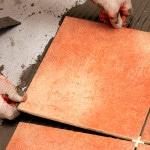 Putting tiles on the bathroom floor
  Bathroom tiling
  Facing the bathroom with ceramic and tile
 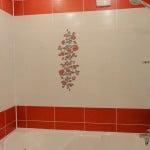 DIY bathroom tiling
  Do-it-yourself bath tiling
  Original tiled bathroom design