How to cover the roof with soft tiles: step-by-step installation from the base
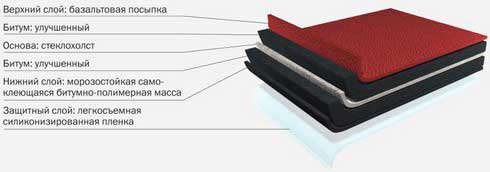
Flexible soft tiles - ideal for roofing houses with a complex roof shape. If you choose the right quality material and correctly install it on the roof of the building, it will provide the roof with high performance for many years. It is also important that when using flexible tiles, there is almost no waste left.
Soft tiles can be laid on the roof of almost any complexity and angle of inclination of 12°-90°. This material is distinguished by low weight, noiselessness and aesthetics (has a wide choice of shades and textures), durability and reliability, high water resistance and anti-avalanche properties.
Installation of a roof from a soft tile takes place in several stages:
Foundation preparation
Before covering the roof, carefully prepare the base for its installation. The foundation must meet certain conditions:
- be rigid and even, for example, OSB boards, moisture-resistant plywood, edged or tongue-and-groove boards can act as a base;
- be dry (humidity not more than 20%) and ventilated;
- the base boards must be at least twice as long as the span between the supports, their maximum width is 15 cm;
- the joints between the laid boards must necessarily fall on the supports;
- a sufficient gap is left between the boards (about 5 mm) with the allowance for the possible expansion of the base material with changes in temperature and humidity;
- boards are recommended to be laid with the core up;
- if it is known that plywood will be the material for the base, then the distance between the rafters is selected in such a way that the seams of its sheets fall exactly on them.
The finished base is pre-impregnated with antifungal and fire retardant agents. To properly cover the roof with soft tiles, it is necessary to provide ventilation on the roof.
Ventilation device
The ventilation device is a mandatory and very important point so that the installation of a roof made of soft tiles is carried out without errors and shortcomings. It is necessary in order to:
- remove excess moisture from subroofing (battens, insulation) and roofing materials;
- in summer, reduce the temperature inside the roof structure;
- ventilate the building
- prevent ice and icicles from freezing on the roof.
For the optimal solution of these problems, ventilation must be provided with a fairly large gap (more than 5 cm). At the same time, the exhaust ventilation opening on the roof should be located as high as possible in its upper part, and the inlet - in the lower part.
Lining layer
A lining reinforcing layer is laid under the soft tiles. If the roof is sloping (slope less than 1:3), then according to the flexible roof installation technology, the entire roof area is covered with a lining layer. In the case of a steeper roof, it is enough to install the lining layer in the end parts, in the valleys, on the cornice overhangs, on the skates. The material is laid in layers with an overlap of 10 cm from the bottom up. The edges of the material are fixed to the base of the roof with nails (20 cm step), the joints are sealed.
Eaves protection
On cornice overhangs, rain moisture can penetrate to the edge of the batten. For protection, droppers (metal cornice strips) are laid on the lining carpet with an overlap (starting from 2 cm), which are nailed in a zigzag pattern in 10 cm increments.
End protection. The protection of the end parts of the crate is equipped similarly to the cornice with the help of metal gable strips.
Installing a valley carpet
To increase the water resistance of the roof in the valleys, a valley carpet is installed on the lining layer to match the tiles. The edges are securely fixed with roofing nails (10 cm step).
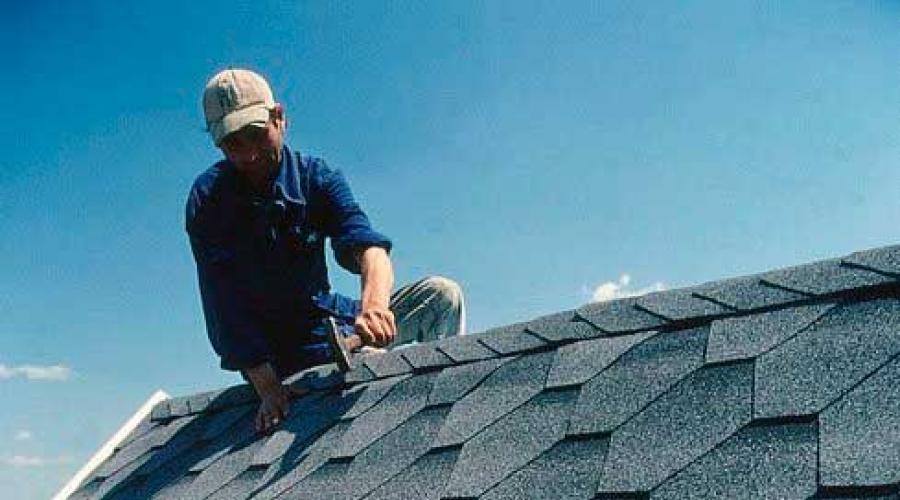
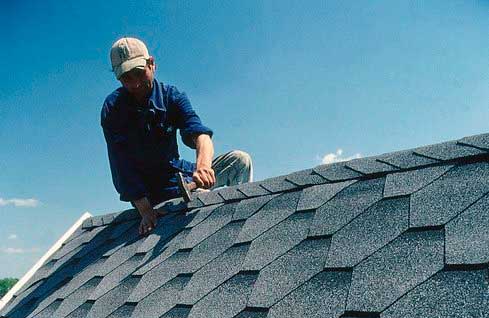
Installation of tiles
How to cover the roof with soft tiles? Work on the installation of tiles begins from the center of the cornice overhang of the roof in the direction of the end edges. In the first row, the tiles are laid indented from the edge of the eaves (3-5 cm). The protruding elements must cover the joints formed between the tiles of the eaves. The protective film is removed from the tiles and they are glued to the base, after which they are nailed over the groove line.
The subsequent rows are laid with the ends of the tongues, corresponding to the level of the cutout of the tiles of the previous row. The tiles in the valleys and on the end sections of the roof are cut to the shape of the edge, then glued along the cut with K-36 glue
Processing elements of a soft tiled roof
Small roof elements are treated with rubber seals and K-36 sealing adhesive.
In places where vertical penetrations are attached to the roof, a triangular rail is nailed. On it, the tiles are brought to the surface of the roof element and glued with glue.
The junction is pasted over with a strip of Pintari valley carpet, covered with a metal apron and sealed with K-36 glue.
Similarly, sections are mounted where vertical walls adjoin.
When installing the ridge, ridge tiles are used: the tiles are glued with the short side parallel to the ridge, then the next layer of roofing is nailed to it under overlapping nails.