How to tile on a bathroom wall
Not everyone can afford to hire a team for a professional bathroom renovation. If you have the desire, patience and time, you can independently lay the tiles on the wall in the bathroom.
Unlike other finishing materials for the bathroom, tiles have the following advantages:
- High wear resistance. Properly laid tiles can last for decades without changing their color or pattern.
- Ceramic tiles perfectly withstand both steam and water that have fallen on the wall.
- Ease of care. Tiles are completely maintenance-free. All that is required is to periodically wipe it with a special tool.
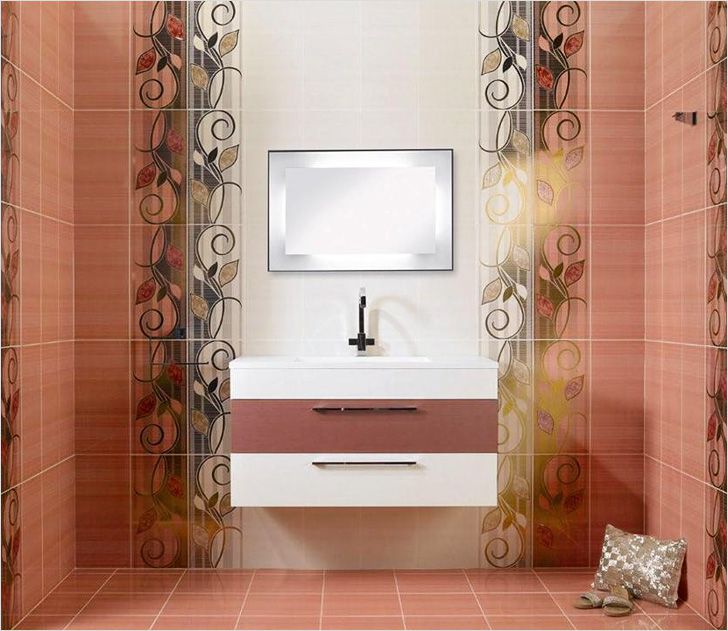
- Extensive bathroom design options. Modern manufacturers offer a diverse selection of colors and decor that can satisfy any even the most demanding customer.
Tips
Few novice home craftsmen imagine another option for laying tiles, except for even rows with tile cutting, if the whole part does not lie completely on the last place in the row.
However, there are several options for laying tiles that will give the bathroom not only sophistication, but also individuality.
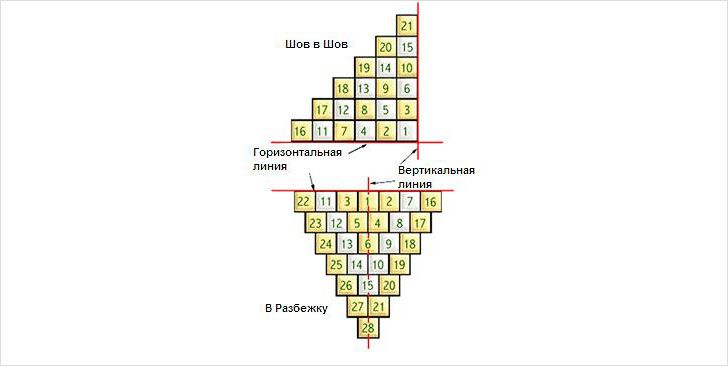
- Direct styling. The easiest and most understandable way, ideal for those who are just starting to lay tiles in the bathroom with their own hands. The first element is placed from the corner along the longest wall, and horizontal and vertical rows with indents for tile joints subsequently diverge from it - this option is economical, since very little waste is obtained with this laying. If you want to do straight tiling at the professional level, we advise you to watch the following video.
- Diagonal fit. A more sophisticated way to decorate the walls and floor of the bathroom, but it helps to hide some of the flaws in the bathroom and, conversely, give the room extra volume.
- Chess set. It is a simple option for laying tiles of different colors. The main thing that must be observed with this installation is the evenness of the tiles of different colors. If you want to save a little on material, it is advisable to choose a tile of such a size that you do not have to cut the last ceramic piece in a row. Even placement of tiles on the wall can be done by slightly changing the tile joints, both up and down.
- Offset padding. This is one of the unusual and time-consuming options for laying tiles on the bathroom wall. The fact is that it is not easy to find the ideal offset length for one tile relative to another. Not every tile will look good in this installation, so you need to take the design of the bathroom with special care.
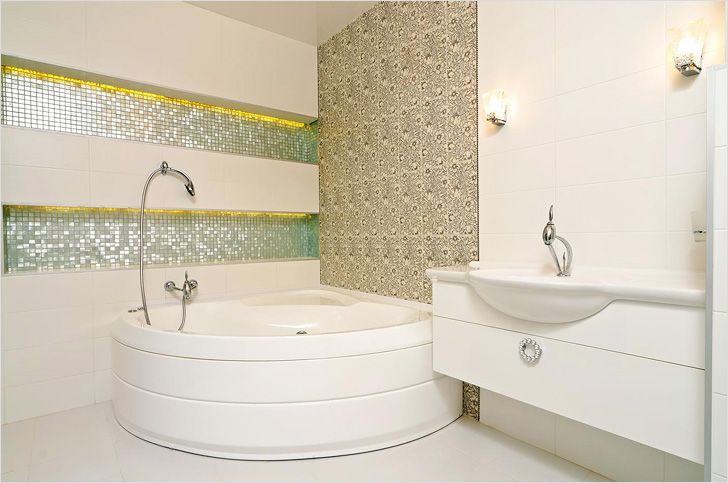
- The most difficult option for laying tiles on the wall and in the bathroom is mosaic. Only an experienced craftsman with extensive experience in tile work will be able to complete the mosaic laying on their own. Mosaic design must match the style of both the entire apartment and the decor of a particular bathroom.
The choice of how to lay the tiles, as well as the ceramic products themselves, largely depends on the size of the bathroom.
small bathroom
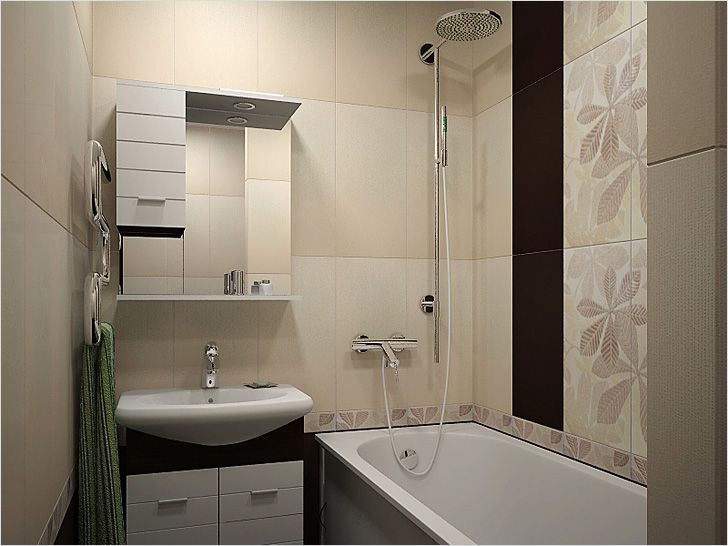
The small space of the bathroom, unfortunately, offers almost no field for activity. Often the location of plumbing fixtures and a minimum of furniture cannot be changed. However, choosing tiles of a certain type and shade can contribute to the visual enlargement of the bathroom.
Note! For a small bathroom, professionals advise using mostly light colors. They visually enlarge the room. Dark tones, on the contrary, noticeably “eat up” the space. However, if there is a strong desire to use neutral or dark colors, tiles of this color are best used on the floor or as a decorative insert on the wall.
The size of the tile also plays a big role. Ceramic products that are too large will turn an already small space into a very tiny one. Therefore, the best option would be:
- tile size 10 by 10 cm, or 20 by 20 cm,
- tiles 20×40 or 20×50 cm.
It is easy to place square tiles on the wall: since they are small in size, they do not have to be cut into pieces.
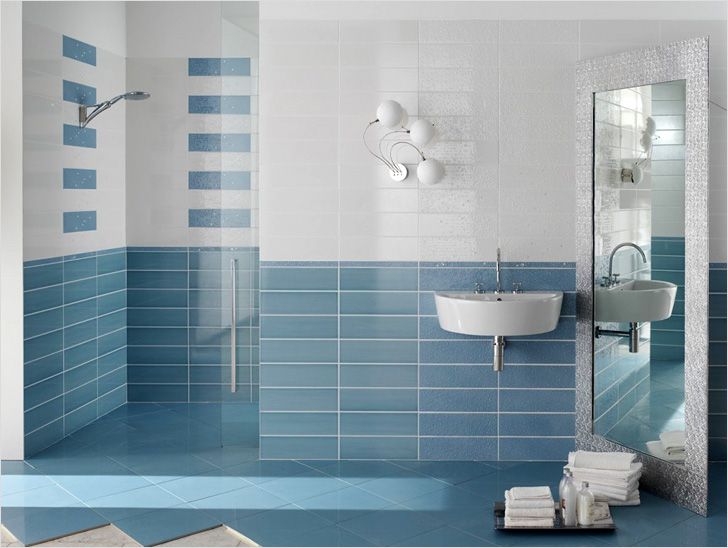
Rectangular tiles in a small bathroom should be placed strictly in a horizontal position. This will visually expand the room and give it the appearance of a large interior space.
low ceilings
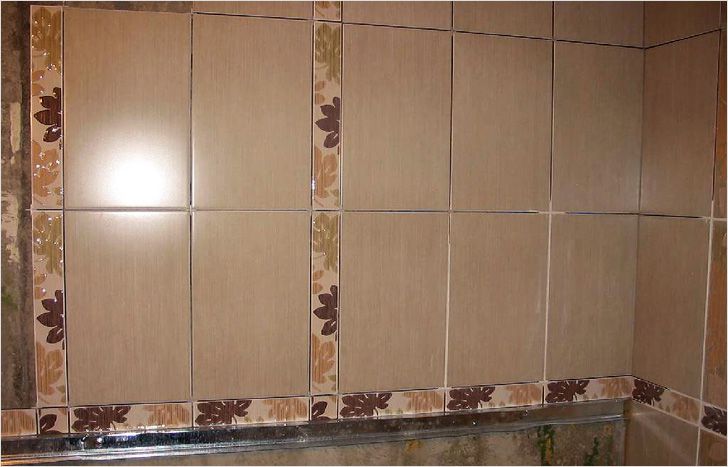
Low ceilings can be raised by laying rectangular tiles vertically on the wall. It is advisable to place the decor immediately above the bathroom, otherwise the insert in the middle of the wall will visually reduce the room.
Elongated bathroom
You can expand an elongated bathroom by laying tiles of at least 20 × 50 in the transverse direction. In addition, properly located decor contributes to the solution of the same problem.
Note! A spacious room can be decorated as you like - its dimensions allow you to implement any projects, so there are no restrictions here.
Calculation and purchase of tiles
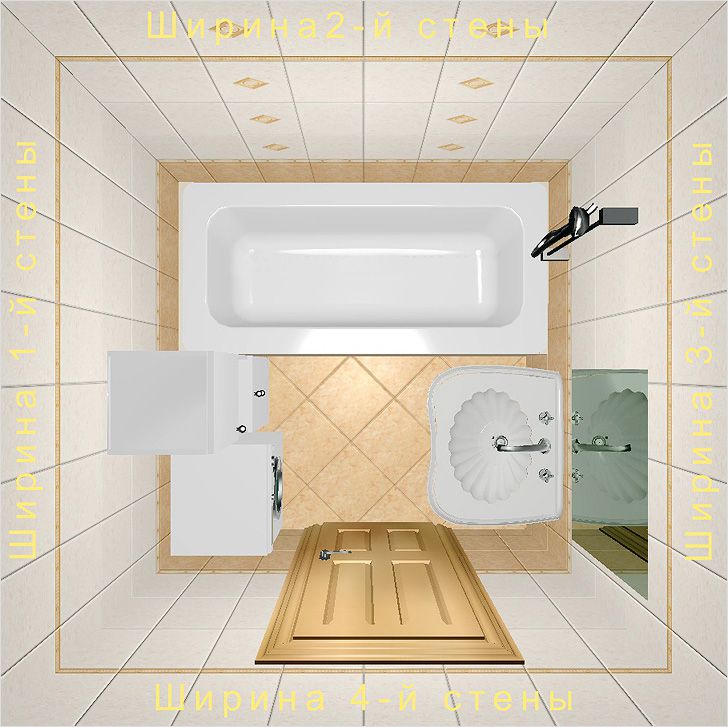
Before purchasing the right amount of ceramic tiles, it is necessary to calculate the area of \u200b\u200bthe entire room.
To do this, the length of each wall, including the floor, is multiplied by its width, and the result is summed up. If it was originally planned to use a decor - a decorative insert separating two shades of a tile - then measurements must be taken taking it into account.
Note! When buying, you need to purchase 5-10% more ceramic tiles. Extra ceramic elements will become insurance in case of an unsuccessful cut of the tile or its split.
When purchasing tiles in a store or on the construction market, you need to make sure that they are from the same batch of goods. Unfortunately, the same tile in different batches can vary significantly in color.
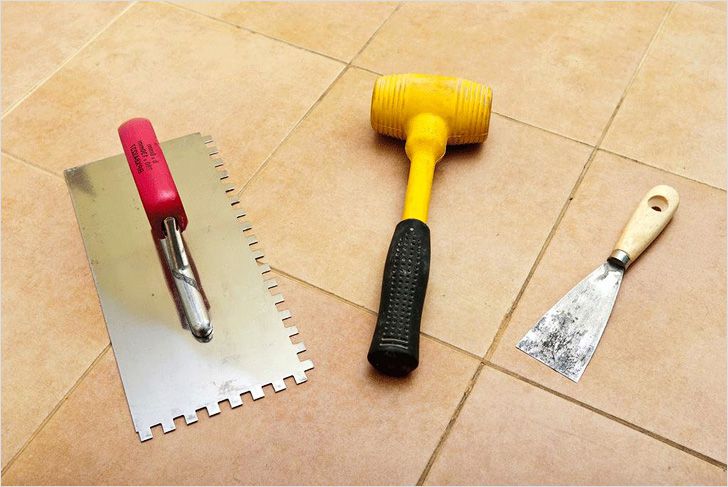
Tools and materials
- Ceramic tiles in one or two shades with matching decor.
- Adhesive for ceramic tiles.
- Grout for tile joints.
- Building level, sponge or universal napkin.
- Notched trowel, beacons for laying tiles.
- Tile cutter, tile tongs, corundum bar, needed for turning a cut on a ceramic part.
- Antiseptic and antifungal agents.
- Putty and special waterproof primer.
Training
Initially, it is necessary to remove the old finishing material, if it has been preserved on the wall. Before the next step, you need to treat the walls and floor with antifungal agents that exclude the occurrence of mold and mildew in the bathroom.
Note! The walls cleared of the remaining dust must be checked with a building level and, if there are irregularities, putty the walls. After that, it is advisable to suspend work for two weeks so that the walls dry out properly.
The last step before laying tiles on the wall in the bathroom is priming the walls - for better adhesion of the tile adhesive to the wall.
Before laying tiles on the wall in the bathroom, you need not only to determine the place to start work, but also to free the bathroom from plumbing equipment. There are two different approaches to this task:
- start laying from the bottom corner of the opposite wall from the entrance to the bathroom.
- start laying tiles from the corner in the middle of the wall.
Method number 1
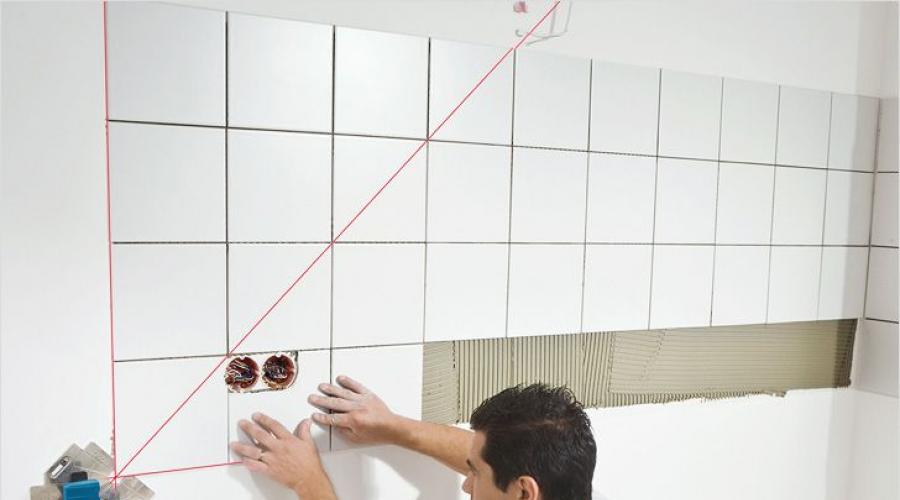
Having chosen a laying method, it is necessary to try on. To do this, tiles are placed on the wall in such a way as to find out how many ceramic elements will be included in the whole row, and whether the last details will need to be cut off for the final fit.
The position of the first, initial tile, as well as the decor, must be marked with a pencil. This will facilitate subsequent work with ceramic tiles.
Before laying the tiles directly, it is necessary to prepare an adhesive solution. It is better to cook it in small portions, necessary for one sector or row of tiles.
The adhesive solution is applied to the wall with a layer of at least a few millimeters using a notched trowel or any other tool specified in the instructions for the adhesive mixture.
When choosing an adhesive mixture for walls, as well as for floors, it is necessary to purchase tile adhesive with a minimum drying time. This will prevent possible displacement of already laid ceramic elements.
To get a neat surface, you need to know exactly how to glue the tiles on the wall in the bathroom. When installing a ceramic product on a wall, press it firmly against the adhesive solution, but not too hard, so as not to squeeze the solution under the tile outward.
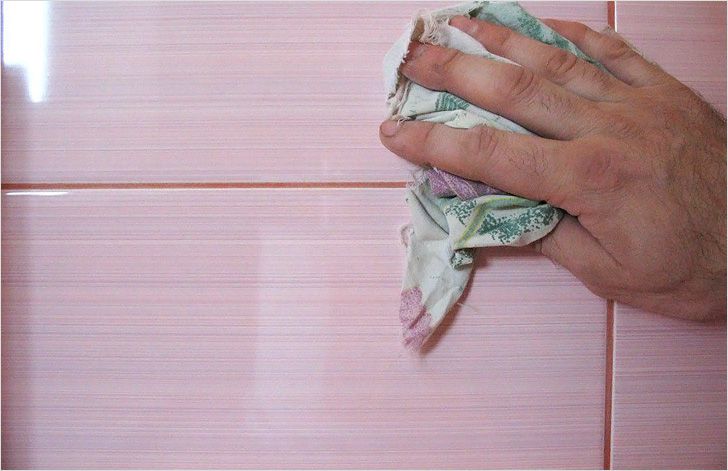
During tile laying, the adhesive mixture may get on the ceramic element. It is necessary to immediately wash it off with a pre-prepared damp sponge or napkin.
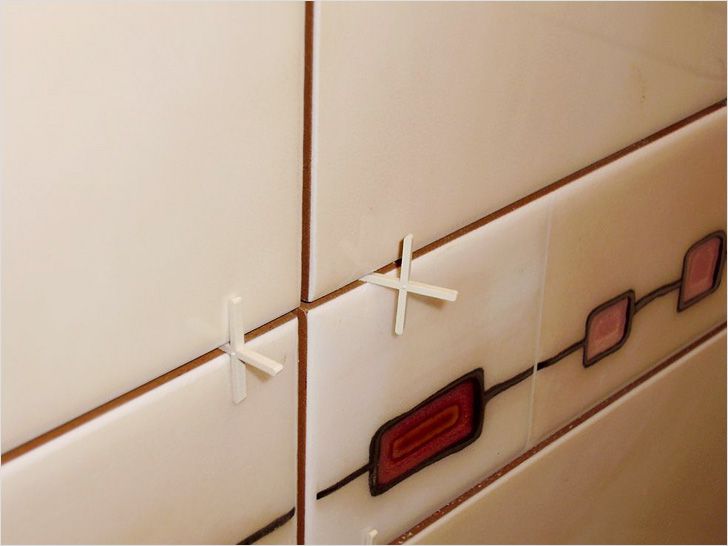
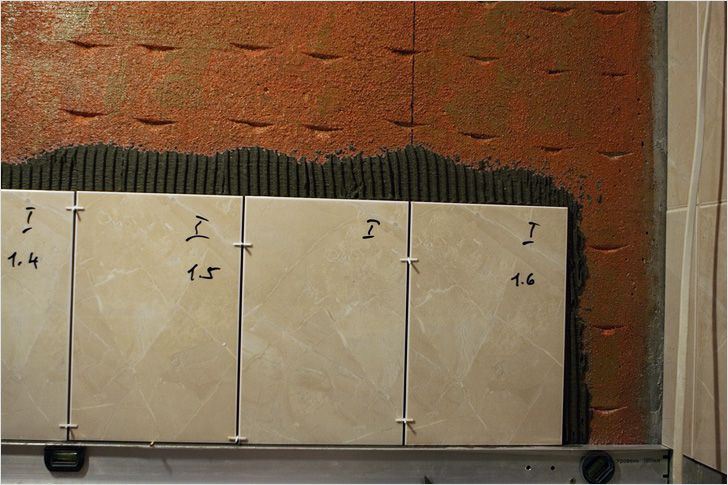
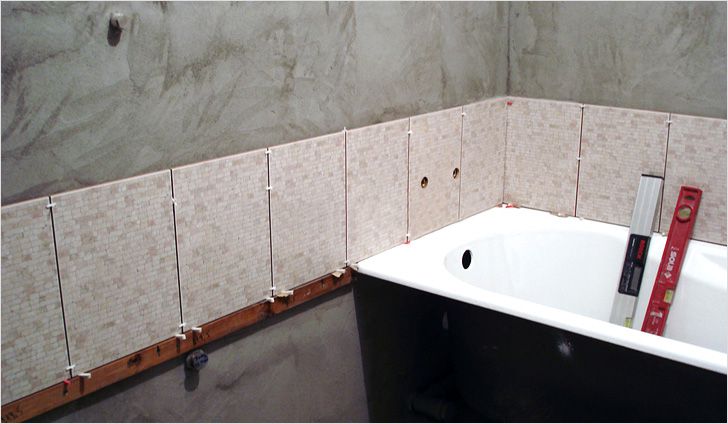
After laying the tiles, it is necessary to put beacons-crosses to form the space between the tile joints. When setting special beacons, it is necessary to strictly observe the height of the future tile joint to prevent uneven rows of laid tiles.
If the last tile in the row does not fit entirely, it must be cut to the desired size. To do this, mark the place of the future incision with a pencil. The ceramic part is placed in the tile cutter tray, with a mark exactly under the knife. Using a lever, carefully, without sudden movements, cut the tile and, using a corundum bar, grind the cut to a smooth state.
Tile tongs must be used to lay tiles near the pipe. With their help, you can cut a semicircle in a ceramic part.
After the final laying of the tiles on the walls, it is necessary to allow some time for the adhesive to dry.
The last step will be grouting the seams. The color of the finishing material is selected according to the shade of the tile. If several shades are used in the bathroom, there should also be several grouts. If there is a decor on the tile, the grout is selected according to the lightest or darkest shade.
In order for the choice of grout to be successful, you need to ask in a store or on the construction market to show ready-made grout samples to determine its exact color.
The grout is applied with a special rubber brush exactly along the tile seams. After complete drying, it is necessary to rinse the laid tile from the grout that accidentally fell on it.
In order for the grout to last for a long time, you need to choose a mixture using the so-called "latex milk". However, this additive is difficult to wash off the tiles, so you need to apply such a grout very carefully and carefully.
The best preservation of the grout, as well as the prevention of mold on the tile joints, can be ensured by periodic treatment with a special protective agent.
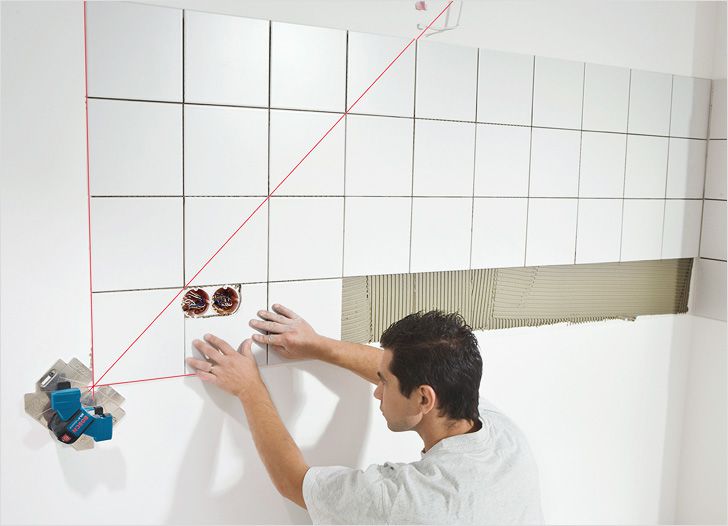
Method number 2
Laying the second way is not fundamentally different from the first. The only difference is that the wall is pre-measured. The resulting value is divided in half and deposited from the edge of the wall, a vertical line is drawn that divides the wall in half. The tile should be laid with its side edge against the line (not forgetting a small gap for the seam). As a result of this laying, the extreme tiles will most likely have to be cut. However, due to the same cut size, the overall appearance of the masonry will look much better and neater.