How to lay porcelain stoneware on the floor correctly: detailed instructions
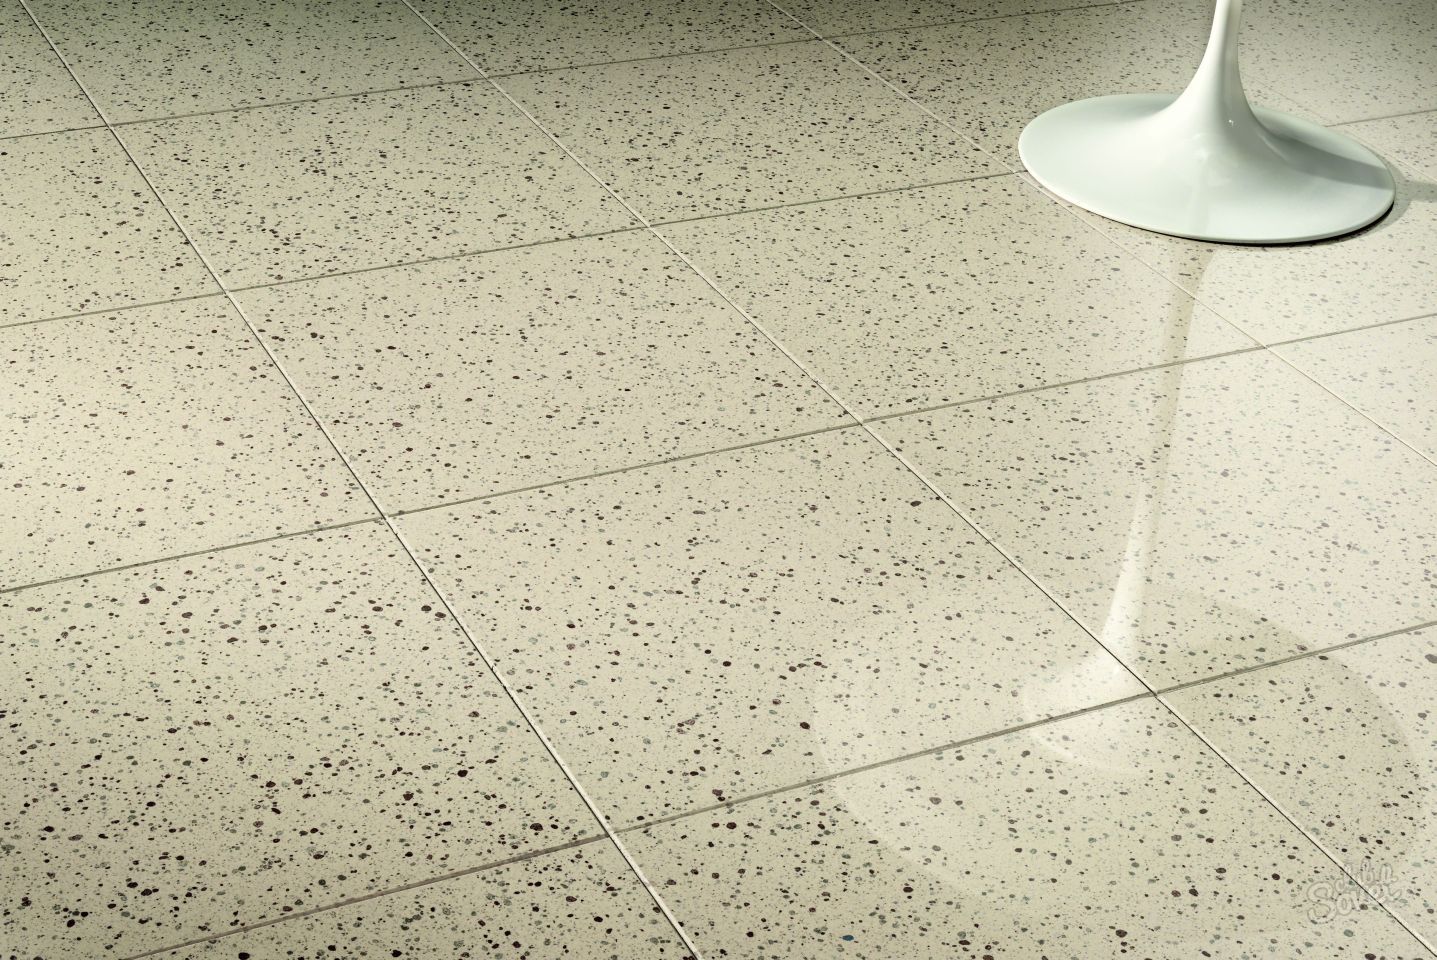
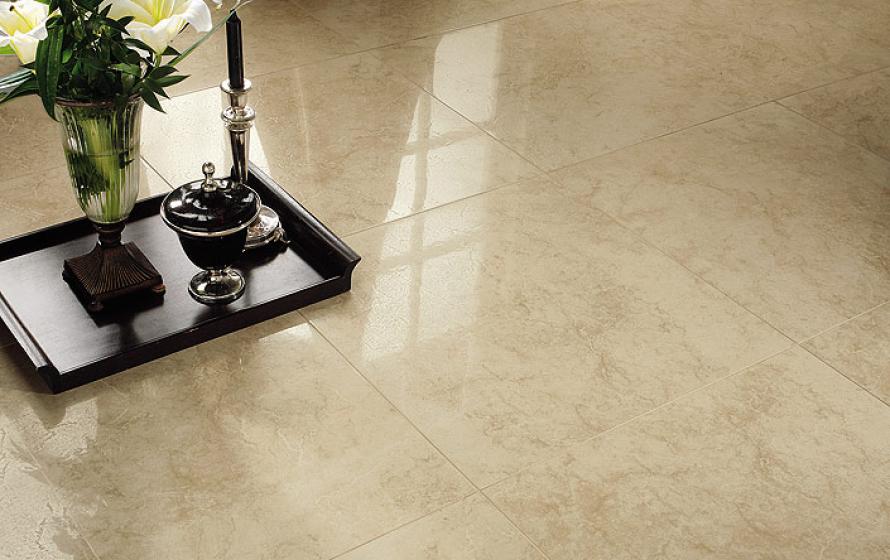
Porcelain stoneware is a special class of facing ceramic materials, whose specificity lies in high strength and almost zero porosity. This is a big plus for artificial stone, but in some aspects its characteristics force you to take a closer look at the installation. The presented guide will help you figure out how to lay porcelain stoneware on the floor - a base subject to heavy loads. Consider all issues: from surface preparation to grouting and tile maintenance.
Quick article navigation
Surface preparation
Cladding must be preceded by compliance with certain requirements for the surface to be laid.
expansion joints
To compensate for the deformation of building elements and to avoid breaking the coating, expansion joints are arranged in concrete floors. They are divided into three types.
Perimeter
They are arranged along the contour of walls and columns in order to limit the effect of deformation of structural elements on the screed. To do this, a strip of compressible material is laid around the entire perimeter of the room before pouring the screed, usually polystyrene foam 1 cm thick.
Temperature
The screed inevitably cracks during operation. To limit the appearance of cracks, arrange expansion joints. It is recommended to cut into squares, but in any case, the width should not be less than one and a half times the length. The usual size of the squares is 6x6 m.
Dividing
They are needed to limit the mechanical loads associated with the rapid evaporation of moisture in the first half of the year of concrete operation. Performed on an area up to 30% of the screed. The gaps are usually at least 5 mm wide.
The last 2 types of expansion joints are mainly used in large commercial premises, or with an area of more than 25 m². For outdoor coverings, at least every 9-12 m².
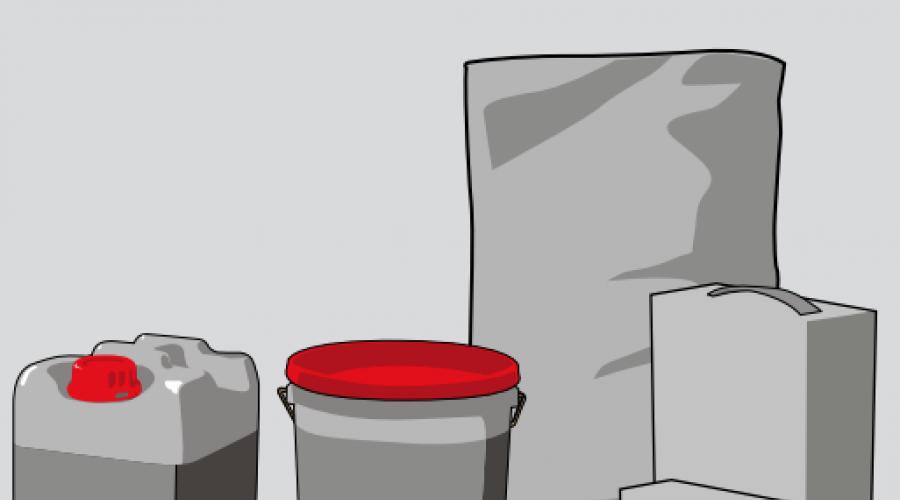
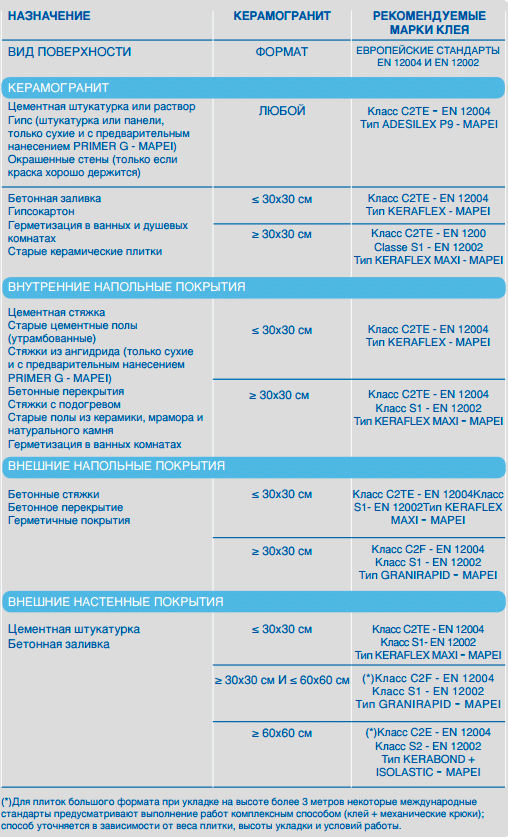
Tile adhesive
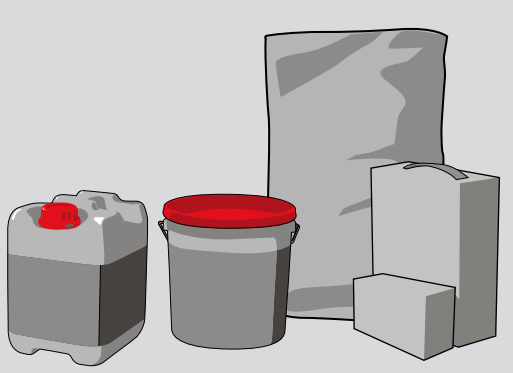
Characteristics of mixtures
According to EN 12004 and EN 12002, adhesives are classified based on their chemical composition and special characteristics:
- cement (short designation with the letter C);
- reactive (R);
- dispersion (D);
Cementitious adhesives are the most common and can be recommended for installation in most situations. Epoxy-based reactive compounds have very high adhesion and are used for bonding ceramics to metal, wood and other complex substrates. When facing on a concrete base, they are inappropriate - too expensive. Dispersion for concrete is also not suitable. They, although highly adhesive, do not penetrate deep into the surface. But this quality is valuable.
Each type of composition is divided into classes:
- basic (indicated by the number 1):
- improved (2):
- fast setting (F);
- long-setting (E);
- elastic (S1);
- superelastic (S2);
- vertical slip resistant (T);
The choice depends on the operating conditions and coverage. The type of glue is indicated on the package. For example, when laying on waterproofing or underfloor heating, C2S1 - cement improved elastic is suitable. This type includes glue CERESIT CM 17, LITOKOL SUPERFLEX K77, SOPRO No. 1, KNAUF FLEX.
The right choice of adhesive is critical for cladding. The use of one or another composition depends on various factors:
- base structures (standard - cement screed or plaster, non-standard - drywall, old tiles, waterproofing, wood);
- tile format (the larger the size, the higher the adhesion of the adhesive should be);
- purpose (walls / floors / inside / outside the premises);
- time before putting into operation (at low temperatures or limited time, it is better to use a fast-setting adhesive of class C2F, for example MAPEI GRANIRAPID);
- weather conditions during the cladding process;
Working with glue
Almost zero water absorption of porcelain stoneware dictates special requirements for the application of the composition. For ordinary ceramics, one-sided smearing is enough - most often on the surface of the base. In order to lay ceramic granite with high quality, we recommend double-sided application: on the screed/plaster and on the tile. This ensures good adhesion and no voids under the ceramic. Voids can lead to cracks in the cladding due to impact or high point load, or when moisture accumulates and freezes in them.
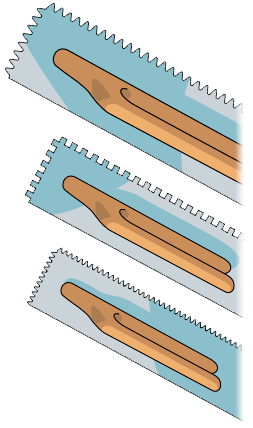
The glue is applied with an even metal spatula, after which the excess is removed with a “comb” - a spatula with teeth. The format of the tool, as well as the size of the teeth, depends on the dimensions of the porcelain stoneware. On the back side of the tile, a thin coating of the mixture is enough - “on a peel”, so long as the adhesive has tight contact with the mounting base.
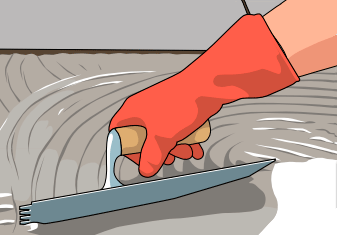
For indoor floor laying in residential premises, the contact between the mounting side of the tile and the adhesive must be at least 70% of the entire surface. "Commercial" interior floors and exterior floors of any type require 100% application of the mixture on both surfaces.
Laying tiles
Seam width
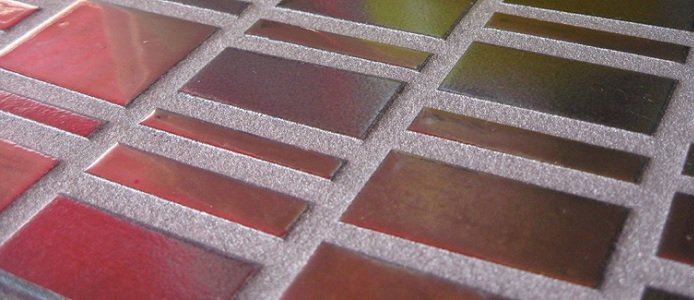
The size of the joints between the tiles depends on the size of the porcelain stoneware and the temperature regime. Depending on the width of the gaps, they talk about laying:
- with an open seam - a width of more than 2 mm;
- with a minimum joint - 1-2 mm;
- butt - less than 1 mm;
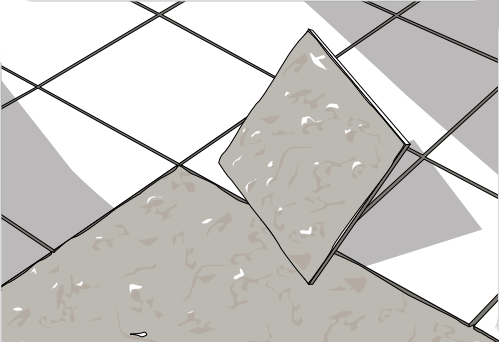
Open-joint cladding is recommended for exterior tiling and for interior underfloor heating. High temperature and its fluctuations affect the deformation of the joints. Therefore, in order to compensate for the movement of the structure, the seams in these conditions are increased. Another reason for wide joints is geometrically poor-quality tiles and their lack of calibration. Porcelain stoneware "trapezoid" forces to play with seams, too narrow gaps can lead to layering of plates. Laying tiles from different batches also leads to the same.
Minimum seams are arranged indoors under operating conditions at room temperature. The width of the joints increases with the enlargement of the tiles. For example, for porcelain tiles smaller than 300x300 mm, seams 1–1.5 mm wide are appropriate.
Laying porcelain stoneware end-to-end does not depend on the size of the slabs. It is practiced - with finished edges. At room temperature and in the absence of sharp temperature fluctuations, it can be laid without seams at all. Still, it is better to arrange at least half-millimeter gaps - they do not spoil the visual solidity of the cladding and compensate for the influence of other factors.
Duties of a tiler
The customer, not being a professional, sees only "decorative" moments. Therefore, it is the responsibility of the tiler to inform about possible problems associated with the facing material and the condition of the base.
The specialist must:
- inform the customer about the presence of tonal, calibration and other defects in ceramics;
- pay attention to existing or potential problems in the structure of the surface prepared for laying; ask profile questions that prevent a decrease in the reliability and durability of the cladding;
- work in accordance with project requirements:
- lay according to the type of layout provided;
- to lay in a single direction (indicated by an arrow on the reverse side of porcelain stoneware);
- observe the specified width of the seams;
- comply with the relevant norms of SNiP.
Laying ceramic granite
Laying ceramic granite with your own hands, although not easy, is within the power of any home craftsman. The work is divided into several stages:
- room layout;
- laying a lighthouse row;
- facing the rest of the surface;
There is no need to pre-soak porcelain stoneware in water. If there is dust on the mounting side, just dip each tile in water.
Mark the floor with a level, tape measure and paint cord. Marking includes checking the plane and geometry, placing beacons signaling the height of the future floor and pulling beacon cords that set the laying direction.
Lay the whole tile in the area with the greatest view, leave “rough” places for pruning. To prevent a narrow cut on the opposite edge, it is better to start laying evenly from the center to the sides.
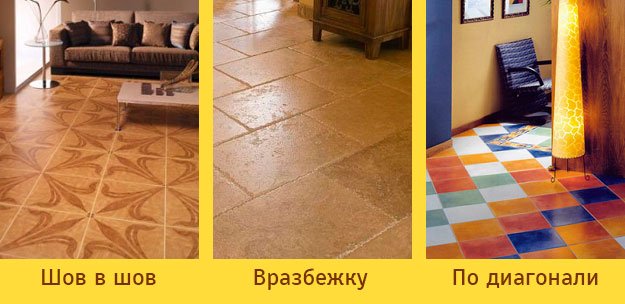
There are three main types of plate layout:
- Seam to seam;
- Off the beaten track;
- Diagonally.
Each step is important in the laying process, but pay special attention to the first row. The final result depends to a large extent on how well it is laid. Use spacers and/or wedges to keep even seams. The latter are needed to correct the gaps in the case of poorly calibrated porcelain stoneware. 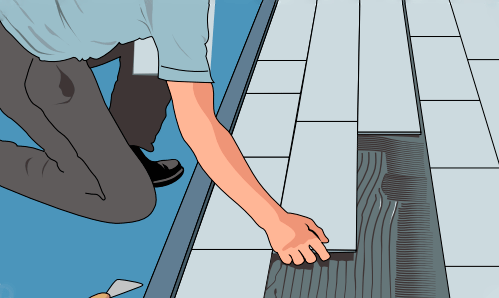
Laying should be done with a little effort: by pressing and (sometimes) with a rubber mallet (light tapping). Visually and tactilely check the absence of differences between the plates - "steps". Control the plane with a level and a rule. There should be no gaps between the rail and the tile. Otherwise, remove the porcelain tile and add/remove adhesive.
Video tutorial on laying:
Follow the technology for using the adhesive mixture. The packaging indicates the life of the finished composition, do not try to exceed it, guided by the plasticity of the adhesive. A light crust that covered the mixture after a while indicates that the material has lost its original qualities, and adhesion to the tile is already greatly reduced. And this, despite the deceptive appearance of re-mixed glue. The subsequent mixing of the mixture with the addition of water further reduces the adhesion.
The area of its single application depends on the lifetime of the adhesive. Mixtures are different, as is the format of porcelain stoneware, but on average, about one square meter is smeared at a time. Try to correct the position of the plates within 10-15 minutes, later attempts to correct the situation lead to a violation of adhesion. Adhesive life can vary greatly under unusual conditions, such as high temperatures or porous substrates with strong moisture absorption.
Trimming tiles
Laying porcelain stoneware on the floor is not complete without trimming. This is done using a tile cutter (manual mechanical or electric) and a grinder. it costs more, therefore, at home, working with your own hands, we recommend using mechanics with a powerful bed and guides. An angle grinder with a diamond blade for tiles is needed for any non-standard cuts.
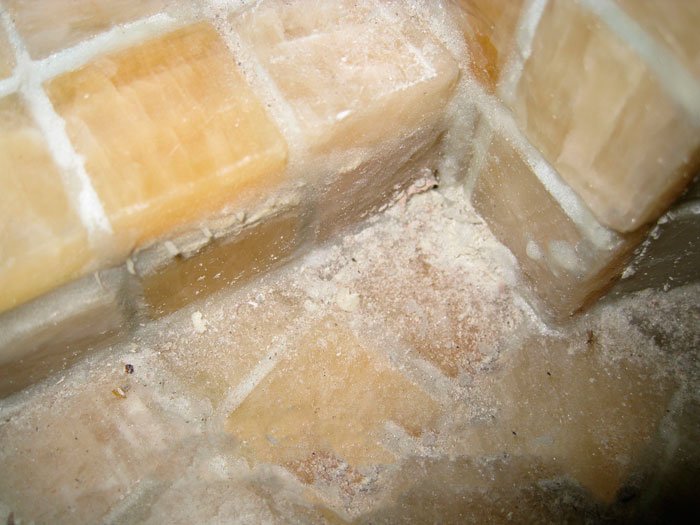
Grouting
Close the joints between the tiles with special putty. The adhesive used for laying is not suitable - apart from the obvious lack of aesthetic appearance, its structure is coarse.
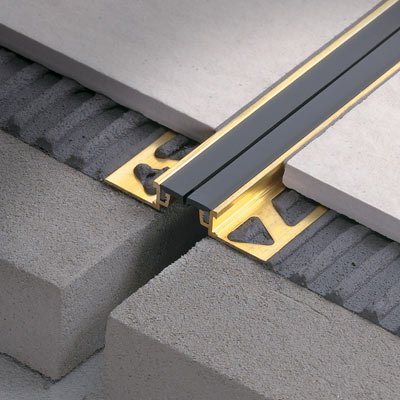
Do not forget about expansion joints, if any. They are sealed either with silicone or with the help of two components:
- elastic filler; it can be, for example, polyurethane foam or expanded polystyrene; the size of the strip should be less than the depth of the seam so that there is a gap for the expansion of the filler;
- surface sealant (based on polyurethane or silicone); the main characteristic of the material for sealing deformation gaps is elasticity;
Let's get back to grouting. According to the EN 13888 standard, the fugue is classified according to its chemical composition:
- cement (denoted by CG);
- for ordinary seams (1);
- for improved seams (2);
- reactive (epoxy, designated RG).
Additional designations have grouts with increased abrasive resistance (Ar) and with reduced water absorption (W).
Silicone grouts are classified as sealants.
- For domestic premises, CG2 class grout is suitable.
- For rooms with high humidity (bathrooms, showers, pools) and interior work - class CG2 W.
- Commercial premises - class CG2 Ar.
- Objects with increased requirements for hygiene and resistance to chemicals (kitchen apron, countertop, food production, hospitals, shops).
Cement putties
Due to the relative cheapness and huge tonal variety, cement grouts are much more popular than the rest. We recommend using material from European manufacturers. Many mistakenly consider the choice of a fugue to be a secondary matter, not realizing that a bad putty will ruin even a perfectly executed cladding in a few months.
Since porcelain stoneware is most often installed in places where conditions are not ideally dry, purchase a putty that includes water-repellent and anti-fungal components. Specialized impregnations, which cover the smeared seams, help to further strengthen the waterproofing of the joints. Depending on the degree of penetration deep into the fugue, two classes of impregnations are distinguished:
- polymer varnish; penetrates deeply, providing good waterproofing;
- water repellent; impregnates the surface of the putty, damage to the upper layer of the fugue leads to hydro-barrier slack;
Impregnation is applied with a brush, after taking care to protect the tile from getting into the composition. Otherwise, stains may remain on the porcelain stoneware. The technology requires double application: treat the second time in a day.
I choose the grout mixture, remember that the tone of the fresh grout is different from the shade of the mature one. Often there are even differences between the actual putty and the one shown on the packaging. If the color of the material is extremely important, experiment on a small area.
 You can begin to putty joints no earlier than a day after facing. An exception is the use of quick-setting glue (you need to wait at least 3-4 hours after laying). The joints must be thoroughly cleaned of the binder mixture, the tiles must be washed. Mix the grout according to the instructions on the package.
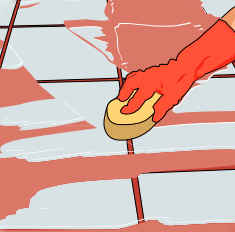
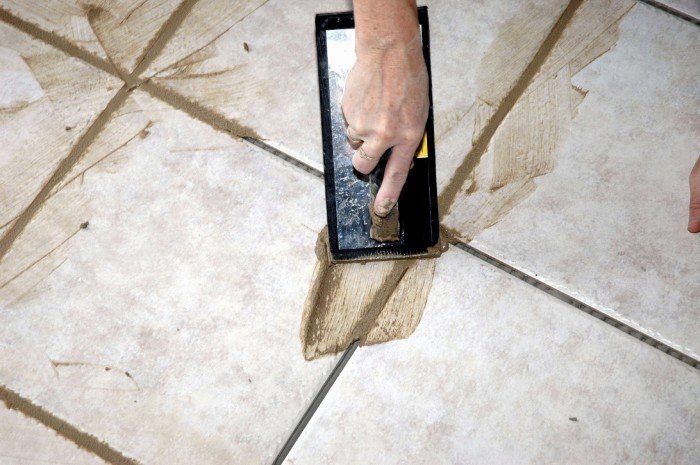
For jointing, they use either a grater, which is used to apply the joint to the seams. The mixture must fill at least two-thirds of the depth of the gap, otherwise there is a risk of destruction of the putty. Apply the composition with effort, the voids are re-processed. Remove the rest immediately with a spatula. In one approach, 0.5–3 square meters can be processed. The specific area depends on the type of putty and the manufacturer.
It is easiest to work with glossy porcelain stoneware. Matte, and even more structured, is more difficult to overwrite - the fugue penetrates into the pores, from where it is washed out with difficulty. In such cases, it is more convenient to wash the mixture with a damp kitchen sponge with an abrasive surface. The seams are brought to condition with a damp foam rubber sponge. Some manufacturers produce special equipment, but their use is not essential. It is important to observe the diagonal movement in relation to the joints, "parallelism" washes out the fugue from the gaps. Before using the sponge, a round rubber spatula or an 8-10 mm cylindrical cable is often used to smooth and compact the fugue layer. As a result, seams are obtained with a uniform recess and a smooth surface. The lining is finally washed off after 10-20 minutes, when the grout begins to dry out.
Epoxy putties
They consist of two components: filler and resin. The quality of the seams worn with this type of fugue is an order of magnitude higher than those filled with cement putty. The material is very dense, water resistant and chemically inert to most chemicals.
Epoxy is much more difficult to use than conventional grout. The components should be mixed to the nearest gram. Due to the harmfulness, it is advisable to work with rubber gloves. In one approach, no more than a square of facing is processed, the movements of the spatula do not differ from those already described. The life of the finished composition is no more than half an hour.
Uncured seams are abundantly wetted with water using a “hairy” kitchen sponge until an emulsion is formed. This is done with care so as not to wash the mixture out of the seams.
Liquid residues of the mixture are removed with a hard cellulose sponge. When the sponge is saturated with resin, you need to replace it with a new one. Litokol has special sponges for epoxy grout, they are more expensive, but more durable.
You need to wash off the epoxy grout before it starts to harden, otherwise problems will arise. The remaining plaque is washed off with water with the addition of 10% ethyl alcohol or special detergents (for example, Litonet Gel).
A little about silicone
The use of silicone leads to the latter getting on the ceramics. Without waiting for setting, it is removed with a solvent (gasoline, toluene, ethyl acetate). The hardened material does not react to solvents, they get rid of it only mechanically, and with the risk of damaging the tile.
Tile care
It is not enough to lay porcelain stoneware, the durability of the cladding is directly dependent on the proper care of the tiles. The laying of ceramics is crowned with cleaning from the mixtures used in the process of work and checking for the absence of mechanical damage. Pieces of sand are the strongest abrasive, and if not removed, they will scratch the surface and collect dirt.
For cleaning, we recommend using acid products, such as FILA DETERDEK. The degree of dilution is selected based on the structure of ceramic granite: to clean a glossy surface, you need 3 liters of an acid solution per 100 m² in proportions of 1 to 10 (0.5 liters of FILA DETERDEK per 5 liters of hot water), structured - 6 liters of solution per 100 m² in proportions of 1 to 5 (1 liter in 5 liters of hot water).
Acid cleaning can be carried out at least two days after grouting. All metal and marble surfaces must be protected with adhesive tape. 
The process is divided into stages:
- moisten the floor with water to achieve a moderate effect of acids on ceramics;
- using a mop or sponge, evenly distribute the product on the floor;
- leave for a few minutes (the time depends on the degree of contamination);
- vigorously wipe the surface of the cladding with an abrasive sponge;
- remove the remnants of the product with a dry cloth;
- Rinse the floor with clean hot water.
Possible remnants of influxes are removed by a repeated procedure, already using more concentrated substances. The current care consists in periodic cleaning of porcelain stoneware with water. In the event of oil stains or stubborn dirt, again seek help from special equipment.
A certain complexity of porcelain stoneware cladding forces you to once again pay attention to compliance with the standards for preparing, laying and caring for tiles. You can be commended for choosing to do the work yourself, but you must be warned against ignoring the recommendations. Remember that the base must be strong and stable, and the adhesive must be suitable for the conditions of use. The choice of ceramic granite is also due to the specifics of the material operation. It is unreasonable to put smalted porcelain stoneware in a technical room, as well as the simplest matte one in a status room.
comments powered by HyperComments