How to make a galvanized ridge. How to make a ridge on a roof - recommendations from roofers. Slate roof installation
The very essence of the ridge indicates that it is an element primarily of gable roofs, but is also present in structures of a more complex configuration - for example, broken hipped roofs. There are also irregularly shaped roofs with different slopes with an offset ridge. The construction of these varieties is a more complex process than in the case of the standard form.
During installation of the ridge Special attention need to pay attention to two points: to produce accurate calculations height of this part and arrange good ventilation roofing pie and attic space.
Previously, asbestos cement was used to decorate the ridge. Currently, galvanized iron is becoming increasingly popular. Construction market offers many options ready-made corners based on galvanization, cut into parts approximately two meters in length. Similar corners can be made from sheets yourself.
Types of skates
The ridge can be made in different options. In some cases, it is laid on vertical racks beam that serves as a support for rafter legs. The vertical posts themselves rest on the ceiling beams or on tie rods.
The second option for the ridge is the connection through longitudinal connections of the exposed triangles of the rafter system. In this case, boards are sewn onto the rafters on both sides at a certain angle to one another, resulting in the formation of a ridge.
The roofing ridge is made on the basis of materials used as roofing: metal profiles, slate, ceramic or bitumen shingles etc. Today you can purchase the following types of skates in stores:
- ridge strip;
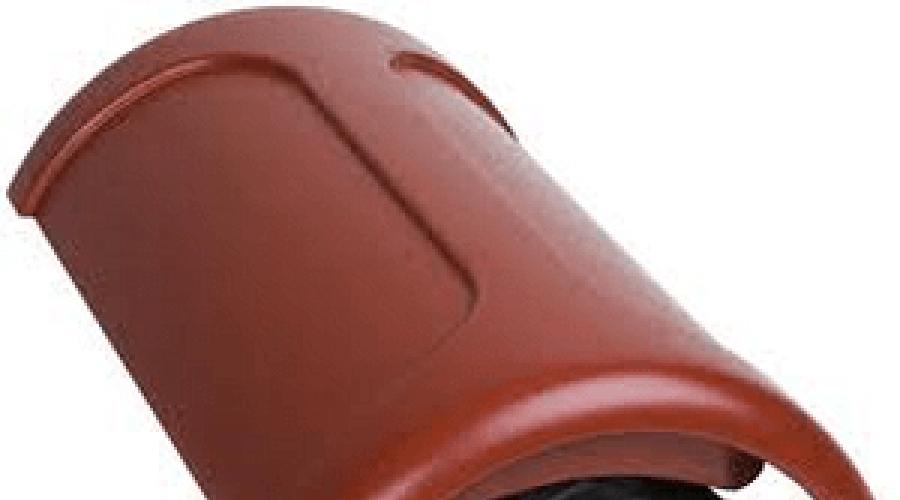
- semicircular ridge;
- mortise;
- crossed skates.
Another name for a ridge strip is a ridge profile. Its function is to connect the junction areas of two opposite slopes on the ridge. The ridge also performs a decorative function. On sale you can find ridge elements that are identical in color to the roofing covering, which allows it to organically fit into the overall design of the roof. During installation, a special sealant must be placed under the ridge strip.
 Semicircular ridge performs the same functions as the ridge strip, while looking more aesthetically pleasing. As a rule, manufacturing companies produce skates that differ in color and texture. It is better to purchase roofing elements from one manufacturer: in this case you can achieve quality device skate and its high functionality.
Mortise skates used for installing hip roofs. Based on the name itself, you can understand that this part cuts into the roof slope. Moreover, its horizontal level in all cases is lower than the main one (at the upper ridge).
Valleys are joint elements of a mortise ridge.
Crossed ridges are also used to create hip-type roofs. This variety has intersections and is always located horizontally. For this reason, they are often confused with roofing hips.
Important points when installing a skate
- When working, it should be taken into account that for free access of air into the under-roof space, the roof covering being installed should not be tightly connected at the ridge.
- The ridge is installed at the final stage of roof installation work. Ventilation material is laid to protect the ridge beams (boards) from moisture that can penetrate during rain or snow. Protective layer It also performs another function: it prevents insects and small birds from entering the attic. It can be created from a special seal, glass, mineral wool, some other materials.
- It is necessary to ensure that the space located under the ridge strip is not tightly filled. – otherwise, natural ventilation will be disrupted or completely eliminated. This can happen due to the filling of the ridge space polyurethane foam or sealed material that prevents free air circulation. This problem often appears in the case of mansard-type roofs.
Accessories
 Having decided on the choice of material for the roof, you need to purchase the roofing covering, the ridge itself, components and fasteners. The main components of the ridge element are:
- ridge ventilation strip;
- ventilation tape;
- holder for lightning rod;
- sealant;
- ridge seal;
- some other aeroelements.
All of them are necessary for durable installation and fastening of the ridge to the roof, ensuring its high functionality. Only under this condition will the ridge be able to protect the joints and provide good ventilation.
What will you need for work?
All necessary tools and equipment should be prepared in advance. To install the ridge you will need:
- a ladder with triangular projections at the upper ends for attachment to the roof;
- level;
- roulette;
- special screwdriver for roofing screws (with a special head shape);
- lace;
- metal scissors;
- drill with different attachments.
Determining the height of the ridge
When installing a roof, a mandatory point is to determine the height of the ridge for further calculation of the amount required to create rafter system and roofing building materials. The necessary calculations are carried out in accordance with the rules of geometry after determining the angle of inclination of the roof. A special table has been developed that can be used for quick calculations if there is data on the width of the building and the slope angle.
 Let’s assume that the width of the building is 8 m, and the roof slope is 40 degrees. To calculate the height of the ridge, use the following scheme:
the width of the house is multiplied by the coefficient
The result is the height of the ridge element from the ceiling. In the case of the example given, it will be 3.35 (4 x 0.839).
Types of roofing and ridges
 The method of constructing a ridge girder is directly dependent on the type of roofing. Therefore, it is necessary to think about installing the ridge already at the stage of choosing a roof covering.
When performing roofing based on asbestos cement sheets you need to purchase commercially available special shaped elements in the form of a gutter, laid on boards or ridge beams and attached to them using slate nails with a rubber gasket. It is imperative to waterproof wooden roofing elements. Before installing slate-based ridge elements, the ridge beam should be covered with roofing felt tape.
Ridge elements made of asbestos cement can be incorrect geometric shape– namely: they are slightly narrower at one end. This end must be covered with the subsequent slate element. In this case, the overlap is at least 7 cm. An anti-wind bracket is used to strengthen the first element.
If the roofing material is clay tiles, you also need to purchase ridge parts in the form of gutters and corners.
When creating roof ridges using ceramic-based fragments, you must use mortar and wire (used for fastening).
Construction of a ridge for a roof made of roll materials carried out by sticking these same materials. The method of laying the panels is determined by the slope of the roof slopes. If the slope is small, the panels are laid parallel to the ridge with a significant overlap. With a large slope angle, the panels must be laid parallel to the drain. When installing the ridge, it is recommended to lay the rolled materials in a direction perpendicular to the ridge. In this case, the minimum overlap of the sheets should be 25 cm.
If you choose a roofing covering based on galvanized iron, as a rule, you need to make the ridges yourself, although it should be noted that hardware stores also offer ready-made elements up to 2 meters in size.
When self-made the ridge should determine the exact parameters of the roof. After that from steel sheet with a galvanized surface, cut out the desired strip, which is attached angular shape. In this case, a wooden hammer (mall) is used. The use of a conventional metal hammer is impractical, since it damages the zinc coating, which leads to the ridge being unprotected from moisture and its rapid deterioration.
Rules for installing a ridge element
 The installation of the ridge begins after the installation of the roofing covering on the surface of the slopes is completed. Ridge piece elements are lifted to the installation site using a winch or rope.
- To secure the ridge elements, a special beam is first installed, the minimum cross-section of which should be 70x90 mm. Then 2 sheathing bars are attached to it on both sides. To facilitate the work of laying parts, you can attach special brackets to the central beam and hang specially designed walking bridges on them.
- The ridge beam is attached to the central one. For ease of fastening, the top edge ridge beam must be rounded. Thanks to this shape, a much stronger fit will also be ensured for all ridge elements used. To prevent decay, the development of fungus and mold, the ridge beam should be upholstered along its entire length with ordinary roofing felt material or a sealant intended for this purpose. Such prevention significantly extends the service life of the ridge element and the entire roofing structure. When installing the ridge and other ridge parts of metal tiles, they must be fastened directly to the ridge beam. Screws are used for this.
To prevent the process of rotting of the ridge beam, the areas covered with a layer of roofing material must be additionally treated: apply a layer of enamel or oil paint.
The ridge ceiling is formed using two ridges laid on adjacent slopes. Then the longer (main) ridge is fixed - it should be extended by 10 mm.
The remaining skates are installed in such a way that their widened ends are directed towards the pediment.
Skate attachment process
 As an example, we can take the fastening of a ridge to a metal tile roof. To ensure its functionality and reliability, the following actions must be taken:
- At the same time, holes must be drilled on both skates.
- The hole should also be on the flat side of the block.
- Two holes must also be drilled on the line of the timber hump located longitudinally.
- During work, it is necessary to ensure that the holes on the lapels pass through the crests of the waves of the material.
- The process of installing the ridge must begin from one of the ends, installing the element on top of the end strips.
- The edge of the ridge should extend outward by at least 2-3 cm.
- The process of installing a flat ridge requires the indispensable joining of all parts with an overlap of 10 cm or more. It is also possible to use tin technology.
- When connecting the parts of a semicircular ridge, the joining is carried out along the stamping lines.
- The specific location for strengthening the ridge board and the methods of fastening are directly dependent on the slope angle of the roof.
- To avoid possible errors, during the installation of the sheathing, you should model the assembly of the future ridge, while paying attention to how the model of the ridge strip and the roof slope angle are combined.
- Then you need to adjust the angle of the ridge strip to the angle of the roof slope. For this purpose, you can bend and unbend the skate (as necessary).
One important point: the ridge mounting flanges in a free state must correspond to the slope angles of the roof slopes.
- In many cases, it may be necessary to additionally install a ridge board. It is installed above the level of the top sheathing board, while an 80-mm gap is maintained between adjacent slopes and the ridge boards of these slopes, which ensures ventilation of the under-roof space. The ridge board should be 10-15 cm thicker than the step sheathing boards.
- The final fastening of the ridge strip is carried out by tightening it with self-tapping screws to the very high areas metal tile sheets. The pitch of the screws should be within 0.8 m.
- To prevent snow from getting under the ridge between ridge strip and metal tiles should be installed on the aerial roller.
CONCLUSIONS:
- A ridge is a horizontal edge at the highest point of the roof, formed by the junction of the roof slopes.
- Mounting the ridge is the last and one of the most important stages roofing works.
- During installation, attention must be paid to making accurate calculations of the height of this part and ensuring good ventilation of the roofing pie and attic space.
- The ridge is made from materials used as roofing.
- There are several types of ridges: they are used for different roofs.
- For free access of air, the roof covering should not be tightly connected at the ridge.
- After choosing the material for the roof, you need to purchase a ridge, components and fasteners.
- You should first prepare the tools and equipment for work.
- It is necessary to determine the height of the ridge.
- The method of installing the ridge is determined by the type of roofing.
- The construction of the ridge begins after installation of the roof covering.
- In the process of attaching the skate, it is necessary to follow the sequence of actions.
- The specific location for strengthening the ridge board and the methods of fastening depend on the roof slope angle.
Look below detailed video instructions for attaching the ridge to the roof.
Over the years of using metal tile roofs, it has established itself as a durable, reliable and affordable roofing material. It is more often used for gable roofs, since the sheets are thin and light metal with embossed relief are perfect for DIY installation. The only thing weakness such a roof is the corner between the slopes, unprotected from moisture and blown through. To quickly and aesthetically eliminate this defect, you need to install a metal ridge.
Reasons for installation
I call the junction between two roof slopes a ridge joint. No matter how ideally the installation of the roofing material is carried out, small cracks and gaps remain between the sheets. Not only does it look unaesthetic, but an unsealed ridge causes the following problems in the operation of a metal roof:
- Penetration of moisture into the cracks between sheets of metal tiles. Water seeps into any, even minor, gaps, penetrating under the roofing material and destroying wooden elements rafter system.
- Blowing cold air under the roof. An unsealed ridge is an abyss into which heated air from a heated house goes; this is a gap not only in the roof, but also in the budget, because in order to maintain optimal temperature more fuel and energy resources will be required.
- Ventilation problems. Installation of a type-setting ridge on a metal tile will help to establish effective ventilation attic or attic space. The air there will be fresh, without drafts.
- Noise. The air, entering under the sheets of metal tiles through the ridge, circulates and is divided into streams, due to which the roofing material is deformed and makes popping sounds.

Mounting the ridge does appearance metal roofing harmonious and complete, will preserve the healthy condition of the wood of the rafter system, increasing its service life.
Assortment of inlaid skates
If previously you had to think about how to equip external corner between the roof slopes, now it’s enough to go to a hardware store and pick up a ready-made ridge in the color of the metal tile of the shape you like. Manufacturers offer the following options:

- Semicircular models. Metal that is pressed into a semicircular shape. It is necessary to attach plugs to the end sides of a type-formed ridge of this shape to close the voids into which snow, water or wind can get. The most expensive of the entire range of skates.
- Straight models. Made in the shape of a rectangle, it is used for hips, gables, and to decorate the ridge. Fastening a rectangular profile will cost less than a semicircular one, but such a connection will look simple.
- Triangular models. They completely repeat the geometry of the angle between the slopes, so their installation does not involve the use of plugs. Most cheap way finish roofing work on a metal roof.
- Decorative models. They differ from other types of skate in their purpose. Fastening decorative elements with narrow shelves does not solve problems with waterproofing the gap between the joints, but simply gives a neat look.

When choosing a metal ridge connection, you need to pay attention to the width of the shelves and the presence of edging. Models without a wrap are not rigid enough to remain level when secured with self-tapping screws. And narrow shelves, the width of which is less than 150-200 mm, are not able to effectively protect against the penetration of water and snow.
Selecting a seal
Professional roofers advise inspecting the condition of the ridge groove before starting work. If the installation of metal tiles was carried out correctly, then there should be no gaps thicker than 20 mm. Otherwise, a sealant must be used. The following types are suitable for this:

Even if the joint between the slopes seems smooth, insulating it with a sealant before you start attaching the ridge will never be superfluous, because the life of the roof and its safety depend on the tightness of the connections. interior decoration attics.
Installation sequence
In order for the skate to perform the functions assigned to it, you must follow the recommended installation technology. It’s difficult to do high-altitude work alone, so it’s better to have a couple of assistants. Installation must be performed in the correct order:


When working with metal tiles, you need to screw in self-tapping screws at the crest of its wave, use rubber compressor to isolate the holes from moisture or special screws, the rubber head of which performs the same protective functions. When performing installation, do not screw the screws too often or infrequently, find golden mean so that the metal tiles do not “disturb” from an excess of fasteners and do not “slam” in windy weather when there is a shortage.
Installing metal additional elements on the ridge will protect the roof from moisture and save heat, however, during installation, do not forget about safety precautions when working at height.
Video instruction
At the very top of the roof, at the junction of two parts of the slope, a special device is installed - a ridge. It allows you to protect the space under the roof from precipitation and also improves ventilation. In addition, the roof ridge can serve a decorative function if it has the appropriate design. What is the design of the roof ridge, what are its types and installation aspects - read about this and more.
Functions of the ridge and types of structures
An edge in a horizontal plane, which is located at the top point of the roof at the junction of two slopes, is called a ridge. This same concept includes additional elements that are directly attached to the rib. Item functions:

Roofs individual houses often have irregular shape. Their slopes are located under different angles to each other and placed along different directions. For them, manufacturers produce special offset cover elements. They differ complex shape and in comparison with them an ordinary comb for gable roof looks primitive.
The market offers the consumer elements from a wide range of materials to choose from, as well as ready-made combs. If necessary, the part is made to order. It is worth noting that it is easy to make a roof ridge yourself, which will save money. However, complex design in this case it is unlikely to be created.
Types of designs and materials of manufacture
It is recommended that the roof ridge be installed from the same material that the roof is made from. Otherwise, the comb may spoil the appearance, despite interesting solution design. There are several design options for mounting the ridge:
- A beam on which is mounted on vertical posts. In this case, the ridge serves as a support for the rafters.
- Longitudinal connection of triangles of the rafter system. Boards are nailed on both sides of the rafters, which form a frame for installing the covering element.
The material options for manufacturing do not differ from those used in roofing production:
- Slate.
- Metal profile.
- Ondulin.
- Roof tiles.
On the market, manufacturers offer the following types of roofing ridge designs:
- Skate bar.
- Semicircular system.
- Mortise ridge.
- Crossed type.
 The ridge strip is often called by specialists a ridge profile.
IN construction stores Our specialists will help you choose the color of the ridge system to match the color of the roof so that the roof looks harmonious when assembled. However, usually such problems do not arise, since the device is purchased along with the roofing.
Note! To avoid compatibility problems between the ridge and roofing elements, you should purchase everything from one seller.
Hip and crossed ridges: differences
The hip ridge crashes into the roof. It is located below the main one because these are two related elements.
Crossed is also mounted on hip roofs. However, the intersections in such a ridge are always located horizontally, for this reason the structure is confused with a hip one.
Skate components
Standard skate for a gable roof consists of several elements and is equipped with components. Construction parts:
- Ventilation tape.
- Fastening for installing a lightning rod. This part is placed on the top of the roof.
- Aerodynamic elements.
- Ridge tiles.
Only if all of the above elements are present can the device be fully functional. In addition to the above components, there are additional ones. These include sealants and seals that help enhance protection from precipitation. Installation must be carried out exactly according to the manufacturer's instructions. If there is deviation, the comb may become useless due to leaks in the cracks.
The role of the ridge in roof construction
The roof serves not only for beauty, but also for protection from rain and sun. In addition, a properly formed roofing pie can improve air circulation in the house.
Components of a modern roof:
- Water protection.
- Insulation material.
- Vapor barrier.
- Ventilation.
 Ventilation is carried out using an air gap. It is located between the roofing material and the heat insulator. This is an additional thermal insulation layer, which allows the space under the roof not to cool down in winter, and in summer - not to overheat from the sun. The roof is rising on it high temperature, and through air gap the under-roof space does not heat up.
But making a gap is half the battle. There must be air circulation in it. The ridge on the roof is not only responsible for temperature regulation. With its help, excess moisture that can accumulate due to condensation is removed. That is, thanks to proper ventilation the ridge removes moist air, and the insulation does not deteriorate, as well as other parts of the roof.
Making your own comb
A factory-made skate can be expensive. With the correct calculation of the parameters and the availability of material, you can make the structure yourself. The material should be galvanized iron or stainless steel sheet.
It is advisable to make the roof ridge yourself if the above material is not available. In addition, tinsmith skills, tools and equipment are required.
Materials:
- Steel - galvanized or stainless steel.
- Copper.
- Aluminum.
The thickness of the material can vary between 0.4 - 1.5 millimeters. The master’s task is to make a product of a suitable shape from the workpiece. In this case, the following rules must be observed:

Calculation for self-production
For correct design you will need to calculate:
- Corner.
- Height.
The parameters are interrelated - the angle depends on the height and material of the roof. When calculating the angle, you should follow the recommendations:

Installation work: features
Before installing the ridge, the sheathing in the under-ridge space must be ready. It is made from several boards, which are nailed without gaps. You should start installing the ridge on the opposite side of the wind on the terrain.
Note! The ridge needs to be installed in dry weather without wind. Safety devices should be used. Before starting work, you should not consume strong medications or alcoholic beverages.
Installation of a straight ridge
Installation work should be carried out with the availability quality instrument, assistants, as well as insurance. The ladder must reach the installation site with a margin.
Roof ridge, installation procedure:

Special attention should be paid to the quality of screws. They must be sharp so as not to warp the material. When screwing, the head of the screw should fit snugly against the roofing material, but not deform it.
Round ridge strip
This type of ridge construction is used on metal roofing. In order to reliably cover the space between the slopes, they should not be separated from each other by a distance of more than 20 centimeters. Installation procedure:
- Install a seal made of fiberglass or mineral wool. The ventilated space should be covered with a counter-lattice.
- Secure the ridge parts using self-tapping screws with seals.
- Close the ends of the ridge with plugs.
 The roof covering can be additionally fixed. To do this, use a block of 50 by 100 millimeters. Lay a metal tape 0.5 millimeters thick on top of it. The tape is secured to the edges of the ridge with self-tapping screws. This guarantees reliable fastening of the structure and no damage even in hurricane winds.
Note! The closer they are to each other two slopes, the easier it will be to close the gap between them.
U-shaped comb, rectangular
For this design, it is necessary to use a support beam during installation, which is installed along the ridge line at the intersection of the slopes. If the width of the rectangular protrusion exceeds 5 cm, then the part may become deformed after a long period operation. There will be a sag in the middle. To prevent this from happening, a sealant in the form of foam rubber is often used. Secure the part with self-tapping screws.
Owners of private houses should take care not only of the attractive appearance of the roof, but also of its protection. To do this, it is necessary to provide the roofing sheets with reliable sealing - protection from moisture seepage into the space under the roof. An important element a design that helps in solving this problem will be a roof ridge. There is a huge variety in the choice of these parts, so it is important to take into account in advance the features of the roof, roofing material and many other nuances, which will be discussed in more detail in this article.

Peculiarities
A roof ridge is a roofing element that protects the joint formed between two slopes from moisture. This is its main function. It is difficult for any private home to do without a ridge, because at the junction of the slopes the formation of a gap is inevitable, into which moisture will subsequently penetrate.
The ridge is an extension that reliably covers this area. It can have a different appearance and structure. In addition to protecting against water getting under the roof, this device performs another function - creating a gap that helps in ventilation of the space under the roof.


Design
The ridge profile for the roof has a rather complicated design. For the profile to function normally, you need to take into account various nuances and diagrams for its installation. This part consists of the following elements, each of which has special meaning and may be more or less necessary depending on the area in which the house is located.
The following components are distinguished:
- The top layer, the raw materials for which are selected according to the material of the entire roof.
- Sealing part - it creates a stronger connection between the ridge and the slopes and protects some roof elements from being torn off by the wind.
This detail is especially important for houses located in areas with frequent gusts of wind.

- Next comes a layer of sheathing and counter-lattice.
- Afterwards the roof waterproofing is laid out.
- A ventilated gap must be left between the layers of waterproofing.
- A mandatory element of the roof ridge is a cap that covers the open end of the structure.


In order for the skate to be a complete and multifunctional structure, it is best to equip it with a number of additional elements:
- lightning rod holder;
- tape for ventilation;
- ridge tiles for ventilation;
- snow holder - an element that reduces the load on the roof surface in winter time years when the roof is covered with snow, this part must be able to withstand a significant load;


- a groove can be used to close slope joints;
- on the end side, a wind strip is attached to the slope sheets, the purpose of which is to protect the material from various atmospheric phenomena;
- special roofing screws are used as fastening elements;
- to create a more durable knot between the slopes and the ridge, corners can be used as additional fasteners.


Having all the necessary components at hand, you can easily transform appearance your roof and protect it from the weather.
Advantages and disadvantages
Before installing an element such as a ridge on the roof, it is necessary to take into account that such a design has both positive and negative sides.
The advantages of ridge structures on the roof include:
- protection of space under the roof;
- giving the roof greater strength;
- way exterior finishing– skates can become an interesting part of the roof and a decorative element;
- such structures prevent the harmful effects of precipitation on the roof of the house.


Among negative qualities You can note some difficulty in installation certain types of structures, for example, figured ones. Some materials are quite expensive, which leads to additional expenses. Also, installation work that takes place at a considerable height is a rather risky and dangerous process for non-professionals.


Varieties
Types of skates are classified according to several characteristics, each of which has important when choosing a design. The first sign is the design features of the rafter elements.
They define 2 types of skate structure:
- The rafter legs are connected to each other by jumpers and then connected in pairs, forming a rigid structure triangular shapes. The ridge base is directly placed on them, which is used as two 50 mm thick boards or a ridge log with a wide cross-section. Such a structure is called a run.
- Vertical racks are installed on ceiling beams, gables or studs. A beam is already installed on them, which serves as a support for the upper parts of the rafter system.


Most often the design is typical for installation on gable roof. But modern roofs may have various unusual shapes, for example, broken or irregular. For such structures, offset technology is usually used when installing the ridge.
Another feature in the classification of pipit species roofing structures is the installation location.
There are different types of skates:
- Direct. They are installed horizontally by level. Such elements are most typical for gable roofs.
- Mortise elements are fixed on the internal tension of the slopes, which are located slightly below the main one.
- If there is an intersection of planes embedded in the main roof, then it is more advisable to install crossed variations of the ridge.
These designs are quite convenient for multi-pitched roofs.


The following types of skates are distinguished by shape:
- Direct is the most simple view, which does not require this during installation additional element, like a stub. They have a very aesthetic appearance and also have enhanced roof protection properties. You can often see similar ridges on metal roofing. To ensure a more durable profile transition when connecting skates of this type, T- and Y-shaped parts are used.
- Semicircular shapes do not have such clear lines as straight ones. A small air cushion is formed inside such elements.
Such forms necessarily require the installation of plugs.


- A narrow ridge is often installed as a decorative element. Their functionality are small, but such products are perfect for decorating gazebos and other small buildings Location on.
- A special type of product is figure skates. This addition has a more complex design; it provides better ventilation.
It can be freely adjusted in size.


Material
The ridge structure can be made from various materials, But the list of the most preferred ones is limited.
- Galvanized structures are popular standard sizes: two meters long and a shelf width of 250 - 300 mm. Skates made of this metal are usually installed on a slate roof.
- In addition to galvanizing, asbestos cement is also used, but currently this material fades into the background.
- A ridge made of thin sheet polymer metal is selected for a metal tile roof.


- Iron elements from more expensive material– composite metal – used for roofing made of composite tiles.
- To connect skates made of ondulin and similar materials, skates made of similar raw materials are used.


- Special ridge tiles are used if the roof is covered with bitumen shingles.
- For a roof made of corrugated sheets, you can use a ridge made of the same material, which is not even difficult to make with your own hands.
- Even for ridges of an unusual roof, for example, made of slate or reed, a material close to that used for the roof ridges is selected. There are even ridge elements made of clay tiles.


How to choose?
In order not to make a mistake in choosing a roof element such as a ridge, you need to take into account a number of nuances:
- Pay attention to the design of the rafter system. They can connect the slopes in different ways, directly determining the design of the ridge profile (purlin or timber).
- Important parameters are the size of the roof and its height. They directly determine the required length of the skate and the presence of some additional elements.


- Roofing material must be combined with the appearance of the ridge element. Some rely on color contrast, but most believe that a harmonious color ensemble is more relevant. It is also important to choose the appropriate combination of materials for the main roof and the ridge element, and pay attention to the features of the accompanying roofing parts.
- Shape affects both the function and appearance of the skate. When choosing this option, you should also take into account that the shape determines the complexity of the process of installing the ridge on the roof.
- An important feature is the presence of ventilation in the under-roof room. This indicator depends on whether the attic is used as a living room.


Calculation
To successfully install the structure, it is necessary to correctly calculate its height. This indicator largely depends on the ridge girder - the main element on which the roof ridge rests.
It is also important to take into account the material used to make the slopes, as well as their height. It is necessary to lay out two parts on the top edge ridge tiles. Remember that they need support, which is the roof slopes.

The next important value is the segment between the point at which the fastening line is bent and the upper part on which the beam of the ridge element is supported.
To calculate the height of the product accurately, you should use a special table of coefficients. To do this, you need to know the roof angle and width of a private house. The formula for calculation is next view: 1⁄2 the width of the building must be multiplied by a factor.

How to install?
It is quite possible to do the installation of a ridge on the roof yourself. Nuances installation work and their order will depend on factors such as the presence of a residential attic, the characteristics of the roof “pie”, the complexity of the roof shape and other individual characteristics. But the editing process itself, in a general sense, represents a certain algorithm of actions.
It includes several steps that allow you to provide the roof with the most suitable option skate:
- After making the calculations, it is necessary to make drawings. They will significantly simplify all stages of further work.
- The first stage is envisaged during the process of laying the roof itself. It is necessary to leave a gap in the space between the slopes. Remember that this gap should not be very wide so that it is easier to seal it with a ridge.
- Then you need to lay a layer of waterproofing along the joint line.


- The cavity located between the ends of the slopes should be filled with glass wool. This will help against the formation of snow drifts under the ridge in winter. Instead of glass wool, other materials that are resistant to decay processes can be used. It is not recommended to tightly fill the space so that there is room for air ventilation.
- If snow flakes are blown under the roof ridge, it is necessary to install a sealing layer. The sealing tape is laid using roofing felt on the line of junction of the roofing planes. On one side, these strips are attached to a bar that forms the height, and on the other, they are fixed to rafter sheathing through the material from which the roof is made. Overlapping the beam, another strip is attached in exactly the same way. As a result, in this way it is created from the inside additional layer insulation and insulation, which protects the space under the roof from the effects of precipitation.


- Installation of planks is carried out using special roofing screws, which are equipped with special rubber gaskets with a protective layer.
- After installing the first plank, you should stretch a cord along the line of the future structure. With its help, you can easily adjust the line of the ridge so that it is installed at the required angle.
- Subsequently, the corners are installed with an overlap of at least 50 mm along the lines of the wave stamp. The laying direction depends on the prevailing wind direction.
- So that the wind cannot deform and bend ready-made designs, for the ends of some of them, for example, a round ridge, there are plugs that are installed on last stage installations.


How to make it yourself?
To make a skate yourself, you will need to use a number of tools:
- To create a straight bend, a workbench with a hammer made from a steel angle is used. The size of one shelf should not exceed 50 mm.
- Ordinary scissors for metalwork or electric scissors to cut sheets of workpiece to the required length.
- To secure the workpieces on the workbench, clamps are needed.
This tool is useful both for cutting and bending sheets of metal.


- A wooden mallet is also suitable for bending.
- To make markings, you should use a marker.
- The size of the axial bend angle must be fixed and transferred very accurately. A special template is used for this.
- Wooden spacers should be used to prevent the formation of nicks when working with a mallet.
At the joints of roof slopes, careful sealing and protection of the under-roof space from the formation of moisture and the “walking” of the wind is necessary. To do this, at the final stage of installation, a roof ridge is installed on the roof.
In most cases, it is made of steel coated with polyester, but a galvanized roof ridge is also available for covering the joint of an andulin roof.
The metal roofing ridge can be made in several options:
- Flat roofing ridge (simple)
- Figured horse
- Semicircular ridge
Coverage options of this element There can be several variations: zinc, polyester and textured coating.
As a rule, ridges are made to order, but there are still popular sizes of roofing ridges:
- 110*110 (120 gr.)
- 110*110 (90 gr.)
- 193*193 (90 gr.)
- 193*193 (120 gr.)
- 141*141 (120 gr.)
- 141*141 (90 gr.)
The average length of one element is 2 meters, however, when manufactured on the LGS-3000 machine, the skate can reach a length of 3 meters.

Advice! When ordering a roof ridge, you must indicate the presence of a rolling seam of at least 15 mm.
The production of roofing ridges can be organized directly on the territory of the exhibition hall, since only a sheet bending machine is required for its production. Therefore, you can buy a roofing ridge, along with all the basic materials in one place.
The main feature of installing a roof ridge is maintaining the length of the overlap between the component elements. For metal skates the overlap is 10 - 15 centimeters.

Calculate the required data roofing element can be done with ease. You need to calculate the total length of the joint and divide it by the length of the ridge minus the overlap.
For example,
element length 2 meters,
joint length 5 meters.
10/1.9 = 5.26, i.e. 6 items.