How to set up your camera for night photography. How to set up a camera for night photography: tips for a beginner
Night photography often seems like something special to a beginning photographer. Photos of a city at night fascinate with the brightness of the lights and reflections, but all attempts to photograph a city at night lead the novice photographer to bewilderment - even if your camera has a night portrait mode, it can be quite difficult to understand how to use it...
You can even take photographs of the city at night with a camera cell phone. It's okay if you're experimenting or shooting for fun. But if you want to take a photo of the city at night that you won't be embarrassed to show to your friends or put in a photo frame and hang on your bedroom wall, then you first need to find out if your camera is suitable for night photography...
Camera for night photography
For night photography, you don’t need to specifically buy one or something with exorbitant prices. For starters, a point-and-shoot camera, even one that doesn’t have a night mode, is suitable. However, not every point-and-shoot camera is suitable for photographing a city at night!
The shutter of your camera must handle very long exposures (tens of seconds, or even better, minutes) - this is a sufficient and, perhaps, the only requirement necessary for high-quality night photography. This is what you will have to check. The easiest way to find this information is in the instructions for the camera. But even without looking at the instructions, you can easily check this by setting the longest shutter speed in mode M. If the shutter speed ends with the letter IN or Bulb, then you won’t have problems with night photography.
For night photography, a camera with
which has a manual long exposure.
Bulb exposure, designated B (Bulb) - the shutter opens when you press the shutter button and remains open until you release the button.
For example, if you hold the shutter button in this mode for 10 minutes, the shutter speed will be exactly these 10 minutes.
In some cameras, it is not necessary to hold the shutter button all the time - the first press of the button opens the shutter, and the second press closes it.
If your camera does not have manual mode M, then you can check the camera’s suitability for night photography in any creative zone mode - Tv(S), Av(A) and even P. If your camera does not have manual modes for setting exposure parameters, and going into a dark room without windows (a bathroom, for example), you see that the camera in automatic mode can set a shutter speed longer than 15′′, and you can turn off the flash - you have a very good chance of getting good photographs of the city at night.
If your camera's shutter cannot handle such long shutter speeds, don't be discouraged - there is one trick that you will learn about below when you study the camera settings for night photography.
Night lens
The myth that night photography is absolutely necessary has absolutely no basis! If you have carefully read about which camera is suitable for night photography, you have already guessed that the exposure for night photography  is provided by a very long shutter speed, but you can use the aperture to control it in the same way as during normal shooting, depending on the subject of your night photographs.
By the way, when photographing in the city, you can use fences as a rigid support: railings, balustrades, parapets and even thick tree branches. To do this, sew a small bag from thick fabric and fill it loosely bulk material- now it is enough to place this bag on any rigid support (even not very level), and on top you can easily install the camera motionless.
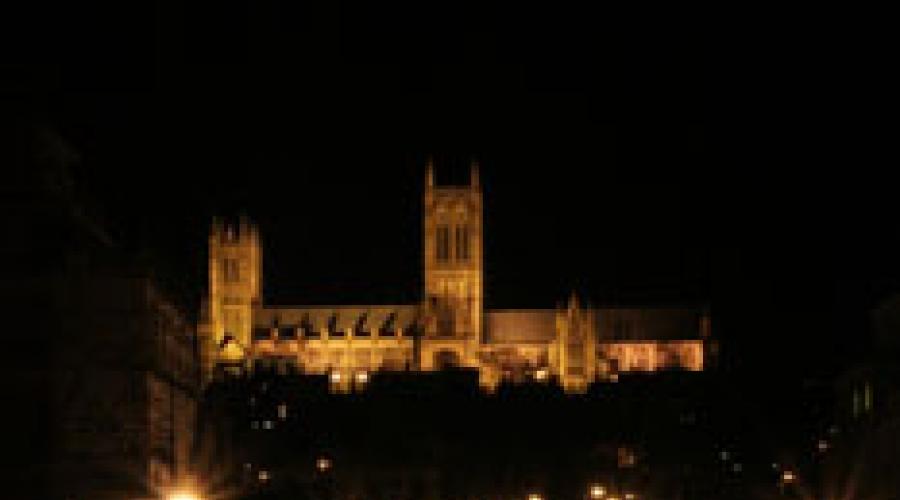
The photograph of the city at night on the right was taken with a camera mounted on the bridge railing. Beautiful stripes of light along the road are the headlights of passing cars, blurred by a long shutter speed!
For photographing a city at night, the lens aperture is not critical. It is much more important when shooting at night to ensure
camera immobility - you need a tripod or rigid support.
Setting up the camera for night photography
You may have already guessed that the main thing in night photography is a long shutter speed and keeping the camera still.
If your camera can automatically handle fairly long shutter speeds (at least 15′′), then optimal mode for photography at night there will be a mode in Aperture priority mode, you don’t have to think long about which exposure parameters to choose - you control the depth of field, and the camera will set the shutter speed automatically! If you are not shooting a night portrait, then it is better to turn off the flash.
If your camera has only automatic modes, but can provide long shutter speeds, it is better to use landscape mode to photograph a night city - in this case, the camera gives preference long exposure and does not include a flash.
Night photography during regular hours

What to do if your camera's shutter is not capable of long exposures? Forget about night photography?
No! Use a simple trick professional photographers: Shoot at night during the so-called MODE TIME. Regime time is evening time, when the sun has already disappeared below the horizon, but there is still enough light to avoid using very long shutter speeds.
During normal operating hours, the lights usually turn on and you will take great shots of the evening city. Using exposure compensation with a slight underexposure of frames will thicken the colors of the night and add a feeling of night, at the same time, the lights will not be overexposed.
Evening photography is no less impressive than night photography!
When shooting from a tripod or stable stand, always turn off and set the shutter delay. Long shutter speeds themselves add noise to your night photos, so try to use the lowest possible values. After taking a long exposure shot, remember that the camera takes about the same amount of time to record the shot to the memory card.
Whether to use autofocus or focus manually depends on many parameters, so there is only one piece of advice: if your camera focuses in low light the way you need, use autofocus, otherwise switch to manual focus mode.
Night photography of people - night portrait
Photographing people at night is different from photographing a city at night. main feature When shooting a night portrait, it involves different exposures between the model and the background. It is on this principle that the “Night Portrait” mode works.
In night portrait mode, despite the fact that the flash automatically turns on, the shutter speed still remains very long. When photographing a night portrait, the main subject (a person) is illuminated by a flash. The power of the built-in flash is enough to illuminate the subject at a distance of up to 3-5 meters. To prevent the background from remaining black, we need a long shutter speed, as if we were shooting night city.
NIGHT PORTRAIT mode can be called
|
In Night Portrait mode, we get a photo in which people in the foreground are exposed to flash light at a very fast shutter speed, equal to length flash pulse. At the same time, to study the background, which the flash “misses”, we use a long shutter speed, as when shooting a city at night.
And if you don't want to get a blurred background due to camera shake while exposing the background at a long shutter speed, then a tripod or rigid support is necessary, even though you have turned on the photo flash.
If your camera does not have a "Night Portrait" mode, but has manual exposure setting modes, shoot in aperture priority mode with the flash on. In this case, the shutter speed will be set depending on the background lighting, and the power of the automatic flash will be adjusted according to the photo model and you can easily get a photo with different exposures of the background and the model.
ATTENTION!
Some cameras have aperture priority mode with
When the flash is turned on, there are two options for shutter speed settings:
1. Fixed shutter speed - the shutter goes into X-sync mode. In this case, set the shortest shutter speed for flash photography, for example 1/200 sec.
2. Automatic mode - shutter speed is set depending on
stage lighting. This mode is just right for photographing people at night.
A common mistake when taking night portraits

Once you're excited about shooting a night portrait, don't forget to critically evaluate the background!
Bright lights in the background can easily ruin your photo - such lights will attract the viewer's attention, while your favorite girl against the backdrop of the night city will remain unnoticeable: o(
Hover your mouse over the photo on the left and see the difference!
Simple and short tips for night photography, as well as several ways to make night photos more interesting. From camera settings to low light photography ideas.
So, let's look at the basic settings, rules and techniques.
1. For a good photo - maximum file quality
If you want to get high-quality night shots, then you need the maximum quality of the file itself, which means shooting in RAW format. In this case, your photo will contain maximum amount“information”, which will provide a wide field for subsequent processing and improvement of the image in Lightroom, Adobe Camera Raw and other RAW file processing programs. RAW is especially important when shooting at night, since it will preserve the maximum amount of detail in the shadows and highlights, which are especially saturated at night, and it is also easy to control the white balance during post-processing, which can be difficult during night shooting itself.
2. Use a tripod for sharp photos
Night photography involves low light and long shutter speeds, often longer than 30 seconds. It is clear that when shooting “by hand”, holding the camera absolutely motionless during this time is unrealistic. So if you want to shoot at night, get a tripod, otherwise it’s almost impossible to achieve sharp pictures. The more stable and heavy the tripod, the better. It is very good if there is a hook at the bottom of the central rod of the tripod, which will allow you to hang something on it that will make the tripod heavier and increase its stability. This could be, for example, a camera bag or backpack. In addition, it is not advisable to hold the tripod with your hands while shooting. In other words, minimize anything that might move the camera the slightest bit after you press the shutter. Even a small displacement, invisible to the eye, can cause blur in the final image.
3. Selectplacein advance
Do some research before you head out to photograph. This will save your time and allow you to get what you want faster. Find a good spot, evaluate the lighting at night, see how buildings are lit if you decide to shoot architecture, evaluate road traffic depending on time and place if you want to shoot “light trails” - traces of headlights from passing cars. In other words, find in advance the place where the city lights at night will look best. What is beautiful during the day will not always be good at night and vice versa.

4. Use the “golden mean” when choosing aperture
When choosing an aperture, use the “sweet spot” - usually f/8 to f/16, but there is no exact rule here. Golden mean it makes sense to find out empirically for a specific lens. Even expensive ones professional lenses will not always give the best picture at the minimum and maximum aperture values. By using the “middle” you protect yourself and increase the chance of getting a good and sharp night shot.
5. Camera settings for night photography
It's best to put your camera in manual mode (M), so you can experiment with the combination of shutter speed and aperture that will give you best result. Good way– first set the aperture, for example, at f/16, and then, based on the camera’s exposure meter prompts, select the shutter speed. Take test shots and evaluate the results on the display. If the photo is too bright, reduce the shutter speed; if it is too dark, increase it. Remember that the optimal exposure, according to the camera electronics, will give too light a picture. Reduce the exposure by 1-2 stops and the result will become more realistic.
6. HowgetEffect « stars»
Stopping the aperture down (around f/16) not only increases the depth of field, allowing you to get clarity in both the foreground and background, but it will also turn street lights into “radiant” stars, which gives night shots a special atmosphere.


7. Nightcomposition
Analyze the scene carefully before taking the photo. Which parts are in the dark? Some, on the contrary, are lit too brightly. How will this show up in your photo? Think about lighting. The large contrast between bright and dark objects is especially important to consider when photographing at night. Feel free to use your zoom or your feet to find the point that will allow you to get the optimal composition, where there will not be ¾ of the frame in absolute darkness or, conversely, “knocked out” by bright light.
8. Use "MirrorLock— Up»
When photographing at night, it is important to avoid the slightest camera shake. Including those that occur at the moment of raising the mirror in a SLR camera. So it is highly recommended to use the " MirrorLock— Up"—preliminary lifting of the mirror (usually lives somewhere in the additional settings).

9. Don't touch the camera!
When using long exposures, even pressing the shutter button can ruin the photo. If the camera can be controlled via remote control remote control, take advantage of it. If not, use the built-in delay timer to release the shutter. Night shots rarely require haste and instant reaction.

10. CreativeideasForshootingof people
Usually, strangers disturb us while taking photographs. But when we're talking about about night photography, then crowds of people can, on the contrary, add variety and some charm. If people are still, they can be used as "silhouettes". If you are in motion, then at shutter speeds of about 1/4-1/2 second, you can get interesting effect"creative blur" emphasizing movement.


11. WhichISObetter
The choice of ISO depends on the type of night photo you want to take. For urban scenes with long exposures, when using a tripod, you can choose ISO 100-200. This will help reduce digital noise and preserve maximum detail. If you are shooting something that requires a relatively short shutter speed even at night, then use the highest ISO at which your camera produces images good quality. Also remember that very long shutter speeds cause the camera sensor to heat up, and this can lead to significant noise even at low ISOs.
12. Motion blurpictures
The “motion blur” category of photos can transform one picture into another. And this is very easy to achieve when shooting at night, using a tripod and long exposure times. Try to shoot a road with heavy traffic at a shutter speed of 2-5 seconds and the individual headlights of passing cars will turn into rivers of fire and light.


13. Manual or automatic focusing?
It's best to use both. Use autofocus to get the focus, and then set the camera to manual to maintain it. Then your camera won't try to "hunt" every subject if the lighting changes, and you won't have to refocus every time you take test shots and adjust optimal values exposure for the photo. If the scene is too dark for autofocus to “catch” the subject, then use only manual focus or Live View if the camera allows it.
14. Time for night photography
Different times allow you to get different effects. It's interesting that best time For night photography, it is not always deep night. Often, interesting photographs are taken at dusk, when the night lights are already on, but the sky has not yet completely darkened. A combination of electric and natural light will help you create a truly unique photo. In the dead of night you are unlikely to be able to photograph beautiful clouds, although this is quite possible in the evening. See how the same frame changes depending on time. Which is better? Complex issue- you decide.


15. White balance for night photography
If you use automatic white balance, then your camera can play tricks on you, because in night conditions, it is difficult for it to decide what white balance is correct. To be more confident in the result, use manual balance. Try the "cloudy" setting (Cloudy ~ 6000k) if you want a warmer, yellowish picture or " artificial lighting"(Tungsten ~3200K) to get a cooler picture.
16. Disablestabilizer
Image Stabilization (IS) - Any image stabilizer, whether it's in the lens or on the camera, is designed to help you when you're shooting handheld. But it can have the exact opposite effect when you're shooting on a tripod with a long shutter speed. The stabilizer, depending on its internal logic and type, can, on the contrary, make completely unnecessary movements and ruin the frame. So turn it off and be calm
17. How to shoot a “star trail”

Effects
Zoom effect. Particularly interesting when you're shooting moving lights. Try starting at the short end of the lens and while the shutter is open, zoom smoothly to the long end. Or vice versa. It's difficult to predict what will happen in the end, but the effect can be very interesting.

20. Using the backlight
On a moonless night, when there are only trees and rocks around and no lighting, you can help yourself with lighting. Conventional flashlights, depending on the temperature of the light (regular lamp, diode, halogen, etc.), will allow you to obtain effects of different colors and perceptions.
To make full use of the backlight
- Arrive early, before dark, to choose your composition
- Switch your camera to manual exposure mode, starting with f8 and 120 seconds of shutter speed, and start experimenting with lighting, aperture, and shutter speed.
- If you use a flashlight, don't leave it stationary. Move smoothly from side to side for a more natural effect and better illumination.


21. Keep your camera cold and batteries warm
In winter, in the cold, batteries discharge very quickly. Especially when you shoot with long exposures. To avoid finding yourself with a dead camera at the most inopportune moment, keep 1-2 spare batteries warm. So that you can replace them if the main one dies. In addition, avoid frequently moving the camera itself from cold to warm, as this can lead to condensation and fogging of the lenses, and in particularly unfortunate cases, damage to the electronics.
22. A little about nostprocessing
When you open your RAW file from Lightroom or Adobe Camera Raw, the first thing you need to do is select the white balance (temperature). Then go to the Vibrance and Saturation settings to make the photo more saturated. But don't overdo it. Recovery – will help you bring “exposed” areas back to life.
Night is an attractive and mysterious time of day. The night world becomes intriguing and alluring. This is what makes night photography so interesting. However there are many technical nuances things you need to know to get acceptable photos. So, first things first.
A small plan for orientation in the article:
Night shooting conditions
What makes night special for a photographer? First of all, an insufficient amount of light does not allow the camera to focus normally and distinguish objects. There is an exit. You can use cameras that do not make too much noise when the ISO is increased. These are mostly full-frame DSLR cameras. Such a camera is an expensive pleasure that not everyone can afford. In principle, you can use any camera, but cheaper models will have poorer quality pictures.
For night photography, the lens is also important. The larger the lens aperture, the brighter the image will be, and accordingly, it will be easier for the camera to focus. It is worth noting that budget lenses at the maximum open aperture at the edges of the frame begin to blur the picture. Expensive optics do not have such a flaw.
If you are the owner of a compact with fixed optics, do not despair. Of course, you won’t be able to take pictures of the starry sky, but almost any modern camera is suitable for photographing a city at night or landscapes.
Since the camera receives little information about light at night, better photos save in RAW format. This will allow you to extract much more detail from the images during processing.
Where can you take pictures at night?
What can you photograph at night? It depends on the imagination of the photographer and possible places where you can go. At night you can photograph the same things as during the day, but everything will look different. The city streets will consist of silhouettes of houses with rare detail in the light of lanterns. The park paths will become romantic and slightly scary.

Night nature is beautiful in its own way. The trees become silhouettes, and the light from the moon makes the view mysterious and alluring.


No less mesmerizing are the photographs of the starry sky. How to photograph stars is described at the end of the article.


Features of shooting at night
Night photography can be divided into two methods of photography: with a long shutter speed and a tripod, and with a short shutter speed, but using additional light sources.
In order to get as much detail as possible in the environment, you need to open the aperture. This will increase the luminous flux, and the light will hit the matrix with greater intensity. If the photographer's interest lies in conveying only lines and points of light, then the aperture should be closed. The shutter speed is selected experimentally.
If you only need to convey information about light sources, you shouldn’t raise the ISO. It's better to increase the shutter speed. In the event that you need to convey as much detail as possible in the picture, and the shutter speed is already at the limit or its further increase will lead to inevitable damage to the frame due to the movement of objects, then an increased ISO value will help. But we should not forget that an ISO value above 400 units leads to a serious deterioration in photo quality due to the appearance of noise. Here you have to choose what is more important. Sometimes you have to choose between taking a “noisy” photo or not taking a photo at all. Sometimes it's worth taking a photo. You can fight the noise later in Photoshop.
IN dark time days there is a problem with focusing. Clear pictures are obtained by focusing on contrasting and clear objects. This could be road markings or building windows. You should not focus on objects that have a uniform color and structure.
Long exposure photography on a tripod
A long shutter speed will not allow you to get a sharp shot when shooting handheld, so using a tripod is a must. IN different conditions Camera lighting settings will vary. It all also depends on what you need to get in the end.
What kind of pictures can you take with long exposures at night?
Perhaps the most common photographs are those of car headlight marks.


Landscape photography is no less common. This can be not only nature, but also industrial landscapes.

When photographing on open area One flash cannot illuminate the entire frame, but it does an excellent job of highlighting objects in the foreground. For example, if you set the flash to fire at the rear curtain of the lens and photograph a moving object, you will get a frame with a clear, sharp object, behind which the trail from its movement will be visible.

Very interesting pictures are obtained when painting with fire. In the next photo, the boy was drawing circles with a sparkler with the shutter open. Before closing the shutter, the flash went off, thereby freezing the image of the guy. Thus, both the light pattern and the model itself remained in the frame.

To get just a pattern of light, you don't need to use a flash. This type of photography is called Freez (English: Freez - freezing, Light - light), this style is also known as Light graphic or Light painting - painting with light.
You need to create a light pattern on the street in a place where there is no lighting or in dark room. The shutter speed can be set to any length. It all depends on how long the drawing will take to draw with light. In complete darkness, the camera will not record anything other than lines from a moving light source. As you know, the aperture regulates the intensity with which light hits the matrix. This means that in freezelight, the diaphragm will regulate the intensity of the glow of the drawn lines of light. With a closed aperture they will be thin, and with an open aperture they will be wide and bright.


At night, with a flashlight you can not only draw figures in space, but also work with it like a brush, illuminating (outlining) objects, making them more noticeable among others. This method is called painting with a light brush.
To highlight an object, you need to set the camera to a long shutter speed and, while the exposure lasts, use a flashlight to evenly illuminate the object.
When working in this style, you should be attentive to detail, and good results will only be obtained after training. When working with a flashlight, you should not hold it statically. Better move it. This will give more uniform lighting. In addition to a regular flashlight, you can use a wide variety of lighting devices.


Just incredible pictures obtained when shooting the starry sky. Photographing stars is not so easy. This can be done in two ways. You can convey the stars as we see them, in the form of points, or you can capture the movement of stars in the sky (star tracks).
Shooting static stars
To capture static stars you need to calculate the shutter speed. There is a rule of 600/fr. As many have already guessed, you need to divide 600 by the focal length of the lens. The result of the calculation will be the shutter speed at which you need to photograph so that the stars in the picture are dots and not dashes.

In this case, the aperture should be opened to the maximum level at which high-quality images are obtained. Light sensitivity will have to be selected experimentally.
Shooting star tracks
Star tracks are more difficult to photograph. The exposure time for such shooting can last from 10 minutes to several hours. This depends on the focal length of the lens and the desired length of the tracks. For each camera and lens you need to select the settings yourself.

There are two ways to photograph star tracks. The first is shooting with one frame with a long shutter speed, and the second is shooting a series of pictures with a not too long shutter speed and then stitching these pictures together in special software. The second method undoubtedly wins. The first has many disadvantages: the appearance of noise due to overheating of the matrix during a long exposure, the appearance of movement, fogging of the lens glass, overexposure due to too long an exposure. Any of these nuances can ruin a picture that was created over a long period of time (from 10 minutes to several hours).
The second method provides a huge number of advantages: The shutter speed of each frame is no more than 60 seconds, and this eliminates overheating of the matrix and overexposure; if movement appears or the lens fogs up, you can subsequently exclude spoiled frames from stitching, you get many frames with images of static stars, you can control long star track program.
Shooting at fast shutter speeds without a tripod
The easiest way to photograph an object or person at night is to use a flash or other lighting fixtures. This could be street lights, light from car headlights, spotlights, or specially prepared studio equipment. With this type of photography, only the illuminated object will be visible. Everything else will hide in the shadows.

At night, photographs of bright objects such as street lamps, window lights, flames, or reflections of city lights in ponds and puddles look very good.


By completely closing the aperture you can get an interesting result. The rays from the flashlights will be visible in the photo.

Quite unusual pictures are obtained when photographing the moon. Most likely, many tried to photograph the night star and, after unsuccessful attempts, wondered how to photograph the moon.
In fact, everything is very simple. Many people mistakenly believe that in order to photograph the moon you need to increase the shutter speed and aperture ratio. It is not right. The moon is a very bright object in a dark sky, so the shutter speed should be fast and the aperture should be stopped down. Nice pictures obtained on cameras whose optics have a long focal length. At its closest approach, the moon looks especially beautiful.

Programs for night photographers:
Startrails - stitching together a series of images of the starry sky into star tracks
The Photographer's Ephemeris (TPE) - calculates the time of sunrise and sunset at any point on Earth.
Conclusion :
Night photography is a very exciting activity, but far from the easiest. Stunning pictures can be created by photographing at night, but you need to be prepared for such shooting.
Article commissioned
Observe the play of light, evening and night colors. We associate night with darkness and darkness, impenetrable emptiness. But in reality even small settlements At night, many shop windows, lanterns, and car headlights begin to glow. Therefore, familiar things become unusual and mysterious even in natural night light.
First of all, night photography– this is the charm of sleeping streets, the play of lights on the surface of the lake, mountain landscapes at sunset. There are many stories. At this time, everything around is transformed. Acquaintances before the smallest details neighborhoods plunge into twilight, boulevards and squares wink with illumination - the main thing is to learn, how to take pictures at night to convey all this as effectively as possible.
Subtleties of night photography
This is a rather interesting area of landscape photography. If during the day the camera “sees” the same picture as we do, then at night everything changes. It often turns out that where there is nothing to photograph during the day, after sunset you can get very spectacular pictures. At night, the surrounding reality transforms, and a special charm appears in the photographs.
Photographer: Jing Magsaysay.
Photography can be called the art of painting with light, since lighting is the determining factor here. The amount of light is the main problem. night photography, because it is sorely lacking (by the way, you can read more about natural light). Our brains and eyes adapt to light so we can see the world both on a sunny day and in the evening twilight. The picture may not be identical, but we can see something. And the decrease in color perception at night is perceived by us as a completely normal process.
As for how to take pictures at night, everything is more complicated here, because the capabilities of photographic equipment are much more modest. In order not to delve into the jungle of physics and photographic technology, I will briefly note that the camera matrix or film will be more receptive to light, the higher its ISO. A sensor with a sensitivity of 700 ISO will be 7 times more sensitive to lighting than an analogue with a sensitivity of 100 ISO. Consequently, the photographer can make the shutter speed shorter or close the aperture further.
Calculation of the amount of light entering the matrix or film, depending on the set aperture value, is carried out using a more intricate formula. However, for a general understanding of what happens when night photography, the above information will be sufficient. Eager photographers will ask what the problem is then. In modern cameras, sensitivity can be adjusted through the menu. Set it to maximum - and you can photograph night landscapes or take portraits!

Photo workshop "Big City".
There is still a problem. You have to pay for everything. If you want to know how to take pictures at night, then be prepared for the fact that at maximum sensitivity values noise will appear in the pictures. Physically, any matrix has one sensitivity. Let it be called nominal and equal to 100 ISO. This parameter can be increased electronically.
In other words, the signals coming from the cells are simply amplified. This leads to an avalanche-like increase in the amount of noise and defects in the photo. They appear in photographs in the form of gray and colored dots that are randomly scattered throughout the image. And the photographer gets whole line problems - from reduced detail to reduced dynamic range. Moreover, the dependence will be direct, although not linear. Simply put, the higher the sensitivity of the matrix, the more noise there is in the images.
Let's look at the features of camera settings for night photography on specific advice:
- Be sure to use a tripod for a night session. As a last resort, use a stable surface. On short exposures lighting will not be enough. And the noise that is formed due to high ISO will be visible very clearly in the dark areas of the image (there are many of these in any night photography). If you are using a tripod, you must forcefully turn off the stabilizer, because when using it, the image will “walk” a little, and with a long shutter speed this will cause blurring.

- Practice using full manual photography mode. Neither autofocus, nor built-in flash, nor exposure metering in such extreme conditions will not be able to provide maximum quality. Before how to take pictures at night, set exposure metering for fragments with average illumination. Do not turn on the flash, since the built-in model is unlikely to illuminate the entire street or objects ten meters away. Most likely, it will simply illuminate a nearby object, leaving all the most interesting things in the dark. Set focus manually to main element frame.
- ISO, shutter speed and aperture settings. Keep the ISO minimal so that the pictures are not spoiled by a lot of noise. The sensitivity of the matrix and the aperture ratio of the optics are not critical. The lack of aperture can be compensated for by long exposure times. If the camera is on a tripod, the shutter speed doesn't matter.
- Night photography promises several problems. The biggest challenge when shooting at night is white balance. There are many colorful light sources on the street. The most optimal way is to shoot with auto white balance in RAW format. Then you can adjust this parameter during subsequent processing in editors.
- Use a cable, remote control or timer with a 2-second delay. If you do not have a cable or remote control, before how to take pictures at night be sure to enable the specified timer mode. The fact is that even pressing the start button can lead to movement in the images. And we also take long exposure photographs.
- Sometimes you have to make a shutter speed of more than 30 s. In such cases, we take photographs by turning on the BULB mode (this is a mode in which the shutter speed is not limited by time).
- Sometimes you can still use an external flash, for example, to deliberately illuminate objects that are located in the foreground. We do everything according to a familiar pattern. Turn on the flash and set its mode to rear or slow. In the first case, the flash fires at the end and beginning of shooting, in the second - only at the beginning.

Obviously, DSLRs perform better when photographing with long exposures. Then the dynamic range will be better and the noise level will be lower. But it’s also possible to achieve relatively good results with a soap dish. Now let's look at the tips above in more detail!
How to set up your camera for night photography
Before how to take pictures at night, put the device into manual mode (M), if present. Otherwise, set P - program mode (about creative modes I). We set ISO to minimum to reduce noise. If the camera supports RAW shooting format, enable it. This will allow you to adjust colors without losing picture quality.

Photographer: Dominique Palombieri.
If the specified format is not available, set the white balance to match the type of light sources. For shooting under the moon or just under the sky, it will be a “cloudy day” (you can also experiment on your own), for street lamps– “halogen”.
If you want to take high-quality photographs with night photography, you will also need maximum file quality, and this means shooting in RAW format. Then your pictures will contain a maximum of “information”, which expands the possibilities of subsequent processing and correction in the appropriate programs. RAW is important precisely because it allows you to preserve the maximum detail in highlights and shadows.
Before how to take pictures at night, set up the self-timer on the camera. This will eliminate the need to touch the device while the shutter is firing. When we press the start button, we move the camera, which is unacceptable. Many SLR cameras have a mirror lockup mode for such cases, in which the shutter is released after a few seconds.
Place the camera on a tripod. Obviously, holding the device motionless for a long exposure time will be unrealistic. The heavier and more stable the tripod, the better.

Photographer: Matt Molloy.
It would be great if at the very bottom of its central rod there is a hook on which you can hang a load to increase stability. You can even use a backpack or a bag from the device as a weight. It is not advisable to support the tripod with your hands while shooting.
At night photography On the street you should forget about autofocus - we don’t rely on it. If you are using a soap dish, before how to take pictures at night, set the focal length at the short end of the zoom from 2 to approximately 2.5 meters, and clamp the aperture to 4. In this case, you will get a depth of field from 1.5 meters to infinity.
If you use a DSLR, you will have to aim at some light object located at the desired distance. Having “hooked” autofocus, switch to manual focusing and do not touch the lens again.
Step-by-step algorithm for shooting at night
Frame your shot properly and secure the tripod head.
When working in M mode, set the aperture and shutter speed. The latter is usually between one and ten seconds (depending on the amount of light available).

Photographer: Dmitry Bilichenko.
The aperture needs to be set in the range of 4-5.6. But don't go higher than f11, otherwise you'll lose image clarity.
Press the shutter
At correct execution the above advice on the topic of how to take pictures at night, the self-timer will fire first. Then the camera will stand for a few seconds with the shutter open. It is important to ensure complete immobility of the equipment.
If the wind is blowing, stand on the windward side as close to the camera as possible to protect it like a flower from vibrations. You should not stomp your feet near the device, since vibration is transmitted through the ground.
After shooting is completed, the camera will process the image for a while to suppress noise. The display will show “busy” at this time. It may even seem like the camera is frozen. The longer the exposure time, the longer the treatment will take. Wait for it to finish. Once you see the results on the screen, check the histogram to see if your exposure settings are correct. Unfortunately, in terms of contrast/brightness, the display may not display the image correctly.

Photographer: Sarah Vivienne.
It is important to understand that images night photography should remain in a dark tone. Before how to take pictures at night, you shouldn’t set shutter speeds that are too long, since even Photoshop can’t save overexposed photos. Try to take at least 3 frames of one scene, experimenting with the lighting level so that you have plenty to choose from.
Before a photo shoot, try to thoroughly study the camera's capabilities - do not shoot in scene modes. Knowing the capabilities of the lens and camera, you can predict the results of the photoset.
Shooting city nightscapes can be an excellent opportunity for self-expression. You will be able to look at your city in a new way, try to convey its gloomy beauty. At night, people look like ghosts and the streets turn out brilliantly black (with long exposures). Don't limit your imagination, experiment, create new stories. Using advice on how to how to take pictures at night, leave room for your own developments.
To night photography proved to be successful, be sure to keep the following in mind: When filming in busy areas, remain vigilant. After all, night is not only a time of transformation of the surrounding world, but also a period of activation of criminal elements who may well covet your photographic equipment worth at least $600. Therefore, take care of your safety first.

Photographer: Maxim Sudorgin.
That's all for me. In the next article I will try to offer some ideas and give some more tips for night photography. So don't miss out - subscribe to updates!
Read other materials on the topic:
Taking a beautiful portrait while walking through the city at night is quite difficult due to insufficient street lighting or too bright flickering background in the form of night city lights.
But it is still possible if you follow our simple tips for photographing people at night .
1. Bring the appropriate equipment:
- SLR camera. It’s quite difficult to take a good portrait in the dark with a regular digital point-and-shoot camera, so if you don’t have SLR camera, rent it from a friend or rent it from a photo studio.
- fast lens with aperture f1.4-1.8. It has no equal when it comes to taking portraits in low light.
External flash. The built-in flash of the camera emits a very small amount of light, so you will have to photograph your model at a distance of 1-1.5 meters, and at such a distance, even if you want, you cannot take a full-length portrait. In addition, the built-in flash gives quite hard light, which makes the photographed person’s face visually flat, without pronounced features. 
- flash diffuser. It is not required, but is still preferred if you want the light from the flash to be diffused and soft.
Monopod. You can use a tripod, but it will be inconvenient for you to carry it around the city, so it is better to use a lightweight monopod, and plus remote for better image stabilization. 
2. Work in aperture priority
It is better to shoot a night portrait in Aperture Priority mode. This will make it easier for you to control the blur of the background, and you will no longer have to think about shutter speed, because. The camera itself will select its optimal value. 
3. Use an external flash
It is better to take photographs at night with an external flash at a distance of two meters from the subject, but no further than five meters. Be sure to pay attention to the flash power. Too much flash at close range can whiten the model's face. To avoid this, use a flash diffuser or simply adjust its power by accessing the camera menu. There is another option: point the flash not at the model itself, but at white wall or a photo reflector located on the side of the model. 
4. Creative approach or how to make a truly beautiful night portrait?
Do you want to take a truly beautiful night portrait? Find first appropriate place for shooting. This could be a street well lit with lanterns, a bridge from which the city at night is clearly visible, or a central street of the city where the traffic flow does not decrease even at night. Place your model so that the lights of the night city are behind her and subsequently turn into the same beautiful background as in the photo below.
Next, adjust the camera so that you get the same beautiful effect bokeh : ISO highest value(800 – 1600 units), maximum open aperture (f1.4 – f3.5), shutter speed (if you shoot in manual mode) 1/20 – 1/30 sec., focus mode – single-point.

5. Take night portraits without flash
Unfortunately, not all beginning photographers have external flash, so many of them use the built-in one, after putting a homemade white paper diffuser on it. We suggest that you abandon this idea and shoot a night portrait without a flash, because it can be replaced by bright city lighting, car headlights, and even an LED flashlight. To avoid image blur, use a tripod or monopod. 
