Make a wire mesh fence. Installation of a fence from a welded grid. Sectional fences have a number of advantages.
Some dacha cooperatives do not provide for installation between plots or any other similar material, since such structures obscure small areas. At the same time, a fence made of welded galvanized mesh becomes an excellent way out. It will not prevent ultraviolet radiation from entering the site, will not impede natural air circulation and can be erected by any summer resident.
Training
The chain-link is an inexpensive material that is ready to last for quite a long time. Its additional advantage is the possibility of using it as a support for climbing plants. This grid was invented at the end of the 19th century, but is still widely used today. Every consumer can buy it.
To create a fence, in addition to the mesh, you should prepare reinforcing bars, thick wire, and a cable. When choosing a grid, you should pay attention to the size of the cells. The smaller it is, the more expensive the mesh will be, but also stronger. If the mentioned parameter is equal to the limit from 40 to 50 mm, and the width of the roll is 1.5 m, then this material will be an excellent solution for creating a fence for a summer cottage.
Tension fence

A fence made of welded galvanized mesh can be stretched. This method of its manufacture is the simplest. After all, the material will have to be stretched between the pillars, which can be made of the following materials:
- concrete;
- wood;
- metal.
The number of supports will depend on the step between them and the length of the fence itself. The best distance is a parameter of 2.5 m. Pipes can be used as poles, but they must not be damaged by corrosion. On sale today you can also find ready-made poles that have hooks and a painted surface. before installation, it must be treated with a protective compound.
As an alternative solution, the mesh is fixed to them with a clamp or wire. The height of the pillars must be calculated. If the clearance between the ground and the fence is between 5 and 10 cm, then the underground part of the support and the width of the grid should be added to this parameter. The load on the corner posts will be greater, so they need to be placed deeper than the rest. Therefore, their length should be 20 cm longer than the length of ordinary pillars.
When making a fence from a welded galvanized mesh, you should concrete the bases of the supports to increase strength. The pillars will be the frame of the structure. After installing them, you can begin to fix the grid. As soon as the concrete hardens, hooks are fixed to the posts or welded on if the post is metal. As a material for fastenings, you should use:
- wire;
- nails;
- rod;
- screws.
You can use any other material that bends into hooks. At the same time, the roll is straightened and installed at the corner support, the mesh must be hung on hooks.

The roll must be rewound one span to reach the next post. The rod is threaded a little further than the place where the mesh will be connected to the post. The master should hold the rod and pull the net. If the rod is not used, then the mesh may be stretched unevenly.
It is better to carry out these works with the help of another person. He will hold the mesh at the bottom edge while the other master at the top. At the next stage, reinforcement is threaded into the mesh, 5 cm must be retreated along the edges. When installing a fence made of welded galvanized mesh, it is necessary to weld horizontal bars or attach to poles.
Without using rods, over time you will encounter the fact that the mesh will sag. In the case where the technology is followed, the rods are used to maintain tension. The mesh should be pulled further according to the principle described above, fixing and pulling the rod or wire. On this we can assume that the fence is almost ready. Hooks are bent on poles, the last of which are painted. It is recommended to wrap the wire antennae down to reduce the risk of injury. The wire is usually threaded through the upper edge of the row of cells, the protruding edges should be wrapped around it.
sectional fence

For the construction of a sectional fence, you will need sections where the grid will be installed. At the first stage, you should use a technology that is similar to the one described above. For this, the territory is marked out, and then the pillars are installed.
The installation of a mesh fence will involve the use of a corner, the dimensions of which are 40 x 5 mm. These elements will be needed to make the frame. Its length is determined taking into account the distance between the pillars, 15 cm must be subtracted from this value. The same amount should be subtracted from the height of the pillar above the soil level. This will get the width of the frame.
Corners need to be welded into rectangular structures. The size of the sections is made taking into account the size of the mesh, which varies from 1.5 to 2 m. The welded galvanized mesh in rolls, if necessary, can be cut with an angle grinder.
Work methodology

At the next stage, metal strips are welded to the posts. They should be placed horizontally. Their length can be from 15 to 25 cm. As for the width and section, they are 5 cm and 5 mm, respectively. With a deviation from the edge of the column of 20 cm, it is necessary to install a section between two supports. For this, welding is used. The next step is to paint the fence.
Fence cost

Quite often, summer residents and owners of territories within the city are wondering how much a galvanized mesh fence costs. If the width of the material is 1.5 m, then you will have to pay 310 rubles for such a fence. per running metre. Using a grid whose width is 1.8 m, specialists charge 390 rubles for their services. per running metre.
Broach reinforcement will cost the consumer 40 rubles. per running metre. You may also be interested in the question of how much a fence costs. If its length is 50 m or more, then 355 rubles will have to be paid per linear meter. This price is correct for structures in which the reinforcement is installed in one row. The mesh width is 1.5 m. This parameter will be equivalent to the height of the fence. If it increases to 1.8 m, then the cost will rise to 415 rubles. The price includes metal supports, broach reinforcement in one row, galvanized mesh and installation work.
Mesh cost
If you decide to do the work yourself, you can ask about the cost of the grid. If the diameter of the wire used is 1.2 mm, and the cell size is 10 x 10 mm, then you will have to pay 455 rubles per square meter of material. The price per roll in this case will be 6825 rubles.
The galvanized mesh, the cell of which is 20 x 20 mm, will cost the consumer 234 rubles. per square meter. In this case, the diameter of the wire used is 1 mm. But the price per roll will be equal to 7020 rubles. With an increase in the cell size to 25 x 25 mm, the cost rises to 416 rubles. per square meter. In this case, the wire diameter is 2 mm, and the price per roll will be 12480 rubles. Welded galvanized mesh 50x50 mm will cost the consumer 312 rubles. per square meter, while the price of the roll will be 7020 rubles, and the diameter of the wire will be 2.5 mm.
Conclusion
Galvanized welded mesh in rolls will be an excellent material for making a fence. It is easy to cut, it is quite simple to pull it between the supporting posts, in addition, it is durable. And in some cases, the grid is the only right solution when it is necessary to protect the site, but it is required to provide access to sunlight.
Are you planning to make a fence from a welded mesh with your own hands for a summer residence or a private house? You need to know some of the features and rules for installing this design.
Despite the low cost, the welded mesh fence is durable and provides good protection against penetration.
How to choose a welded mesh for mounting a fence
So, you started in the country or your land and are inclined in favor of this material. This fence is a great option for both home and garden. But first, you should make a choice of material, since the welded mesh for the fence can be different. The quality of the design depends on the specific type.

The sectional fence made of welded mesh is lightweight, durable, and resistant to various adverse weather conditions.
- Non-galvanized mesh. This is the simplest and least expensive material. This mesh is made of steel. The diameter of the rods is approximately from 1.2 to 5-7 mm. But the lack of coverage is a vulnerability to negative external factors.
- Galvanized mesh. A layer of zinc is applied to the steel elements. Do this either before welding or after it. If you started a not too expensive construction of such a fence for a summer house or a house with your own hands and count on the durability of the structure, then this option is optimal.
- Polymer coated mesh is protected from corrosion and other factors.
- Polymer coated galvanized mesh is the most durable, strong and high-quality option. But the price of such a fence will be higher.
Installation of a fence of their welded mesh: tools and main steps
If you decide to install a mesh fence for a summer residence or at home, then first of all, stock up on all the necessary tools, materials and fixtures.
So, you will need:

The pillars should be located at the same distance from each other, and it is also desirable to have the same height.
- metal poles for the frame;
- fasteners for poles (pole bases, connecting clips, brackets with nuts and bolts or U-shaped clamps);
- screwdriver;
- concrete or cement mixture for the foundation of each pillar;
- rope;
- roulette;
- pegs;
- building level;
- drill or bayonet shovel for digging holes for poles;
- sand;
- cement composition;
- water.
Installation sequence.

The installation of any fence begins with marking and setting out the fence line in nature with the help of pegs, rope and tape measure. To install the poles, you will need a professional level.
- Where to start building? The first of the welded mesh is markings. Use pegs and a rope for this (and first outline the perimeter, indicating the location of the fence). You need to measure the distance between the holes with a tape measure. The distance from one pillar to another will be equal to the width of one sheet, but you need to take into account the diameter of the pillar and the margin for the foundation. For example, with a cut width of 2 m and a pole diameter of 10 cm, measure the distance between the supports, which is 2.15-2.20 m.
- We continue the construction of a fence from a welded mesh with our own hands. Now you can start digging holes. Their diameter should be 1-3 cm larger than the diameter of the column (taking into account the concrete or cement base-foundation). It is most convenient to do this with a drill, but if it is not available, a bayonet shovel will do. The depth of one hole should be about a quarter of the length of the post. But consider the depth of soil freezing (the larger it is, the deeper the pits will be). Usually the pillars have a height of 2 m. In central Russia, winters are very severe. it turns out that 10-20 cm should be added to 50 cm (a quarter of the height of the support). This will be the depth of one hole.
- Now you can proceed to the installation of support pillars. Pour cement mortar into the pit. To prepare it, mix one part water with one part cement and three parts sand. Then insert the post (some put it in a special base). Level it with a level (hang it from the top of the post and make sure the level is exactly perpendicular to the ground and parallel to the support), secure with spacers and leave to set the base.
- After about a day (this is the time it takes for the foundation to solidify), you can proceed with the installation of the grid. It can be installed using special fasteners (brackets, clips, and so on) or using U-shaped clamps. Use a screwdriver for fastening. It is better to fix the mesh in two places of support, and for greater strength even in three. If you do not cut the mesh into sheets, but fasten it with a roll, then use staples for this. Pay special attention to fasteners, because the durability and strength of the structure depend on it.
- Completes the construction of the fence with his own hands painting it, although it is optional.
A metal fence is installed to protect your property.
This is its main function, but a modern fence is usually installed
with an eye on the "appearance" of the house, landscape design and other details that ultimately create what is commonly called an individual style.
Therefore, when choosing a fence for your home, it is very important to take into account such moments as: the combination of the style of the fence with the style of the house, the strength of the structure, the connections of all parts of the fence, the presence of an anti-corrosion coating, etc.
High-quality 3D metal fences are one of the strongest and most durable types of fences.
Therefore, it is recommended to install a 3D metal fence.
The fence serves as protection and is an external manifestation of the quality of life, the hallmark of the house, the style of its inhabitants. A modern and stylish fence can be the pride of the owner.
Fences can be very diverse, as well as their purpose: protection from gusts of wind, child safety, hiding not too beautiful places of ownership - each of these cases requires its own individual approach.
Our company presents 3D welded fences on the Russian market.
Sectional fence made of 3D welded mesh in terms of durability it is not inferior to a brick or stone fence.
The fencing elements are industrially manufactured from high-quality steel on automatic machines. Installation of a panel-type fence is much faster than the construction of any other capital fence.
Purpose of panel welded fences 3D:
- cottage villages - fences for cottages and houses;
- fencing for railway, highways;
- park areas;
- fencing of industrial facilities;
- administrative buildings and territories;
- sports facilities and territories;
- car parks and car dealerships;
- storage area fencing.
Advantages of 3D welded mesh fencing:
- reliability and quality;
- high color fastness;
- does not require maintenance;
- ease of installation;
- cover warranty - 10 years.
Durability of 3D welded railings:
Durability and high quality of products is achieved thanks to a special steel processing technology - microcrystalline phosphating. Microcrystalline phosphating is a technology recognized and used in the automotive industry. Unlike conventional amorphous type phosphating, this technology can guarantee the high quality of products and increase the durability of products by 3-4 times.
To date, welded fences are presented in the most popular
on the Russian market color: moss green (RAL 6005).
All profiled products are covered by a company guarantee.
3D welded railings mean reliability, quality and ease of installation.
Welded mesh for a fence is one of the types of material for fencing a land allotment. Its external characteristics are simple, but the design is more durable than a chain-link. In addition, you can do the installation yourself, as the material is quite lifting.
What are the types of grid
Welded mesh fencing can have different mesh sizes, wires and overall section dimensions. There are several types of wire, and the method of making the mesh also varies.
Main settings
The strength of the canvas is determined by two characteristics: the dimensions of the cage, the diameter of the wire. The smaller the cell of the mesh material, the stronger the fence will be. But the material with such parameters costs more. Standard cage: 50x50 mm, 100x100 mm (the most common), as well as 150x150 mm, 200x200 mm. The metal mesh can be light or heavy depending on the thickness of the wire.
In the first case, the diameter varies between 3-6 mm. Heavy fences are erected using mesh material with a wire thickness of 8 to 40 mm. Section dimensions (standard dimensions): 1000x2000 mm, 1500x3000 mm, 2000x3000 mm.
Mesh types
There are several types of mesh material made by resistance welding:
- Non-galvanized - uncoated, made using black steel wire;
- Galvanized - during production, wire without special protection or galvanized material is used, respectively, in the first case, an anti-corrosion coating is applied after the fabric is made;
- Polymer mesh - the finished structure is coated with polymers, both galvanized and non-galvanized wire can be used as a base.
The scope of these varieties: strengthening the roadway and other structures, wall decoration, construction of fences. The polymer mesh has proven itself well in domestic conditions - fences are erected with its help.
The best characteristics of galvanized material with a polymer coating: sectional fence will last longer due to double protection against corrosion, and it is more attractive in appearance.
Positive qualities of a welded mesh fence
It is necessary to highlight the light transmission capacity of the structure. This feature allows you to set up a garden or vegetable garden next to the fence, as the grid eliminates the possibility of shading the area. Do-it-yourself fence installation is faster and easier than most other analogues (made of decorative brick, natural stone). And the cost of the fence is lower.
The main stages of the construction of the fence
A welded mesh fence is built using the following materials: sections of the fence cloth; metal poles with embedded parts, but they can also be fixed with your own hands using a welding machine; concrete mortar.
Scheme of a sectional fence made of welded mesh
Main tool: welding machine, screwdriver (if the sections will be attached to the poles by means of a threaded connection), tape measure, building level, shovel / hand drill.
Step 1: Marking work
A fence made of welded mesh, as well as any other fence, requires preparatory work: cleaning the territory, checking the difference in the levels of the soil surface, marking.

The construction of the fence begins with the markup. To create the desired line, pegs, rope and tape measure are used.
First of all, you should outline the line of the fence. To do this, stakes are driven into the corners with their own hands, between which a rope is stretched. Next, you need to determine the location of the fence posts. They are located at a distance that is 15-20 cm more than the length of the section. The stock is allocated for embedded parts, through which the fence is attached.
Step 2: Installation of support legs
A welded mesh fence is usually erected using metal poles. They are strong enough to withstand the construction of a section made of frame and mesh. In addition, in most cases, the fastening of the fence cloth is carried out by welding. Another caveat: a metal fence lasts much longer. And if the wooden posts fail, you will have to repair the fence ahead of time.

For the preparation of cement mortar, one part of cement, one part of water and three parts of sand are used.
A sufficient section of the pillars for a web of wire 3-5 mm thick is 60x60 mm. The depth of the pits for the support posts is determined on the basis of data on the structure of the soil and the depth of its freezing. On average, for a mesh fence, a columnar foundation is set up 0.8-1 m deep.
It is important that the support be buried to a level equal to a third of its length. Pits are dug with a shovel, but you can use a hand drill. This will speed up the work. The diameter of the holes in the soil should be several centimeters larger than the posts.
Fences made of welded mesh are often installed by the method of complete concreting of supports. This further strengthens the structure. For the manufacture of the solution, sand, cement (3: 1) are used. Then the hole is poured with a cement mixture with their own hands, a pole is installed there and leveled. Spacers are used to fix the support. After a few days, you can continue building the fence.
Step 3: Fence fastening
The use of rolled mesh requires the use of special clamps or staples. In this case, a solid fence is attached. If you plan to use a stronger mesh, prepare a frame made of a corner or a profile pipe.

Fasteners of 4 pieces are installed on each post, with which the grid is attached.
The main material is welded to it with their own hands. The finished section is attached to embedded parts using a welding machine or by using a threaded connection (bolts, nuts).
The use of galvanized mesh does not require coating with paints and varnishes. But if the section is made by hand, the protective coating can be damaged during welding. Then it is necessary to provide additional protection with paintwork materials.
The use of welded roll mesh involves two solutions: do-it-yourself cutting of the material for the manufacture of sections; installation of a fence cloth using clamps, while cutting it is not necessary.
If galvanized mesh is used for the second option, then the installation process will take less time, since there is no need to prepare sections. But in this case, the fence will lose its strength.
But the thicker the wire used in the production of the material, the stronger the structure will be. The dimensions of the cells of the roll mesh are also responsible for this quality.
The fence has two main purposes: to form the boundaries of the site and to create a barrier against the entry of unwanted guests. The appearance of the building is in third place. But today, more and more often, this criterion moves into fourth place, displaced by the cost of the protective structure. Therefore, more and more often, the owners of suburban areas give preference to mesh fences. They have high reliability, but low price.
mesh fence
It is necessary to divide the mesh into two groups that differ from each other in the source material. These are metal meshes and plastic ones. The latter are rarely used for fencing sites, because they do not have sufficient strength. They are used for fencing flower beds, garden plantings and other structures.
In this regard, metal protective structures made of meshes are used everywhere. Because they have high technical and operational characteristics. Today, two types of nets are used for fencing: chain-link and welded.
They differ from each other in manufacturing technology. The first is made by the weaving method with the formation of cells, the second by the spot welding method, in which metal bars are joined.
It cannot be said that a welded mesh is better than a chain-link. Both have fairly high strength characteristics and almost the same advantages and disadvantages.
Advantages and disadvantages of welded mesh
The main advantage of fences made of welded mesh is low price with high technical characteristics. Next, we note:
- the ability to dismantle the mesh and use it elsewhere for the construction of fences or other needs;
- ease of installation;
- a huge variety of proposed sizes, which makes it possible to build fences of different heights;
- easily tolerates natural loads;
- transparency of the structure, allowing air and sunlight to pass through, which is an important factor for some areas.
With regards to the shortcomings, the last plus is regarded by many as a minus. Not everyone likes when their personal life is wide open. A transparent design contributes to this. The second negative is not quite a presentable appearance when compared with other protective structures, such as brick, stone or wood.

Not the most presentable
Varieties
The classification of welded mesh is based on the source material. There are three categories here:
- Manufactured from carbon steel without protective coatings. Weld it from metal rods with a diameter of 1.2-10 mm. Such products are subject to metal corrosion, therefore, over time, it becomes rusty. This type of metal mesh must be painted to reduce the wear process. Staining is carried out with an enviable frequency, which increases the cost of maintaining the protective structure.
- Galvanized. It is welded from galvanized wire, which practically does not rust under the influence of natural loads. It has a fairly long service life, there is no need to paint such a product. And yet it is not the best material.
- Not galvanized with a polymer coating. In fact, this is the first option that is covered with a polymer layer. The finished mesh is simply dipped into the polymer mass and then dried. To give the product a more presentable appearance, it is covered with paint using powder technology. This further increases the protective qualities.
- Galvanized with a polymer layer. This is the pinnacle of the quality of metal meshes, but also the pinnacle of the price component. Welded meshes of this type can be attributed to materials from the category with an unlimited service life, although manufacturers guarantee 65 years. At the same time, this type of material can easily withstand the temperature range from -55C to +65C and humidity not more than 97%.
Note that welded meshes are treated with zinc using two technologies. The first is the manufacture of a mesh product from galvanized wire, the second is made of carbon steel, and the finished mesh is subjected to galvanizing. The latter option is better, because in the first technology, welding heats up the zinc layer of two rods, which reduces the protective characteristics of the material. Often the zinc layer simply peels off from the body of the base metal.
In the construction market, the welded mesh is represented by two positions: rolled and in the form of layers. The second option is easier to install, because it is a finished product with its own dimensions, under which you just need to install support posts in increments equal to the width of the seam.

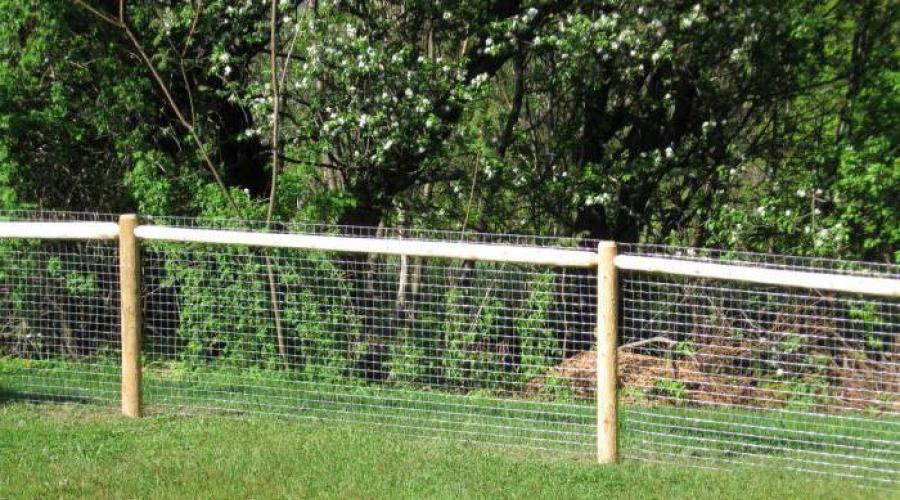
Galvanized fence with white polymer coating
Fence installation
Consider three installation options: layers or, as they are called, sectional structures and a roll.
Option number 1
First of all, you need to prepare all the required materials. Namely: a welded mesh, the layers of which are selected to match the height of the future protective structure, and support pillars, preferably from a profile pipe with a section of 50x50 mm and a wall thickness of 2 mm. Pipes must be closed with metal square plugs on both sides (they are welded by electric welding) and painted with powder paint to match the color of the entire protective structure. Today, plastic plugs are sold in different sizes, shapes and colors.
The next stage is the planning of the boundaries of the site. To do this, pipes or fittings (can be used) are clogged in the corners of the site, which are tied with twine. The installation step of the support posts must be determined during the design of the fence, it is on the basis of this indicator that the layers are selected, or rather, their width. The standard step is 2m.

Under the racks it is necessary to drill wells half a meter deep
The installation sites of the supports are determined, in which holes with a depth of 0.5 m are immediately drilled. For this, a drill with a diameter of 200 mm is used. Prepared shaped pipes are inserted into the pits and, with the help of a sledgehammer, they are hammered to a depth of 1 m. It turns out that half a meter of the pipe will be driven into the ground, half a meter will be concreted.

Pillars are hammered with a sledgehammer
Each pillar is set vertically using a building level and concreted with a mortar of the classical recipe: 1 part of cement, 2 parts of sand, 3 parts of crushed stone. All supports must be set to the same height.
Now we need to install mesh layers. For their fastening to the poles, special U-shaped clamps are used, connected on the reverse side with a mounting plate, which is supported by two nuts. The number of clamps is 4 for each post. In this case, the grid must be strictly set in height, taking into account the installation of each layer.

Fastening mesh layers with U-shaped clamps
There is another option for fastening work, which is a long bolt and a special shaped washer. To do this, the racks at the places of fastening of the layers are drilled through to the diameter of the fastening bolt used. The layers are installed, bolts with washers are inserted into the holes, which are tightened with nuts on the reverse side. It is recommended to place a rubber or plastic gasket under the washer.

Mesh fastening with a bolt and a shaped nut
And another type of fastening is a special clamp that works for tightening. Choose it according to the size of the profile pipe used for the support posts. They compress both the pipe and the mesh laid on it with a clamp. Tightening is done with a bolted connection. The photo below shows such a collar.

Clamp for fastening the welded mesh to the support posts
We offer you to watch a video on how to properly mount a welded mesh fence.
Attention! You can not drive the pillars into the ground. They are simply installed in a prepared hole 70-80 cm deep and poured with concrete. The main thing in this process is to install supports under the racks so that they support the supports in a vertical position during the drying of the concrete solution.
Option number 2
The installation sequence of this type of fence is different. And the mounting method is different.
You will need pipe-racks, in which holes are made every 40-50 cm, where special rivets are driven. The latter have an internal thread for fasteners. The rivets are driven into the holes with an interference fit so that they do not rotate at the installation site.
Now the two posts are laid on the ground parallel to each other. A welded mesh is laid on them, which is attached to the pipes with a bolt and a special washer.

Fastening to racks with special fasteners
It turns out a finished section, which is installed in prepared pits and concreted as a separate element of the barrier structure.
Option number 3
Consider how the roll-type mesh material is attached.
- The edge of the product is tied to the first post with a knitting wire.
- The roll unwinds to the second rack.
- Stretches to the max.
- It is tied to the rack with wire in several places.
And so to the end of the fence. To prevent the mesh from sagging, you can pass a thick wire or steel rods along the upper and lower edges. This is how work is done to install a grid made of thin steel bars. The structure with greater strength is attached to the racks in other ways.
If the mesh is welded from rods of not the largest diameter, then you can try to attach the finished product to the pillars with metal roofing screws. Not the best option, because the head of the self-tapping screw is of small diameter, so a tight fit to the surface of the profile pipe is not guaranteed. There is a high probability that the mesh will pop out from under the fasteners in the process of wind pressure or ground movement. You can try to put a wide washer under the screw, but this is not the best solution. Although both methods are often used when installing grids made of small wire.

Fastening to metal risers with roofing screws
It is optimal to make a rectangular washer into which two self-tapping screws will be screwed at once. The mesh rod located on the post will remain between the two fasteners, and this will not allow it to move along the post. And the washer will keep it from moving in the horizontal plane.

Roofing screw for fastening a welded structure
You can use roofing screws with profile washers, as in the photo above. They simply attract the mesh to the rack, so the washer must be selected according to the dimensions of the profile pipe so that the latter is inside the washer.
The fence assembly technology is almost the same in all the situations described above. But there are many ways to attach a mesh product to racks. Therefore, one is chosen that is easier in the process of doing the work with one's own hands.
Photo gallery

Painted fence assembled from welded mesh on U-shaped clamps

Protective structure made of welded mesh

Fence assembled according to the type of 3D welded mesh construction