L-shaped roof of the house with equal gables.
All boxes of houses in the shape of the letter "G" can be divided into two groups:
1 - the width of the base of the gables is the same;
2 - the width of the base of the gables is different.
The L-shaped roof, depending on this factor, is built in a different sequence.
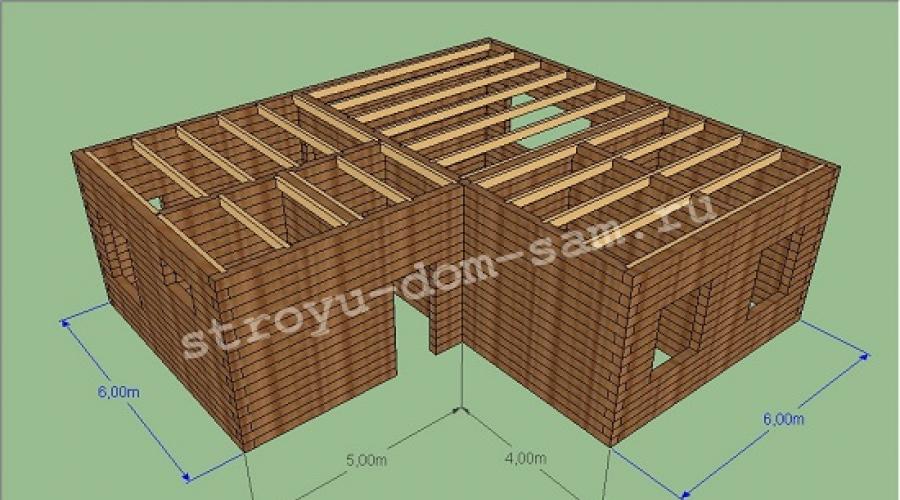
So let's go in order. In this article, we will consider a box of a house with the same width of gables (see Fig. 1). These dimensions are shown in blue in the figure. Our house is made of timber. The floor beams have already been installed. The rafters will be hanging with support on the upper crown of the box (Mauerlat).

Picture 1
In principle, the truss system of an L-shaped roof will be two gable roofs crashing into each other. How are gable roof rafters, we have already seen, so I do not stop there.
STEP 1: We put up temporary racks and a ridge board. They are located strictly in the middle (see Fig. 2):
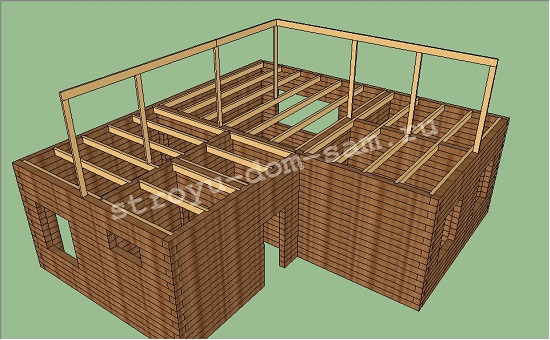
Figure 2
Temporary braces supporting the uprights are not shown in the figure. We made the racks from boards 50x150 mm, the ridge - 50x200 mm. The rafters will also be made of boards 50x200 mm.
STEP 2: We install the rafters of the slopes. We mark the rafter template in the same way as described in the article "Four-pitched hip roof".
First of all, we put the rafters shown in Fig. 3:
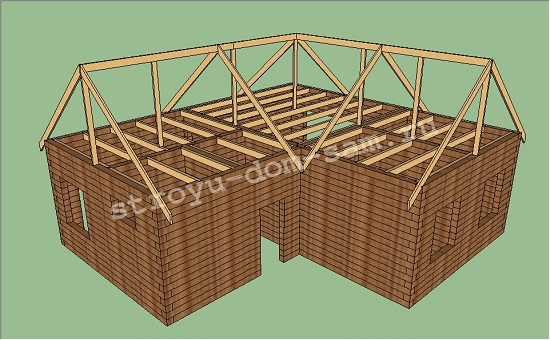
Figure 3
These are rafters on the gables, rafters at the break of the ridge and rafters in the inner corner of the box of the house with opposite ones.
How the rafters stand in the inner corner of the house box is also shown in Fig. 4. The indicated dimensions (0.5 m) are the width of the cornice:
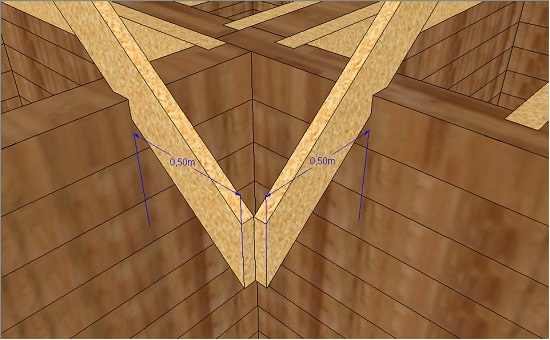
Figure 5

STEP 3: We install the corner rafter on the outer corner of the box of the house. How this is done is described in detail in the hip roof article I linked to above. There you will also find a description of how the sprockets are installed.
STEP 4: We install the corner rafter in the valley (inner corner). It will also consist of two stitched boards with a section of the rafters of the slopes.
To begin with, we fix a small equilateral triangular bar in the corner, made, for example, from a bar 100x100 mm sawn diagonally (see Fig. 6):
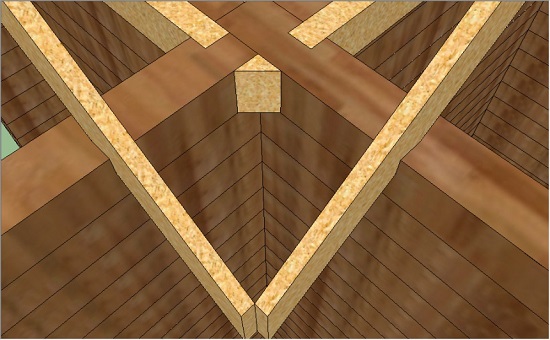
Figure 6
We pull the lace between points "A" and "B" (see Fig. 7):
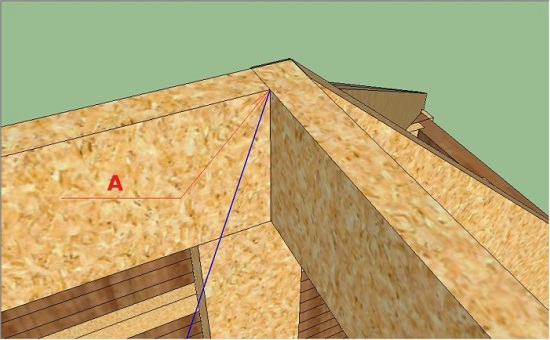
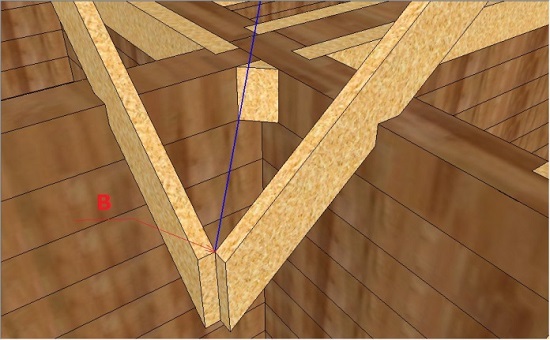
Figure 7
With the help of a bevel, we measure the angle ʺβʺ (see Fig. 8):
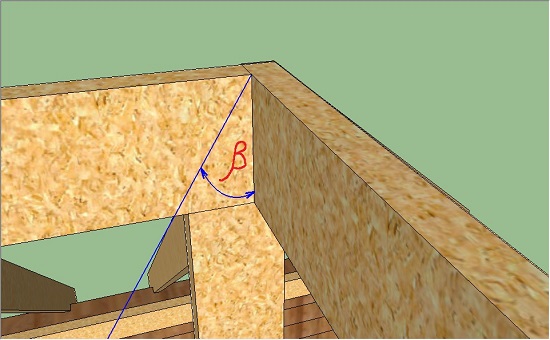
Figure 8
We make a template from a small trimming of a board with a section of rafters (50x200 mm). First, we file the end at an angle ʺβʺ. Then we apply the resulting workpiece to the crown along the stretched laces and mark the second washed down parallel to the ridge board (see Fig. 9):

Figure 9
According to the resulting template, we will mark the upper cuts of the corner rafter. And turning the template upside down, we mark the lower cuts.
In addition, we need to define one more dimension. Again we apply the template to the crown and measure the distance shown in Fig. 10. In this example, it turned out to be 3 cm:
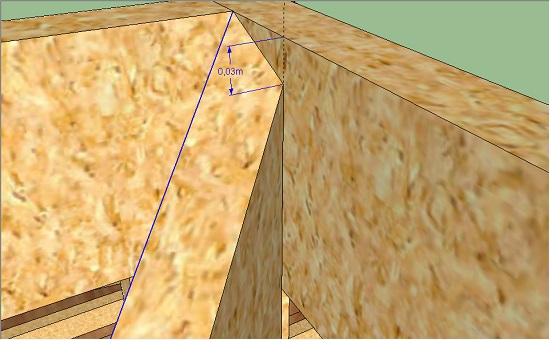
Figure 10
That is how much we will need to chop off the upper edges of all the boards from which the corner rafter will be sewn (see Fig. 11).
This can be done either with an ordinary ax or a chainsaw.
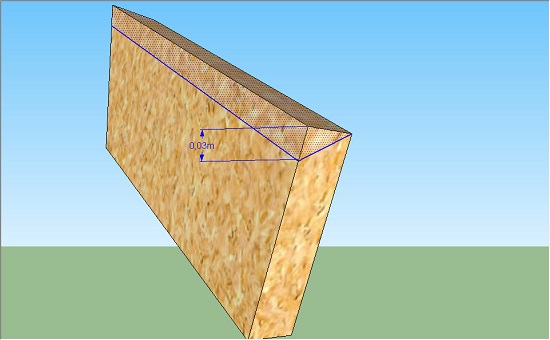
Figure 11
So, for the manufacture of the first half of the corner rafter of the valley, we take a board of the required length, we file the upper and lower ends with the help of a template. We cut off our 3 cm along the entire length of the board. Now it remains to make a drink in the place where the rafters rest on the Mauerlat. To do this, holding the board parallel to the stretched cord, we make markings (see Fig. 12):
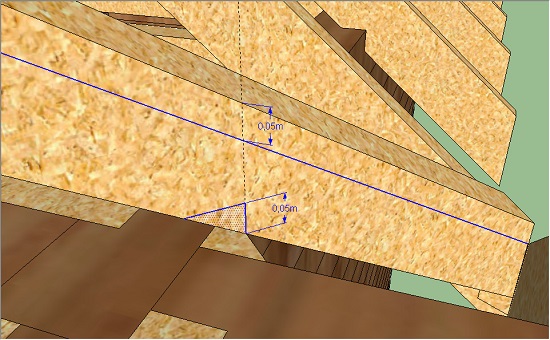
Figure 12
The lace in the figure is shown in blue. We measure the distance that we need to lower the rafter so that it is aligned with the lace. This distance (5 cm) will be the desired depth of gash. Having made it, we put the rafter in place.
The second half of the corner rafter is done in the same way. It is a mirror image of the first. The result is shown in Figure 13:
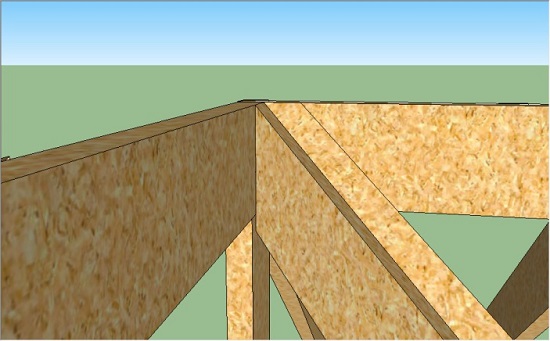
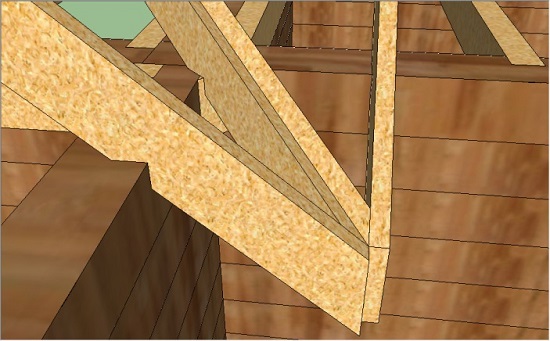
Figure 13
STEP 5: For reinforcement under the corner rafters, we install racks through trusses (see Fig. 14):
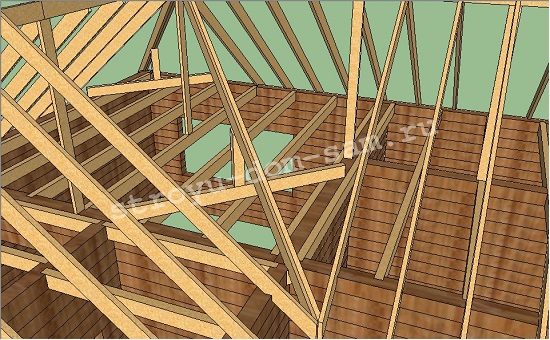
Figure 14
We have sprengels made of timber 100x200, as well as floor beams.
STEP 6: We make and install sprigs (see Fig. 15):
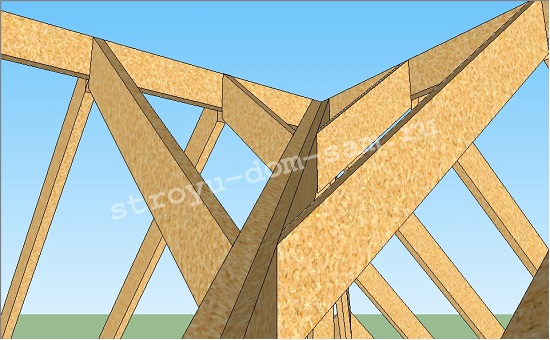
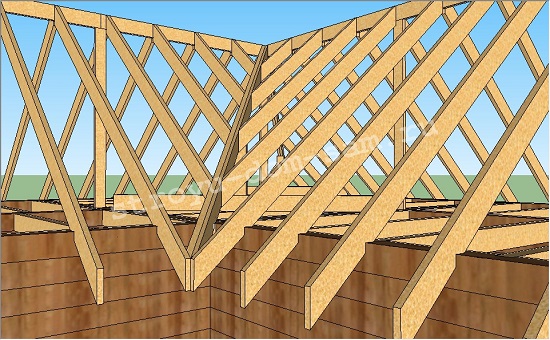
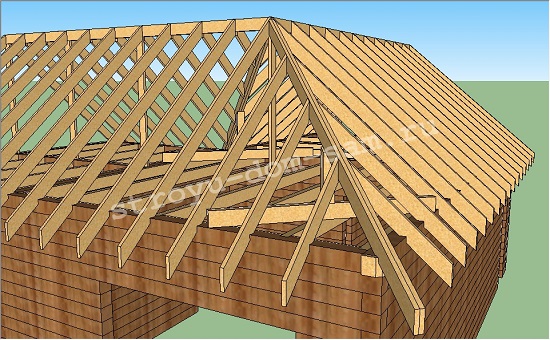
Figure 15
STEP 7: All subsequent steps have already been repeatedly described in previous articles, so I will simply list them: we put puffs (we also tie the corner rafters together with a puff), if necessary, remove the racks under the ridge board (the rafters will be hanging, we talked about this at the beginning of the chapter) , we sheathe the pediments, we make the crate and cornices.
In the next article, we will look at how L-shaped roof on a house with different gable widths.