Do-it-yourself four-pitched roof
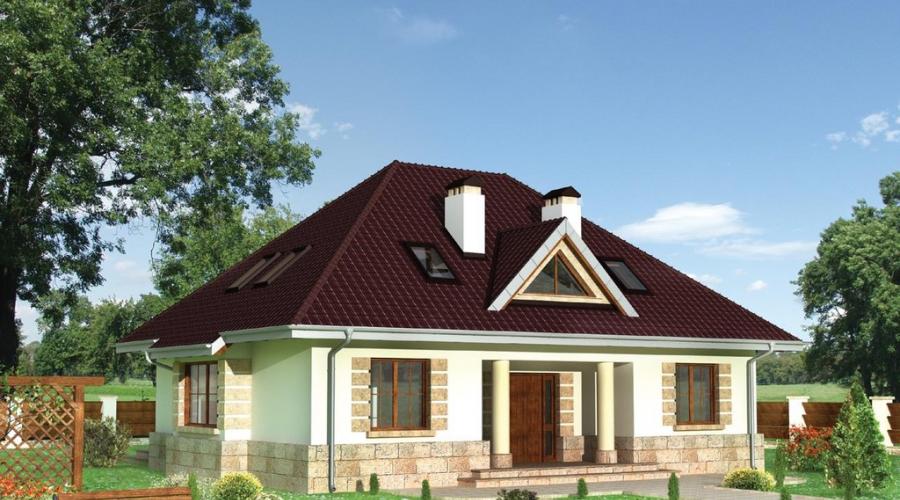
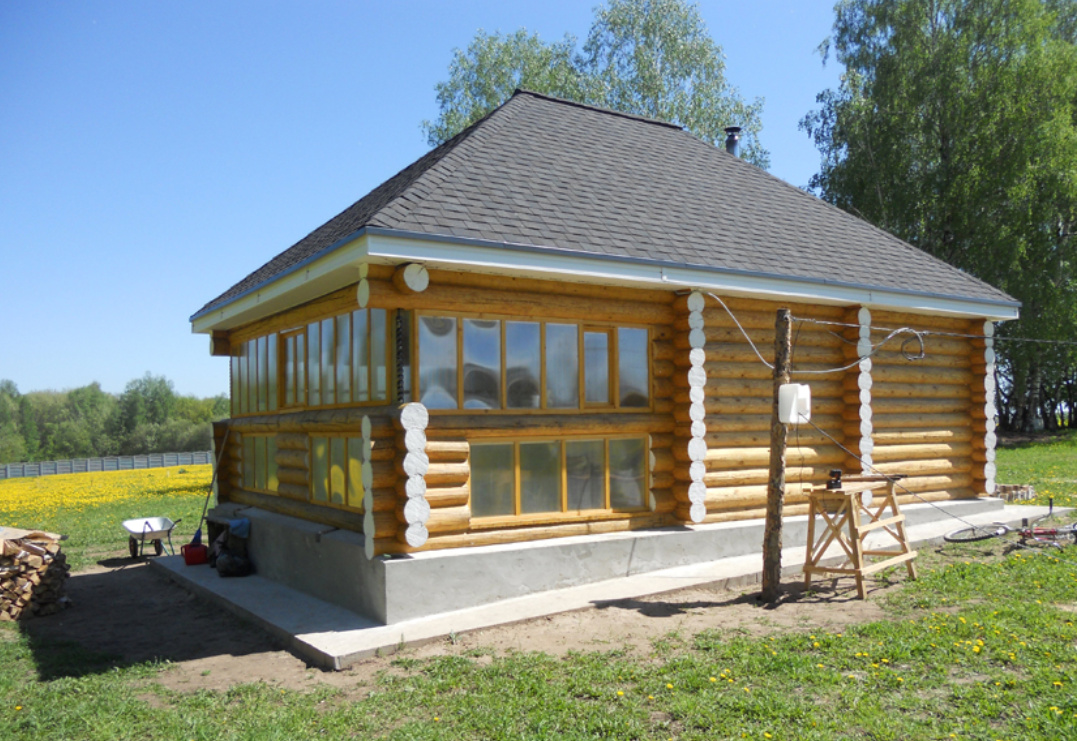
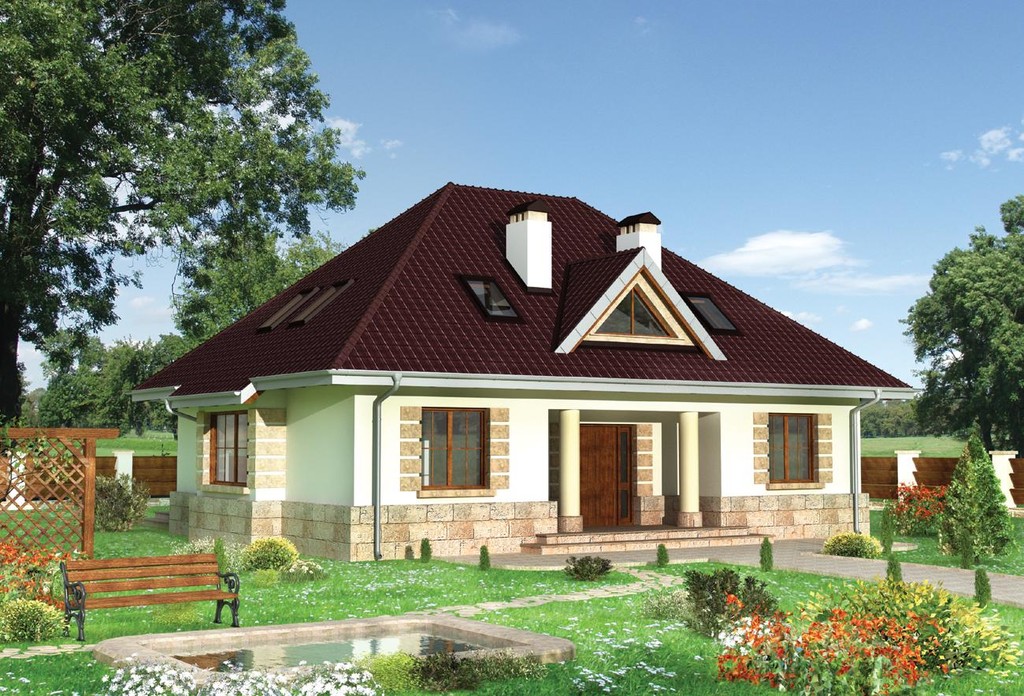
A hipped roof, otherwise called a hip roof, has long been widely used in European countries. Currently, an increasing number of owners of country houses in Russia prefer this durable and reliable roofing system.
The most important difference between the hip roof is that its design does not involve gables. Instead, there are 2 additional ramps.
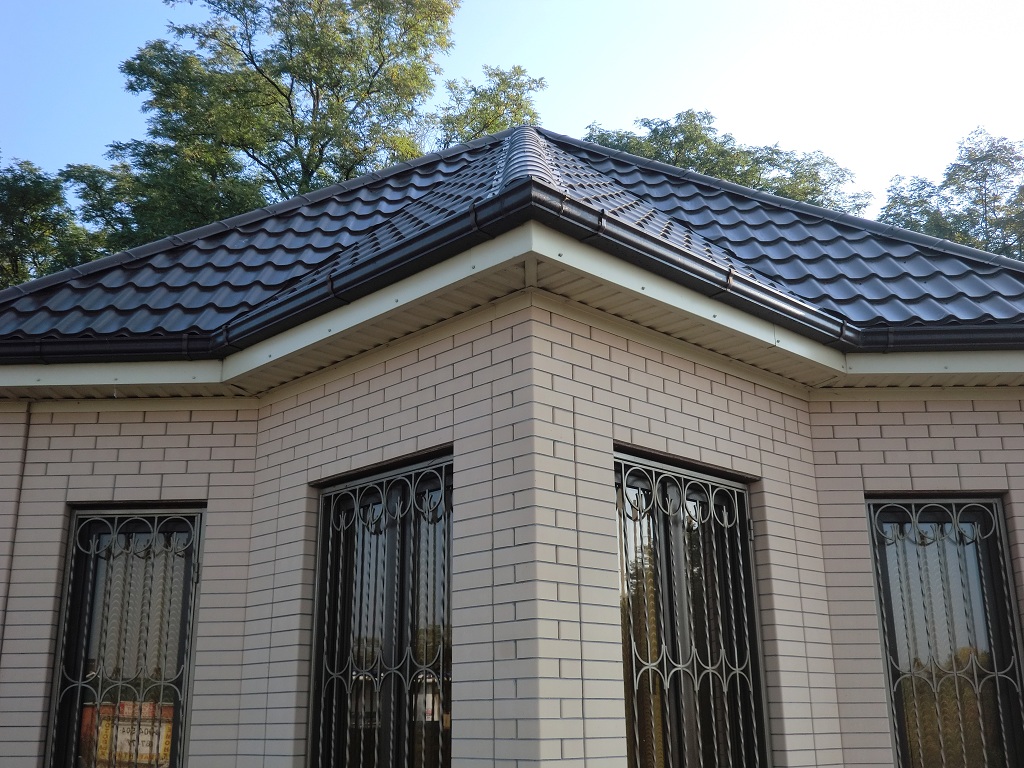
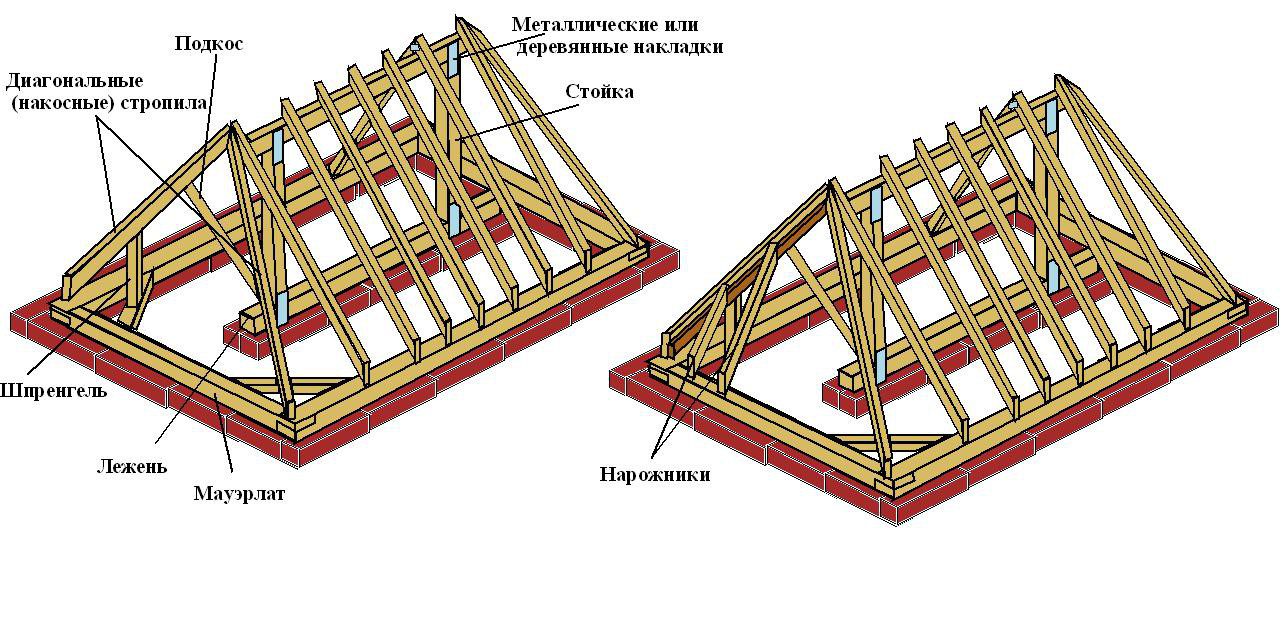
- classic hipped roof (all overhangs are at the same height, all four slopes with straight rafters, and corner ribs originate from the central ridge);
- hipped roof (the corner ribs of the slopes diverge from one point in the center of the roof, there is no ridge run in its design);
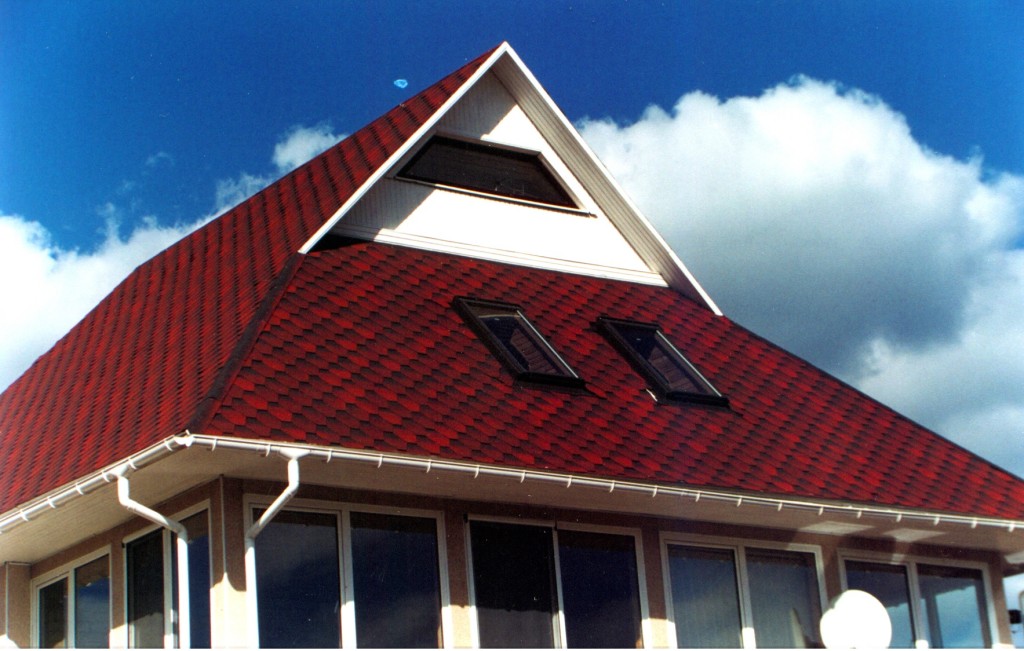
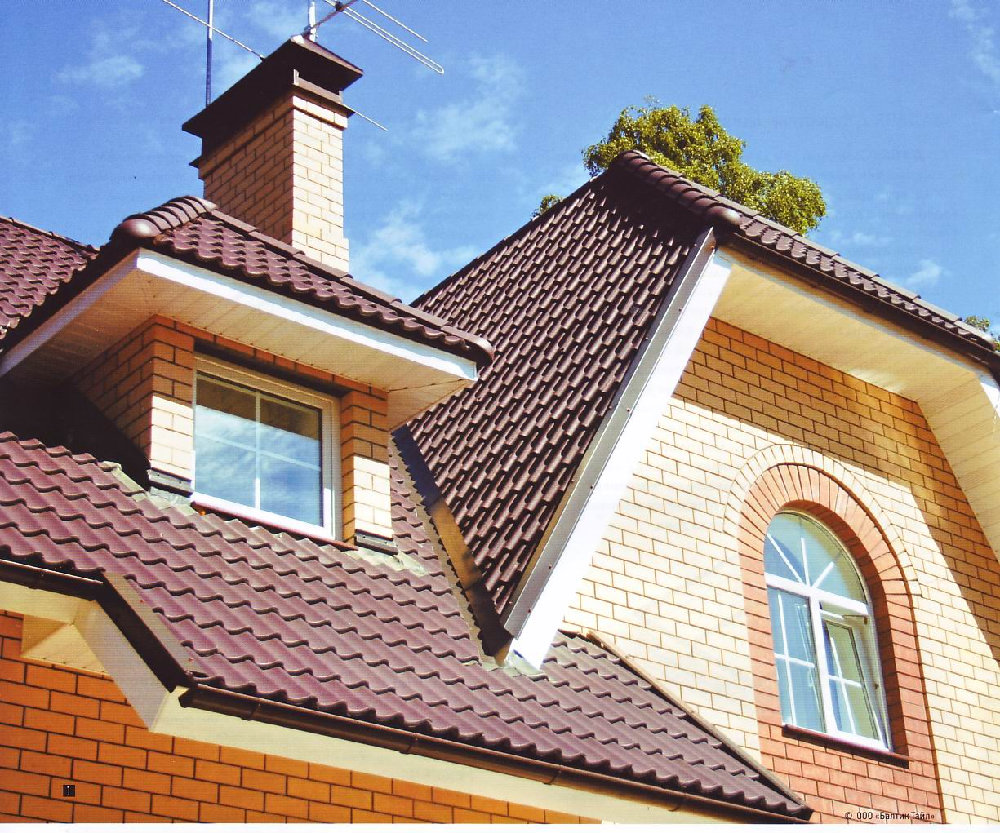
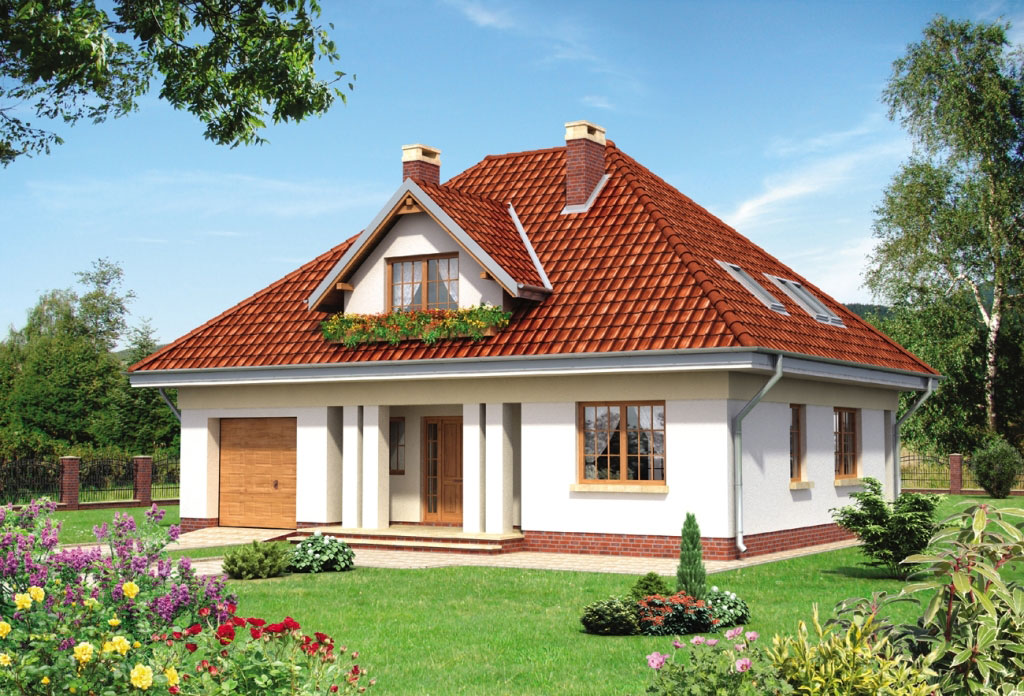
- Danish roof (involves short slopes with gables in the upper part of the roof, which are used for lighting and ventilation);
- half-hipped roof (with a stretch it can be attributed to four-slope roofs, because its design is more like a gable roof - the rafter legs run parallel to each other and are installed on the long side, based on the Mauerlat);
- a sloping roof (attic) corresponds to its name, and has a lot of broken lines in the design, which allows you to build a higher ceiling on an additional floor and make the most of the living space;
- multi-pitched hip roof (despite the fact that the number of slopes is more than 4, the principle of assembling the truss systems of this one of the most complex varieties is no different from the construction of a simple four-pitched roof).
Advantages and disadvantages of a hipped roof
Any roof has strengths and weaknesses in its design. And the hipped roof configuration is no exception, and its advantages and disadvantages are usually considered in comparison with the gable roof - the most common and simple roof option.
The benefits include:
- a properly designed roof resists even hurricane-force winds well;
- little susceptible to destruction of the roof in those places where there are cornice overhangs;
- due to the rigid structure (due to the angular ribs that converge to the support beam of the ridge), it does not undergo serious deformation;
- large overhangs on all sides protect the facade of the building from precipitation;
- the possibility of arranging an additional attic or attic space;
- the attic space, thanks to this roof structure, warms up evenly and retains heat well;
- attic windows can be mounted directly in the roof slopes - there is no need for gables;
- external attractiveness, which can be further emphasized by a well-chosen roofing material.
The disadvantages are:
- the complexity of engineering calculations and construction;
- impressive weight of the structure;
- greater financial costs are expected than with the construction of a gable roof, however, it should be noted that there is no need to spend money on brickwork of gables;
- water penetrates through ajar dormer windows during rain, while with windows located in gable roof gables, this problem does not arise.
Calculation of the slope of a hipped roof
When it comes to the slope of a hipped roof, we mean the slope of the longitudinal (trapezoidal) slopes. To correctly determine this parameter, it is necessary to take into account certain factors individually and in combination:
- the slope depends on the design of the roof and facade of the building;
- the greater the slope angle, the greater the consumption of building materials and the complexity of the work performed;
- the slope of a hipped roof can be in a wide range from 5 ° to 60 °;
- in regions with frequent and heavy rainfall (winter snowfalls are especially worth considering), preference is given to a large roof slope - from 45 ° to 60 °;
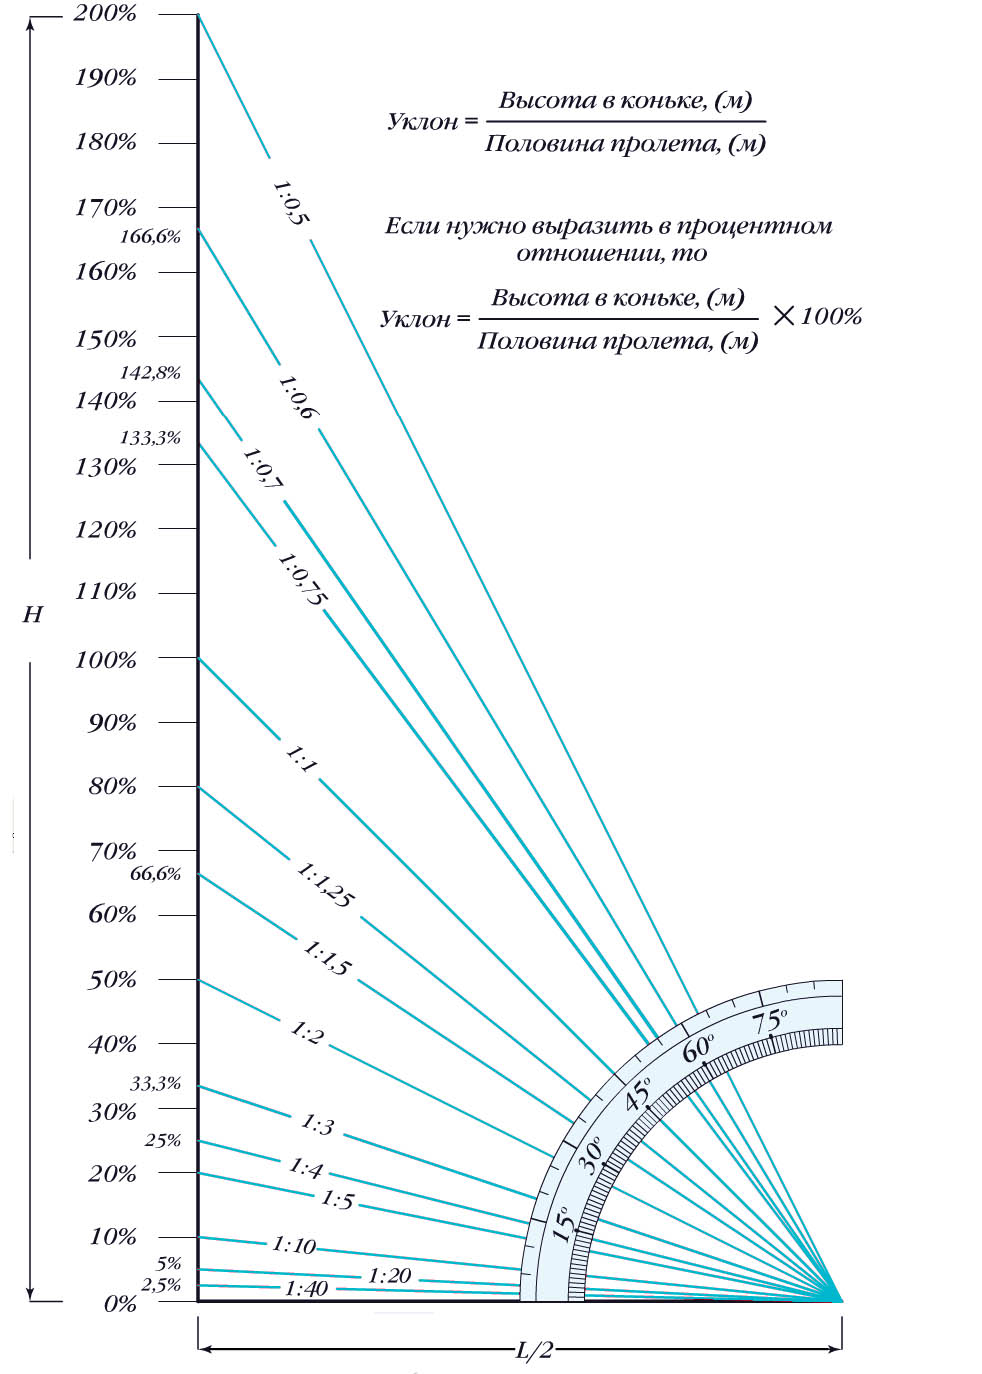
- in areas where strong winds prevail, it is better to choose a small slope angle (from 9 ° to 20 °), which will significantly reduce the windage of roofing materials;
- if roofing materials are collected from piece units, then the slope of the roof slope must be at least 25 °, otherwise moisture will seep through the seams;
- most often, a universal angle of inclination of 20-45 ° is chosen.
Materials for the construction of a hipped roof
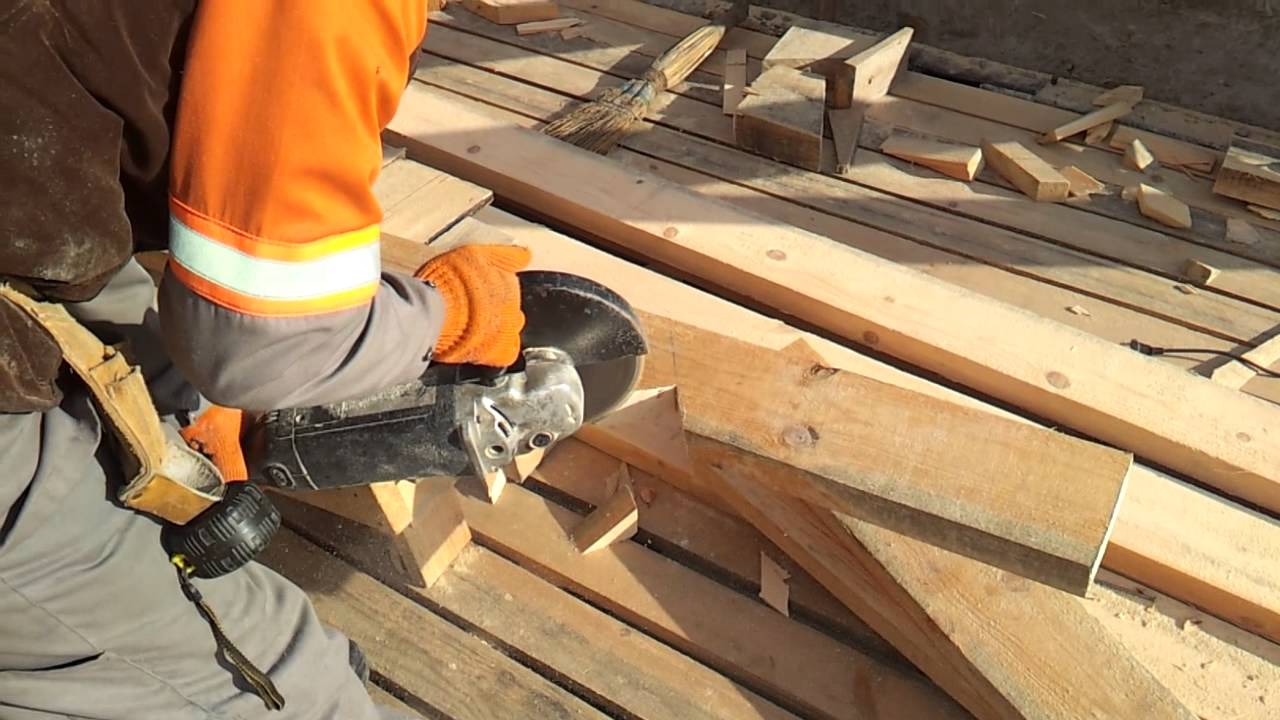
Before approaching the issue of choosing a material, it should be noted that due to the specific design of a hipped roof, during its construction, a considerable part of the building materials will turn into waste. Therefore, the choice should be based on the financial capabilities of the customer. The most economical will be the material that consists of individual elements of a small size.
- coniferous wood (pine, larch) is usually used for rafters;
- you need to pay attention to the quality of lumber (there should be no defects that can affect the strength and durability of the roof);
- in order to avoid deformation of the roof, the moisture content of the wood should not exceed 18-22% (for measurement, you can use the device - an electric moisture meter);
- if the moisture content of lumber exceeds the permissible values, they must be dried (drying is done in the shade, under a canopy and in a draft);
- for rafters, a rectangular beam will be optimal (its cross section is determined during design);
- an alternative to a rectangular beam can be a board with a section of 50 x 100 or 50 x 200 mm (if necessary, use double boards);
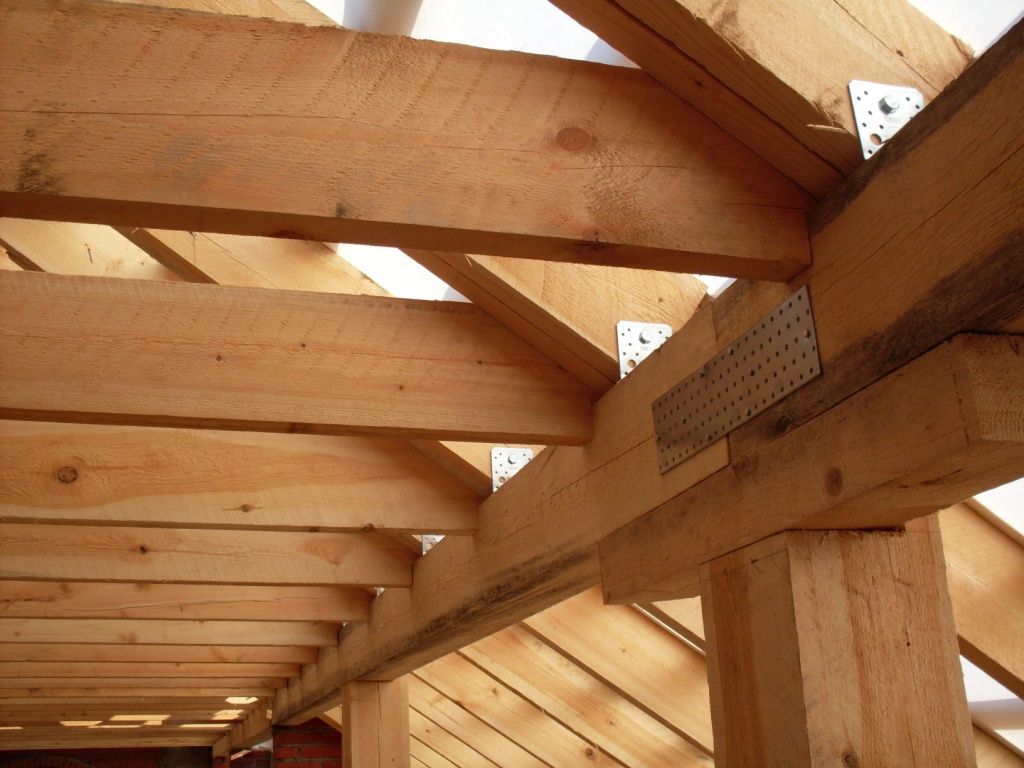
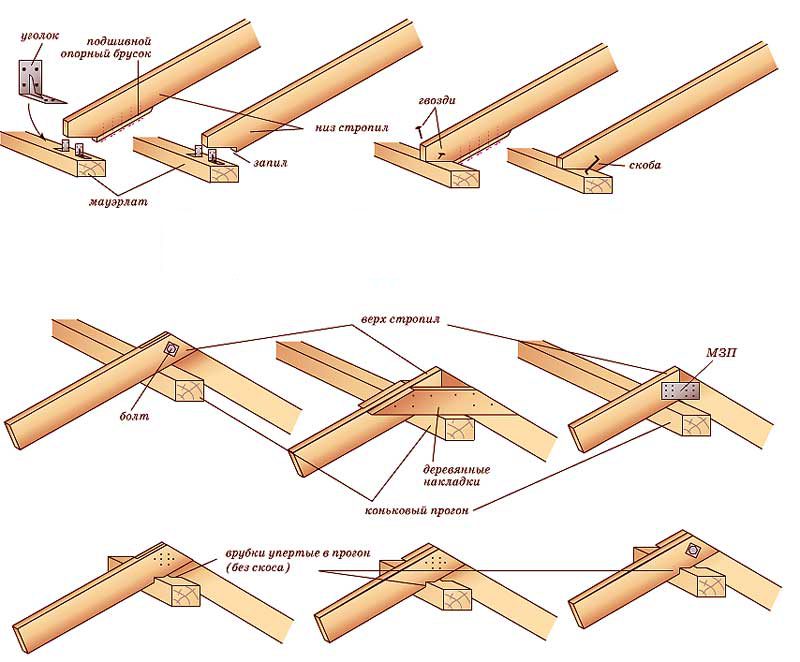
- to increase the strength of a multi-pitched roof, steel fasteners are used (they allow you to keep the relative position of the rafters unchanged);
- supports for the most loaded skates can be made of metal elements;
- Combined structures are distinguished by the highest strength.
Common types of hip roof coverings:
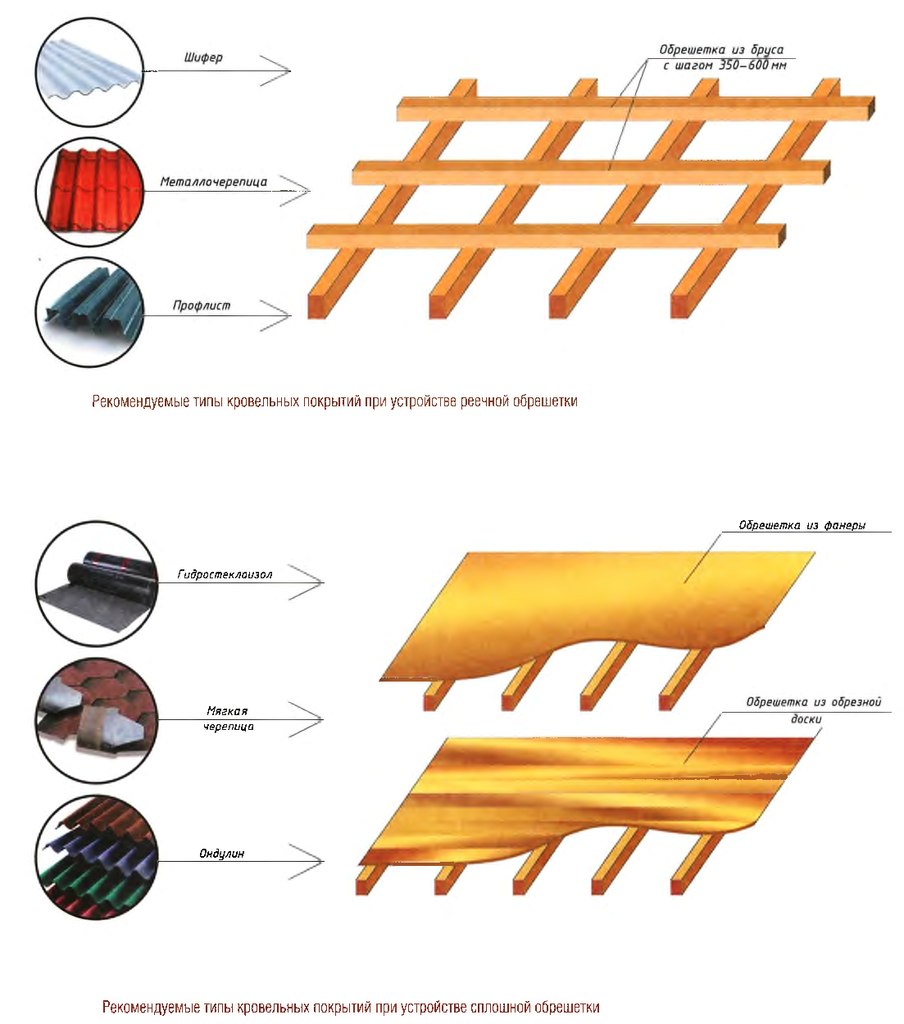
- Flexible tiles. It has several more names: shingle, roofing tiles, shinglas. This is not only the most economical coating option, but also the lightest (1 m 2 weighs about 8 kg). For the production of the basis of such tiles, fiberglass impregnated with bitumen is most often used. It is the base that gives the coating flexibility and elasticity. Outside, flexible tiles are sprinkled with slate, basalt granulator or mineral chips, which not only provides protection from environmental influences, but also gives the roof a variety of shades.
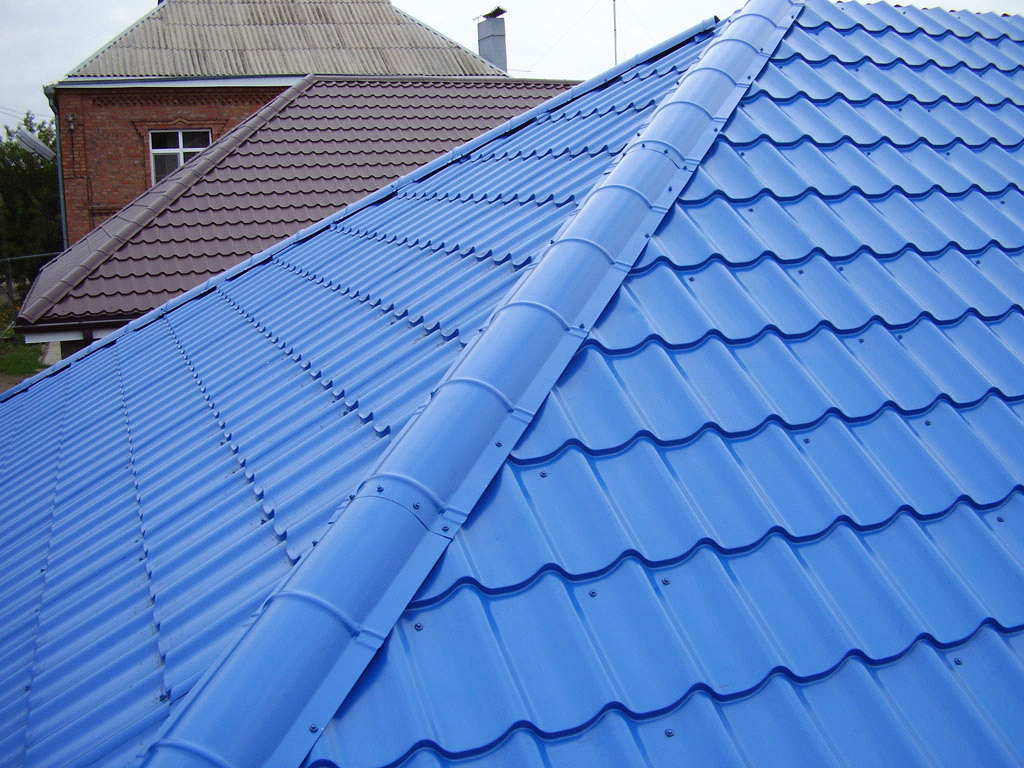
- Metal tile. One of the most popular materials used for roofing. It consists of sheets of galvanized or aluzinc steel. Special layers in the composition of the metal tile prevent corrosion. Its weight is only 4-7 kg per 1 m 2, and the color palette includes up to 45 shades. In addition, the metal tile is an environmentally friendly material. Among the disadvantages of such a coating, it can be noted that it makes a lot of noise when it hits raindrops or hail, and when cutting, a lot of trimmings are formed.
- Ordinary tile. This is a natural material, which is a tile (flat or curly) made of baked clay. This is a durable, but rather heavy material (30-75 kg per 1 m 2). Usually clay tiles are laid on a powerful crate. To create the desired shade, you can cover with colored glaze.
- Slate sheet. This type of material is used to cover the roof with a slope of more than 12 °. If the slope angle is less, moisture may enter through the joints of the slate sheets. The use of slate allows you to significantly speed up the construction time due to the ease of installation. In addition, it is a very economical material. Of the minuses, one can note insufficient strength under mechanical stress, as well as the ability to accumulate moisture, which, with sudden changes in temperature, can lead to cracking.
- Ondulin. For the production of this roofing building material, bitumen, cellulose fibers, mineral additives (as a filler), fiberglass and resins (for strength) are used. Thanks to mineral pigments, ondulin retains its color for a long time. The cost of this material is low, it can withstand significant temperature changes, has impact resistance and moisture resistance.
How to create a pitched roof project
- choose the type of construction;
- analyze the likely loads on the rafters (taking into account the winds in a particular region, the maximum mass of snow, the degree of slope angle of the slopes);
- experienced builders recommend choosing rafters with a margin of safety of 1.4;
- calculate the pitch of the rafters;
- evaluate the bearing capacity of the truss system;
- find out if additional elements are needed when erecting rafters (for example, braces or puffs), because it is they who give the structure the necessary rigidity and strength;
- determine the coating material;
- taking into account the slope angle, calculate the height of the roof ridge.
How to calculate the load on the truss system
There are two types of loads:
- constant (which consists of the mass of the roof, lathing, rafters, insulation and girders);
- temporary (wind strength, abundance of snowfalls, payloads).
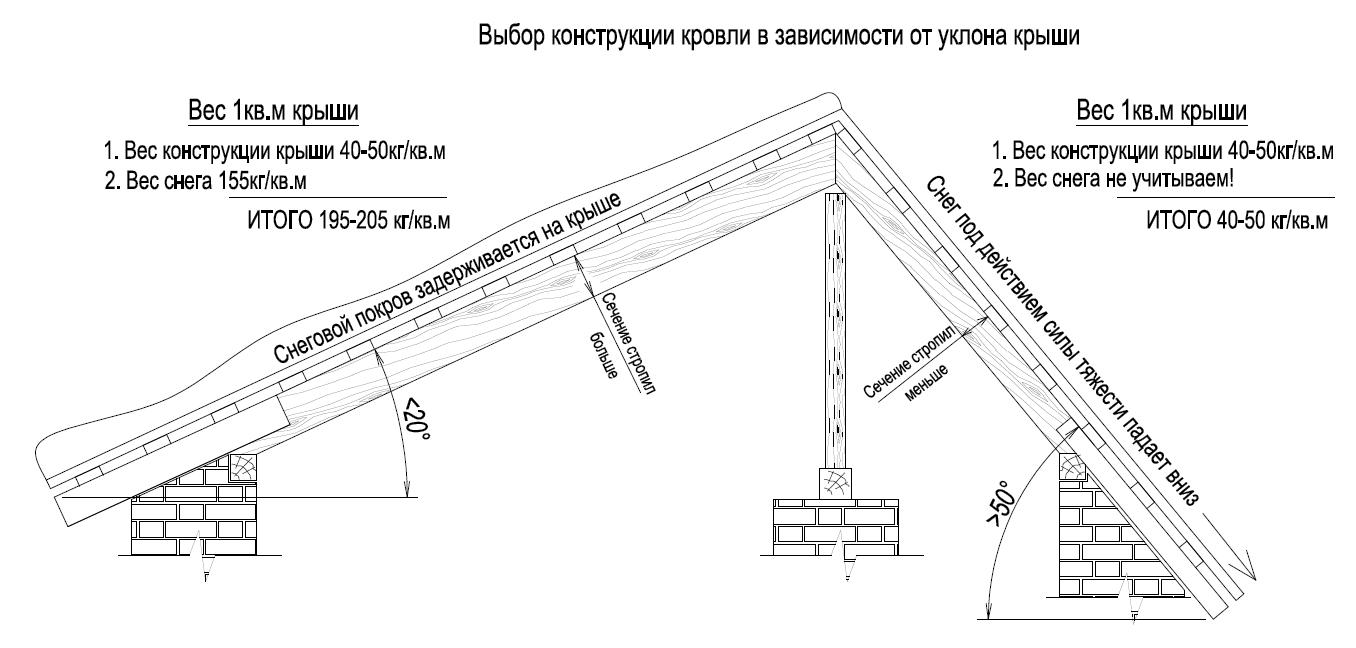
According to building codes and regulations (SNiP), in the middle lane of our country, the snow load is 180 kg / m 2. In case of accumulation of snow mass, this value can increase up to 400-450 kg/m 2 . With a roof slope angle of 60 ° or more, the snow load is not taken into account.
The wind load in the same region according to SNiP is 35 kg / m 2, and if the slope angle is less than 30 °, then this value is not taken into account in the calculations of the roof.
There are additional correction factors for different regions of the country.
The payload is taken into account when ceilings are suspended from trusses or it is planned to install water heating tanks, ventilation devices and other suspended objects.
When designing the truss system of the future roof, special attention should be paid to two main points:
- calculation of the strength of the rafters themselves (you need to make sure that they do not break under the influence of loads);
- calculation of the degree of possible deformation of the truss system with the selected parameters (for example, the deflection of the rafters used for mansard roofs should not exceed 1/250 of their length).
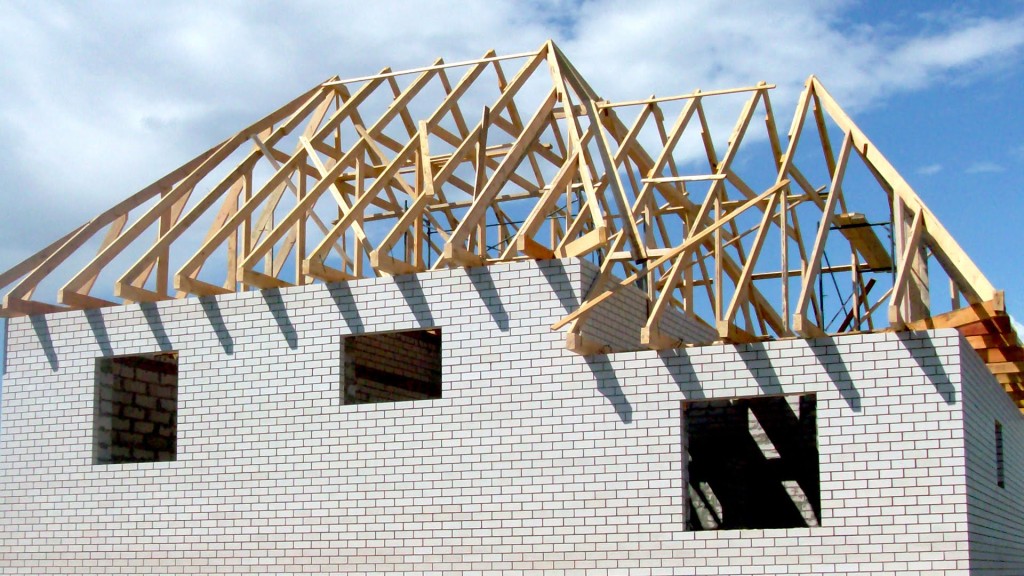
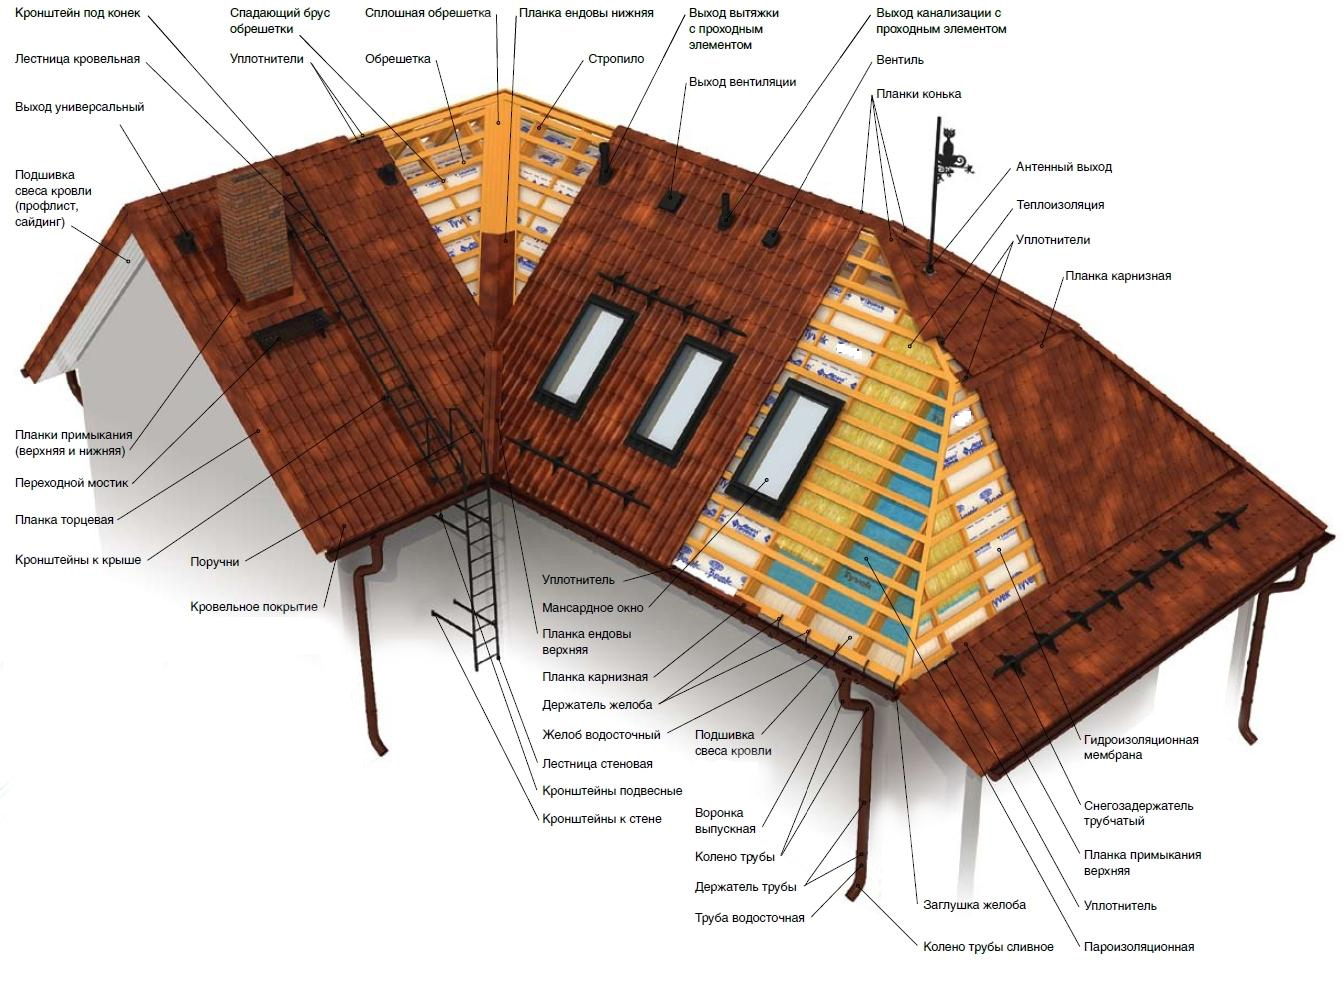
Do-it-yourself installation of a hipped roof
Before proceeding directly to the installation of the hip roof, it is necessary to process all the wooden parts of the future structure with special fire-fighting agents. And on the places of contact of wood with concrete or brickwork, lay rolled insulating material.
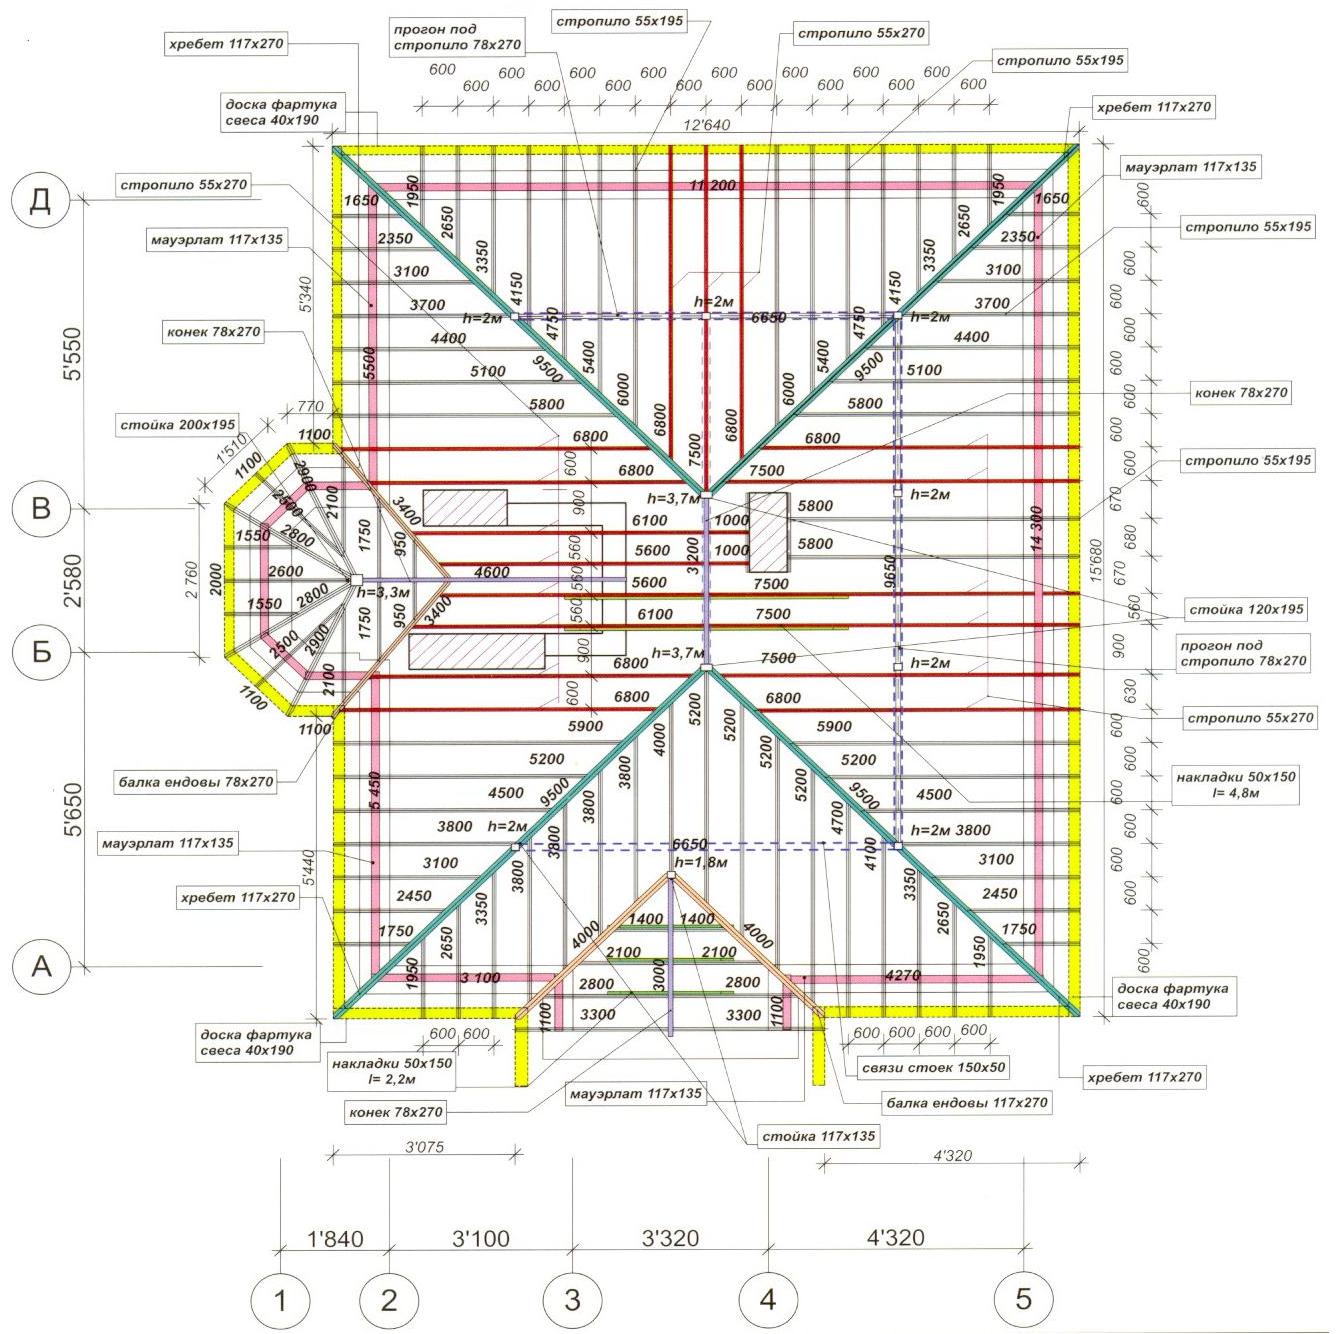
Installation is carried out in the following order:
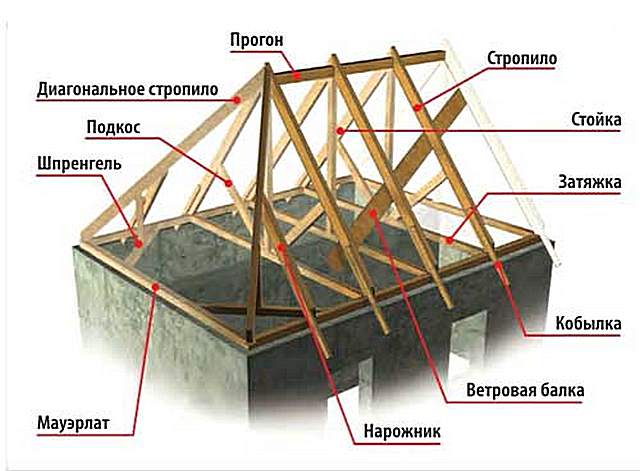
- laying a Mauerlat along the perimeter of the building, which is a support for the entire future system (consists of a bar with a section of 100 x 150 mm or 150 x 150 mm);
- the mauerlat is fastened with studs (threaded from M12 or more) or loops made of durable wire built into the wall;
- installation of a bed (the central beam of the truss system) as a support for struts and racks;
- the central beam is laid on the inner wall of the building or on special brick columns, which are located on the floor (in some cases, on the floor slabs);
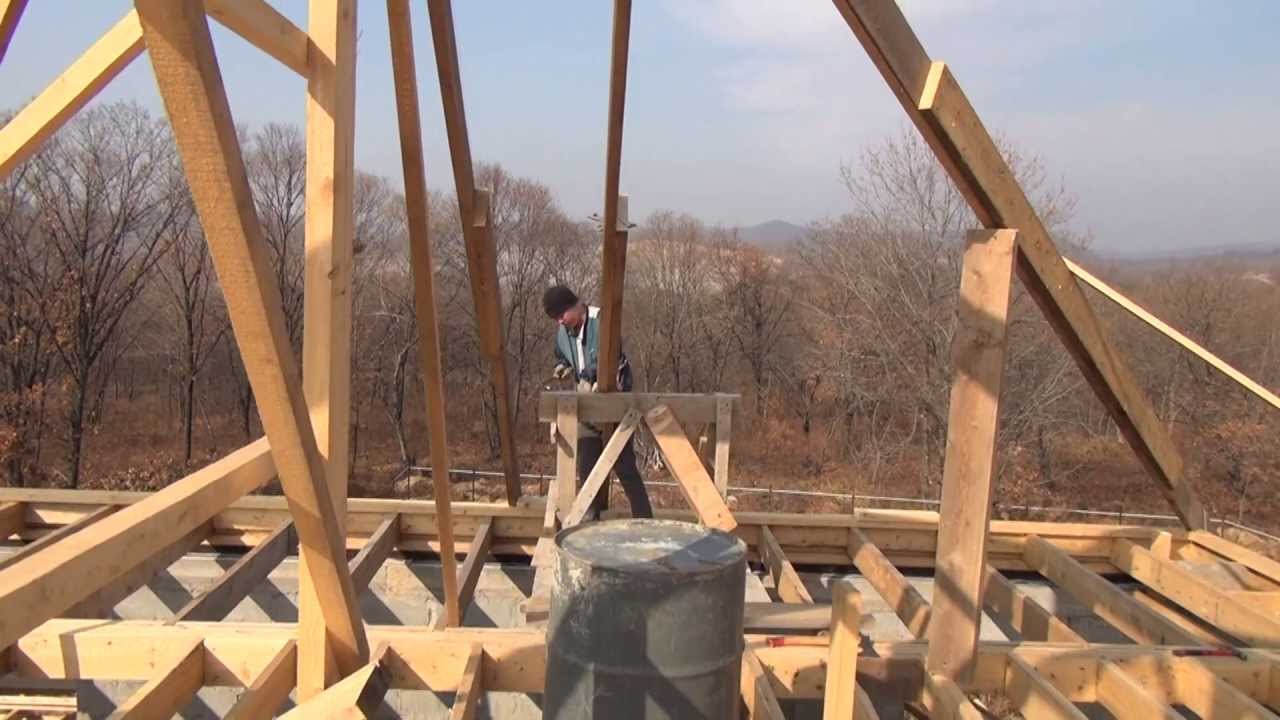
- strictly vertical installation of special racks to support the ridge (the strength of the entire future roof depends on this);
- fixing the ridge beam with the help of a mowing system (be sure to use a plumb line and a rail);
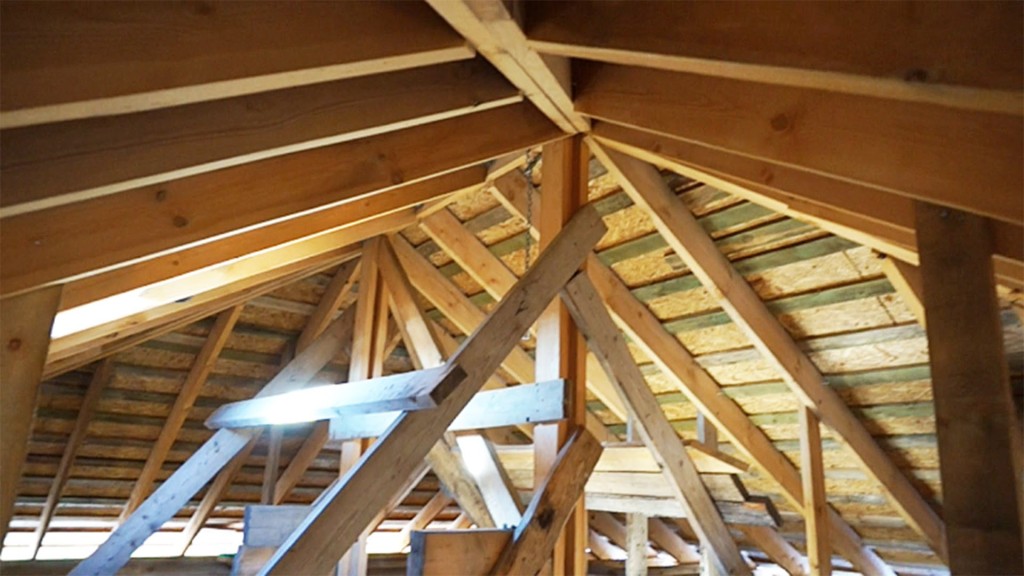
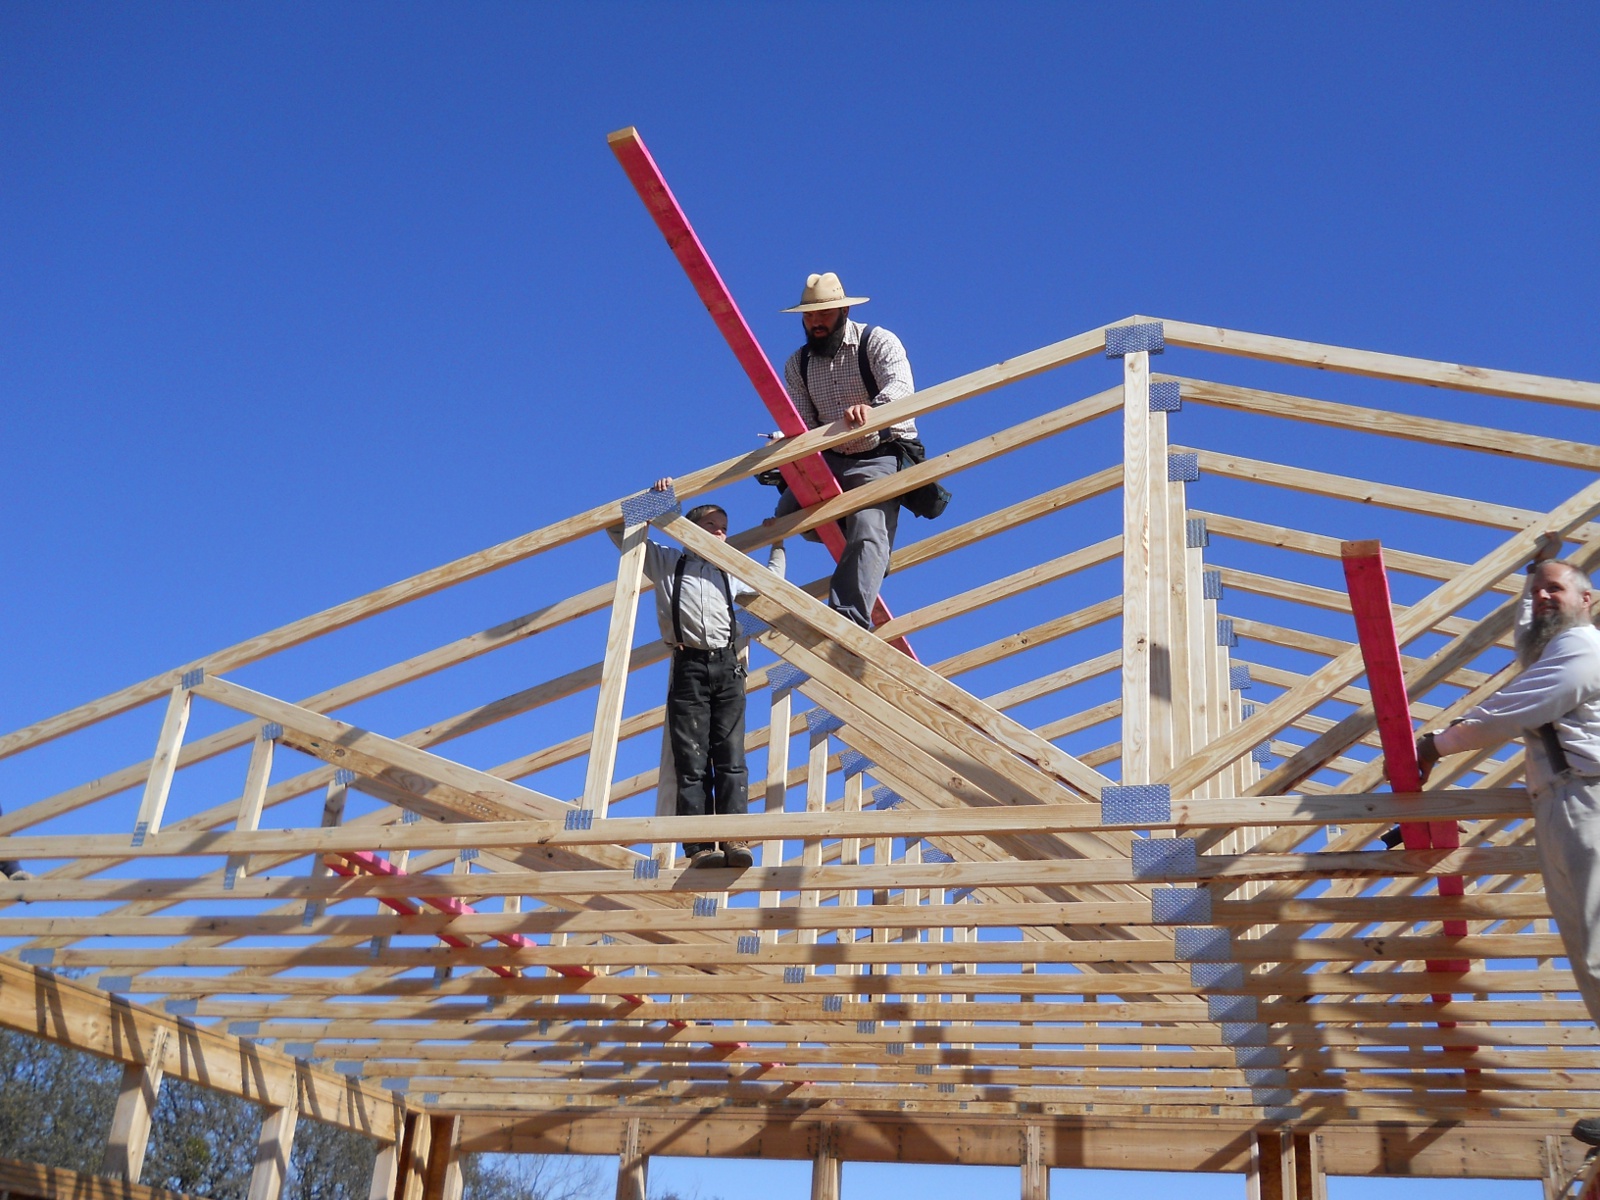
- installation of diagonal rafters (the height and angle of inclination of the roof depend on them and on the ridge run). In some cases, they have to be assembled from 2 parts, and then - to unload the joint - an additional support is installed under it;
- installation of ordinary rafters is carried out based on a Mauerlat and a ridge beam (like diagonal ones, they can be reinforced with racks or struts) in increments of 600 mm;
- strictly parallel to the ordinary rafters, angular (spreaders) are installed so as to exclude their convergence in one place. The length of the sprigs will decrease as you approach the corners of the slopes;
- the installation of the crate takes place in direct proportion to the selected roof covering (it can be solid or with gaps). Under the crate, bars with a section of 50 x 50 mm or boards with a thickness of 200-250 mm are used;
- laying heat and sound insulation;
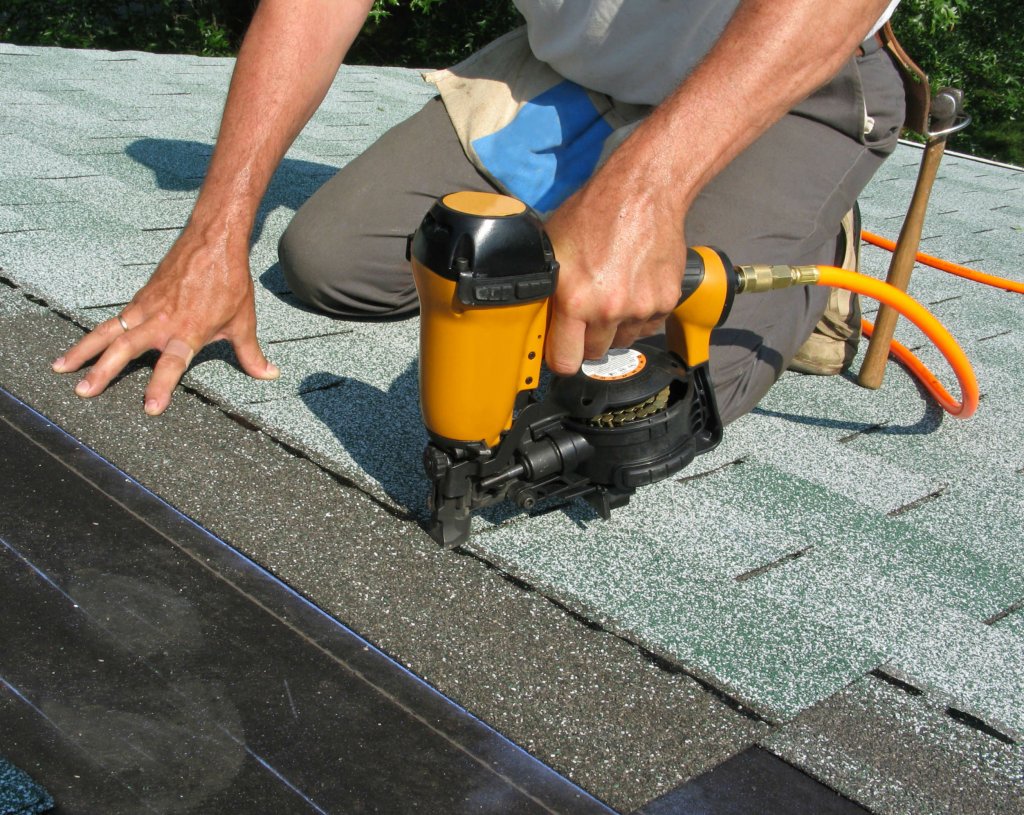
- installation of roofing material to the crate using self-tapping screws;
- installation of ridge parts (a long narrow sheet of material that is bent longitudinally at an angle); The main roofing ridge is laid along the upper edge of the roof, secondary between triangular slopes and trapezoidal;
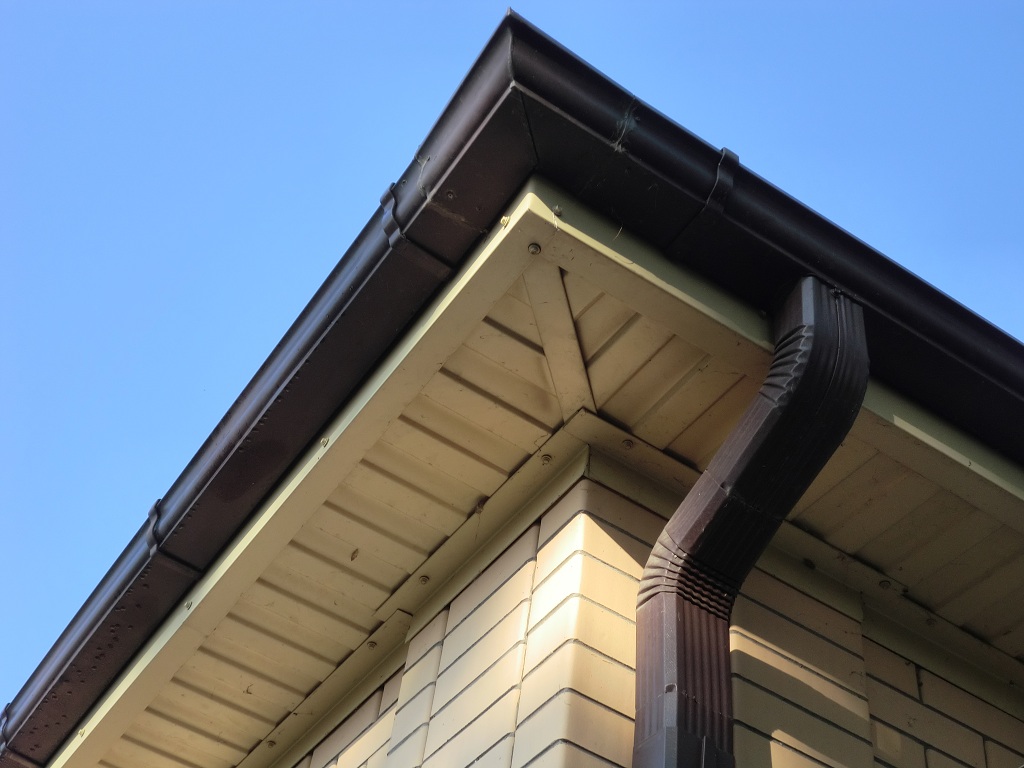
- filing cornices and installing gutters (it is more practical to use an industrial drain system).
Based on the foregoing, it is safe to say that it is quite difficult to make a hipped roof with your own hands, but this reliable design is worth the effort and financial investment spent on it.
Four-pitched roof: video
Four-pitched roof: photo