List of tools for installing interior doors. Tools and materials for installing a metal entrance door. Installing the lock plate
Read also
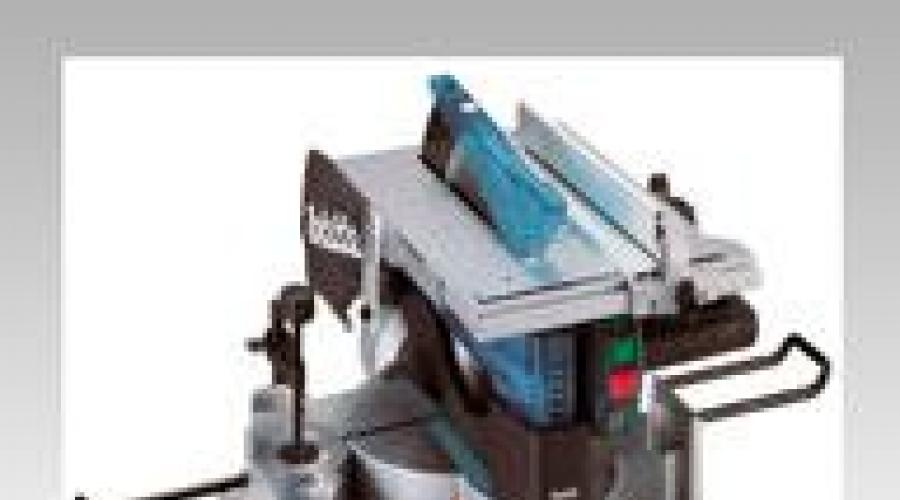
Miter saws


In installation, our company uses 4 types of miter saws and not with ease. Combination saws are designed to perform various tasks, have different dimensions saw blades. For example, if you have eco-veneer veneered or laminated doors, then Makita LH1040 will be enough, which will do the job perfectly with a 260 mm disc. But if you have doors made of solid hardwood, with thick frames, the cut will be better and cleaner using Virutex TM33L or Makita LH1200FL, which are equipped with saws more than 300 mm in diameter. Combination saws as installation tools interior doors used for cutting material both lengthwise and crosswise. For example, for adjusting the width and length of platbands, extensions, boxes as necessary, as well as forming an angle of 45 degrees. 
MAKITA LS0714 is another tool used for installing doors, namely for a transverse, clean cut of non-standard trims and trims. The saw is especially irreplaceable for installing wooden skirting boards, since adjusting the joints of the skirting board to 45 mm cannot be done with other saws on products over 120 mm. The cutting width is 300 mm, and this is a very good indicator!
Milling machines and equipment


In our practice, we use 4 types of routers depending on the type of work and tasks. For example, hidden hinges, “Butterfly” type hinges (not to be confused with non-mortise, overhead hinges, which we strongly do not recommend!) - are deepened using a variety of templates and a milling cutter from the leading Spanish developer Virutex, and the seats of decorative and strike plates of locks are using another specialized router  Makita. The addition of “card” hinges, both universal and detachable, is carried out using a different router with appropriate, proprietary modifications, which make it possible to achieve impeccable quality of inserting fittings into Makita interior doors.
The lock router is a giant in our arsenal of tools for installing interior doors, used for shaping (milling) depth, width and length seats for locks of any standard sizes. It is usually used for milling locks on doors made of solid hardwood and for large volumes of milling.
Rip saws and pneumatic tools


Pneumatic equipment for installation is a compressor and a gun for attaching trims and glass frames to micro-studs (thinner than a needle and 2.5 times thinner than a finishing nail). Used where the manufacturer does not provide grooves for fastening elements. Leaves virtually no visible traces of attachment on decorative surfaces.
A rip saw with a rigid aluminum guide is a tool used for cutting door panels to height (if necessary, you can reduce the height of the panel, for example from 2000 mm to 1900 mm, etc.). This is high-precision Spanish equipment that allows you to work with doors from any manufacturer and price categories. Makes very high quality cross cuts door leaf!
Drills, screwdrivers and hammer drills
When installing interior doors, we use a drill as a tool in two cases: to drill a hole for installing a square for a handle, plumbing screw or lock cylinder, and to drill holes for mounting screws. By the way, drilling holes of a smaller diameter for self-tapping screws is very important and necessary procedure, and the screw holds tighter and more reliably and will not split the wood when screwed in.


Drill - screwdriver. This tool used for screwing self-tapping screws into door hinges, locks, boxes. In our practice, we use bits from leading manufacturers, so we don’t knock down the slots on the screws and don’t damage them. appearance screws. Main principle- maximum quality and aesthetics of installed products!
Hammer - used for drilling holes in concrete and other materials for subsequent fastening of interior doors into the doorway. It must be remembered that even hidden installation doors require fastening using self-tapping screws. Also, if necessary, it is possible to expand the doorway in concrete or brick.
Electric plane and jigsaw
One might say that these are throwback tools for installing doors, but they are still used!

 Electric planer. Any point adjustments to the extensions, platbands, if they are cut lengthwise, when installing interior doors, are made with a plane. With the advent of high-precision miter and rip saws, this operation, as a rule, is not required.
Electric jigsaw. This is a tool mainly used for longitudinal cutting and fitting door casing. For example, if your entire length of the casing does not fit + a curved wall, you can use a jigsaw to fit the casing to the wall as accurately as possible; if the wall is flat, then use a Makita rip saw.
Manual installation tool for door installation

Hand tool. The set of hand tools for installing interior doors includes a whole list of items. There are a variety of chisels, bits for self-tapping screws, drills of different sizes, a square, a hammer, a screwdriver, a plumb line and much more. It is fundamentally important to use only sharp and serviceable tools in your work!
Video presentation of our equipment for milling hinges and locks in action.
In order for the process of installing interior doors to be successful, it is important to choose the right tool to carry it out. Today, many tools are available to make the job easier. The presence of some of them is not mandatory, but in any case you cannot do without a certain set.
The right set of tools will greatly simplify the door installation process.
Features of installation work
In order to understand what tools you will need to install interior doors, you should understand the process of this work itself.
For the first experience it may seem like a very dusty job. In fact, with proper organization of work and the use of auxiliary devices, the amount of dirt can be reduced to a minimum.
The whole process can be divided into several stages:
- Removing the old structure. If necessary, the canvas is removed and the old frame is cut out.
- Installation of the box. After preliminary assembly and adjustment, the new box is fixed in the opening. Then all gaps are foamed.
- Finishing the opening. Excess foam is cut off, the gaps are plastered and closed with platbands. Slopes are issued separately.
- Installation of doors and fittings. The hinges and lock are inserted and the canvas is hung on the frame. Handles and additional fittings are also attached.

The main stages of installing an interior door
Necessary materials
In order to installation work were successful and did not take much time, you need to prepare everything in advance necessary materials and stock up on tools for installing doors. Speaking specifically about consumables, the following can be distinguished:
- Polyurethane foam. With its help, the gap between the wall and the box is filled, and it also provides sound and thermal insulation, shock absorption when environmental conditions change, and reliable adhesion between materials.
- Nails without heads. Basically this is a way to connect frame parts and with minimal visual defects.
- Putty. Used to mask defects on the wall, as well as to create a protective layer for foamed joints.
- Serpyanka. Required for particularly difficult areas to be plastered, especially if we're talking about about depressions and wide joints.
- Metallic profile. Needed for hatching even corners when finishing slopes.
- Drywall. Another material that allows you to tidy up the slopes in the opening.
- Wooden wedges. This auxiliary materials to fix the position of the box, installed between the wall and the frame before foaming the gaps.
- Spacers. Hold the frame in in the right position during the process of expansion and drying polyurethane foam.
- Dowels. They are driven into the wall to fix the position of the fasteners.
- Bolts. Basic fastener at .
- Glue. Allows you to secure trims and slopes without the use of nails.

List of materials required for door installation
Required Tools
In order to work with the above materials, you must have at your disposal certain tools for installing doors. You can highlight a list of required tools, without which it will be impossible to carry out such installation work:
- Roulette. This is the main one measuring tool, without which it is impossible to carry out any construction process.
- Level. Allows you to verify the correct position of a particular element both vertically and horizontally.
- Saw. It is used for cutting frame elements, extensions, platbands, etc. For metal, it is better to use a grinder.
- Drill. Allows you to make holes in the wall for further fastening of the opening design elements, as well as in the door itself when installing fittings.
- Chisel. Used to remove a layer of material when inserting hinges, handles or locks.
- Hammer. Used for fixing platbands and adjusting slat elements.
- Putty knife. With its help, plaster is applied and leveled when finishing the opening.

Basic tools needed to install an interior door
Which one else additional tool may be needed to install an interior door? The following devices can be distinguished:
- screwdriver;
- jigsaw;
- plaster trowel;
- construction mixer;
- wire cutters.

If you do not have the entire arsenal of tools needed to install doors, some tools can be interchangeable, for example, a screwdriver and a screwdriver or a drill.
If you want to achieve an ideal result without excessive effort, prepare the maximum list of the described devices. However, if you have knowledge and skill, you can get by minimum quantity tools and this will not negatively affect the final work.
When deciding to install interior doors yourself, you need to make sure you have the necessary tools for the job.
Door installation steps
Installation of interior doors can be divided into three main stages.
- Door frame installation.
- Fastening of accessories.
- Finishing the opening.
Exactly what tools are needed for the job depends on the installation stage. Let's consider the minimum required set for each of them.
Box installation
Below is a list of tools needed to install interior door frames:
- level, pencil, square, tape measure;
- perforator;
- drill, drill bit;
- screwdriver,
- saw;
- syringe for polyurethane foam.
A level, pencil, square and tape measure ensure perfectly level installation of the door frame, which is necessary for proper operation doors.

A saw is needed to cut planks to the required length. You can use a jigsaw instead.

A hammer drill will help you quickly make holes in the wall for anchors to attach the box.

A drill and drill bits will be needed to drill holes for self-tapping screws, which are screwed in with a screwdriver. However, its role may well be taken over by a drill if it has the necessary attachments.

Using a foam syringe it is convenient to blow out the gap between the wall and the frame. If you don’t have it, then choose polyurethane foam cylinders with a dispenser.
The listed tools are not strictly necessary, some of them can be replaced with others, but this will complicate the work and increase the door installation time.
Fastening accessories
To install the handle, hinges and lock, you need to make special recesses in the door leaf. To do this you will need:
- pencil, tape measure, square;
- drill, pen, drills;
- screwdriver
This set of tools can be expanded or reduced depending on the type of fittings.
A pencil, tape measure and square are used to measure and mark Right place fastening accessories.

To insert the handle and lock, you cannot do without a drill and a pen. They are used to make round holes.

The chisel is used to cut out recesses for the hinge floor and lock strip. It can be replaced with an electric milling machine, which will facilitate the work process. However, not every home has this tool and you can do without it.

Using a screwdriver, you can quickly and securely tighten the screws that secure the fittings to the door leaf. A screwdriver can replace a drill or a regular screwdriver, but it is less convenient and will require more strength and time for installation.
Professional carpenters use templates for precise cutting door locks various designs, moving the router in several planes when cutting grooves in the door leaf. But purchasing them makes sense only for very large volumes of work.
Finishing the opening
After installing the interior doors in place, it's time to tackle the slopes. You may need a painting kit for this if you decide to plaster and paint them.
- perforator, special attachment – mixer;
- spatula, trowel;
- level;
- sandpaper for grouting;
- brush, roller;
- paint tray.
It is very convenient to make a solution for plastering using a hammer drill with a special attachment - a mixer. With its help, kneading will take only a few minutes, and the mass will be homogeneous.
Application of the solution is done with a trowel and spatula. How smoothly the work is done can be assessed using a level. After the slopes have dried, they are leveled by sanding with sandpaper.

To paint you need a brush, roller and paint tray.

The last thing left to do is to attach the trims that will hide the seam between the wall and the door frame. To do this you will need the following set of tools:
- pencil, tape measure;
- saw, miter box;
- hammer.
Cutting trim strips is impossible without a pencil and tape measure. To connect the vertical and horizontal slats at an angle of 45 degrees, you will need a miter box. If you don’t have such a tool, you can get by with a saw or jigsaw. If fastening is done using small nails, you will need a hammer.

Most of the listed types of tools are available in every home, so almost any owner can install interior doors. If the set of tools that you have is not complete, then you can rent the missing items. This practice is quite common and will save you money if you don't intend to use it in the future. Otherwise, it’s easier to buy a tool to have it on hand when necessary.
Sections of the article:
When planning renovation work in your home, you need to pay great attention to the installation of interior doors. It is not enough to choose good and quality doors. It is necessary to install them correctly to ensure a happy purchase. long years. Many who have encountered the installation problem note that the process is quite painstaking and requires perseverance and a certain skill. It is better to prepare a set of tools for installing interior doors in advance. You should think about what specific tools may be useful, what you already have, and what needs to be purchased.
The standardized set of tools includes more than ten various items, but such a list is not always exhaustive. The easiest way is to prepare a list of tools that you may need. The list must be divided into groups of tools. As an example, you can include a power tool in one group and a hand tool in another. Usage large quantity A specialized tool will allow you to perform the job efficiently and as quickly as possible.
What principle should you follow when selecting a tool?
First of all, it is necessary to evaluate the scope of work and determine the list of tools, as mentioned above. Thanks to such forethought, it will be possible to save a lot of time: you will not have to go to the store while the work is being completed, because this can make it endless.

Besides, preliminary preparation will allow you to purchase a tool best quality, thoughtfully approach the choice, avoid senseless waste of nerves and money. If you choose a tool in a hurry, you can purchase low-quality devices that will very soon fail.
Those tools that are in the house should be checked to see whether they work or not. Equipment that sits idle for years can break down, rust, or stop working. In order to more accurately make a list of everything you need, you need to mentally imagine the amount of work that lies ahead. Let's give an example.

It is necessary to replace the previously installed doors; therefore, the dismantling of the frame is required, since the new frame must be installed in the prepared opening, and the slopes will need to be sealed in the walls. For such work you will need many different devices. If installation does not require removing the box, the entire procedure will be much simpler and will require a small number of devices.
In addition to the tool, you should think about the materials that may be needed during the work process. These can be materials such as self-tapping screws, nails, drill bits, power saws, etc.
All this will definitely be needed, so the planning stage is very important, it will make the installation of doors as simple and enjoyable as possible.
Power tools you may need
For comfortable work, you will need a power tool, which is designed to simplify the door installation procedure. In addition, the use of various specialized electrical devices will significantly speed up the work and make it better.
So, let's look at the necessary power tools:
Miter saw. This device allows you to cut various materials required angle. Can be cut various elements boxes (for example, when connecting bars), platbands. In addition, such a saw can be an excellent replacement for a jigsaw, because it allows you to cut longitudinally.

Fraser. Allows you to make locking cutouts both in the front and back parts of the canvas, and at the end. In addition, it is suitable for cutting wood for installing hinges.

Jigsaw. In order to saw various materials lengthwise without unnecessary hassle A jigsaw will come in handy. Can be used instead of a miter saw.

Electric drill. To pre-drill holes for self-tapping screws.

Screwdriver. Necessary for mounting various screws. Besides, good screwdriver quite capable of drilling holes using special drill bits.

Hammer. Allows you to drill holes in walls made of hard materials, which the screwdriver will not take. It can be concrete or brick. You can use it to knock down excess mortar/concrete from the doorway.

This is a list of those door installation tools that will most likely be needed in any situation. The purchase of most of them is quite justified, since they will definitely come in handy on the farm. For example, with a screwdriver you can always easily tighten any bolt, and you will need a hammer drill to hang a picture or shelf on a load-bearing wall.
Required hand tools
Which hand tool needed for quality and correct installation interior doors?
Let's look at the main tools that will definitely come in handy:
Chisel. Its use will allow you to prepare places for installation door hinges and the lock, as well as its counterpart. Can replace a router if there is no necessary budget to purchase it.

Hammer. Anyone knows the purpose of this important household tool. It can be used to hammer in any fasteners. When installing doors you will need it if you need to nail down the trim.

Plumb or level. With their help you can install door frame so that the canvas does not sag in the future. Without them, it will not be possible to complete the installation, since the box will not be installed evenly.

Saw. For trimming any wooden elements designs. Since the wood is not too thick, a regular handsaw will be sufficient to cut it.

Crowbar (mount). Without it important tool It is impossible to remove the old door frame. Using a crowbar you can perform this procedure quickly and easily.

Device for squeezing out polyurethane foam (gun). When foaming the box this device will definitely come in handy. Otherwise, the procedure cannot be carried out.

Screwdriver. Suitable as a replacement for a screwdriver if you don’t have the funds for one. It's better to stock up on a set of screwdrivers, or big amount special attachments so that it is always easy to select required size under self-tapping screws.

Miter box. Allows you to cut wood at an angle, perhaps useful when connecting door frame elements.

Using these tools, you can easily complete the door installation procedure, which consists of several stages:
- Removing the old door frame;
- Placement of the door block;
- Installation of accessories on the canvas;
- Installation of the frame in the doorway;
- Adjustment;
- Hanging the canvas on hinges.
Hand tools are not very expensive, electric tools are more expensive. It should be understood that tools are purchased at for a long time and can last a lifetime (with proper care).
How to install doors economically?
It is already clear that without high-quality tools it is impossible to properly complete the door installation procedure. Of course, it is better to make a choice towards professional quality tools, however, this will inevitably entail certain material costs. However, if you don't use good tool, the result of the work will most likely be disappointing. Currently, there are many companies on the market that rent out various devices for renovation for rent. For little money you can get the entire necessary set - both manual and electrical devices.
When installing doors, you can use various tricks. For more high-quality installation For any fasteners, it is better to pre-drill holes for them using a drill or screwdriver. Both the drill and the screwdriver allow you to tighten screws and bolts with impressive speed. It is better to use a drill and screwdriver with a comfortable handle, as this allows you to protect yourself from possible wounds and protect your expensive door from damage.
In cases where a door made of veneer or PVC is installed, it is better to use a router. To fix the platbands, you can use a pneumatic gun.
So, tools for installing interior doors can help you complete the job quickly and efficiently. Their use should not be neglected, since it was the tools that allowed man to become the dominant species on planet earth.
Installing doors requires knowledge and experience. This alone is not enough for high-quality installation of the door block. This matter cannot be accomplished without special devices.
 Even to an experienced master You can’t do without special tools for installing doors.
Let's talk about what accessories for installing doors are necessary for any professional or amateur craftsman.
Buying a door of any type:
- entrance or interior;
- wooden or metal;
- swing, sliding, accordion, etc.
Do not forget that in addition to the door leaf there is a frame, an opening and fittings, which also require the attention of a specialist during installation. There are door models equipped from the factory with built-in hinges, locks, and handles. But this is rare, and the model costs much more. Then you need to install all the components yourself or invite a specialist.
 Every man should have a magic suitcase with gadgets in his arsenal.
 Any professional in his arsenal has a bag with the necessary equipment for installation. Let's take a look at what's included in this bag and what it's intended for. House master could have purchased necessary equipment to install the purchased door.
Overview of door installation devices
The master needs different instrument for installing doors, which will be discussed below.
Power tools
Power tools include devices that operate on mains power and perform all work quickly and accurately. To install any door block you will need:
Perhaps this is the entire set of power tools. If you do not have any of the devices from the list at home, you can purchase them for rent. It is better to buy such a tool, because it may be needed for other tasks around the house.
Hand tools and related accessories
Many power tools can be replaced with common tools that you most often have at home. They will help you install any element, but they will require more time and patience:
- Screwdrivers different types help to screw any fasteners into pre-prepared holes.
- A chisel and chisel are useful for installing a lock or hinge. They can be used to carefully hollow out holes and make indentations in the canvas. Just take your time so as not to spoil the product with unnecessary actions.
- A hand saw is required for sawing off excess from wooden blanks.
- Tape measure, angle, plumb line, level - these devices are also necessary to correctly take all measurements and position them evenly door block in the opening or install fittings.
- Many craftsmen advise using devices to hold the door leaf in a stable position. When installing a hinge or inserting a lock, you need the help of a second person to prevent the door from falling. The assistant can be replaced by a workbench or a limiter where the blade is inserted.
We talked about a device for installing doors and all components. Make sure you have the listed elements so that the installation goes quickly and successfully.