The hinge on the glasses broke. How to repair glasses: frames, arms, hinges. Repair of moving parts
Read also
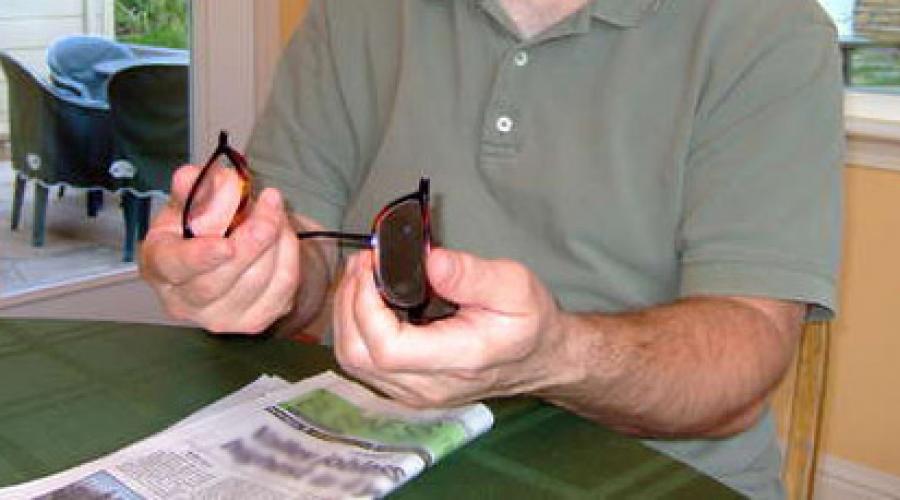
Are your glasses broken? You can take them to a workshop or buy new ones, or you can repair the glasses yourself, using materials and tools that can be found in every home. Our instructions will tell you how to repair plastic glasses.

Materials and tools for repairing glasses:
- drill with a very small drill bit
- needle with thread
- Super glue
- nail polish remover
- cotton buds
- wax paper or soft cloth
- stationery erasers
- wooden slats


1. To repair glasses, clean, sand and degrease the plastic at the break point.


2. Prepare a jig (a device that allows you to secure the frame parts in a certain position) to fix the glasses.

A wooden strip or an old ruler will serve as a conductor. Cut the rail so long that its length is slightly less than the width of the glasses.

Wrap wooden blank wax paper or soft cloth. This is necessary in order to protect the lenses from contact with the surface of the conductor.

3. Secure the glasses to the conductor. Attach a fragment of the frame to the rail and wrap it several times with a rubber band.

First make sure that the rubber bands are clean and will not stain the lenses of your glasses. Then attach the second half of the glasses, pressing it well to the first. Use the rubber band again.

Align the parts of the glasses with each other, making sure once again that they are touching.
4. Apply glue to the place where the glasses broke. This is the most critical stage of repair, so everything must be done very carefully.
- Fill the broken area with glue, make sure there are no voids or air bubbles.

- Quickly wipe the surface with a cotton swab to remove excess glue.

- Let the glue dry for an hour.

5. Drill holes to attach the bandage. After the glue has dried, you need to drill one hole in the frame on each side of the break.

Place the glasses on a soft cloth. Drill very carefully so that the connection does not break. Try to make the holes not too close and not too far apart.

In our example they are placed too close.
Tape bandage is regular thread, stretched into drilled holes and tightly wound over the glued joint. The bandage is needed to strengthen the connection.

Pull the thread into a thin needle. The length of the thread folded in half should be about 60 cm.
First, pull the thread through the drilled holes as many times as possible. If the needle no longer goes through, you can start winding the threads around the bow. Wind the thread tightly, but do not overdo it, so as not to break the glasses again.
6. Apply glue to the bandage. Use a needle to remove air bubbles if they form. Let the thread soak and remove excess glue with a cotton swab. Let the glue dry for 15 minutes, trim off any protruding ends.
7. Take a long thread and glue one end of it to the bow with masking tape.

Wrap the temple of your glasses completely.

Glue the free end of the thread to the frame.

Treat the resulting joint with glue, blot it and let it dry a little.

8. Wind the thread in the opposite direction. After the glue has dried, release the end of the thread that you secured with masking tape and wind it around the bow, moving in the opposite direction. As a result, the upper and bottom loops should lie crosswise - this way the connection will be as strong as possible.

Treat the threads with glue again and let it dry. Trim the ends.

Do not use glasses for 24 hours to allow the glue to completely dry and set.
This is not to say that glasses break often, but they do break, and, as a rule, at the most inopportune moment. In addition, glasses are not so easy to replace, because, firstly, they are most often dioptric, and secondly, we get so used to them that replacing our favorite eyepieces, even if old and worn out, with new ones seems like such a thing to us It's as difficult as, say, giving up your daily cup of coffee.
But what to do if the temple of your glasses suddenly falls off? Is it possible to fix them at home in this case? Of course, it’s possible, especially if the bolt that connects the behind-the-ear part of the frame to the nose part has just fallen out of your earband, and you haven’t managed to lose it, and also if you have a miniature screwdriver in your house, or even better, a special one - for repairing glasses or watches .
Unfortunately, most often the average person doesn’t have any trace of this at hand. It doesn't matter, you can go the other way. In the nose part of the frame there is a hole left for a bolt, to which you can attach a fishing line (this stuff is usually enough in every home). If the hole is broken, it is not difficult to drill a new one, or, at least, without dragging it through, simply tie a fishing line to the protrusion remaining at the junction of the temple and the nose of the frame. We measure approximately twenty centimeters of fishing line and tie any small sinker to its other end. Now we throw the fishing line with a sinker instead of the broken bow (or arms, if both are damaged) behind the ear or behind the ears - and please, this device holds the nose part of the frame no worse than the “native” temples.
If you find it unpleasant that there is a thin fishing line on your ears, you can, before tying the sinker, put an ordinary drinking straw on it, which is sold for pennies in any grocery store. These tubes have a special “accordion” for bending, as if specially invented for constructing homemade glasses frames.
You can also get creative with the sinker. Of course, a regular nut is the easiest way to solve the problem, but not the most aesthetically pleasing. Therefore, in the form of a sinker, you can tie rare pebbles with holes, the so-called “chicken gods”, keychains, various pieces of jewelry and other jewelry (for women), and so on, to the fishing line.
It is difficult to say that the resulting glasses will be as elegant and comfortable as they were before the breakdown, but it is quite possible to use them.
True, there is an even simpler way to solve this problem - take the glasses to a workshop, especially if you live or work in Moscow. There are a lot of eyeglass repair shops in the capital, and they are most often located right next to the metro (you just have to pay attention to this). Don't worry, such repairs usually take no more than fifteen minutes, so you'll only have to leave the house a quarter of an hour early or return home the same way to pick up the repaired glasses (unless you like to wait or the breakdown is quite complex).
But after this, your glasses will be as good as new again, you won’t find any flaws in them. Moreover, most often in the workshop, all other flaws are corrected at the same time, for example, in the case of one broken arch, they will check and correct the second one, so that the frame will serve you faithfully for another ten years. Well, the cost of such repairs is mere trifles...
1. Be sure to store your glasses in a case.
2. You need to wipe the glass of your glasses with a special soft cloth, and not with a napkin or the hem of your skirt.
3. Do not forget that glasses must be placed on the surface only with the lenses facing up, otherwise they may get scratched.
But it still happens that the mechanism of the glasses may break. First, study the breakdown and its cause. If the problem is not very serious, then use some tips how to fix glasses on one's own.
1. If the frame is loose.
You need to tighten the screw with nail scissors. If it continues to constantly unscrew, then place a drop of clear nail polish or synthetic glue on the screw, and then screw it back in.
2. If the glass of the glasses breaks off at the place where the frame is attached.
Take adhesive transparent tape and apply it to the damaged area in 2 or 3 layers. After this, make punctures on the tape with a needle, then install the glass in its original place and secure it with nuts.
3. The frame of the glasses broke in half.
Drill a small hole at the edges of the break and insert a U-shaped bracket from steel wire from the inside. Then you need to bend the ends of the bracket from the outside.
4. If the screw from the frame of your glasses is lost.
The screw can be replaced with a nylon rivet. Melt the tip of the nylon fishing line in the flame of a match (the thickness of the fishing line is approximately 1 mm). Wait until the resulting droplet hardens, and then insert the resulting rod into the screw socket. Melt the end of the thread protruding from the socket in the same way.
5. If the plastic frame bursts.
If the frame is made of celluloid, it can be easily glued homemade glue. You can prepare it like this: dissolve plastic debris, such as an old comb, in acetone or nail polish remover until it has the consistency of thick cream. Apply the resulting mixture to the area where the glasses are broken. After some time, the procedure must be repeated again.
Now you know how to fix glasses at home. But there are times when glasses need to be taken to a specialist. The most common method of “treating” glasses is laser welding.
Glasses are often a constant attribute modern man who has to spend a lot of time at the computer, because not everyone has the opportunity and desire to wear contact lenses. However, not only people with poor eyesight; it is also quite a stylish accessory, and sunglasses, waiting in the wings, lie on almost everyone’s shelf.
Whatever kind of glasses - for vision correction, perforated, sunglasses, decorative without lenses, expensive branded or cheap bought on the market for a hundred rubles - they tend to break. Frames usually break, but broken lenses are not uncommon. How often do we sit down on the sofa and suddenly hear an unpleasant crunch? This crunch indicates that it is time to buy new glasses.
It's a pity! Maybe it's not too late to fix everything? If, for example, you figure out what glasses are made of and how to fix them yourself?
Glasses design
The main element of any glasses is lenses made of glass or plastic. The lenses are inserted into the frame, to which using hinges temples or temples are attached. The hinge has a fixed part, fixed in the frame, and a movable part, welded to the metal core of the earhook and fixed in its plastic part. Some models use a headband or elastic band instead of temples.
 The bridge between two lenses is called a "bridge", or nosepiece, and plastic or silicone pads protecting the bridge of the nose from strong pressure from the frame, - nose pads, which, like the temples, are attached to the glasses using hinges. The presence of nose pads is more typical for heavy metal glasses, whereas plastic glasses They are quite light and do not put so much pressure on the nose.
Any structural element of glasses can break, but the “bridge” and the junction of the frame with the temples (and nose pads, if any) are especially prone to breakage.
How to fix a nose bridge yourself?
1. Temporary repair of the “bridge” using paper and glue
The good news is that even a child can handle this task! It is only necessary find superglue ("Moment" will do) and glossy paper, which is not much different in color from the frame (however, you can play with the contrast).
The paper needs to be cut into thin strips and carefully wrapped around the nose piece to the desired thickness, not forgetting to coat it with glue. Before applying a new layer, you need to wait until the old one dries.
The glasses are ready! Now you can safely wait until you go to a repair specialist.
 Pretty too interesting way. You will need a small saucepan or bowl of boiling water and a pin.
First you need to melt the plastic, for which the ends of the “bridges” formed during the split are lowered as close as possible to boiling water. When the ends softened, you need to insert a short pin into one of them (you can “pinch off” part of the pin with wire cutters), and then put the other end on it. The resulting gap should be smoothed out by hand before the plastic hardens. Glasses are like new!
3. Professional repair of the “bridge”
This method is essentially similar to the previous one, but requires more attention, accuracy and diligence. In addition, you will need various tools:

In the ends formed when the frame splits, it is necessary to drill two holes with a diameter of 1.5 mm and a depth of 5 mm, then drill from above and below them through holes with a diameter of 1 mm. Use a cutter to create grooves between the top two holes as well as the bottom two holes. Pour glue into holes with a diameter of 1.5 mm and insert a steel wire 9 mm long. Grease the ends with glue and connect. Fasten the structure with nichrome wire, passed through the upper and lower holes. Fill holes and grooves with glue and sand after drying. sandpaper.
How to replace a lost screw?
1. Temporary repair of the hinge
You can make temporary repairs to the hinge, which will allow you to wait for a trip to a specialist, using a toothpick, wire, pin or nylon fishing line.
Frame and temple of glasses aligned with each other so that a hole is formed in the hinge into which a toothpick is inserted (or whatever comes to hand from the list presented). The excess part of the toothpick must be cut off, the wire must be twisted, and the nylon fishing line must be melted in the flame of a lighter or match.
2. Repair of a hinge with a flex mechanism
 Flex mechanism is used length of fixation of glasses temples in a certain position - very convenient for those who have custom size heads! Unfortunately, such a wonderful device has a serious drawback: a screw that has fallen out of such a hinge is very difficult to put back in place.
The fact is that between the two parts of the hinge there is a movable bar, which, when the screw falls out, is pulled into the arch. To pull out the bar, you need to fix the bow (for example, using a vice) and, holding the frame and the bar pulled out with a needle or screwdriver with one hand, screw the screw into the hinge. It may not work out the first time, but don't give up! A few tries and you're done.
How to adjust the temples yourself?
 Sometimes it happens that after wearing for a long time in a bag or a brief unfortunate contact with something heavy, the glasses do not seem to be broken, but still they are not very comfortable to wear: they put pressure on the ears, the bridge of the nose, or, conversely, they constantly dangle and slide down. The reason may lie in incorrect adjustment of the temples and nose pads.
- To check whether the nose pads are adjusted correctly, you need to place the glasses on flat surface and compare their position relative to each other. To change the height of the glasses, the nose pads should be moved (if the glasses need to be raised) or moved apart (if the glasses need to be lowered).
- If your glasses are too tight or loose, you need to hold the temples in place for a while. hot water or heat them with a hairdryer, and then slightly straighten them or, accordingly, bend them more strongly. You must act carefully so as not to melt the arms or break them. This method is suitable for plastic frames. Wire frames are easily bent using small pliers.
With the help of simple devices, you can successfully repair glasses that are broken inappropriately or adjust the frames for maximum comfort.
Glasses- This optical instrument, used for optical correction human vision in case it deviates from the norm and protects the eyes from dangerous external influences.
Repairing glasses requires a tool that rarely anyone has at hand. If you do not have the opportunity to repair your glasses yourself, you can contact professionals who will repair them, and if repair is impossible, they will help you choose new ones.
If the screw for fastening the glass or in the hinge for fastening the temple (arm) is simply unscrewed, then even a child can handle such a repair; just take a watch screwdriver or a knife with a sharp end and tighten the screw, without applying more force, until it stops.
But if the frame of the glasses breaks at the place of the nose, or the temple breaks off at the hinge, then such a breakdown of the glasses is no longer easy to fix; repairs require tools and knowledge of technology.
In modern glasses, the temples are often attached to the hinges using flex. This mechanism is a spring that fixes the temple (arm) in a given position and allows the temples to move apart, in contrast to the standard 100˚ angle of ordinary glasses, by an angle of up to 160˚.
Frames with flexes eliminate pressure on the head when wearing glasses and distortion of the frame when removing glasses with one hand, so glasses with flexes last longer and are more comfortable to wear. But the more complex the glasses are, the more likely they are to break.
How to tighten a screw
in the hinge for fastening glasses frames with flexes
If it is not difficult to screw in a loose screw in the fastening hinge of simple glasses, then in glasses equipped with flexes it is not as simple a task as it seems at first glance. When attaching the temple, the screw passes through the movable flex bar, and if the screw is unscrewed, the flex bar is pulled into the cavity of the temple and the mounting hole in the frame does not coincide with the hole on the temple. It is impossible to tighten the screw.

When analyzing the breakdown, everything became clear; you need to pull out the flex bar and screw the screw into place. The bar can be easily pulled out using an awl or a needle if you thread it through the hole for the screw, but then there is nowhere to screw the screw. Otherwise, it seems like there’s nothing to grab onto. But if you look closely, it turns out that there is a ledge in the bar protruding from the temple, beyond which it can be pulled out. Only the problem of a lack of hands arises. A vice can serve as a third hand.

The temple is clamped into the jaws of a vice; if the material from which the temple is made is soft, then you need to place a piece of leather between the jaws of the vice. But even with the help of a vice, screwing a screw into the frame of glasses is not easy, since you have to hold the base of the frame with one hand and at the same time, with the same hand, use a small screwdriver to move the flex bar up so that the holes coincide. With your second hand you need to insert a screw into the aligned holes and screw it in. I only succeeded after a few tries.
The original screw was lost and had to be screwed in with a suitable diameter that came from a broken calculator. Before assembling the glasses, you must first tighten the new screw with force, thereby cutting a new thread. In order to prevent the screw from unscrewing again, I riveted it a little on the side where it exits the frame of the glasses.

If a suitable screw cannot be found, it can be replaced with a brass or steel rod of a suitable diameter for fixation by riveting its ends, as described below.
Repair of flex glasses frames with flex
I received a pair of glasses for repair, the temple of which broke off at the point where the hinge was attached to the flex.

The load on the junction of the temple with the flex is large and glasses can be repaired using superglue or epoxy resin would not provide a reliable connection. There's only one left mechanical method repair.

At the end of the temple of the glasses there was a hole with a rectangular groove, and the counter part of the part, which went into this hole and was fixed in the hinge of the frame, was a narrow flat steel strip about 1 mm thick. The only possible reliable method of repair was to connect the parts using a rivet.
Rivets industrial production There is no such thing as such minor repairs. But a brass sewing pin with a metal head 0.7 mm in diameter worked well as a rivet. The size of the pin determined the diameter of the holes that needed to be drilled in the parts to be joined.

Before drilling, you need to make markings. The first hole must be drilled in the earpiece (arm), at a point calculated so that it passes through the center of the strip secured in the hinge of the frame.
To do this, the earhook needs to be clamped in a vice. Between the jaws of the vice, so as not to damage the covering of the temples, place pieces of leather and use a core to mark the drilling point.

Next, you need to drill a hole in the earhook. It is difficult to drill a hole with a diameter of 0.7 mm with a powerful household drill without breaking the drill, since it is impossible to feel the pressure on the drill due to the greater mass of the drill and this will lead to inevitable breakage of the drill. For such work, you need a miniature drill, for example, like in a homemade mini drilling machine.

You also need to drill a hole in the flat plate that secures the temple to the frame hinge. Before drilling, you need to mark the drilling point. To do this, the plate is inserted all the way into the groove of the temple located at its end and in this form the assembly is clamped in a vice lined with leather. The temple of the glasses should take a position relative to the frame that corresponds to the glasses being worn on the person’s head.

The hole previously drilled in the temple will serve as a conductor; inserting a drill into it will drill a hole in the plate. You need to drill very carefully, using little force, as the drill can easily be broken.

The holes are drilled, and you can begin the final stage of repairing the glasses, connecting with rivets. The flat plate is inserted all the way into the groove of the temple, and the pin is threaded through the holes.

Using pliers, the pin on the opposite side of the head is shortened so that the protruding part is 0.2-0.3 mm high.

To complete the repair, all that remains is to flare the protruding part of the pin using a small hammer. To do this, you need to press the round head of the pin against the anvil and with light blows, changing the angle, flatten the part of the pin protruding above the temple.

If there is no small hammer, then you can flare the pin with a large hammer, striking weakly on the protrusion of the pin through the metal rod.

As you can see, the repair of the glasses is completed, the connection of the temples with the base using rivets turned out to be neat and did not spoil the aesthetic appearance of the glasses.

While I was repairing the glasses, putting one temple in place, the second one broke. I had to repair it using the technology described above. Now the glasses will last a long time after repair, and time has confirmed this. I tested the technology for repairing glasses with rivets on several types of glasses frames; after the repair, the glasses at the junction of the temples with the console no longer broke.
Repairing the temple of glasses with a broken hinge
A neighbor approached me with a request to try to repair his favorite glasses, since a specialized workshop refused to repair him - they advised him to buy new ones.

The arm of the glasses broke at the hinge and at first glance it seemed that it was impossible to repair the glasses. But if you think about it, you can always find a way to repair it.

First you need to unscrew the self-tapping screw and glue the broken part of the loop to the earhook using Super-glue “Contact”. I often use this glue to glue any cracked or broken parts together. But in in this case The fracture area is small and the glue will not hold securely. Therefore, the parts were glued together mainly for the convenience of further repairs.

Next from paper clip The bracket was bent as shown in the photograph and, using heating with an electric soldering iron, fused in the longitudinal direction of the temple. The middle of the bracket should follow the crack line.

To ensure a secure connection, a second bracket was fused across the temple. To avoid burning your fingers and fuse the bracket into Right place earhook, it is convenient to hold it with tweezers. It takes up to a minute to warm up the brackets, there is no need to rush here. When the bracket warms up to the melting temperature of the plastic, it will easily fit into it.

After the brackets are fused into the temple, all that remains is to smooth out the protruding plastic and cut off the excess after it has cooled with a knife or grind it off with fine-grained sandpaper. If the bracket appears on the surface, then it can be heated again and sunk deeper.

Now the brackets are no longer visible, the resistance to breakage after reinforcement with steel brackets of the temple has become higher than before. The glasses will no longer break at this point. If desired, the joint can be polished, making it completely invisible.

The repairs have been completed and now the glasses look like new and, if treated with care, will last a long time. When I returned the glasses to my neighbor, he was very surprised that they were able to be repaired, but he doubted whether the temple would break off in this place again. After a month of wearing it, he started asking me what kind of glue I used to glue the glasses together. After all, he did not know that the bow at the site of the breakdown was reinforced with metal brackets.
Repair of the place where the temple of glasses is attached to the rim
Another pair of glasses with a broken temple went into repair. But in this case, the earhook was intact, but the place where it was attached to the headband was destroyed.

The earhook loop was made of brass so it didn't break. This failure is more likely due to a design flaw in the frames of the glasses, rather than to handling them.

The earhook loop was attached to a rectangular hole made in the frame using one self-tapping screw screwed into the metal of the loop. When wearing glasses, the screw slowly unscrewed, and the load on the plastic increased, which is why it cracked. Ultimately, the self-tapping screw was completely unscrewed and lost, causing the shackle to fall out of the mount.

There was no screw suitable for the size, so I had to use a standard M1.5. To do this, a thread was cut in the hinge bar with a tap.

The plate on the rim for securing the earhook loop had a crack. But installing a metal bracket to strengthen it was impractical, since it was necessary not only to strengthen the plate, but also to increase the support area of the screw head

Therefore, a washer with a ribbed circumference was selected and fused into the plate by heating it with a soldering iron. As a result, the area of support of the screw head on the plastic increased many times over, and the crack partially melted, which also increased its strength.

Next, the mating surfaces of the plates were lubricated with Super-moment glue, the hinge plate was inserted into square hole the base of the glasses and the screw is screwed in. At the same time, the broken fragment from the frame was also glued. It did not bear the load and therefore there was no need to strengthen its fastening with a bracket.

The next glasses were repaired with our own hands and their use for several months confirmed the reliability of the repairs performed.
Half-rim frame repair
with lens mount on fishing line
In a semi-rimless frame, the lenses are half mounted in the frame, and the rest of them are held in the frame by a fishing line, half recessed in the bevel (a groove running along the entire length of the end of the lens). Thanks to this method of attaching lenses, glasses have elegant look and less weight compared to rim frames, especially if the lenses are plastic.

But you have to pay for elegance with a more careful attitude during use, since such a frame, compared to a bezel frame, is less reliable. If you forget to take off your glasses and start to remove a piece of clothing over your head, it may well happen that the glass will fall out or the fishing line will jump out of the frame, as in the photo. If the lens falls out, but the fishing line remains securely fastened in the half-rim, then due to the elasticity of the fishing line, the lens can be put back in place. If the fishing line is disconnected from the frame, you will need to replace the fishing line with a new one.

But don’t get upset and run to the workshop; such a breakdown of the semi-rimless frame of glasses is not difficult to fix with my own hands. For repairs, ten centimeters of transparent fishing line with a diameter of 0.8 mm is enough. You can ask fishermen you know for fishing line or ask at any fishing tackle store. They cut off half a meter for me as a thank you.

The first step when starting repairs is to remove the old fishing line from the frame. Usually it is enough to move the fishing line back and forth with force and it will move from the place of attachment. If its melted ends interfere, the line can be cut. It won't be needed anymore anyway.

After freeing the holes from the old fishing line, you need to check whether the fishing line purchased for repair fits well. To do this, you need to bite off one of its ends with side cutters or cut off obliquely so that the end of the fishing line becomes sharp. This will make it easier to insert it into the holes of the frame.

If the fishing line cannot be threaded through the mounting hole of the frame, it needs to be cleaned. This is best done using a mini drill with a drill bit with a diameter of 0.8 mm. But if this is not possible, then you can use a needle or a thin awl; an unbent paper clip will also do.
The holes in the half-rim of the frame have the shape of a cone; on the lens side their diameters are 0.8 mm, and on the side outside 1.5 mm. This is clearly visible in the photograph. Thus, by melting the end of the fishing line, you can securely secure it in the frame.

First, the fishing line is threaded through the hole in the nose pad, without a lens. Next, the end of the fishing line is melted using a soldering iron and quickly, before the end of the fishing line hardens, it is pulled into the hole in the nose pad. You need to retract it slowly so that the line does not jump out of the hole.
If you have a soldering iron high power, then you can wind several turns of any wire with a diameter of 1-2 mm, copper, aluminum or steel, around its tip. And with this improvised sting, warm up the fishing line. If you don’t have a soldering iron, you can melt the fishing line with a nail heated on a burner gas stove. To avoid getting burned, you need to hold the nail with pliers. You can use the sharp tip of a heated electric iron or, at worst, even a small flame from a lighter to melt the fishing line.

After fixing one end of the fishing line in the nose pad, the lens is inserted and the fishing line threaded into the hole on the side of the temple is stretched. Next, the fishing line is pressed with your fingers where it passes through the facet of the lens, and is cut so that its end protrudes from the hole by a couple of millimeters. Next, the lens is removed, the second end of the fishing line is melted and after cooling, its lens is installed in the half-rim.

Remains of melted fishing line protruding from the holes of the frame must be cut off flush with a sharp knife.

The glasses have been repaired and are like new. The repair took less time than it took to read this article, which I hope was useful to you.
Repairing a broken half-rim of a glasses frame
A few years passed, and my favorite half-rim glasses on a fishing line cracked as a result of a collision with the right angle of a kitchen shelf.

As you can see in the photo, the frame broke in the glass installation area at the narrowest point. To repair it, gluing technology was used, followed by reinforcement of the fracture site with a metal bracket.

In the first step, the frame must be glued with Super-Moment glue or similar, intended for gluing plastic products. To do this, you must first apply a thin layer of glue to the inside of the rim of the frame, which is in contact with the glass along its entire length. Next, also apply a thin layer of glue to the end of the glass in contact with the frame.

After gluing, a small gap was discovered between the glass and the nose pad. To ensure reliable gluing, a small amount of soda was poured into this gap and then soaked in glue.

After such gluing, the frame received sufficient strength, but for higher joint strength, a metal bracket made from a paper clip was additionally installed.

The bracket was fused into the frame of the glasses using electric soldering iron. For clarity, the photo shows the bracket not yet completely recessed into the plastic.

Ultimately, the bracket was completely recessed into the plastic of the glasses, the area was cleaned with sandpaper and polished with felt. There are practically no traces of repairs left.
In the same way, you can successfully repair the plastic temples and cracked frames where the nose rests with your own hands.
Repairing a broken plastic rim of a glasses frame
I had to repair glasses with plastic frames, in which one of the plastic glasses fell out of the rim.

Upon closer examination, it turned out that the rim at the bottom was cracked in half. This is one of the glasses breakdowns that you can fix yourself in a few minutes.

To do this, just apply Super glue to the crack and inside the rim a couple of centimeters to the sides from the crack. Next, insert the glass into the rim, squeeze it tightly and hold it there for a couple of minutes.

The rim of the glasses in the place of the crack does not bear any power load, and therefore reinforcement with steel wire is not necessary. The glasses have been repaired, the appearance has not changed, and now, if treated with care, they will last a long time.
Repairing metal eyeglass frames with a broken rim
They brought me glasses with metal frames with a broken rim at the bridge of my nose, which the repair shop refused to repair. The breakdown was really serious. Glue, even the strongest one, will not hold in this case, since the area of the end of the rim at the fracture site was no more than a square millimeter.

I, too, immediately thought that this was a hopeless case and it was impossible to repair the glasses, but after a while I suddenly came up with an idea on how to do without welding metal. After all, you can repair the frame by gluing the broken metal frame directly to the lens of the glasses. The area of the gluing surfaces will become large and, thus, sufficient strength of the frame will be ensured after the repair as a whole.

The universal super glue “Contact” is well suited for gluing frames. This glue is made on the basis of cyanoacrylate and has great strength. adhesive connection and polymerizes upon contact with water in the air. The higher the air humidity, the faster the glue hardens, so you can glue even damp surfaces. The setting time of the glue, depending on air humidity, ranges from several seconds to several minutes. The glue hardens completely within a day.
By the way, not all home craftsmen know that if you need to quickly repair a crack or chip in hard materials, then you can prepare homemade putty by mixing super glue with baking soda.

The lenses of the glasses were plastic, and to protect them from glue getting on the optical surface, strips of tape had to be glued on both sides around the perimeter of the lens. It is undesirable to cover the entire surface of the lens with a single piece of tape, since after gluing it will be difficult to peel it off without damaging the optical surface of the lens. Excess tape on the ends of the lens can be easily removed using fine sandpaper.
If the lenses are made of glass, then there is no need to glue the tape. Super glue is easily softened with acetone, which is safe for glass. Therefore, to remove residual adhesive after repair from the optical surface of the lenses, it is enough to wipe them with a soft cloth soaked in this solvent.
Before gluing, you need to think through all the movements and practice installing the lens in the frame before applying glue to it. When the movements are practiced, you need to apply glue to the end of the lens, accurately insert it into place in the frame and tighten the frame ring with your fingers for a few minutes. I could not take photographs of applying the glue and installing the lens, since only a few seconds were allotted for this operation.

When the glue sets, remove the tape and tighten the frame with thread, tying it as in the photo. The glasses should be left bandaged for a day until the glue has completely hardened. If there is a gap between the rim of the frame and the lens, it is advisable to additionally fill it with super glue.

Checking the glasses frame after repair with glue showed that it has a sufficient margin of strength for further exploitation. Appearance glasses remained without visible changes.
Repairing a broken eyeglass frame temple
At the request of a friend, I had to repair glasses where one of the temples had broken in half. The breakdown occurred at the junction of its metal part with the plastic extension.

The metal part of the temple was attached to the plastic part by means of a protruding pin, which was tightly inserted into the hole in the plastic part of the temple and secured with a screw. It was not possible to remove the pin from the plastic after unscrewing the screw, since the break occurred along the line of the plastic, and it was impossible for the tool to catch on the pin. I also didn’t want to grind down the plastic to shorten the temple.

The difficulty of repairing the earhook at first glance was aggravated by the fact that the metal part was covered in openwork holes. But as it turned out, this was a plus. To restore the integrity of the temple, a specially shaped pad was made from a sheet of brass 1 mm thick. Geometric dimensions I don’t include pads, since all temples are different and the pad for repairing a specific glasses frame will have its own dimensions, depending on the width of the temple at the point of breakage.

As you can see from the photo, two holes were drilled in the cover and three bends were made. The bends are needed to prevent axial swing of the connected parts of the temple. The dimensions of the holes determined the finished holes in the metal and plastic parts of the temple, and were 2.5 mm and 1.5 mm in diameter, respectively.

The metal part of the temple was secured to the pad using a shortened M2.5 screw with a conical head. The screw was used as a rivet.

It was inserted from the outside of the metal part of the temple and riveted from the inside with a small hammer. To ensure that the riveted part of the screw does not protrude into the plate, the hole was pre-countersinked.

The pad was secured to the plastic part of the temple using an M1.5 screw screwed into the previously existing threaded hole in the remaining pin.

The photo shows a view of the pad after installing the screw and rivet on the inside of the temple.

And in this photo is a view from the outside of the temple after connecting its broken parts.

All that remains is to attach the earpiece to the frame of the glasses using a standard screw and the repair can be considered complete.

This is what the glasses looked like after the repair. If you don’t look closely, it’s difficult to notice the restored place on the earhook; it’s not noticeable. But the earhook has become much stronger and now it will definitely never break in this place.
Repair of plastic glasses frames
with broken headband and earhook loop
Glasses with frames made of thermoplastic plastic are easier to repair, since it melts easily when heated, adheres well, and is dissolved by certain types of solvents, for example, dichloroethane or benzene.

I was faced with the repair of glasses with plastic frames, which were broken in three places at once. The right ear hook of the frame was broken off.

Also, as can be seen in the photo, part of the rim on the side where the temple was attached to the base was broken off. Apparently, the glasses were accidentally sat on or stepped on.

The repairs had to be carried out in two stages. First, using super-glue “Contact” using the technology described above, used to repair a metal frame of glasses with a broken rim at the bridge, the broken plastic part of the rim was glued to its original place.

In the glasses being repaired, the temples were equipped with flexes, which, during use, would create a large load on the glued part of the rim. Therefore, to ensure sufficient strength of the rim, two steel brackets, bent from a paper clip, were additionally installed at the gluing site, fused into the plastic.

To fuse a paper clip, you need to take it with tweezers and apply it to the place with the crack, as shown in the photo. Next, use a soldering iron tip with a power of 12-40 W to heat the bracket, lightly pressing on it from above. This usually takes a few minutes. There is no need to rush here.

When the bracket has entered the plastic a little, you can remove the tweezers and then, pressing, continue to heat the bracket until it is completely sunk into the base of the glasses.

Next, the soldering iron tip smoothes out the plastic squeezed out by the bracket so that the bracket is completely hidden. After the plastic has hardened, the resulting unevenness is ground off with a file or sandpaper, and the roughness is removed by polishing with felt. After this, you can begin repairing the hinge joint.

First, you need to remove the remaining loop with side cutters and use a file to level the surface of the junction of the temple with the base of the glasses.

You need to bend a rectangular loop from copper or steel wire ∅1-1.5 mm. The photo shows a loop made from electrical wiring wire. Copper, unlike steel, bends easily and has sufficient strength.

Based on the size of the base, the ends of the loop are shortened to the required length and moved apart. This shape of the loop will ensure its reliable fixation in the plastic case of the glasses.

Next, the eyelet is placed on a flat surface covered with a soft cloth and pressed down heavy object. The base is placed close to it, as in the photograph. All that remains is to fuse the homemade eyelet into the base body of the glasses using the technology described above for the bracket. After cooling, the hinged joint made will hold quite tightly and work well. If the plastic at the melting point loses its shine, then you can cover this place thin layer liquid transparent nail polish. Varnish is usually solvent-based, which softens the thermoplastic plastic.

As you can see in the photo, the repaired hinge joint of the glasses turned out to be quite neat.

From the outside, traces of repair of the plastic frame are practically invisible. The glasses have been repaired and are ready for further wear.
How to repair glasses
with a broken bow at the hinge point
In the Guest Book, Margarita from Rybinsk asked me the following question:
– I have such a problem, the child broke his glasses! The bow broke off at the hinge with the screw, that is, the hinge with the screw remained on the frame, and the bow was without a hole. The frame is plastic. I took my glasses to a repair shop and they said they couldn’t fix them, I had to buy new ones. Maybe you can recommend something.
My advice:
– Everything can be repaired, but the complexity of repairs and the need to purchase special tool often making repairs economically unfeasible. This is exactly your case. But since the main cost of glasses is optical glass and their installation, you can repair glasses at low cost if you buy a cheap frame, from which the arms will match your glasses in color, method of fastening and loop size. It's even better to buy the exact same frame. Switching the temples from one glasses to another is not difficult. The glasses will be like new.