Vacuum cleaner irobot what does error 5 left mean. Error codes and options for eliminating them in Roomba robotic vacuum cleaner models. Caring for the brush mechanism of the robot vacuum cleaner
Read also
Robot vacuum cleaners complex product, in order to better use your Roomba robot vacuum cleaner, this section was created.
Your robot's battery may be very low. In this case, it will take longer to charge than 6 hours. If you have fully charged the battery (the Clean light on the robot is solid green) and the charging time has taken less than 20 minutes, and the robot has been running for a very short time (less than 20 minutes), follow these steps: 1. Reset the Dirt Dog charging system - Remove the battery from the robot and hold the CLEAN button for at least 5 seconds, then reinsert the battery. 2. Plug the charger into the Dit Dog (do not use the charging base)...
If your robot isn't cleaning as well as it used to, its brushes may need to be cleaned or replaced. We recommend cleaning Dirt Dog brushes after every cleaning (or every time you empty the dust bin). Here are a few things to check (make sure the robot is powered off and the dust bin is empty first) 1. Turn the robot upside down on a flat surface. Manually rotate the stiff brush and see if the smaller brush rotates. If it does not rotate or is difficult to rotate, clean the brushes and make sure that the yellow ...
Advanced design Improved performance, reliability and durability Use of new technologies in robotics New generation home robots How it works The vacuum sucks up debris and places it in a large, easy-to-clean trash compartment with an improved filtration system for dust, pollen and other allergens. Roomba moves confidently from floor to carpet and carpet to floor, automatically adapting to any type of surface. Using anti-entanglement technology, Roomba 500 Series does not get stuck in...
Roomba will let you know if something is wrong with a two-tone "ooh" sound followed by a voice message. Refer to the table below to determine the type of problem and resolve it. If the problem cannot be resolved by yourself, please contact technical support. ...
Before using Roomba for the first time, you must remove the battery guard and charge Roomba overnight or until the CLEAN light turns green. Under normal conditions, the Roomba charging process looks like this: . The light on the power supply should be solid green when the power supply is plugged in and charging the robot. . The power light on the charging base (if you are using a charging base) should glow green when it is plugged into the power source and charging the robot. ...
Charge more often;) In addition: We recommend rebooting the robot by long-holding the “Clean” button, as well as double-holding the “Spot” and “Dock” buttons, completely discharge the battery and put it on charge. Possibly due to improper use your robot will need a battery replacement. ...
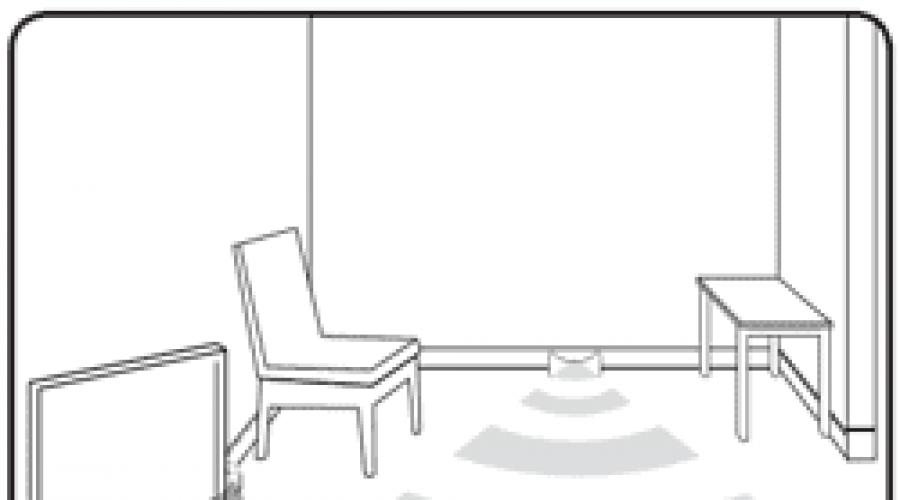
A virtual wall with LightHouse technology (lighthouse wall) automatically turns on/off when you turn on/off the Roomba robot. Virtual walls can operate in two modes - "Lighthouse" (lighthouse) and "Virtual Wall" (virtual wall). Use the switch to set desired mode work. When working in the "Virtual Wall" mode, virtual walls block the robot from accessing prohibited areas of your home. An invisible, safe infrared barrier is created that can...
Now Roomba speaks most European languages, and, of course, Russian 1. Turn off Roomba. 2.Press and hold the CLEAN button 3.Release the CLEAN button 4.Select the desired language with a short press. 5. For recording desired language into memory, press and hold the CLEAN button until the robot turns off. 6. The selected language is recorded. ...
Important Instructions Safety To reduce the risk of electric shock, do not remove the robot's panel, battery or battery, or internal parts that are not intended for user use. Charge the robot using the standard charger for your region electrical network. Always use caution when operating your Roomba. To reduce the risk of damage or failure, keep the following safety guidelines in mind when installing or using the equipment. General...
This means that the side brush module operates in anti-tangle mode. The side brush can rotate slowly or quickly in the opposite direction to free the robot from carpet fringes or wires. If the brush operates in this mode when the robot is on a hard floor or without fringes or wires, try cleaning the brush: 1. Remove the side brush screw. 2. Remove the side brush. 3. Remove any hair that may have gotten wrapped around the brush shaft and clean the brush itself. After that, install o...
Your Roomba may need circuit board repair. Due to moisture ingress. This defect manifests itself in 2 cases: Failure of the side brush motor, or breakdown of the gearbox. The second option is the most likely. Perhaps your robot ran into some puddles, spilled liquid, etc. ...
Roomba returns to its charging base at the end of a cleaning cycle and when battery power is low. To return to the base, Roomba must find an infrared signal from the base. Always keep the base plugged in. When Roomba is in the charging base, the lights on the base should remain lit to indicate that Roomba is connected to the base. When Roomba is charging, the CLEAN button on the robot flashes yellow. Charging base location: You must install the charging base on a solid surface, within reach...
To keep your Roomba running at its best, we recommend cleaning the front wheel regularly. 1. Pull the front wheel to remove it from the robot. 2. Remove any debris stuck in the wheel cavity. 3. Remove the wheel from its mounting. 4. Pull the wheel axle to remove it completely from the wheel. 5. Remove any hair that may be wrapped around the wheel axle and wipe it with a dry cloth. 6. Wipe the wheel thoroughly. 7. Insert the axle into the wheel, the wheel into the mount...
It is necessary to empty the dust container and clean the brushes every 2-3 cleaning cycles, depending on the amount of hair, wool and debris in the room being cleaned. If you notice that the robot is picking up less debris, empty its dust container and clean the brushes...
The "oooh" sound followed by a single beep indicates that the robot's wheel is below the robot itself. This can happen if the robot was not started flat surface or got stuck on some obstacle during the cleaning cycle. Pick up the robot from the floor surface and move it to the center of the room. Then restart the cleaning cycle. Use Virtual Walls to protect your robot from getting into problem areas. If such an error occurs when the robot is on a flat surface, then follow these steps: 1. Check to see if...
Roomba automatically detects and avoids falls. An “oooh” sound followed by twelve beeps means that the Roomba 500 Series' sensors are constantly reporting that the robot is at the crash site. This can happen if the robot was started on uneven surface or got stuck on some obstacle during the cleaning cycle. A very dark floor surface can also cause this type of error. If this error occurs while the robot is on a flat, light-colored surface, it means that Roomba's sensors may be clogged or reacting to nearby proximity...
An "oooh" sound followed by five beeps indicates that one or both of the robot's wheels are not spinning. This can happen if the robot was launched on an uneven surface or got stuck on some obstacle during the cleaning cycle. Pick up the robot from the floor surface and move it to the center of the room. Then restart the cleaning cycle. Use Virtual Walls to protect your robot from getting into problem areas. If such an error occurs when the robot is on a flat surface, then follow these steps: 1. Check to see if you hit...
Roomba automatically detects and avoids falls. An “oooh” sound followed by six beeps means that the Roomba 500 Series' sensors are constantly reporting the robot's location at the crash site. This can happen if the robot was launched on an uneven surface or got stuck on some obstacle during the cleaning cycle. A very dark floor surface can also cause this type of error. If such an error occurs when the robot is on a flat, light surface, then Roomba’s sensors may be clogged or react to a nearby obstacle. What ...
The sound "oooh" followed by seven beeps means that the robot's driving wheel is not rotating. This can happen if the robot was launched on an uneven surface or got stuck on some obstacle during the cleaning cycle. Pick up the robot from the floor surface and move it to the center of the room. Then restart the cleaning cycle. Use Virtual Walls to protect your robot from getting into problem areas. If such an error occurs when the robot is on a flat surface, then follow these steps: 1. Check whether you have bumped into...
Yes, you can wash the filter in the hand wash- with water and a little soap. Make sure the filter is completely dry before use. However, this does not mean that your filter does not need to be changed. Over time, the micropores of the filter element become clogged. ...
No, Roomba cannot fall down stairs or steps. Roomba uses an intelligent fall sensor system that detects falls and alerts the robot about them. However, under certain conditions, such a system may be less effective. Here are some examples: 1. Rounded edges of steps 2. Slippery surfaces 3. Heavily dirty fall sensors If Roomba does not detect the edges of surfaces and places of falls, please check whether ...
As a rule, this means that one or several bumper sensors have failed and you will have to contact service center. However, before making such a conclusion, spin the robot's wheels, lightly tap the bumper with different sides. Consult a specialist toll free number: 8 800 2000 255. ...
Roomba robots have a different cleaning technology than most people use to clean their floors. Roomba uses a specially designed intelligent system to determine the best path through the room and clean all areas of the floor. As Roomba cleans, it calculates the optimal path and determines what type of cleaning will be best: Spiral: Roomba uses a spiral motion to clean confined areas. Along Walls: Roomba uses this technique to clean around the entire perimeter of a room and move between furniture and obstacles...
Roomba uses Light Touch technology to detect the location of walls and other obstacles, allowing the robot to slow down, lightly and delicately touch the bumper to the obstacle and change direction. If Roomba slows down when there are no obstacles nearby, the bumper sensors behind the black bumper window may be dirty. Most effective method to clean them is to use them compressed air. 1. Turn Roomba upside down on the floor. 2. Direct compressed air between the window...
If your Roomba stops during a cleaning cycle and its warning light is flashing, it means that a performance error has occurred. In this case, your robot will let you know that something is wrong with two-tone "ooh" sounds, a series of beeps, and in some cases a voice signal. Press the robot's bumper or the "CLEAN" button to listen to the message again, and then refer to the following table: ...
If this happens, try the following: 1. Turn off the robot 2. Pull out and empty the dust bin, then turn the robot upside down and place it on a hard surface 3. Check the drop sensors for dirt 4. Push the front bumper and make sure it springs back back. ...
Problems with Beacons Problem: Let's say a Customer receives a new Roomba (Models 535 and above) and the old Beacons stop working properly. Solution: Have the client remove the batteries from the Beacons and reinsert them (erase the Beacons' memory). Background: When a customer uses a new Roomba for the first time, all new Beacons within RF range will turn on. Then, when Roomba cleans for the first time, when the robot gets within the infrared ray He will assign an identification to the Lighthouse...
Virtual Walls create an invisible infrared barrier that Roomba cannot cross. This barrier can be used to keep a robot in a specific room or area of a room to prevent it from accessing areas with electrical and computer wires. Virtual Walls can block an area up to three meters in diameter. As the length of the infrared beam increases, its width also increases. Virtual Walls also create a barrier around themselves to prevent the robot from getting too close to them. For getting best result, place Virtual Walls in the door...
Roomba 500 Series robots have three cleaning modes and will clean depending on the mode you select. Cleaning mode - for all models. Roomba automatically calculates the size of the room and sets cleaning times accordingly. Spot Mode - for all models. Roomba will work by concentrating on cleaning areas up to 1 meter in diameter. The robot moves in a spiral and removes the localized area, and then returns to its original position. Use for th...
If your robot spins or rotates in one place, this may indicate a problem. Here are some examples of this behavior and solutions to this problem: . The robot rotates in a circle. Solution: Unplug the robot, turn it over and place it upside down on a flat surface. Try to turn the wheels by applying equal force to both wheels. If the wheels do not provide the same resistance, please contact technical support. . The robot quickly returns to the same place and rotates in a circle until...
Roomba automatically detects and avoids falls. If the robot says, “Please check and clean the fall sensors,” this means that the Roomba 500 Series' sensors are constantly reporting that the robot is in a fall location. This can happen if the robot was launched on an uneven surface or got stuck on some obstacle during the cleaning cycle. A very dark floor surface can also cause this type of error. If such an error occurs when the robot is on a flat, light surface, then Roomba's sensors may be clogged or...
No iRobot robot model remembers a room's configuration in any sense for longer than a cleaning cycle. The robot is guided by the approximate perimeter of the room, the average mileage without a collision, and the frequency of detection of dirt by the detector. All this affects the duration of cleaning, but not the quality of cleaning. The quality always remains excellent. Reset simply resets the battery registers, as a result the robot thinks that it has a new, uncharged battery and charges it for 16 hours. ...
Language Mode Roomba can provide troubleshooting messages in English, French, German, Spanish, Italian, Dutch, Danish, Swedish, Norwegian, Finnish, Polish, Russian, Portuguese, Japanese, Korean, and Chinese. Setting the language The default language is English. To change the default setting, follow the steps below. 1. Turn on Roomba by pressing the CLEAN button. 2. Press and hold the DOCK (connect to base) button until.........
With a wireless contact center, you can more easily control Roomba's activities. You can use it to turn the robot on and off, set a cleaning schedule, and control what the robot does in your room without having to follow it. To set a cleaning schedule on the wireless contact center, use the same buttons as when setting a schedule on the robot itself. . Before using wireless...
The robot will only start a 16-hour battery charging cycle if it senses that the battery is significantly discharged. This may happen if Roomba for a long time did not have access to the charging base (or charger). If your new Roomba doesn't start the 16-hour battery charge cycle, it only means it doesn't need it. If this charging cycle has been initiated, the CLEAN light on your robot will flash rapidly. DO NOT INTERRUPT THIS CHARGING CYCLE. The 16-hour charging cycle cannot be set manually, it is set automatically by the robot only...
If Roomba tries to dock with the charging base and instead just bumps into it, follow these instructions. For the charging base for 500 series robots: 1. Wipe the charging contacts on the robot and base with a dry, clean cloth. 2. Plug in the power supply and make sure the power light is green. 3. Plug the power source directly into Roomba and make sure the POWER/CLEAN lights are blinking. 4. Insert the power supply into...
A virtual wall with LightHouse technology helps Roomba move around your home. When working in Lighthouse mode, virtual walls help the robot move around the room, find the floor charging base and help keep Roomba from going into new room until the current room is completely cleaned. When working in "Virtual Wall" mode, virtual walls block the robot from accessing prohibited areas in your home. Use the switch to...
If your Roomba 500 Series says "Check and Clean Robot Wheels," it means the robot's side wheels are stuck. This can happen if the robot was launched on an uneven surface or got stuck on some obstacle during the cleaning cycle. Pick up the robot from the floor surface and move it to the center of the room. Then restart the cleaning cycle. Use Virtual Walls to protect your robot from getting into problem areas. If such an error occurs when the robot is on a flat surface, then follow these steps: ...
| Indicator status and voice guidance | Most possible reason | Remedy |
| Error 1. Move Roomba to a new location then press CLEAN to restart. (Error 1: Move Roomba to a different location and press the CLEAN button to restart the device.) | Problem with robot movement. The robot is stuck, the front wheel is hanging in the air. | Move the robot to another location where its wheels are firmly on the floor and start it. |
| Error 2. Open Roomba’s brush cage and clean brushes. (Error 2: Open the brush compartment in Roomba and clean the brushes.) | Problem with brush rotation | Roomba's brush mechanisms need cleaning |
| Error 5. Spin Roomba’s side wheels to clean. (Error 5: Spin Roomba's side wheels to clean them.) | | |
| Error 6. Move Roomba to a new location then press CLEAN to restart. (Error 6: Move Roomba to a different location and press the CLEAN button to restart the device.) | Problem with sensors that monitor differences in floor level in height or the robot has fallen | It is required to clean the six sensors with a dry, clean cloth and start the robot vacuum cleaner |
| Error 7. Spin Roomba’s side wheels to clean. (Error 7: Spin Roomba's side wheels to clean.) | Problem with the rotation of the wheels that provide the movement of the robot | The mechanism for fastening the wheel parts needs to be cleaned. You should check the functionality of the wheels and start the robot vacuum cleaner |
| Error 9. Tap Roomba's bumper to clean. (Error 9: Tap the Roomba's bumper to clean them) | There was a problem with the reaction of the bumper part of the robot vacuum cleaner, under which debris was probably clogged | You need to remove particles of debris from under the bumper of the robot vacuum cleaner by lightly tapping it. |
| Error 10. Spin Roomba’s side wheels to clean. (Error 10: Spin Roomba's side wheels to clean.) | | Check the rotation of the wheels. Remove particles of debris from under the bumper of the robot vacuum cleaner by lightly tapping it. Use the Virtual Wall electronic barrier to reduce the size of the area you clean. |
| Please charge Roomba. (Charge Roomba's battery.) | There is a problem with the rotation of the front wheel or with the reaction of the bumper part of the robot vacuum cleaner, under which debris is probably clogged | It is required to place the robot on charger Home Base |
Battery charging progress signal system
| Robot vacuum cleaner indicator light signal | Information on the Roomba display | Voice accompaniment | Most Possible Cause | Method for eliminating the problem |
| 1 flash | Err 1 (error 1) | Charging error 1 (charging error 1) | No contact with battery | You should check whether the packaging protection has been removed from the contacts battery. Insert new battery. |
| 2 flashes | Err 2 (error 2) | Charging error 2 (charging error 2) | | Turn off the robot vacuum cleaner, leave it to cool for an hour and continue charging the batteries. |
| 5 flashes | Err 5 (error 5) | Charging error 5 (charging error 5) | Error during battery charging process | Reset the settings of the robot vacuum cleaner control program and continue charging the batteries. |
| 6 flashes | Err 6 (error 6) | Charging error 6 (charging error 6) | The robot vacuum cleaner's battery is too hot | Turn off the robot vacuum cleaner, leave it to cool for an hour and continue charging the batteries. |
The robot's main language is English. To change this setting you need to:
First turn off the robot by pressing the CLEAN button.
Press and hold the DOCK button until the robot vacuum cleaner plays the name of the current language in voice guidance.
Release the DOCK button.
Press the CLEAN button until the robot says in voice the name of the language convenient for you.
Press and hold the CLEAN button until the robot vacuum cleaner turns off. The selected language will be recorded in the robot's memory.
Resetting control program settings
To reset the control program settings, you must press and hold the CLEAN button for 10 seconds.FAQ
What is the reason why the robot vacuum cleaner brush starts rotating in the opposite direction?Changing the direction and speed of rotation is an attempt intelligent system control to free the robot from entanglement. Sometimes this is how the robot reacts to high pile carpeting floor.
The occurrence of such a robot reaction on a flat floor is a sign that the brushes need cleaning.
What is the reason that the robot makes clicking sounds?
The clicking sound made by the robot vacuum cleaner signals an attempt by the intelligent control system to free the robot from entanglement by changing the direction of rotation of the brushes.
The appearance of such a sound made by the robot on a flat floor is a sign that the brushes need cleaning.
Why does the robot not detect the presence of some obstacles on the way while moving?
The intelligent control system of the robot vacuum cleaner, receiving information from sensors located on the body, promptly detects the presence of obstacles in the direction of movement, reduces the speed of the robot and touches the obstacles very gently, and then changes the trajectory of movement. Dark colors Floor coverings can reduce the quality of obstacle detection.
Security requirements
DO NOT OPEN THE CASE OF THE ELECTRONIC UNITS AND BATTERY OF THE ROBOT VACUUM CLEANER OR CHARGER. THEIR CONTENTS ARE NOT SUBJECT TO ANY REPAIR OR MAINTENANCE.TECHNICAL SUPPORT FOR THE ROBOT VACUUM CLEANER SHOULD BE ENTERED ONLY TO SPECIALISTS OF A SPECIALIZED SERVICE CENTER.
BEFORE OPERATING THE ROBOT VACUUM CLEANER, YOU SHOULD CHECK THE CONFORMITY OF THE CHARGER VOLTAGE AND THE VOLTAGE IN THE ELECTRIC ENERGY SUPPLY NETWORK.
Ignoring safety precautions when using the Roomba robot vacuum cleaner and handling it carelessly can cause injury and damage.
Instructions for general questions
Be sure to follow all instructions included with your robot vacuum cleaner. Be sure to pay attention to the warning notices on the body of the robot vacuum cleaner and other equipment supplied with it.Entrust servicing of the robot vacuum cleaner beyond what is recommended for the user to qualified specialists from specialized service centers.
Instructions regarding operating issues
The robot vacuum cleaner cannot be used outdoors.
The Robot Vacuum Cleaner is not a gaming or entertainment device and is not intended to carry any objects or carry people around. When cleaning a room with a robot vacuum cleaner, young children and pets located there must be supervised by adults.
The robot must not be used in areas with high humidity or on wet or damp floor surfaces.
The robot must be maintained using dry and clean cleaning material.
Do not use the robot vacuum cleaner to clean burning, smoldering, chemically active debris or liquids.
Before you start cleaning the room with a robot vacuum cleaner, you should remove scattered objects from the floor, fragile interior items, cords and wires hanging on the floor or lying there.
It is necessary that the robot vacuum cleaner is not able to physically enter dangerous areas such as a balcony or landing.
After pre-charging, you should remove the battery from the robot body if the need for its help does not arise for a long period of time.
The robot vacuum cleaner cannot be handed over to people with disabilities or a number of chronic diseases without supervision from adults.
The robot vacuum cleaner is not a gaming or entertainment device.
Completeness and charging of batteries
To charge the batteries of the robot vacuum cleaner, use only a standard electrical supply. Using additional conversion devices deprives you warranty obligations from the manufacturer.
To charge the batteries of the robot vacuum cleaner, use the included, technically sound and undamaged charging device.
Charging of batteries occurs exclusively indoors.
In case of sudden changes in electrical voltage in the electrical supply network, the robot vacuum cleaner is equipped with a stabilizing device.
You have become the owner of yourself modern equipment - iRobot robot vacuum cleaner Roomba. More than five million people living around the world use robot labor in their homes. Sometimes, robots literally become members of families - people give them names.
More than two decades of iRobot's history have been dedicated to the design and creation of robots.
Before you start a most fascinating process before putting the robot into operation, carefully read this manual. This will allow you to correctly approach the process of operating the robot, spend a minimum of time on training and get maximum pleasure and effect from the operation of iRobot Roomba.
Thank you for choosing an iRobot robot!
Robot vacuum cleaner maintenance
To ensure that the quality of the iRobot Roomba robot vacuum cleaner remains excellent over the course of long period time, the following requirements must be met:
- The robot should be used periodically, or specially prepared for storage if it is not needed for a long time. This approach will maximize the life of the iRobot Roomba battery.
- The robot's brushes will work extremely efficiently if you can take the time to clean them. In addition, the mechanisms that control these brushes also require regular maintenance and cleaning of debris and dirt.
- electronic modules and electrical circuits iRobot Roomba robot vacuum cleaner will become unusable from active contact with water. The robot should not be immersed or doused in water, allowed to operate, or stored in wet conditions. The robot should be cared for using a dry cloth.
Remember safety
When preparing the robot for operation, you should carefully read the safety rules contained in this manual.
Preparing the robot vacuum cleaner should begin by removing the packaging protection from the battery contacts. To do this, you need to first turn the robot over and remove the yellow battery tab. The robot vacuum cleaner's battery will then need to go through a full charging cycle. The first charging of the battery must not be interrupted! The robot will indicate the end of battery charging with a green light on the CLEAN button.
Preparing the work area for the robot vacuum cleaner
The intelligent control system of the robot vacuum cleaner allows it to move around the space being cleaned completely independently. But such obstacles as wires lying on the floor or running along the baseboard, with the help of which power is supplied to others household devices, may become an insoluble problem for the robot and require your intervention.
The Roomba robot vacuum cleaner effectively copes with various types garbage and dirt. But it cannot be used in rooms with high humidity or on wet or damp floor coverings.

First of all, you should determine the location where the Home Base™, the robot vacuum cleaner's charger, will be located and install it there. Then you need to plan which areas of the room will be cleaned and define their boundaries using Virtual Wall devices or Virtual Wall® Lighthouse™ devices used for models 780 and above. Based on their signals, the robot vacuum cleaner will be able to work, moving from area to area.
Beginning of work
If you purchased a device to control your robot vacuum cleaner or a remote control, you must first configure it to control the robot. Otherwise, turn on the robot vacuum cleaner by pressing the CLEAN button on the robot body.
The robot vacuum cleaner will notify you that it is turned on with a special sound and a light indicator on the CLEAN button. The next press of CLEAN will signal the robot to start cleaning the room.
Pausing during the cleaning process and returning to the active cleaning phase is also carried out using the CLEAN button.
To turn off the robot vacuum cleaner, the CLEAN button must remain pressed until the indicator light turns off.
Cleaning programs and models
The Roomba robot vacuum cleaner is controlled by the iAdapt™ intelligent system, which constantly receives information about the world around it and decides how to react to it during operation. The memory of the robot vacuum cleaner contains forty basic ways of reacting to various external conditions and three basic models work. The intelligent system constantly makes decisions about what reaction and what model will be most optimal under current conditions.
The Roomba 700 Series robot vacuum cleaner is programmed to use the following cleaning programs:
- Clean Mode. The intelligent system collects information about the size and configuration of the room intended for cleaning and builds a time-optimal work model.
- Spot Mode. This cleaning mode is used by the intelligent control system of the robot vacuum cleaner when a cleaning task appears on small area. The robot begins to move along the area along a trajectory resembling a spiral with a radius of about half a meter, returning to the starting point at the end of cleaning.
- Scheduled Cleaning Mode. When using this mode, the intelligent system of the robot vacuum cleaner turns on at a predetermined time, cleans the planned areas and returns to the charging device.
Floor coverings
The robot successfully copes with any floor covering and is able to protect itself from the occurrence of emergency situations due to falls and slips. An intelligent control system identifies places on the floor where changes in height occur. However, sometimes a robot vacuum cleaner may need help. This happens when cleaning around rounded corners or on floors that tend to be very slippery. The robot vacuum cleaner cannot be used outdoors.
Release from entanglement
The brushes of the robot vacuum cleaner may get tangled in loose items on the floor. electrical wires, through which power is supplied to other household devices. In this case, the robot's intelligent control system stops the current cleaning job and tries to release the brushes by changing the direction of their rotation. The unraveling process is accompanied by a characteristic sound similar to clicks.
Home Base
The Home Base charging device of the robot vacuum cleaner should be located near the wall, on the floor, no closer than one and a half meters of free empty space from the places where the floor level changes in height. After cleaning, or when the batteries reach a certain level of discharge, the robot vacuum cleaner is sent to the charging device. Once the robot vacuum cleaner is installed on the base, the Home Base will indicate success with a green indicator light. A signal that the robot has started charging its batteries will be a yellow flashing indicator on the robot’s body.
A sign that the robot vacuum cleaner has successfully completed the procedure of charging its batteries and is ready to work will be the green light of its indicator.
The Virtual Wall electronic barrier is compatible with the entire Roomba range

The Virtual Wall electronic barrier is designed to forcibly limit the operating area of the robot vacuum cleaner. It can be used to prohibit the robot from traveling outside a specific room or to protect the robot from contact with fragile objects.
The electronic barrier is powered by 2 size C batteries. Batteries are not included in the delivery set and must be purchased separately.
The electronic barrier creates a kind of “obstacle” for the robot in the shape of a cone, up to two meters wide, which it cannot overcome.
The electronic barrier is designed to block door openings. The best place its installation is the outer part of the opening.
The Virtual Wall electronic barrier operates in two modes:
- Manual. The barrier should be turned on together with the robot vacuum cleaner. It will automatically turn off a little over two hours after turning it on.
- Auto. The barrier turns on when the vacuum cleaner is turned on.
The indicator on the body of the electronic barrier indicates the selected mode and battery status. A flashing green indicator light indicates low battery life and the need to replace them. To save batteries, you should turn off the Virtual Wall electronic barrier during periods when the robot vacuum cleaner will not be used for a long time and turn it on only when there is a period ahead. regular work robot vacuum cleaner. At other times, the Virtual Wall electronic barrier must be turned off.
Virtual Wall Lighthouse device
For Roomba models 780 and older, the Virtual Wall Lighthouse™ electronic barrier is available with an additional Lighthouse mode. In this mode, the device works as a navigator for a robot vacuum cleaner and helps it navigate the space of the room.
The mode is selected in advance using a switch on the device, and the transition to active mode or shutdown of the Virtual Wall Lighthouse™ occurs automatically, along with iRobot Roomba.
The Virtual Wall Lighthouse™ electronic barrier is powered by 2 size C batteries. Batteries are not included and must be purchased separately.
The indicator on the body of the electronic barrier indicates the selected mode and battery status. A flashing green indicator light indicates low battery life and the need to replace them.

When installing the Virtual Wall Lighthouse™ device in Lighthouse mode, it should be placed in the doorway so that the part of its body on which the logo is located is facing forward. The Virtual Wall Lighthouse™ device will act as a beacon for the robot vacuum cleaner, which will help it move, sequentially cleaning one room after another.
The operating time of the equipment will depend on the size of the premises intended for cleaning. Once your robot vacuum finishes its job, the Virtual Wall Lighthouse™ guides it to the Home Base™ charger.
If you plan to use several Lighthouse and Virtual Wall devices at the same time, you should remember that they cannot be placed next to each other, the charger of the Home Base robot vacuum cleaner, or behind large interior items that do not transmit signals emitted by the listed devices for mutual communication. If you ignore these requirements, the robot vacuum cleaner will not detect Lighthouse or Virtual Wall devices or will not be able to determine the route to the Home Base charger.
Virtual Wall Lighthouse equipment with the mode switch set to the Virtual Wall position creates an electronic barrier that forcibly limits the operating area of the robot vacuum cleaner. This mode prohibits the robot from traveling outside a specific room or protects it from possible contact with dangerous objects. In Virtual Wall mode, the device will automatically stop emitting a signal two hours and fifteen minutes after switching on.
Virtual Wall Lighthouse, running in Virtual Wall mode, is installed in the area doorway. The signal strength, and therefore the distance at which the robot vacuum cleaner can detect the Virtual Wall Lighthouse, can be adjusted. It can range from two to six meters, depending on the configuration of a particular room. The longer this distance, the higher the power consumption of the Virtual Wall Lighthouse device.
Handling batteries
The iRobot Roomba robot vacuum cleaner is powered by rechargeable batteries. The very first battery charging cycle is carried out in preparation for the first use of the robot and takes a period of nine hours.
You should check the charge status of the robot vacuum cleaner's batteries before each cleaning.
In order for the batteries to work as long and efficiently as possible, the Home Base charger of the robot vacuum cleaner must be constantly connected to the power supply, and the robot itself, between cleanings, must be located on the base of the charger. The fact that the charger is functioning and the procedure for charging the robot's batteries is proceeding in normal mode is indicated by a light indicator on the body of the charger.
If the robot vacuum cleaner has been left for a long time without the ability to recharge the batteries, after connecting it to the charger, the battery recovery mode can be automatically turned on. The activation of this mode will be indicated by a flashing light indicator. It will take significantly longer to restore the batteries compared to the normal battery charging procedure. You cannot interrupt the operation of this mode before it is completed.
Removing the batteries
If it is known in advance that the help of the robot vacuum cleaner will not be needed for a long time, after the battery is fully charged, it should be removed from the case and stored in a safe place. room temperature and low air humidity.
The battery should always be removed when it becomes clear that the help of the robot vacuum cleaner will not be needed for a long time. To remove the battery, you need to open the compartment on the bottom of the robot body by first removing the screws.
| Sign | Signal |
| The brushes on your iRobot Roomba may have become tangled in wires on the floor. The intelligent control system of the robot vacuum cleaner has activated the appropriate mode and the robot is trying to free itself. |
|
| The robot has detected a place where garbage has accumulated, as indicated by the Dirt Detect indicator light. | |
| A problem has arisen, the intelligent control system of the robot vacuum cleaner is trying to diagnose and fix possible problems. | |
| The dust container in the robot vacuum cleaner needs to be emptied because it has reached its full capacity. | |
| Information about the state of charge of the battery. Red indicator light, constant light - the battery of the robot vacuum cleaner has exhausted its charge. Yellow indicator light, flashing light - the batteries of the robot vacuum cleaner are in the process of being charged from the power supply. Green indicator light, constant light - the battery of the robot vacuum cleaner has 100% charge. Yellow indicator light, short blinking - battery recovery mode is on |
Device for remote control of a robot vacuum cleaner

The process of using a device to control a robot vacuum cleaner from a distance is very similar to the process of controlling another household appliances using the remote control remote control. Using the buttons of the device, which is previously directed in the direction where the robot is currently located, it is launched, controlled and individual functions are enabled.
The remote control device for the robot vacuum cleaner is powered by two AA batteries.
You should not use the remote control if you are within a short distance of the Home Base or Virtual Wall as signal interference may occur and Roomba may not perceive the signals correctly.
Special control device for the robot vacuum cleaner
For iRobot Roomba robot vacuum cleaners from model 780 and older, a special control device has been created with which you can plan complex work schedules for the robot, setting time intervals and selecting the required work model. Being actually the center from which the robot is controlled, this device allows you to remotely access the robot control during operation.
When drawing up a schedule, its owner sets the start time of work. The robot vacuum cleaner will begin cleaning as scheduled without additional commands. You can create a schedule a week in advance by assigning the robot a one-time task per day.
To successfully implement the schedule, you must accurately set the current time in the control system of the iRobot Roomba robot vacuum cleaner. To do this, after turning off the robot by pressing the CLEAN button, press the CLOCK button and select values for the DAY, HOUR and MINUTE positions. Then, the result is saved by clicking OK. Pressing the CLEAN button will exit the time and date setting mode and allow you to return to the setting mode later.
Setting the time format
iRobot Roomba supports eight and twelve hour clocks. To select a convenient format, press the CLOCK button without releasing it until the format selection mode is displayed on the screen. Pressing CLOCK will switch the system to a format convenient for you, pressing OK will record the result.
If the Robot Vacuum Cleaner's battery reaches a charge level below its minimum charge level or is removed from the Robot Vacuum Cleaner's body, the time format will reset to twelve hour clock.
Task schedule for the robot vacuum cleaner
The robot vacuum cleaner can be scheduled for a week in advance with one task per day. Before creating a schedule, you should set the time value on the robot vacuum cleaner clock.
To set the schedule, use the CLEAN button to turn off the robot vacuum cleaner. By pressing SCHEDULE you enter the cleaning schedule planning mode. When creating a schedule, you should set the appropriate values for the DAY, HOUR and MINUTE positions, according to your task plan for the robot vacuum cleaner. The created schedule is confirmed by clicking on the OK button. Pressing the CLEAN button will exit the time and date setting mode and allow you to return to the setting mode later.
View your cleaning plan
In order to see which cleaning plan is currently set for the robot vacuum cleaner, after turning it off by pressing CLEAN, press SCHEDULE. Having entered the task schedule, by pressing DAY you can display the programmed work schedule for the robot vacuum cleaner. You can confirm by pressing the OK button. current schedule operation of a robot vacuum cleaner. Pressing the CLEAN button will exit the time and date setting mode and allow you to return to the setting mode later.
Deleting a cleaning plan
In order to delete a previously programmed operating schedule for the robot vacuum cleaner, after turning it off by pressing CLEAN, press SCHEDULE. Having entered the task schedule, by pressing DAY you can display the programmed work schedule for the robot vacuum cleaner. Having selected the position in the chart that you want to delete, press HOUR to remove the entry. By pressing the OK button, you can confirm changes in the robot vacuum cleaner's operating schedule. Pressing the DAY button for five seconds will delete all previously programmed operating schedules for the robot vacuum cleaner.
Changing your cleaning plan
In order to change the previously programmed operating schedule of the robot vacuum cleaner, you should first turn it off by pressing CLEAN and press SCHEDULE. Having entered the task schedule, by pressing DAY you can display the programmed work schedule for the robot vacuum cleaner. Having selected a position in the chart that needs correction, use the HOUR and MINUTE keys to correct the entry. By pressing the OK button, you can confirm changes in the robot vacuum cleaner's operating schedule. Pressing the CLEAN button will exit the time and date setting mode and allow you to return to the setting mode later.
Routine maintenance
A small, regular amount of work aimed at maintaining good technical condition iRobot Roomba robot vacuum cleaner will significantly extend the life of the equipment and improve the quality of its work. The parts of the robot vacuum cleaner that need to be cleaned of debris stuck to them are yellow. They should be removed from the robot body and cleaned regularly. If possible, you should regularly empty the special container in the vacuum cleaner body of debris. Wool, hair and threads are wound around the brush assemblies of the robot vacuum cleaner. This can, over time, damage the quality of cleaning and lead to equipment failure. The robot's brush assemblies should be cleaned regularly.
Simple regular maintenance operations

Emptying the container for collected waste. You should regularly empty the special container in the vacuum cleaner body of debris by removing it and putting it back in place after cleaning. In the absence of a container, or when it is not correct installation, the robot vacuum cleaner will not work.

Cleaning the filter system. The robot vacuum cleaner's filters should be cleaned regularly to remove debris and dust. If you use the robot vacuum cleaner for two months, you should replace the filters.
Caring for the brush mechanism components of the robot vacuum cleaner.
To care for the brush mechanism components of the robot vacuum cleaner:

1. Remove the safety frame from the robot vacuum cleaner body. This can be done by pressing on two yellow tabs.

2. Take out two brushes, remove the yellow bearings from the shafts and carefully remove particles of debris and dirt from them.

3. To remove wool, threads and long fibers of dirt from bearings and shafts, you need to use the device for cleaning them from the robot vacuum cleaner kit.

4. To clean the brush mechanism side mounting, it must be disconnected from the robot vacuum cleaner body by first removing the screw securing it. After the cleaning procedure, the brush mechanism should be returned back, secured with a screw.
To care for the front wheel of the robot vacuum cleaner:

- Remove the wheel by pulling its mount out of the robot vacuum cleaner body.
- Clean the place where the wheel is attached to the housing.
- Clean the parts of the wheel and the mechanism for attaching to the body from debris, fibers and dirt.
- Install all parts in place. When the wheel is installed correctly in the housing, a clicking sound is heard.
To care for the garbage container fullness monitoring sensors (relevant for models 770 and older), you should:

- Remove the waste container from the robot vacuum cleaner body.
- Carefully clean the sensors with a dry, clean cloth.
To care for sensors that monitor differences in floor level in height, you should:

Carefully clean the six sensors with a dry, clean cloth.
Fault detection.
For timely detection possible malfunctions, the Roomba robot vacuum cleaner is equipped with a system for diagnosing, identifying and eliminating emerging problems. The system will promptly inform you about the failure of individual components of the robot vacuum cleaner using a light indicator. You can recall the error message using the CLEAN button.
If you have a need for additional information For Roomba, get the complete manual from www.irobot.com
Indication of emerging problems
| Indicator status and voice guidance | Most Possible Cause | Remedy |
| Error 1. Move Roomba to a new location then press CLEAN to restart. (Error 1: Move Roomba to a different location and press the CLEAN button to restart the device.) |
Problem with robot movement. The robot is stuck, the front wheel is hanging in the air. | Move the robot to another location where its wheels are firmly on the floor and start it. |
| Error 2. Open Roomba’s brush cage and clean brushes. (Error 2: Open the brush compartment in Roomba and clean the brushes.) | Problem with brush rotation | Roomba's brush mechanisms need cleaning |
| Error 5. Spin Roomba’s side wheels to clean. (Error 5: Spin Roomba's side wheels to clean them.) | ||
| Error 6. Move Roomba to a new location then press CLEAN to restart. (Error 6: Move Roomba to a different location and press the CLEAN button to restart the device.) | Problem with sensors that monitor differences in floor level in height or the robot has fallen | It is required to clean the six sensors with a dry, clean cloth and start the robot vacuum cleaner |
| Error 7. Spin Roomba’s side wheels to clean. (Error 7: Spin Roomba's side wheels to clean.) | Problem with the rotation of the wheels that provide the movement of the robot | The mechanism for fastening the wheel parts needs to be cleaned. You should check the functionality of the wheels and start the robot vacuum cleaner |
| Error 9. Tap Roomba's bumper to clean. (Error 9: Tap the Roomba's bumper to clean them) | There was a problem with the reaction of the bumper part of the robot vacuum cleaner, under which debris was probably clogged | You need to remove particles of debris from under the bumper of the robot vacuum cleaner by lightly tapping it. |
| Error 10. Spin Roomba’s side wheels to clean. (Error 10: Spin Roomba's side wheels to clean.) | Check the rotation of the wheels. Remove particles of debris from under the bumper of the robot vacuum cleaner by lightly tapping it. Use the Virtual Wall electronic barrier to reduce the size of the area you clean. | |
| Please charge Roomba. (Charge Roomba's battery.) | There is a problem with the rotation of the front wheel or with the reaction of the bumper part of the robot vacuum cleaner, under which debris is probably clogged | Requires robot to be placed on Home Base charger |
Battery charging progress signal system
| Robot vacuum cleaner indicator light signal | Information on the Roomba display | Voice accompaniment | Most Possible Cause | Method for eliminating the problem |
| 1 flash | Err 1 (error 1) | Charging error 1 (charging error 1) | No contact with battery | You should check whether the packaging protection has been removed from the battery contacts. Insert new battery. |
| 2 flashes | Err 2 (error 2) | Charging error 2 (charging error 2) | Turn off the robot vacuum cleaner, leave it to cool for an hour and continue charging the batteries. | |
| 5 flashes | Err 5 (error 5) | Charging error 5 (charging error 5) | Error during battery charging process | Reset the settings of the robot vacuum cleaner control program and continue charging the batteries. |
| 6 flashes | Err 6 (error 6) | Charging error 6 (charging error 6) | The robot vacuum cleaner's battery is too hot | Turn off the robot vacuum cleaner, leave it to cool for an hour and continue charging the batteries. |
Voice language
The robot's main language is English. To change this setting you need to:
- First turn off the robot by pressing the CLEAN button.
- Press and hold the DOCK button until the robot vacuum cleaner plays the name of the current language in voice guidance.
- Release the DOCK button.
- Press the CLEAN button until the robot says in voice the name of the language convenient for you.
- Press and hold the CLEAN button until the robot vacuum cleaner turns off. The selected language will be recorded in the robot's memory.
Resetting control program settings
To reset the control program settings, you must press and hold the CLEAN button for 10 seconds.
FAQ
What is the reason why the robot vacuum cleaner brush starts rotating in the opposite direction?
Changing the direction and speed of rotation is an attempt by the intelligent control system to free the robot from entanglement. Sometimes, this is how the robot reacts to the high pile of carpeted flooring.
The occurrence of such a robot reaction on a flat floor is a sign that the brushes need cleaning.
What is the reason that the robot makes clicking sounds?
The clicking sound made by the robot vacuum cleaner signals an attempt by the intelligent control system to free the robot from entanglement by changing the direction of rotation of the brushes.
The appearance of such a sound made by the robot on a flat floor is a sign that the brushes need cleaning.
Why does the robot not detect the presence of some obstacles on the way while moving?
The intelligent control system of the robot vacuum cleaner, receiving information from sensors located on the body, promptly detects the presence of obstacles in the direction of movement, reduces the speed of the robot and touches the obstacles very gently, and then changes the trajectory of movement. Dark floor colors may reduce the quality of obstacle detection.
Security requirements
DO NOT OPEN THE CASE OF THE ELECTRONIC UNITS AND BATTERY OF THE ROBOT VACUUM CLEANER OR CHARGER. THEIR CONTENTS ARE NOT SUBJECT TO ANY REPAIR OR MAINTENANCE.
TECHNICAL SUPPORT FOR THE ROBOT VACUUM CLEANER SHOULD BE ENTERED ONLY TO SPECIALISTS OF A SPECIALIZED SERVICE CENTER.
BEFORE OPERATING THE ROBOT VACUUM CLEANER, YOU SHOULD CHECK THE CONFORMITY OF THE CHARGER VOLTAGE AND THE VOLTAGE IN THE ELECTRIC ENERGY SUPPLY NETWORK.
Ignoring safety precautions when using the Roomba robot vacuum cleaner and handling it carelessly can cause injury and damage.
Instructions for general questions
Be sure to follow all instructions included with your robot vacuum cleaner. Be sure to pay attention to the warning notices on the body of the robot vacuum cleaner and other equipment supplied with it.
Entrust servicing of the robot vacuum cleaner beyond what is recommended for the user to qualified specialists from specialized service centers.
Instructions regarding operating issues
- The robot vacuum cleaner cannot be used outdoors.
- The Robot Vacuum Cleaner is not a gaming or entertainment device and is not intended to carry any objects or carry people around. When cleaning a room with a robot vacuum cleaner, young children and pets located there must be supervised by adults.
- Do not operate the robot in areas with high humidity or on wet or damp floors.
- The robot must be maintained using dry and clean cleaning material.
- Do not use the robot vacuum cleaner to clean burning, smoldering, chemically active debris or liquids.
- Before you start cleaning the room with a robot vacuum cleaner, you should remove scattered objects from the floor, fragile interior items, cords and wires hanging on the floor or lying there.
- It is necessary that the robot vacuum cleaner is not able to physically enter dangerous areas such as a balcony or landing.
- After pre-charging, you should remove the battery from the robot body if the need for its help does not arise for a long period of time.
- The robot vacuum cleaner cannot be handed over to people with disabilities or a number of chronic diseases without supervision from adults.
- The robot vacuum cleaner is not a gaming or entertainment device.
Completeness and charging of batteries
- To charge the batteries of the robot vacuum cleaner, use only a standard electrical supply. The use of additional conversion devices voids the manufacturer's warranty.


Roomba will report errors with an “oooh” sound followed by a number of beeps or a voice message. The table shows possible problems and ways to solve them.
Errors during the cleaning process:
|
Light indication |
Solution |
|
|
Flashes once every 2 seconds |
Roomba is stuck or one wheel is not touching the floor. |
Move Roomba, make sure all wheels are on the floor, and restart Roomba in a different location. |
|
The main brushes cannot rotate. |
Remove and clean the robot brushes |
|
|
One or both drive wheels are stuck or not touching the floor. |
Clean the wheels of hair and dirt. Move them around to make sure they rotate freely. Power on the robot in a different location. |
|
|
The height difference sensors are dirty, or the robot is partially in the area of the height difference. |
Wipe the sensors with a dry cloth and turn Roomba back on. free space. |
|
|
The front wheel is stuck or the robot is stuck. |
Clean the robot's front wheels of hair and dirt. Press them down and make sure they rotate freely. Turn on Roomba in an empty space |
|
|
The bumper is jammed or the bumper sensor is dirty |
Tap the bumper vigorously several times to dislodge any debris stuck underneath. |
|
|
The side wheel is stuck or the bumper does not detect obstacles. |
If Roomba spins around, clean the side wheels. press them down and make sure they rotate freely. If the robot does not rotate in place, it may be in a very large room. |
|
|
The battery is dead. |
Charge Roomba on the Charging Base or from the mains. |
Charge errors
|
Light indication |
Inscription on the control panel |
Possible problem |
Solution |
|
1 time |
Err1 |
The robot has no contact with the battery |
Make sure the battery protection tape is removed. Remove the robot's bottom panel, remove the battery, and reinsert it into the robot. |
|
2 times |
Err2 |
Charge error |
Allow the battery to cool for at least 1 hour and then try charging again. |
|
3 times |
Err3 |
Charge error |
|
|
5 times |
Err5 |
Charge error |
Reboot software. Press and hold the SPOT and DOCK buttons for 10 seconds. Try charging again. |
|
6 times |
Err6 |
Charge error |
Allow the battery to cool, then charge it. |
|
7 times |
Err7 |
The battery does not cool down |
Let the battery cool, then charge it |
Robot vacuum cleaner is very complex technical device. To ensure it serves you for a long time, read the following recommendations:
For efficient work Roomba must follow these guidelines after each cleaning cycle:
1. Clean the vacuum cleaner dustbin
Press the trash container release button and remove it.
2. Clean the filter compartment
Clean the garbage disposal.![]()
Clean the filter compartment and the filter itself.

For daily use, the filter must be changed every 2 months.
Attention: Clean the dustbin and brushes after each cleaning. Check regularly to ensure that hair and other debris do not become entangled in the front wheel. Heavily dirty brushes or wheels can significantly reduce Roomba's performance.
Helpful information:If Roomba's cleaning performance decreases, check and clean the dustbin and brushes if necessary.
3. Clean the brushes of the robot vacuum cleaner
Press the two yellow tabs and remove the brush.

Remove the caps and use scissors to trim away hair and other tangled debris.

Helpful information: When caring for your Roomba, pay attention to the parts yellow color. They need to be removed and cleaned after each cleaning.
Remove hair and dirt from the robot's yellow bearings.

Using a special cleaning tool, remove hair, threads and other debris from the brushes.

If a lot of debris has accumulated around the robot's brushes and bearings, Roomba may be damaged. Check the condition of the bearings regularly!
Never turn on Roomba without bearings!
4. Clean the front wheel of the robot vacuum cleaner
Pull firmly towards you to remove the front wheel module from the robot body. Remove dirt from the wheel cavities.

Remove the wheel from the holder and remove any debris wrapped around the axle. Press firmly on the axle and remove it from the wheel. Clean the wheel and insert the axle. Place the wheel into the holder and the entire wheel module into the robot.

If the wheel is heavily dirty, the robot's movement becomes difficult, the robot's performance decreases, and the trajectory of its movement may even change, so do not forget to inspect and clean the wheel and its module.
5. Clean the height difference sensors
Wipe the sensors with a dry cloth or brush.

If you use the robot every day, you need to perform a full inspection and maintenance of iRobot once a week, and once a month, remove dirt and dust from the wheels using tweezers and a regular vacuum cleaner.
Troubleshooting IRobot Roomba
For timely detection of possible malfunctions, the Roomba robot vacuum cleaner is equipped with a system for diagnosing, identifying and eliminating emerging problems. The system will promptly inform you about the failure of individual components of the robot vacuum cleaner using a light indicator. You can recall the error message using the CLEAN button.
If you need more information about your Roomba, get the complete manual from www.irobot.com
Indication of emerging problems and errors
| Indicator status and voice guidance | Most Possible Cause | Remedy |
| Error 1: Move Roomba to a new location then press CLEAN to restart. (Error 1: Move Roomba to a different location and press the CLEAN button to restart the device.) |
Problem with robot movement. The robot is stuck, the front wheel is hanging in the air. | Move the robot to another location where its wheels are firmly on the floor and start it. |
| Error 2. Open Roomba’s brush cage and clean brushes. (Error 2: Open the brush compartment in Roomba and clean the brushes.) | Problem with brush rotation | Roomba's brush mechanisms need cleaning |
| Error 5. Spin Roomba’s side wheels to clean. (Error 5: Spin Roomba's side wheels to clean them.) | ||
| Error 6. Move Roomba to a new location then press CLEAN to restart. (Error 6: Move Roomba to a different location and press the CLEAN button to restart the device.) | Problem with sensors that monitor differences in floor level in height or the robot has fallen | It is required to clean the six sensors with a dry, clean cloth and start the robot vacuum cleaner |
| Error 7. Spin Roomba’s side wheels to clean. (Error 7: Spin Roomba's side wheels to clean.) | Problem with the rotation of the wheels that provide the movement of the robot | The mechanism for fastening the wheel parts needs to be cleaned. You should check the functionality of the wheels and start the robot vacuum cleaner |
| Error 9. Tap Roomba’s bumper to clean. (Error 9: Tap the Roomba's bumper to clean them) | There was a problem with the reaction of the bumper part of the robot vacuum cleaner, under which debris was probably clogged | You need to remove particles of debris from under the bumper of the robot vacuum cleaner by lightly tapping it. |
| Error 10. Spin Roomba’s side wheels to clean. (Error 10: Spin Roomba's side wheels to clean.) | Check the rotation of the wheels. Remove particles of debris from under the bumper of the robot vacuum cleaner by lightly tapping it. Use the Virtual Wall electronic barrier to reduce the size of the area you clean. | |
| Please charge Roomba. (Charge Roomba's battery.) | There is a problem with the rotation of the front wheel or with the reaction of the bumper part of the robot vacuum cleaner, under which debris is probably clogged | Requires robot to be placed on Home Base charger |
System of signals about the charging progress of the robot battery
| Robot vacuum cleaner indicator light signal | Information on the Roomba display | Voice accompaniment | Most Possible Cause | Method for eliminating the problem |
| 1 flash | (error 1) | (charging error 1) | No contact with battery | You should check whether the packaging protection has been removed from the battery contacts. Insert new battery. |
| 2 flashes | (error 2) | (charging error 2) | Turn off the robot vacuum cleaner, leave it to cool for an hour and continue charging the batteries. | |
| 5 flashes | (error 5) | (charging error 5) | Error during battery charging process | Reset the settings of the robot vacuum cleaner control program and continue charging the batteries. |
| 6 flashes | (error 6) | (charging error 6) | The robot vacuum cleaner's battery is too hot | Turn off the robot vacuum cleaner, leave it to cool for an hour and continue charging the batteries. |
Voice language
The main language of the robot vacuum cleaner is English. To change this setting you need to:
- Turn off the robot by pressing the CLEAN button.
- Press and hold the DOCK button until the robot vacuum cleaner plays the name of the current language in voice guidance.
- Release the DOCK button.
- Press the CLEAN button until the robot says in voice the name of the language convenient for you.
- Press and hold the CLEAN button until the robot vacuum cleaner turns off. The selected language will be recorded in the robot's memory.
Resetting the robot control program
To reset the control program settings, you must press and hold the CLEAN button for 10 seconds (until the reboot sound signal)