Half-hip hanging roof rafter system. Half-hip roof: how the rafter system is installed. Calculation of the half-hip roof project
The covering of the upper part of the house cannot be assessed in purely utilitarian terms. In fact, this element has an important decorative value, because the impression received by people, including the owners themselves, depends on it. An original solution often becomes a half-hip roof.

Peculiarities
The half-hip roof is sometimes also called Dutch, which directly indicates its origin. That is why the main property protective structure turns out to be a combination of elegant appearance with the ability to withstand significant wind loads. It should be remembered that the half-hip roof is quite complex in design. Designing it and then installing it will not be easy.
To a large extent, this “pays off” by unification positive characteristics gable, hip and hip structures.


The configuration of the pediments is close to a trapezoid formed by hip elements, which allows you to achieve several positive aspects at once:
- good aerodynamics (streamlining);
- excellent resistance to strong winds - this is important not only for open places, but also near rivers, in the foothills and mountains;
- increasing the efficiency of using attics;
- the ability to change the angle at which the slopes are inclined;
- pleasant appearance.


But we must not forget that a half-hip roof is not so easy to make - you can make it yourself only with the assistance of professional craftsmen and under their direct leadership. The amount of materials consumed increases significantly compared to other options. The reason is the complexity of the geometry and the weight of the structures - you will have to carefully calculate all the loads and ensure that each part has the ability to resist them.


Types of construction
Gable rafter system includes, first of all, a mauerlat - a square-shaped beam that helps distribute the weight load along the wall and transmit it to the foundation. Beds are also used ridge purlins, legs running diagonally, ordinary rafters, fillies and a number of other elements. When choosing a hanging outline, the frame of the house does not have any load-bearing partition. The rafters are supported only on top of the ridge purlin and on top of the Mauerlat. The rest of the time there is no support.
Extended, heavy legs push the walls of the house to the side, so they must be compensated for by crossbars, tie-rods, headstocks and struts. There is another device - a layered one, which is used when at least one load-bearing wall is located within the perimeter of the building. Then it will become a good base for holding the rafters. Since the energy directed to the sides is reduced, additional weight will not be required, therefore reducing the number of supporting parts will not affect the stability of the system.


Roofing specialists indicate that whenever possible, a layered type of structure is preferable and more reliable.
There is a so-called Danish variety, which is equipped with a triangular block in the upper part of the end. The bottom line of the triangle is in close contact with the vertical gables, arranged in the form of trapezoids. The tangent line forms a convex angle.
The difference from a simple hip design is that the end slopes are shorter.


It is important to know that any half-hip roof, no matter what it is formally called, will in fact be hipped, since the division is only conditional. If it is called that, then, unlike the gable version, the end slopes do not come from the skates, but from the central points of the side slopes. They definitely reach the eaves overhangs.
Half hip double pitched roofs V one-story house differ in that they make it easy to create an attic. If you use a hipped design of a full-fledged model, then the attic must be equipped with a very high window. In addition, it will not be possible to place a balcony at the end.


Dimensions
Pairing boards is an excellent practice, which allows you to get a large block even from small elements and make, for example, a part 9 meters wide or more. When calculating the permissible and justified length, width or thickness of the board, a balance must be maintained between strength and the load created, because robust construction inevitably turns out to be heavier. The smallest cross-section that is considered acceptable according to technical requirements is 5x15 cm. This is what should be used to save money when constructing secondary row buildings.
When constructing long spans, it is worth choosing boards measuring 15x15 or even 25x10 cm for the rafters. An even larger section is justified only for very large roofs (for example, on an apartment building, above a solid trade pavilion and similar buildings). Regulatory parameters can be useful, but they do not reflect the climatic specifics of certain areas.
Therefore, professional builders clearly agree that calculations should be carried out every time a new structure is created.


Optimal thickness boards for forming rafters range from 40 to 60 mm. When building a roof over utility buildings of secondary importance, it is possible to save money by using wood 35 mm thick. But above residential buildings it is recommended to install solid rafters made of boards with a thickness of at least 50 mm. As the board lengthens, its required width also increases.
The most accurate calculations are made using special software.


Materials and tools
It’s not enough just to select boards for the rafters - to build a half-hip roof on a log or other house correctly and in short time It won't work if you don't use the right materials. The choice of thermal insulation, vapor barrier and means of protection from precipitation and wind is largely individual - it must be consistent with both the warm or cold arrangement scheme, and with the type of facing material, with the order of its use. That's why it's worth focusing on.
Metal tiles must have a lower slope of 150 mm, and if it does not exceed 200 mm, then the joints will have to be carefully sealed.


This type of roof is attached using self-tapping screws equipped with rubber gaskets. Accession metal tiles to the base occurs quite simply, and its mass is relatively small. The requirements for transportation, loading and unloading are quite gentle, and the cost of the material is low. However, one has to take into account a significant amount of waste during work and the need to install enhanced noise protection from below.
When choosing a profile deck, a roof slope of at least 100 mm is required.


This material must be secured using 6-8 self-tapping screws per 1 square meter. m. Installation of profile flooring on the previous roll material. The advantages of the coating are: long period operation, bending strength and low price. But you have to take into account the fact that the roof can become very noisy if you don’t take care of sound insulation.
Ondulin is good where required:
- excellent hygienic and environmental quality of the coating;
- ease of cutting;
- strength;
- ease of transportation;
- absence of noise during operation;
- comfortable price.


But it is important to remember about its disadvantages: ignition when heated above 110 degrees, the likelihood of paint fading, the danger of moss growing in insufficiently illuminated areas. Cheap and long-lasting slate is suitable for roof slopes from 12 to 600 mm; an overlap of 1 or 2 waves is a prerequisite.
A sheathing is mounted below, for which square bars are used. When taking reinforced profile slate, support structures should also become thicker.
You will definitely need a lining layer (roofing felt, glassine) and an additional soft material under all the nails.


It should be remembered that asbestos present in slate can negatively affect human health. In addition, even the best varieties of slate are very fragile, they can absorb moisture and become covered with moss and lichens. Steel seam roofs are durable, beautiful in appearance and can last a long time for a long time. But they easily allow cold to pass through, which raises the bar for requirements for the quality of thermal insulation. The “pictures” are secured to the sheathing using thin steel clamps.
Regardless of which of these materials and types of construction is chosen, it is advisable to work in the same way as professional builders. And this means, among other things, compulsory purchase only such materials, components and fasteners that meet the requirements of the state standard.

When installing roofing materials with your own hands, you will need:
- construction knife;
- strong hammer;
- cord (lines are aligned along it);
- building level;


- medium-sized wood saw;
- stapler for attaching insulating sheets;
- screwdriver;
- pliers.


How to make it yourself?
Project options. The differences between specific versions of the hip roof are determined by the angle of the short hip in relation to the walls of the gables. It can be either convex or concave, and there is an upper or lower placement of the half hip. The drawings of Dutch half-hip roofs clearly show that the half-hip is located at the bottom. The upper side of the trapezoid extends parallel to the vertical triangle, which can be either monolithic or with an addition in the form of a dormer window.
The Danish type of roof means that the half-hip is made in the form of a triangle. It is supported by a vertical pediment in the form of a trapezoid. The entire structure together forms a convex angle.
The difference from a simple hip roof is that the end slopes are shortened.


It is not necessary to limit yourself precisely classic options- exist hipped structures, each side of which belongs to the Danish or Dutch group. There are also buildings in which a shorter hip is placed at one end or on one side.
Regardless of the approach chosen, there will be some portion of the rafter legs that are installed in a hanging or layered manner. Execute suspended structure needed where the box does not have load-bearing walls inside.
It is also appropriate in a situation where it is not possible to install supports for ridge girders.


In both cases, the heels rest:
- to the Mauerlat;
- in the upper crown of the frame, used instead;
- into the floor beams.


It is quite common to see the development of the Dutch format in one way or another. An example is a design that resembles a postal envelope, but differs from it in the projection of the hip contours. The Danish “broken” system is more complex and more expensive than the classic half-hip roof. When preparing projects, it is by no means necessary to scrupulously calculate every element - experienced builders and architects recommend limiting the calculation to the longest part, and all the others do the same or slightly smaller dimensions.


Construction Guide. Any step-by-step instructions for constructing a half-hip roof with your own hands implies that by the start of work all the necessary calculations have already been carried out and drawings have been drawn up, because both are necessary for selecting materials and estimating their quantities. The Mauerlat is made unlike a classic wooden frame.
The timber is laid in the form of separate strips:
- the first - flush with the back of the facade walls;
- the second - in the middle of the inner supporting wall;
- the third is flush with the internal planes of the gables.


Then comes the turn of the floor beams, laid out at right angles to the mauerlat beam of the key walls. If it is necessary to join two bars together, then the weakest position in their connection is taken upward from the internal supporting wall. When installing supports that hold the ridge run on the same interior wall, it is very important to estimate the distance from one peripheral post to another, since the length of the key roof fragment depends on it. The row racks are spaced at equal distances from each other - the uniform distribution of the resulting load depends on this.
It is important to know that before fixing, you need to control the support lines using a plumb line or a laser meter.


Setting up auxiliary jibs helps to eliminate distortion of the positions of the racks after measurement. They are removed as soon as final fixation has been made. After this comes the turn of installing the rafters of the main slopes (their ordinary legs), for which they choose the suspended or layered method. It is worth remembering that in many drawings that can be found on the Internet or in special manuals, floor beams are not shown in order to simplify the presentation of information. In reality, of course, it is impossible to do without overlap.
The rafters running diagonally are designed to connect the edges of the ridges with the corner points of the gables. First, a fragment of a board, the dimensions of which is 5x15 cm, is placed flush to the outer side of the Mauerlat. This part is lightly pressed to the base with nails so that it does not change its position and does not fall during further manipulations. This approach allows you to quickly determine where exactly the cutting points should be. Then they take a board (the size is not important), which is placed on top of 3 or 4 row rafters, as long as the parallel is maintained with respect to the run.


The landmark must be checked to see if it is horizontal to the required extent. Then the board is pulled up to the nailed area. When crossing, they find a point from which to draw a line for cutting. The diagonal block itself is tried on, applying it to the top point of the peripheral roof truss and to the corners of the trims.
Then the upper cut is measured, and required distance put on top, counting from the mauerlat of the pediment in 4 places. At the same time, the imaginary contours of the board are duplicated. Cutting along marks is carried out only on solid foundation. If there are no serious problems, then you can immediately proceed to the next stage of work. The heel of the rafter leg, running diagonally, rises above the Mauerlat to a carefully measured distance (it is counted from the top point of the skates).


The reference point is the construction cord. The middle leg of the half-hip is placed only after measuring with a protractor the angle separating the lace from the support post, as well as the angle of the junction of the diagonal parts. The workpiece is tried on again, the result obtained is transferred down to determine how deep to make the bottom notch and how to make a cut there. The fillers filling the hip slopes are prepared according to the usual method, but adjusted for dimensions and installation conditions.
When all the rafter legs (long and short) are ready, you will need:
- install pediment fillets to make overhangs at the ends;
- install wind boards around the perimeter of the roof;
- build up the diagonal parts with a board of the same size.


Another option is:
- laying mauerlat on the walls of the external perimeter and gables;
- laying a bench on top of a load-bearing partition in the house;
- fastening the bed with brackets (bolts) in wooden buildings using screeds reinforced with studs in concrete and brick structures;
- to protect against moisture, the gap between the main wall and the supporting beam is filled with roofing felt;
- internal beds are equipped vertical posts connected through the ridge run, all angles are measured repeatedly to eliminate the slightest error;
- install rafter legs of an ordinary level with a distance of 0.6 or 1.2 m;


- fastening diagonally running structures from above with nails, from below - with steel corners;
- flooring of narozhniks with cuts at the bottom for the mauerlat, the length is calculated with a reserve for the overhang;
- placement of cornice fillets, wind boards and drain holders;
- preparation of sheathing and waterproofing;
- cutting and laying roofing material with overlap of strips or sheets from 100 to 150 mm;
- completion of work on the drain.


When external works finished, they begin to work inside. The half-hip roof must be insulated and sheathed with decorative materials. After completion of finishing, you only need to monitor the actual condition and timely repair problem areas. Any, even the most weak spots Leaks and passage of cold air must be repaired immediately. Compliance with these principles allows you to use the roof for a long time, but only if it was done correctly.
It is worth mentioning separately about safety measures during the construction of a half-hip roof. It will be necessary to strictly follow the instructions of the manufacturers of materials and tools when storing, moving and lifting. All work is carried out exclusively in calm or light winds, in clear, dry weather. Before starting work, all tools are inspected every time.
It is prohibited to work in poor visibility or without protective gloves.


Calculations. In addition to choosing a half-hip roof scheme, it must be carefully calculated. No developer can avoid this stage.
To simplify the calculations, the surface being processed is conventionally divided into shapes. The Dutch formation is characterized by division into rectangles and trapezoids. First, calculate the area of the slopes, and then the area of the triangular parts.
If a Danish roof is made, then the division is made into a rectangle and a series of triangles. Then the hip slopes are calculated and the figure is doubled. The results obtained are summarized. It is important to consider that the slightest mistake can lead to very unpleasant consequences.
Therefore, saving on the services of professionals even at the design stage is stupid and irrational.


Beautiful examples of private houses
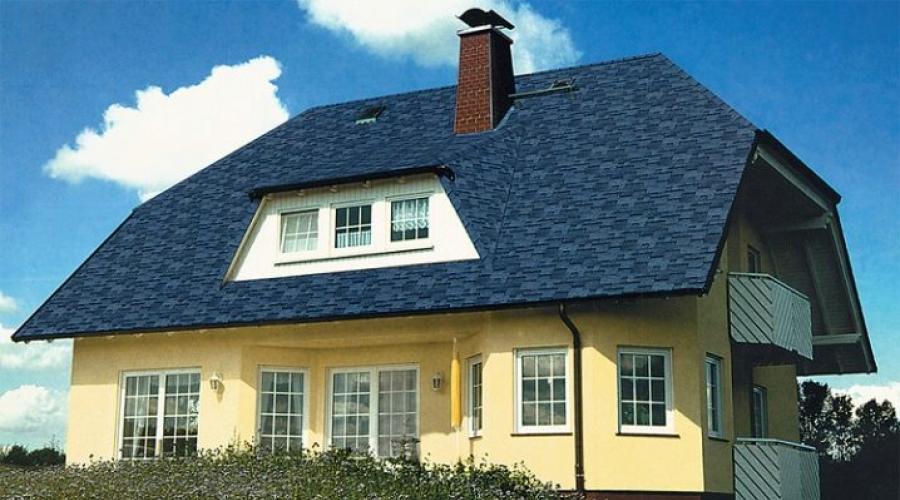
The half-hip type of roofing looks really beautiful and unusual and can be very varied in appearance. The photo below shows just such an example. Shiny metal tiles, even sparkling in the sun, laid out in a bizarre geometric pattern, harmonize perfectly with the light brick walls, which do not create such a dazzling appearance. There is another option, with an attic - here they are already going for interesting color experiments: this roof is purposefully designed to look like rusty metal.


Sometimes architects go even further. Here is an example of a radical approach: a black, seemingly shabby and worn half-hipped roof with white inclusions in different places. From the outside it looks as if it was not installed firmly on the rafters, but was simply put on top, like a hat. The pinkish brick walls complete the ensemble and create an interesting contrast. The roof itself has two relatively small windows used to illuminate the attic space.

About how to quickly and efficiently cut down rafters on hip roof, watch the video below.
The half-hip roof (see photo) is something between a gable roof and a hip roof. The pediment here has the shape of a trapezoid. This type of roof is also sometimes called Dutch.
Let's look at an example of this rafter system. In this article and all subsequent ones devoted to various rafter systems, I will no longer focus on calculating the cross-section of rafters. I will say that the longest rafter is calculated (in in this case any rafter of the slope), and the rest are made of the same section. An article on calculations of rafters and floor beams
So, we have a box house with trapezoidal gables.
STEP 1: We install. We also place a mauerlat on the upper edge of the pediments (see Fig. 1):

Picture 1
STEP 2: We install the ridge beam and rafters. Here we do everything the same way as described in the article (see Fig. 2 - Fig. 3):

Figure 2

Figure 3
These and subsequent drawings do not show floor beams.
You are free to choose the distance from the outer rafter (from the edge of the ridge beam) to the pediment yourself. We always took it approximately equal to half the length of the upper edge of the pediment (see Fig. 4):

Figure 4
STEP 3: We manufacture and install corner rafters. All the actions described below are performed so that the installed corner rafter is the line of intersection of the plane of the slope and the plane of the half-hip.
To begin, we take a piece of board with a cross-section of 50x150 mm and place it on the edge of the pediment mauerlat. Let's hold it in place for a while with a couple of screws. A cutting height of 150 mm is required for a future corner rafter with a section of 50x200 mm.
Then we need to select any board that is even in length (the smoother the better) and use it to make a mark on our trim - a blue line (see Fig. 5):

Figure 5
This flat board is placed on 3-4 rafters with one end and touches the trim with the other. The most important thing is that it is strictly parallel to the ridge. We control this using a tape measure. When we achieve parallelism, draw a mark (blue vertical line). After this, we shorten the trim along this line (cut).

Figure 6
We mark the upper cut of the corner rafter along the side plane of the slope rafters (see Fig. 7):

Figure 7
We measure the distance on the upper cut shown in Fig. 8 (we got 26 cm):

Figure 8
Now we set this size aside from the gable mauerlat upwards in four points, marking the bottom cut of the corner rafter (see Fig. 9):


Figure 9
Having sawed off the workpiece at the marked points, we get a corner rafter (see Fig. 10):


Figure 10
We remove a piece of board from the mauerlat, install a corner rafter and secure it. The upper end is nailed, the lower end can be secured metal corners(see Fig. 11):


Figure 11
We make the three remaining corner rafters in the same sequence.
STEP 4: We install the half-hip rafters.
Let's start from the central one. First of all, we measure the size shown in Fig. 12 on the corner rafter:

Figure 12
In our example it is 12 cm. We put it on the ridge according to Fig. 13. From the resulting point we stretch the lace to the middle of the pediment mauerlat.


Figure 13
Using a small tool, we measure the angle “β” between the lace and the ridge beam post. This will be the angle of the upper cut of the half-hip rafters (see Fig. 14):

Figure 14
We also measure the angle “φ” (see Fig. 15):

Figure 15
We will make the half-hip rafters from 50x150 mm boards. This section is quite sufficient.
So, we take a board of suitable length and saw one end of it, first at an angle “β”, then sharpen it at an angle “φ”. Next, we place the resulting workpiece on the Mauerlat, aligning its bottom with the stretched cord (see Fig. 16):

Figure 12.16
At the top we measure the distance shown in Fig. 17:

Figure 17
We got it equal to 6 cm. Now using this value we mark the lower edge of the rafters of the half-hip (see Fig. 18):

Figure 18
In addition to the bottom cut, we immediately noted the width of the cornice (50 cm). Thus, we have a middle half-hip rafter.
On the half-hip we will have four more sprigs (two on the right, two on the left). We are not securing our middle rafter yet, but using it as a template. The lower cuts are the same for all riggers, the upper cut is made first at an angle “β”, then “φ/2” in the desired direction. I'm sure you can easily determine their length from the spot.
We install and secure all the received half-hip rafters and flanges (see Fig. 19):

Figure 19
STEP 5: We manufacture and install stingray hooks. We make the lower cuts according to the same pattern that all the rafters of the slopes were made according to. We also first make the top cut according to this template, and then cut it at an angle = 90°-φ/2 in the desired direction. We determine the length of the rafters locally using a tape measure (see Fig. 20):

Figure 20
STEP 6: We make cornices.
We start with the pediment cornice fillies (see Fig. 21)

Figure 21
Then we attach the wind boards (see Fig. 22):

Figure 22
Now we need to extend the half-hip corner rafters to the wind boards. We do this with a 50x100 mm board. Sew with a piece of inch tape (see Fig. 23):

Figure 23
After that, all we have to do is hem the cornices from below and make the sheathing. The cornices can be hemmed either as is, or made into “earrings”. Here you can choose for yourself what you like best. We have already seen how all this is done in previous articles.

Half-hip gable roof- This is a cross between gable and hip roof types. The pediment is made in the shape of a trapezoid, which is why such a roof is often called Danish or Dutch. You can do it yourself, but only after detailed study installation features and correct calculations.
This type is very popular in areas where constant and strong winds blow, especially for small houses whose low slopes will well protect the pediment of the entire building from moisture and the same wind.
The rafter system of a half-hip roof, the diagram of which is presented in this material, can be made of either wood or steel structures. At the same time, the scheme of the half-hip roof from the side of the slopes is completely identical classic roofing with straight slopes, and the differences will only be on the side of the gables.
Semi-hip gable roof DRAWING:

To understand how a half-hip gable roof, the drawing of which is presented above, should be implemented correctly, let’s take a 5-minute plunge into the theory of roofing.
Roofing options for half-hip roofs.
The main roofing options that involve the use of the one presented in this material designs:
- Attic. This type of construction is suitable for those who wish to have additional living space, but do not have the opportunity to build another floor. It will be great solution for a combination of two opposites - the desire to have a roof with original design and the possibility of adding additional space.
- . Such a design idea can be implemented if the room top floor does not fit into the cocked hat of a gable roof type. The result will be a huge space that is livable.
- Gable half-hip. This design also has triangular shape. The roof slope (hip) on the back side of the house is cut off almost at the very top. This roofing option is suitable for small houses, whose owners do not particularly need additional living space.
By making such a roof, you will also reliably protect your home from the harmful effects of precipitation.
Where to begin?
Even if you have experience as a builder or roofer, before installation work there will be nothing wrong if you ask search engine request “half-hip roof drawing” and then purchase reliable drawings of the rafter system and roofing pie.

By purchasing a detailed plan for the future structure, you will be able to calculate all the nuances of the installation work and make the roof so that it is not only a decoration of the house, but also performs all the functions assigned to it.
On the other hand, you simply won’t have to tell the workers and explain in detail all the stages of the work being performed.
Now let's look at what you need to pay attention to when drawing up a plan.
1. and her design features. The half-hip roof is considered the most difficult option. Therefore, here you should strictly observe all the parameters and measurements that will be laid out on the drawings. And so there will be an increased consumption of both wood and metal tiles ( sheet metal) due to too much miter cutting at the joints.
2. Ventilation grates and air ducts. For some reason, many people forget about this part of the installation and construction work. But it is the correct air circulation that increases the service life of the rafters, whether the windows in the house will fog up, whether mold will appear on the walls or not.
3. Gutter system. The correct functioning of a half-hip roof depends on correct installation drains, set slopes and calculations of all loads. All these details are easy to provide if a detailed roof plan is available.
4. Total cost of the entire structure. This includes installation work, and , and building materials (timber). Many experts who make up technical documentation, they try to calculate the full estimate that is necessary for the construction of the roof, but taking into account the materials that you choose.

Before erecting this type of roof, you can select a ready-made drawing. But in this case, you will not be able to provide for all the features and nuances that are inherent in your area. It is best, as practice shows, to create a personal project that can emphasize the individuality of your home and the landscape where you live.
Installation work.
1. Necessary calculations. Calculating the quantity required material, contact a specialist roofer for help. Spend more than redoing a poorly done job later. But the most the best option– contacting a construction company.
2. Concrete base rafter system. Along the entire perimeter of the base it is poured concrete belt using reinforcement to strengthen the screed. When pouring concrete, it is necessary to insert pins (Ø at least 10 mm). They are installed so that they protrude above the concrete by 10-15 cm at the distance of the rafter step (at least 1.20 m).
3. Waterproofing. Roofing material or film is placed on the frozen screed.
4. Wooden base rafter system. Along the entire length reinforced belt Place beams in which holes are drilled for the prepared pins. After installation, the threads on the pins should protrude by 3-4 cm. Tighten with nuts. All! The base is completely ready.

Don’t get to work without the advice of professionals: the more complex the design, the more you need their help. Soberly evaluate your capabilities and skills, and the roof will always delight you and protect you from bad weather.
Durable and original roof half-hip type is interesting option, which is perfectly adapted to wind loads. The half-hip roof has triangular slopes, which allows you to simultaneously increase the attic space, reducing the load on the load-bearing joists. It is possible to equip such a roof with houses of any type, so today more and more homeowners are deciding to choose this roof design for their private home.
Design features
One of the undoubted advantages of the half-hip gable roof is the presence of a full attic, in which correct layout it will be possible to arrange a full-fledged room for a study or bedroom. In its appearance and shape, such a roof resembles a trapezoid, resistant to wind loads.
It is necessary to note the versatility of this type of roof, which is equally suitable for small country house, and a full-size cottage with an area of 200-300 square meters. In every specific case Double and hipped semi-hip roofs of different designs can be used, differing in internal design and dimensions.
 It is also possible to use different types of roofing elements. So, you can put an expensive one on the roof natural tiles or use economical ondulin, slate and metal profiles. There are currently no special requirements for the arrangement of a half-hip roof, the rafter system of which is made of wooden logs. It is only necessary to correctly calculate the load on the load-bearing logs and subsequently securely secure the base, which will allow him to properly bear the load on the walls of the house.
Advantages and disadvantages
Popularity in many ways of this type roofs are due to their numerous advantages, so it is not surprising that today many summer residents and owners of private houses prefer this type of construction.
The advantages of a half-hip roof include:

The disadvantages include the following:

Arrangement of the rafter system
It is possible to carry out a roof truss system yourself only if the homeowner has the appropriate work experience. The roof base consists of from the following elements:

Step-by-step instructions for arranging a roof
Homeowners who decide to independently install a half-hip roof must follow the following step-by-step instructions, which will allow them to complete the roof of the house themselves.

At this point, the installation of the rafter system is completed, you can begin further arrangement roofs.
Thermal insulation and roofing decking
 The completed rafter system is sheathed with lumber, which will be the basis for roof thermal insulation. The sheathing is mounted and laid inside it mineral wool, foam or other similar materials. When using fiber insulation, it will be necessary to take care of their high-quality hydro- and vapor barrier, for which special insulating membranes are used.
All that remains to be done is to secure the used roofing material. This work is not difficult, you just need to remember that the flooring needs to be done at a height, so precautions must be taken. To fasten metal profiles and similar materials, it is necessary to use self-tapping screws with rubberized heads, which will prevent damage to metal sheets by rust. If ondulin is used, then the fastening should be carried out in full accordance with the technology, achieving the maximum possible waterproofing of the roof.
A half-hip roof is original design roof, which will allow you to decorate your home, and the homeowner gets the opportunity to maximum efficiency use the under-roof space. At the same time, one should remember the complexity of arranging such a roof, so if the homeowner does not have the relevant experience, it is best to turn to professional builders, and they will do the appropriate work in a short time, installing a high-quality and inexpensive half-hip roof.
IN modern construction Installation of several types of roofs, different in appearance and design, is practiced. One of the most popular and aesthetic is Dutch. The rafter system of a half-hip roof can be made with either two or four slopes. Let us consider in detail all the features of this design and methods self-installation half hip roof.

Half-hip roof for a residential building
All pitched roofs have one common feature– the presence of an attic space, which, with proper finishing, can be used as a living space. This design allows you to significantly expand the living space without an extension. The half-hip roof also has excellent technical characteristics: it can withstand powerful wind loads and provides reliable protection fronts of the house from precipitation.
Depending on the design features, half-hip roofs are divided into two main types:
- semi-hipped gable roof;
- semi-hipped hipped roof.
Photos of houses with half-hip roofs are presented in large numbers both on specialized websites and on construction forums.

Advantages and disadvantages of a half-hip roof: photos of beautiful houses
What distinguishes a half-hip roof from a hip roof? The hip roof has two large slopes in the shape of a trapezoid, and smaller slopes have the shape of triangles. In a half-hip roof, everything is arranged a little differently, and the slope line takes on a broken shape.
The design is like this sloping roof largely depends on the shape of the house itself, the presence or absence of living space in the attic, the type of roofing material with which the surface will be covered, and even climatic features region.
Moreover, the decisive role in the creation of the structure is played by the climate, because in regions with snowy winters, precipitation will accumulate especially strongly on the surface of the slope, forming a kind of “snow cap”. Therefore, for such areas, roofs with steep slope and minimal overhangs. If snow drifts are an irrelevant problem, then it is quite acceptable minimum angle tilt

Among the advantages of a half-hip roof are:
- the presence of an additional room that can be used as a living room or attic;
- aesthetic appearance, with the possibility of unusual design of the house by creating an original shape of the structure;
- reliable protection of the home from influence weather conditions: snow, rain, strong wind.
Among the disadvantages of half-hip crumble it is worth noting:
- presence of certain difficulties during the construction process: a large number of ribs, struts and stops makes the construction of a rafter system a long and labor-intensive process;

- in the process of building such a rather complex structure, not only large quantity forces, but also materials;
- The process of laying roofing also becomes somewhat more complex.
But, despite the shortcomings, houses with a half-hipped roof look unique. All the difficulties and expenses are worth it to give the roof an original and memorable appearance. If it doesn't scare you complex installation rafter system, you can safely get to work. Among the photos of private houses, half-hip roofs are found quite often, so it will not be difficult to choose the option you like.
Mansard half-hip roof
Under mansard roof imply a structure that has two vertices in the shape of cut triangles. If the house has square shape, then the roof will turn out to be pyramidal. This type of roof has increased strength. On rectangular houses mansard roof has two triangular sides and two trapezoidal. The slopes are located at the same angle, which allows them to be mounted symmetrically to the axial beams.

This type of roofing has the following advantages and disadvantages:
- increased strength allows this design to be used in regions with extreme climatic conditions, for example, on the seashore or places characterized by strong winds;
- the aesthetic appearance allows such a roof to look appropriate against the backdrop of absolutely any landscape;
- low profile provides increased resistance of the roof to vibrations;
- due to the shape of the structure, certain difficulties may arise with cleaning and repairing the surface;
- the attic space of the half-hip roof can be used to furnish living rooms;
- it is necessary to consider additional forced ventilation, which entails costs.

How the rafter system of a half-hip roof works: diagram and photo examples
Like any other roof structure, a half-hip roof consists of many layers that are layered one after another. Among these structural elements can be distinguished:
- rafter system, which acts as a base for holding all elements;
- Mauerlat – lower support beam for rafters;
- materials that provide heat, hydro and vapor insulation of the roof;
- roof covering that provides mechanical protection.
The rafter system itself also has several component elements: ridge, rafter legs, posts, struts, sheathing and much more. Each of these elements performs its own function, providing the roof with additional rigidity and strength. This is especially important when creating a half-hip mansard roof.

Installation of a half-hip roof should begin with laying the Mauerlat on load-bearing walls Houses. For brick buildings, a reinforced belt is installed, which provides additional strength and evenly distributes the load. At the concreting stage, vertical studs made of galvanized metal are inserted into it. The Mauerlat is attached to the reinforcement by insertion.
The length of the studs should be sufficient to provide a protrusion from the timber of 2–3 cm. The fastening spacing should be 120 cm. Minimum diameter the reinforcement used to fasten the beams is 10 mm.

To protect the reinforced belt, it is covered with at least two layers of roofing felt and only after that the beam is placed on the studs. How to do this can be seen in the drawings. Thanks to this stage, the half-hip roof is more durable.
Selecting and installing a Mauerlat is one of the most important stages preparatory work. The cross-section of the timber used for this purpose should be 150×150 mm or, in extreme cases, 100×150 mm. All necessary holes are drilled on the ground, after which the wood is processed with specialized antiseptics to protect against moisture and fungal development.
Half-hip roof rafter system: installation basics
The installation of a half-hip roof includes the installation of a ridge, rafters (both slanted and diagonal) and fasteners, for example, metal brackets and special notches.

Ideally, the diagonal rafters should be a continuation of the ridge, which at the top seems to be divided into two parts and goes down to the corners of the house. Extensions are also attached to the diagonal rafters, which forces these elements to take on the entire main load and weight of the structure. That is why double boards 50×150 mm are used for their manufacture, thus providing a reinforced base.
Thanks to this, the load-bearing capacity of the slanted rafters increases, which makes it possible to use long whole beams for very large roofs. In addition, the same boards can be used for diagonal and row rafters, which makes it possible to simplify the work process.

When the installation stage of the slanted rafters is completed, and all the elements are securely fastened to the mauerlat and ridge beam, it’s time to start installing the ordinary rafters. The upper part will rest against the ridge, and the lower part against the Mauerlat. Before starting work, be sure to read available projects houses with a half-hipped roof.
To make the structure stable, notches are made at both ends of the rafters. This allows you to capture elements. Metal brackets and corner linings are used as additional fastening. If the roof of the house is very long, then it is necessary to create additional supports in the form of struts. Truss trusses are used to support diagonal rafters.

If the floor slab is made of reinforced concrete, then all the supports and racks can be rested directly on it. Otherwise, it is necessary to install additional tie-downs on the floor beams, otherwise the half-hip roof structure will be unreliable.
How to make a half-hip roof with your own hands: calculating the number of rafters and the pitch between them
In order for the rafter system to be reliable and fully functional for many years, before starting work it is necessary to carry out calculations that will become the basis for installation. As an example, you can use a photo of a half-hip gable roof with a house width of 9 meters.

The pitch is the distance between two rafter legs, and usually for residential country houses this indicator ranges from 0.6–1 m. This depends on many factors, so calculations must be made individually based on your own indicators. To calculate the required number of rafters, use the following algorithm:
It is useful to know that although ideally the axis should pass through the center of the rafters, in practice errors are permissible, depending on changes in the slope angle of the surface of the future roof. This is clearly visible in the photo of a half-hip gable roof.

Let us consider as an example the following calculation: the length of the roof slope is 16 m. In this case, the pitch between the rafters will be 0.6 m. Based on the above algorithm, 16? 0.6 + 1 = 27.66 = 28. This means that for a slope 16 m long we will need 28 rafters.
Alternatively, you can use special online calculators for calculations, although it is much better if you have a plan or drawing of a half-hip roof with your own hands, because having clear example it is much easier to carry out calculations and work.

Installation of a half-hip roof: the final stages of construction
When all the wooden elements are laid and secured, all that remains is to worry about the heat, steam and waterproofing of the roof. To do this, a lathing is made, and the selected material is rolled out on top.
It is difficult to say which materials are best to give preference to, but when it comes to vapor barrier, aluminum foil will definitely perform its function well. With help construction stapler the foil is attached to the rafters so that the glossy side faces inward, that is, into the attic.
For insulation, synthetic wool (mineral or stone) is most often used, which is sold in rolls or mats. The insulation is laid out in the spaces between the rafters and covered with a layer of waterproofing. Previously, roofing felt was used for this purpose, but today it has given way to a diffusion membrane.

If the space under the roof ridge has not been sealed, then natural ventilation will not allow fungi and mold to develop inside the “pie”.
Of course, in terms of installation, a gable half-hip roof is significantly superior to a hip roof due to its simpler design and lower installation costs. But when it comes to the end result, nothing beats sophisticated beauty. hipped roof. Photos of a half-hip hipped roof clearly demonstrate the beauty of this solution.
And with all this, the second option provides much more space for equipping the attic space, which will be equipped with instructions, photos and videos of the half-hip roof rafter system provided on the Internet.

Choosing roofing material for a half-hip roof
The choice of roofing material plays a significant role in creating a beautiful and reliable roof. Let's look at a few of the most popular solutions and how they meet the requirements.
During installation and operation, roofing have to deal with a whole range of external factors, which affect him in different ways. Among them: precipitation, strong winds, “snow caps,” exposure to ultraviolet radiation and significant temperatures. Carry out selection suitable material should be based on these data.
Asbestos cement sheets, or slate, is an inexpensive and fairly durable roofing material. It has a number of advantages, such as fire safety, high resistance to temperature changes, resistance to corrosion and the development of mold and mildew. Slate will never rot or lose its appearance in the sun. To give a more aesthetic appearance and increase technical characteristics asbestos cement sheets can be painted.

This material is not suitable for a half-hip roof for two reasons:
- such an inexpensive coating will not look advantageous on such a complex structure;
- Slate is a fairly fragile material and cutting it accurately will take a lot of time and effort.
Metal tiles- also quite affordable material, but at the same time much more attractive. Long service life (up to 30 years including maintenance) and excellent technical characteristics have made this coating a leader in its price category. The material is not at all afraid of temperature changes or mechanical loads. And the wide range of colors on the market allows you to choose a shade to suit every taste.
The main advantage of metal tiles is its light weight and, accordingly, a small load on the rafter system of a half-hip roof.

One of the disadvantages of this material is the integrity of the sheets, the cutting of which for a half-hip roof requires a certain skill and dexterity. And, of course, very low sound insulation. After all, we all know the sound of raindrops hitting a metal surface.
Composite tiles- one of the subtypes of metal tiles, which is widely found on sale. This coating is more expensive, but it also has better technical characteristics. The only shortcomings noted are heavy weight material.
Flexible roof– ideal for a half-hip roof. Bituminous shingles Sold in rolls and easily cut into pieces the right size. This makes it easy to design areas with high architectural complexity. Among the technical characteristics are:
- low weight of material;

- fire resistance and water resistance;
- a huge selection of color and stylistic solutions;
- resistance to mold and rot.
Ceramic tiles, perhaps the most ancient of the proposed materials. The roof is laid out from individual elements that were fired at a very high temperature. It's environmentally friendly pure material, which is resistant to both high and low temperatures. Undoubtedly, this material has the longest service life - up to 150 years.
This coating is excellent for a half-hip roof, provided that the rafter system is highly durable and reliable, since ceramic tiles are quite heavy.
Another feature of this material is the fragility of individual elements. However, this is compensated by the ease of repair and the ability to replace each individual part.

Wood decking or shingles. Eco-friendly and very nice option. The constituent elements are small planks made of various types of wood - oak, beech, aspen and all kinds of conifers.
Corrugated sheeting. This material owes its popularity to its good characteristics, combined with at an affordable price. The main advantage of such a roof is cost-effectiveness, but there are other advantages:
- light weight;
- ease of transportation and installation;
- long service life;
- resistance to corrosion damage;
- large selection of shades.

However, like metal tiles, this material is quite noisy in rain and hail. It can also be susceptible to corrosion, provided there is mechanical damage as a result of improper transportation and installation. In addition, laying corrugated sheets on a half-hip roof, like other sheet materials, is complicated by the need to cut out individual elements.
As we can see, creating a half-hip roof with your own hands, although not an easy task, is quite feasible. Having thought through all the stages and gradually following the algorithm, you can give your home original look, making it even more comfortable and beautiful.