Whitewashing walls with lime - instructions for DIY budget repairs. How to whitewash a ceiling using old whitewash How to prepare whitewash from chalk for a ceiling
Old methods of repair are gradually being replaced modern materials, which are used for finishing. And now whitewashing with lime is no longer as widespread as before. But it's still great option for those who want to save money while still receiving an acceptable quality of finished work.
First you need to decide on the material that will serve as the basis for making the bleach solution. Chalk or lime are the most widely used options. However, every decision to whitewash a house has a list of pros and cons.
Lime is a type of composition, to obtain which they burn rocks carbonate based. This current solution not only for the construction industry, but also when obtaining connections with various chemical properties. Lime whitening should be done using a slaked type of solution. It is obtained by combining water and lime powder.
Let's list positive characteristics lime whitening:
- ability to adhere well to any type of surface;
- tightening of small cracks during application;
- moisture resistance;
- resistance to temperature fluctuations;
- presence of bactericidal properties;
- affordable cost of the material combined with low costs during painting.
Not without negative aspects, Although lime mixture and does not differ in their large number:
- the likelihood of burns for those who perform painting;
- possible appearance of defects in the form of stains and stripes on the surface.
Lime, in fact, is a sodium alkali, therefore precautions are required, otherwise health cannot be protected.

But chalk is a material of natural origin, known and familiar to many. This finish has its own advantages:
- simple, safe work when painting;
- easy rinsing, removal of layers on the surface;
- deep whiteness, whitewash does not turn yellow over time;
- environmental friendliness;
- affordable price.
There are also a couple of disadvantages:
- the likelihood of defects occurring during subsequent coating of walls with lime;
- unsuitable for use in damp environments.

How to slak lime correctly and safely
The rules for preparing and slaking lime are required for those who have chosen this particular whitewash option when finishing. Lye is purchased from construction stores in slaked or unslaked form. With the first option, you can connect elements to work immediately. In the second case, before whitening, it is assumed that the composition must be extinguished.

It is important to make sure in advance that there is no health hazard. To provide necessary measures need to:
- achieve good ventilation of the room where whitening will be carried out;
- prepare a suitable bucket for the composition - lime is slaked only in metal containers;
- put on a respirator and protect your eyes with special glasses;
- You can’t do without overalls, headgear and rubber gloves.

The name quenching is given to the reaction during which the elements interact with each other. The result is a special powder or lime paste. The exact results are determined by the bases used. Next, we’ll tell you how to properly dilute lime:
1. Fluff is obtained by mixing lime and water in proportions 1:1. For example, one kilogram of dry material needs to be diluted with a liter of water. Lime powder is poured into a clean container, then everything is poured cold water.
2. The lime gets very hot when it reacts. This causes hissing and splashing. At least 30-40 minutes should pass before everything calms down.
3. To stir the composition, use a wooden stick. The powder is obtained when the moisture finally evaporates. At this stage, it is considered that it was possible to dilute the lime for whitewashing.

For whitewashing and filling small cracks, a thicker composition is needed. Lime dough is a mass of plastic form, in the preparation of which alkali and water are used in a ratio of 1:3. IN further process slightly different from the first option: take a container with lumps of lime, gradually add water to it in small portions, slowly stir everything with a brush.
Lime paste helps strengthen cement-sand mortars, the mixture helps in preparing materials for plastering work.

On video: recipe for making lime whitewash.
Secrets of uniform whitewashing
Preparatory work
Windows, furniture, doors and floors in the house must be closed plastic film, you can also use old newspapers, then cleaning the room will not be so difficult. Prepare working tools, in case of whitewashing the ceiling - a stepladder.

The surface also requires preliminary preparation. Old chalk whitewash must be completely removed, the same goes for crumbling plaster. The surface is cleaned of stains and dirt.

How to apply lime mortar
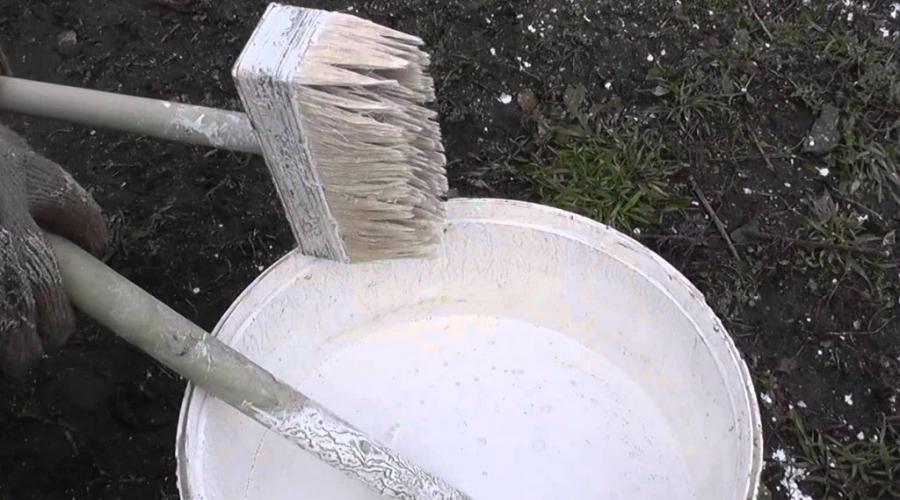
There is nothing complicated in the application process. Simply dip into a container with whitewash painting tool(wide brush or roller). The solution is then distributed over the surface only in a thin layer. It’s good if you can use devices with long handles. They are easy to make yourself. Then there will be no need to make additional efforts during processing, and the whitewash consumption will not increase.

Application is carried out in several layers, at least 2-3. Each layer is applied perpendicular to the previous ones, then thickening and streaks will not appear, and the coating will be uniform. It is important to maintain time intervals between application of layers. For old ones, complete drying is mandatory. If you make the layers thin, then this process ends faster.

Often, areas appear in the corners without proper treatment. It is recommended to simply go over them again using a whitewash brush.

The Best Alternatives to Brushes
Using brushes used to be the only thing affordable solution for whitewashing walls. But thanks modern technologies Repair costs are significantly reduced and large spaces can be whitewashed. Brushes remain relevant only for rooms with a small area.
The following devices greatly facilitate the work of whitewashing a wall:
- Spray guns for whitening. You can use the same tools as for plants, for example, a sprayer. The main thing is to have a container with a volume of 5 to 15 liters.

- Special apparatus for whitewashing with lime. Useful when large areas are being processed. The principle of operation has much in common with a spray gun.

- Thanks to this tool, lime is easily distributed over the surface.

There are several types of spray guns available: pneumatic, electric, manual. Latest – best option during processing small areas. Devices different types work according to a similar scheme. Electric ones cost more than manual ones. But they also distribute the lime better.
Uniformity of layers per 1 m2 and simplification of work are the main advantages that distinguish any such devices. The labor intensity of the process becomes minimal, and the whitewashed ceiling has no streaks or other defects.

Whitewashing process with a spray gun
Stick to it the following tips when whitewashing:
- For work lime composition additionally diluted and filtered if the work is carried out using spray guns or sprayers.
- The lime whitening solution is mixed before adding each new portion.
- The surface must be slightly moistened before applying the material.
- Limestone whitewash is poured into the spray gun, and air is pumped into it. The spray nozzle is adjustable to ensure even material distribution.
- If problems arise with spraying, the material is too thick. You need to add water to dilute even more if necessary.
- The distance between the surface and the sprayer should not exceed 15-20 centimeters.
- Application requires circular and smooth movements.
- New layers should be applied at intervals of one and a half to two hours.

Use of special additives
There are additional components, the use of which helps to improve the properties of the original composition. Shallowing is the first problem that such materials solve. To resolve the issue you can add:
- salt;
- drying oil;
- acrylic primer;
- wallpaper glue or PVA;
- grated laundry soap.
Thanks to such additives, bloating and blistering are eliminated and effects such as maximum adhesion to any type of surface are enhanced. The listed components allow you to quickly wash off the lime with water.
White is not the only option
Adding ordinary blue will help to cope with the situation when the lime coating turns yellowish after application. 10-20 grams of material per liter of composition will be enough. After this, the whitewashed ceilings become snow-white.

Sometimes it is necessary to obtain other colors. Not every dye will be suitable in this case, and the name whitewash will not be suitable for the technology. It is required to use pigments with maximum resistance to alkaline environments. Lime paints are combined with the following pigments:
- ultramarine for blue;
- lithopone for white;
- titanium dioxide for white;
- chromium oxide for green;
- mumiyo for red-brown;
- red lead for orange;
- umber for greenish brown;
- ocher for a yellow tint.

It is recommended not to add pigments in their original form, in powder form. You should first dilute everything with water until a paste appears. Then the dye is given time to infuse for 24 hours, only after which the pigment can be added to the lime mortar.
Painting and puttying on lime
It is unlikely that the quality of the repair will be satisfactory if the materials are applied one after another at once. The paint usually quickly adheres to the whitewash and rolls off along with it. After everything dries, there is a high probability of air bubbles appearing; painting the walls does not give the right result.
To avoid such results, first wash the surface with water and soap. Then it is carried out additional processing using a stiff brush. This is done to prevent additional defects from appearing.
Putty helps level the base when repairs are made. Removing old layers of finishing is necessary if puttying is carried out on walls covered with lime. You can use a scraper to remove all the swollen areas, and then apply a primer, after which the original base can be removed without any problems.

Today, there are many options for giving the ceiling freshness and a sense of newness. If we're talking about about a concrete ceiling, many still prefer to whitewash the ceiling with chalk. Traditional way Whitewashing has not lost its relevance to this day due to its simplicity and the availability of all the necessary ingredients.
Which is better - chalk or lime?
You can whitewash a concrete ceiling with either chalk or lime. Both of these materials have a similar structure and are used to prepare whitewash, and even the proportions required for mixing the solution are the same. However, contrary to popular belief, chalk and lime are not the same thing. They differ in composition, properties and origin and have different uses.
- Chalk. This material gives a long lasting concrete ceiling bright white color, however, does not have sufficient water resistance, so whitewashing the ceiling with chalk is not recommended in damp and damp rooms.
- Lime. Lime whitewash is highly resistant to moisture and fungus, so it is better suited for use in the bathroom. However, unlike chalk, lime does not give the ceiling a perfect whiteness.
Since lime and chalk have different shades, they are strictly not recommended to be applied to each other. Applying chalk whitewash over lime whitewash, or vice versa, can lead to the formation of clearly visible stains on the ceiling.
Preparing the room and ceiling
For getting best result whitewash should be applied to clean flat surface. Applying a new layer of whitewash to an existing layer is not recommended, since this can lead not only to the appearance of stains, but also to the top layer crumbling as a result of the destruction of the old base underneath.
Before starting work, it is necessary to properly prepare the room in which whitewashing will be carried out. To do this you need:
- Take out of the room extra furniture and interior items;
- Remove all lighting fixtures from the ceiling;
- Cover the floor and remaining objects in the room with film or newspapers, securing them securely with tape or masking tape;
- Prepare a table or stepladder for work.
Having prepared the room, you can begin processing the ceiling surface, which is performed in several stages:
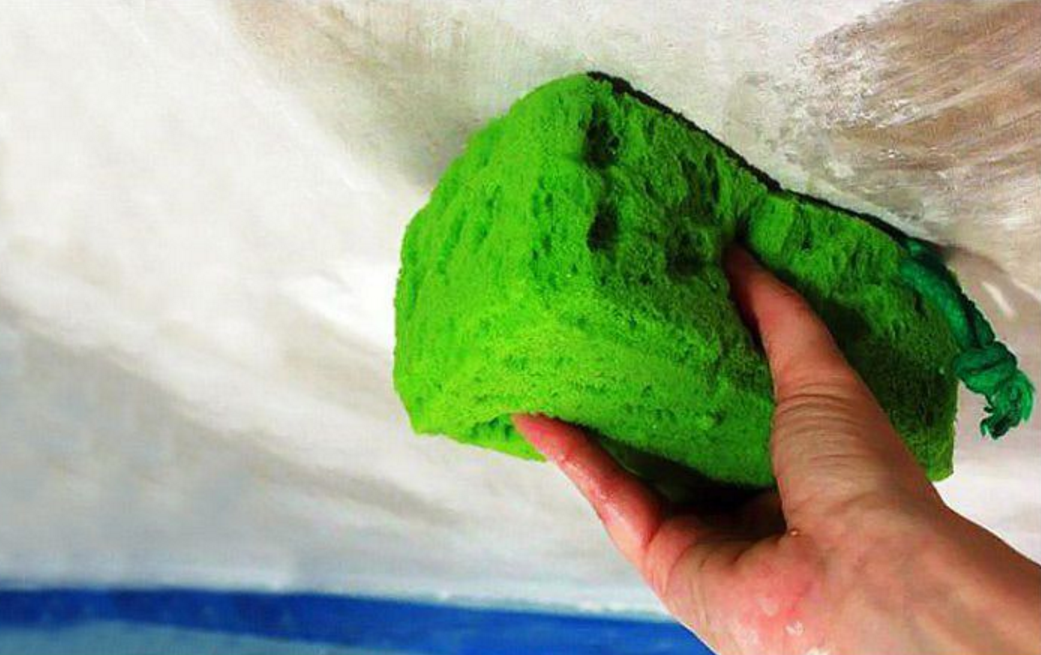
- Cleaning the ceiling from old whitewash using a wet sponge, which must be used to thoroughly wash off the whitewash layer by layer.
- Cleaning the ceiling from stains and mold, if any, using special means.
- Removing loose parts of old finish.
- Leveling the ceiling surface using putty.
- Treat the surface after the putty has dried with sandpaper.
- Treating the ceiling with a deep penetration primer.
- Dry the surface within 24 hours.

Preparation of whitewash solution
How to dilute chalk to whitewash the ceiling? For good whitewashing, just mixing chalk with water will not be enough. Despite the apparent simplicity, good solution requires a number additional ingredients, which will help preserve the whiteness of the ceiling and the quality of the coating for at least several years.
To prepare the solution you need:
- Pour 5 liters of warm water into a bucket;
- Dilute 100 grams of wood glue in water;
- Pour out 3 kilograms of sifted chalk powder and dilute the chalk, thoroughly stirring the solution;
- Add 10-20 grams of blue to the solution to enhance whiteness.
The finished solution should be enough for 10-12 square meters surfaces. The density of the whitewash is checked with a regular knife, which must be lowered into the solution. Good whitewash should not completely drain from the knife blade, leaving an even layer. If the solution drains, exposing the surface of the blade, you need to add more chalk, pouring a little at a time and stirring until the desired consistency is obtained.

Applying whitewash to the ceiling
Whitewashing the ceiling with your own hands is one of the dirtiest types of work, so it is better to do it using special means protection: rubber gloves, safety glasses and a respirator, since getting whitewash on the skin or eyes can cause allergic reactions or even chemical burns.
To apply the solution to the ceiling surface, you can use a brush, roller or spray. The roller provides more uniform application whitewash than a brush, but the most effective and fastest way is spraying, which allows you to apply the solution in a thin, even layer.
However this method requires a special device - a compressor with a spray gun or a special spray gun.
If they are unavailable, you can use a “homemade” device - a vacuum cleaner with a special attachment.
Regardless of the method of applying the solution, you should follow general rules whitewash:
- The ceiling begins to be whitewashed from the window to the opposite walls;
- The solution is applied in several layers (2 or more);
- Each subsequent layer must be applied to a dry surface;
- The direction of application of each layer should be perpendicular to the previous one;
- The quality of whitewash when drying can be spoiled by drafts and direct sunlight.
You can quickly, easily and cheaply finish the ceiling by whitewashing it. To achieve a satisfactory result, you need to take into account all the features of the process, starting with the preparation of the solution. The quality of the layer depends on its composition, color intensity and consistency.
The content of the article:
Whitewashing is a budget and simple finishing option, which, in addition to all its advantages, has significant drawback- fragility. Whitewash quickly crumbles, fades, and loses its aesthetic appearance. In order for the finishing layer to look attractive and last as long as possible, you need to be able to not only apply the whitewash composition correctly, but also prepare it.
Types of whitewash compositions for ceilings

Today, there are two main types of mortar for whitewashing ceilings:
- Cretaceous. It is hygienic, has a deep whiteness, but crumbles quite quickly.
- Lime. It has bactericidal properties, crumbles less, but can dry out the air in the room and can cause allergies.
You can buy lime and chalk in dry or paste form. For high-quality whitewashing, you can use both options. Most recipes also include additional ingredients.
Preparation of chalk solution for whitewashing the ceiling
There are several recipes for preparing this composition. In addition to traditional ingredients, you can add various colors to give the desired shade ceiling.
Concentrated solution of dry chalk for the ceiling

Before diluting chalk to whitewash the ceiling, you need to stock up on laundry soap, wood glue, ultramarine or colorant.
We adhere to the following instructions:
- Sift 3 kg of dry chalk powder and pour into a container.
- Pour 3-3.5 liters of warm water.
- Add 50 grams of laundry soap shavings and 100 grams of wood glue.
- In a separate vessel with warm water dilute ultramarine.
- When the shade of the desired intensity is obtained, pour the blue into the solution.
- Thoroughly mix all ingredients until smooth and strain through double gauze or nylon.
The consumption of this solution is 0.5 liters per 1 m2.
Whitewash from dry chalk for the ceiling

This composition will be enough to whitewash 20 m2 of ceiling.
We prepare it in this order:
- We heat 10 liters of water to a temperature of +40-45 degrees.
- Dissolve 120 grams of wood glue and 150 grams of laundry soap shavings in it.
- Mix thoroughly and add 6 kg of dry chalk, which had to be sifted first.
- Add water, bringing the composition to a volume of 20 liters.
- Dilute ultramarine with water in a separate vessel.
- Add blue to the solution to avoid yellowing of the layer.
Composition of chalk paste for whitewashing ceilings

To make a solution of paste chalk for whitewashing the ceiling, you will need CMC wallpaper glue. We carry out the work in the following sequence: dissolve in warm water glue so that a 1.5 percent solution is obtained, mix the adhesive mixture with chalk paste in a ratio of 4 to 1. This composition does not need to be filtered, it is immediately ready for use.
Preparation of lime mortar for whitewashing the ceiling
Lime for whitewashing the ceiling, like chalk, is sold dry or already slaked. Dry lime, depending on the speed of slaking, is of three types: fast slaking - 10 minutes, medium slaking - 20 minutes, slow slaking - more than half an hour. The slower the lime slaks, the smaller portions you need to add water. The composition for whitewashing the ceiling is prepared from slaked lime. If you only have dry fire, you can extinguish it at home.
Lime slaking technology for whitewashing ceilings

To carry out this procedure at home, you must first put on safety glasses, a respirator and work clothes.
We carry out the work in this order:
- Pour the lime into a rust-free metal container.
- Let's pour cold water in a ratio of one to two.
- Mix the lime and dilute with water to the required viscosity.
- Let it sit for several days.
During the process, it is very important not to lean over the container with slaking lime, since very caustic steam is released.
Mortar of lime and aluminum alum for ceilings

To dilute correctly slaked lime, we need salt, dye (you can use ultramarine), 200 grams of aluminum alum.
Prepare in the following order:
- Dilute 3 kg of slaked lime in 1 liter of water and stir until smooth.
- Soak 100 grams of salt in a separate bowl.
- Add 200 grams of aluminum alum and soaked salt to the solution.
- Mix all ingredients thoroughly and add 0.5 kg of dye.
- Bring the composition to a volume of 10 liters with warm water.
To ensure that there are no streaks left during lime whitewashing, it is recommended to first wet the coating with water.
Composition of slaked lime and glue for whitewashing the ceiling

To prepare this solution, you will need slaked lime, laundry soap, wood glue, ultramarine, salt.
Dilute the mixture in this order:
- Dissolve 6 kg of slaked lime in 8 liters of water.
- Add 100 grams of laundry soap shavings.
- Separately dilute 200 grams of wood glue in water and dilute it with the general solution.
- Mix the composition thoroughly and add ultramarine until the shade of the desired intensity is obtained.
- Add 200 grams of regular kitchen salt, which we first dilute in water. This will make the mixture more stable.
Waterproof lime mortar for ceilings

This mixture can be made from slaked lime, water, drying oil and salt in the following order:
- We dilute 400 grams of lime in 0.6 liters of warm water.
- Add 1/3 tbsp to the composition. spoons of drying oil and the same amount of kitchen salt.
- Mix the solution thoroughly until a homogeneous consistency and shade is obtained.
- Strain the mixture to remove excess lumps. The consistency of lime white should be like thick milk. Whitewashing with such a mixture will last a long time and have high moisture resistance.
Lime and chalk solutions for whitewashing have their own characteristics. However, in order for any finishing layer to stick to the surface efficiently and evenly, you need to understand the main issue - how to dilute lime or chalk for whitewashing the ceiling. Our recommendations will help you choose optimal method. From the proposed methods, you can choose the one that is most suitable for finishing the desired surface.
There are a huge number of options for finishing the ceiling, but the most affordable and simplest is whitewashing. With a limited budget for repairs, this solution will be the most optimal, and clean and smooth surface in any case, it will give the room a neat, well-groomed look. In addition, whitewashing the ceiling with your own hands will not take much time and will not require much effort.
Ceiling preparation
You cannot whitewash a ceiling using an old coating: when wet, the previous layers of whitewash will begin to peel off and stick to the brush, making the process difficult. In addition, the surface will not be perfectly smooth, which is completely undesirable. When cleaning the ceiling, you must take everything out of the room or cover it with polyethylene, otherwise you will have to wash everything from lime and.
Step 1: Surface Cleaning

For cleaning you will need:
- bucket with water;
- sponge;
- medium-sized metal spatula;
- clean rags;
- ladder.
If you clean a dry ceiling, a lot of dust will rise, and the process itself will take a long time; It is much faster and more convenient to remove the whitewash after moistening. You should not immediately wet the entire area, since the surface dries out very quickly; it is better to divide the ceiling into small areas and hydrate as you go.
After wetting the whitewash, you need to wait a few minutes until the layers are saturated with water to the base, then the coating can be very easily removed with a spatula. Finally, wipe off any remaining chalk or lime with a clean, damp cloth until no traces remain.
Step 2. Sealing joints and cracks
For further preparation you will additionally need:
- serpyanka;
- putty;
- sandpaper;
- primer;
- brush or roller;
- level.
There are always gaps between the ceilings, which gradually diverge over time. So that they do not appear on the ceiling, they are embroidered and filled putty mixture, covered with sickle tape on top. Putty is again applied over the serpyanka and thoroughly rubbed with a spatula, making the surface even.
While the joints are drying, the ceiling is carefully inspected and defects are eliminated. Small cracks are simply rubbed with mortar, gouges and chips
Step 3: Remove stains
Very often stains appear on the ceiling that show through the finish. It can be quite difficult to remove them, but this must be done at the preparation stage, otherwise after a while they will again be visible through the whitewash layer. Stains from water leaks are removed using bleach or bleach: dip a sponge in the liquid and press it onto the stain until it lightens. Of course, you need to wear rubber gloves to protect your skin.

To remove rust stains you will need copper sulfate. Prepare a saturated solution of bright blue color, spread the stain well, let it dry and repeat everything again. If necessary, re-process until the marks fade. After that problem areas prime and dry well.
Step 4. Alignment

When all noticeable defects have been removed, ceiling surface apply level in different places to determine the magnitude of the differences in height. If there are recessed areas, they are puttied separately, and when the solution dries, the entire area is covered with putty. Usually used finishing putty, which is applied in 2 layers 1-2 mm thick.
To work, take two spatulas - narrow and wide; when applying, hold the spatula under small angle to the ceiling. The resulting sagging or stripes are removed after the mixture has dried with sandpaper. It is necessary to sand the entire treated area to give the surface maximum smoothness. Finally, the ceiling is wiped with a dry cloth to remove dust and primed.

Prices for mixtures for leveling walls and ceilings
Mixtures for leveling walls and ceilings
How to whitewash a ceiling
For whitewashing, chalk, slaked lime and water-based paint. Each option has its own advantages, so to decide, you need to learn about the basic properties of these materials.


The chalk solution is easy to apply, has good covering power, and is almost odorless. Chalk - very cheap material, and therefore whitewashing will cost pennies. But at the same time, the chalk gets very dirty, preparing the solution takes time, and the surface may acquire a yellowish tint. To prevent this from happening, blue is added to the solution.


Lime has bactericidal properties and covers well small cracks, lasts a long time, has low cost. Disadvantages include sharp bad smell, which appears when the solution is diluted and the material is caustic. When whitening with lime, you must wear gloves, otherwise it will corrode the skin on your hands.

Paint on water based– this is the best option. Its cost is higher than that of chalk or lime, but its covering capacity is much greater. It does not smell, is easy to apply, is sold ready for application, and the painted surface does not get dirty. There is a washable paint that is especially suitable for wet areas.
Prices for whitewashing ceilings
Whitewash for the ceiling
Ceiling whitewashing process
For whitewashing you will need:
- ladder;
- small brush;
- roller 20 cm long;
- plastic container.
Step 1. Preparation of the solution

To dilute chalk, you will need water, preferably warm, PVA glue and blue. First, glue is diluted in water, and then chalk is added in small portions. Stir the solution well, break up all the lumps, and pour in the blue. Mix everything again until the color is uniform. For 10 square meters you will need 3 kg of sifted chalk, 30 g of glue and 20 g of blue.
Less lime will be required for the same ceiling area: you need to dilute 1.7 kg of lime in water and add 40g of blue. First take a little water, about 5-6 liters, and then add little by little, depending on the required concentration of the solution. if necessary, also dilute, adding only clean water. If you want to give the ceiling a colored tint, you can use special pigments.
Step 2. Applying the first layer

They begin to whitewash in the corner from the window; First, the joints of the ceiling and walls are carefully treated with a brush, and then whitewash is applied to the surface itself with a roller. Do not dip the roller into the paint too much to avoid splashing and drips; the layer should be thin and uniform. Whitening should be done in parallel movements perpendicular to the direction of light. Having finished applying the first layer, the surface is left to dry completely.

Step 3: Reapply whitewash

The base can be visible through the first layer, and stripes from a brush or roller are also clearly visible. A second layer of whitewash, which is applied perpendicular to the first, will help remove these defects. The solution must be mixed, because lime, chalk and paint could settle to the bottom. After this, they begin to whiten from the same place as the first time. The movements should be as uniform and confident as possible, then the quality of the whitewash will be high. To ensure that there are no unpainted areas left, when applying the composition, the ceiling is visually divided into strips and overlaps 4-5 cm wide are made at the joints.

After completion of the work, it is necessary to exclude the occurrence of drafts and lighting of the ceiling sunlight, otherwise the coating may crumble. Also, you should not create dust in the room while the whitewash is drying; All paint stains on the floor and walls should be wiped off immediately with a damp cloth, and swept only later so that dust does not settle on the surface. Subject to these simple rules re-finishing will be required no earlier than in 3-4 years.
Video - Do-it-yourself whitewashing of the ceiling
Whitewashing walls with lime is a procedure well known to many ordinary people. It enjoys well-deserved trust due to the fact that such a coating is breathable and has an antiseptic effect.
You can do the work yourself, without involving specialists, but that’s all necessary materials do not require significant material costs. To make it work high-quality coating, you need to know some of the features and subtleties of preparing the composition.
It is important to apply it correctly to the prepared surface. Before whitewashing ceilings or walls, you need to choose a base for preparing the solution. It can be chalk or lime.
 Lime resists the development of fungus
 Despite the fact that using chalk is the simplest and affordable way preparing a composition for whitening indoor surfaces, lime is in great demand. This is due to the fact that walls and ceilings treated with lime whitewash are not susceptible to the formation of mold and mildew. The most popular composition for whitewashing walls is fluff. Powder white, which has undergone the quenching procedure and is ready for use after adding water and fixatives.
Modern manufacturers sell lime:
- Slaked, supplied to places of sale in the form of powder or paste (dough).
- Quicklime, sold in the form of granules or large lumps.
 After filling the lime with water, close the container with a lid.
 For whitewashing, only slaked lime is used, for the preparation of which you will need:
- water and lime itself, taken in a 1:1 ratio;
- clean metal utensils no chips or corrosion;
- lid for container;
- wooden spatula for mixing the solution.
After quicklime is poured with cold water, it begins to boil, heating up to 130 ° C. The reaction is very violent, the liquid bubbles and splashes fly into different sides. At this point, it is better to cover the container with a lid to avoid getting the mixture on bare skin.
Use plastic dishes it is impossible, since the solution gets very hot during the quenching process, and the composition can be mixed only after the reaction is completed. Now you need to close the container with a lid and put it in a cool place. dark place for 20-25 days.
At the end of the specified time, the composition is thoroughly mixed.
 Achieve complete dissolution of granules
 There should be a thick white film left on the wooden spatula. The mixture required for whitewashing is diluted with cold clean water, achieving a homogeneous opaque composition. Approximate quantity the finished solution prepared from 1 kg of quicklime is 10 liters.
During quenching, all lumps and granules must be completely dissolved in water, but before use, the contents of the container must be thoroughly mixed, and before use, strain through a special mesh.

 The tool for performing whitening can be selected taking into account the wishes of the average person or the characteristics of the surface being treated:
- spray gun.
When using a spray gun, the resulting mixture will have to be filtered through cheesecloth to remove even the smallest remaining lumps.
How to increase the stability of the solution
 Soap will give the solution durability
 In order to whitewash walls with not only a high-quality but also durable solution, you will need to add some special additives to it. You can use regular laundry soap or wallpaper glue. Whitewashing lime is used for application to façade walls.
In this case, you need to protect the composition from negative impact precipitation and rapid rinsing. This can be done by introducing drying oil into the solution, which will repel moisture and help the whitewash to remain on the walls as long as possible.
The introduction of certain additives into the whitewash composition will prevent lime from falling off the walls.
 Surfaces whitened with lime tend to stain everything that touches them. This can be avoided by adding ordinary table salt to the solution.
Knowing the proportions allows you to achieve the desired effect:
- lime and salt - 1 kg per 10 liters of solution; salt will help make the surface snow-white;
- drying oil - 100 ml per bucket of whitewash;
- laundry soap, grated on a coarse grater, poured hot water, and then during the preparation of the bleach mixture, a soap solution is added instead of water.
Sometimes craftsmen advise adding carpentry glue to the solution instead of a small portion of PVA or wallpaper glue. It is boiled on steam bath and before whitening the walls, it is added hot to the prepared lime whitewash. For more information on how to apply whitewash, watch this video:
 It is convenient to apply whitewash with a roller
One of the most popular recipes for preparing bleach composition:
- 5 kg of slaked lime;
- 100 g of crushed and brewed laundry soap;
- 50 g wood glue;
- 10-15 g of linen blue powder;
- 8 liters of clean cold water.
After mixing all the above ingredients, add water, mix thoroughly and let it brew for 5-10 hours. You can apply it to the surface using a roller, a special bleaching brush or a wide paint brush(maklavitsa).
Before you whitewash a wall with lime, you should make sure that it is intact and that there are no cracks or cracks. Microcrack on a thick putty surface lime whitewash will easily hide, but larger ones must be eliminated before work begins.
Work order
 In some cases, whitewash can be sprayed onto the walls
 Whitening does not take much time and will not take much effort from the average person if it is carried out in accordance with existing rules. First of all, it is worth mentioning the need preparatory work. All walls and ceilings that are planned to be whitened must first be puttied, applying putty in two layers.
After complete drying (after 12 hours), you can proceed to the surface using sandpaper. In the case where wood glue or PVA was added to the whitewash mixture, priming of the walls is not required. The whitewash will last for at least 5 years without cracking, crumbling, or staining the hands and clothes of residents. Read more about fast way see whitewash in this video:
 To ensure high-quality painting of the walls, cover them with two layers of lime.
 The composition is applied in two layers with completely dry. Before you start re-bleaching, you need to wait at least 5 hours. A properly prepared solution does not leave noticeable transitions or marks (stripes) from a brush or brush.
When working with a spray gun, it is important to prepare the mixture at the correct consistency and not spray it from a short distance. This way you can avoid drips and achieve uniform distribution of whitewash over the surface.
In order for all layers to be of the same quality, you will have to constantly mix the contents of the container, preventing sediment from forming.