Plastic stick when bending the lantern. Neon glow sticks his. How to use the finished product
Read also
Make glowing sticks today it is possible in normal home conditions. To do this, you don’t need to spend money on buying absolutely nothing. expensive materials. The main thing is to prepare well and act, strictly following the technology.
What might you need a magic glow stick for?
Colored fluorescent sticks Recently they have become one of the most common attributes of entertainment public events. They are used equally often during entertainment by both children, young people and older people. Often the idea is used to create glowing drumsticks, decorate a hall, musical instruments, costumes. This approach allows you to organize a truly spectacular, unforgettable show.
However, it is not at all necessary to use such sticks at a party. Their use can be effective in nature, while hiking or fishing. Sticks with a fluorescent reagent are actively used by speleologists, rescuers, and people whose activities are inextricably linked with working in conditions of extremely limited access to natural light.
Always having a few homemade glow sticks with a bright chemical reagent in stock, you don’t have to worry about the flashlight running out or losing the main source of lighting at night.
Components

To create glow sticks with my own hands at home, you will need:
- plastic, maximally transparent flexible tube made of polyethylene;
- prepared fluorescent liquid;
- blowtorch;
- pipette;
- hydrogen peroxide;
- Teflon tape;
- copper caps for blocking the tube.
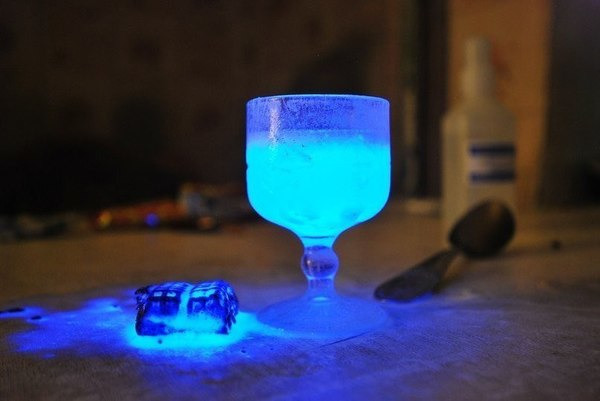
Creating Fluorescent Liquid
If you have managed to collect all the above components that are required for the glow sticks to give a bright glow, you can immediately get to work. However, a certain obstacle for some people may be the purchase of fluorescent liquid, which costs a lot of money.

In cases where you don’t want to spend money on buying a glowing base for a neon stick, you can try to make it yourself. In this case, you will have to obtain the following chemical components:
- 20 g luminol;
- a small glass flask with a volume of no more than 0.5 l;
- 30 ml dimexide;
- 30 g of dry alkali;
- simple fluorescent dye.
Since the liquid contains a sufficient amount of potentially dangerous chemical reagents, the components for its preparation should be mixed as carefully as possible, working in rubber gloves, a respirator and protective clothing.
To begin with, alkali, dimexide and luminol are combined in the quantities indicated above. The resulting composition is placed in a flask and shaken well, after which the necessary reaction should occur, which will subsequently lead to the glow of the liquid. Adding a chemical dye will help give it the desired shade.
How to make a glow stick: step one

Armed with a polyethylene tube, copper caps to plug its opposite holes and Teflon tape to securely fix them, you need to assemble the future container of the luminous liquid. The neon glow stick should be assembled in such a way that one of the copper caps can be easily unscrewed.
Step two
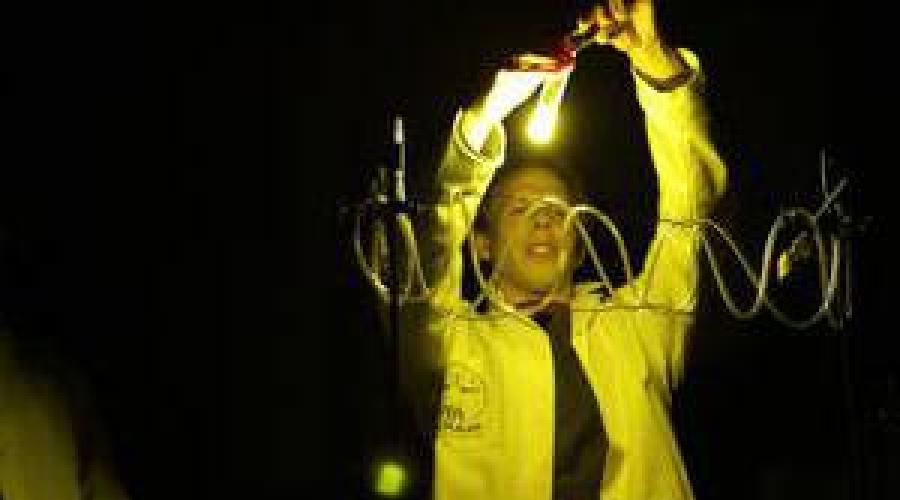
Using a heated blowtorch, seal the tip of the pipette tightly. Next, through the remaining open hole, the pipette is filled with a solution of hydrogen peroxide, and the other end is sealed again blowtorch. After completing the work, it is advisable to thoroughly wipe the blowtorch, clean it and put it aside.
Step three
A pre-prepared luminous liquid, diluted with a fluorescent dye, is poured into a polyethylene tube through one of the open holes with the cap unscrewed. A sealed glass pipette with hydrogen peroxide is placed inside. It is necessary to fill the tube to the maximum until the pipette is completely immersed in the liquid. By screwing the cap tightly and additionally securing it with Teflon tape for reliability, you should make sure that the fluorescent liquid does not spill out.
How to use the finished product?
To activate the glow sticks you created yourself, you just need to bend the polyethylene tube, breaking the pipette with hydrogen peroxide. As a result, the peroxide will combine with fluorescent reagents, after which the necessary chemical reaction will occur and the stick will light up with a bright glow.

Unfortunately, neon sticks created using the above method can only be used once. And the glow of such homemade products cannot be called too long. As for advice on the possibility of charging a stick with glowing liquid in the refrigerator or microwave oven, which abound on the Internet today, it is not recommended to engage in such amateur activities. Both methods are extremely ineffective and, moreover, do not exclude causing irreparable harm to one’s own health.
If there is a strong desire to reuse the glow stick, then it is better to thoroughly rinse and clean the parts of the product, get new reagents, take a whole glass pipette and perform the operation again, repeating all the successive steps once again.
Looking for quality neon sticks? Need glow sticks that will last more than an hour? Are you looking for a good and reliable chemical light? Our online store is pleased to present you a new generation of chemical light! The chemical light source is made according to a unique, new technology. Which made it possible to improve the quality and safety of using a chemical light source. These glow sticks in the dark are made in a durable housing. Which is at the same time flexible and safe. What will protect you from negative influence chemical elements, which will be packaged in a reliable case.
If you have a question: “What are glow sticks called?” It's actually very simple. This is His, or light. In which the selection luminous flux occurs due to the release of light energy during a chemical reaction.
The His stick is a unique invention. Which does not require external power supplies. It is completely autonomous and energy independent. Ideal for emergency situations, hiking, will be an ideal addition to your travel equipment and a quality addition to your equipment. After all chemical light is able to provide you with the necessary lighting throughout long period time.
Neon sticks You can buy it in our online store at a very reasonable price. The cost of this chemical light is not comparable to how unique, reliable and easy to use this invention is. It won't leave you Hard time and will help you illuminate your path even in emergency situations.
You will no longer have to worry about the battery in your flashlight, phone or any other lighting fixture sits down at the wrong time. And if this happens, chemical light will come to your aid. All you have to do is bend it in half until you hear a characteristic click. This click indicates that the inner flask with the reagent has opened.
Glowing sticks
After this action, shake the neon stick thoroughly. This is necessary so that all the reagents are thoroughly mixed and react. The better you mix the reagents by shaking the stick, the more intense the glow will be. On the other hand, the less you mix the reagents, the less intense the glow will be, but longer.
A chemical light source or glow sticks are a very reliable piece of equipment. It is unpretentious to environmental conditions. Maintains excellent performance as before elevated temperatures, and with low temperatures in severe frost conditions.
Color chemical light has become a very popular device among conductors. Which work both in tropical climates, where air humidity exceeds permissible norm factor of. The same applies to shipping conditions. Where ordinary electric light may not be available for one reason or another. And it is simply necessary to illuminate the area.
Glow sticks are great for hiking and fishing. After all, use for fishing is extremely undesirable. Since this is an artificial light source, it can unnecessarily scare away the fish and reduce the desired catch. His is a natural light source that will easily illuminate the required area and will not harm the catch.
The chemical light source is very popular among tourists. Due to its long operating period and low cost, it is much more profitable than carrying it with you. And at the same time, it is powerful enough to provide light for a small tourist group, leave marks on the ground, and also be used as a night light in a tent.
You can buy glow sticks in our online store. By purchasing his you guarantee that you will not be left without light in difficult situation. His will perfectly help you illuminate your path and will become a reliable companion even on the darkest night.
Chemical light
Heath or glow sticks have become very popular among children as a toy. After all, they are fun to interact with in the evening. Run and twist in your hands. They are also great for parties, instead of lighters or a smartphone flash. His is bright, does not require any additional manipulations and is perfect for entertainment.
A chemical light source should be in every camping equipment or in your home emergency suitcase. After all, you never know when you will need energy-independent lighting. His is sealed, so it is also ideal for use underwater. Whether it's an evening party in the pool or a deep swim. His will retain its brightness and light output.
You can buy a chemical light source in our online store. The cost of glow sticks is not that high, especially considering how long they glow. How much joy and emotion they will bring to the party, and also how functional this device. After all, it does not require batteries or recharging. Heath is completely autonomous and versatile.
Characteristics:
- Material: the shell is made of safe plastic;
- Size: 15 x 2 cm;
- Weight: 20 grams.
AND HIS
↓ Where can glow sticks be used? ↓
An excellent attribute for various festive events such as festivals, parties or corporate events. They can also be used in tourism, during hiking, hunting, fishing or diving for signaling in emergency situations. Indispensable in the absence of other light sources and in cases where conventional sources are not suitable (for example during gas leaks)
↓ Why do neon sticks and other chemical light sources glow? ↓
↓ What is the duration of the CIS glow ↓
The duration of the glow of chemical light sources directly depends on 2 factors - the structure and number of components inside and the ambient temperature. The smallest glow sticks glow for up to 2 hours, while the largest glow for up to 12 hours. There are special glow sticks with a very bright glow, but its duration does not exceed 10-15 minutes.
At temperatures close to 0 degrees Celsius, the reaction either stops completely or is very slow - accordingly, the glow is either not observed at all or is very dim... but for a very long time. In hot weather or when glow sticks are heated, the brightness increases, but the glow time is reduced.
There is also a phenomenon called AfterGlow, that is, afterglow, which in some cases can be observed in complete darkness and 2-3 days after using glow sticks.
↓ How to “recharge” glow sticks? ↓
Chemical light sources are disposable - once activated, their process cannot be stopped, only slowed down. In connection with this, a common myth arose about the ability to “recharge” glow sticks by putting them in the freezer.
In fact, the reaction inside just slows down to an almost complete stop. This makes it possible to use the activated sticks several times over 1-2 days.
↓ How long do chemical light sources last? ↓
The shelf life of non-activated glow sticks is 3-4 years, provided storage rules are followed: no exposure to direct sun rays, temperatures below 0 and above 35 degrees Celsius. Optimal mode for storage temperature from 10 to 20 degrees Celsius in a dark room
It must be taken into account that even short-term contact with sunlight reduces shelf life to several weeks
↓ How to activate a glow stick? ↓
Most chemical light sources are activated by bending, causing the contents to mix and react. After this, you can shake the glow stick sharply several times to get maximum amount light and all the substance inside reacted.
Do not bend the glow sticks excessively - just bend them slightly and you will hear a characteristic crack (this is a sign that the inner vessel has broken and its contents have mixed with peroxide).
↓ What are the conditions for using glow sticks? ↓
Chemical light sources can be used in almost any weather conditions, because they are dust and moisture resistant. The exceptions are low temperatures. The visual perception of the brightness of the glow depends on the intensity of illumination from other sources in a particular location.
Optimal glow is observed at temperatures above 10 degrees Celsius in the dark or twilight open space and in any dark places. They cannot compete with the brightness of the Sun or stage spotlights, so the glow will not be noticeable in clear weather and only slightly noticeable in cloudy weather.
↓ Are glow sticks safe? ↓
When used properly, chemical light sources are completely safe. The chemical components are non-toxic, not flammable, but of course they will burn in a fire. Impact on environment comparable to plastic cups or plastic bags.
WARNING. Avoid excessive or multiple bending of glow sticks - they are durable, but not immortal. This is the only reason for the shell to fail, other than intentional damage.
Ensure this is followed simple rule your children, and don't let them chew on glow sticks.
↓ What to do if the contents of glow sticks get on your body or clothing? ↓
Compliance with the rules described in the previous paragraph prevents this possibility almost 100%, without excluding the possibility of factory or transportation damage.
A sign of casing leakage is a characteristic odor and the presence of a slightly oily liquid in the package or on the glow stick itself.
If the contents get on your clothing, try to rinse the contaminated area as quickly as possible. warm water With detergent. If it dries, it may leave a permanent stain.
If liquid from glow sticks gets on your skin, wash it warm water with soap. In rare cases, with increased allergic sensitivity, mild skin irritation may occur.
Getting the contents of chemical light sources into your eyes causes burning and irritation of the mucous membranes - do not rub under any circumstances and immediately rinse your eyes with plenty of warm water.
If by accident the contents of the liquid enter the oral cavity or are swallowed, it is necessary to rinse your mouth. May occur allergic reaction, and in case of large quantities ingested, poisoning. Although one of our client’s cats once ate almost 3 glowing bracelets and remained alive))
Today, fluorescent, or, more simply put, glowing sticks are very widely used in the decoration of holiday rooms, as decorative elements or simply as children's toys. They are popular among people different ages from small to large.
Such a luminous “toy” will add a touch of magic to any holiday. Little children will be delighted with a holiday decorated with “magic lights” or the opportunity to simply play with such sticks. Young people often use such sticks at parties and get-togethers. And middle-aged people will appreciate luminous decorative elements. With such firefly sticks you can decorate not only the room itself and use them as a decorative element. The sticks can be twisted into bracelets, used as decorative elements in various holiday costumes, or simply held in your hands during a party.
Not everyone knows that you can make a glow stick yourself at home in a fairly short period of time. But don’t think that this is a two-minute affair. To create small miracle with your own hands, you need to rely on patience, a small amount of available and inexpensive materials and you can start. And you don’t need a chemist’s education or a specialized laboratory at all.
By the way, you can involve children in making fluorescent sticks. It will be very interesting for the child to see how the magic happens in own home. But in any case, regardless of whether you make the wand yourself or want to involve a child in the process, you need to be very careful and follow basic safety rules.
Before starting work on creating magic glow sticks, you need to prepare minimum set materials and tools you will need. You can easily find all the materials in the nearest stores at fairly affordable prices.
There are several ways to create glowing tubes, which differ only in the materials used. The tube itself is always made in approximately the same way. The main difference is the creation of a luminous filler liquid with which it will be filled.
Method No. 1 - glow stick based on fluorescent liquid
Fluorescent- This is a special substance that has a light-accumulating effect. It is this substance that will provide the glow to our wand. The fluorescent can be in the form of a powder or solution.
So, in order to make a fluorescent stick from ready-made fluorescent liquid with your own hands at home, you will need:
- Glass ampoule.
You can use the glass part of a regular medical pipette, which you can buy at home or at your local pharmacy.
- Blowtorch.
- Ready-made fluorescent liquid of the color you need. It can be purchased at an art store or a store that specializes in selling art supplies;
- Hydrogen peroxide. You probably have it in your home medicine cabinet.
- Teflon tape. You can buy it at a hardware store.
- Copper caps. They will subsequently twirl the glow stick. You can also easily find them in the store. building materials;
- The polyethylene or propylene tube itself.
It is best to choose a flexible tube; it will be easier to work with later.
When everything you need is prepared, you can start creating. At the first stage, you need to assemble the stick itself, which will later be filled with luminous liquid. To do this, take a polyethylene tube of the required diameter and the required length. We secure the copper cap at one end with Teflon tape as securely as possible. Copper tape It is necessary for the cap to hold better and not leak liquid. The second cap should screw on easily.
When all manipulations with the workpiece are completed, you can proceed to the next stage. On at this stage A blowtorch will be used, so you need to work carefully and carefully to avoid burns and other injuries. To begin, take a pipette and heat one of its ends with a blowtorch until the glass melts and securely seals one of the ends of the pipette. Then wait a few minutes for the pipette to cool down. It is necessary to check the tightness of the sealed end of the pipette, otherwise you simply will not succeed. Now, you need to pour hydrogen peroxide into the resulting flask. Then we seal the top of the already filled pipette in the same way.
When both blanks are ready, you can start assembling the glow stick. To do this, place an ampoule of hydrogen from a pipette into a plastic tube. After this, pour luminous fluorescent liquid into the stick.
You need to try to fill in as much liquid as possible, that is, try to fill the tube to the very edge.
And screw it securely magic wand, using Teflon tape and a copper cap.
In principle, the glowing tube is ready. And in order for it to “work” you just need to bend it. The flask with hydrogen from the pipette will burst and the hydrogen will react with the fluorescent liquid, which will cause a bright, beautiful glow.
One of the advantages of the above method is the ability to activate the wand at any time. That is, the wand will start working exactly when you need it.
Unfortunately, such sticks are disposable, and they do not glow as long as we would like. When using them, you need to remember that a microwave or refrigerator will not be able to extend their life. So, if your wand stops glowing, it’s better to make a new one and not risk your property and health.
The blank itself - the stick - can be used repeatedly. If the stick stops glowing, just refresh the contents and your tube will find a new life.
You may not have to make the wand yourself; if you have leftover sticks from past holidays that have stopped glowing, you can use them. Just fill them out according to the principle indicated above.
Method No. 2 - glow stick from the most accessible ingredients
One of the disadvantages of the first method is that the fluorescent liquid itself is quite expensive and is not always freely available. But if you don’t want to spend that much, or you couldn’t get some of the components of the previous “recipe,” there are enough a large number of alternative methods on creation glowing water at home. For this method, the most readily available materials will be used, which can easily be found in your apartment. And so, to make a luminous liquid you will need:
- Regular tap water;
- 3% solution of hydrogen peroxide, which you probably have in your first aid kit;
- Salt(which is in any kitchen);
- Table vinegar (you’ll probably also find it in your kitchen, or in the store next door for pennies);
The glow will occur due to the interaction of chemical elements. All ingredients must be mixed well. During the mixing process, due to the interaction of these substances, hissing should begin. You need to shake very thoroughly and vigorously for 5-10 minutes until you get the desired result - a glow.
It is most convenient to mix the ingredients in plastic bottle- it closes securely and can be shaken vigorously.
Ready glowing liquid can be poured into sticks, which we already know how to make. The only difference is that you don’t need a flask of hydrogen peroxide. And the wand will glow immediately.
Method No. 3 - glow stick using luminol
This method is more complicated, as it will require large quantity specialized components. This method differs from the previous ones only in the method of making a luminous filler for a polyethylene stick. In order to make neon liquid using this method, you will need:
- Luminol, in an amount of 2-3 grams;
- Drinking water- 100 ml.;
- Copper sulfate - 3 grams, or ferric chloride, or red blood salt.
This ingredient can be replaced with a few drops of blood from chicken leg, For example.
- Caustic soda solution - 10 ml;
- Fluorescent dye, the color you need;
By itself, luminol will create a beautiful bluish glow. If this color does not suit you, then you need to use a dye that will color the glow in the desired shade.
Fluorescent dye can be replaced with regular brilliant green. A few drops of brilliant green will give the glow a very beautiful emerald-greenish hue. Depending on the amount of greenery, the color intensity will change.

Making glow sticks using this method, you feel like a real chemist. To begin with, in 100 ml. dissolve 3 grams of water. luminol. Add 3 grams to the resulting solution. copper sulfate(or whatever you replaced it with). Then pour in 10 ml. caustic soda and add a dye of the selected color, which will give the glow the required color.
Method No. 4 - glow stick, using luminol and alkali
IN in this case Chemical reagents will be used, which can be purchased at a specialized store or ordered from an online store. Since this method is based on an alkaline reaction, all precautions must be taken to avoid contact with alkali and its derivatives. open areas skin, eyes, etc.
List of required reagents:
- Luminol - 0.15 g;
- Dry alkali - approximately 35 g;
- 30 ml. dimexide;
- Dye;

First you need to mix dry alkali with dimexide and luminol. It is necessary to mix the ingredients very thoroughly. It is better to use a glass bottle. Plastic dishes, should not be used when working with alkali. Luminol gives a bright bluish glow, which can be colored with a dye if desired. The color intensity is controlled by the amount of dye. More dye means more intense color. When you open the lid to pour the magic water into the tubes, it will glow brighter when it interacts with oxygen.
Method No. 5 - based on washing powder
This method will use more affordable ingredients, most of which you can easily find at home. And therefore, it is simpler and more budget-friendly. For the fifth method you need to prepare:
- Mixing containers;
- Washing powder;
- Water, the most ordinary;
- Hydrogen peroxide;
- Luminol;
- Potassium permanganate, or more simply, potassium permanganate;
When you have collected all the components, you can start creating. Add washing powder to 20 ml. water and stir until the powder granules are completely dissolved. That is, we stir for a long time and very carefully. Pour 10 ml into a solution of powder and water. 3% peroxide and 5 ml. luminol solution. Several crystals of potassium permanganate need to be crushed into powder. Pour the resulting potassium permanganate powder into the container with the solution, stirring vigorously. When the components react, you will be able to enjoy a stunning spectacle - bright, glowing sparkles. And everything is ready - you can fill the tubes with neon mixture.
Method No. 6 - based on pine extract
IN this method we will use minimal amount components. To get them, just visit a nearby pharmacy. To get liquid to fill sticks that will glow in the dark, you need to prepare:
- Aluminum container. You can use an aluminum tablespoon;
- Boric acid - cheap, available without a prescription;
- Coniferous concentrate - easily available in any pharmacy;

The cooking process is quite simple. Mix in an aluminum container boric acid With pine extract, add a small amount of water and put on low heat. The resulting liquid must be boiled until all the moisture has evaporated.
Bubbles that will form during the boiling process must be burst with a needle. When all the moisture has evaporated, you need to leave what’s left to cool. As soon as the resulting mixture has cooled, it must be mixed with water and very quickly poured into sticks. The sticks need to be screwed tightly so that no air gets in, otherwise all your work will go down the drain.
Method No. 7 - based on carbonated drinks
This method is the simplest and safest. TO this method You can attract children, they will be very interested in seeing how you can create magic with your own hands. In this case, only three components will be used:
- Sparkling water. You can use absolutely any sparkling water;
- Baking soda (you have it in your kitchen anyway);
- Hydrogen peroxide;
First, mix 3 tsp. peroxide with 1 tsp. baking soda. Pour about ¼ cup of sparkling water into the resulting mixture. Quickly pour the resulting liquid into the sticks and close tightly. If you don't have enough liquid to fill all the sticks, just increase all the proportions and enjoy the result.
Method No. 8 - neon sticks based on sodium tetroborate
If the first seven methods did not suit you, seemed too complicated, you could not get some of the components, or simply decided to experiment, there are several more that are not complicated ways fill the tubes with neon water.

The secret of the next method is strict adherence to proportions. You will achieve the desired result only if you measure correctly required amount ingredients and mix them in the correct order.
First, let's prepare everything you need:
- Regular tap water - 140 ml;
- Sodium tetroborate, or borax - ½ teaspoon.
You can buy it at the pharmacy, freely available.
- Table soda - 1 teaspoon;
- Hydrogen peroxide - 3 teaspoons;

All components are ready, you can start chemical experience. To begin with, the required amount of sodium tetroborate must be dissolved in the specified amount of water. Add soda to the resulting solution, the required volume. If you do everything correctly, the solution will begin to foam and hiss - this is how it releases carbon dioxide. Now you need to add hydrogen peroxide and fill the previously prepared sticks with the resulting luminous solution.
If you want the sticks to not immediately start glowing, you can proceed by analogy with the first method. That is, hydrogen peroxide is sealed in a pipette flask. And “turn on” the wand when it is convenient for you.
A few more easy ways to make sticks that glow
There are still a huge number of different ways to create luminous magic fillers for wands. One of the most in the simplest ways is the use of white phosphorus. If you have the opportunity to purchase white phosphorus, then you just need to mix it with water. And fill the sticks with the resulting liquid. The advantage of this method is the light-accumulating effect. That is, such sticks are reusable and can be “recharged”; to do this, you just need to put the sticks in the light so that they are “charged” and can be used again.
If you don't find white phosphorus, there is one trick - you can replace it. To do this, you can use any toy or figurine that glows in the dark. (In the past, luminous figurines of eagles were very common. They could be found in almost any apartment. Maybe you have a similar figurine lying in your closet or on your balcony.) So, the phosphorus figurine will have to be destroyed, or rather, turned into a very fine powder. The resulting powder must be mixed with water. There is one more trick - to prevent the powder from settling to the bottom, you need to add a little gelatin to the water. Gelatin will prevent phosphorus particles from settling, which will ensure a uniform glow. And pour the resulting jelly into sticks.

An alternative to all the chemicals that were used in the above methods can be ready-made phosphorescent paints. They can be purchased at any art store, craft supply store, or ordered online. This method, one might say, is for the laziest. Minimum effort and components. Mix the dye and water, pour it into a plastic tube and you're done.
Whatever method you use, remember that you were working with chemical reagents, therefore, all utensils that you used must be thoroughly washed so that not the slightest trace of substances remains that can harm your health and the health of your loved ones.
All of the above methods for making neon filler for tubes that glow in the dark have one common drawback - fragility. No matter how sad it may be, after some time the wand will begin to fade and go out completely. And if you decide to make the sticks in the morning, it’s not a fact that they will be able to last until the evening and will still glow just as brightly. Therefore, if you make sticks in advance, then methods with an ampoule of hydrogen peroxide are better suited for you.
If you are far from chemistry and are not eager to turn your home into a laboratory, there is an excellent alternative - LED glow tubes. The advantages of such a stick are obvious. First, no reagents fizzing around your house. Secondly - a long, bright glow. And thirdly, reusable products.
LED sticks are very widely used in various kinds of light shows and performances. But you can use them at your discretion.
Making such a stick is not difficult at all. First you need to arm yourself with everything necessary materials and tools. To get started, prepare:
- Polycarbonate tube with plugs. IN construction stores you can easily purchase a tube of the required length and diameter along with plugs;
- Insulating tape;
- Light-emitting diode, desired color;
- A small coin cell battery with a power of 3 volts;
By by and large, all materials are easily accessible and relatively inexpensive. When you have collected all the components of the future “light”, you can begin the process itself.
First, measure the required length of the polycarbonate tube; if necessary, cut it. It is better not to make a stick that is too long, since one LED will not be able to provide a sufficiently bright glow for a stick that is too long. Now, observing the polarity of the battery, we attach an LED to it. To do this, we tape the antennae of the LED with electrical tape to the two flat sides of the battery. If you are not clever with the polarity, the diode will light up. Now you need to attach an LED with a battery to one of the plugs. For these purposes, you can use electrical tape, glue, liquid nails, in general, in any way convenient for you. When the LED is securely attached to the plug, connect it to the polycarbonate tube and install the second plug on the opposite side.

This wand will delight you and your children until the battery runs out. And you can easily replace a dead battery and give a new life to your magic wand.
To make the stick brighter, you can place LEDs on both sides of the stick. The two-color stick looks very interesting and beautiful. That is, we install an LED of one color at one end, and a different color at the opposite end.
It is very convenient to use an unnecessary LED flashlight as a basis for a glow stick. It is enough to disassemble the flashlight and remove the contents from the flashlight body. Thus, you will have an LED in your hands, which is already soldered to the battery, with a switch. Now all that remains is to move the contents of the flashlight into the polycarbonate tube and securely fix it on the plug. The only thing to consider is that you need to make a hole for the switch. A wand like this is convenient because you can turn it on and off according to at will. Such a thing will delight you or your children for more than one day.
You can also complicate the task and make the stick more complex, which, for example, will change colors by soldering several LEDs of different colors. Or you can use ready-made ones instead of LEDs LED strip. Make a glow stick from LEDs that will shine different colors It’s not easy enough, but if you’re comfortable with a soldering iron, it won’t be too difficult for you.
Surely, many have seen in the movies how the hero of the film takes some kind of stick out of his backpack, breaks it and it begins to glow red, green, blue or orange. And this is not a fictional special agent weapon. Such products can be bought today in any specialized store. And they have a simple name - glow sticks or neon sticks.
They are widely used in hiking trips, when immersed in water or descending into caves. In general, wherever an extra light source would be useful.
How does a neon stick work?
The design of the glow stick is quite simple. It consists of only four components. The first is a plastic housing in the form of a tube. The second is a small glass ampoule that floats inside the tube. And the third and fourth are different liquids, with which the outer body and the glass ampoule are respectively filled.
Activating the wand is quite simple. To do this you need to either bend it or hit it against something. The main thing is that the glass capsule inside the tube cracks or breaks. Then the liquids will enter into contact with each other chemical reaction, and it will be the same one bright light.
In order to get multi-colored glow sticks, special dyes are added to the liquid.
Advantages of glow sticks
Neon sticks are designed to different time glow. Their brightness also depends on this. That is, the concentration of substances initially set by manufacturers can provide very bright, but short-lasting light. And vice versa - chemical source Sveta may work for a long time, but the lighting will be dim.
The undeniable advantages of non-new sticks include:
- work in any weather conditions and at any time of the year;
- provide uniform lighting at 360 degrees;
- completely autonomous and do not require power sources;
- fireproof, they don’t even heat up;
- non-toxic - even if the tube breaks and the liquid leaks out, it is enough to simply wash it off with water;
- do not take up much space and weigh almost nothing;
- low price and accessibility – buy glow sticks can be found in any specialized store.
The only disadvantage of neon sticks is their fragility. And the fact that once activated, the process cannot be stopped. It will burn until it has exhausted its entire resource. Therefore, when going on a hike, it is better to stock up on neon sticks and buy more of them.