Chimney in the wall. How to choose the right chimney and install it yourself. What kind of chimneys can be routed through the wall?
Read also
Proper execution chimney pipe through the attic floor, rafter system and roof - no less important than compliance with all other requirements when building the stove itself. How reliably these nodes are equipped will depend fire safety home, and therefore everyone living in it, as well as the efficiency of the heating device.
The passage of the chimney through a wooden ceiling must be especially reliable, since in this area the heated walls of the pipe are in close proximity to flammable materials. In order to protect the floor elements, various thermal insulation materials and special devices can be used - there is no shortage of them on the market today.
Such work must be carried out with the utmost responsibility. Therefore, to understand these issues, you should familiarize yourself with the current requirements regulatory documents, consider the process of passing the chimney through the ceiling in order to carry out everything strictly according to the rules established by regulatory organizations.
What do building codes and regulations (SNiP) say about this?
SNiP 41-01-2003 “Ventilation, air conditioning and heating” regulates the main aspects related to the arrangement of various autonomous heating systems. Since this publication is devoted to the analysis design features passage of the chimney through the attic floor, it is necessary Special attention pay attention to section 6.6 - this is “Stove heating”, and its subsections.
In some cases, these existing rules become a real problem for owners of private houses when arranging their home heating system. Such difficulties arise due to the fact that some of the requirements for modern heating systems and materials used for thermal insulation are clearly outdated. However, despite possible obvious contradictions, regulatory organizations rely on this guidance and demand compliance with established standards.
It must be remembered that if a stove is installed in a newly built house, then it will be necessary to legalize its presence with the fire services, otherwise it will simply not be possible to register the property. Such a permit is issued on the basis of a document drawn up by an employee of the controlling organization who accepts the building. If during the inspection serious violations of current standards are discovered, then there is no escape - the mistakes will have to be corrected. Therefore, it is best not to immediately deviate from the established standards.

Not everyone likes the dry language of regulatory documents, and that is why they are simply afraid to look into them. Let's try to outline these rules for them in a few paragraphs:
- The thickness of the walls of a brick chimney in the area of its passage through the floors, roofing or walls (partitions) must be greater than along the main height. This thickening is called cutting.
According to existing standards, the cutting thickness is calculated taking into account the thickness of the pipe itself. Craftsmen often use the colloquial term “from smoke” in this regard. So, standard size cutting is:
- 500 mm if the pipe borders building structure made of flammable material (which, of course, includes wooden flooring).
- 380 mm - for those cases when the materials of the building structure are protected from fire by a layer of plaster of at least 25 mm with reinforcement steel mesh, or a metal sheet with an asbestos lining underneath with a thickness of at least 8 mm.
- The height of the chimney cut must be at least 70 mm greater than the thickness of the ceiling. By the way, SNiP does not stipulate from which side these millimeters should “look out” - from below, on the ceiling, or in the attic. Judging by the forums, there is also no unanimity among the masters. But, as a rule, customers ask to fulfill flat ceiling in the room, therefore a 70 mm step can be located in the attic. However, if you read the forums again, you can come across cases when inspectors fire department required a 70mm “side” both at the top and bottom. And it was not possible to convince them otherwise.
- It is not advisable to firmly fix the chimney section to the floor materials or rest it on any building structures. True, there is no categorical prohibition on this matter, but one should still adhere to such a recommendation so that the deformation of one element that occurs for some reason does not entail the destruction of another.
- The space between the cutting and the building structure is filled non-flammable materials. The list of materials is not specified, but in practice those that can be classified as thermal insulators are usually used - expanded clay, vermiculite, mineral wool.
- If the pipe is cut through the opening of a wall or partition and flammable materials, then its thickness cannot be less than the thickness of the partition itself. In this case, the cutting must be done along the entire height of the wall.
- When the pipe passes through the roofing, cutting is also often performed, which in this place is called “otter”. In any case, the distance from the outer walls to any elements roofing structure of combustible materials must be at least 130 mm for brick pipe, and 250 mm – for ceramic without thermal insulation (when using insulation with a heat transfer resistance of at least 0.3 m²×ºС/W – 130 mm). The roof section at the passage point should only be made of non-combustible material.
- When constructing a stove and its chimney, it is important to maintain the distance to walls and partitions. This gap has its own name - retreat. The amount of deviation is also regulated by the requirements of SNiP:
| Chimney wall thickness, mm | Indentation type | Distance from the outer surface of the furnace wall or chimney to a wall or partition made of flammable material, mm | |
|---|---|---|---|
| - surface not protected from fire | - surface protected from fire | ||
| 120 (ceramic fired brick) | Open | 260 | 200 |
| Closed | 320 | 260 | |
| 65 (heat-resistant concrete) | Open | 320 | 260 |
| Closed | 500 | 380 | |
The surface will be considered protected from fire if the requirements mentioned above are met - plaster of the required thickness or an asbestos-metal “pie”. In this case, the dimensions of the area where such protection is made must be larger than the dimensions of the stove or chimney pipe by at least 150 mm in each direction.
These requirements are optional only for partitions made of materials with a fire resistance rating of REI 60 and higher (preservation bearing capacity, integrity and thermal insulation properties at 60 minutes of direct exposure to fire) and zero flame spread limit.

- When installing metal furnaces factory-made, it is necessary to adhere to the recommendations given in the documentation from the manufacturer. If there are none, the general rules apply.
- It has important and the distance between the stove itself (its upper wall) and the ceiling. The following standards apply here:
A. If the furnace ceiling consists of three continuous brick rows, then this distance must be no less than:
— for unprotected ceilings - 350 mm with periodic firing, and 1000 mm - for long-burning stoves.
- for ceilings protected by a plaster layer or asbestos 10 mm + metal - 250 and 700 mm, respectively.
B. If the stove ceiling consists of only two continuous rows, then the above distances to the ceiling should be increased by one and a half times.
IN. For metal stoves, the clearance between their upper surface and the ceiling of the room should be at least 800 mm if the ceiling has the thermal protection mentioned above, and 1200 mm if it does not.
- The passage of metal chimneys through any ceilings or walls must be done through sleeves made of non-hot material.

The sealing of gaps around chimney pipes must be done with non-combustible materials (class NG or, in extreme cases, G1), best of all - with the lowest possible thermal conductivity coefficient. This will provide the necessary fire resistance limit for the fences.
Wood used for installation rafter system and attic floors, belongs to group G3-G4 in terms of flammability. After treating it with fire retardants, it becomes more resistant to fire, but despite this, it remains flammable. It is naive to rely on the “magic qualities” of advertised impregnations, which supposedly make wood completely non-flammable. That is why you should adhere to the standards established by SNiP, correctly positioning the chimney and other parts of the stove at the specified distances from the structural elements of the house.
Independence in these matters, unauthorized deviation from existing rules, or simply negligence can lead to tragic consequences, since overheating of adjacent furnace design elements of the building will most likely end in fire.

So, a poorly constructed chimney through a wooden ceiling can easily lead to a fire. To avoid tragic consequences, it is necessary to properly thermally insulate the cutting, ensuring the proper level of fire safety.
To figure out how to carry out these actions correctly, it is necessary, keeping in mind the recommendations of SNiP, to consider the entire process step by step.
Since the chimney pipe can be metal or brick, it is necessary to separately consider the installation of both options
Penetration for a metal chimney pipe
Special devices and materials for sinking a metal chimney
Box-shaped ceiling-passage structures
Arranging the passage of a metal chimney pipe through the structure wooden floor can be done using a ready-made ceiling pass-through node, or made independently, but in compliance with standard dimensions.
If a ready-made version of such penetration is purchased, then its size is selected according to the diameter of the chimney pipe. The convenience of using a factory box is that its design already includes all the dimensions established by SNiP, so you don’t have to rack your brains about it. All that remains is to open an opening in the ceiling for penetration, and then strengthen its thermal protection of the surfaces.

You can make a box penetration yourself. It is made from different materials- this can be a steel sheet with a thickness of at least 0.5 mm, alone or in combination with mineralite, asbestos sheet, with mineral basalt wool foiled on one or both sides. If the box is purchased or made of metal, then it will need to be thermally insulated with regular or foil mineral wool, vermiculite, expanded clay.
If you decide to make such a penetration yourself, then the diameter of the hole in its central part should be approximately 0.5 mm larger than the outer diameter of the pipe. This is done so that the metal pipe passes freely through the box, but at the same time, the gap between them is not too large.
To make a penetration, you can use the dimensions shown in the illustrations and presented in the table:

| Letter designation of structural elements and size in mm | |||
|---|---|---|---|
| d - hole diameter | L - side length decorative panel boxes | G - width of the sides of the box | H - box height |
| 205 | 580 | 370 | 310 |
| 215 | 580 | 370 | 310 |
| 255 | 580 | 450 | 310 |
| 285 | 580 | 450 | 310 |
- If the passage box is made only from foiled mineral wool 50 mm thick, then cutting the elements for it is best done according to pre-made templates. The parts are assembled into a single structure using heat-resistant foil tape. Having chosen this option for cutting, you must not forget that you will also need to purchase or manufacture one or two metal panels for it. One of them is fixed to the ceiling surface, flush with it, and the second (optional) closes thermal insulation material from the attic side.

- Another option for penetration could be a box made of metal sheet, insulated with the same foiled mineral wool. This insulation is cut into strips with a width equal to the height of the resulting box and laid along the walls at the end, with the foil side facing the pipe. The space of the box free from the pipe must be tightly filled with thermal insulator.
- The box can also be made of mineralite (fiber-reinforced concrete slabs) 10 mm thick. Structural elements are also cut out using prepared templates and then fastened together using metal corners. A smaller box made of a metal sheet 0.5 mm thick is installed and secured into a casing made of this material.

There should be a gap of 10÷15 mm wide between the walls of the outer and inner boxes, which is filled with basalt insulation, and the space around the pipe can be filled with vermiculite, expanded clay of fine or medium fraction, or the same mineral wool. The holes through which the pipe will pass must have the same diameter in both boxes. For aesthetic design of penetrations on the side of the living room, you can also use metal plate, or leave the fiber cement board exposed. After finishing installation work, the slab facing the living space will be easy to paint to match the color of the ceiling.
Video - Manufacturing and installation of a homemade box-shaped penetration for the chimney of a sauna stove
Heat-resistant materials for making penetrations
The characteristics of heat-resistant materials that are used to insulate the ceiling penetration deserve a few minutes of attention. They differ in some qualities from conventional insulation made on the same basis.

- Minerite is absolutely not flammable material, which is also called fiber cement boards. It is often used for wall cladding in areas where stoves are installed and where chimneys pass through.
Prices for mineralite
This material is not only resistant to extremely high temperatures, but also moisture-resistant, has good mechanical strength, and does not contribute to the formation of mold and mildew colonies. Minerite is environmentally friendly pure material, so when elevated temperatures does not emit fumes harmful to human health.
Minerit LV panels are used to make screens installed in the grooves and on the walls around stoves and chimneys. In addition, such panels are also suitable for the construction of fire-resistant partitions.
- Non-combustible slabs made of basalt wool and covered with aluminum foil are used for fire protection of walls and passages around chimneys.

This material is made from environmentally friendly components and is highly resistant to aggressive biological and chemical influences. In terms of its thermal insulation properties, mineral wool is certainly many times superior to mineralite, but is inferior to it in mechanical strength and durability.
High-quality basalt slabs do not accumulate moisture, and they do not create a favorable environment for the settlement of rodents and insects, or the appearance of microflora colonies. This type of insulation belongs to the flammability group G1. (And this is only due to the adhesive layer that holds the foil coating, since in “ pure form» basalt insulation can be classified as completely non-combustible materials). Basalt slabs different manufacturers may differ slightly in the upper limit of the operating temperature range. But in any case, it ranges from +750 to 1100 degrees, which should be more than enough for the chimney duct.
Prices for basalt slabs
basalt slabs
Installation of penetration for a metal pipe
Before installing the penetration into the window cut out for it in the attic floor, it must be prepared, additionally strengthened, if necessary, and insulated from high temperatures.

- The first step is to additionally monitor the condition of the opening and its surrounding parts. ceiling structure. This is done to make sure that the box will be securely fastened in it.
The box penetration must be firmly fixed to the ceiling structure. It is, of course, positioned so that it is between the floor beams (it is clear that these issues regarding the placement of the stove in the room are always thought out in advance). Beams can become a reliable basis for fastening the penetration, located on the sides of it.
However, it often happens that the floor beams are located too far from each other and therefore the floor “pie” in the area where the pipe passes does not have the necessary rigidity and will need to be strengthened. Another option, exactly the opposite, is too frequent a step installed beams doesn't leave enough free space to accommodate the box penetration.
In any of these cases it is possible, after removing the desired area coating, mount the frame in accordance with the dimensions of the box, using wooden beam. The cross members of this frame are rigidly cut into the floor beams. If necessary, if the beams are too widely spaced, additional longitudinal support beams can be used in the frame. An example of creating such a frame is shown in the illustration.

Such checking and strengthening (revision) of the frame will be necessary if it is installed in an already built house. However, as a rule, the installation of stoves and, therefore, the installation of chimneys are planned in advance. And during the installation of floor beams during the construction of a building, such a frame is provided in advance for the subsequent installation of a box penetration.
- Next, that's it wooden parts ceiling structure located around the perimeter of the cut-out window for penetration must be additionally treated with a special impregnation. The fire retardants included in the composition will increase the fire-fighting characteristics of the created unit. Further operations are carried out only after the treated surfaces have completely dried.

- The next step is to install a penetration box into the cut opening from the side of the room. The edges of its bottom part are securely screwed onto the ceiling surface with self-tapping screws.
But this operation should be performed only after carefully monitoring the location of the round opening for the chimney relative to the heating device. It is unacceptable for even a slight deviation to cause unevenness or a “kink” in the installed pipe. This will create unnecessary stress in its walls and may well lead to insufficient sealing at the joints.
It is best to accurately adjust the position of the box passage using a plumb line to ensure that the axis of the pipe being installed is vertical.
- Further Bottom part The chimney pipe is assembled starting from the outlet pipe of the stove (boiler).
It is very important - whatever the distance from the stove to the ceiling, and whatever components are used, never, under any circumstances, the connection of two elements (pipes) of the chimney should fall on the ceiling. Little of, minimum distance from such a connecting unit to the surface of the ceiling (no matter from below, indoors, or from above, from the attic) must be at least 300 mm.
Requirements for correct location The interfaces between individual pipes are important, of course, from the standpoint of ensuring visual control. But the main predetermining factor of such a considerable (300 mm) distance from the ceiling is the continuing likelihood of a breakthrough of hot gases in these, let’s be honest, the remaining most vulnerable places of the prefabricated metal chimney.
- The next stage of work can be carried out from the attic or living space, depending on how it is more convenient to install the next section of the pipe. If the work is carried out from the attic side, then the next part of the chimney pipe is passed through the hole and fixed to the lower, already mounted section.

- When the pipe is brought into the attic, you can proceed to filling the penetration box with heat-insulating material. If one of the bulk thermal insulation materials is selected, and there are small gaps between the pipe and the border of the round hole, they can be sealed with basalt wool or plastic clay, and then the insulation can be poured on top.

It is best to choose expanded clay or vermiculite from bulk heat-insulating materials. Ordinary sand is used for backfilling only as a last resort, since it has too fine a fraction, heavy weight and thermal conductivity that is excessively high for such a function. Expanded perlite sand is not particularly convenient to use in such conditions due to its excessively high “volatility”.
The easiest way is to fill the box with heat-resistant basalt wool, since it has the lowest thermal conductivity. When using mineral wool mats, the box from the attic side should not be completely sealed in order to have free access to the pipe along its entire length. If the pipe goes to the second floor, then the hole in its floor with insulating material around the chimney can be closed with a metal sheet, screwing it to the floor.
The selection of photographs below demonstrates the installation of a homemade box-shaped penetration made from dense slabs of foil-coated basalt insulation.

— The first two fragments: this is a finished homemade tunnel from different angles.
— Third fragment: a window was cut out in the ceiling to install the penetration. Please note: to ensure maximum safety, the master also filled the resulting gap between the ceiling covering and the attic floor with mineral wool.
— Fourth photo: The penetration box is inserted into the prepared opening and fixed from below.
— Fifth fragment: After installing the section of pipe leading into the attic, the passage is closed from below with a metal panel. It is securely fixed to the ceiling with self-tapping screws, completely covers the edges of the window of the passage unit, holds the heat-insulating box well in the ceiling and provides mechanical protection for the mineral wool panel, which is not particularly durable.
— Sixth photo: Continued installation of the chimney pipe. The gap between the pipe and the box will be tightly filled with mineral wool. Since the attic in this case is “inhabited”, the passage unit will be covered with a decorative metal plate.
And in the video below, the master managed without creating a box structure at all.
Video: fire-proof fluffing of a chimney in a passage through a wooden ceiling
Passage of a brick pipe through the ceiling
A brick chimney is usually designed to protect the surrounding combustible materials from overheating. The section of the pipe that is laid out as it passes through the ceiling is itself a cutting and is called “fluff”.
This chimney design is traditional, long tested, and most often chosen by stove makers.
- The “fluff” begins right at the ceiling in the living room (three to four rows of bricks before it) and passes through the entire thickness of the attic floor. Sometimes the fluff is raised up to the clean floor of the attic, in other cases it is made flush with the subfloor. Both options can cause quibbles from inspectors - let’s remember the notorious “70 millimeters” already discussed above.
This structural element acts as the necessary thickening of the pipe walls, protecting the flammable materials of the ceiling from overheating.
In fact, the design of the “fluff” is directly influenced by precisely those SNiP requirements that were discussed in the first section of the publication. In order not to repeat ourselves, we can provide a diagram that clearly shows what dimensions must be observed and where:

Is it possible to lay a brick chimney yourself?
The work, at first glance, is not difficult, however, a lot depends on its quality, including the health and life of the inhabitants of the house. Detailed information You can read about it by following the recommended link - it will be easier to figure out whether it’s worth taking on this event yourself, or whether it’s better to invite specialists.
- Another option for arranging the penetration of a brick pipe through the ceiling is carried out in almost the same way as a metal pipe. In this case, naturally, the chimney along its entire height has the same cross-sectional size, without increasing the thickness of the walls. However, everything linear parameters established by SNiP are observed.

The hole in the ceiling can be covered with a metal sheet or a fiber cement slab. In the middle of the thermal insulation panel, a window is marked through which the chimney will pass. The length and width of this opening should exceed the similar parameters of the pipe by literally 3–5 mm.
When laying a chimney, approximately three or four rows up to the ceiling, a sheet with a prepared opening is placed on it, and then the laying is carried out further up to the height of the finished attic floor.
The next step is to lift the sheet placed on the pipe, press it and fix it to the ceiling in a convenient way. specific case using self-tapping screws or dowels.
Further, the work is carried out from the attic or second floor. Along the walls of the opening cut out for excavation, strips of basalt wool, pieces of asbestos or fiber cement boards are laid. This “frame” should cover the entire thickness of the attic floor. If necessary, the material can be fixed to the floor beams.
Thanks to these operations, a kind of box is created around the neck of the pipe, which will be filled with heat-resistant material. You can use basalt wool as it, which tightly fills the entire volume. If cotton wool with a foil layer is used, then it is turned towards the walls of the oven.
It is quite possible to perform similar thermal insulation of a pipe with expanded clay or vermiculite, but before backfilling it is necessary to seal the remaining gaps between the pipe and the edges of the opening, especially if fine-grained material is used.
Of course, you can do exactly the same as with a metal pipe, by putting a ready-made penetration made from a steel sheet onto a brick chimney. This option will probably be more reliable and convenient both in terms of its installation and reliable fixation, and when filling the box with thermal insulation material. True, such a box will cost significantly more. Whether it makes sense - decide for yourself.
Having filled the penetration with insulation, it is also covered with a metal or fiber cement sheet on top.
At this point, work on arranging a safe passage of the chimney through the ceiling can be considered completed.
Having familiarized yourself with the details of the arrangement of this area of the chimney pipe, you can come to the following conclusion:
That there are no particularly complex actions that can only be carried out by highly qualified specialists in this process. The main thing is to scrupulously follow the requirements established by SNiP, maintaining all required dimensions and following the recommendations. If you do everything according to the rules, you can not only ensure safe operation heating device, but also to avoid completely unnecessary problems with regulatory authorities.

Evgeniy AfanasyevChief Editor
Author of the publication 28.10.2016
![]()
17 June 2014  Alexei
What is anyone's job? heating apparatus impossible without a gas exhaust system, everyone knows. But in 50 cases out of 100, you have to think about where and how it will be installed.
Because when building a cottage, very often they simply lose sight of the need to arrange a smoke duct simultaneously with the construction of walls and ceilings.
If it is carried out in an already built house, you have to lay the chimney directly through the wall. How it should be installed will be discussed below.
How important is such a structure as a chimney?
The need to remove combustion products is due to various factors. Among them, the main thing is not even the efficient operation of the boiler or furnace, but the life and health of the people around them. Everyone knows that carbon monoxide poisoning can be fatal, so it should not be allowed into the premises.
Another fact confirming the need for a chimney is that no fuel will burn without access to oxygen. And its entry into the system, again, is carried out through the smoke channel.
As for its implementation not in traditional version– and through one of the walls, this is most often caused by the lack of standard smoke channels.
Installation Rules
What do you need to know to properly install a chimney through a wall? There are several main points that must be taken into account when arranging it. First, communications cannot be located where the channel will pass.
Installing a chimney from a sandwich pipe, watch the video:
Secondly, the places where the chimney passes through the wall are covered with a protective casing, but it is better to plaster it, having first filled the space with heat-insulating material.
Third, the chimney fastenings are installed at intervals of 60 mm.
Fourth, for this design, double-circuit systems are usually used, since they are better protected from mechanical influences with the mandatory installation of a valve that allows you to regulate the draft.
 Having studied the rules listed above, you will be able to install sandwich chimneys passing through the wall in accordance with established standards. This will be a design that perfectly copes with its functions, and therefore can make the operation of the equipment efficient and safe for others.
Specifics of installation of the internal structure
Difference horizontal chimneys is their most effective heating. This is easy enough to explain. Heated combustion products rise upward, and since the horizontal design has large area, then warming up improves. But if a chimney is installed through a wall, it is not allowed sharp corners in the design, as they can lead to turbulence.
The thickness of the seams is also important for horizontal construction. If there is even a slight difference, the internal cross-section changes. And of course, we must not allow the pipe to become clogged with soot, otherwise the draft will worsen.
Installation stages
How to install a chimney through a wall? Installation begins from the heating device with the connection of the pipe and the boiler, and then proceeds directly to the installation of the structure. How to bring a chimney through a wall? To do this, prepare the place for its passage by first marking it and then making a hole for the passage pipe.
The next stage is installation of the pipe. It is mounted in an opening made in accordance with its dimensions with mandatory insulation of foiled mineral wool.
How to make a chimney through a wall if you need to change its direction? In this case, a tee with a cleaning glass is used, which is easy to dismantle for subsequent cleaning. It is fixed with a bracket.
Then the gas exhaust pipe is fixed on the wall surface with a special fastener with a gap between elements of no more than 2 m.
Watch the video of a pipe passing through the roof:
The last stage is the removal of the structure through the roof overhang. In this case, you need to know that at the outlet point it is not allowed to join the pipe elements with each other. Upon completion, a protective umbrella is installed to prevent precipitation from entering the structure.
Features of making a chimney through a wooden wall
 If it is necessary to install a pipe through the log structure of a building, it will require mandatory insulation with non-combustible material (asbestos or brick).
This is done in accordance with fire safety rules and will allow the gas exhaust system to be operated for a long time with minimal maintenance and repair costs.
The best option is vertical installation of the chimney through wooden wall, which involves the use of one pipe without bends or turns. To adjust the draft, a gate is installed in it.
 The chimney is fastened at regular intervals not exceeding 1 m, and the neck is covered.
And remember that installing a gas removal system is a responsible procedure that requires thorough preparation. After all, the functionality and efficiency of the entire system depends on its correct implementation.
 Before purchasing and installing a combustion product exhaust system, it is necessary to determine the power of the heating apparatus. The diameter of the pipe depends on it.
Calculation of the height of the structure is carried out to obtain good traction, without which effective operation of the equipment is impossible. A chimney passing through a wall cannot be either too short or too long.
In the first case, smoke and soot will enter the room, and in the second, fuel will be quickly consumed. With high draft, the operation of the equipment becomes ineffective, because heat is removed from the room along with the gases.
To avoid such situations, experts recommend performing all work taking into account existing norms and regulations. The chimney should be connected to the boiler using the appropriate elements - an elbow, a tee or a pipe.
 And those who install heating equipment in an already built house should know that classic version installation will be very difficult. In this case, the best solution is to lead the chimney through the wall and install the pipe outside the building.
This design requires mandatory insulation, because with strong heating, temperature loads will lead to the destruction of the wall.
And it can be done in two ways:
- Using a telescopic assembly for the passage of a chimney through the wall (a pipe with a diameter larger than the main one, along the edges of which protective plates are installed)
- In filling the space between the wall and the structure with mineral wool (used only when laying insulated pipes)
Conclusion
Chimney in load-bearing wall- For finished house the simplest and relatively inexpensive option. It will save the owner from the difficulties and interfloor ceilings and will allow all work to be completed in a shorter time.
The main thing is to choose the right design parameters and connect them. Indeed, with the slightest mistakes made during the installation process, the operation of all heating equipment can become ineffective and sometimes even dangerous.
There are times when it is not possible to remove the chimney pipe in the usual way - through the roof, and then you have to install a chimney through the wall. In order for the functioning of the chimney to be as efficient as possible, it is necessary to select the most suitable suitable pipes under the boiler, perform a high-quality installation of the chimney, and, if necessary, insulate it.
Brick chimneys, which were once very popular, are losing their relevance, and today they are increasingly used. These products are easy to install and inexpensive. Their surface is smooth; these pipes do not need to be insulated.
Advantages and disadvantages of a chimney through the wall
By venting the chimney through the wall you will get the following advantages:
- the chimney pipe almost completely protrudes onto the street, rather than passing through the entire house;
- You can install the product both at the construction stage and after the house has been built, for example, during installation heating system;
- there is no need to make holes in the ceilings when the boiler is located on the ground floor of a building several floors high;
- the integrity of the roof is maintained;
- When assembling and installing a chimney through a wall, there will not be any particular difficulties.
Chimney through a wall in a wooden house
Despite a large number of There are also advantages and disadvantages of the design and they must be taken into account:
- A prerequisite for installing a chimney through a wall is.
- Inside or outside the house, you will need to allocate a fairly large horizontal area for such a chimney.
- According to experts, the external gas exhaust pipe has low productivity.
- It is unlikely that the product will fit the design of the room, so you will have to get confused here.
Installation of a chimney through the wall
Installation
Before proceeding directly to installation, it is necessary to carry out a number of preparatory activities, including calculating the boiler power, determining the optimal diameter of the pipes, as well as the thickness of the heat-insulating layer.
It is very important that the diameter value inner pipe was not less than the diameter of the pipe on the boiler. The boiler is selected based on the criterion of the heated volume, and only after that the components for the chimney are selected for it.
If the diameter of the pipe is larger than the diameter of the pipe, then an adapter must be placed in the middle of them.
When installing pipes of a certain diameter, it is necessary to take into account the power indicators of the heating device. So, for boilers with a power of up to 3.5 kW, the diameter of the pipes should be 8 cm, for equipment with a power of 3.5 to 5.2 kW, pipes with a diameter of 9-11 cm are needed, for products with a power of 5.2 kW - The diameter of the pipes must be greater than 11 cm.
It is also necessary to take into account the thickness thermal insulation layer. At an operating temperature of 250°C, like a gas boiler, the basalt layer should be at least 3 cm.
For wood and liquid fuel boilers with an operating temperature of 400°C - already 5 cm.
Installation of a chimney
There are two ways to exit the chimney through the wall:
- The pipes inside the room must be raised a short distance from the ceiling, where they are brought outside.
- From the boiler nozzle, pipes lead immediately through the wall in a horizontal position. The advantage of this method is that fewer bends are formed, and this has a positive effect on the performance of the chimney.
Assembling a sandwich pipe when installing the vertical part of a chimney can be done in two variations - “smoke” or “condensate”.

Assembling a chimney “for smoke” and “for condensate”
When installing a pipe along the smoke, gas and combustion products move upward, but here you will have to deal with such a negative aspect as the formation of condensation that accumulates in the pipe. This method has gained popularity in cases where the chimney is assembled through the roof. Here, almost the entire pipe is located in the house, and not much condensate is formed.
Condensate installation is an installation method in which the pipe with its expanded end is directed upward.
With this assembly, the condensate simply flows through the pipe into the glass. The disadvantage of this method is that smoke can leak out if the areas at the joints are not properly sealed.
Condensate collection is used when a chimney passes through a wall: in this case, the condensate is directed into a glass, and the smoke comes out of the joints on the street. This will not affect the well-being and health of the residents of the house.
Basic installation rules
In order for the functioning of the chimney to be as efficient as possible, during the installation process it is necessary to follow a number of rules and recommendations on which not only the performance of the installation will depend, but also safety.
Basic requirements for installing a chimney through a wall:
- It is important that the pipe rises above the ridge by at least 50 cm, and preferably 100 cm. The traction force depends on this. The traction force directly depends on this.
- The total length of the vertical part of the pipe should ideally be 5-10 meters; if the pipe is located at a greater distance, the draft will be too strong and the fuel will burn out very quickly. If the pipe length is not enough, then the draft, on the contrary, will be weak, and, accordingly, the operation of the heating device will not be very efficient.
- To prevent the heat insulator from melting, the first segment of the chimney must consist of a single-circuit pipe. It is necessary to make a joint with a sandwich pipe, while maintaining a distance sufficient to ensure that the fastener does not overheat during operation.
- The boiler must be placed on a metal sheet. Insulating the wall from the boiler is done in the same way. For wooden houses, according to SNiP, it is necessary that the boiler and chimney be located at a distance of at least 45 cm from building elements that can catch fire, and 25 cm from parts made of low-flammable materials. To ensure that the outlet hole for the pipe is not too large, the wood must be sheathed with metal, in which case the outlet hole may be 25 cm rather than 45 cm.
- Place in the finished hole metal box, through which the pipe is passed, and without any connections, because if necessary, access to them will be very difficult. The cavities in the wall must be filled with heat-insulating material that is not afraid of burning.
- Next, you need to sew up the pipe hole from the outside and inside. A metal sheet is used for this.
- Then, using brackets, you need to fix support platform for a chimney outside the building, and a tee should be placed on the outlet section of the pipe. The bottom of the pipe is removable, it has the shape of a glass and condensate, which is formed during the combustion of fuel, gets into it. Often the glass is equipped with a tap and a drainage hose. Condensation is toxic substance, so it’s better to drain it away from home.
- The chimney at the top is also secured using brackets, which are located one from the other at a distance of no more than a meter. To protect against precipitation, a cap is placed on top of the pipe.
- For high-quality sealing joints, they must be coated with heat-resistant sealant, after which the joint area must be tightened with a clamp.
Insulation of external chimney
As already noted, the most best option chimney is the use of a sandwich pipe, which is not only easy to install, it also does not require additional insulation.
If it is used for smoke removal, then you need to install it in a box, where the distance between the walls of the box and the pipe is filled with a basalt heat insulator. You can also use foil or other non-flammable material as insulation, but the top of the pipe must be covered with a dense layer of heat-insulating non-flammable material.
To summarize all of the above, it is worth saying that installing a chimney through a wall is quite simple. If you strictly follow the installation technology, this procedure will not take much time and effort, and heating device will delight you with its efficiency and good traction.
The chimney is the most important component of the home heating system, ensuring the removal of combustion gases generated during the disposal of fuel put into the stove. In addition, with its help it is possible to avoid the ingress of carbon monoxide and other elements contained in the waste into the room that are hazardous to human health.
As a rule, the procedure for arranging these elements of the heating system is laid down when designing the future structure and involves their internal or external installation.
When installing a chimney in an already constructed building, due to the complexity of its wiring through the roof, the channel outlet is provided through a hole in the wall. With this embodiment, the chimney itself will be located entirely or partially outside the building.
In this situation, it is necessary to have a clear idea of how to bring the chimney out through the wall in an already inhabited room.
Requirements for output channels and their types

Before installing a chimney, it is necessary to take into account a number of points regarding the permissibility of installation in a particular room. When wiring it through a wall, the following prerequisites must be met:
- Such a chimney is not allowed to be installed next to utility lines.
- Wiring through the wall should be done in an area where there are no joints between individual pipe blanks.
- The prepared hole must be protected with a protective casing, under which a heat-insulating gasket is placed in the gaps.
- The outlet pipe in the area where the chimney passes through the wall is rigidly fixed using special fasteners located at intervals of at least 60 cm.
- Horizontal sections when connecting to the wall should not exceed one meter in length.
According to their design, chimneys intended for outlet through the wall are divided into single-circuit and double-circuit systems.

A single-circuit design of the smoke exhaust channel is allowed when the chimney is placed externally in buildings made of non-combustible material (brick and concrete). Its main advantages are the relative ease of installation and low cost. The features of this method of arranging a chimney include the use of standard steel and stainless steel pipes.
When installing a double-circuit drain system, not one, but two pipe blanks inserted into another are used. Before the pipes are taken out from the furnace through the wall, a layer of insulating material is placed between them. This option for arranging a chimney passing through a wall has an increased degree of thermal protection and is recommended for use in wooden buildings.
On a note
Constructions based on modern sandwich pipes, distinguished by their attractive looking, relatively light weight and long service life.
It is clear that installing a chimney through a wall in a wooden house involves its partial or complete installation with outside residential building. Let's look at the positive and negative sides this method of arranging the output channel.
Advantages of external installation of chimneys

The external method of wiring the outlet pipe has the following obvious advantages:
- Removing the main part of the drainage channel from the house allows you to increase the useful living space premises.
- The installation of a combustion product exhaust system can be carried out upon completion of the main construction activities.
- External installation of a chimney will not require you to spend a lot of time and effort.
Easily removable disadvantages of this approach include:
- Necessity mandatory insulation chimney pipes.
- Possibility of significant heat loss with low quality thermal insulation.
- The difficulty of combining the design of the chimney with architectural style building.
Despite all these difficulties, when deciding whether How make a chimney through the wall; preference is usually given to its external placement (full or partial).
Assembling the chimney and its outlet through the wall

Before starting installation work, you should prepare full set parts included in the structure being built. It should consist of the following standard components:
- a set of pipes and connecting elements (tees, in particular) necessary for branching the chimney and leading it outside;
- so-called “elbows”, through which it is possible to form a bend in the pipe outlet at the desired angle (its value is usually indicated in the name of this workpiece);
- fastening support console, through which the structure is fixed to the walls (with a set of special clamps);
- a special inspection (inspection) tee, simultaneously used to clean the channel from soot;
- a moisture (condensate) collector built into the chimney.
If necessary, additional viewing windows and control valves are introduced into the structure.

Before installing a chimney through a wall, you should make sure that the angle of its connection to the wall is exactly 90 degrees (a pre-prepared angle can be used for these purposes). At the same time, you will need to take the dimensions of all the blanks and apply markings at the point where the pipe exits through the wall, specifying the location and diameter of the hole for it.
All further operations are carried out in the following sequence:

- First, in accordance with the markings, a round hole is made in the wooden wall, corresponding to the diameter of the selected pipe blank (with a small margin for insulation).
- Then a horizontal section of the outlet is laid through it, going directly from the heating device.
- A layer of thermal insulation, optimally suited for the given conditions, is mounted on top of the outlet workpiece, and the hole itself is inside closed with a special protective casing.
The passage of a sandwich pipe through a wall is also subject to mandatory thermal insulation.
- The vertical part of the outlet channel is attached to the outside of the laid horizontal pipe at an angle of 90 degrees, the tees of which are fixed with support brackets, and the joints are secured with clamps.
- A condensation tank is mounted on the bottom side of the tee, and the main outlet channel is fixed on the wall using the same clamps and brackets, located at a distance of no more than 60 cm from one another.

Experts also advise organizing the insulation of the pipes being laid from the outer surface of the building walls (using basalt mineral insulation, For example). This technique is usually used when laying chimneys in buildings made of wood materials.
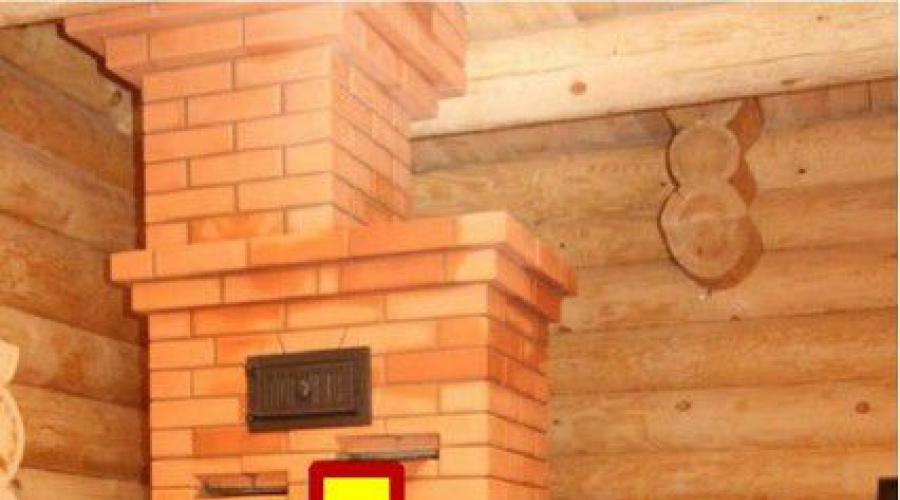
In conclusion, we note that users often ask the following question: how to remove the pipe from the bathhouse through the wall and are there any special requirements for this procedure?

The answer to this question is quite simple. In a bathhouse, the chimney outlet is arranged in exactly the same way, but in this case, its insulation is subject to increased requirements, namely:
- the hole for the outlet channel is protected with special non-flammable materials (fire-retardant fabric, for example);
- in addition, this section of the wall is covered with metal sheets that protect wood material from excessive overheating and fire.
All other steps for laying a chimney in a bathhouse are similar to the operations already described earlier.
0
Last revision: 04/12/2017
To remove gases from the heating system, a chimney is installed, which is vented to the street through the roof or through the wall. The passage through the roof is carried out during the construction of the channel simultaneously with the construction of the building. When replacing a heating source, a situation arises when it is more advisable to remove the chimney through the wall. For each method, there are rules and regulations regulating how to properly remove the chimney.
Roof pipe installation location

The optimal place to exit the pipe through the roof would be at a distance of up to 1.5 meters from the ridge. Stove makers and roofers are unanimous in recommending this location because it offers several benefits:
- No need to build tall pipe, which means minimal wind load and rare formation of condensation.
- IN winter time A small amount of snow accumulates near the structure and no leaks occur.
Note! If the pipe is installed three meters from the ridge, according to SNiP rules, its upper edge must be flush with the ridge. When extending the structure further than three meters, an angle of more than 10 degrees should not form between its top and the ridge line. A pipe with a height of 0.5 to 1 meter is installed on a flat roof.
Valleys are not recommended for installing a chimney, where inner corner At the junction of adjacent slopes, it is difficult to make a high-quality connection of the pipe, eliminating water leakage. When located under the roof of a residential attic, you cannot install a chimney near its windows; the wind will direct the smoke in their direction.
Choosing a passage design

The design of the unit through which the chimney is discharged depends on the material of the pipe. Common types include brick, stainless steel, galvanized steel, and ceramics. The choice of material is determined by the type of fuel used, if gas is released during combustion high temperature causes overheating of the chimney, then metal cannot be used. Its high thermal conductivity contributes to heating of the surrounding structure and can cause a fire. The chimney for such fuel has thick walls, and the top is equipped with a spark arrester. Steel chimneys are installed at flue gas temperatures below 400ºC.

The shape of the chimney also matters; popular options are square and rectangular pipe. This choice is due to the availability of ready-made additional elements used to construct the passage. View roofing covering one of the most important factors.
Note! Depending on the resistance of the roof to fire, the size of the fire gap is selected. For flammable materials it is 13–20 cm.
Smoke duct box

Any roof contains a layer of vapor and waterproofing. The integrity of these sheets determines the tightness of the roof, the absence of leaks and wetting of the insulation. Bringing a chimney through the roof requires creating a hole in the roof, including not only the size of the pipe, but also the fire distance to the sheathing and roofing pie, determined by the relevant standards.
Note! The optimal solution will be the production of a box at the passage point.

The junction of the chimney is limited on the sides by rafter legs; the upper and lower parts are made of transverse beams selected according to the size of the rafters. After production, the box is cut roofing pie according to the envelope principle. The edges of the vapor and waterproofing sheets are placed on the rafters and beams and secured with nails or staples. Additionally, their edges are glued with adhesive tape. Damage to insulation must be compensated by carefully sealing its edges. For further finishing attic space The waterproofing will be pressed against the sheathing strips.

The free space between the pipe and the box is filled with fire-resistant insulation. The tightness of the pipe passage is ensured by installing an apron. Its upper part is laid outside and placed under the roofing material.
Joint insulation

For withdrawal round pipes a ready-made soft penetration made of silicone or rubber with a flange attached to the slope is used. The element has different sizes and it is easy to match the pipe diameter. Silicone seal is suitable for any passage slope. This option is suitable for a metal pipe that does not heat above 100ºC. At a higher degree of heating, a metal cup with a skirt is used, which is placed on the pipe. The skirt is attached to the roof with self-tapping screws. The skirt is covered roofing material with obligatory gluing with sealant. The passage of the brick pipe is covered by the elements that come with the roofing material.

Sealing the joint between the pipe and natural tiles performed using an elastic band containing aluminum and lead. The bottom side with the adhesive composition is applied to the bottom of the pipe and to the roof. It is secured to the pipe with a metal strip, the upper edge of which is covered with sealant. Connection with soft roof also insulated with elastic tape.
Output through the wall

When installing a chimney, when the stove is located near the wall, it is easier to remove the gas exhaust channel not through the roof, but through the wall. This design has its advantages:
- space saving;
- accessibility of installation;
- the roof seal is not damaged.

Among the disadvantages are:
- the need for insulation;
- loss of part of the heat escaping through the chimney;
- the presence of a horizontal section that negatively affects traction.
Installation

The diameter of the chimney pipe depends on the power of the heating boiler, and the height takes into account the optimal draft level. The design of this chimney model consists of an external vertical channel and a horizontal chimney connecting outer pipe and a boiler. The work begins with choosing the place where the pipe will exit the room. The hole in the wall is made according to the size of the channel plus insulation. The horizontal pipe is connected to the boiler using standard adapters and passes through the wall at an angle of 90º. It is fixed on the wall using special brackets. The connection to the external channel is performed at an angle of 90º. Installing a tee with a cleaning cup and a condensate drain pipe will ensure the possibility of cleaning and uninterrupted operation. An inexpensive single-circuit system with one stainless steel wall or a double-circuit system is used as a chimney. optimal device, having a layer of thermal insulation between two pipes. Such a system is protected from damage and provides a sufficient level of fire safety.

The outer pipe is evenly attached to the wall every 1–2 meters; metal brackets are used for this.
Note! Location horizontal pipe through a wooden wall it must be insulated with heat-resistant material - asbestos fiber, steel.
Video
How to install a chimney through a finished roof, see below: