Reliable ways to attach a bathtub to the wall. Step-by-step instructions for installing a steel bathtub, expert advice Strengthening the structure of the legs of a steel bathtub
Read also
Steel bathtub is the most cheap option, when installed correctly and additional processing In terms of performance, it is in no way inferior to more expensive analogues. The main advantage of heavy cast iron bathtubs – long time heat is retained. But in order to heat cast iron, you need a lot hot water, and this is associated with additional losses of thermal energy. Moreover, during the adoption water procedures the water still cools down, the heat leaves through large area unprotected surfaces. There is a simple way to eliminate this drawback; if desired, the performance characteristics of an ordinary steel bath can be brought to high standards.
An important point: the correct choice simplifies installation and increases the comfort of use.
By what criteria are bathtubs classified?
| Parameter | Meaning and tips for choosing |
|---|---|
| 105x70, 120x70, 130x70, 140x70, 150x70, 160x70, 170x70, 170x75, 180x80. Choose the length and width of the bath taking into account the size of the room and the height of the residents. Try to ensure that the product is adjacent to the opposite walls as closely as possible, this will greatly simplify the installation process. | |
| 110, 120, 123, 136, 150, 170, 195, 210, 240. Volume directly depends on depth, and this parameter affects the height of the edge. If elderly people or children live in the house, then you should not buy a large bathtub; it is difficult to get in and out of. In addition, a large volume will require significant losses of hot water. But, on the other hand, than more water, the longer the comfortable temperature remains. | |
| On bolts or double-sided tape. The first option is used by serious manufacturers; bolt-on mounting is more reliable and in most cases does not require additional reinforcement or installation on bricks. Legs on tape - a budget option, is not stable. The legs can help level the bathtub horizontally; to increase the reliability of fixation, installation on brick linings is recommended. | |
| All steel bathtubs are covered with enamel. But the quality of the coating is different. Domestic manufacturers cover the worst. Insufficient enamel thickness and poor quality of the composition in terms of physical strength reduce the service life. As a result, there is a need to restore the enamel (long and unreliable) or replace it. |
Choose the size of the bath responsibly, taking into account the characteristics of the residents and the room. Poor quality enamel can be recognized by several signs.
- Run your hand over the surface. The surface must be perfectly smooth. Roughness or “sea waves” indicate a violation of the annealing conditions. Such a coating will quickly get dirty and requires constant cleaning.
- Inspect the coating from different angles. If not complied with standard thickness, then in some places the shade of white changes.
- Pay attention to the area of the bottom near the drain. There are cases when the drain is in the same plane or protrudes slightly above the surface. In this bath, the water will not drain completely; a small amount will always remain near the drain. After drying, calcium is deposited in these places, and over time it acquires a yellow tint.
Practical advice. Steel bathtubs belong to the segment of inexpensive products; there is no need to buy the cheapest ones. Additional savings will ultimately bring losses; purchase products only from well-known, time-tested manufacturers with numerous customers.
steel bath
Preparing the site
The location where the bathroom is installed should already have sewer and water pipes. Check the levelness of the floor and the corners of the room. If the angle between the walls is not 90°, then this disadvantage must be taken into account when installing the bath.
The floor covering must be horizontal.
Of course, with the help of legs or bricks, the bathtub will be installed level, but problems may arise with water drainage during leaks. The fact is that it is difficult to detect small leaks under the bathtub, all elements are closed. If water accumulates near the wall and the leaks are insignificant, then fungus will definitely appear in this place. Getting rid of it is difficult, time-consuming and expensive. In some cases, you will have to completely dismantle the bathtub and make a complex special events and reinstall the bath. Minor leaks may appear due to various reasons, it is impossible to completely guarantee their absence. If water flows towards the screen, then the problem is immediately visible, the causes are promptly eliminated and the negative consequences are minimal.
Installation of siphon and overflow
These elements must be installed before installing the bathtub in place. In terms of their design and connection technology, all systems are the same, the only difference is in price and material of manufacture.
Step 1. Turn the bathtub upside down. To protect enamel from mechanical damage When tipping, place cardboard or soft cloth on the floor. Do not do such work yourself, call an assistant. Together, the process not only speeds up significantly, but also the quality of installation improves.
Step 2. Read the assembly instructions and check that the siphon is complete. Pay attention to the gaskets, they differ in appearance and size. Do not mix up the gaskets; each must be installed in its place.
Step 3. Assemble the siphon and secure it in the drain hole. Do not use too much force to avoid damaging the seals and gaskets. To make assembly easier, it is recommended to use petroleum jelly or moisten the surfaces with soapy water.
The upper part is attached inside the bathtub, the lower part is mounted under the bathtub drain hole
Important. The drain gasket has a groove dividing it into parts of unequal thickness. The thin side should go inside the bathtub, the thick side should be with reverse side. Don't change your position. Otherwise, the plastic element will protrude above the surface of the bathtub and the water will not be able to drain completely. The remaining part, after drying, forms yellow spots on the bottom and will have to be removed frequently. All cleaning products contain compounds that have a negative effect on enamel. Even if their concentration is insignificant, but with repeated use, the thickness of the enamel decreases.
Step 4. Turn the bathtub on its side, install the gaskets one by one and screw on the plastic parts of the drain and overflow. It's much easier to do this together. One should hold the parts, and the second should tighten them with a mounting bolt. Do not apply too much force, the plastic may crack.
Check the connections for tightness. It is better to do this before installing the bathtub in place, this will make it easier to eliminate leaks. Everything is fine - you can install the legs.
Installation of legs
We have already mentioned that the legs can be fixed with double-sided tape or nuts. In the first option, no problems should arise. You just need to make sure that they do not interfere with the inspection of the siphon and ensure the stability of the bath.
Assembling the second version of the legs will be more difficult. General recommendations It is impossible to give, each manufacturer develops its own design. Look at the pictures, read the recommendations. It is necessary to achieve reliable fixation of all structural parts to the bathtub.
Adjust the position of the bathtub using the threads on the legs; check horizontality in two directions with a level. When you find it desired position, be sure to secure the threads of the legs with nuts. They should not wobble, otherwise the slope of the bath will change over time. In addition, gaps will appear between the wall and the bathtub. To fix the problem, you will have to make additional stops under the bottom.
And one more piece of advice. Unfortunately, there are defective bathtubs; their factory tilted bottom does not ensure complete drainage of water. To prevent such situations, practitioners advise immediately increasing the slope of the bathtub bottom towards the drain hole by a few millimeters. This will not be noticeable to the eye, but will guarantee the normal functioning of the drain.
Warming the bowl
A very significant point, it makes it possible to significantly reduce the consumption of warm water, which is important given modern prices for utilities. After insulating the bowl, the bathtub’s heat-saving indicators are significantly superior to all expensive analogues available for sale. In addition, it does not add weight and extinguishes perfectly unpleasant sounds while filling with water.
How is the bowl insulated?
Step 1. Work must be done in an overturned position. Recommended immediately after installing the siphon with overflow and legs. Buy two or three cans of polyurethane foam. The cheaper the better. The fact is that cheap foam during hardening significantly increases in volume, and this is exactly what we need. More volume means more air bubbles, less heat losses. A low price due to low compression force values, this parameter does not play any role in our case.
Step 2. Clear outer surface baths. If there is grease on it, you will have to wash it off with solvents. Working with solvents is unsafe for health; ensure maximum ventilation of the room. Better to work for outdoors, not indoors. Be sure to use respiratory protection.
Step 3. After the solvent has completely dried, moisten the surface of the bottom with a spray bottle. Moisture increases the adhesion coefficient of foam to the bottom by an order of magnitude. In addition, water helps optimal mode flow chemical reactions, the foam will harden much faster.
Step 4. Shake the foam container thoroughly and put on a special plastic tube. Start covering the bottom with foam. The process will go faster if you apply it in sectors from bottom to top. The foam should lie in even rows at a distance of no more than a centimeter. Wider rows are not a problem; after hardening, the gaps will correct themselves. If the surface dries out, re-wet it with a sprayer. Do not touch the wet foam with your hands, do not try to “stick” it to the surface. You won't get anything other than additional problems. The foam will no longer increase in volume, and it is almost impossible to wash your hands. You will have to scrape it off for a long time and tediously with a knife.
Step 5. Wait until the foam hardens, check the uniformity of the coating, and blow out any gaps.
Practical advice. If the foam falls off from vertical surfaces, then turn the bathtub in different directions and finish only the horizontal ones. It will take longer to work, but the result is worth it.
Step 6. Cut off the excess foam near the edge of the bath; it should not interfere with making the frame for the screen. The distance depends on the type and method of installation of the screen.
On this preparatory work installation completed. The bathtub has a siphon, legs and insulation.
Installing a bathtub on bricks
This installation completely eliminates the bathtub from swaying and tipping over; we strongly recommend using it.
Step 1. Place the clawfoot bathtub in the desired location, mark their location, and draw horizontal lines. Bricks or blocks will be laid along these lines. The bathtub is pre-adjustable in height and inclination using leg bolts.
Step 2. Measure the distance from the bottom to the floor, prepare the required number of bricks. If necessary, use a mason's hammer to chop off the excess parts to the required height.
Step 3. Prepare a cement-sand mortar. For one part of cement, add about three parts of sand, water as needed.
Step 4. Lay two rows of bricks where the tub is supported. Place about two more centimeters of solution on top. The solution should hold its shape and not spread over the surface of the bricks. If necessary, add a little sand and cement to it, mix thoroughly.
Step 5. Carefully lower the bath vertically into place until it stops with the solution. Now, with a little effort, rock and press it until your legs touch the floor, repeat these actions on both sides. Take your time, let the bath gradually take its place and squeeze out the excess solution. Once the feet (if any) touch the floor, the installation is complete. Give the solution time to harden (about a day) and continue installing the bathtub.
Bath screens
Using screens, communications are hidden; it is possible to make shelves for storing various household items. In addition, they significantly improve the interior of the room. The screen can be brick with further cladding with ceramic tiles, MDF, plastic panels, plasterboard boards, OSB or in the form of an ordinary curtain made of thick fabric. We'll tell you how to do each option in turn.
Designs must provide easy access to the siphon for periodic routine cleaning of the system. It is advisable to have an opening for the feet only if the bathroom is used for washing. As an option - country house for temporary residence. It is unprofitable and dangerous to install an expensive washing machine in it; summer residents, out of old habit, use the bathtub to wash clothes.
What types of frames are there for installing screens?
Any type of screen, except brick, is mounted on a frame. They are made from metal profiles (the best option), wooden slats or square pipes. Last option very expensive and labor intensive, operational benefits has none. Why do you need a frame that can withstand a load of hundreds of kilograms, if it actually does not exceed a few? We believe that there is no point in considering it. The manufacture of the structure must be approached very carefully; in any case, a crooked structure will have to be redone.
How to make a frame from metal profiles?
Step 1. Count the number of profiles.
They need three vertical baths in height, two horizontal in length and two horizontal in the width of the bath. To strengthen the structure, use jumpers; you need to make a separate small frame for the door. Three jumpers in length are enough; in width you can do without them. Knowing the dimensions of your bathtub it is easy to find out total material. Immediately buy self-tapping screws for attaching profiles.
Step 2. Make markings.
This is a very important stage, don’t rush, check the measurements several times. To increase accuracy, use a plumb line, level vertical planes indicates inaccurately.
How to markup?
- Apply the plumb line to the wall and corner of the bathtub, wait until it calms down. Make a mark of the upper and lower position of the thread, draw a line between the marks. Using the same algorithm, draw a vertical line at all free corners of the bathtub; there can be two or three of them depending on the size of the bathtub and the room. This way the junction of the screen with the walls is indicated.
- At a distance of about 3-4 centimeters, draw parallel lines next to them outside the perimeter of the bath. The specific distance depends on the frame material and finishing finishing materials: plasterboard, OSB, MDF or glue and ceramic tiles.
- Draw the same parallel lines on the bathroom floor. Check all dimensions again to avoid mistakes.
Further work depends on the material used to make the frame. The best option– metal profile, but you can also work with wooden slats.
Metal profile frame
Step 1. Cut the metal profile to size; we have already described how to determine them. Don’t work on jumpers yet; make blanks only around the perimeter of the frame.
Step 2. Lay the long profile on the floor, one side should be exactly adjacent to the marked line. Carefully use a marker to mark the locations for drilling holes for the dowels. It's not good to work with a pencil, use a marker.
Step 3. Remove the profile, drill holes with a drill, put the profile in place and fix it. Do not immediately tighten the dowels; the strips have perforated holes, with the help of which the element can be slightly moved in different directions and achieved an exact position.
Step 4. Now fix the planks to the walls. The algorithm of actions is the same. If you plan to use a heavy OSB board for cladding, then the vertical and horizontal profiles at the corners are connected to each other with hardware.
Step 5. Attach the profiles along the length and width close to the top side of the bathroom, you should have a strong frame. If necessary, make additional jumpers to strengthen the structure. They can have a vertical or horizontal position.
Step 6. Decide on the dimensions of the door for siphon inspection, make it according in the right place a small frame for it. Constantly check the position of all frame elements with a level. The door dimensions are at least 30 cm around the perimeter, otherwise it is inconvenient to clean the siphon.
The frame is ready, check its stability, apply multidirectional efforts from all sides. The structure is shaking - add jumpers to problem areas, achieve high stability.
Frame made of wooden blocks
In terms of its performance, it is in no way inferior to metal profiles. Do not be afraid that rot will appear on the tree. If there are any concerns, soak it with antiseptics.
You can use slats for the frame various sizes. When choosing, take into account the load of the finishing sheathing. A universal option You can consider the dimensions of the slats to be five by five centimeters. Make markings on the floor and wall as always. One feature - take into account the width of the slats; they should fit under the side shelves of the bathtub and not interfere with the finishing. To fix the frame, use metal corners and dowels, the width of the corners is slightly less than the width of the slats. This will make it possible to adjust the position of the frame without fear. In addition, possible errors during drilling holes for dowels can be easily corrected.
Step 1. Place a long block on the floor and estimate the position of the corners. Make marks for drilling holes for dowels.
Practical advice. In order to completely eliminate the possibility of the corner going beyond the line, it is better to move it slightly inward. It’s not scary that it will be screwed to the block off-center, but nothing will interfere with the finishing.
Step 2. Drill holes, secure the corners with dowels and a block to them with self-tapping screws. Adjust its position. Install the short block in the same way.
Step 3. Measure the height of the vertical elements. Make a gap of approximately 1 cm to the bottom of the sides of the bathtub. Using corners, fasten the segments into a single structure with the bottom one.
Step 4. Prepare two more long ones and two short ones for fixing in the upper part of the frame. Why two and not one? We recommend installing the first one at a distance of approximately 10 cm from the side; these bars are needed to control the size and verticality of the frame. On an already stable structure, it is recommended to fix one more one close to the side. It’s much easier to do this, and the frame is more accurate. In addition, the strength of the structure increases.
Step 5. In the right places, make a frame for the door, if used heavy materials, then install several jumpers. To increase strength, you can fix several spacers in the corners.
The frame is ready, you can start finishing cladding, fastening is carried out with wood screws.
Brick screens
In terms of time, they do not take much time, and in terms of strength, reliability and durability they are much superior to the previously described options. Prepare materials and tools. You can use bricks or concrete blocks. The quantity is calculated in this way.
- Calculate the side and end area of the space near the bathtub that you are going to cover.
- Divide the resulting amount by the area of one brick or block. Round the quantity to a whole number. For reserve, you can take one block or two bricks.
One bath will require two buckets of sand and a third of a bucket of cement. In the future, the surface should be finished with ceramic tiles, step by step design We'll give it in the next section.
Step 1. Place the first row of bricks on the edge, constantly checking its position with a level. You need to know that masonry on an edge has its own characteristics; if they are not followed, the wall may “float”. First feature. The solution should be slightly thicker than when laying flat. To increase the adhesion of the mortar to the side edge of the brick, it should be moistened with a spray bottle. Do not overdo it. The optimal degree of wetting will be determined practically. Second feature. After three rows you need to give the solution time to harden a little. Take a break for two or three hours.
The bricks are laid in a checkerboard pattern, the joints of the lower row are covered with whole bricks of the upper one.
Step 2. Continue working until the entire space is covered. It will be difficult to push the mortar into the gap between the masonry and the sides. It is advisable to make such an emphasis, it significantly increases the strength of the bathtub installation. Use any small means at hand for these purposes; such work cannot be done with a trowel.
Important. Don't forget to leave a hole for siphon inspection. Check the structure, remove any remaining mortar that has emerged. Give it time to harden at least 24 hours.
Ceramic tile finishing
If the wall already has tiles, then the work becomes somewhat more complicated. The fact is that you need to take measures to match the seam between the tiles on the wall and the screen. There are situations when it is impossible to lay a whole tile, you have to cut it into pieces. If you have no practical experience in cutting tiles, use plastic inserts. They can even out jambs up to a centimeter, but the appearance, of course, will suffer a little. Real professionals do not use inserts for joints; their cuts fit tightly to surfaces without gaps.
Step 1. Count the number of tiles, the method is the same as for bricks. And you can buy one or two tiles as a spare; you won’t need any more, the surface area to be finished is very small. You need to buy about 10 kg of glue.
Step 2. Start laying tiles from the bottom row. Check the position with a level or a level rod, control several tiles at the same time. They must lie strictly in the same plane.
Step 3. The tiles are placed on an uneven surface; it is impossible to use a comb. Apply the glue with a spatula along the edges and in the center of the tile, about one centimeter thick. Next, the tile must be pressed and moved left and right until the position is leveled. The final adjustment is made with a level. Don't forget to use crosses. Some beginners install crosses flat on the four corners of the joint. This should not be done for several reasons. Firstly, it is much more difficult to level the tile; the cross will constantly move the nearby one. Secondly, there will be problems with removing the cross; you will have to pick out each one with a knife.
Step 4. No experience - use in corners and joints plastic elements, they make the job much easier.
Step 5. After about two hours you can start. The color of the material should be in harmony with the tiles and the overall design of the room. Excess grout is removed with a damp cloth or sponge. Do not wait until it is completely dry; dry material is difficult to clean.
Finishing with OSB boards or plasterboard
Finishing with slabs is much simpler than laying ceramic tiles. How is it done?
Step 1. Take the dimensions of the frame and mark the slab. As a rule, the length of the bathtub exceeds the length of the slab; it will have to be joined. This possibility must be foreseen during the manufacture of the frame and a vertical stand must be installed at the joining point.
Cut off all the blanks. Drywall is easily cut with a mounting knife; for OSB you will need a manual electric saw or a jigsaw.
Step 2. Fix the elements one by one with self-tapping screws, and work carefully with the drywall. When the self-tapping screws are tightened with great force, their heads fall inside the plaster, and new ones have to be screwed in.
Step 3. Screw small hinges where the door is installed. Check the functionality of the door.
Step 4. Proceed with finishing surfaces. You can use ceramic tiles - it takes a long time and is expensive. There is a simpler option - cover the surfaces with self-adhesive decorative film; today there is a huge selection on sale - cheap and beautiful. In addition, you can easily change the pattern or repair the coating in case of mechanical damage. But the film also has a drawback - the surface must be perfectly flat.
Practical advice. Do not try to immediately glue the film without air pockets, it is almost impossible to do. Removing air is simple - pierce the pocket in several places with a needle and remove the air by smoothing the pocket.
Plastic lining
The option is not the best. It is recommended to use if the bathroom walls are lined with clapboard. The installation process is standard. The problem arises with the technological hole and the door. Practitioners recommend making them from OSB from plasterboard and not wasting time on lining.
How to make sliding doors
Very simple and functional option screen. For manufacturing you will need two guides and an MDF board. The disadvantage of this material is that there is a possibility of spontaneous deformation. You can get rid of it only by making a separate small frame for the doors. It is advisable to use thin wooden slats, MDF is glued to them with special glue.
Step 1. Make a frame from a metal profile; we have described the algorithm for making such structures. Check the position of all elements.
Important. For sliding screen It is especially important to maintain the parameters; the racks must be strictly vertical.
Step 2. Attach the guides to the frame. They can be aluminum or plastic.
Step 3. Measure the exact distance between the guides; the spread in parallelism cannot exceed 1–2 mm. Otherwise, the doors will jam when opening/closing.
Step 4. Cut from MDF boards doors required sizes. For overlap, 2–3 cm is enough. You can cut the slab electric jigsaw or a hacksaw for metal. Work carefully, place emphasis on the bottom - this will reduce the hairiness of the cut.
Step 5. Bevel the cut. Use sandpaper or a cylindrical sander. Install handles.
There is another way. It is the most reliable, but also the most labor-intensive. It is advisable to use it before covering the walls; if they are already finished, then the work becomes somewhat more complicated.
Step 1. Remove the row of ceramic tiles at the level of the bathtub rim. If it breaks, there's nothing to worry about. Put a new one in its place and make a pattern around the bathtub, this will only improve the appearance.
Step 2. On the wall, draw a line for the position of the upper plane of the side of the bathtub, at a distance of about 2 cm, draw another line. It indicates the position of the protruding side part of the side.
Step 3. Make a groove in the wall along lines approximately 1 cm deep.
Step 4. Apply sealant to the ends of the rim and place the bathtub in place. The edges should fit slightly into the groove; remove excess sealant.

The tiles were laid, decorative ceramic plinth was used to match the tiles
This method completely guarantees the tightness of the junction; water will never get behind the bathtub.
Use any method that does not present difficulties for you. If the technology is not violated, then the tightness of the junction of the bathtub with the wall will be sufficient.
Video - Installing a steel bathtub
Nowadays it is impossible to imagine a modern bathroom that is not equipped with a bathtub. Basically, builders install and fix the bathtub, but over time, the plumbing fails, loses its attractiveness, or becomes deformed. In this case there is a need self-installation baths to replace the old product. In our article we will look at how to fix a bathtub on legs if it is on tiled floor, and other options for its installation.
Choosing a bath
A bathtub is a large-volume sanitary container used for washing, washing and other household needs. More recently, shower cabins tried to displace this device, but due to less functionality they failed.
There are 3 types of baths:
- Cast iron. This - classic version, which retains heat perfectly and is highly durable. The disadvantage of this product is heavy weight, since a bathtub made of such material weighs about 80-150 kg. With a large mass, transportation and installation of the product becomes difficult. Also, cast iron containers have a high price and they are limited in the set standard sizes and forms.
- Steel. A product made of steel can retain heat for much less time, but at the same time, its weight is 3-5 times less than cast iron. Mostly steel bathtubs weigh up to 30 kg. The main disadvantage of these models is the large noise that occurs when a stream of water falls. Very difficult to install steel bath on the floor so that it does not wobble or play. However, these models are widely used due to their affordable price, which is 3 times lower than for cast iron products.
- Acrylic. Acrylic from which it is produced modern baths, is a durable polymer material. Products made from it are able to satisfactorily retain heat, and they can be purchased at very reasonable prices. affordable price. In addition, such products have a beautiful appearance. Acrylic containers are easy to install because they are not heavy. A significant disadvantage is low strength, which is inferior to cast iron and steel. Therefore, the significant weight of a person can break an acrylic product.
Important! To ensure that the bathtub does not wobble and stands level after installation, you should choose the correct size of the product. The length of the container corresponds to the distance between the walls minus 4-5 cm. When purchasing a bathtub, you need to choose models that are as close as possible to the calculated dimensions. This requirement helps prevent possible appearance gaps between the bathtub and the walls that may appear after installation is completed. In addition, with the right choice of container, the process of attaching the product to the wall and floor of the room is much easier.
Features of installation of various bathtubs
Many people ask the question: how to fix the bathtub yourself so that it does not wobble or play? When installing a sanitary container, you need to remember some nuances, taking into account which you can independently cope with the task.
To do this, you should take into account the mounting features various types baths:
- The most difficult part of securing a cast iron bathtub is bringing this product weighing about 100 kg into the room and installing it on the floor. to install given capacity, requires 4 supports supplied with the selected product. A cast iron bathtub is installed on the floor of the room using legs, which are attached to the bottom of the product with special bolts or wedges. To distribute the load from the weight of the bathroom, a metal sheet is laid on the floor of the room.
- A steel container is much more difficult to install than cast iron product. Since it has less weight, very often illiterate installation leads to its swaying and sliding. To securely fasten the steel product, it is required that the bathtub adjoins 3 walls as closely as possible. You can install the container on a brick podium or brick supports that come with the bathtub.
- Acrylic products are fixed to the podium or adjustable feet so that there is no rocking, wobbling or sliding of the container. The container must be adjacent to 3 walls of the room. Since acrylic models have low mechanical strength, it is recommended to build a frame around them, which makes it possible to give the product additional rigidity and hide communication elements.
Important! When renovating a bathroom, only after laying ceramic tiles can the product be installed. In order to provide access to the floor under the container, the product must be lifted and then installed on wooden blocks or bricks.
Basic rules for installing a bathtub
When purchasing a bathtub, you should definitely pay attention to the fastening system with which it will be equipped. After purchasing the product, you must carefully read the instructions and become familiar with the installation method recommended for this model.
How to fix a steel bathtub so that it does not swing? Basically, the product installation process is as follows:
- Before fixing the steel bathtub, we prepare the site for installation. If you intend to perform Finishing work ceramic tiles, then we lay the tiles on the walls and floor of the room.
- We install the bathtub on its side, then carefully place it on the floor, since this position facilitates convenient connection of the overflow and drain pipes.
- Using a sealant or seal, as well as changing the position of the product, we connect the floor siphon with plastic pipes.
- We screw or glue the legs to the bottom of the sanitary container, while adjusting the height of the supports.
- We place the product in such a way that it is possible to connect the siphon to the sewer system.
- Under the bottom we build a podium from bricks or some other materials. We install a frame that would allow us to hide the pipes behind a decorative screen.
- We seal the joints between the walls and the product using a sealant, moisture-resistant solution or plastic corner.
- After installation is complete experienced specialists check the reliability and quality of fastening. To do this, fill the product with water and check that the drain is working properly. We make sure that the product does not swing or wobble.
Fastening with polyurethane foam
Polyurethane foam is used to strengthen the product and simultaneously fix it on the floor and walls of the room. Mounting the bathtub to the wall using polyurethane foam done this way:
- We adjust the sanitary container in place and height using adjustable legs so that there is a gap of about 0.5-1.5 cm near the walls.
- After this, fill the bath to the brim with water.
- Using polyurethane foam, we seal the gaps between the body of the sanitary container and the walls of the room, as well as between the legs of the product and the floor.
Important! Sealing foam has the property of expanding when dried, so it must be used in strictly dosed order. Otherwise, unwanted deformations of the structure occur, which reduce the reliability of its fixation.
Application of brick frame
As a rule, a brick frame is used in situations where you secure the product without using legs, while ensuring uniform distribution of the load along the entire perimeter of the support. This installation method allows you to use the option of laying out the frame both across the bathroom and along the room.
Important! When positioned transversely, the product must rest directly on the brick, which implies additional fastening of the frame to the walls using corners made of metal - aluminum or steel. We fix the pre-prepared corners to the wall using dowels. With this option, the free edges of the container have additional support, and when pressed it does not wobble.
How to fix a steel bathtub using a brick frame:
- We unpack the purchased product and conduct a thorough analysis of the dimensions of the product and the room.
- We install the bathtub on spacer bars placed close to the wrong side of the sides.
Important! When installing a bowl in a niche, it is necessary to maintain the required distance between the sides of the plumbing fixtures and the wall on each side, which corresponds to 2.5 cm. This requirement does not apply when installing corner products.
- Using a spirit level, we check the position of the product relative to the horizon. If necessary, change the angle of installation of the spacers, thus leveling the installation of the bowl.
- We lay out brickwork in the intended places for installing the legs.
- The last row brickwork We install it close to the wall of the container, using pieces of brick.
- When the masonry has dried, remove the spacers, and then check the stability of the bowl using its own weight.
- Using brick, we lay out the screen along the perimeter of all plumbing fixtures right under the edge.
Attention! In this case, creating a screen serves not only decorative decoration, but also provides additional rigidity to this structure. If the strength of the lower supports is insufficient, laying brickwork to the lower segment of the side along the entire perimeter of the bowl prevents distortions of the plumbing.
When performing such work, be sure to provide a small inspection hole that would allow free access to the siphon. As a finish to cover the hole, use a small piece of drywall or install a small plastic door. If you are going to use ceramic tiles for wall decoration, then you can use a ready-made screen that serves as the front panel of such a base.
Installation on a metal frame
This installation method is mainly used when installing acrylic bowls, which are already equipped with a ready-made steel frame. If such an accessory is not available, the steel frame can be purchased separately or created independently.
How to mount acrylic bathtub to the wall using a metal frame:
- When installing such a product, we attach the frame guide strips to the bottom of the product using self-tapping screws.
Important! Fastening must be done in special places that are thickened.
- We install the included legs on the fixed guides, using a bolted connection.
- Lower the bowl into place.
- We mark the points of contact of the product with the walls of the bathtub room.
- In these places we install special strips that provide additional support.
Important! A small gap should be left between the bar and the side - about 2-4 mm, which is taken into account when the product expands after the bowl has been filled with hot water.
Installation of an acrylic corner bathtub on standard supports
To secure a corner acrylic bathtub on legs if it is on a tiled floor using standard supports:
- We remove the purchased acrylic container from packaging.
- To prevent scratches on the bathroom floor, spread a blanket and turn a sanitary container onto it.
- We take measurements of the sides of the product and compare them with the dimensions of the installation location.
Important! For quick and quality installation corner product, it is necessary to check the converging walls of the seat, the angle between which must be right. Otherwise, a gap appears that is very difficult to cover.
- Let's unpack the components needed to make the frame.
- We use plugs for the ends of the legs.
- We screw in the studs onto which we screw the locknuts.
- We assemble the profile to create the frame.
- We screw the adjusting leg pin into the profile hole. We screw one locknut tightly against the profile, and screw the other one towards the leg for stability and strength of the structure.
- We install the prepared profiles on the product and fasten them with the screws included in the kit.
- To assemble the second profile, we prepare a short and a longer pin. Using a locknut, screw in the short stud.
- We screw in a long pin from the protruding side of the product's side.
- We install plastic legs on both sides of the screwed-in long pin so that one leg can rest against the acrylic side of the product, and the other, respectively, against the floor.
- We secure the installed legs with nuts.
Important! After installing the support legs on the profile, you need to check that the plugs are located at the same level. You can use a ruler to check the location extreme points support legs, while measuring the distance from the profile plane to the surface of the plugs.
- We turn the assembled structure over and install it in the required place.
- By applying a level to the sides, we check the position of the sanitary container.
- If necessary, align the legs and tighten the locknuts again.
Reinforced fastening of acrylic bathtubs
Strengthening an acrylic bathtub on supporting legs has one significant drawback, which consists in the fact that in the area formed between the fixed profiles, the bowl crunches under the weight of a person.
To make reinforced fasteners for an acrylic bathtub:
- We select standard brick blocks with a length of 625 mm and a thickness of 250 mm.
- Using the adjusting supports, raise the container to the maximum height.
- We blow foam around the perimeter of the product, on the surface of which we install blocks.
Important! In order for the foam to interact better with the blocks and floor screed, it is necessary to moisten the mounting surfaces with water from a spray bottle.
- We lower the bowl onto the foam and, using nuts, fix the supports.
- After a day, the plumbing stops crunching and becomes motionless.
This method is very simple, since you only need to purchase a bottle of foam and a few bricks.
Inserting a bathtub into a niche
Small apartments often create installation difficulties sanitary product to the place designated for it. As a result, the installation of the bowl is complicated, but on the other hand, it provides the possibility of rigidly and reliably fixing the container in the niche of the room.
How to fix a cast iron bathtub to the floor? To rigidly fasten the product on each side of the wall, it is necessary to prepare grooves having the thickness of the edge of the bowl. For this purpose, a hammer drill or grinder is used. The bowl flaps are inserted into the prepared grooves with a slight “tightness”. The absence of complete play guarantees the most rigid fixation.
Important! If the legs do not have the required rigidity, the bowl can be further strengthened by using special transverse profiles that serve as supports for the lapels of the product.
How to seal a large gap near a wall?
Sometimes during the installation of the container there remains a large gap between the wall and the end, which does not allow for rigid fixation of the bowl. In this case, you can this disadvantage turn it into an advantage by creating a framework. As a result, a shelf appears between the wall and the bathtub, which can be used to store shampoos, powder and other accessories.
Let's look at some ways to eliminate a large gap:
- We make a frame from profiles that can be sheathed with moisture-resistant material such as plasterboard.
- We create a hatch to have access to the plumbing.
- We fix the block to the wall and build a shelf, one side of which is located on the block, the other is on the product or frame.
Important! When designing a shelf, it is necessary to create it with a slope so that there is no accumulation of water. To avoid water stagnation, plumbing fixtures should be installed with a slope towards the drain.
Video material
In principle, any installation work within the power home handyman, if he takes the upcoming work responsibly and scrupulously. In this article, we have offered you several options on how to secure a bathtub on legs so that it does not wobble. different models plumbers. We hope that using our step-by-step instructions, you managed to do everything efficiently and reliably.
The previous article talked about installing cast iron bathtubs, now let's figure it out.
In general, installing a steel bathtub is not much different from installing a cast iron one (except, of course, that a steel one is easy to move). However, there are still differences.
Features of installing a steel bath
If a cast iron bathtub will stand securely even in the middle of the room due to its stability due to its massiveness, then installing a steel bathtub in this way will not work: it must necessarily be adjacent to three walls.
A steel bathtub must be installed before laying the wall tiles (unlike a cast iron bathtub, which is installed after the bathroom has been tiled). In this case, it is desirable that the distance from one end wall to the other was equal to the length of the bathtub plus a couple of centimeters (so that the bathtub fits freely between the opposite walls). In apartments, this condition is met, since everything is done according to standards: a standard bathtub is 1.7 m long, and the bathroom in apartments is, as a rule, 2 cm larger (this is also a standard). Well, in private houses, it often happens that the owners themselves plan what, how and where to tinker... it’s for such owners that this paragraph was written.
Supports for installing a steel bathtub
All lightweight bathtubs come with adjustable feet.
The most reliable and safe supports for steel bathtubs are supports with self-adhesive pads. If the manufacturer has provided rigid fastening using tightening bolts, during the process of tightening them or under the influence of load during operation, the enamel may peel off at the fastening points. To prevent such peeling, self-adhesive overlays are used.
The supports have a channel shape. The supports have adjusting screws equipped with plastic tips. It is better to use fasteners with long bolts and short supports, and not vice versa.
How to install a steel bathtub on bricks?
As mentioned above, steel bathtubs are not stable enough due to their low mass, so you can make an additional support - install the bathtub on bricks, laying out this same support from bricks (or blocks) with outside baths:
It is clear that this support will be tiled, so the appearance of the bricks themselves does not matter.
When installing such supports, do not forget to leave space for access to the siphon.
How to install a steel bathtub: step-by-step instructions
Now let's figure out how to install a steel bathtub step by step.
Preparing a site for installing a steel bathtub
In the first step, we prepare the installation site. There must be connections for the mixer and a sewer pipe for drainage (all dimensions were discussed in the section on designing water supply and sewerage systems).
A steel bathtub is installed against bare walls! Before installing the bathtub, the walls must be prepared: the old coating is removed, the walls are leveled, primed, free of dust, which guarantees reliable fastening of the tiles. It is also preferable to treat the walls with a moisture-proofing agent. The angles between the walls must be strictly straight.
Options for attaching the legs of a steel bathtub
The difference between steel bathtubs is in the fastening of the legs. In one embodiment, the legs are mounted on Double-sided tape, in the other - with wing nuts. In any case, the bathtub is placed bottom up (see below).
There is no need to remove the cardboard packaging, and if removed, then add soft material.
The bathtub comes with instructions for its installation and assembly, just do it as written in the instructions. Here is just an example for standard bath, your distances may vary.
We try on each of the two paired supports to their installation locations. For example, 70 mm from the water outlet to the middle of the front legs, and from the middle of the front legs to the rear 820 mm:

The supports must be located without displacement from a flat bottom surface. And, I repeat, read the distances in the instructions for your bathtub; they may differ from those shown in the photo.
To ensure that the supports fit tightly to the bottom of the bathtub, you can carefully straighten the supporting channel. This should be done, of course, not on the bathtub, but somewhere to the side, on a sheet of packaging cardboard laid on the floor.
At the joining points, the surface of the bath is degreased with acetone or pure alcohol.
Next, remove the protective film from the pads, carefully place the supports in their places and press them tightly. Here, too, you need to degrease the mounting surfaces with the above-mentioned substances (and nothing else, especially paint solvents!).
Before deletion protective film, it is advisable to slightly warm up the pad with a household or hair dryer.
To mark the places where the legs will be glued, a simple pencil may not be very convenient - it is difficult to see on a dark surface. You can use, for example, a yellow pencil, it is clearly visible on metal. Or you can stick a piece of masking tape on the bathtub in the right place, as in the photo above.
The legs of a steel bathtub can also be attached with wing nuts to the brackets on the bottom of the bathtub:

The legs are pressed against the bathtub with corner stops and that’s it.
Important! Do not tighten the lamb too much, otherwise the enamel will bounce off from the inside.
The legs are supplied with studs for adjusting the bathtub in height and level; they can be disassembled. Their assembly is as follows. We carefully drive the adjusting threaded rods into the plastic tips all the way, making sure not to damage the threads. It is better to screw the complete nuts onto the ends of the studs first. Next, we drive the fixing nuts to the tips and screw the studs into their places on the supports (legs, in the sense).
If the doors in the bathroom are narrow, then it is advisable to install the supports already in the bathroom. With wide doors, assembly can be carried out outside the bathroom. We bring the bath into vertical position, you don’t need to hold it by the legs, just hold it by the edges.
Installation of bathtub trim
It is better to buy a collapsible and rotating harness, which will facilitate the installation of the corrugated outlet to the sewerage system.
Go. First insert the cuff into the hole in the bathtub:

We fasten the drain grate with a screw:

Everything here is plastic, so without fanaticism, you can always hold out if necessary.
Make sure that the grille is not skewed.

In general, there are many types of bathtub trims, choose according to your taste. It is better to buy something that is easy to install and easy to change.
Simultaneously with the installation of the bathtub, we provide for the installation of a check valve for draining washing machine. Such a valve also prevents the siphon effect that occurs due to drainage from upper floors and leading to poor machine performance.
As a result we have:

Drain from the bathtub (1), drain (2) from the washing machine through the check valve (3), while the end of the pipe (4) is plugged, where it will then be continued for draining from the sink. Well, the pipe goes through the wall (5) into the sewer system. The bathtub overflow connected by corrugation (6) is also visible.
Leveling the bath after installation
So, we placed the bathtub in its designated place, having first screwed on the legs. We carry out preliminary alignment in height and level, similar to what was considered for a cast iron bathtub. By adjusting the legs, we level the bathtub in two planes: longitudinal and transverse:


Then, between the end sides and the walls, closer to the corners, we hammer in four narrow wooden wedges, performing precise alignment along the three walls. This gap will then be needed to firmly fix the bathtub.
Attention! There is no need to slope the bathtub using legs, supposedly for better drain. Bathtubs are deliberately made with a sloped bottom.
Fixing the steel bath after its installation
Cast iron bath, thanks to its weight, it stands securely and does not wobble without any additional tricks. A steel bathtub needs to be fixed somehow - fastened, even though it seems to be on legs. This is where the gaps we left between the tub and the walls when we set the levels come in handy.
These gaps can be filled with foam. The edges of the bathtub at the points of contact with the wall must first be covered with paper removable tape (the white tape on the white bathtub is not visible, therefore it is shown in red lines):

Now we fill the gap between the walls and the bathroom with polyurethane foam using a narrow nozzle:

Try not to stain your hands and clothes with foam.
A little bit about finishing after installing the bathtub
The wedges are pulled out with pliers after the foam has hardened, the excess foam is trimmed with a blade, and the tape is removed. First we lay out the border, then the tiles on the wall. If the border is not ceramic, but will stick to the tile, then first lay out the tile, then grout the seams, after which we glue the plastic baseboard.
The space under the bathtub can be covered with a wall made of bricks or blocks, then laid out with tiles:

Or install a sliding plastic screen:

That's all about how to install a steel bathtub. There is more to come about installing an acrylic bathtub.
how to install a steel bathtub
For many people, comfort in the bathroom is associated with a quality bath. A metal product is considered to be one of the best in terms of quality. We will consider additionally how to install a metal bathtub yourself, placement options, and principles of work.
Features of steel baths
Installation of a metal bathtub is largely related to the peculiarities of its characteristics. You can find data plumbing fixtures on a leg, in boxes and other mounting methods.
Modern models of their metal have a number of features:
- Glass-forming raw materials are now included;
- The surface does not crack;
- Deformations are not scary;
- Not afraid of alkali, acids;
- Retains color;
- Wide selection of shapes;
- Budget price.
Steel models differ exquisite design, and their service life will be much higher than acrylic ones. Of course, the water in such a product will lose temperature much faster; when it gains temperature, the sound is quite loud and requires grounding. Applying a layer of polyurethane foam will help to cope with this problem.
Any type of product must be reliably and safely installed in accordance with all the rules.
Installation options for a steel bath
Unlike cast iron bathtubs, this model requires reliable fastening. Features of installing a steel bathtub are related to the specifics of the material. The disadvantages of steel bathtubs can also be eliminated at the installation stage.
First distinctive feature This type serves the need for installation before finishing the bathroom. In this case, it becomes possible to give the surface of the support a rather interesting look.
Most often, it is customary to install baths between three walls. This method will allow you to securely fasten the product. The distance required for installation should be equal to the dimensions of the product, plus a few centimeters from above.
There are several ways to install a bathtub correctly:
- On legs;
- In the middle of the room;
- In the corner;
- On the podium.
The height of the bathtub and installation will depend on the drain, the convenience of connecting the siphon to the sewer, and a number of other features. Installation is carried out on pre-prepared, bare walls. Prepare polyurethane foam, which will definitely come in handy during the process.
Each method has its own advantages and disadvantages that remain to be studied.
On standard legs
When choosing a device, pay attention to the quality of the legs that are necessary for installation. Very often they are completely unsuitable. The installation process must be carried out in stages:
- Place the product near the installation site with the bottom up;
- Install the siphon;
- Prepare the legs;
- Put it in place and connect it to the drain.
Legs modern baths They are extremely rarely reliable and most often serve a purely decorative function. In addition, due to the lightness of the material, this model has an increased risk of overturning. Therefore, it is advisable to provide additional fasteners.
To the corner of the room
If it is customary to install the device in the corner of the room, the support will only be on two sides. With this method, you will need to resort to additional support.
The process consists of the following stages:
- You'll need a corner. Make five half-centimeter holes;
- Attach the corner to the wall;
- Fill all irregularities with sealant;
- Place the bathtub between the walls and the corner with precise support.
The steel bathtub is quite light. Its stability can only be ensured with reliable fasteners.

Between the walls
With this arrangement, it is advisable to install corners on both sides of the product. This is how it is achieved maximum reliability fastenings As a rule, the dimensions of the distances between the walls coincide with the standard dimensions of bathtubs. In this case, three walls provide an additional point of support, which is very important for lightweight models. Moreover, this even creates some additional comfort. The third wall can even be made of plasterboard, a niche.
In the middle of the room
With this option, it is necessary to manufacture a special case, which will be responsible for reliability. In this option, the use of legs is completely unnecessary, since the load will be taken by a frame made of brick or other dense material.
This is one of the most popular methods due to its high reliability. In addition, in this case, access to communications is not always convenient, which is also important to take into account.

Manufacturing for a steel podium bathtub
Very effective reliable method installation involves making a podium. This design may differ in the production method and the material from which it will be made.
According to the method, a monolithic and frame type are distinguished. The step that supports the product, the first type. The second type is hollow inside; all communications are hidden in it and necessary things are stored.
The podium can be made of plasterboard, brick, or blocks. Each material has a number of features.
Making a metal frame
It is quite easy to make a high-quality metal frame yourself. To do this, you will need a metal profile that is connected with bolts. Can be fastened by welding. The edges need to be processed so that they are not sharp. It is better to additionally make a brick platform below. The frame is attached to the walls, the joints are treated with sealant to avoid leakage.
The method is suitable for this easily and durable material. Such fasteners may not save a cast iron bathtub, and may even damage acrylic.
Foam blocks are a good material to work with. They are quite light and durable. It is important to pay attention to the joints, since the material absorbs moisture and can become a place for fungus to form.
Making a podium from wooden beams
Wood is often used to make podiums. It is customary to install a sheet of plywood on the joists. To prevent noise from forming, install strips of cork under the joists. Preferably free space use as a place to store things.

Methods for attaching a steel bathtub
After the bathtub has been prepared, the legs have been installed, and turned towards the drain, we proceed to fastening.
One of simple methods– use of polyurethane foam. The product is displayed, adjusted in height, and partially filled with water. Foam is poured into the gap from the wall to the device. It is advisable to let it harden for 24 hours.
The brick frame makes the installation more reliable and safe. It can be combined with legs. Can be completely covered with brick. The combination of legs with a metal frame gives a good result.
The method of inserting into a niche is very reliable. In this case, the device will have to be placed in special grooves.
When installing, maintain a slight level of inclination to facilitate the passage of water.
Brick base for a steel bath
There should be no gaps between the wall and the base of the bath. If this is not done, mold and mildew will soon form.
For steel bathrooms, a brick base is most often installed. The rear pillar should have a height of nineteen centimeters, the front one seventeen. This move will increase reliability.
Installing a steel bathtub on brick supports
Before installing on the brick, you need to put spacers. You need to adjust the correct installation using a level. This should be done without haste, at least together. It is important to check for stability. If the indicators are not reliable enough, it is worth making additional fastening to the wall.
Fastening a steel bathtub to metal corners
This method is quite reliable. Corners can be included in the kit or purchased separately. The planks must be attached using self-tapping screws in special places. You can install corners along the walls, and place the sides on it. Treat all joints with sealant.
Securing the bathtub to the wall
You can attach it to the wall using a bracket. Another option is to provide adhesion to the wall before installation. When exposing the bathtub, it must connect to the side. These could be corners or staples. You can use brick supports and sealant for this.
Covering the perimeter of the bathtub with brick
The most reliable installation method is brick cladding. At this point, you first need to install the product, then carry out the laying. After drying, decoration is done based on wishes. It is important to leave a window, opening, and access to communications under the bathroom. For cladding, the brick is halved in thickness. It is necessary to leave space for laying tiles and access to the siphon.
Installation on an additional wall profile frame
The most common frame used for bathrooms is plasterboard. It has a number of advantages, such as water resistance, strength and lightness. The base is pre-selected from metal profiles, which are connected to the bathroom. A screen for the product is often made from such material.
Whatever type of installation is chosen, its important feature should be reliability. It is important to carry out all measurements and tests several times before completing installation.
steel bathtubs are still popular among consumers.
First of all, due to its durability. But in order for the font to serve you faithfully for many years, it must be installed correctly.
That's why we created the most detailed instructions for installing a steel bathtub. Where we collected all the expert advice. It will save you from installation errors. It will also show how it can be converted into advantages.
Have you already chosen a bath? If yes, you can begin preparing the room for its installation.
If you haven’t purchased a font yet, be sure to check out ours. This will help you avoid further problems with operation and installation, and will also allow you to purchase a truly high-quality model.There are three types of installation of hot tubs:
- tiled bathroom;
- to bare walls and then laying them out with tiles;
- to walls lined to the planned level of bathtub installation.
Let's figure out which one is best to use and when.
First way convenient if you bought a high-quality massive steel bathtub that does not require additional fastening to the walls. Everything is simple and quick here - the font is placed on legs and moved towards the wall. It’s just important not to forget about sealing the joint.
Second way will allow you to make high-quality stops on the walls without compromising the integrity of the tiles. Plus, sealing the joint will be much easier, since the tiles will be laid out from the side. Therefore, water will definitely not get behind it. The disadvantages of this option include the fact that laying tiles will not be very convenient and quite dangerous for covering the bathtub.
If you decide to cladding the walls after installing the font, under no circumstances remove the factory film from the bowl. Better yet, line the bottom and sides of the bathtub with cardboard. This will keep the enamel coating intact.And finally, third way- the most, in our opinion, optimal, but also the most difficult. After all, it is very important to measure everything accurately so that the font clearly fits in height into the space that is not tiled. With this option, you will not damage either the tiles or the coating of the bowl.
We've decided on the options. Now you need to clean the room well and prepare the tools. More on this below.
Tools
 First you need to prepare your tools. For comfortable work you will need:
- level- to set the horizon line;
- roulette;
- construction marker— to perform markings;
- kit wrenches - for adjusting the legs;
- corner— for inspection of right angles;
- hammer drill- for drilling holes in the wall;
- screwdriver or screwdriver.
Step-by-step instructions for installing a metal font
Thermal and sound insulation
Despite everything, they have their drawbacks: high thermal conductivity (water cools very quickly) and poor sound insulation(the sound of a filling bath can be heard even by neighbors). But both of these problems are quite easy to deal with. , which can be used to cover the walls and bottom of a steel bowl to improve its characteristics.
Especially for you, we have written detailed instructions about and.How to assemble and install legs with your own hands?
After completing the insulation work, you can begin installing the legs. They are:
- universal— as a rule, such legs come with the cheapest models and are simply attached to an adhesive base;
- with bolted connection- such models are more solid, connected to the bottom using special bolts. Exist different variants their execution, but the installation principle is the same for all.
STEP 1. A bolt is inserted into a special mounting location at the bottom of the bowl.

STEP 2. Then the support frame is placed on it. The structure is secured with a nut. To reduce the load on the bowl, it is important to remember to place rubber gaskets between the bottom and legs.

STEP 3. After this, you need to screw the legs themselves to the frame. There is no need to tighten them too much. Since the bathtub will still need to be adjusted to its level.

STEP 4. All that remains is to put on the plastic pads to reduce the pressure of the legs on the floor.

Drain and overflow
It is better to assemble the drain and overflow at the stage when the bathtub is still on the floor - it will be more convenient. This can be done according to standard instructions:
- gaskets are inserted into elements (10), (7 - siphon), (4), and then they are connected to each other with plastic nuts (8);
- gaskets (18), (15) are inserted into the corresponding overflow elements (17), (14), which are fastened with nuts;
- The assembled drain and overflow are applied to the holes in the bathtub and bolted to the grates.

Level regulation
After installing all the elements, you can turn the font over on its legs and place it in its future location. Next, you need to level it using a building level. Place the level on each side of the bathtub, twisting the corresponding legs. After all the sides have been exposed, you can move on to the next stage.
If the length of the legs is not enough to achieve the required height and the question arises of how to lengthen them, everything is simple. You can put bricks under them, after securing them to the floor with mortar.
Additional supports, what to attach to the wall so that it doesn’t swing?
As mentioned above, a high-quality steel bathtub with walls at least 3 mm thick does not require additional supports, and it is not at all necessary to attach it to the wall. But if the font is not the most expensive or you want to insure against the fact that it will wobble -. Or screw additional supports for the sides to the wall. Let's figure out how best to do this.
STEP 1. First you need to measure the distance from the floor to the bottom edge of the bathtub side (distance “A”). Then you need to move the bathtub and set this distance from the floor using a tape measure, drawing a side line along the entire perimeter.

STEP 2. As additional support, you can use a high-quality galvanized profile, steel corners or wooden beam, treated with special moisture-resistant impregnation. Using dowel nails, it is necessary to attach them to the wall along the line that we drew at the previous stage. They will take some of the load off the legs. The sides of the bathtub will rest on them.

Grounding an iron bowl
Next important stage is the grounding of the bowl. Metal baths must be grounded, since steel is an excellent conductor. And if a phase hits, for example, metal pipe- the result can be disastrous.
Bathtubs usually have a special grounding bolt with a special designation. It must be connected to the nearest point of the ground loop using a copper wire. As a rule, in the dignity. The socket always has a grounding conductor, so you can connect the grounding wire to it.
Sealing
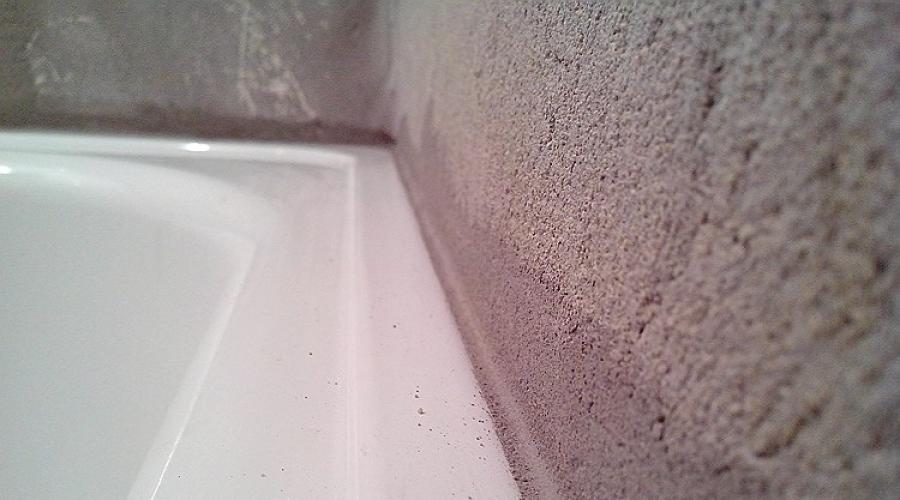
The final step is to seal the joint between the wall and the tile.
 You can seal the seam between the iron bathtub and the tiles using silicone sealant. It must be applied along the entire perimeter of contact between the side and the wall.
Then moisten it with a spray bottle and remove the excess with your finger or a special spatula.
If they are additionally moistened, the work will be done even more accurately.
Screen
In order to rank. the unit looked more aesthetically pleasing; it was better to cover the space under the bathroom with a screen. You can make a blank screen from tiles. But in order to effectively use the space under the bathroom, a screen with sliding doors is best suited.
Useful videos
Assembling the legs
Installation
conclusions
As you understand from the article. It is quite possible to install a metal bathtub yourself. All you need is tools and a little perseverance. We hope our article was useful to you. On our website you can find other interesting materials.