Is it possible to start laying tiles on the walls vertically, horizontally or from top to bottom: laying technology, options and methods of cladding. How to lay tiles on a bathroom wall - expert experience
Read also
There is no need to resort to the services of expensive craftsmen to lay tiles. At the right approach and preparation, cladding costs can be minimized. Considering the average prices for laying tiles, the savings can be significant. It is necessary to strictly adhere to the rules if you plan to lay tiles with your own hands, so that the result is the most attractive, functional and durable. So, laying tiles involves the following steps:
- surface preparation (forming screed, plastering walls);
- marking the location of the first row and installing support stops;
- laying the first row or several multidirectional rows according to the markings;
- filling the entire area with solid tiles;
- cutting and laying tiles to fill the remaining areas;
- grouting joints (jointing).
Tools for tiling work
The tools required for surface preparation are selected depending on the required operations and technologies for performing the work. Directly for installation you will need the following:
- trowel, trowel, notched trowel, rubber spatula, small level (30-40 cm), medium level (60-80 cm), plumb line, rubber hammer, solution container. In places where a whole tile does not fit, you will need to cut and cut it, for this you will need: a tile cutter (mechanical or electric), pliers or wire cutters, a large needle file or sandpaper, an angle grinder.
Calculate the amount of materials!
In order to correctly evaluate required amount tiles, you should not only measure the square footage of the surface for cladding, but also estimate the number of tiles that need to be cut into pieces. All this depends on the complexity of the walls and floor and the presence of various obstacles in the form of pipe outlets, corners, protrusions in the wall, etc. Approximately follows on top of the calculated quantity square meters Take enough tiles to lay two rows along two adjacent walls.
For gluing tiles, it is best to use specialized adhesives. This is especially true for bathroom and kitchen cladding, where you need to use moisture-resistant compounds. Moreover, when proper preparation surface, the solution consumption is minimal, and the cost of installation is significantly reduced.
Read more about calculating materials for tile work.

Step 1. Surface preparation
In order for the tiled surface to be perfectly smooth and durable, it is necessary to properly prepare the surface. Under no circumstances should you expect that small unevenness on the floor or wall can be covered by using more mortar under the tiles. A high-quality result can only be achieved when all the material is laid evenly on a small layer of adhesive.
Before laying tiles on the floor, a screed should be formed. In the bathroom and toilet, a layer of waterproofing is necessarily formed. Screeding can also be done using the wet method, adhering to the appropriate technologies. It is best to lay tiles on concrete base, that is, on wet screed. If the old coating is being replaced, then it is used and the surface is leveled with cement mortar.
In order to tile the walls, it is necessary to get rid of all the old covering and plaster the walls with obligatory reinforcement with construction mesh. It's best to do this. There is no need to use putty, nor should it be perfect smooth surface, this may impair the adhesion of the adhesive.
All skirting boards and platbands are dismantled doorway and thresholds. The prepared surface must be cleaned of dust, dirt and primed.
If you are confident in the reliability of the layer old tiles or just want to save time - check out. But in any case, this practice is only suitable for notorious lazy people.
Step 2. Marking and installing supports

options for custom floor coverings
Before laying, it is necessary to prepare markings and stops for the first row along which the tiles will be installed.
Walls
Fixed at the very bottom plastic corner or a wooden strip on which the first row will rest. Using a plumb line, a line is drawn to control the verticality of the installation. In case of using multi-colored tiles or various types mosaic installations It is best to mark with marks the places where tiles other than the mass are laid.
Floor
A line is drawn for the spaced edge of the tiles of the first row. The locations of the tiles that will differ from the main mass when the pattern is formed are marked. Laying floor tiles starts from the far corner. In this case, if necessary, you should shift the location of the first tile so that a solid fragment is laid at the entrance without the need to trim it. The calculations take into account not only the size of the tiles, but also the gap between them.
Step 3. Laying solid tiles

traditional tiling schemes
Having prepared the markings and guidelines, you can begin installation. To do this, a solution of tile adhesive is applied to the wall using a notched trowel with a thickness equal to the depth of the teeth. The tile is first leaned against a support or on the crosses below, after which you need to carefully lay the tile with your own hands on the mortar. There is no need to press it down. Slightly turning the tile along its axis light movements, achieves maximum adhesion of the product with the solution.
Remember that removing the tile from the surface after laying it on the mortar will be problematic, so you should immediately position it as correctly as possible. You can only move it slightly to the sides. The correct installation should be checked using a level in all directions and in relation to the already laid rows. If it is necessary to deepen the tile somewhat, use a rubber hammer. There are crosses in the corners to maintain gaps. After this, you can begin further installation.
Do not press down the tile too much so that the mortar protrudes along the edges. All gaps between them should be as clean as possible. In the future, grout will be used, which will prevent moisture and dirt from getting under the tiles and will give an aesthetic appearance to the entire surface.
When your hand is already full, you can apply the solution, taking into account the laying of several tiles at a time. In this case, after distributing the mortar, the tiles are installed in their places and settled on the mortar with small circular movements. After this, the crosses are quickly distributed into the gaps and, using a level, the entire laid row is pressed in various directions, adjusting it to the general level.
After completing the first row, it is best to wait for the glue underneath to set properly. After this, it will be much easier to lay subsequent tiles on the wall. It is important to remember that if, after laying the next row, it is decided to take a break from work, then all the mortar that is located not under the tile, but along the edges, must be removed. If this is not done and it dries, then before continuing work you will have to chip off the frozen mortar, which will affect the strength of the connection of the already laid tiles. All excess mortar is also removed in places left for laying cut tiles.
Step 4. Fill in the remaining areas
Having laid out the entire space where solid tiles are used, you can begin cutting the missing pieces and installing them. You can also use a glass cutter, but it is better to use a manual, machine or electric tile cutter, in extreme cases, a grinder will do. IN latest version There will be a lot of dust, so pruning is best done outside. Tile marking is done taking into account gaps on all sides.
In order to form an uneven cut, use either manual tile cutter-nippers, or an electric machine with a diamond wheel. Read more about how to do this below.

Step 5. Grouting (jointing)
After completely laying the tiles on the wall or floor, you should wait until the adhesive solution dries. After this, all the crosses between the tiles are removed and the joints are jointed. To do this, you can use cement-based, silicone or epoxy grouts. First of all, you should select a suitable grout according to color design the selected coating. In terms of characteristics, they differ little from each other, except for the method of preparation and use. Cement grout It is distributed in dry form and must be diluted with water immediately before use. Silicone and epoxy grout are sold ready-to-use in sealed containers.
Before jointing, it is necessary to completely clean the surface of the tiles and the seams between them. It is better to use a vacuum cleaner for this purpose. After this, if silicone or epoxy grout is used, the edges of the tile are additionally covered with masking tape. If this is not done, it will be difficult to remove the dried mixture from the glazed surface of the tile.
Next, using a rubber spatula, apply a small amount of grout over the seam and press it inwards. By placing a rubber spatula across the seam and pressing along it, the excess is removed. In this case, the seam deepens a little and is evened out.
Masking tape and grout residues should be removed after use. completely dry. Having cleaned and washed the entire tiled surface, the work can be considered complete.
Note: installation is done in the same way ceramic tiles. The differences partly relate only to the nuances in the methods of cutting tiles.
A little about cutting tiles
Almost no tiling work can be completed without the need to trim it. This can be done most different ways: starting from a glass cutter and ending with modern machines with a diamond cutting wheel. If using a mechanical hand tool, then the process is similar to cutting glass. In this case, the cutting wheel draws a line along the markings on the glazed side of the tile. After which scrapping is carried out. Floor tiles are more massive and cannot be cut beautifully with a glass cutter. All types of tile cutters have a significantly larger cutting wheel of 1.6 cm to create a deeper cut.
For example, consider the cutting option using a mechanical tile cutter:
- This tile cutter has a platform for placing tiles with limiters on which ruler markings are applied. This makes it easier to cut a whole row of tiles of the same size. We adjust the stops to the required distance so that the intended cutting line falls on the line in the middle of the tool.
- At the top of the tool, a carriage runs along two guides, equipped with a cutting wheel and a folding stop, the petals of which are located at an angle to each other, as well as a lever. We move the carriage to the edge farthest from us. Place the wheel on the edge of the tile and apply pressure along its surface along the cutting line.
- After this, the stop on the carriage is located in the middle of the cut and light pressure is used to stake the tile.
The difficult part is not the straight cut or the diagonal, but the curly cutouts with a semicircular shape or several bends for exiting wires, bypassing sockets or exiting water pipes. In this case, the shape of the cutout is marked on the glazed side, and the cutting wheel of a manual tile cutter is carefully drawn along the line. After this, you can bite off the unnecessary part of the tile piece by piece until only the part required in shape remains. The resulting edge will be quite uneven; to solve this problem, use a file or sandpaper.
Using electric machine the entire part that should be removed from the tile before marking is cut into thin strips and bitten off; the edge is also compared with a file.
- It’s good if the length of the row fits the tiles without the need to trim the end. If this is not the case, then the laying row should be shifted so that last tile was whole. If the remaining gap requires a piece of 1-2 cm, the row is further shifted so that wider pieces are placed on both edges. This will eliminate the need for labor-intensive cutting of narrow strips of tile.
- The same applies to marking the position of rows in height, especially when laying is not done to the ceiling, but to a certain level, for example, tiles are often laid in the kitchen. It is worth distributing the rows in such a way that the first bottom row is formed from pieces, and the top one from solid tiles. It is better to start laying with whole tiles, while raising the initial support bar to the required level.
- It is best to lay tiles in the corridor, starting from filling the space along the long walls, leaving a gap of one tile in the middle or at one of the edges. It is imperative to apply marking lines in order not to get lost and not make the remaining opening narrower than the tile.
- If used various options laying in the form of a figured structure or using tiles different colors, you should designate in advance the locations of tiles that differ in shape, direction or design. Separating individual tiles diagonally to form a pattern by spacing the joints is often used. In this case, it is better to leave the places with the installation of cut tiles for filling last.
- Be sure to read the instructions for the tile adhesive you are using. Some options involve moistening the surface of the tile before installing it on the layer adhesive solution, applied to the wall.
Video: laying tiles on the floor
Video: laying tiles on the wall
Bathroom renovations are rarely complete without replacing the tiles, especially if they have already served for 10-20 years. But, as usual, the question arises: to hire a master or do everything yourself. If you have a proven, tried-and-true tiler in mind and a certain amount of money (usually they ask for the same amount for the work as the materials cost), you can hire him. Otherwise, try laying the tiles yourself. If the walls are at least relatively smooth, everything should work out without any particular difficulties. But just before laying tiles on the wall, carefully study the technology.
It starts, as usual, with choosing a tile. Just pay attention not only to her external data. You will definitely need to check its geometry, otherwise it will be difficult to work with. If you are laying tiles for the first time, any curvature will greatly complicate the task. So, let's check:

From experience, it is worth saying that ideal parameters are extremely difficult to find. If you like it externally, there are no cobwebs of cracks or glaze defects on the surface, the edges are even, the dimensions are the same, you can take it despite some non-linearity (first point). Otherwise, you will be tired of running around the shops. What you shouldn’t do is buy tiles “to order”. How can you control its quality if you already pay for it? Take only what you hold in your hands.
What are the tiles placed on?
Previously, tiles were laid on cement-sand mixture, to which PVA glue or Bustilat was added. You can, of course, do it this way, but it will be more difficult. For more comfortable work, use ready-made compounds; they are also called “tile adhesive” because they contain adhesive components, which is why they sometimes say that tiles are “glued” to walls. Compositions come in two types:
- in buckets - mastics, ready for use;
- in bags - dry mixtures that require dilution with water.
Professionals mainly use dry mixtures. If necessary, they can be used to correct an imperfect wall, making the layer a little thicker or thinner. Another plus: they retain their plasticity longer, which allows you to make adjustments some time later. They work with mastic according to perfect wall and there can be no deviations here: the layer is too thin.

When choosing a tile adhesive, you can choose it according to specific tasks. So there are compositions that contain additives that increase the water-repellent properties of a wall or floor. This is important in the kitchen and bathroom. There are frost-resistant ones, this will come in handy if you put it in unheated room or on the street. You can find glue that has bactericidal properties: it will prevent fungi and mold from developing, which is in demand in damp rooms.
Preparatory work
Before laying tiles on the wall, carry out whole line preparatory activities. This is a long and unpleasant process, but it is extremely undesirable to skip it: not every master, let alone beginners, can lay tiles properly on uneven, unprepared walls.
Leveling the surface
First of all, the old coating and anything that may fall off is removed from the walls. If there greasy spots, they are taken out, or part of the plaster is simply cut down along with the absorbed oil. The walls are tapped with a wooden hammer, determining by the sound whether there are voids. They occur if the plaster has peeled off, but has not yet been blown out. If you stick a tile on such an area, everything will collapse under its weight. That’s why you do all these places yourself.

A flat plank is applied to the cleaned base and an assessment is made of how smooth or crooked the walls are. If the wall surface is very convex or curved, it is better to correct everything with plaster to a level. Then laying tiles on the wall will be very simple. If the walls are relatively flat, only indentations that are too large are leveled: irregularities (protrusions or holes) that are more than 5 mm. Protrusions need to be cut off, holes need to be filled plaster mixture, widen the cracks, moisten them and also cover them with plaster.
We prime
It is advisable to treat the prepared wall with a primer. “Betonokontakt” or another composition with similar characteristics is best suited for these purposes. It penetrates to a fairly large thickness deep into the wall, connecting all the particles. After drying, the surface becomes rough, and tile adhesive “sticks” to it very well.

How to start
There are several possible starting points. To put it quite simply, you can lay out the first row right from the corner, following the floor line. But the first row will become level and without problems only if the floor is perfectly level, without any deviations. Otherwise, you will be trimming the tiles to somehow get vertical joints. As a result of these prunings, the second and all subsequent rows can “walk”. The work will be very hard and unpleasant. Therefore, it is better to spend time and mark the wall, finding the “start” points.
Wall marking

If you don't really care about the small pieces of tile that have to be placed in the corners and at the top, under the ceiling, you can skip this step. But if you want all the tiles to lie symmetrically, before laying the tiles on the wall, you will have to do the layout:

If it turns out that only narrow strips remain at both ends, it is advisable to redo the layout. If the middle was located in the center of the wall, try laying it out from the seam, and vice versa. It should come out better.
When placing tiles in height, the situation is slightly different. In some cases, the seam is made at a certain level. In the bathroom this is often the edge of the installed bathtub. If there are no such requirements, you can do the same: find the center, arrange (draw on the wall) the position of the tiles relative to it. This way you will find how to trim the tiles of the top and bottom rows.

There is another way to arrange it vertically: mark the first tile from the ceiling, and so on to the bottom. In this case, only the bottom row will have to be trimmed. This is not entirely correct, but the consumption of tiles is slightly less.
In any case, when calculating how to lay tiles on the wall, mark the level where the first row ends. This usually serves as a starting point. This is where the laying of tiles begins.
Start line
Based on the layout results, you have a line where the first row ends. It is at this height that a flat bar is nailed. Resting the tile on it, place the starting row, and all subsequent rows on it. The last row to be installed is the first row, into which the tiles will have to be cut.

Profiles for working with drywall are usually used as a support strip, but a flat dry block can also be used. At a given height, it is attached to the wall with self-tapping screws or dowels (depending on the wall material). To lay tiles on the wall with your own hands without problems, you need to fasten them often enough so that there is no sagging. Be sure to check that it is installed horizontally. There shouldn't be even the slightest deviation.
How to lay tiles on a wall
The technology for laying tiles on the wall is simple. It consists of several simple steps:

A few nuances about full process. First, in the marked places on set bar glue the outermost whole tiles (those that do not need to be trimmed). When laying out, you noted their position. It is very important to set them correctly. To do this, each is checked with a level in the vertical and horizontal planes. If the geometry of the tile is ideal, you can also check the verticality/horizontalness along the edges. Then they take a long level or an even bar with a shorter level and check how evenly one beacon bar is set relative to the other. They must be in the same plane. Then, using this bar, they check whether each subsequent tile is positioned correctly.
Description is one thing, but seeing everything with your own eyes is another. The video demonstrates the technology; after watching, you will understand exactly how to lay tiles on the wall.
Wall adhesive thickness
For those who are laying tiles on a wall for the first time, they may have questions about how thick the adhesive layer is needed. This value depends on how much smooth walls. If they are ideal, you can apply the minimum layer allowed in the instructions for the composition. If the walls are only relatively flat, the “starting” layer can be 3-4 mm. Then, as necessary, it can slightly decrease or increase, correcting the unevenness of the wall.
There are several techniques for laying ceramic tiles. It is not always the case that glue is applied to both the tile and the wall. Some craftsmen apply the composition only to the wall, others - only to the tiles, some recommend dipping it in water before applying the glue, others do not do this. Choose the option that seems more correct to you. But it is more convenient for novice tilers when the mortar is on both the wall and the tile: it is easier to move and level it.
Manufacturers of tile adhesive advise applying it to the wall, removing excess with a notched trowel, but this means ideal level base. Based on these recommendations, the cost of laying one square is calculated.

With other techniques, consumption increases by 50% or even 100%, since the wall has to be adjusted. But you should definitely listen to the prescribed sizes of the spatula teeth.
How to cut tiles
There are several ways. For small volumes and not very thick tiles, a manual tile cutter is suitable. This is a device consisting of a platform on which tiles are placed. Fusing pads are attached to the platform along which the cutter moves. The cutter moves with the help of a handle, ripping durable coating. A stop is usually installed on the same handle, with which the tiles are broken along the line drawn by the cutter.
Another way is with a grinder, but it is very noisy and dusty. Besides, you won’t be able to make a perfectly even cut, but it will work in case of an emergency.
If necessary, round holes are cut using a crown of a suitable diameter, which is put on a drill. During drilling, to ensure that there is as little dust as possible, the work area is constantly watered with water. The result is a perfect hole and everything looks decent.

If you need to cut off a strip that is too thin, you won’t be able to do it with a tile cutter: it simply won’t break off. Then drawing a line cutting disc or a rod (for some companies the cutting element is made in the form of a rod), the thin edge is broken off. In general, there are special tongs for this, but it works well with pliers.

If the edge turns out to be very uneven, you can smooth it out a little with a file or sandpaper, fixed on a block.
Decoration of corners
If the tiles are laid evenly, the internal corners do not raise any questions. Difficulties may arise only with the installation of crosses. Just turn them so that they are not in the way or break off the protruding parts. In general, they join neatly in the corners, and the final seam is formed using grout.
Available for internal corners more profiles. They are matched to the tone of the grout, installed in the corner, leveled, and then attached to self-tapping screws or dowels. When laying tiles in a corner, the tiles rest on them. This results in a finished fillet seam.

External corners are more difficult. If you simply join the tiles, overlapping the edges, it turns out ugly. To arrange it properly outside corner you have to cut the edge at 45°.

This can be done using a professional tile cutter. But not everyone has such equipment. Then you will have to work with a grinder. The first cut, at approximately the desired angle, is made with a smooth diamond disc. There should be no slits or holes in it, and the spraying should also be even.

It turns out not very smooth, and the outer edge is quite thick. But this is only Preliminary processing. We bring the cut to the required parameters using a grinding attachment with the same disc. See the video for more details.
If you don’t want to bother with such trimming, there is another option - to decorate the corner with a special plastic corner.

Another video about how you can design junctions and seams when laying tiles.
To make laying wall tiles with your own hands completely clear, watch another video tutorial.
When finishing kitchen apron ceramic tile technology is practically no different from that described above. There is simply no need to calculate the number of vertical rows. The “start” location is determined by the height of the tabletop: it should start 5-10 cm above the edge of the tile. Attach the bar at the required level, align it exactly with the horizon, and you are ready to begin.

An apron in the kitchen is usually made using working wall. If it is not one wall, but two or three, you can start from one of the corners.

If it is laid out from small-sized tiles, the undercuts may not be very noticeable. If you want to do everything symmetrically, repeat the layout and start from the center, as described above.
As you now know, decorating bathroom walls with ceramic tiles has many advantages over finishing methods such as painting the walls or wallpapering.
The tiles have excellent hygienic properties. She washes easily and is not afraid detergents. Does not support the spread of mold and mildew.
Ceramic tiles are not afraid elevated temperature and humidity. Even direct hit water on tiled walls will not lead to any consequences.
The tile has high decorative qualities, thanks to which you can always choose tiles for repair desired color and drawing.
Another advantage of tiles is its durability. For many years, tiles are able to maintain their original appearance. Sometimes you just need to wipe it with a damp cloth and soapy water to wash off the dust.
As you can see, the advantages of ceramic tiles over other types finishing materials quite a bit of. But there is one significant drawback. Laying tiles requires some experience in performing such work and is the most labor-intensive and expensive type of finishing bathroom walls.
Let's see how to lay tiles on bathroom walls step by step.
Preparing walls for laying tiles
Before proceeding directly to gluing the tiles, you need to properly prepare the walls.
As a rule, preparing walls comes down to removing old paint, puttying and applying a primer for better adhesion of the tile adhesive to the wall surface.
Old paint can be removed different ways. For this you can use a special chemical agent or mechanical methods– grinder, hammer drill, electric drill. You can read more about surface cleaning in the article on painting walls.
After the surface is cleared of old paint, you need to repair cracks and chips, if any, in the brickwork.
You can seal the cracks with putty, carefully leveling it with a spatula where necessary.
Only after the putty has completely dried can you proceed to priming the walls.
After the wall surface is prepared for gluing ceramic tiles, you can proceed to preparing the adhesive.
To do this, use dry mixtures specially designed for preparing the mortar on which the tiles are glued. When purchasing a dry mix, be sure to check that it is suitable for preparing tile adhesive for wet areas.
The ratio of dry mixture and water is usually indicated on the packaging. In a container of a suitable size, mix the dry mixture with water using a mixer until a homogeneous dough-like consistency is obtained.
Tile layout
Before you start laying tiles, you need to decide on the layout of the tiles. As a rule, bathroom walls are decorated with rectangular tiles, placing their long side parallel to the walls. This orientation of the tiles will visually make the ceilings higher, which is important for decorating a bathroom in a modern small-sized apartment.
But you can choose the orientation of the tiles whichever you prefer. In addition, it should be taken into account decorative inserts, if you use them when decorating walls, as well as borders.
Below is a video on how to correctly lay out tiles when tiling walls:
How to lay the first row of tiles
As a rule, the first row of tiles begins to be laid not from the floor, but from a flat horizontal line at the height of the second or third row of tiles. This is due to the fact that gender does not always have absolutely flat surface and when laying out the first row along the floor line, further rows may not be even.
In addition, there are often sewer pipes on the floor, which make it difficult to lay out the first row even with a perfectly horizontal surface.
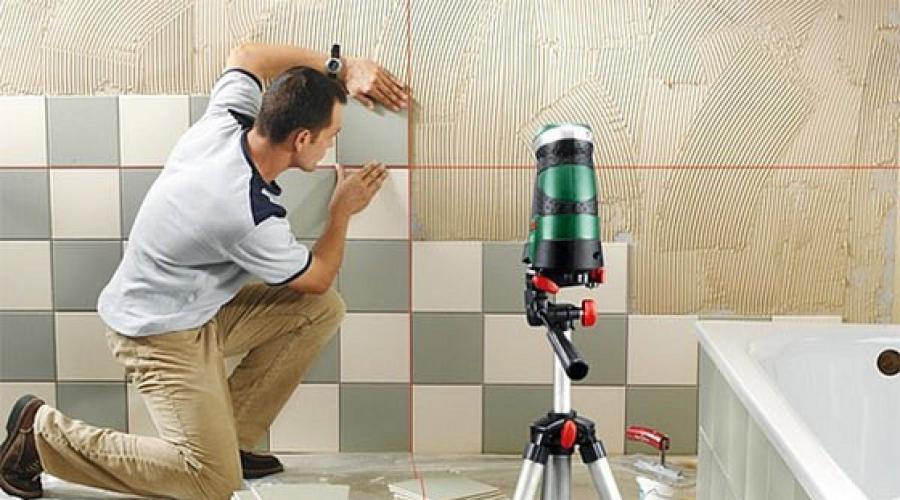
Therefore, for the first row, you should mark the wall using a hydraulic level and strengthen it according to the markings metallic profile for drywall or other level guide support on which the first row of tiles will be laid.
It is advisable to lay out the first row at such a height that there is an even number of rows of tiles left from it to the ceiling without trimming. If you are planning a suspended ceiling made of PVC panels, suspended ceilings or aluminum slats, then this point will not be so important, since the upper edge of the tile will be hidden behind the false ceiling.
Often work begins by taking the side of the bathtub adjacent to the wall as a basis for the first row. In this case, seal the side of the bathtub with masking tape so as not to damage it during the laying of the tiles and begin to apply glue to the wall.
The glue is applied with a straight spatula (trowel) to small area, sufficient for laying 2-3 tiles. The thickness of the tile adhesive layer should be 5-7 mm. The applied layer is stretched with a spatula-comb.

After this, a small amount of tile adhesive is applied directly to the tile itself with a spatula and a comb is also passed over it to create unevenness for better adhesion.

The tile is pressed forcefully into the layer of adhesive applied to the wall. After this, using a level, you need to check the horizontality and verticality of the first tile, since then all subsequent tiles will be aligned with it.

To ensure that the same gap is maintained between the tiles when laying on the wall, special crosses and liners should be used. The thickness of the crosses is usually 1.5 mm. This is quite enough to get a beautiful, even seam.

If a whole tile does not fit in the corners, then it needs to be trimmed. For this purpose it is used special tool which is called a tile cutter:

If you don't have a tile cutter, you can cut the tiles without one. Below is a video on how to cut tiles without a tile cutter (click on the triangle to play):
If you need to trim a border, it is best to do it with a grinder:

Tile is one of the high-quality and very popular materials for wall cladding. It is known for its durability, practicality, as well as a variety of shapes and colors. Most people invite professionals to do the tiling, however, few people know that there is nothing complicated in the process of laying tiles with your own hands, the main thing is to follow some rules and remember the nuances.
Wall tiles happen different types. Porcelain tiles are very durable and resistant to damage such as scratches and wear. It has a smooth facing surface similar to glass. Mirror tiles– usually used as a decorative element in combination with other types of finishing materials.
A distinctive advantage of any tile is durability and high strength.

Porcelain tiles are resistant to damage of any origin. The surface of such a tile imitates natural materials eg granite and marble. Terraglia is a glazed tile produced by double firing. It is considered the highest quality and environmentally friendly.
Ceramic tiles are the most popular and most in demand due to their:
- Unpretentiousness;
- Strength;
- Inexpensive cost;
- Variety of species.
- Great popularity is also due to the variety of choices;
Clinker tiles are incredibly durable and are guaranteed to last for several decades. Has increased moisture resistance. Cotto – matte, made from a clay base with special properties. Excellent resistance to moisture, making it ideal for the bathroom.
Laying tiles on the wall: choosing according to the purpose of the premises
Tiles are a type of material that is laid once and for a long period of time. It is very important not to make mistakes, so it is worth taking into account the purpose of the target space. Wall tiles for decorating a kitchen apron must be resistant to both mechanical and chemical types impact. In the slab area, tiles with high heat and moisture resistance are placed on the wall.
If you want quality tiles- don't save money. Majolica is suitable for public spaces - it is made from red clay. For tiles there are different price categories, which generally correspond to its quality.

Tile surface:
- Covered with glaze;
- Embossed;
- Basically, it has a patterned design.
In facing wet areas(bathroom, restroom) the walls need to be laid with tiles with the greatest moisture resistance. It must be able to withstand changes in humidity and temperature perfectly. Mosaics are especially popular for installation in these rooms. You can add luxury to your bedroom design by decorating some elements with tiles that imitate natural materials.
When choosing tiles individually for each room, you must be guided by different criteria, depending on the type of room.
To prevent contamination from entering the premises (hallways, balconies, loggias) great solution will be the design of these spaces using ceramic tiles or porcelain stoneware. Decorating the space of offices and living rooms using wall tiles can be excellent design solution. A fireplace decorated with tiles imitating a natural stone or clay surface.
How to lay tiles on a wall correctly: necessary tools and materials
Proper laying of tiles is not complete without components. You will definitely need tile adhesive, sealant and grout, primer and putty, plastic crosses, a device for mixing the glue (you can use a spatula).

It is necessary to take a responsible approach to the selection of such elements as:
- Tile saw;
- Ruler and pencil;
- Master OK;
- Level;
- Wooden slats;
- Bucket for solution;
- Tile spatula.
And one more integral component is the tile itself. In order not to make a mistake with the quantity, you just need to add an additional 10% to the resulting number.
Methods for laying ceramic tiles on the wall
Methods for laying tiles on the wall can be very diverse. Diagonal laying– most often, this method is used for the floor. Deck laying - this method most often imitates brickwork.

Parallel row of laying - standard tile laying:
- In a checkerboard pattern;
- Lines;
- Ornament;
- Moldings are often used.
Herringbone laying is a combination of diagonal and deck, difficult to perform. Carpet laying is a covering that imitates a wall carpet. In the center is a part of a mosaic of a certain size.
Thanks to the variety of ways to choose ceramic tiles, you can create spectacular design, which will not leave anyone indifferent.
Modular grid - composition of tiles different textures and sizes, followed by its repetition diagonally or parallel to the installation.
The correct technology for laying tiles on the wall
The technology of laying tiles on the wall takes place in 4 stages. Preliminary stage - first, you need to decide on the type of tile, its size, color. Then you need to measure the parameters of the room and decide how much of the selected tiles will be needed.
It is necessary to stock up on additional tiles in reserve in case of unexpected damage to the tiles.
Before facing, you need to lay wall tiles on paper near the wall and count the number of tiles in each row horizontally and vertically. This way you can understand whether it is necessary to cut the tiles into pieces, and where it is best to lay them. You can also make marks on the wall using a ruler - in this case, the tiles will lie flat.

It is necessary to prepare the surface - this is very important stage. Without this, it is not possible to tiling properly. The surface is leveled using a special leveling solution (plaster is also used instead) and a special spatula. Experts also recommend priming the walls.
Step-by-step instruction:
- Dissolve glue in a bucket and prepare the selected tiles.
- To prevent the laid tiles from slipping, attach wooden slats along the marking line.
- The first tile should be placed in the lower corner, limited by the slats.
- First, apply glue to the wall with a notched trowel and begin laying tiles; the thickness of the layer of applied glue should not be more than 5 mm.
- From the very beginning we use special plastic crosses, inserting them between the tiles. This is necessary so that the masonry is level. It should be remembered that the plastic crosses will need to be carefully removed within 10 minutes, otherwise they will stick.
- Make sure that excess glue, which got on the tile, was immediately removed, otherwise it would be very difficult to remove it later.
The glue will dry within 24 hours. After complete drying, you can begin grouting the joints. This is done using sealant or putty. Grout must be applied rubber spatula diagonally along the laying boundaries. Finally, you need to wipe the surface with a dry cloth, and then remove the remaining traces of grout with a damp sponge. Be careful when tiling, check the level position of the tiles more often.
How to lay tiles on a wall (video)
Laying tiles on the wall is a very important part of repairing and transforming the room being decorated. Laying tiles for the first time yourself may not be possible without mistakes. Don't rush, don't try to lay out all the rows of tiles at once, 5 rows - best option. This way it will be ensured necessary control quality, and the process will not be a burden. If all the rules for cladding are followed, properly laid tiles will delight you with their appearance for many years.
They always try to stretch out repair issues for as long as possible. This may be due to many factors, for example, lack of time or finances. But the time comes, and they still take on this process.
The biggest impact on the interior is in the kitchen and bathroom. There are temperature changes, high humidity, and mechanical stress. Most often, floor tiles suffer from this and there is a need to replace them. How to lay tiles on the floor correctly?
The most basic solution to this issue is to call professionals. But the cost facing materials far from low, and this is not to mention how much tiling services can cost. Therefore, to save money, you can do the work yourself. The main thing is to correctly observe the sequence of stages and the quality of the work performed on them.
Surface preparation
For this stage you need to prepare:
- chisel;
- hammer;
- building level.

First of all, the space is cleaned, that is, all plumbing is dismantled. Next, use a hammer and chisel to remove old tile. Since such a coating easily splits, sharp fragments are formed at the moment of breakage. To avoid getting hurt, you need to think about your protection in the form of gloves for your hands and safety glasses for your eyes. After the old coating is removed, using the same chisel, the remnants of the old glue are removed.
In order for the floor tiles to hold tightly and not crack the first time you press them, the floor surface must be perfectly flat.
First of all, you need to pay attention to the plaster and its quality. It happens that the sand-cement coating swells, and from long term service is still crumbling. Then, before calculating the space and material, the poor-quality plaster coating is cleaned.
With help building level The horizontalness of the surface is checked. Convexities and concavities can cause slab seams to look untidy. In addition, large gaps are formed between the floor and walls. In case of such defects, they can be eliminated with plaster.
Return to contents
Leveling the floor
If you have a concrete floor, you can use a special construction mixture or a solution of cement and sand. The use of the second option involves a process similar to conventional plastering.

But if you choose construction mixture, then you need to know the technology of work. It will not be difficult to prepare such a solution, since the manufacturer prints instructions for correct mixing on each label. The standard also indicates the thickness of the layer that can be laid on the floor in the bathroom, and how long it will take to dry. If concrete surface has pores, cracks, joints and gaps, then you need to think about waterproofing. To ensure that the mixture and the base adhere well to each other, a primer is used, which is initially used to treat the floor surface.
The next step is to draw a level along the entire perimeter of the room. This can be done using a water level. Its design is a thin hose with graduated flasks attached to it. The measurement principle is based on communicating vessels, that is, the flasks are filled with water and placed around the perimeter. To carry out high-quality measurements, it is better to carry them out together with a partner, one of whom will mark the marks on the wall, and the second will align them with the markings of the flask. Next, the resulting points are connected with a ruler into one continuous line.
The resulting horizontal lines serve as the basis for installing pendulum slats. After this, the surface is filled with the resulting solution.
You can level the surface with a wide spatula.
If air bubbles begin to form, they can be removed using a needle roller. The direction that must be followed when leveling the floor is from the far wall to the door.

But in old houses, wood was often placed on the floor. The difficulty of such a coating is that the wood does not have a rigid structure, which means it will be difficult to lay tiles on the floor. If floor tiles put it on old and rotten boards, it will crack very quickly.
Therefore, first of all, you need to take care of replacing old boards with new ones, the thickness of which should be at least 2.5 cm. You should not forget about protection against fungus, mold and rot. To do this, it is necessary to perform an autopsy with special solutions. Again, a layer of waterproofing is needed under the tiles on the bathroom floor.
Alignment wooden floors occurs using the same building mixture. But before you fill the surface, use nails or pieces of brick to attach it at a distance of 5 mm. construction mesh. Only after this is it covered with the selected mixture. The average drying time for such a floor is 28-30 days, then further work can be carried out.
Return to contents
Purchase of materials

Floor tiles can be purchased in advance, or after the base has been prepared. Of course, it is better to stick to the second option, since after the work is completed, the area in the bathroom may change. And it’s good if it decreases.
So that the bathroom has decent looking, it is best to buy first grade floor tiles. The second and third grades often have defects in the form of differences in color and size. When laying tiles in the bathroom, they may crack or break, so you should always take extra.
For decoration, it is important to purchase borders, baseboards, patterned coverings, etc. When purchasing tiles for the bathroom, you must immediately purchase glue. It is better if it is a special dry mixture that can withstand temperature changes and high humidity. It is recommended to pay attention to the instructions on the label regarding the permissible thickness of the plaster.