Beautiful napkins that can be used to decorate furniture with decoupage. Decoupage of an old cabinet. How to choose material for decoupage furniture
Read also
The term "decoupage" is French word, meaning "cutting". It belongs to the types of applications that are glued to wood, glass, metal and plastic surfaces. You have already met, but did not know, that colorful frames, pots, kitchen boards, colorful figurines and furniture covered with paintings from wallpaper and napkins are products made in the spirit of decoupage.
This is functional and easy way design of decorative elements will give even a child the opportunity to create unusual craft. Decoupage will allow creative people without spending a lot of time and materials, create a masterpiece. The designs you like just need to be cut out, distributed on the surface to be decorated and secured with special means.

Individuals who are not afraid to experiment and spend time on creativity may like decoupage old furniture. This technique requires presence quality materials and patience. This option will update and improve the interior, but it will not take much time.

Materials that are used when decoupaging furniture with your own hands include bright three-layer napkins and extra pieces of wallpaper. Nowadays, along with the above, fabric is used. Contrasting, colorful patterns and elegant fabric textures will transform old, sloppy furniture into designer creations.
At the end, the decorated surface is varnished so that the item lasts a long time and looks attractive. In addition to paper, you can use lace, leather and drawings from magazines for decoupage.

Today we will watch a master class on furniture decoupage and learn how to decorate interior items.
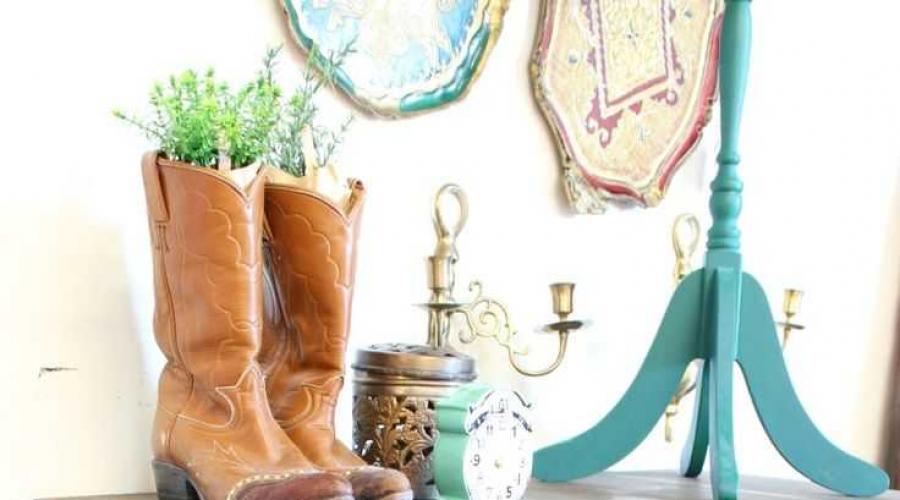
Often in Everyday life The word "vintage" is used. In apartment decor, vintage means bringing old things back to life. Not everyone can afford to buy vintage furniture, because they will have to fork out big bucks. But creating an inexpensive, unique analogue is within the power of any person. The main thing you need to have with you is a rich imagination and openwork multi-layer napkins.

Decorating cabinets and cabinets in the kitchen using napkins
To freshen up the look of an old one kitchen set, buy paper napkins with a contrasting vintage pattern, cut out the pictures you like and start creating “updated” furniture.

Beginners should first practice on thick cardboard or chipboard covered with plywood. Having “stuffed” your hand, you can start decorating kitchen cabinet. For this we need:
- High-quality three-layer napkins with a bright pattern;
- Sandpaper;
- Sharp scissors;
- PVA glue;
- Acrylic paint and varnish.

If you are decorating old furniture, then clean and level the surface with sandpaper and degrease with an alcohol-containing product.
Then cover the selected surface acrylic paint, let dry. Then, cut out the design you like and separate the two bottom layers.

Apply glue to the place where the picture will be glued and place the picture, carefully straighten its surface, remove air bubbles. Using a natural brush, cover the top layer of the design with glue - this will protect it from tearing after subsequent paintings.

When the pattern is dry, carefully apply acrylic varnish. Its advantage is that it dries quickly and does not “stink” of chemicals, which makes it possible to varnish furniture indoors. After 3-4 hours you have a new vintage cabinet.

Following the given step by step instructions you can decorate the doors of bedside tables, wall cabinets, and the visible part of the cabinet.

Decoupage wallpaper
Wallpaper is used to decorate only furniture that does not fit new interior or is considered obsolete. Wallpaper with a fashionable print that harmoniously matches the decor will refresh the furniture and give it a second chance at “life.” Wallpaper design methods are varied. You can wallpaper both individual parts (doors, drawers) and the entire visible surface as a whole.

For beginners in furniture decoupage, it is better to start with simpler models. For example, you can decorate a table top using a single piece of fabric.

This lesson with step by step photos furniture decoupage will show you how to decorate a table correctly and tastefully. Typically, the material from which the table top is made is chipboard, boards, or solid wood board.


We need:
- Acrylic lacquer;
- Roller;
- Sandpaper;
- Vinyl or non-woven wallpaper of the desired shade;
- PVA glue.

As in the previous case, clean the lid with alcohol and level it sandpaper. We measure the dimensions of the lid and cut off the corresponding, even fabric with a small allowance. Then we coat the entire surface to be decoupaged and the back of the wallpaper with PVA glue. Carefully place the wallpaper and begin to level it using a roller.

Using a roller, we remove air bubbles and level the paper over the entire surface. Let the wallpaper dry. Afterwards, we sand the edge of the lid and cover the top layer with acrylic varnish. Ready product It will look like it was purchased.

Decoupage of an old stool
In every house and apartment there is an old, shabby stool that is a pity to throw away. How to turn old things into a real masterpiece, a rarity? The answer is simple - napkin decoupage. This technique will help you make a vintage stool without spending a lot of personal time and money. For this we need:
- Acrylic paint and varnish;
- Three-layer vintage napkins;
- PVA glue;
- Brushes with natural bristles;
- Sandpaper.

We begin the work, as in all other cases, by leveling and degreasing the surface with sandpaper and alcohol. After cleaning the seat, we cover it with two layers of cream, white or beige paint. Let it dry so it doesn't stick to the tools.

We divide the napkin into layers, glue the top one with the pattern facing out. We dilute the glue with water in a 1:1 ratio and treat the surface of the pattern with the mixture. During the coating process, we align the picture and remove air from under the napkin. Let the glue dry. Afterwards, we varnish the surface. Voila! The vintage stool is ready.
Fabric decoupage of a sleeping chest
Decorating a chest of drawers with fabric occurs if it is outdated, peeling and does not fit into the overall background of the room. For work we need:
- Scraps of fabric;
- Scissors;
- Sandpaper;
- Acrylic paint in pastel colors and varnish;
- Roller.

First, use a solvent to remove the old paint and sand the entire working surface. Cover with a primer and paint with beige or milky acrylic paint. Give it time to dry. Afterwards, cover the chest of drawers with PVA glue and glue the fabric special glue. Using a roller, spread the fabric over work surface, remove air bubbles.
Depending on your preferences, select the color, pattern and number of patches. Let the fabric dry and periodically spray it with glue from a spray bottle. This is done so that the fabric does not wrinkle and sticks well. We cover the product with transparent acrylic varnish in several layers, giving each layer a certain amount of time to dry.

Photo ideas for decoupage furniture


Many people are accustomed to perceiving furniture as something permanent and not subject to change... Pieces of furniture, as a rule, are bought rarely and expected to be used for a long time. And this is justified: furniture is not cheap, this part of the interior is quite heavy and it is simply difficult to perform any manipulations with it. What to do if there are no new funds for purchase, but you really want to update the situation? You can try to use skillful hands and decorate old furniture using decoupage.
A little about the history of decoupage
The French word “decoupage” is translated into Russian as “cutting”. The decoupage technique entered our lives most fully in the 20th century, but the origins of this decorative creativity go back to the distant 12th century, not of French history, but of China. In this country, the Chinese poor decorated their homes with carved fragments.
Mentions of decorating furniture with cut-out paper pictures can be found in historical documents in Germany and Poland. They date back to the 15th century.

The highest point of decoupage creativity was celebrated in Europe in the 17th century. It was at this time that furniture imported from China and Japan with beautiful inlays became popular. But such furniture was unaffordable for many who wanted to purchase it, and such items were brought in in limited quantities.
This is where mahogany specialists from Venice showed their ingenuity and a little cunning. They simply cut out oriental motifs from paper and pasted them onto furniture surfaces, covering them with multi-layers of varnish. Cabinet makers had to apply 30-40 layers of varnish to achieve an analogy with the one imported from eastern countries furniture.
Local Venetian craftsmen valued their “masterpieces” much cheaper, which is why they were sold more readily.

Following furniture, similar imitation pictures began to be glued to the walls and ceilings of homes. Basically, this was done by people of low income, trying to follow fashion in the interiors of wealthy people.
Gradually, decoupage began to win the hearts of women more and turned into a means of decorating various women's objects and gizmos: fans, screens, boxes.

Techniques and materials have changed over time, but the most important thing remains - decorating something through the skillful use of decoupage principles.
Today, the decoupage technique is an integral part of styles such as.

Decoupage techniques
There are five main types of decoupage:
- Direct (the image is glued to the outside of the thing or object being decorated).
- Reverse (used to decorate transparent glass surfaces, in this case the picture is glued with the front side to the back side of the glass object).
- Volumetric (some of the decorative elements are deliberately made higher than all the others; for this, many layers of decoupage fragments or special modeling masses are used).
- Smoky (this type of decoupage is to imitate artistic painting, the border between the image and the surface is almost invisible, a smoky halo appears around the picture).
- Decopatch (the entire surface of the object is covered with paper pieces of different textured materials - napkins, corrugated paper, sheet paper, etc.)
The choice of decoupage technique depends on the decorator’s idea and the style of design of the entire room into which decoupaged items will be “introduced.”

Materials for decoupage
No decoupage required large quantity materials.
Having paper pictures and suitable glue, you can get a wonderful decorative element. There is also a small nuance - to give individuality and nobility to products decorated using the decoupage technique, additional materials may be needed.

Application of paper
Favorite pictures from postcards, colorful magazines, labels and even wallpaper - all this can become an object that is pasted during decoupage. Calendars, newspaper notes, wrapping in the skillful hands of decorators they can find their second life as a decorative element.

Helper napkins
The main materials that are affordable in price, quality, and variety are paper napkins. You can use regular three-layer napkins and small four-layer paper handkerchiefs. These napkins are sold both in hardware supermarkets and in specialized handicraft shops. When purchasing napkins from “craft supplies”, you can buy them individually, choosing the only one that you need according to your creative plan.

Cards for decoupage
There are also special glossy cards with drawings on sale - thematic sheets of paper different sizes, which are grouped into so-called decoupage cards. These “helpers” for needlewomen can be produced in a double-sided version (for reverse decoupage) and in several identical copies (to add volume).
The advantages of decoupage cards are that they practically do not tear when wet, and almost do not change size when gluing. If napkins are glued mainly to a light surface, then fragments of decoupage cards can also be used on dark surfaces. The cards are very elastic and resistant to friction.

Textured paper
You can use rice paper to decoupage large and glass surfaces. It is easy to use and even a novice needlewoman can handle it. The only requirement when working with it is not to cut out fragments, but to tear them out. The paper is fibrous and lays easily on the surface. The raw material for its production is rice straw.
Rice paper napkins will give the product an original and unusual look, because they completely repeat the shape of the object (due to the fibrous structure).
There is also mulberry and banana paper, which are also loved by decoupage artists. Rough and loose, such paper includes various inclusions; it is used in background and textured coatings.

Glue
To make the decoupage product look neat and high quality, you need to purchase water-based glue. Of course, it is best to use specially developed glue, but in the absence of one, you can use regular PVA.

Surface coating materials
For painting and aging surfaces use:
- acrylic and oil paints;
- pigments;
- metallized pastes;
- bitumen.
To make the coating look like gold plated gold leaf and metallized foil are used.
The materials used by decoupage masters are not limited to those listed above; in fact, there are much more of them.

DIY furniture decoupage with napkins: step-by-step instructions
There is room for your creativity and bringing your decoupage ideas to life - furniture. To begin with, you can practice on something inexpensive - highchair, stool, coffee table.
If you are planning to change the appearance of your furniture using decoupage, use these step-by-step instructions:
- We create in our heads or on a sheet of paper a project of what we want to get as a result of decoupage.
- We purchase necessary materials, suitable for the design (decoupage cards, napkins, glue, varnish)
- Sand the surface of the furniture using fine sandpaper.
- We fill the pores of the furniture (if any) with special products.
- We cut out a piece of napkin that we will glue to the furniture.
- Having cut out the desired fragment, we separate the “extra” layers, leaving only the outer one with the pattern.
- Coat the fragment with glue using a small brush. For convenience, you can put it on polyethylene or a stationery file.
- Carefully, so as not to damage the cut piece of napkin, transfer it to the prepared surface of the furniture (it is very convenient to do this using a file) and stroke it with a brush, trying to “drive out” all the bubbles and smooth out all the creases.
- After waiting for the fragment to dry (don’t rush!!!), we cover the glued picture with a transparent water-based varnish.

It is advisable to repeat the last step at least three to four times, and the time between varnish coatings should be sufficient for the previous layer to dry (at least one hour).
DIY decoupage of old furniture: video
Decoupage – great option to transform old but dear furniture. What if the furniture is outdated and you don’t have the funds to purchase new ones? What to do if a piece of furniture is very dear to you and represents some important piece of your life?
You can try to change the appearance of old furniture using decoupage.
Today, new techniques have appeared in needlework that can play an important role in working on furniture. For example, do-it-yourself furniture decoupage, which is well known to many craftswomen, can be useful when you need to restore an old piece of furniture. It often happens that a chest of drawers or a cabinet performs its functions perfectly, but time has worn it out so much that its appearance spoils the entire interior of the house.
The decoupage technique is different in that it allows you to create very beautiful things and decorate existing ones, but does not require serious skills from the master. This perfect solution For creative personalities who do not like to spend a lot of time on technical execution. Drawings in in this case will already be ready, and the master’s task is only to work on their correct distribution on the surface and fixing them with glue and varnish.
To decoupage furniture, ordinary napkins, old cards, and wallpaper scraps are often used.
To decoupage furniture with your own hands, use various materials, these can be ordinary napkins, and old cards, and even wallpaper scraps. Recently, fabrics are also often used. Beautiful colors and pleasant fabric texture make it possible to transform old furniture into true masterpieces.
Craftsmen who are not averse to spending their leisure time in creative work, you might like this idea of decorating old furniture. The technique of decoupaging furniture with your own hands using fabric and other materials in this case will be one of best options, since this allows you to add originality to the interior, but at the same time, there is nothing complicated in the work process.

It should be noted that in furniture production The decoupage technique has been used since the 17th century. At this time, cabinetmakers who made expensive furniture began to use a rather cunning move. They simply cut out certain oriental decorations from paper, glued them onto their products and covered everything with several layers of varnish. It was difficult to distinguish such furniture from Japanese or Chinese originals without special knowledge. Many people won this way. It was very difficult to buy real oriental furniture, since it was imported in limited quantities and was very expensive. Similar pieces of furniture made using the decoupage technique could be purchased without any problems at a more reasonable price. Over time, glued elements began to be used not only in the production of furniture, but also for room decoration. Nowadays, both furniture and decorative elements, as well as batteries, heated towel rails, etc.

This unusual technique allows you to create unique pieces of kitchen and other furniture that reflect your individuality and power of imagination
For some time they forgot about such a technique. But now it is used very widely. It is used not only by needlewomen, but also professional designers when working on projects in style French country and shabby chic.
To decorate furniture in the decoupage style with your own hands, you can use various techniques. They differ in appearance and complexity of work. Most often for working with smooth surfaces use napkins or special cards.

Most often, napkins or special cards are used to work with smooth surfaces.
All this allows you to give old furniture an extremely unusual and original look. But the imagination of the craftsmen does not stop there, as many try to use colored fabrics. An interesting option There will be decoupage of furniture with wallpaper, made with your own hands. You can use the remaining pieces from the roll. This is a guarantee that the furnishings of the room will be fully suitable for renovation.

This decoupage looks very interesting, but the work will be quite painstaking, since the surface should look good on both sides
The decoupage technique itself may differ slightly. In total, masters use 5 basic technical solutions. The most popular is direct decoupage, in which any type of paper or fabric is used, simply glued to the prepared surface and covered with varnish.
Important! This technique is well suited if you need to decorate a cabinet door or countertop.
The reverse technique is exclusively suitable for glass processing. It is used to work with decorative vases either with glass doors. This decoupage looks very interesting, but the work will be quite painstaking, since the surface must look good on both sides.
The smoky processing technique makes it possible to obtain a piece of furniture or decoration that will imitate the real thing. artistic painting
Volumetric decoupage requires a lot of material to work with. Here, several layers of paper or fabric are used, but sometimes they are replaced with special modeling compounds. The result is a rather original work, but this decoupage is only suitable for vertical surfaces.
Volumetric decoupage requires a lot of material to work with.
The smoky processing technique makes it possible to obtain a piece of furniture or decoration that will imitate real artistic painting. The border between the sticker and the surface itself will be invisible, since the master’s task will be to create a smoky transition between the two areas.
Another technique for decoupaging old furniture with your own hands is decopatch. This is work with numerous pieces of multi-colored materials that are glued in a certain order. Sometimes this technique is used to cover the entire product. For furniture, this approach is not particularly suitable, however, when we're talking about O French Provence, you can decorate a chest of drawers or a closet with deco patch.
Decopatch is working with numerous pieces of multi-colored materials that are glued in a certain order.
How to choose material for decoupage furniture?
To begin with, it is very important to draw up a work plan. After this, it will be easier for the master to decide on the material. The choice can be overwhelming. Most often, craftsmen use special paper or cards. They are sold in specialized stores. The choice of colors is simply huge. It allows you to choose the most suitable for processing suitable option. For example, for decoupage kitchen furniture With your own hands, you can take paper with fruit or beautiful dishes, and for a chest of drawers in your office, cards or colored cards with stamps are perfect.
If there is no specialized store nearby, you can purchase simple multi-layer napkins. They are available in various color options and can be very beautiful. Upper layer napkins are ideal for tidying up old furniture.
Textured paper napkins can give old furniture an extremely unusual look.
If possible, you can also purchase special textured paper. It is well suited for processing cabinet doors, chests of drawers or any other vertical surface. This type of paper is made from rice straw. It is very convenient to use, as it is easy to glue and fits perfectly on the surface. Textured paper napkins can give old furniture an extremely unusual look. In addition to rice paper, craftsmen also use mulberry and banana paper.
Decorating an old drawer in Provence style will fit perfectly into the kitchen interior
The choice of materials for do-it-yourself furniture decoupage is simply huge.. That is, any master’s idea can be brought to life using one or more options.
We must also not forget about additional materials. To work using the decoupage technique, you will need PVA glue or its substitute, which can be purchased at a specialized store. You also need to take a good varnish for finishing surfaces.
To age furniture you will need: acrylic paints, pigments, bitumen and metallized paste
If a master is going to use the artificial aging technique, which is very popular these days, in his work, he should purchase acrylic paints, pigments, bitumen and metallized paste. Gilding also goes well with decoupage, for which special foil is used.
Rules for working in the decoupage technique
As for how to make furniture decoupage with your own hands, it is worth noting that the main technical principles will be the same for each type. Beginning masters should first practice unnecessary things. It could be old chair little boy or simple board. From your own experience it will be much easier to understand all the nuances of working in the decoupage technique. For the first time, it is worth taking the most simple options material (napkins or paper). Even a regular old newspaper will do for training.


Old furniture is not a reason to send it to a landfill. Moreover, having on hand a little paint, glue, varnish, beautiful illustrations and, of course, imagination, you can do a simple decoupage of old furniture with your own hands, turning it into an original, unique exclusive. Moreover, you can decorate almost any surface with the help of decoupage (this is both, and, and even), you can decorate a room, or even the entire apartment, in your own special style.
The word "decoupage" has French roots and means in translation - “to cut out”. And speaking at all in simple language, this procedure can be called varnished applique, although acrylic paints are also used. With the help of decoupage, old furniture literally gets a second life. This technique turns old thing into a real masterpiece. See the example in the video:
Master class on decoupage furniture with napkins using a simple technique
We select materials for work
- an object for decoration - a bedside table, and in general anything you want;
- finishing material - three-layer napkins;
- scissors;
- sandpaper may come in handy (when processing a wooden surface);
- a brush 1-2 cm wide for applying glue. The brush is slightly wider for applying varnish;
- decoupage glue;
- acrylic varnish (and if you take colorless acrylic paint, then you won’t even need varnish). If the surface will come into contact with water, it is better to use wood varnish or yacht varnish;
- acrylic paints.
- In order to decoupage old furniture with napkins, you need to carefully cut out a design that will serve as an applique. Some people cut off the pattern along the contour for an aging effect.
- Apply glue to the prepared surface at the location of the application. Glue and carefully level the pattern so that there are no bubbles. Be sure to let it dry. You can additionally decorate it with acrylic paint to add expressiveness to the design or greater individuality. It is also important to use paint to achieve the effect of merging the pattern with the surface.
- Polish the surface. You will need to apply 2-3 layers of varnish. The decor item must be dried between layers.

We try to decorate with unnecessary wallpaper with our own hands

Old wallpaper scraps, combined with glue and imagination, can turn ordinary, old, ugly furniture into an original, unique piece of furniture.
You will need:- wallpaper glue;
- brushes, roller;
- large, sharp scissors and another small one;
- ruler;
- sandpaper;
- decoupage glue;
- acrylic paints;
- acrylic lacquer;
- wallpaper;
- object for decoration.
Step-by-step master class on working with wallpaper
The surface of the furniture must be cleaned of dirt. Sand it with sandpaper. Especially if there are scratches or cracks.
If there are dark spots on the surface that will be visible through the wallpaper, then you should paint it with acrylic paints.
To decoupage old unnecessary furniture with wallpaper, you can use the entire surface by gluing a single piece of wallpaper or several, making up the intended pattern. Even individual cutouts from the drawing pasted onto the surface look original. This technique is almost no different from the traditional technique of working with napkins.
Attention to the video:
Trying our hand at creating a vintage style

By definition, vintage is a winemaking term that literally means “aged wine.” From winemaking the term has become fashionable and is understood as original item previous generation. Things that are older than 30 years are already vintage. Age is not yet a basis for classifying an item as vintage. Vintage items should be original pieces of art, as in the photo above, and fully express fashion trends of its time. To decoupage furniture in vintage style and give an aging effect, you can use craquelure varnish. As this varnish dries, it forms cracks of various textures - this depends on the thickness of the applied layer. Then rubbed into the cracks Oil paint, it remains only in the recesses. Thanks to decoupage of furniture in vintage style, it acquires a noble antique look.
Exquisite decor in Provence style

Provence is one of the most popular techniques because it is associated not just with the village, but also with the sea, sun, smell flowering plants, that is, with a wonderful holiday in the lap of nature. All this affected the aesthetics: sun-bleached colors, like in a photograph, many living and dried plants, naturalness, simplicity, uncomplicated lines. Decoupage of furniture elements in the Provence style must include one or more mandatory colors: white, cream, beige, pale lemon, terracotta, burnt orange, the color of sunflower petals, blue, pale green, sea wave and lavender.
Furniture restoration using decoupage techniques

The technique of restoring furniture with decoupage is not much different from working on other surfaces. Let's look at the basic tips.
If you want to restore a cabinet using decoupage, as in the photo, a cabinet or, then you will need acrylic paints, decoupage glue or pva, napkins, acrylic varnish. If you will be doing decoupage on surfaces that may often come into contact with water, it is better to use regular wood varnish. It’s even better to use yacht varnish - it most reliably protects the surface from water.
We restore polished furniture in a couple of evenings
In order to decoupage polished furniture, the first thing you need to do is wash it with dishwashing detergent that breaks down grease. All smooth surfaces (such as laminate) should be washed with a degreaser. Acrylic paint does not adhere very well to polishing, but, in principle, polished furniture can also be painted with acrylic paint. Subsequently, simply cover it with several layers of acrylic varnish, and better than varnish for wood.

- PVA glue
- brush for applying it,
- emery,
- scissors,
- acrylic lacquer,
- decorative napkins with images of vegetables, fruits or dishes. You can also print any image you like on a printer.
A simple and detailed MK for beginners
- We will need to sand down everything you decide to decorate.
- After this, it is recommended to coat the surface with a primer. If you are going to decoupage kitchen furniture and glass, it must be degreased. Well suited for these purposes detergent for dishes.
- Using miniature scissors, cut out the details of the design. Most small parts It’s better not to cut it out, but to finish painting it after gluing it using acrylic.
- To avoid accidentally tearing the napkin, after it is applied to the surface to be pasted, it should be soaked in glue. For these purposes, you can use a medium-hard brush. It will also help smooth out folds along the edges and in the center of the cut-out image.
- When the glue is completely dry, some details can be completed with acrylic paints.
- When the paint has dried, the entire drawing must be covered with a layer of varnish. Varnish is necessary in order to protect the image from higher level humidity, which is almost always observed in the kitchen. The varnish, whether matte or glossy, is applied in several layers.
Decorating furniture elements with fabric

In order to decoupage furniture with fabric, we prepare the materials the same as for standard technology working with napkins.
- We cover the object of decoration with two layers of PVA glue using a thick brush or roller.
- Then we cut the fabric into pieces of the desired sizes and grease it with PVA glue.
- Let dry for 40 minutes. After spraying with spray, we glue the fabric to the bedside table using the patchwork technique or as your imagination dictates.
- When the fabric sticks well to the cabinet, it can be varnished.
That's how easy and simple everything turns out. More details in the video:
We create stylish children's furniture for your baby

Decoupage of children's furniture will never go unnoticed. An ordinary children's cabinet can be turned into a work of art. And if you make it with your favorite cartoon characters that the child really likes, then you can be proud of such a thing, since it will be a child’s favorite thing. As an example, take a look at .
Read our article about how you can not only decorate furniture, but also.
How nice it is to create something with your own hands! And it’s doubly pleasant when, with the help of creativity, you can bring old things back to life, use them again to the fullest, without being embarrassed by their obsolescence appearance. Craftswomen all over the world know a lot of techniques that allow you to beautifully decorate different types products we use in everyday life. Do-it-yourself decoupage of furniture with napkins is far from new way updating cabinets, chairs and much more, but now it is at the peak of popularity. How to turn old furniture into an exquisite piece?
Furniture is now simply an element of home furnishings. However, just a few decades ago, furniture was treated much better - it was taken care of and valued, since it was difficult to get something interesting and beautiful. And what were the chests of drawers made by the hands of my great-grandfather worth! They were passed on as real family heirlooms and preserved for children and grandchildren. Now, in most cases, such products are sent to a landfill, with rare exceptions they go to live in the country.

But what if now you don’t make hasty decisions, don’t spend money, but, after spending a little of your time, restore some old wardrobe? Especially in modern conditions It’s not difficult to get materials that can be used for this - craft stores can be found on every corner, and there are often some suitable supplies and tools at home. It is recommended to restore old furniture for the following purposes:
- receive an exclusive product;
- update the interior by decorating the furniture to a certain style;
- realize creative abilities;
- there is no opportunity to buy new products.


One of the most popular techniques for bringing old furniture back to life is decoupage.. This is a fairly simple method, having studied and mastered it, you can turn any element of the decor into something original, unique, and striking in its beauty.

What you need to know about decoupage?
Decoupage is one of the options decorative design surfaces, which is based on the use of paper clippings from newspapers, wallpaper, postcards, etc. Elements made from other materials can also be used - for example, fabric, leather. The technique is very simple - to describe it briefly, all the work consists of gluing beautifully arranged patterns onto the surface and covering them with varnish in compliance with certain rules.
The history of decoupage has its roots in China, despite the fact that the technique has a purely French name, which can be translated into Russian as “cutting”. The first mention of this method of decoration dates back to the 12th century, but it reached particular popularity only in the 17th century in Europe - furniture with very beautiful ornaments was brought here from China, but it was expensive and not everyone could afford it. That is why Venetian woodworkers came up with the idea of gluing patterns cut out of paper onto their products. By covering them with a huge amount of varnish, the craftsmen ensured that the furniture resembled that very expensive Chinese one. But such products were much cheaper and therefore sold like hot cakes.

On a note! At the dawn of the appearance of decoupage in China, only the poor decorated their homes with cut out patterns and fragments, but now products using the decoupage technique can also be found in richly furnished houses.
Over time, decoupage began to be used to decorate walls and ceilings - as a rule, this was done by people with a small income, but who wanted to keep up with fashion. Then rich ladies also became interested in the technique and decorated boxes and fans with cutouts.
Table. Decoupage techniques.
| Equipment, photo | Short description |
|---|---|
 | In this case, the selected pattern is simply glued to outside decorated surface. Next, the picture is varnished, sanded and covered again with a layer of varnish. Can be decorated with additional paint. |
 | With this type of technique, some elements are glued so as to be higher than the rest relative to the horizontal. Usually multi-layered patterns are used or special compounds for modeling. |
 | The technique is applicable when decorating transparent coatings (for example, glass) - the design is glued with reverse side front surface towards the glass. |
 | The surface to be designed is completely covered with all kinds of different textured materials. Thus, a solid background is formed. |
 | The technique imitates artistic painting, when the line between the surface itself and the pattern is almost invisible due to an artificially created smoky halo. |

On a note! When choosing a decoupage technique, you should focus on the general style of the room.
Before you start decorating old furniture, you should familiarize yourself with the effects that can be used in decoupage:
- gilding(using gold, silver paint, the use of a sheet analogue of gold leaf);
- craquelure(imitation of cracks using a varnish of a special composition and a certain brush stroke technique);
- toning(enhanced color effect, pastel and dry brush are usually used);
- aging(creating abrasions that will allow the furniture to look expensive, elegant - creating the illusion rich history products. The surface is treated with wax, painted, then rubbed with sandpaper);
- patination(Creation dark spots natural color, appearing supposedly from the touch of hands).
 Perpetual calendar. Blank - prefabricated plywood, techniques - decoupage, aging, patination
 You can decorate any surface using decoupage. It can be wood, cardboard, glass, ceramics, metal, plastic, etc. But most often the method is used to decorate wooden products.

What tools and materials will be required?
Decoupage of furniture with napkins involves the use of a number of tools, as well as the acquisition necessary materials. The list of the latter includes:
- paper napkins. In this case, the choice can be made in favor of ordinary dining rooms or you can buy ones specially designed for decoupage. Paper handkerchiefs will also work;
- pore filler– necessary for sealing cracks and crevices on old furniture, helps make the surface perfectly smooth;
- sandpaper– for grinding;
- decoupage glue or PVA(it’s better to use a special one, PVA leaves marks);
- acrylic varnish for wood, matte or glossy – optional;
- appliqués– images used for this technique.

The list of tools is small and includes large and small scissors, a medium-hard glue brush. May need wooden block for sandpaper. If there Grinder, then you shouldn’t give it up.

Secrets of technology
Before starting work, it is worth familiarizing yourself with several secrets of performing decoupage. They will help make the work interesting and unique.
- To achieve expressiveness of the pattern, it is recommended to cover its surface with wax, paint and only after that - varnish with a glossy effect.
- To create scuffs and decorate furniture in a vintage style, you will have to use sandpaper.
- The craquelure varnish will develop cracks only after drying.
- Artificial gilding must be covered with a special film.
- To get a three-dimensional pattern, you should proceed as follows: the same pattern is cut out of the material several times, then glued together layer by layer with silicone glue. It is this adhesive composition that will give the picture a three-dimensional appearance.
- Before starting work, varnished or painted furniture is degreased.
- Varnish can be used to prime the surface.

 Decoupage - which finishing varnish to choose?
 Master class on decoupage of a chest of drawers with napkins
Let's look at an example of how to update a lost view old chest of drawers using decoupage technique.
Step 1. To do this, you will need to prepare all the necessary materials - a ruler, scissors, varnish, napkins, sandpaper, primer. Anything that could interfere with work is removed from the surface of the chest of drawers. Cracks are sealed with foam filler. You can use putty to fill deep flaws. After this treatment, the surface should dry for 3-5 hours.

Step 2. Small sizes a block (such that it is comfortable to hold in your hand) is covered with sandpaper. Next, the surface of the chest of drawers is sanded in a circular motion - all the bumps and irregularities are ground down. The resulting dust is swept away.

Step 3. The surface is cleaned with acetone and covered with a primer layer of white paint. Then it is sanded again with sandpaper to increase adhesion.

Step 4. An iron is used to smooth out wrinkles on napkins. The napkins are ironed until smooth. If the material is multi-layered, then it will have to be divided into separate layers.

Step 5. The napkins are laid out on the surface of the chest of drawers as they will be glued. If necessary, they can be trimmed, the main thing is to do this so that the pattern matches both the trim and the whole napkin.


Step 6. The napkins are glued to the surface one at a time. Then they are varnished in stages - it is important not to leave uncoated areas. Sometimes, if the paper is very thin (as in this case), you don’t need to use glue - you can immediately cover the laid out napkins with varnish, due to which they will stick to the surface.


Step 7 The edging is being done. To do this, napkins are cut into small strips, which are also coated with varnish and fixed on the edge. Due to the small working surface, varnish is first applied to the edge itself, then a napkin is applied to it, and the top is again coated with varnish applied with a thin brush.


Step 8 After the varnish has dried, the hanging napkin is removed from the edge. A piece of sandpaper is used for this. It is applied perpendicular to the edge along the edge - the napkin easily comes off after this treatment. The edge turns out smooth.


Step 9 The final stages are another grinding of the surface, treating it with acetone and applying another layer of varnish.

 Decoupage of a chest of drawers with napkins - before and after photos
 Decoupage stool
Using decoupage, you can update not only a closet or chest of drawers, but also an old chair or stool, as in this master class.
Step 1. For ease of use, the seat of the stool can be removed from the legs.

Step 2. The process of sanding the surface with sandpaper begins. If you don't have it at hand grinder, then a piece of coarse sandpaper is screwed onto the block. Sanding is done very carefully over the entire surface. There should be no irregularities left.


Step 3. The surface can be wiped well with a cloth soaked in acetone. This will degrease the surface and remove dust resulting from sanding.

Step 4. The surface is primed with acrylic construction paint using a brush. The layers are applied evenly. You can apply up to 3-4 layers of paint. You need to use white color.


Step 5. The painted surface is sanded again with sandpaper. 
Step 7 The napkin is covered with a layer of varnish. It is necessary to carefully coat the edges and corners. During the process of applying varnish, all irregularities on the napkin are smoothed out. The varnish is applied with a brush. The napkin is visually divided into 4 parts, each of which is coated separately. First, the varnish is applied along the inner edges of the visual square, then diagonally to the corner of the stool, then the remaining areas are coated. Other visual squares of the napkin are also processed.
Removing overhanging excess napkinStep 9 The varnish layer dries well.

Step 10 After the varnish has dried, the surface is sanded again with sandpaper. At this stage it is important to perform the procedure very carefully.

Step 11 To decorate the sides you will need brown gouache and a little varnish. They are mixed together in small quantities. The resulting composition is, as it were, driven into the sides with a brush. The actions are carried out with an almost dry brush.
Video - Decoupage. Glue on a large napkin
This is how you can give new life old furniture. And it will last for many more decades. And most importantly, no one can boast of exactly the same design; decoupage products are truly exclusive!
5 /5 (4 )