How to build a temporary shed with your own hands. Do-it-yourself construction of a hozblok: personal experience. How to make a roof extension to the house
Read also
The barn in the country is one of the most important buildings, often it is one of the first to be erected. It may have various purposes. At the first stages of the construction of the dacha, it serves as a shelter from the weather, and later as a place to store inventory. A do-it-yourself shed for a summer residence can be made of various designs and from different materials. However, the most simple and inexpensive to build is a wooden shed. How to build it and how to sheathe it will be described in this material.
Optimal barn dimensions
A barn in the country should be easy to build and easy to use. The easiest to build is a wooden shed, for this reason, most summer residents prefer this type. Simplicity of a design will provide its fast construction and the minimum investment of means. A handy tool shed is one that has everything close at hand, so it's important to plan it properly.

Fig.1.
The scheme of the barn is highly dependent on the purpose of its use. Depending on what and in what quantity it will be stored in it, the overall dimensions of the barn, as well as the presence of shelves and the layout of storage areas, depend.

Fig.3.

Fig.4.

Fig.5.
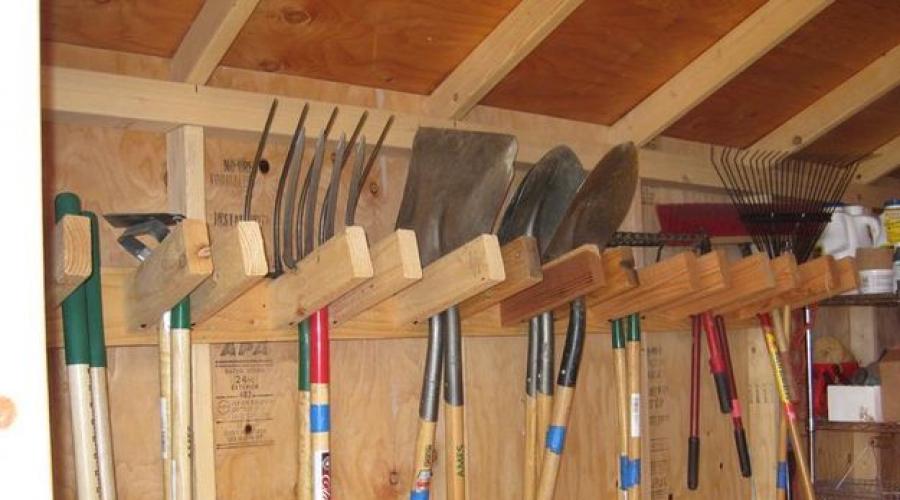
- garden tools(rakes, shovels, pitchforks, etc.). To store this tool, a building measuring 1.5x1.5 m is enough. You can additionally install hooks or a special stand for storing secateurs, hacksaws, etc.

Fig.6.

Fig.7.

Fig.8.
- Garden tools and accessories(fertilizer, paint, materials for greenhouses and greenhouses, etc.). For these purposes, you will need a utility block with dimensions of 1.5x2 m. It will have enough space for wide shelves where additional materials will be stored.

Fig.9.

Fig.10.

Fig.11.
- Garden tools and park equipment(lawn mower, trimmer, etc.). To store the entire set of country equipment, you need a barn 1.5 wide and 2.5 - 3 m long.

Fig.13.

Fig.14.
Barn construction scheme
The most versatile building size: width 1.5 m, length 2.5 - 3 m. It will be quite spacious, you can install several rows of shelves in it and there will be room for a lawn mower and other overall tools. Structurally, the utility block will be a rectangular building with a pitched roof.

Fig.15.

Fig.16.

Fig.17.
The easiest way to build a barn using frame technology. The frame is made of wooden blocks, and the facade can be sheathed with any material, from lining to siding. The roof can also be covered with any material, most often a profiled sheet is used for these purposes.

Fig.18.

Fig.19.
For the construction of a barn, a beam with a cross section of 80x80 mm can be used. In this case, the number of racks indicated in the drawing is sufficient. With a smaller section of the board, the number of racks must be increased.

Fig.20.

Fig.21.
A board 40x100 mm can be used for overlapping. For the flooring of the profiled sheet, it is additionally necessary to make a crate from a board with a thickness of 20 - 25 mm.

Fig.22.
Foundation for the barn
Despite the ease of construction, the foundation for the barn is necessary. It is important to note two points. If you install a building without a foundation on the soil, then the base boards will rot very quickly, even if they are pre-treated with an antiseptic. If the soil is prone to heaving and the foundation is not deepened below the freezing level, then after the winter the structure will squint and lose its original appearance.
For a wooden shed made using frame technology, three types of foundations are well suited: block, pile and monolithic slab.
- block foundation- the easiest to assemble. The foundation of this type is made of concrete blocks. Blocks are installed on a sand cushion with a step of 1 - 1.5 m around the perimeter. It is good to use such a foundation on soils with a low tendency to heaving. Otherwise, after the winter, the foundation blocks may settle, which will lead to the curvature of the building.

Fig.23.

Fig.24.

Fig.25.
- pile foundation devoid of the disadvantages of block and can be used on any soil. Piles can be used any. One of the simplest types of piles is metal pipes that are buried 1.5 m into the ground. For a wooden shed measuring 1.5 x 3 m, 6 to 8 piles are enough, depending on the thickness of the beam section at the base.

Fig.26.

Fig.27.

Fig.28.
- Monolithic slab the most versatile option. It is made from a cement-sand mortar laid on a sand cushion. For a country shed, a slab thickness of 10 cm is enough, and a sand cushion thickness of 15-20 cm. To increase the strength of the slab, reinforcement is used. A monolithic slab is easy to manufacture without special equipment in 1 day. The plate has its advantages, there is no need for flooring. The floor will be the foundation.

Fig.29.

Fig.30.
We build a barn using frame technology
The construction of a barn using frame technology is quite simple. Start by assembling the floor. To do this, install and fasten 4 bars together. The bars are connected to each other in half a tree. Fix the bars with nails or screws. If the building has a width of no more than 1.5 m, then additional cross members are not required. If the width is greater, then additional crossbars must be installed, otherwise the floor will play.

Fig.31.
Next, install vertical racks. In order for the racks to stand evenly, they are leveled and temporarily fixed to the base with scraps of boards. Racks are attached to the base with metal corners. On the installed racks fix the bars on which the rafters will be installed.

Fig.32.
After all the vertical racks are assembled, install the horizontal crossbars. They are necessary to give the structure rigidity. All elements are fastened by means of structural metal corners with self-tapping screws. At the same stage, rafters are installed, window and door openings are formed.

Fig.33.
Thus, the frame of the barn is assembled. The final stage of construction is the roofing and wall cladding. It is important to consider that if the hozblok will be sheathed with siding or profiled sheet, then its walls must first be sewn up with OSB or plywood.
In a private household or in a summer cottage, a territory is always allocated for placing vegetable gardens, flower beds, beds, greenhouses and other areas for growing crops and ornamental plants. The cultivation of this farm requires a large amount of garden tools, as well as bulky equipment for field work. All these items need to be stored somewhere. It is inconvenient to place such equipment in a residential building. Therefore, the best option for storage would be an outbuilding.
Design features and purpose of the utility unit
In past decades, small outbuildings made of wood or metal were used to store garden tools. As a rule, these structures had a small area and looked more like a box with doors. Alternatively, all garden tools were kept in a shed.
Today, special attention is paid to the construction of outbuildings. Modern designs of hozblokov combine compactness, practicality, convenience and even beauty.
The design of the hozblok can be finished with modern materials, then it will have a neat and beautiful appearance.
Hozbloki have a wide range of applications, and in some cases are an indispensable structure for economic and domestic needs. Given the domestic needs of private households, there are several main areas for using household blocks:

On the Internet, you can find a lot of ready-made projects of utility blocks, combined with other necessary buildings.
For the effective use of every centimeter inside the hozblok, racks, shelves are made, hooks and loops are hung. In such a structure it is convenient to place a cellar.
If the roof of the outbuilding is equipped with a truss system, in which the distance from the floor beams to the ridge boards allows you to place any items, then this area is convenient to use for drying fruit or as an attic space.
Rational placement of shelves and racks will allow you to use the internal space of the hozblok to one hundred percent
Tips for choosing materials for the manufacture of all structural elements of the hozblok
Buildings for household needs are usually made of wood, metal, foam blocks or profiled sheets. These materials can be combined, which makes construction work more convenient and efficient. Despite the fact that such a structure does not exert a large load on the ground, it requires the installation of a solid foundation. Concrete pillars or screw piles are usually used as a capital foundation for utility blocks.
As a rule, such buildings have a frame structure. The cheapest way to make it is from wooden blocks. However, wood must be carefully treated with antifungal agents before use. Although this option is the most budgetary, it has a significant drawback, which is expressed in the fact that wooden buildings are extremely unstable to open fire. In this regard, many owners of private households prefer a metal frame.
To implement a metal structure project, much more money will be required, as well as skills in working with a welding machine. This building material is much stronger, but it also has its drawbacks. The main disadvantage of metal structures is that they are susceptible to metal corrosion. To protect such a frame from rust, it is necessary to cover it with an anti-corrosion compound. As an additional protection, you can paint the entire surface of the structure.
Wooden bars are the cheapest building material, but they must be treated with antiseptic impregnations.
As a covering material for frame structures, use:
- Profiled steel sheets. This material has many protective layers that prolong the service life by preventing corrosion processes. The thickness, shape and wave height of corrugated sheets are adapted to be placed as walls and roofs of the building. It should be noted that improper installation of the profiled material will lead to corrosion. To avoid this unpleasant circumstance, it is necessary to use special self-tapping screws with a rubber gasket, which tightly press the material and at the same time form a waterproofing layer.
Depending on the purpose, conditions and region of application, it is possible to choose a corrugated board with the necessary characteristics of a protective coating.
- Bituminous tiles. However, this coating will require the installation of insulation, vapor barrier layers, as well as an additional OSB base. They are easily mounted on the roof surface, this does not require special knowledge and additional assistance. Bituminous shingles are relatively lightweight, so a complex truss system with a high bearing capacity is not required as a base.
Bituminous tiles are made from modern composite materials, so it has high strength and long service life.
- Slate. This material will not look as aesthetically pleasing as shingles or corrugated board. Slate is a rather fragile material, and therefore a large hail or a tree branch that has fallen on the roof can cause cracks or through holes in the coating. Given these circumstances, it is advisable to use slate only as a last resort or as a temporary cover.
If foam blocks are chosen as the building material for the walls of the outbuilding, then for the construction of this structure it is necessary to have bricklaying skills. This material is often used for such work, since the block is much larger than a brick, so it is possible to build a building of the desired height faster.
The foam block is much larger than the brick in size, so you can build a utility block from this material much faster
The inconvenience of foam blocks lies in their higher price, as well as in transportation conditions. To deliver the purchased material, you will need to attract trucks and a crane.
If it is planned to place a shower cabin in the hozblok, then care must be taken to purchase moisture-resistant materials. This will require moisture-resistant drywall, as well as heaters that do not collapse under such conditions. The interior decoration of this room can be made of ceramic tiles, plastic panels or noble woods, such as oak, aspen or larch.
Design of hozblok structures
The design of the utility block will play an important role in the future, eliminating the incorrect calculation of materials and unforeseen costs. In the case of a limited budget, the most profitable option would be the construction of a frame structure made of wood. Such structures do not require laying deep foundations. On unstable soil types, it is enough to make a columnar foundation or a pile-screw foundation.
The project of the utility block must contain a drawing indicating all the dimensions of the building, its layout and a detailed image of all nodes
To design a future outbuilding, you need to choose the right location for it. It is best to place such a structure on a small hill. This will protect the wooden frame and the interior from excessive moisture accumulated after the snow melts or heavy rains. If there is no area with a hill, then it can be created artificially. For this, fragments of bricks are poured, which are covered with earth. If several such layers are made, they will serve as an effective drainage system. To protect the inside of the hozblok floor from the settlement of rodents, along with fragments of bricks, glass fragments can be filled up, which will become a reliable barrier for small animals.
The location of the future building depends on the purpose of its use. If it is planned to attach a poultry house, a shower cabin or a toilet to the economic block, then the minimum distance of its location from the residential building will be 12 m, and from the border of the neighbors' territory - 4 m. The best option for combining such economic zones is to arrange them in the following order: shower compartment , hozblok, toilet. The room for household purposes in this case should be in the middle, since the adjacent buildings will be equipped with water pipes and a cesspool. If the area of the site does not allow the placement of several buildings for household needs, then the utility block can be built with several levels. In this case, the ground floor will be occupied by a cellar, and on the first floor there will be an outbuilding with a summer kitchen and a veranda.
The outbuilding, being a small structure, does not take up much space on the site. However, a well-designed design will allow it to be rationally placed on the territory of the household, thereby saving precious meters on the site. Sometimes it is convenient to build a corner structure of a utility block, and if it combines a shower room and a toilet, then you can achieve the maximum location of useful household areas in a small area.
The corner hozblok is conveniently placed on the site and saves space
At the stage of designing the design of the utility block, it is necessary to take into account the methods of ventilation and lighting of the premises. To do this, it is enough to make a couple of small windows inside. It is also necessary to take into account the fact that the outbuilding should be easy to use. In the design drawings and diagrams, it is necessary to provide entrance doors of such a width that a garden wheelbarrow can freely pass through them.
A large roomy hozblok will take up less space if you make it a corner
Do-it-yourself step-by-step instructions for making a hozblok on the site
The construction of the frame structure of the outbuilding is carried out in several stages, which are conventionally divided into:
- Preparation of the foundation for future construction. This stage consists in the study of the soil in order to select the correct type of foundation, as well as carrying out earthworks and pouring the concrete foundation. If the hozblok combines a toilet and a shower room, then you will need to dig a pit and make trenches for sewer pipes.
- Frame construction. At this stage, the upper and lower piping, support posts and cross beams will be designed.
- Floor covering installation. This stage includes strengthening the log and laying the subfloor.
- Construction of the walls of the building, external and internal coating, as well as the installation of insulation, waterproofing and vapor barrier layers.
- Roof manufacturing. At this stage, floor beams are installed and a truss system is made.
- Roof installation. These works include fixing the roofing material using modern technologies.
The list of tools required for the manufacture of the hozblok
When erecting the frame structure of the utility block, the following tools and construction equipment will be required:
- Bayonet and shovel.
- Garden drill.
- Wheelbarrow.
- Tanks for concrete mix, water and construction debris.
- Yardstick.
- Building level.
- Big square.
- Plumb.
- Marker or pencil.
- Hacksaw.
- Cord.
- Plane.
- Sander or sandpaper.
- Big hammer.
- Electric drill.
- Concrete mixer machine.
- Rammer.
- Screwdriver.
- Metal scissors.
- Sharp knife.
- Chisel.
- Clamps.
- Calculator.
Foundation manufacturing
Before starting earthworks, it is necessary to investigate the properties and qualities of the soil. If this is not done, then you can choose the wrong type of foundation. In this case, the building may sag unevenly, deform, move during winter fluctuations in the ground level, or collapse.
In order to investigate the type of soil on the site, it is enough to drill a control well and examine the soil sample
To carry out this check, it is necessary to involve specialists. For the sample, samples of the soil layer up to 3 m thick are removed. The dimensions of the samples to be extracted can be larger or smaller. The main criterion for choosing the depth of drilling is the achievement of the level of freezing of the soil or groundwater.
- If the soil contains a large amount of clay, then in winter it will be subject to swelling. In this case, it is more advisable to install a columnar base.
A concrete pillar can be replaced with brick or masonry, but in any case, the foundation must be placed on a sand cushion at a depth depending on the type of soil
- If the hozblok is planned to be built on a swampy area, then screw piles are the best option for a capital foundation. It is advisable to use such a foundation if the construction site is located on a slope or has landscape differences.
Screw piles have special blades that facilitate the process of screwing them into the ground.
- The soil, which is dominated by sand and stones, is not subject to changes at low temperatures. In this case, the hozblok can be erected on a shallow strip foundation.
Shallow concrete tapes are usually used on sandy and rocky soils, where frost heaving forces are practically not manifested.
- On rocky soils, outbuildings can be built without a foundation.
For the manufacture of the capital base of the frame structure, it is necessary to perform the following construction work:
- On the selected piece of land, using a twine or cord, measuring tape and wooden stakes, mark the boundaries of the future foundation.
The cords are pulled so that their intersections show the location of the corners of the future building.
- In the area of the future base marked with a cord, remove the top layer of soil. This is necessary in order to exclude the processes of decay under the floor of the building. It should be noted that the top layer of the excavated earth contains a lot of black soil, which is useful in the garden, in the beds, in the greenhouse - wherever crops are grown.
- After that, it is necessary to make wells at a distance of 100–120 cm from each other. The depth of the wells is at least 70 cm. The diameter of each hole should be 30–35 cm. To make the process of making wells faster, you can use a construction drill. If there is no such equipment, then an ordinary garden drill will do. The base of the concrete pile should be located below the level of soil freezing. In this regard, the depth of the columnar foundation in different regions of our country may differ.
The use of a hydraulic hand drill will significantly reduce the time required to prepare for pouring the foundation.
- The bottom of each well must be covered with a layer of sand 10 cm thick. It must be remembered that wet bulk material is easier to compress. For the best effect, you can use a tamper. If this device was not found, it is easy to build it yourself. To do this, you need a log about 100 cm long, as well as a bar measuring 40x40 mm and 70 cm long. This bar must be nailed to the end of the log, resulting in a T-shaped structure. The free end of the log will become the impact part, and the attached bars will become the handles.
A do-it-yourself rammer will help to compress the sand layer and soil as much as possible
- Pour gravel of medium fraction of the same thickness on top of the sand cushion. These two layers will serve as a drainage system, and will also play the role of shock absorbers during soil deformations during the cold months.
- If the walls of the wells crumble, they can be strengthened. A good waterproofing material is roofing material rolled into a pipe, which is inserted into the well. Another convenient option is asbestos-cement pipes of the appropriate diameter, which not only isolate the concrete pile from moisture, but also become a formwork for uncured concrete.
Asbestos pipes will protect the walls of the well from spilling and hold liquid concrete at the time of solidification
- The strength of the columnar foundation will increase significantly if it is strengthened with a solid frame. For this, reinforcing bars are used, from which a three-dimensional structure is made. To make such a frame, you will need 4 pieces of metal rods, equal in length to the height of the column. Reinforcing cages that will be located at the base of the foundation must be bent by 45 degrees. This feature will make the structure stable during the solidification of concrete.
- Install the finished metal frames in the wells.
The metal structure of the reinforcement will add strength to the columnar base
- Pour concrete mix inside roofing felt or asbestos-cement pipes.
- Until the base has hardened, install anchor bolts in the upper part of the pole, which will serve as a connecting element for installing the lower frame trim.
The studs are the connecting element of the lower harness and the foundation
- It will take 3 to 6 days for the mixture to harden, depending on the ambient temperature. In the cold months, this will take about 10 days.
Video: columnar foundation - easy
Building a wooden frame
When the base is completely hardened, you need to proceed to the manufacture of the frame structure. At this stage, it is important to prepare the wood for use. To do this, it is treated with special means that will prevent the processes of decay and the spread of bacteria inside the frame. As an additional protection, all wooden elements can be covered with several layers of drying oil.
- After the protective layers have impregnated the wood, the bottom trim can be made. To do this, use bars with a section of 100x100 mm. At the ends of each of them, it is necessary to make cuts to make a connection in half a tree.
The connection in half a tree will allow you to securely fasten the ends of the wooden elements of the construction of the lower trim
- Then, holes must be drilled in the middle of the end joints in the bars. Anchor bolts will be threaded through them, which will secure the lower trim to the foundation.
Holes in the connection of the ends will allow you to pass the immured studs through the strapping beam
- The wooden frame must be isolated from the concrete surface with a double layer of roofing material.
- Install the wooden elements on the poles, securing them with metal nuts and washers.
Beams of the lower trim are installed on the anchor bolts (studs), which are attracted from above with nuts
- After that, the supporting pillars of the structure are installed. First of all, it is necessary to fix the corner bars. So that they are constantly in an upright position, they are strengthened with jibs and transverse bars. As additional connections, you can use metal corners and plates, which are fixed to the ends of each rack and to the bottom trim. The installation accuracy must be checked after each fixing of a wooden structural element. To do this, use a square, a plumb line and a measuring tape.
Racks must be strengthened with struts and transverse bars, constantly monitoring the vertical position of the pillars
- When these structural details are securely fixed, you can begin to manufacture the upper harness. The upper structure is made according to the same principle as the lower one. The only difference can be that bars of a smaller section, for example, 100x50 mm, can be used for this element.
The upper frame is assembled according to the same principle as the lower one, and finally binds the structure
- At this stage, it is necessary to install logs and make a subfloor. For logs, bars with a section of 50x100 millimeters are used, which are laid at a distance of 50 to 80 cm. On top of these wooden elements, it is necessary to install a draft floor, which consists of grooved boards. Their width is selected individually. As additional fasteners, you can use nails or self-tapping screws.
- Next, you need to make and install doorways and window frames.
Boxes of doors and window frames will give the erected structure transverse stability
Video: frame - lower harness
Manufacturing of the truss system
For utility blocks, single-pitched and gable roofs are usually used. It is better to entrust the manufacture of the roof to experienced specialists, since the design contains many elements that require accurate calculations.
The rafter system for the utility block may contain such details as a crossbar, puff, rafter leg, strut, bed, Mauerlat, run.
If the hozblok will be equipped with a gable roof, you must choose one of several options for the design of the truss system
It should be noted that it is more convenient to assemble the rafters on the ground, and to lift the finished elements up and install them.
When the rafter system is fully installed on the upper trim of the utility block, it is necessary to prepare the base for placing the roofing material. To do this, a crate of boards with a section of 10x40 mm is stuffed perpendicular to the rafters at a distance of 30 to 50 cm from each other. This option is acceptable when using corrugated board, slate and other sheet material as roofing.
If bituminous tiles are used as roofing, then it is necessary to build a continuous sheathing from boards, waterproof plywood or OSB boards.
Video: do-it-yourself cabin roof
Insulation of the roof, walls and floor of the hozblok
It should be noted that the installation of roofs and walls does not consist only in the installation of sheet material or tiles. This is preceded by the fixing of vapor barrier, waterproofing and insulation layers. Today, there are various ways to insulate the roof.
In the simplest version of the roofing cake, there are layers of vapor barrier, battens, counter battens and topcoat
When insulating the walls of the frame structure of the utility block, other technologies and materials are used. To protect the interior from temperature extremes and dampness, it is necessary to lay a heater in the frame, protected by layers of vapor and waterproofing.
Internal wall decoration is carried out on a vapor barrier membrane fixed at the ends of the frame racks
The floors of frame structures also need to be insulated. As in previous cases, various technologies are used for this, using materials such as mineral wool, expanded clay, extruded polystyrene foam, OSB boards, moisture-resistant drywall, polyethylene and others.
Insulation of the floor in the utility block is usually carried out according to a simple scheme - mineral wool is laid in the space between the lags, which is covered with a vapor barrier film from above
After carrying out these construction works, attention can be paid to the landscape design of the territory located near this building.
After the construction is completed, it is necessary to put the territory in order and decorate it with decorative elements and plants.
Video: insulation and interior decoration of the hozblok
Photo gallery: options for interior decoration of the hozblok
Video: hozblok from A to Z
Properly designed, as well as erected in compliance with modern technologies, the frame structure will become not only a convenient living area, but also an adornment of the entire household.
Foreword
All about the construction of a warm wooden shed from timber and boards. Site selection, development of the structure of the building, arrangement of the foundation, assembly of the frame, insulation and sheathing of the shed.
There are many different uses for a barn. And the choice of a place on the site, as well as the size, design and materials from which it will be made depend on them. Therefore, before proceeding with the construction of a barn for a summer residence, you should immediately decide on its purpose. And not only in the near future, but also in the long term, so that later the auxiliary building would not have to be improved, completed, or even completely dismantled in order to rebuild.
Warm barn for chickens
If the barn in the country will be used only for storing garden tools and equipment, then when choosing a place for it, it is enough to adhere to the following criteria:
- Convenient access to the outbuilding at any time of the year.
- The soil at the construction site is unsuitable or not at all suitable for growing plants.
- Insufficient natural light for fruit and / or ornamental crops.
- You should not build a barn in a lowland, as rain and melt water usually accumulate there. The structure will quickly become unusable, or during its construction it will be necessary to take protective measures (to make a higher foundation, to provide, if possible, its waterproofing and drainage from it, to strengthen the moisture insulation of the entire building, etc.), which will require additional efforts, time and costs.
- It is not advisable to locate the outbuilding in places where there is a lot of snow in winter. It may be difficult to get into it at this time of the year (you will have to clear the path and the approach to the doors to open them), and in the spring you will have to throw more snow from the walls so that, again, they are not flooded.
- If the appearance of the site from the front entrance matters and there are no intentions to decorate the barn in any way (using high-quality building materials or finishing over cheap ones or using ornamental plants), then it is better to place it behind the house or hide it behind tall plants, or in the depths of the garden, where he will be invisible.
A shed only for tools, especially in a country house with a small plot, can be built in a very modest size. Most often, buildings are made 2 × 2.5 m.
If the barn in the country will be used for something else, or if it has a completely different purpose, then this will need to be taken into account additionally. If a woodcutter (a place for firewood) or a coal burner (under coal) is located in it, then it is still better to build it closer to the house.
If there is a workshop in the barn, then, on the one hand, when there is noisy equipment in it, it is better to place the building away from housing, and on the other hand, the cost of supplying the necessary communications (electricity, water supply, heating) depends on their length. We must not forget the importance of natural light, as well as solar heat in winter. It is better to build a workshop in an open space, and not in the shade of trees or other buildings, and so that its windows are in the southern or eastern walls.
If the shed is intended for keeping pets, one must also take into account the required conditions for their maintenance. For example, that his guests should not be disturbed at all.
In general, when choosing a place, you need to take into account all the nuances of using the barn. They must also be relied upon when developing the design of the building: what dimensions will be along the outer perimeter of the walls and height; how much, if they are needed, to make interior spaces and what will be their area; the presence of windows and additional doors (gates) and so on.
After drawing up a sketch of the future structure with the main dimensions, it is advisable to make more detailed drawings. They should indicate the dimensions of all elements of the barn for giving. In this case, it is recommended to use the algorithm below for performing all the work. According to detailed drawings, it will be possible to more or less accurately determine the amount of necessary building materials and draw up a preliminary cost estimate.
The best option for the foundation is columnar or pile. They belong to lightweight types of foundation, just intended for light buildings, which is made of wood. Columnar is easier to make than any other. The pile foundation is suitable for any type of soil, except for rocky ones. It is usually used in the case of construction on complex and heaving soils, since the installation of piles requires the use of special equipment or special equipment. When there are no serious concerns that, due to the state of the soil, the building on the columnar foundation may soon be damaged, then it is not necessary to make a pile foundation.

Arrangement of a columnar foundation
Both types of foundations, pile and column, in their completed form are rows of columns around the perimeter of the building and, if necessary, inside it. The supports must be at the corners of the building and under the junction of the internal walls (partitions) to the external ones. The installation step of the pillars usually varies between 1.5–2.5 m and depends on the following points:
- shed size;
- what logs (with what thickness and width) are planned to be installed.
The larger the lag section, the longer the span between the supports can be. For example, for a 2 × 2 m building, it is enough to put posts only in the corners and the logs will be 150 × 50 (in extreme cases 150 × 40) mm. If the shed is 3 × 3 m, then, leaving a board with the same cross section, you will have to install intermediate supports or use logs of 150 × 70 mm.
In the case of using a board with a width of 100 mm, it will be necessary to reduce not only the installation step of the pillars to 1–1.5 m, but also the lag itself to 30 cm (instead of 0.5–1 m). Otherwise, the floor under your feet will noticeably sag.
After the formation of supports (from piles or poles), the further construction of the barn is no different. Therefore, and since the installation of a pile foundation will still require the involvement of specialists, we will consider in more detail the arrangement of a columnar one.
It can be made from different materials and in different ways. The most common options for manufacturing a columnar foundation:
- from pipes (metal, asbestos or plastic), which, after installation, are poured with concrete;
- from bricks or small blocks;
- from reinforced concrete blocks.

Column foundation for a barn
For the first option, pipes with a diameter of 15–20 cm and a length of 1.8–1.9 m are taken. We dig holes 1.5 m deep at the installation sites of asbestos or plastic pillars. We insert pipes into them. All of them should protrude from the soil to the same height within 30–40 cm. If construction is carried out on a site with a slope, then this must be taken into account. Pipes must be taken of different lengths - 1.8–1.9 m will go to the very top of the place under the barn, and below it will be required longer, in proportion to the difference in installation levels.
The top of all posts should be at the same horizontal level.
Then you need to drive in two reinforcing bars inside the pipes and at a distance of 6-8 cm from each other. This will strengthen the poles and get in their upper part the elements necessary for attaching the lower trim of the barn. The fittings must be driven in deeper than the level of installation of pipes at the bottom of the wells by 25-30 cm and so that at the top the rods protrude above the supports by the same amount. After that, we fill the pipe with concrete at the same time from the outside and from the inside.
If the pipes are metal, we subject them to anti-corrosion treatment. We install them in almost the same way as asbestos with plastic. Only wells must be made with a diameter that is several millimeters smaller than that of metal pipes. That is, the pipes will have to be driven into pits for them. Then pour concrete. Fittings and studs are optional. A timber frame building is light enough to support metal pipe posts. And for fastening the lower harness, instead of protruding reinforcement or studs, it is better to use a welded profile, for example, a corner.
The fastest way is to prepare a columnar foundation of the third of the above types, using ready-made reinforced concrete blocks, for example, FBS 600x300x200. Under them it is necessary to dig pits. Their width and length should be slightly larger than the blocks, and the depth depends on the height of the latter. We fill the bottom of the pits with a sand and gravel cushion, and then we tamp it down, after which it should have a thickness of 20–30 cm. We install blocks on the backfill. They should protrude above the soil surface by at least 15–20 cm. We fill the remaining gaps between the blocks and the walls of the pits with the soil extracted from the latter, which we then tightly tamp.
From bricks or small blocks, a columnar foundation is made in much the same way as the previous type, only the supports are composite. First, we dig pits under them with a depth of at least 40 cm. At their bottom we fill up a sand and gravel cushion, which we then ram. After that, its thickness should be at least 25 cm. We lay bricks or blocks on the pillow using cement mortar.
The dimensions of the resulting pillars in diameter should be at least 2 widths of bricks or blocks. The height of the supports should be such that they protrude above the soil surface by at least 15–20 cm. Steel pins (reinforcement) or threaded studs should be installed in the middle of the corner and central pillars in the process of laying out their top. They are useful for precise and reliable fastening of the lower harness and / or vertical racks of beams. It is better to pour concrete into the remaining gap between the pillars and the walls of the pits, and not to fill in the ground.
We lay waterproofing on top of the prepared foundation. It can be an ordinary ruberoid. In order for it to lie better, and the waterproofing to be more reliable, it is better to lay it not directly on the foundation, but on bituminous mastic, which must cover the top of the latter.
We install the bottom trim on the waterproofing. We make it from a bar 150 × 150 mm. We connect this lumber at the corners of the future barn and at the places of intermediate joints, if there are any, into half a tree - this is the easiest way. That is, we cut wood at the junction at the joined beams to the middle of their section, so that one board fits snugly on the other. If the foundation is with studs or protruding reinforcement bars, then holes in the lumber must be drilled in the same diameter as in the metal products before they are installed. We align the drilling points by applying the bars at the installation site to the protruding fastener elements.

Installation of strapping and lag
Then we install the strapping lumber in place on top of the foundation. At the joints, we nail the beam to each other with nails, preferably weaving, for example, 100 × 4 mm. For greater reliability of the connections, reinforced corners can be nailed on their inner side, and a mounting plate on the outer side. After that, if the foundation was without studs, that is, as a rule, from blocks, it is necessary to attach a strapping to it. To do this, we drill holes for a stud with a diameter of 10–14 mm through the bars into the foundation. We drive it into the prepared place and tighten it with the adjusting bolt. So that the hat of the latter does not protrude above the beam, a hole must first be drilled under it.
Let's move on to attaching the lag. Under them, it is best to take boards 150 × 60 mm. We turn them on edge and so fasten them to the strapping on the inside of the bars (and not on them) with special brackets or corners of a suitable size. Fixing material is nailed. Before you thoroughly fix the logs, they must be aligned as accurately as possible along the upper edge of the strapping beam. Otherwise, during the flooring, you will have to suffer a lot, adjusting or redoing something, using a planer and other tools.
Before installing the lower trim bars and joist boards, it is recommended that these lumber be treated with fire-bio protective compounds. Then the barn will stand for a long time.
After the log, perhaps the most interesting part of the work is the assembly of the wall frame. It can be done in two ways. The first is the following order of work. The frame of each individual wall is assembled directly on the logs or on the ground next to the future building. The main thing is that the selected site is flat. Frames must be assembled sequentially one at a time. Not worth it at the same time.

Building a barn frame
To assemble the wall frame, you must first put the bars of the lower and upper trim and corner posts on the ground, forming a regular rectangle out of them. Then we align the lumber with respect to each other again, using a square and, if necessary, a level, ensuring that all corners are right and the frame bars are in the same plane. After that, we drive nails of suitable sizes along all joints and / or use mounting angles and strips as fasteners. Then we install the resulting box in place of the corresponding wall on the lower harness flush with its outer side. Then we align the frame, set a right angle between it and the base and fasten it with stops, slopes, spacers, while nailing to the lower trim with nails 200 × 4 mm.
After that, we fix intermediate racks inside the box in the places of window, door and gate openings, as well as the junction with internal partitions (walls). They can be made not from timber, but from boards 100 × 50 or 100 × 40 mm, knocked together in 2 pieces. nails, which we drive in in a checkerboard pattern with a step of 20 cm. After that, we install additional racks from the same boards in the remaining openings of the frame box. The distance between them should correspond to the width of the selected wall insulation. The optimal step is 0.6 m.
First we collect 2 frames of the longest walls, that is, the front and rear. To ensure the subsequent arrangement of a shed roof, they must be made of different heights. With a width of the future shed of 3 m, the facade wall should be at least 0.5–0.6 m higher than the back wall. After installing these two frames on the lower trim and installing intermediate racks in them, we proceed to the end walls. Their boxes can be made from boards, and there are two assembly options. You can assemble the side frames as described above. At the same time, we do not immediately install the manufactured first box, but use it as a template for the second one. So both frames will turn out to be exactly the same in size.
However, this option has one drawback - there is a high probability that the side boxes, when installed between the front and rear walls, will have to be slightly adjusted to the size of the opening with a planer or even an ax to make it faster. This usually happens if the required dimensions were not maintained and / or too uneven lumber was caught.
Therefore, it is better to assemble the boxes of the side walls directly in the opening between the front and rear frames. First, we nail a timber or a board of the lower trim at the bottom. Then we attach lumber for the sides of the end frame to it and the corner posts of the front and rear walls. After that, we nail a timber or a board of the upper trim from above. Then we install intermediate racks.
The second method of assembling the frame of the barn is more complicated and time-consuming. It has to be used when the walls are long and / or massive lumber (with a large section and / or heavy wood) is used to make their frame. In this case, the assembled frame boxes are difficult or impossible to install on the bottom trim and therefore they are made right on the site of the future walls.
First, we nail the bottom trim of all 4 frames. Then we sequentially install the corner posts, align them, setting a right angle relative to the base in all planes, and then nail it to the bottom trim and fasten it with slopes so that the beam does not roll until the frame is assembled. After that, we stretch a twine (twine) between the corner posts and install and fasten the main intermediate posts one by one along it (where there will be door windows and adjacent walls). If there are none, then at the frame of the front and rear walls we mount one in the middle, and from the ends we do without it. Then we nail the upper harness, and then all the other intermediate racks.
Using this method of assembling a barn, you can make all the walls in parallel in stages or sequentially one at a time. First, we completely manufacture the frame of the facade, then one of the ends of the building, and then at our discretion.
We assemble the rafter system from boards 150 × 40 (you can take 100 × 40) mm. Their length should be greater than the width of the barn so that the roof has an overhang on each side. Usually it is made 30–50 cm above the front and rear walls. That is, for a building with end walls of 3 m, the length of the rafters should be 3.6–4 m.
We turn the boards on edge and lay them in this way, and then we nail them to the upper trim of the walls with nails, which we drive obliquely, 2 on each side of the barn. After that, it is not necessary, but it does not hurt to strengthen the fastening of the rafters by installing mounting brackets. This will allow the roof to withstand significant snow and wind loads.

Installation of the roof lathing
After that, you can immediately proceed to the installation of the crate under the roofing material, but it is recommended to take care of the ventilation of the roof. To do this, we lay a waterproofing material on top of the rafters (a special film or an ordinary roofing material). We fasten it with 40 × 40 bars, which we put on top along the rafters and directly above them, and then we nail it. With this installation, they are called counterbars. On top of them we nail a crate of boards 100 × 25 mm. The gap created by installing the counter beam will provide ventilation for the roofing, battens and waterproofing.
The installation step of the lathing depends on the type of roofing chosen. Under soft, small and fragile materials (for example, roofing material, tiles, flat slate and the like), it is made solid. That is, the gap between the boards will be less than 1 cm. Under the ondulin, its manufacturer recommends a step of 40 cm. Less than 50 cm later, it is not worth laying the boards of the crate, regardless of the type of coating.
Above the end walls, it is also necessary to provide a canopy. To do this, we lay the boards so that the crate protrudes 20–30 centimeters beyond the extreme rafters.
You can save a little on the crate if you make it from unedged boards. They are 1.5–2 times cheaper than edged ones. Only it will be necessary to carefully choose this lumber, because there are behaving (like a propeller) and strongly curved unedged boards. And we must take into account one more thing. On an unedged board, roofing material, such as roofing felt and the like, can be damaged. It will be necessary to take care of his protection.
We lay roofing material. Then we nail an anti-wind system along the perimeter of the roof, which will protect the roof from strong winds and from below from flowing water. To do this, we nail boards of the same width from the front and back sides of the building to the ends of the rafters. Then we install the same lumber on the sides of the roof. We fasten it with corners to the wind front and rear boards. After that, we sheathe the rafters from below. To do this, you can use not only boards, but also moisture-resistant sheet building materials made of wood.

Shed wall insulation
We do exterior wall cladding. For it, you can use siding, lining, profiled or regular board. Sheet materials are good and easy to install: plywood, DSP, OSB and so on. Better if they are waterproof. Boards must be nailed horizontally. This will give the structure of the barn greater rigidity.
Again, you can save a little. If it doesn’t matter what the appearance of the barn will be, then it can be sheathed on the outside with an unedged board. Only given that the edges of this material are uneven, it must be nailed with an overlap. You have to start from the bottom. We make an overlap of 2–3 cm, and if the lumber is too uneven, then more. In the same way, you can sheathe and edged board. And the view is more attractive, and after the skin dries, no gaps form.
Under the outer skin, it is imperative to install hydro-windproofing. It can be roofing material or a special film. First, we lay insulation on the racks of the frame, temporarily fix it somehow or hold it, and sequentially install the sheathing material on top.
We lay the floor. It can also be insulated and made with waterproofing. To do this, you need to bring boards under the logs, you can unedged and fix them with corners. This will be a crate for waterproofing and insulation. The step of its installation must be done up to 20 cm. Otherwise, the insulating materials will sag greatly over time and become less effective. Then, inside the shed, we lay hydro- and then thermal insulation on the crate between the lags. We install a vapor barrier directly on the logs (an ordinary plastic film will do). After that, lay the floor. We use boards or sheet materials made of wood.
Installing interior wall cladding. We lay thermal insulation between the racks of the frame. We install a vapor barrier on top of the beams and boards of the frame. Then we mount the material of the inner lining - any of the above for the outer.
We do the ceiling sheathing in almost the same way as the walls. We lay thermal insulation between the rafters, nailing the inner crate in parallel. It will not allow the insulating material to fall out. Then we lay the vapor barrier on the boards of the crate and in parallel install the material of the inner lining - any that is for the walls.
The shed is the first and most necessary, where the arrangement of the land begins. At first, it will be a shelter from the weather, a workshop and a doss-bed. And then he will take on his main duties as a storage of gardening tools, crops and home-made products. It may also accept domestic animals.
Building a barn with your own hands is not God knows what kind of science, this is what the article is about. It is much more difficult to immediately correctly position it, taking into account the prospects for one's own development and the layout of neighboring plots. The barn is one of the sources of pollution. If initially there were no mice planned in it, then where is the guarantee that over time there will not be chickens, or even a bull? In modern dense buildings, it is difficult to meet sanitary standards, especially in the future. You may have to build a mobile shed in the fall (see below), and in the spring put it where you need it forever: it’s not so easy to guess right away so that later it doesn’t turn out to be an eyesore.

Take a look at fig. How much is there! Paradise on earth, and only, and not the estate. Now take the scale: standard 12 acres and a house of 120 squares in plan, 80 residential. Having acquired land, they argued all winter about where to start, where to be. The family income is average; it was impossible to build up for one's own without selling future agricultural products. It was assumed that for 3 years there would be only a barn on the site of the buildings, so it had to be built cheaply, but capitally. The garage was moved to the far corner and the estimate for the road to it was reluctantly knocked down, but otherwise it didn’t work out to put a garbage dump with a cesspool into sanitary standards, also providing a garbage truck access to the tank and a sanitary tank to the septic tank.
Since the construction was carried out for ourselves, we decided to protect ourselves from infection not only formally, but also in fact, for which a walnut was planted over the utility yard with a barn. This tree exudes a lot of phytoncides, so nothing really grows under it and around it, but there are no flies with rats either; in addition, in summer it provides excellent shade. Near Lipetsk, the walnut had to be nursed for a long time, but in the 8th year it still gave a harvest, by that time the arrangement was completed. Which was noted at the pond, having taken a sip of what is supposed to be from the cellar; the cellar at the recreation area came in very handy. And it all started with a barn...
What first?
The family in question did not show any strategic abilities before. Indeed, without knowing how to delve into the details, it is impossible to cover the problem globally and achieve success. An unpretentious shed can give invaluable experience here, if you immediately perceive it as the beginning and fundamental principle of future well-being. In general, although the barn itself is simple, its construction must be taken with all responsibility. Especially - to the preparation of construction. Step by step preparation for the construction of the barn is as follows:- We focus on the place, we talk with neighbors. The goal is to find the best place for the barn: so that it is not very far away, but also does not stick out in front of your eyes and fits into sanitary standards in terms of distances to water sources and other objects prone to pollution (residential buildings, planting crops, especially root crops);
- Suddenly, according to paragraph 1, there is no clarity, we are building a barn, either a mobile one, or a temporary hut from cheap waste material. Nevertheless, it is possible to build a shed in a country house from a slab or used boards that is durable enough, inexpensive and easy to ennoble to give it a very nice look, see below;
- If we immediately decided on a place for a barn, we choose the type of upper structure, taking into account the possibility of acquiring pets;
- We select the roof to the "box";
- Determine the type of foundation;
- We are designing a barn with a binding on the ground. The latter is especially important, because supervisory authorities do not stand on ceremony with sources of pollution;
- We reduce (knock out) estimates for construction and design;
- Perhaps we adjust the project if the barn does not fit into the budget;
- Also, perhaps, we are considering the option of self-building with subsequent legalization. If the shed obviously fits into SanPiNs (Sanitary Rules and Norms), then it will turn out cheaper and easier than building it initially according to the project;
- We buy materials and build.
How about a project?
A barn is a light, prefabricated, unheated non-residential building, from which important corollaries that make things easier follow. We will talk about them for construction ahead, but for now you need to know that when designing / legitimizing the greatest nit-picking and difficulties should be expected for binding to the terrain in accordance with SanPiNs. The barn project itself should include sheets with facades, a plan with cuts, see next 2 fig. and a plan-scheme of the foundation with a specification of materials for it, as in Fig. with cut plans.

As a rule, free projects of sheds from Runet are approved without any, and then no one ever checks thoroughly what is actually built there. It looks like a project, and okay. Deviations from the project in construction are permissible, but in "small-scale construction" for yourself, you can do without coordination. But here the layout plan of the location on the site is studied very carefully, as well as the plans of neighboring sites and their consent to construction. So take care to collect these papers in advance, they are valid for 3 years.

Perhaps a corrosive bureaucrat will require another sheet with a frame structure, tk. non-residential, it is non-residential, but people go there. In such a case, for a sample, the drawings in Fig. By the way, this is a very good shed for a 6-hundred dacha. In extreme cases, you can sleep there, lying down diagonally.

Note: small fasteners (nails, self-tapping screws, corners, brackets) in the material sheet for the drawings are not necessary to list, because it is purchased as it is spent. It is also not necessary to indicate soft roofing materials worth up to 3000 rubles. If, say, 2 rolls of roofing material are used on the roof, then it will come out up to 1000 rubles, therefore we also refer to those purchased as they are spent. Keep only sales receipts, all of a sudden - they will help out.
About temporary sheds
A solid wooden shed without a foundation weighs up to a ton; with a shed roof, and if you build carefully, but not like a merchant, you can fit in half a ton. You can move it on skating rinks along the tracks, see Fig., lifting it with a crowbar, you can do it together. To lift and put on the base with the help of straps (ropes), 10-12 strong men are enough. Although who knows if the subsequent treat for this crowd will cost more than renting a truck crane ...

Why is this, besides the fact that at first you can build anywhere? Moreover, in this case, the project is needed no more than for a doghouse, but for her it is not needed at all. If it stays idle for a year, then later, on the foundation, they will legalize it, if only it fits into the SanPiNs.
However, here the question arises already for itself: how to put it on the foundation? It would be necessary to put them on anchors, but not to disassemble the building in order to push them through the crown? There is a way, see below about it.
What to build from?
What building materials are best for a barn? Strong enough, resistant, inexpensive and easy to work with? First of all, boards. A barn can be built from planks alone, see below. Unedged boards are cheap, and the structure of them can look quite neat and even elegant in the spirit of rustic design, pos. 1 in fig.

Note: even cheaper than "uncircumcised" croaker. It is also possible to build a barn from it alone, see the video below. True, it is more difficult to bring it to exquisite “rusticism”. The most difficult part of the work is debarking the croaker, i.e. cleaning it from the bark; it needs a special hand tool, see the next video.
Video: slab barn
Video: cleaning the slab from the bark
Frame shed, pos. 2 in fig. above, the most common, because small frame construction technology is well mastered by private developers. However, to assemble a frame from a bar, as for or other at least temporarily inhabited buildings (these, by the way, include a country toilet with a shower), pos. And in fig. right, not required. More precisely, based on the requirements of strength, it is mandatory for mobile sheds. And if the building is placed immediately in its place, then the frame can be assembled from only boards, pos. B. This will greatly reduce the cost of construction if unedged and used boards are used.

Sometimes, for the sake of aesthetics, the dacha shed is sheathed with OSB, pos. 3, or plywood. These materials are prone to delamination in the open air, therefore, before painting, the shed with OSB sheathing must be properly primed, and the plywood should be treated twice with a water-polymer emulsion.
Capital sheds, especially cattle sheds, are most often built from foam blocks, pos. 4. Their lower strength compared to brick does not play a role in this case, but a foam block shed is cheaper, easier to work with, warmer in winter and cooler in summer. If you choose one for yourself, consider:
- A foam block shed can be built on a columnar foundation along a wooden crown, like, for example, a bathhouse.
- On a cement-sand mortar, no more than 3 lower rows are laid, and above you need to switch to a special adhesive for aerated concrete. The structure is light, and slightly vertically loaded upper cement joints can tear under lateral wind pressure.
- Having laid the walls a third in height, the work is interrupted until the masonry mortar hardens so that the masonry does not float at the seams. The same break is done for 2/3 masonry.
On sale there are also kits of parts for quick-assembly plastic sheds, pos. 5. However, the prices, to put it mildly, are bewildering, firstly. Secondly, for some reason, living creatures in such sheds do not take root. Perhaps for the same reasons, whatever they may be, why people do not live in plastic houses.
Choosing a roof
What kind of roof to cover the barn: two- or single-pitched? The former has an exclusively aesthetic advantage. Miasma is always released in the barn. Let's be honest, even work clothes are not washed every day. And not even every week. And sweet apples and boiled potatoes exude far from harmless and safe ethylene in high concentrations. There is no need to talk about chickens and pigs.

A shed roof will provide effective ventilation without any additional measures, on the left in fig. Suddenly the wind will blow in the forehead, the visor will become an air intake and squeeze out unnecessary fumes into the cracks. And under a gable roof, they will swirl for quite a long time before leaving for the portage window, on the right there. In addition, a shed roof is much simpler and cheaper. Therefore, it is highly desirable to build a shed barn. An exception is if there is a hayloft in his attic.
Base
A temporary barn without a foundation is placed on a crushed stone pillow 25-40 cm thick. It is poured flush with the soil surface, removing the humus. However, a durable barn still needs a foundation that is sufficiently reliable for this type of structure, inexpensive and not very laborious.
Sheds are rarely erected on slab foundations: they are too laborious and expensive for ordinary ones, and it is difficult to arrange stalls and a manure pit in a barn or pigsty on a slab. Large livestock sheds made of bricks are erected on a strip or column-and-strip foundation, but for a small private economy, this is perhaps unnecessary.

The optimal foundation of the barn is columnar, see fig. The technology of its laying (this is the name of the process of building the foundation); we will analyze here, facilitate and simplify this work for the barn. The step-by-step arrangement of a columnar foundation for a barn looks like this:
- For concrete, we buy sand and gravel mix (SGM) from road builders (not builders), it is much cheaper than building sand and gravel separately. Concrete at ASG for a residential building is unsuitable, but it will do for a barn;
- We also buy cement M400 at the rate of 1 bag for 9 bags of PGS. Concrete will turn out M150, enough for a barn;
- On the site we make a cast-off from the 1st (yes, exactly one) cord on pegs;
- We check it as usual, by comparing the diagonals and measuring the sides;
- Using the hose hydraulic level, we find the highest angle and set the distance of the cord from the soil surface to 10 cm;
- With the same level we expose the cast-off to the horizontal;
- In the lowest corner, we drill a well with a 200-mm manual drill for the estimated depth plus 15-25 cm for a sand-gravel cushion;
- We make a mark on the drill rod;
- We drill the remaining wells until the mark on the drill coincides with the cord;
- We fill the wells with equal layers of sand and gravel with tamping of each layer. It is impossible to use PGS here, because the solution to be poured should penetrate a little into the gravel;
- We turn from 2 layers of roofing material the sleeves of piles with a diameter of 150 mm. We fasten them with 2 mm soft wire. To prevent the sleeves from opening when pouring, you need 3-4 strapping belts per 1 m of their length;
- We put the sleeves in the wells. Putting pebbles, set vertically;
- We cut the sleeves with metal scissors or large tailor's, flush with the cord;
- We prepare reinforcing cages: 3 (10-12) mm corrugated rods per pole, tied with the same 2 mm wire. The vertical pitch of the bundle is 200-250 mm. The distance from the inner edge of the sleeves and their top is normal, 30-50 mm;
- We put the frames in the sleeves, set them so that they do not touch the walls;
- We knead the concrete on the PGS until the density of sour cream;
- We fill the pillars in layers, in layers of 15-20 cm, with a break of 10-25 minutes. between layers. This is called a water seal fill. In practice, the layers are poured in order, starting from the same column;
- Before pouring the last (penultimate) layer, we put anchors in the pillars;
- On the 3rd day, we backfill the soil with a rammer. Be careful not to knock the poles off the vertical!
- On the 7th day (concrete gained 50% strength), construction can be continued. On the 20th day, at a temperature of 15-25 degrees, concrete will gain 75% strength and the structure on it is considered serviceable.
Topside
So, now we are building a barn. For example, such as in Fig. He, too, will stand up without any problems at a 6-hundred dacha, but a little more: you can sleep well in it, and there is a tool compartment. In the future, perhaps for a woodcutter or poultry house.

For novice builders, as a rule, it is not reading drawings and diagrams that causes difficulties, but how to put your hands on all this? Unaccustomed to carpentry, not hardened by calluses and not provided with special tools? On this we will dwell in more detail.
Frame connections
The barn, as mentioned above, is non-residential and, in general, from the point of view of SNiP (Building Rules and Norms) is barely a structure. Therefore, it is possible, without fear of anything, either in fact or on paper, to use thin-walled metal connectors for wood parts. As for residential buildings, SNiPs are merciless: their metal parts must be at least 4 mm thick. This is dictated by the requirements of fire resistance: in case of fire, the building must resist fire until the collapse, at least enough time for people to evacuate. With a shed, it's easier.

Mustache, paw and tenon connections (pos. 1 and 2 in the figure), which require a special tool and sufficient carpentry skills, can be omitted. If you still have to, then you can reinforce with hardware not with a square or an envelope, but with a pair of nails / self-tapping screws diagonally (on the sidebar there) or along if the part is narrow.
Connections on stamped corners (crossed out in red) without a tie-in of wooden parts are not quite reliable on logs and ceiling beams, because. they are not adapted to shear loads, and the corners themselves are quite expensive. Perforated plates, pos. 3. They can be bent as you like, receiving incl. and pockets holding vertical stresses. How do you like the ceiling in fig. on right? No mortise-slotting of spikes-grooves with painstaking calculations and mistakes inevitable for a beginner, but at least keep an elephant in the attic.

Perforated plates for embedded anchors are especially good, in the same place at pos. 3. Remember the question: how to put the finished barn on the foundation? Now it's clear how.
Nail plates, pos. 4, allow you to save even more on fasteners, but, firstly, they can only be used flat. Secondly, fastening them requires skill so that the bending nails do not crumple. The nail plate must either be gradually beaten with a hammer evenly over the area, or, conversely, immediately driven in with one powerful and accurate blow of a sledgehammer.
Note: for permanent shear-loaded nodes, e.g. floor log, it is still better to use special also thin-walled log pockets or pockets for logs, pos. 5.
About sheathing
For all technical parameters, the best barn sheathing is plank. Technologically, it is also not complicated if it is sheathed with a nap ("herringbone", see Fig.). And it is very cheap if the board for sheathing is unedged, and what kind of sheds come out of skillful hands can be seen in some figs. in the article.

Only boards
Many timber merchants sell boards cheaper than timber, because. more of them come out of one forest. In addition, having a circular, it will not be difficult to dissolve cheap unedged ones into measured ones. Therefore, the shed of boards as a whole is a very relevant issue.
How to solve it is shown in Fig. below. Plank beams can be assembled even from scraps, pos. a) and b). Intermediate racks are made box-shaped (pos. c) for internal partitions, and tee (pos. d) frame window and door openings.

Is it just boards?
Profiled sheet sheds are most often sold ready-made on a metal frame, pos. 1 in fig. In general, this is not the best option: in such a barn it is stuffy in summer, cold in winter. But, perhaps, for economic reasons, you will stop at such a design. Then you need to take into account that a thin profiled sheet in the building structure will not be a working sheathing and the wooden frame of the corrugated shed needs to be reinforced.
Actually, strengthening the frame in extra money and labor will not cost, it is enough to put braces in the entire wall of 40-mm boards not flat, relative to the lower crown, but with an edge, pos. 2. In this case, there will be a door and a window in the front wall. If only a door, then its opening is made in the middle and the braces are placed on both sides of it.

The struts are not cut into the racks, they are simply nailed. Under the skin, horizontal slats are stuffed as thick as the thickness of the board; when crossing with braces, breaks are made in the crate. The sheathing is attached to both the crate and the braces.
Note: it is highly desirable to adjust the dimensions of the barn and the selected corrugated board so that the troughs of the vertical sheathing waves fall on the corners. Then they are attached directly to the corner posts, which will give some additional structural strength.
Frames of the same type can be sheathed with a small non-measured board: container (pos. 3), scraps. You can make a shed out of anything very pretty in many ways. For example, lighten old boards as described below, sand, tint with stain and fill in an artistic mess, pos. 4. Or paint the boards separately, displaying geometric patterns, or fantasize something else.
Absolutely "bad" boards
The old boards are dark and unsightly. The frame of a barn in haste can be made literally from garbage, pos. 1 in fig. The result is a painfully familiar bawdy shack, pos. 2. However, if you inherited this from your great-grandfather, but it is still quite dilapidated and crooked, it is not so difficult to bring it to a look similar to that in pos. 3:

- Take out the window, remove the door.
- Support the corners from the outside with struts of poles, aligning the posts. It doesn’t go further - it’s not necessary, why should it be firmly mangled.
- Carefully inspect, reinforce with screws. We do not touch the old nails, let them rust to the end.
- Remove roof and roof sheathing.
- Treat the entire structure with a wood clarifier (reducer).
- After 2-5 days, treat with biocidal impregnation, drying oil, or, in extreme cases, mining.
- Lacquer with acrylic varnish, if desired. There is no need to paint, the “rusticism” will go away, and the “crookedness” will kick out in all forms.
- Put a new window, hang the door, lay the roof.
About tree lightening
Wood restorers are made on the basis of bleach. Therefore, if lumber is processed piece by piece, you need to work outdoors or in a well-ventilated area. It is not necessary to apply the composition with a spray, as is often written in the instructions (they seem to be marketers, not forestrymen), everything around is splashed with a caustic liquid. Processed with a brush; best of all - plaster maklovitsa; she picks up a lot of solution and gives it evenly.
We got to the roof
The advantages of a shed roof for a barn have already been said. If you are more satisfied with a gable roof, then its rafters will be quite enough with one suspension without crossbars, pos. B in fig. The material is everywhere - timber 100x50 or board 100x40. Mauerlat is not needed, truss trusses are attached to the beams of the upper trim on the corners or bent perforated plates. In the same way, all the details of the truss truss are connected.

It is not worth cutting the tops of the legs into each other, as usual (pos. A), as well as fastening the ridge angle of the legs with a steel plate: the first is too difficult, the second is weak. The ridge of the roof is formed, firstly, still on the ground with scarves (pos. B1) from scraps of boards from 20 mm thick. Scarves are placed on both sides, fastened with 12 self-tapping screws, 3 for each half of the scarf. And the rafter structure receives its final strength after installing a ridge run of 2 boards, pos. AT 2; it is nailed or screwed to the legs, 2 attachment points per leg.
About livestock sheds
Sheds for productive pets require a separate description, and one for each species. A cowshed with a pigsty and a chicken coop is combined only territorially in the same household yard. From the point of view, so to speak, of general shed construction, one must first of all take into account that animal droppings are chemically aggressive, emit a lot of ammonia (especially poultry and pigs), and its consistency and drying speed are significantly different. In any case, manure must be removed as it arrives and stored, because. he is any, except for pork - a valuable fertilizer.
The first thing that follows from this is that the livestock shed must be well ventilated, located according to SanPiNam and legalized. Further, a weighty pig or a young bull, scratching on a corner, will create considerable loads in the structure. A dairy cow of half a ton is not yet a giant among its own, and they fall on 4 hooves, the supporting area of \u200b\u200bwhich is much less than 1 square. m. I.e., about human according to SNiPs 250 kg / sq. m need to forget and take into account the real load.

Finally, goats, as you know, are not averse to gnawing pieces of wood. For the barn to be completely eaten, this was not noticed. But the bactericidal and water-repellent impregnations, which are mandatory for wooden buildings, will not benefit them until they die.
So, a chicken shed can be structurally ordinary, but with good ventilation and chemical resistance; for pigs - also wooden, but on a reinforced timber frame, for example, as in rice; for goats, a wooden barn is undesirable, and for cows, in addition, it must be warm, because. a freezing cow gets sick easily and will not give a good milk yield; in general, it is preferable to build a cattle shed from foam blocks on a strip foundation. A sheepfold may be simpler, but sheep breeding in small private farms in the world is not developed, because. only viable on a large scale.
About woodworkers
Good natural ventilation is also necessary in a woodshed: the calorific value of wet woodfuel drops sharply, which is why heating costs increase, and the wet wood boiler will fail faster. For ease of use, woodsheds are most often made in the form of an extension to the house, pos. 1 in Fig., or on the veranda, pos. 2. If this is unacceptable for aesthetic reasons, then the firewood shed is built according to the mode of use and / or climatic conditions.

For a seasonal dacha, inhabited from spring to autumn, with a small and irregular fuel consumption, you need a woodshed with wide roof overhangs (from rain) and a solid floor raised above the ground by at least 0.4 m so that the firewood does not draw in wet fumes from earth. It is also highly desirable to remove the humus under it and cover the soil with waterproofing, pos. 3.
In places with severe continental winters, preference should be given to ventilation, pos. 4. Ice, as you know, sublimates (turns into steam without melting) even in the Siberian frost, only slowly. But in regions with mild and even more “rotten” winters of the Mediterranean type, firewood must be properly covered from precipitation, pos. 4, turning the woodcutter to the rear of the prevailing winds.
How to save on foundation
Look again at fig. with columnar foundation. Doesn't it seem like a lot of pillars? Yes, the bearing capacity of such a foundation under the barn is excessive, even if it is made of M75 concrete. But there seems to be nowhere to go: if you put the pillars less often than after 1.5-1.7 m, then the lower crown will not receive proper support. And the foundation, anyone understands, is the most expensive and difficult part of the barn. So, it is quite possible to put a barn 3 by 3 m on 5 pillars instead of 9, without losing in the least in strength.

Let us take into account again that the barn is a non-residential, utility and non-standard technical solutions in it are acceptable. And, remembering what we taught at the university, let's first turn the flooring from the shield into a membrane. With hands, this absurdity is implemented simply: we lay the floor from a tongue-and-groove board from 100x40 to 150x40. It is more expensive than edged, but the savings on poles will many times exceed the overspending on timber.

Then we also recall that a triangular membrane is much stiffer than a square one of the same area. As a result, we get the lower crown, as on the left in Fig. There is no need to mess around with trigonometry, calculating oblique grooves: they are marked in place by placing a board on the frame. The floor is laid without a log, right along the bars of the crown, from edge to edge. Two 3x3 modules can be brought together for a barn 6 by 3 m, but it is not necessary to sculpt a large structure from such modules: the calculation is valid if the cells have no more than 1 common beam. There are also additional conditions:
- Frames are only timber 100x100 mm; prefabricated boards are not suitable.
- The vertical frames of the module are reinforced with struts from a 100x40 board flat on steel fasteners without a tie-in, except for the one where the door will be.
- For a 6x3 shed, additional vertical racks from the same board with a step of 1.5 m are also needed (not shown in the figure).
- The flooring of the 6x3 frame is made of boards 6 m long, so that the floor boards are solid.
- It is highly desirable to put the corner posts (the same beam 100x100) on the so-called. quarter spike, reinforced with corners, see fig. on the right above, and large intermediate frames 6x3 - half a tree, which is noted in the diagram.
In addition

Each owner of a summer cottage needs to build a building in which garden tools and other things necessary for economic activity can be stored. A do-it-yourself barn can be used to keep poultry, rabbits, pigs or goats. A workshop or warehouse for storing crops is often organized here. In the utility block, you can equip a toilet with a shower, adding a bath room to the building.
Such a building may be temporary or permanent. The second option needs to draw up a barn project with reference to the site plan. The structure can be designed for specific purposes or be multifunctional, consisting of several compartments. The building is often used as a barn for keeping domestic animals and fodder. There are special requirements for the construction of such structures.

A multifunctional building most often consists of several zones where a storage room is organized, a toilet and a shower are equipped. By attaching a veranda or terrace, you can expand the functionality of the building by arranging a place to relax and eat.
A number of requirements are put forward for an outbuilding in the form of a barn. The building must be built quickly and cheaply. Despite the fact that it belongs to the category of non-residential buildings, the structure must be solid, reliable and durable, have the minimum comfortable conditions necessary for further operation. Depending on the purpose, the building must be insulated to the right extent. The size of the barn should be selected based on the dimensions of the site and the purpose of the building. It should be provided with convenient and free movement of a person.
Helpful advice! Do not build too high a structure. However, it should be noted that a person must move in it to its full height, without bending.

The construction of the barn is carried out taking into account technical, sanitary and fire safety requirements. If gas cylinders, flammable liquids and other combustible materials are stored here, fire safety should be especially responsibly approached. An important role in the household blocks is assigned to the proper organization of good ventilation.
How to build a barn in the country: construction technologies
There are three options for building a barn in the country:
- monolithic technology;
- frame construction;
- modular method.

Monolithic technology consists in erecting a structure from building elements in the form of cinder blocks, foam concrete and aerated concrete, brick, block or log cabin. This method allows you to get a high-strength, capital and durable building, which will be quite expensive. You can speed up construction while reducing costs by using cinder blocks or foam blocks. Such masonry is used today quite often for overall structures with an area of 20 m² or more.
The most popular in the construction of sheds is the frame technology. Its principle is to create a solid frame, which is the skeleton of the building, from wooden beams or a profile pipe, followed by its sheathing with shields, panels, slabs or wood. Such a do-it-yourself barn construction is carried out at a fast pace and is relatively cheap. At the same time, proper strength and reliability of the structure are ensured.
The modular method involves assembling a house from ready-made modules, which can be made of metal or plastic, which is demonstrated by photos of beautiful sheds. The fastening of elements to each other occurs through the use of special parts. The main feature of such structures is their mobility. The building can be dismantled and moved to another place.
How to build a barn with your own hands: preparatory activities
Before making a barn, it is necessary to plan the territory of the site with the determination of the location of the future building. This issue has its own peculiarities. The barn is being built on the territory not used for growing country crops. The building should not be located in a lowland. In the event of heavy precipitation, the building will be subject to constant flooding.

Depending on the purpose of the barn, it should be located at a remote distance from the residential building and the interface with the neighboring site, which is regulated by the current regulatory documentation.
Then you will need to draw up a plan for the future construction with the design of the premises. All dimensions must be listed here. The drawing can be done independently, taking into account personal preferences, or you can use ready-made standard projects for a shed for a summer residence, presented on specialized sites.
The next step is to compile (based on do-it-yourself barn drawings) a list of building materials, which depends on the construction technology of the structure. For frame construction, the amount of material needed to create the frame of the structure and complete the finishing of the building is calculated. In the case of using a monolithic version, the number of masonry material and the amount of mortar that will be needed to complete the work are determined.

Building a foundation for a barn with your own hands
Under the barn, you can perform one of two types of base: tape or columnar. The first option is arranged for capital frame structures with a concrete base. Light buildings are recommended to be placed on a columnar base.
Important! The strip foundation cannot be erected in areas with sedimentary soil or peat bog.
The step-by-step technology for laying a strip foundation for a barn with your own hands is as follows:
- marking for the future building according to its size;
- preparation of a trench 40 cm deep and 30 cm wide;
- backfilling the recess with a layer of sand with crushed stone 15 cm high;
- strengthening the bottom and side walls with roofing material;

- installation of formwork along the perimeter of the trench;
- laying a reinforcing frame in the form of a box of rods 12 mm thick over the entire area of the recess;
- pouring concrete solution.
Important! The foundation should protrude above the ground level to the height of the base.
After two to three weeks, it will be possible to start building a barn in the country with your own hands.
Installing a columnar base involves the following steps:
- making holes 80 cm deep under the foundation pillars at the corners of the structure and at the junction of partitions, which should be located at least 1.5 m;
- backfilling the bottom of the holes with a layer of crushed stone or gravel with sand 15 cm thick;
- installation in the wells of pieces of metal or asbestos-cement pipes or liners made of roofing material;

- backfilling the space between the rack and the ground with sand and gravel;
- filling the pipe cavity with fittings 10-12 mm thick, tied with 2 mm wire;
- pouring pipes with concrete.
Helpful advice! To improve the waterproofing of the base and extend its service life, the support pillars should be coated with special mastic.
The columns can be made of brick or concrete blocks. You can also use oak or larch logs with a thickness of at least 300 mm. Wooden products must be carefully treated with an antiseptic. The lower part of the logs, which is buried in the ground, is covered with bituminous mastic and wrapped with several layers of roofing material. After installing the racks in the holes, the wooden supports are poured with concrete.
Frame barn: features of construction technology
Frame technology is very popular in the construction of sheds, according to which the skeleton of the building is erected, which is subsequently sheathed with finishing material. The frame is made of wood or metal. The latter option is used to create a do-it-yourself barn from corrugated board. A wooden frame structure is widely used, which is characterized by increased strength, the ability to withstand significant loads.

Frame technology makes it possible to build a structure in a short time with minimal costs. Since wood is a high-tech raw material, it becomes possible to add additional elements. The material is quite durable, with high thermal insulation characteristics and environmental friendliness.
Wood is characterized by hygroscopicity, which contributes to high moisture absorption with the formation of rot, mold and fungal infections. Therefore, the material needs to be treated with special moisture-resistant and antiseptic compounds, and to extend its service life, it can be covered with an outer protective layer of varnish or paint.
The durability and design of the barn is directly related to the cost of materials. You can build a barn cheaply and quickly with your own hands from unedged boards of spruce, birch or pine, while the building will have an unsightly appearance. A more aesthetic structure will be obtained from high-quality material in the form of edged boards, profiled timber or lining.
We build a barn with our own hands using frame technology
After the base under the shed is completely frozen, you can start building the frame of a wooden shed with your own hands. Its manufacture begins with the lower frame, which will serve as the basis for the future design. Therefore, for its manufacture, you should use a high-quality wooden beam without knots and mechanical damage.

Before you make a barn out of boards with your own hands, you need to waterproof the foundation. To do this, the base must be covered with two sheets of roofing material. This procedure will protect the wooden frame from moisture.
Related article:
Variety of garages Room layout plan. Finishing the walls and floor in the garage. Choice of lighting. Shelving placement. Useful tips.
The lower frame is created from a bar with a section of 100x100 mm. In the corners, the elements are fastened with a dowel. Logs from boards with a section of 50x100 mm are attached to the strapping crown at a distance of 50 cm from each other. The next step is the construction of wooden racks from a bar of the same section as for the lower frame. They are fixed by means of overhead metal plates or can be nailed obliquely.
Important! If a shed roof is being arranged, wooden racks are installed at different heights, which will facilitate further roofing work.
The distance between the wooden posts should not exceed 1.5 m. 0.6 m is considered optimal. In this case, each support will coincide with the upper floor beams and become a reliable basis for the roof. To create additional rigidity, struts are attached to the vertical racks and the lower frame using bolted connections. In the upper part, at a distance of 2 m from the lower crown, the racks are tied by creating a wooden frame. Door and window openings are formed using vertical posts and horizontal crossbars. The distance between them is determined by the dimensions of the structure.

To create a barn frame, not only a wooden beam can be used. Here you can use a steel pipe, corner or profile. The order of erection of the frame in this case remains unchanged. The only difference is that all metal elements are interconnected by electric welding. Such a frame does not require the construction of a foundation. It can be installed on a sand and gravel embankment.
Helpful advice! Before sheathing, the metal frame should be painted. The exception is a profile with a galvanized coating.
Do-it-yourself floor and walls of a wooden building in the country house
After creating the frame and laying the log, you can proceed with the installation of the floor. For a cold shed made of boards with your own hands, it is advisable to use OSB sheets, which are nailed to the logs. On top of them, waterproofing is laid in the form of a sheet of roofing material. Next, a finishing floor is made of grooved or edged boards. The first option is more preferable due to the fact that there are special grooves on the ends of the boards that eliminate the possibility of cracks, thereby increasing the strength of the floor.
The floor can be insulated. For this, mineral wool, expanded clay or polystyrene are used, which are laid before the installation of the floor covering. For this, OSB boards are knocked down from below the lag. This process is carried out before the stage of erection of the frame racks. If this moment was missed, then the draft floor of this material is stuffed on top of the log. A counter-lattice is mounted on the plates, which is necessary to create cells in which insulation is laid. Under it, waterproofing is laid on the subfloor. From above, the insulation is covered with a layer of vapor barrier. Next, a clean floor is mounted.

Helpful advice! The height of the insulation should be slightly less than the height of the log in order to provide a ventilated gap between it and the floor covering.
Until the walls are finished, the frame must be reinforced with permanent jibs. They are especially needed if the structure will be sheathed with a board or clapboard. The jibs are set at an angle of 45°, which provides better structural rigidity. Near doors or windows it is allowed to maintain an angle of 60 °. Docking elements with the frame is carried out "in the paw" or "half-tree", which eliminates the formation of gaps.
Important! Before fixing the jibs, you should check the evenness of the corners of the frame using a building level or plumb line.
After completion of the installation of jibs and flooring, the walls are insulated. To do this, use foam or mineral wool. From the side of the room, the material is closed with vapor barrier followed by sheathing, and from the side of the street - with waterproofing, to which a counter-lattice of slats with a section of 20x40 mm is nailed to equip the ventilation gap.

Do-it-yourself frame shed roof device
To create a shed roof of a barn with your own hands, wooden boards with a section of 50x100 mm are used, from which rafters are made. It is most convenient to assemble the structure on the ground and fix it in finished form on the frame racks. The rafters are fastened at a distance of 0.7-0.8 m from each other. A crate is mounted on top of them. To do this, strips of unedged boards are installed with a gap of 15-20 cm from each other (in the case of using slate as a roofing material). If rolled products are used, then the crate step should not exceed 2-3 cm.
Important! The crate must be covered with waterproofing material.
You can do without rafters. To do this, the front wall of the frame is made 50 cm higher than the back, as shown in the drawing of a barn in the country with their own hands 3x6 with a shed roof. In this case, floor beams lie on the upper trim at a certain slope. They will play the role of rafters. With this option, an overhang of the roof should be organized, which is ensured by overlapping the beams by 50 cm in front and behind the structure.

To obtain an attic space, a gable roof is erected above the barn, which is formed by triangular rafters that are attached to the upper trim of the frame. In this case, the front and rear walls of the frame must have the same height.
Varieties of roofing for a country barn
Do-it-yourself metal tile, slate, ondulin, flexible tile, roofing felt or profiled sheet can be used as a roofing shed for summer cottages. One of the most budget options is slate, which is characterized by durability, good strength, weather resistance. However, it is quite fragile, so it requires careful handling. When installing it, there is no need to stuff a reliable crate. The material has low aesthetic properties, which is not so important for a shed in the country.
The metal tile is also an inexpensive material, which is characterized by durability, a wide range and attractive appearance. When installing the coating, care must be taken to avoid scratches and other damage that will become a prerequisite for the formation of corrosion.
The profiled sheet is similar in its technical and operational characteristics to the metal tile. However, it costs much less and has a simpler appearance, which is clearly shown in the photo of the do-it-yourself shed from corrugated board.

A cheap and simple roofing is a rolled roofing material. It is distinguished by ease of installation, carried out in several layers, and low aesthetics. Soft slate is represented by ondulin, which is lightweight, flexible, easy to fit and has an aesthetic appearance. However, the material is flammable.
A flexible metal tile has good operational and aesthetic performance. However, the material has a relatively high cost, so it is not advisable to use it as a roofing shed.
How inexpensive to sheathe a barn outside: popular options
For sheathing frame wooden sheds with your own hands, you can use lining, a wooden board, OSB sheets or profiled sheets.
The most popular and cheapest option is to use unedged boards. They are dissolved into elements of the required size, which perform the outer skin of the frame. However, in such a lining, cracks form over time, which can be closed with wooden planks. But it is better to overlap the board with a herringbone. With this technology, each subsequent row of boards is put on the lower tier with its edge.

A little more expensive, but easier to cut and install are OSB boards. It is important to set the elements in such a way that their joints are in the center of the frame racks. This material does not deform under the influence of moisture and does not rot. However, to create additional protection and give the structure a more attractive appearance, the surface should be covered with paint.
To organize a cold warehouse, you can use a profiled sheet, the elements of which are attached to a wooden frame with self-tapping screws. The sheets should be overlapped by 15-20 cm. If the structure is reserved for keeping animals or for a workshop, the walls of the corrugated shed are sheathed from the inside with insulating material.
A polycarbonate barn is being built for indoor walking of poultry. The technology of installing honeycomb plastic is similar to the installation of OSB boards. Fastening is carried out using self-tapping screws with a wide cap and a sealing washer.
Budget and environmentally friendly frame sheathing options
One of the cheapest and most popular materials in rural areas are pressed straw blocks, which are also environmentally friendly. Such bricks are treated with a special composition that protects them from fire. They have good strength and the ability to retain heat. Straw bricks fill the gaps in the wooden frame, so when it is installed, intermediate racks are installed.

The resulting barn walls from a bar are finished with clay plaster, which is applied to a steel mesh fixed on top of the straw. A straw building is characterized by a minimum cost, and in terms of thermal characteristics it surpasses sheds made of cellular concrete and brick.
Another budget option is the use of sawdust concrete. To do this, a flat and durable formwork is constructed from OSB sheets, which is securely attached to the frame of the building. Next, layer-by-layer pouring of a mixture of sawdust and cement mortar in a ratio of 2: 1 is performed.
You can make a cheap and at the same time environmentally friendly barn for domestic animals using a clay pot. This is a mixture of clay, wood and cement-sand mortar, which fills the voids in the frame of the structure. The result is a robust design with high energy efficiency.
Do-it-yourself barn from foam blocks: the main advantages
For the construction of solid outbuildings, blocks of cellular gas or foam concrete are most often used. The main advantages of the material are:

- large size of products, which allows you to perform work quickly and conveniently;
- accurate geometry, reducing the complexity of the process;
- light weight of the product, which is 11 kg;
- low thermal conductivity due to the porous structure of the material, which allows you to retain heat for a long time;
- increased frost resistance;
- good soundproofing properties;
- high hygroscopicity, which allows the material to breathe, removing water vapor to the outside, while preventing the likelihood of mold and dampness in the room;
- incombustibility;
- pliability of the product when sawing (due to the porous base);
- environmental friendliness of the material;
- low cost.
However, the material can be used for buildings no higher than 10 m, due to the limited strength of the material. Another disadvantage is the unattractive appearance of the products, which requires additional finishing of the walls of the barn for giving with their own hands from foam blocks.

How to make a barn with your own hands from foam blocks
Before building a barn from foam blocks, a strip foundation is being erected, the manufacturing technology of which is described above. The blocks are laid on a waterproofing material covering the base. In this case, you can use roofing material or hydroisol. For laying blocks, an adhesive mixture should be prepared, which consists of sand and cement in a ratio of 1: 3. The first row starts from the corner of the building and continues along its entire perimeter. The thickness of the seam between the products should not exceed 30 mm. After laying the first row, the wall is checked for evenness using a level.
Helpful advice! To obtain a durable and strong structure, after every third row, reinforcement bars with a diameter of 80 mm are laid on the blocks.
The last row is covered with waterproofing material. Next, the roof of the barn is created. For a small building (width no more than 3 m), a single-slope option is suitable. For do-it-yourself sheds 6 by 6 m, it is better to equip a gable roof, the installation description of which is given below.
With the help of metal studs, a Mauerlat in the form of a wooden beam with a section of 50x150 mm is attached to the upper row of masonry. The distance between the studs should not be more than 120 cm. Extreme trusses are installed on the Mauerlat, which form gables. For ease of installation, the rafters are assembled on the ground and then lifted up for installation. All elements should be interconnected by means of metal fasteners and overlays. The installed truss structure is covered with a waterproofing membrane, over which the crate is stuffed. The selected roofing material is attached to it.

Next, the outer surface of the walls of the country house is insulated with your own hands using the selected material. The most commonly used foam boards, which are glued with a special composition. Slopes of windows and doors should be strengthened using aluminum squares. Further, the insulation is covered with an adhesive mass 3-4 mm thick, into which a reinforcing mesh is embedded. After complete drying of the surface, which occurs after 48 hours, the walls are plastered and painted. They can also be sheathed with siding or corrugated board, which will give the structure a more aesthetic appearance.
Other block material options for building a barn
An alternative to foam concrete blocks is wood concrete. It is often used for the construction of utility rooms. The material is characterized by increased strength, high vapor permeability, low thermal conductivity, resistance to rodents and mold. At the same time, it, in comparison with foam concrete, is less fragile. The material has low frost resistance and moisture resistance.
To build a barn with your own hands 3 by 3 m, you can use a brick. The material is distinguished by reliability, moisture resistance, fire resistance, durability, resistance to rodents and mold. Having an attractive appearance, brick walls do not need subsequent cladding. However, the brick has a high cost. Bricklaying is a labor intensive process. In addition, the material is characterized by significant weight, which requires a reliable foundation, and this will entail additional costs.

For the construction of an outbuilding, you can use a stone from a quarry, which is laid on a cement-sand mortar. Such a structure cannot be called warm, therefore it requires additional insulation from the inside with mineral wool. The outer surface of the walls can be sheathed with clapboard.
How to make a barn to the country from logs, timber or sleepers
You can build a barn with your own hands from logs or timber. The material is characterized by high thermal insulation performance, so it can be used to equip a workshop or a place for year-round keeping of animals. The service life of the structure can reach 70 years. The assembly of the structure must be carried out by specialists in order to exclude the possibility of errors and misses in the work.
Important! Firewood should not be stored in a log or timber shed, as there is insufficient ventilation in the room to dry the heating oil.
For the construction of a building in the country, a beam with a section of 100x100 mm or 150x150 mm is suitable. The elements are laid on a strip or column foundation. The first crown is treated with an antiseptic. In the bars, cutouts are made at half the width of the product, which ensures good grip. The length of the elements must match the width of the wall. In logs, recesses are made in the form of a semicircle or angle along the entire length. Between the rows it is necessary to lay a layer of insulating material. For this, tow or jute is used. To ensure the strength of the structure, the crowns must be connected to each other with dowels, which is clearly shown in the photo of barn sheds.

The barn can be made from old wooden sleepers. Such a structure will be solid and durable. Walls are built by stacking sleepers on top of each other. In the corners, the elements are tied with steel brackets, which are hammered into the upper edges of the bars, connecting the joined crowns. Along the perimeter, the staples are hammered into the side faces of the elements.
There is another mounting option. To do this, one part of the sleepers is dug into the ground along the perimeter of the building. The remaining elements are cut at the ends with a chainsaw so that a spike is obtained. A groove is formed on the poles by stuffing two bars onto the sleepers. Next, sleepers are inserted into the prepared grooves. Between themselves, the elements are fixed with brackets.
Prefabricated shed for a summer residence: design features
The prefabricated barn is made from individual elements according to the principle of the designer. The cost of such a structure will exceed the costs required for the construction of a frame or block structure. Buildings are characterized by mobility and high speed of construction. A prefabricated barn with your own hands (photos clearly demonstrate different options) can be made on the basis of:
- sandwich panels;
- SIP panels;
- plastic panels.

SIP panels consist of two layers of wood, between which a heater is placed. Sandwich panels have the same structure, only metal sheets are located on the sides of the insulation material.
The first stage of the assembly of the structure involves the creation of a frame. Then standard elements are attached to it, specially made for a specific construction option. The assembly of the structure is carried out on the basis of detailed instructions with a drawing.
SIP panels can be made independently. To do this, you will need OSB boards, polystyrene foam, glue and a wooden beam. The assembly takes place according to the principle of "sandwich". An adhesive is applied to the OSB sheet laid flat. Styrofoam is laid on it in such a way that there is free space for the docking bar along the contour of the product. Glue is applied to the insulation, and then a second sheet is laid. On top of the resulting structure, the load is evenly distributed over the entire area.
Plastic shed for a summer residence: characteristics of the structure
Such a beautiful shed is made of frost-resistant composite plastic, which is characterized by strength, wear resistance, reliability and practicality. The material is resistant to sunlight, moisture, does not corrode and attack by harmful insects, mold and fungus do not form on it. Despite the small weight, such a structure is able to withstand constant and long-term loads. For a long service life, plastic, unlike wood, does not need to be treated with special compounds. With proper use, such a building will last at least 15 years.

The ridge of the roof is made of a transparent material, due to which it is light in the room during the daytime. The design is characterized by passive ventilation, which ensures the unhindered movement of air masses inside the barn, so that the air does not stagnate and the room remains dry. The service life of the building is about 25 years. The plastic construction is suitable for creating a workshop or a place to store garden tools. This building is not recommended for keeping animals, due to its small area and lack of insulation.
Modern models of plastic sheds for summer cottages - the photos clearly confirm this - attract attention with a neat and stylish appearance. Such a barn can become a real decoration of a summer cottage. Such a design is assembled without assistance in 2 hours. Work is carried out without the use of additional fasteners, complex tools and the use of welding. Under this structure, it is not necessary to build a foundation. The object is mobile, which makes it possible to transport the structure to a new location.
Helpful advice! You should not often move the plastic shed, as its fasteners will loosen, as a result of which the structure will lose its strength and reliability.
Ready-made barn in the form of a container: a compact and functional structure
Today you can buy a ready-made metal shed for a summer cottage of a container type. The basis of such a monoblock structure is a rigid metal frame, sheathed on the sides with metal with an insulating layer, where electrical wiring is laid. Such a barn looks like a container.

The internal content of different models can vary significantly. There are models with shelves in the barn, which resembles a pantry. Some designs are equipped with a canopy for arranging an open terrace. It is possible to purchase a ready-made shed for a summer residence with a toilet and a shower. Multifunctional containers are recommended to be used as a small country house at a time when the main building is being built. Later the container can be sold.
To install the finished structure does not require the construction of a foundation. It can be placed on a concrete slab. The container is delivered ready-made and mounted using a truck crane. Such sheds have a high cost and not a very attractive appearance, which is offset by the durability and practicality of the structure.
Sheds for animals: design features and requirements for them
Sheds for animals belong to a separate category of household blocks, which are subject to special requirements. The building for domestic animals should be well ventilated. This is primarily due to the large amount of animal droppings located indoors. It is chemically active, releases ammonia. The consistency of the litter and the speed of its drying are different for different types of animals. The shed can be additionally equipped with a place for storing litter and manure, which are valuable fertilizer.

The location of the livestock shed on the site is strictly regulated by regulatory documentation. The design must withstand significant loads and mechanical stress. This is especially true for barns. It should also be borne in mind that some species of animals like to gnaw on wood. Therefore, you should not build a barn made of wood, additionally impregnated with bactericidal and water-repellent compounds, which can be detrimental to some animal species.
For chickens, the building must be made of chemically resistant material and equipped with good ventilation. For pigs, a prefabricated wooden shed for giving with a reinforced frame is suitable. For goats, a wooden barn is undesirable. The cowshed should be warm and reliable. It can be performed on a strip foundation made of block material, followed by insulation.
A barn in the country is an indispensable multifunctional structure that can be built from any building material. The installation technology directly depends on the purpose of the building, its size and the financial capabilities of the owners. In order to build a barn in the country, the price of which will depend on the version of the building, it is important to use high-quality material and follow the algorithm of actions when erecting a structure of the selected type. With a good financial opportunity, you can purchase a ready-made mobile shed for a turnkey cottage in the form of a container or a set of structural parts for self-assembly.