How to paint a painted ceiling with water-based paint. Can water-based paint be applied to a surface painted with water-based paint? Required tools and materials
Read also
Many home craftsmen are interested in the question of how to paint the ceiling after whitewashing, using a water-based emulsion popular among domestic consumers. Let's figure this out together.
Is it possible to paint the ceiling surface after whitewashing?
Until recently, all problems with finishing ceilings were solved quite simply. They were whitened using chalk or mortar. This operation was performed without any problems, and in a fairly short time. A little later it became fashionable to paint ceiling tiles. This finishing option remains quite in demand today. At the same time, many home craftsmen are literally perplexed by the question of whether or not they can paint earlier. whitewashed ceiling. There is only one answer to this. The ceiling can be painted after whitewashing. But subject to certain conditions.
Painting the ceiling after whitewashing
Painting with water-based emulsion is allowed when the whitewash layer is thin and adheres well to the ceiling.
In this situation, you can safely paint the surface without removing the old finishing layer. If the whitewash does not hold firmly, regularly crumbles, water streaks and traces of rust are clearly visible on it, it is not recommended to use paint to decorate the ceiling. You must first thoroughly clean the surface of the old coating and only then use water-based emulsion. In cases where the whitewash lies in an even and beautiful layer that is thick, experts advise removing this coating. If this is not done, some time after painting water-based paint a beautiful layer of whitewash will begin to crumble and peel off. As a result, all the finishing will become unusable. And you will have to decorate the ceiling again.
Painting the ceiling with water-based paint - 7 steps
So, if the whitewash holds tightly, we proceed to painting. First, thoroughly stir the purchased water emulsion. For these purposes, we use a suitable stick or (which, of course, is better) a special attachment on construction mixer. The paint is sometimes slightly diluted with water (provided that the manufacturer of the composition allows this possibility).

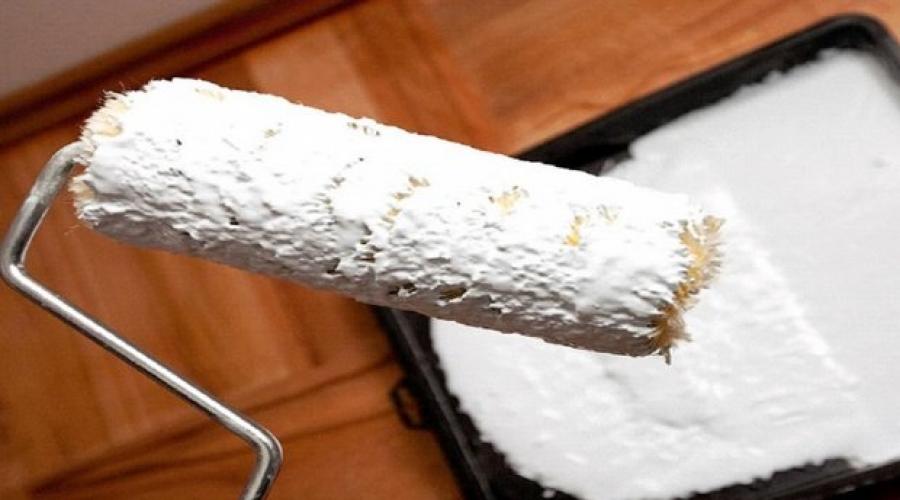
Roller for painting the ceiling
After this, the mixed composition is poured into a container with a grooved side. Such baths cost pennies and are sold in any construction supply store. You are all ready to paint the ceiling surface with water-based paint. The operation is performed like this:
- Dip into a container with the prepared composition, squeeze (lightly) the tool on the grooved side.
- Paint the perimeter of the ceiling twice (the areas where the ceiling and wall surfaces meet).
- Shade the painted part with a semi-dry brush (there should be a minimum of paint on it).
- Take it paint roller. Dip it into the bath and then be sure to roll it out along the grooved side of the container.
- Apply with a roller thin layer paints. The movements of the tool should be directed perpendicular to the light rays coming from the window opening.
- Wait 7–8 hours for the first layer of water-based paint to dry.
- Apply the next layer. Now you need to paint the ceiling parallel to the rays of light.
That's all the wisdom of treating a whitewashed ceiling with water-based paint. Note that we have given universal method surface painting. With different types of water-based emulsion (more on this below), sometimes you need to work according to individual schemes. The specific method of using the paint is always indicated in the instructions supplied with it. Please take the time to read this important information.
Painting ceiling surfaces can be done not only with a roller and brush. If desired, use a spray gun if you know how to use it. Also, many craftsmen adapt old vacuum cleaners for these purposes, turning them into original spray guns. Some craftsmen advise treating the ceiling with a primer before applying paint. There is no particular need for this. The water-based emulsion itself acts as a primer. Why complicate the work? If the whitewash adheres poorly to the ceiling, no primer will make it more durable. The old finishing layer should always be removed from crumbling ceilings. In other cases, feel free to apply paint without washing off the whitewash.

We use a spray gun for painting
When using a sprayer, it is advisable to apply the coloring composition in three layers. Then it will lie evenly on the surface. If you have no experience using a spray gun, achieving an ideal coloring result can be very difficult. Therefore, home craftsmen most often use traditional tools - a roller and a brush. It is recommended to carry out work on painting ceilings using a respirator and safety glasses. And the walls and floors in the room where painting activities are carried out need to be covered with film. In this case, you will definitely not stain the room.
About the types and characteristics of water-based compositions
IN construction stores and can be purchased in the markets different types water-based emulsions. According to their composition, they are: silicone, acrylic, silicate, latex. There are no fundamental differences between them. They differ from each other only in that ceilings painted with certain compounds (for example, latex or acrylic) can be washed. In addition, latex-based paints do a good job of closing small gaps on ceiling surfaces. But the cost of such compositions is very high.
All water-based paints have a number of advantages. They are very practical, easy to apply with your own hands, hypoallergenic and completely safe for health. It is also important that a modern water-based emulsion can have almost any color shade. Finally, let’s say that the paints described in the article are divided into glossy, matte and semi-matte. If you are painting a whitewashed surface without washing off the previous finishing layer, do not use a glossy compound. He will not be able to mask all the unevenness of the ceiling. But matte paints are ideal for painting whitewashed substrates.
Today, the trend of painting surfaces is very common. But old surfaces are not always conducive to such actions. Many apartments still have whitewashed ceilings. Our article will tell you whether such ceilings can be painted with water-based paint and how.
Paint selection
Today, thanks to new technologies and finishing materials It is possible to paint the whitewashed ceiling. But for painting to be successful, it is necessary not only to properly prepare the surface, but also to choose the paint.
Most often ceiling surface painted with water-based emulsion. But you can find several types of this paint in stores, which can make choosing difficult. So what paint should you paint the ceiling with? In order to choose the most suitable option, you need to know the features of each type of water-based paint. It comes in the following types:
- Polyvinyl acetate. She is characterized by herself low cost, as well as high hydrophobicity. This water-based paint can be used to cover surfaces only in dry rooms. In this case, washing such a surface is excluded.
- Compositions containing latex additives. The cost of such solutions will be the highest. But at the same time, with the help of such water-based paint you can create a coating that is smooth and resistant to various external influences.
- Acrylic. This type is characterized by high resistance to abrasion. Ceilings can be washed after treatment with acrylic paint. Usage acrylic compositions allowed in any premises. Another advantage of this paint is its affordable cost.
- Slicone. Before applying this composition is not required pre-primer surfaces. This water-based paint is characterized by high vapor permeability. Therefore, treating ceilings with this paint is relevant in basements and bathroom.

As we see, there are the most various types water-based emulsions. To choose the right composition, you must carefully read the instructions before purchasing. It is always shown on the side of the can. Thanks to the annotations, as well as the help of a consultant or seller, you can quickly select a composition for painting the ceiling. In addition, from the annotation you can find out the material consumption per one square meter and determine exactly how much paint you will need for painting work.
Preparation
The ceiling must be prepared for treatment with water-based emulsion. Moreover, experts recommend that when painting with any composition, you carefully remove the old finish. Only in such a situation can the surface be painted with high quality.
Although removing whitewash seems like a difficult task, if you use correct methods surface preparation, it can be removed relatively easily.
Removing old coating from the ceiling occurs in two ways:
- dry method;
- wet method.
Let's look at both methods in more detail.

Dry method
In this situation, you will need the following tools:
- electric drill equipped with a brush attachment;
- grinder along with a grinding disc;
- sandpaper;
- Grinder.
The dry cleaning method, thanks to the use of the above tools, is carried out quite quickly. But it has several disadvantages, due to which it is used extremely rarely. The main disadvantage of this method is the huge amount of dust.
To carry out dry cleaning in a room, it must be carefully isolated. In this case it is necessary good ventilation rooms. Since a lot of dust will be generated during the processing of the ceiling surface, it is necessary to work only in personal protection(glasses, respirator). After completing the work, all dust that has settled on the floor must be swept away. Then you need to rinse the floor thoroughly.

Wet method
The main advantage this method there is a minimum of dust, which is much safer for human health. Although experts still recommend carrying out such surface preparation in a respirator. But wet method much longer in time.
To remove trim using this method, you will need the following tools:
- metal brush;
- sharpened small spatula;
- a roller having a medium length of pile;
- spray;
- container with water.
The wet method involves the following steps:
- First, you need to remove the maximum layer of whitewash by wetting the surface using a spray nozzle or a simple roller. Please note that you need to wet it small area in order to have time to wash off the whitewash before it completely dry.
- The solution should be applied generously, as the lime will actively absorb it.
- To increase the deoxidation of the whitewash, you need to add 5-6 tablespoons of regular soda and a few tablespoons of liquid soap to the water.
- After the solution has been applied, you need to wait a little (about half an hour).
- Then you can start removing the old finish with a putty knife.

If some areas of the old finish are not removed, you should not focus on them. You can return to them after processing the entire ceiling and clean sandpaper. It can be replaced with a brush for working with metal.
Before painting, you should try to remove the main layer of whitewash from the ceiling surface. In this case, you should not use very sharp objects (chisels, chisels, etc.), as they can lead to scratches and other defects in the base. This statement is especially important in a situation where under the whitewash there is a well-leveled layer of finishing putty.
If scratches and gouges are found on the ceiling, they should be covered with putty. After it dries, all resulting roughness must be rubbed off using sandpaper.
After the ceiling has become smooth, it is necessary to prime its surface before painting. A primer applied before painting will allow for greater adhesion and uniform distribution of the paint composition over the ceiling surface.
Painting

After they were carried out preparatory work, you can paint. To achieve maximum aesthetic effect, water-based paint must be applied in two layers. Please note that when applying the second layer, it is recommended to choose the direction of movement from the window and towards the opposite wall. In this way, it is possible to avoid the formation dark spots after the ceiling surface has dried.
The following tools can be used to apply paint:
- Brushes of different sizes. Considering the surface area, working with brushes all the time will be inconvenient and very time-consuming. Brushes can be used to apply paint at the junction of walls and ceilings.
- Roller. In this situation, a roller will help you get the job done much faster and more efficiently. For painting the ceiling, special products with elongated handles are sold. Special models of rollers are also sold for painting corners.
- Spray gun. With this tool you can paint any surface very quickly, efficiently and effectively.
It is believed that a roller is best suited for painting work. It is inexpensive and produces an even coat of paint. At the same time, working with it is much more convenient and easier than with other tool options.

Painting water-based compositions ceiling occurs according to the following scheme:
- Open the can of paint and mix it well.
- We pour it into a special container - a tray.
- Soak the roller in it and squeeze it on the ribbed squeezing pad of the tray.
- We begin to apply paint from the far left corner of the room.
- You need to move the roller from left to right. After this we change direction. W-shaped movements are allowed.
- The last layer must be applied with a new roller. This way, it will be possible to achieve a uniform final finishing coat, without dark spots.
It is important to know that when painting indoors, you need to exclude any drafts, as they can deform the applied layer.
The main key to success is high-quality whitewash removal and adherence to paint application technology. As a result, the new finishing coating will be beautiful and will serve you for a very long time, without changing its qualities.
Video “Painting the ceiling with water-based emulsion”
Take the advice of a professional and you will learn how to paint the ceiling with water-based emulsion so that it looks flawless.
Exist various options ceiling finishing. Available in stores today huge assortment materials for this. Water-based acrylic paint is considered one of the most popular and relatively inexpensive. For the ceiling this is a completely acceptable option. Many people believe that this type of finishing is the least labor-intensive of all. existing options. In this article we will find out if this is true.
Advantages of the material: consumer opinion
Why do many owners choose water-based paint? As consumers themselves say, this material has many undeniable advantages. First of all, home craftsmen note that this coating dries very quickly. In some cases, just a couple of hours is enough for this. Many people choose coloring compositions of this type because they are safe not only for humans, but also for pets. The composition does not have a pungent or unpleasant odor. So after application there is no need to urgently leave the room. The composition can be given different color. For this purpose, special colors are used water based. If you follow the recommendations, the dyeing process does not cause many problems. Consumers believe that one of the undoubted advantages of the compositions is that the tools can be easily cleaned after application.
Possible difficulties
Whitewashing ceilings with water-based paint should be done very efficiently. Otherwise, glare and streaks will be visible on the surface. It must be said that painting the ceiling with water-based paint may not work the first time. It is especially difficult to achieve an ideal surface for those who have never done this before. At the same time, re-painting the ceiling with water-based paint will not hide, but on the contrary, will increase the visibility of defects. There are several nuances that are usually not taken into account.

Why do stains appear on the surface?
The occurrence of defects can be due to several reasons. First of all, before whitening the ceiling with water-based paint, you should take into account the lighting features in the room. Stains can also appear when using a low-quality composition. The choice of the tool with which the ceiling will be painted with water-based paint should be approached with the utmost care. An incorrectly selected or poor-quality roller can cause uneven distribution of the composition. How to buy the right tool? Experts do not recommend choosing a velor or foam roller. As the owners of the premises in which the ceilings were whitewashed with water-based paint say, the best tool is one with long pile or threads. It should also be remembered that after drying, the composition forms a smooth and fairly durable film. It can give off glare in daylight. If the technology for painting the ceiling with water-based paint is not followed, the work is done in a hurry, and optical effects are not taken into account, then the surface will be simply terrible.
Lighting
Before whitening the ceiling with water-based paint, it is necessary to evaluate the characteristics of the light distribution in the room. As a rule, it is necessary to take into account the type of flooring. If it is shiny and smooth (for example, parquet, ceramic tile or laminate), then the lighting on the ceiling will be much brighter than with a pile covering. Taking into account the optical effect that is obtained when light is reflected from the floor, the surface is covered with the first layer in the direction from the window to the opposite wall. The next one, on the contrary, is parallel to the source of natural light entering the room. With a chaotic distribution of strokes, a rather unpredictable “reflection” effect can result.
Coating composition
Both layers require the same brand of paint. The ideal option is for the mixtures to be from the same batch. If the composition has frozen to such a state that ice has formed in it, then it should not be used. In any case, as the masters note, in such a noticeable area as the ceiling. Separation of pigment components may have occurred in the mixture. Before doing this, it must be thoroughly stirred. There should not be a single lump in the mixture.

Tool
A roller is the most optimal device for applying water-based paint for the ceiling. Reviews from residential owners indicate that applying the mixture with a brush is a very labor-intensive task. In addition, in the latter case there is a greater likelihood of streaks and glare. The roller is bright yellow and suitable for use.
Surface preparation
This stage, according to experienced craftsmen, is decisive in the process of painting the ceiling. The surface must be dry and perfectly clean. To soak the old coating, you can use scouring brushes or a water spray in a vacuum cleaner. Next, the whitewash must be scraped off with a spatula down to the concrete base. After this, the surface is washed again. The ceiling must be allowed to dry. If the surface was covered with wallpaper, all remaining adhesive should be removed. As experienced craftsmen note, old layer coatings are usually removed in whole layers. The surface must be thoroughly cleaned, otherwise the new coating will lie unevenly, with defects, and will not adhere well.

Painting the ceiling with water-based paint: nuances
In the process of work, as experienced craftsmen assure, there is not a single moment that would not affect the result. At the very beginning, before stirring the paint, you need to read the information on the packaging. Some manufacturers do not recommend further diluting the composition with water. This paint should be thoroughly mixed directly in the factory container. Otherwise, there is a risk of leaving the pigment components in the jar. Experienced apartment owners involved in self-repair, adapted to mix the composition using a drill and a special attachment - a mixer. If the mixture needs to be further diluted, this should be done by adding small portions of water. In this case, you need to continuously mix the composition. When adding water, the main thing is not to pour too much of it, since it will not “thicken” the paint back.
Device for convenience
After the paint is mixed, it must be poured into a container with a wide bottom. A plastic cuvette is ideal for these purposes. It is usually used when developing photographs. If there is no such device in the house, then it is quite possible to replace it wooden box for fruits. You will first need to cover the bottom with polyethylene.

How to paint a ceiling with water-based paint?
The paint roller should be dipped into a container (special paint bath) with the composition and rolled over the surface on it until completely and evenly distributed. For convenience, a long handle is attached to the tool. Applying the layer can be called the most crucial moment. As professionals say, movements should be straight, fast and confident. At the same time, one should not forget about the direction. The first layer is applied from the window to the wall. As soon as the paint becomes scarce, the roller is dipped into the container again.
Subtleties
Painting the ceiling with water-based paint is not an easy job. One nuance needs to be taken into account when applying a layer. The area covered with the composition should not be looked at directly from bottom to top, but at an angle (approximately 30-40 degrees). In this case, all defects and errors in the layer will be visible. It would be better, of course, if there is an assistant who can tell you where there are unpainted areas. While the paint layer has not dried, errors can be eliminated. But once it dries, it can only make things worse. As experienced craftsmen say, it is highly not recommended to be distracted from the process. Painting the ceiling with water-based paint is done without lunch breaks or smoke breaks. Applying a second coat can either correct errors or make them worse. It should be remembered that re-painting is carried out after the surface has dried. If the defects cannot be corrected with the second layer, it is not advisable to apply the composition a third time. In this case, only removing the entire coating and repeating the process from the very beginning will help.

Reducing work time
Any painting work using a brush or roller is considered quite labor-intensive. The process often takes quite a long time. Painting the ceiling with water-based paint using a spray gun will significantly speed up the process. This option for applying the composition has a number of features. Let's consider them further.
Preparation
The paint, as when applying it with a roller, is thoroughly mixed beforehand. In this case, it is necessary to absolutely eliminate the presence of lumps in the mixture. If they remain, they can clog the spray gun and the mixture will go uneven. If it is intended to give the composition any shade, color is added during mixing. You need to pour it in small portions. It is unacceptable to leave pigment stains in the paint. The composition must be homogeneous. Experienced craftsmen It is advised to prepare the paint with a reserve, because if it runs out and the surface is not completely covered, then it may not be possible to choose a perfectly accurate tone.
Important Details
It should be remembered that when applying the mixture with a spray gun, a fairly large volume of the sprayed composition hangs in the air. It will settle not only on the surface being treated, but also on all others that are in the room, not excluding furniture. In addition, it is necessary to protect the face and especially the eyes from spray paint. Therefore, work must be carried out in a respirator and goggles. It is better to remove all furniture from the room. If this is not possible, then the items must be carefully covered with polyethylene, securing it with tape.
Progress
Using a spray gun allows you to get an ideal surface without defects. When applying, it is very important that the layer is thin and even. Immediately before application, move the spray gun nozzle slightly to the side and press it briefly several times. Once the spray is uniform, you can begin applying to the surface. The spray gun should be kept at a distance of approximately 30-50 cm from the ceiling. The paint jet is directed directly perpendicular to the surface.

How to make the process easier
You should mentally divide the surface into squares. The width of each should be approximately equal to the length of your arm. The areas should be painted one at a time. The layers are applied first transversely and then longitudinally. When using a spray gun, under no circumstances should you stop or linger in one place. In this case, the layer will be too thick or the paint may bleed. Work should be carried out at the same pace.
How to apply the composition
The recommended number of layers is three. Each new one is applied only after the previous one has dried. Do not paint over a fresh coat of paint or primer. Otherwise, the mixture will lie poorly and may peel off quite quickly. This will lead to a complete redesign. To create the first and third layers optimal time are considered morning and evening hours when the room has good daylight and direct rays of the sun do not dazzle. Although this recommendation does not have to be followed exactly. The most important thing here is that all errors in the application of the composition are visible, and the angle at which the light falls is as close as possible to constant for the room being repaired.
Modern water-based materials can be used for painting any surfaces, including in rooms with high humidity where previously only oil paints could be used.
To obtain an even structure, the surface should be properly prepared by performing the following steps:
- The whitewash or previous paint is removed. Before cleaning the surface of old materials with a spatula, it is necessary to treat the ceiling twice hot water, after which the old paint can be removed much easier;
- The water-based emulsion can also be applied old paint, but before performing work it is necessary to wipe the ceiling with a damp cloth to remove dust and fine dirt. However, it should be remembered that achieving ideal flat surface in this case it will not work;
- After the ceiling is freed from old materials, small cracks and holes are puttyed; large cracks should be glued with a special cloth and plastered;
- The prepared surface is leveled with special plaster compounds. Irregularities in the plaster are removed with sandpaper;
- The final stage of preparation is applying primer.
After the primer solution has dried, the main work begins.
Required tools and materials
High-quality application of water-based emulsion is impossible without special tools. To perform work in the kitchen, room, bathroom or toilet, purchase:
- Roller with sandpaper faux fur;
- Brush-flutz. Required for painting corners and ceiling surfaces adjacent to the wall. The width of the brush should be from 7 to 10 cm;
- Rectangular container with a ribbed cuvette. Used to place a single portion of material and roll out a roller;
- Mixer. Required for mixing the water emulsion;
- Paper tape. With its help, you can protect the wall surface from the ingress of material during work;
- Overalls. You will need a hat, glasses and a set of clothes.
If necessary, apply different colors on the wall surface, it is recommended to use different instruments for each shade.

Selection and preparation of water-based paint
There are several types of paint of this type. Their difference lies in the presence of a basic substance, which determines the parameters for using this material.
- Acrylic paints have excellent resistance to abrasion when washed, are odorless, and are suitable for painting almost all types of premises. The cost is average.
- Latex paints are among the most expensive, but this drawback is compensated by improved properties. Surfaces painted with latex materials can be treated using household chemicals.
- Polyvinyl acetate paints are classified as inexpensive. Recommended exclusively for dry rooms; water should not be used for washing.
- A water-based emulsion based on silicate compounds is recommended for application to plastered surfaces or concrete.
- Silicone-based water emulsion is suitable for working in rooms with high humidity, as they have increased vapor permeability.
Almost all of these paints are produced in two types: with the formation of a matte or glossy surface. To calculate how much paint is required, you need to know the area of the ceiling and the paint consumption indicated on the label.

Which roller to use
How to paint a ceiling with water-based paint without streaks? Here, first of all, you should carefully approach the choice of tool. The simplest and most reliable device for obtaining an ideal ceiling surface is a roller. Next simple tips will help you decide which roller to paint the ceiling with water-based paint.
It is advisable to select a tool with a long handle, which allows you to carry out work without using a stepladder. The fastening of the device must be reliable so that when force is applied, the tool does not change its position.

There are many types of roller sandpaper, but for painting the ceiling it is recommended to use only faux fur sandpaper (pile length from 10 to 12 mm). The sandpaper should sit tightly on the base, and the joint should not stand out, and it is good when it is made tangentially.
Padding
Painting the ceiling with water-based paint begins with applying primer to a previously prepared surface. Many people ignore this mandatory process, which leads to uneven coverage and streaks.
The primer improves the adhesion of the water-based emulsion to the plastered surface, as a result, the appearance of bubbles, microcracks, stains and mold can be avoided. This preparation also increases the length of time the ceiling retains its appearance after painting.

The surface must be primed with special compounds (primers), which are selected based on the composition of the water emulsion. Yes, for acrylic paint use acrylic primer, for silicone primer - silicone.
On concrete surface At least three layers of primer are applied, and for plastered ceilings it will be enough to walk over the surface twice.
If special compounds are absent, you can use the water-based emulsion itself to prepare the primer. To do this, you need to dilute the material in the following proportions: water-based emulsion - 1 part, water - 2 parts.
Coloring instructions
There are several ways to whiten a ceiling with water-based paint without streaks; various tools are used for this purpose.
Painting with a roller
You can get excellent ceiling coloring using a roller. This option is quite economical, and even a beginner can cope with the entire process. Enough to stick the following tips, which explain how to paint with this tool step by step:
- Before painting, the room is prepared for work. It is advisable to glue the wall at the junction with the ceiling with paper tape so that the water emulsion does not get on the wall;
- Objects in the room should be covered with paper or film;
- Mix the material thoroughly, especially if colored dye is added to the white base;
- For the initial layer, a material of a thicker consistency is prepared than for subsequent layers;
- If small particles are found during mixing, you will have to strain the entire volume of paint through gauze so that the surface of the ceiling is free of flaws;
- A strip 8-10 cm wide is applied along the perimeter of the ceiling with a brush;
- The prepared material is poured into a container suitable for the size of the roller. For rolling, a piece of flat plywood is used, but it is more effective to use special containers equipped with a ribbed ditch, which allow you to evenly saturate the tool with paint;
- Painting is carried out from the corner in stripes 40-50 cm wide. The initial layer is applied parallel to the window, the subsequent one perpendicular. When working, maintain an inclination angle of 45 degrees. Painting of the next strip is carried out with an overlap on the previous one (about 100 mm is covered);
- It is necessary to take into account the drying time of the material (up to 20 minutes), so the entire amount of work should be done quickly, without being distracted by rest;
- The quality of painting can be checked in good lighting, and if daylight not enough, use a powerful flashlight;
- Each new layer can be applied only after the previous one has completely dried, usually no earlier than 12 hours after completion of work;
- Irregularities are sanded with fine-grained sandpaper, after which another leveling layer of paint is applied.
 Painting in 2 layers.
  Painting in 3 layers.
 Spray painting
Using a paint sprayer allows you to get an even painting of the ceiling, while the worker makes a minimum of effort. The disadvantages of this technology include fairly high requirements for the power of the spray gun or spray gun.
An apparatus for spraying water-based paint must have a special compressor that is capable of creating the necessary pressure to force a fairly thick liquid through the nozzle.

How to paint a ceiling with water-based paint using a spray gun correctly:
- To facilitate this process, diluting the emulsion with water is often used. The water emulsion should be diluted in a ratio of one to one, as a result of which to obtain beautiful coating you will need to apply at least three layers of thinner paint;
- Before starting work, it is recommended to adjust the sprayer on an unnecessary flat surface (a piece of plywood or drywall) to achieve the required coverage;
- Noticeable boundaries of the joining layers should be rubbed with fine sandpaper so that when applying the second layer this defect will be eliminated;
- Paint is sprayed at a distance of 50-55 cm from the surface to be painted; it is advisable to maintain a perpendicular inclination of the nozzle to the ceiling;
- The material is applied in squares, covering the surface first along, then across. You should move to the next area without delay to prevent excessive accumulation of material in one place. It is better not to paint the entire area, since this defect can be eliminated by covering the defect with the following layers, and thick layer the entire volume will have to be cleaned and redone.
Painting with a brush
It is possible to paint the ceiling using a brush, but the result will certainly be disappointing. It will not be possible to avoid stains and uneven paintability of the surface.
Repairs made with a brush are possible in non-residential premises, such as closets, but you will have to put up with increased paint consumption, since drops of material, even with the most careful control, will flow from the tool onto the floor.
How to avoid stains
Obtaining an ideal ceiling structure when painting is achieved not only correct technique performing the actual application of the material to the surface, but also preliminary preparation premises. You need to do the following:
- Turn off the heating or insulate the radiators by wrapping them with thick material.
- Close all windows to prevent drafts.
- Good lighting should be provided to monitor the quality of work.
When painting with a roller, you must be at an angle of 45 degrees to the ceiling surface. This position allows you to control the uniformity of application of the material. Each next strip should overlap slightly (up to 10 cm) with the previous strip, while the time between applying the first and second strip should not exceed 20 minutes. If you apply the material on a dry surface, the border will be visible.
Any flaws are corrected with fine-grained sandpaper, after which a final coat of paint is applied.
Video on the topic
If you are going to paint the ceiling or walls, then before you start renovating your apartment, you need to decide on the choice of paint. Painting the ceiling is considered a more difficult job than whitewashing the walls, but even an untrained person without experience can easily handle it. Just watch a video on how to properly paint ceilings with water-based paint and you can do everything yourself.
If in the past all surfaces in the premises were covered with whitewash or wallpaper was pasted, today manufacturers offer a variety of facing materials. Despite this, ceiling repair with water-based paint remains one of the most popular types finishing works. Nowadays, no one whitewashes their own home, because it quickly loses its original appearance. And such finishing is no different in aesthetics.
Besides everything else, modern technology painting the ceiling with water-based paint is the simplest and most in an accessible way home renovation. This is due to the fact that this composition is obtained from water, tiny particles of polymers and coloring composite materials. The changes in the properties of such paints are influenced by the binding components. A coloring composition of this type fits well on any surface and adheres firmly to it.
The only paint option that does not resist moisture well is a composition based on PVA glue. It is used for interior decoration with low humidity concentration. If the paint base is polyacrylates, then they are called acrylic. They have found their application in construction, painting and the textile industry.
Flow calculation
According to its composition coloring matter is a suspension. Its peculiarity is the rapid evaporation of water, after which a protective film. Thanks to this, painting ceilings with water-based paint becomes quite durable, reliable and able to withstand high moisture. This refers to a formulation that does not contain polyvinyl acetate (PVA). Ecologically pure material, not highlighting harmful substances and does not cause allergies.

Water-based paint fits perfectly on any surface. The product consumption depends on the quality of the applied layers. Manufacturers indicate optimal rate in the instructions. For 10 m² you will need 1 liter of paint. To avoid overspending, the following recommendations should be followed:
- You cannot use thick paint in hopes of covering the ceiling with one coat. It is diluted with water and three thin layers are applied.
- Each subsequent painting is carried out after the previous one has completely dried.
- The coloring composition has a unique ability to be absorbed into any surface, so you will need to apply additional layer. This can be avoided if the ceiling is carefully primed.
Ceiling repair with water-based paint
Before purchasing such a mixture, you should carefully read the accompanying documents. Typically they contain the following characteristics:
- What kind of work is the paint designed for?
- What is the composition consumption per square meter.
- The ability of the composition to hide a darker background under white flowers.
- Abrasion resistance. This can be wet or dry cleaning.
Particular attention should be paid to small print. It is in it that more often is indicated detailed information about all the characteristics of this coloring composition. As for the consumption of water-based paint for walls and ceilings, it indicated even on the banks.
If the instructions say that this mixture has high abrasion resistance, it means that the painted base can be washed, but the use of chemicals is not recommended.
There are paints that do not have water-repellent properties, which means that walls coated with such compounds can only be vacuumed or wiped with a dry cloth.
The inscription about use in dry rooms speaks for itself. Kitchens, bathrooms and other rooms with high humidity are not recommended to be painted with such compositions.

High-quality video on how to paint ceiling tiles with water-based paint with your own hands, gives a complete picture of step by step process of this work. Glossy and matte paint compositions are in quite high demand. If the first paint option can visually expand the room and increase the height of the walls, then matte paint reliably masks minor defects. However glossy surface It is not fussy to care for, which cannot be said about the matte finish.
Water-based paints are ideal option for ceilings, because they dry quickly and do not emit unpleasant odors. They are divided into three types: silicone, acrylic and silicate.
Before painting any surface, preparatory work is carried out. Thanks to the endless information on how to paint the ceiling with water-based paint with your own hands, the majority of owners refuse the services of professionals. Thanks to this, people save a significant amount of money.
No less attractive is painting a plasterboard ceiling with water-based paint. To do this you will need the following tools:
- Foam or felt roller and tray for paint composition.
- More experienced owners use brushes with nylon or natural work surface. They are produced different sizes and forms. Such brushes are more suitable for treating raised areas that cannot be reached with a foam roller.
- For processing the most hard to reach places, use miniature brushes with a width not exceeding 3 mm.
Now many people understand that painting the ceiling with water-based paint with your own hands is not particularly difficult. Main properly prepare the surface. It needs to be cleaned of traces of previous repairs. To do this, you can use a spatula or scraper. You may also need warm water, soap and rag. This is in case you need to wash off the previous whitewash.
After removing all this, the surface must be carefully examined - the recesses must be filled with putty, the growths must be removed. The most the best option preparing the surface for correct painting ceiling with water-based paint is to clean it before concrete floors. Only in this case will the coloring composition firmly adhere to the surface and remain on it for years.
Based on this, we can conclude that painting ceiling tiles with water-based paint is quite easy, quick and simple. The main thing is to carry out this work consistently, without missing anything. Moreover, the choice of painting technology is influenced by the condition of the ceiling and the type of its coating.
There are two options:
- new painting of the ceiling, already painted with water-based paint;
- applying a coloring composition to whitewash.
Both options differ in their technological process, however, the essence of the task remains the same: the ceiling surface must be completely ready for painting.
All work is divided into the following stages:
- The completely cleaned ceiling is plastered and then thoroughly puttied. In this case, the layers are not counted, as when painting or priming. It all depends on what defects you find on the surface being treated. Choose the highest quality plaster and putty.
- The ceiling acquires ideal smoothness after treatment with finishing putty.
- After applying it, the ceiling surface is treated with fine-grained sandpaper. This guarantees reliable adhesion of the primer to the putty. Prime the surface in three layers.
Upon completion of this work, the actual painting begins. More attractive for professionals is deluxe water-based paint, designed for walls, ceilings and other surfaces. Corners and joints are treated with brushes, but for the main work it is better to use a spray gun. It can be rented.

Working with a foam roller or wide paint brush, the layers are applied perpendicular to each other. Allow the paint to dry completely before applying the next coat. In a warm room this will take no more than 5 hours. If you don’t know how many layers of paint can be applied to a ceiling or wall, then optimal quantity make up three layers.
When using a roller, it should be thoroughly soaked in the coloring composition and rolled well in the tray. This will avoid smudges, streaks and droplets. You can also use a roller with a fur working surface. In this case, the renovation of the ceiling painting will be of higher quality. The fur distributes the paint more evenly, pushing it into the most inaccessible places.
The paint is applied with longitudinal movements. The first and last layers are directed perpendicular to the window. In this case, minor streaks left by the brush will be less noticeable. The worst thing is when there are unpainted areas. To prevent this from happening, it is necessary to create bright lighting in the room. When working, you should periodically step aside different sides and inspect the surface being treated. This will allow you to notice gaps and stripes.
In addition to complete painting, you can refresh a ceiling painted with water-based paint. In this case, her do not remove, but apply on top several new layers. Painting decorative elements, representing ceiling skirting boards, requires more careful work. You can't use a roller or sprayer here. In this case, use a small brush. If necessary, it can be equipped with a long handle. Then you won’t have to climb onto a table or stepladder.

Often the ceilings in kitchens are covered with soot. It must be washed off and the surface primed. If this is not done, the paint will not last long and will begin to peel off after a few months. In addition, the blackness will show through the coloring composition, making appearance The ceiling is not at all attractive.
If after applying three layers you are not satisfied with the painting result, cover the ceiling with another layer of paint. It all depends on the condition of the concrete floors. Even qualified professionals often paint ceilings and walls more than three times. By the way, the quality of painting is influenced by the choice of putty and primer. They are selected according to the characteristics that are best suited for a particular surface: concrete bases, hanging plasterboard ceilings, wooden surfaces and others.
If, of all the types of ceiling finishing, you prefer painting it with water-based paint, then you should take this task quite seriously and do the job no worse than the masters do. By the way, even after professionals, completely dried paint often gives glare different shades. However, when amateurs get down to business, this does not happen, because they work slowly but carefully.