How to glue foam tiles on the ceiling: step by step instructions with photos and videos. Do-it-yourself methods for gluing ceiling tiles How to glue ceiling tiles
Read also
Ceiling tiles are the best cladding choice when you need a quick and inexpensive repair. Properly selected ceiling tiles can be glued to various types of mixtures. The main condition is the absence in the composition of components that deform the finishing material. Consider the types of adhesives, select the best compositions and at the same time talk about how to mount the cladding on a pre-prepared base.
The opinion that the best glue is the most expensive is completely wrong with foam decor. Of course, the component composition will not smell, but is it as good as it seems? When choosing how to fix the ceiling tiles, it is important to pay attention to the following characteristics of the composition:
- Adhesion. The higher the level of adhesion, the more firmly the tiles will be fixed on the ceiling. Grip does not always depend on the viscosity of the composition, but it is better to pay attention to this quality.
- Drying time. Too fast drying compounds are just as bad as long drying mixtures. The former will not allow you to move the element if it accidentally moves from the desired point, the latter may simply not grab and the tile will fall off the ceiling. Proper glue dries within 2-3 minutes. At the same time, it seizes almost immediately, which means that it is enough to hold the tile against the ceiling for a short time, pressing it a little so that it normally “adheres” to the base.
- Smell. If the smell does not disappear for a long time, while you have not yet started working with glue, imagine what kind of aroma will be in the finished room.
Important! The adhesive for foam tiles should not contain solvents (white spirit, acetone, toluene). Components deform, burn elements. Also, you can not take colored mixtures for thin lamellas - glue spots will definitely begin to shine through the elements.
The best types of adhesive mixtures:
- Titanium.
- Silicone (Compound).
- Universal.
- Acrylic putty.
- Liquid Nails.
Preparing the ceiling surface for gluing
In order for the foam ceiling tiles to lie evenly on the base and stick tightly, the ceiling preparation process is preliminarily carried out.

The work algorithm is as follows:
- Remove all old decor. The whitewash is washed away, removing especially resistant pieces with a spatula. The wallpaper can be wetted with water, and when it swells, it can also be removed with a spatula. Remove the paint with a special solvent. Break off the tiles, remove the adhesive tracks with a spatula.
- Dry the surface, prime with a mixture of deep impregnation. It is good if the primer is with antiseptic additives. It is necessary to primer twice, but first let the first layer dry, and then apply the second and dry it too.
If the ceiling is even, the preparatory work is completed. There are defects, back to work:
- repair all chips, cracks, cavities with a starting putty;
- sand the dried putty with a grater with a mesh;
- primed again to increase adhesion.
Advice! If mold spots have formed on the ceiling, they must be removed. A solution of copper sulfate or an antiseptic is used. First, clean off the mold, then treat the surface, carefully smearing all areas.
Tools and materials for work
To perform the work, the master will need the following set:
- ladder;
- roulette;
- a pencil with a ruler;
- chopping paint cord;
- primer (you can immediately with antiseptic components);
- primer roller;
- set of spatulas: with a wide serrated edge, regular;
- sharp knife;
- adhesive composition;
- ceiling tiles;
- ceiling plinths;
- seam sealer.
Tiling schemes
When thinking about how to glue tiles to the ceiling, first decide on the layout scheme.

There are several options:
- Parallel. The easiest way to glue ceiling tiles. The option is suitable for walls that are even along the length in a room of standard geometry. Start work from the wall panel located opposite the window or door. The layout starts from the center, then goes into the corners - it’s easier to mount solid elements first, and trim the extreme ones. But you can start laying out from the corner, trimming in this case requires only one (extreme) element.
- Diamonds. A good way to glue foam ceiling tiles in rooms with irregular geometric shapes. The option is complicated, but the result is beautiful. First, find the center of the room from it, set aside the required number of squares (4-8), then the diagonal pasting of the ceiling begins. The result should be a pattern in which the corner of the element looks exactly at the center of the room, and one side of the lamella coincides with the diagonal line on the ceiling. The rhombus in this case is created by 4 elements. The option allows you to use different color solutions, highlight tiles with a pattern, interesting texture.
- Diagonal. Here you have to figure out how to fix it - the technology is simple, in which the center of the room is first located, from where the decor will be installed. A thread or cord will come in handy, which must be pulled diagonally from the corners of the room where they intersect - there is the center. Set aside 4 elements from the center, joining the corners, lay out from them. If the room is of normal geometry, then the center of the room is where the hook from the chandelier is.
Advice! If you have a simple ceiling tile, you know how to glue it in different ways, but you don’t want to - laying out with a seam offset will come in handy. This is a simple option: each next pattern is shifted with an end seam by half of the tile of the previous row. Patterned decor is not laid out in such a way that it does not ripple from a mismatch in the pattern.
Ceiling markings
In order for the rows to lie flat, regardless of the choice of gluing method, you first need to mark the ceiling. In addition to ease of installation, the markup makes it possible to pre-prepare trimmed decor fragments so that they are not distracted during work.

Usually, the installation of decor starts from the center of the ceiling or the location of the chandelier (sometimes this is the same point). Twine, thread, chopping paint cord are useful for marking. Fasten one end of the rope in the corner, the other - stretch diagonally to the opposite corner. Do the same with a couple of other corners. Where the threads intersect, there is a center and a right angle is formed. Mounting zones are marked along the cords (with a pencil), and the first elements are laid out at the intersection. So the easiest way to start the installation according to the rhombus scheme.
If the chandelier is not located in the center of the room, the markings must be done differently.
The work algorithm is as follows:
- through the hook for the chandelier, draw 2 lines perpendicular to each other parallel to the walls;
- right angles are obtained;
- divide the corners in half, bring the line through the division point to the point of junction with the walls;
- you will get one point of the beginning of the installation of tiles.
It remains only to choose how to stick the tiles on the ceiling and you can start finishing.
Tile sticking
Having decided on the layout scheme, you should prepare all the tools and materials. And now to evaluate the degree of viscosity and the type of adhesive composition, the method of applying the adhesive depends on this. If it is putty or cement mortar, the mixture is applied in a thin layer or pointwise so as not to weigh down the elements. When using other mixtures, liquid nails, glue is laid out along the perimeter of the lamella, in the center or crosswise. After application, you can spread the glue with a spatula over the entire wrong side of the element.
How to stick tiles on the ceiling correctly:
- Prepare room for work. Close doors and windows so that there are no drafts that interfere with the natural drying of the composition.
- Apply glue to the lamella, wait 1-2 minutes for the composition to thicken and attach the tile to the place of gluing.
- Press the element to the ceiling, hold a little, release. The following piece samples are laid out in the same way. In the process of applying, pressing, you can have time to correct the tile if it lay unevenly.
The extreme lamellas will be trimmed, it is important to lay out the cut edge to the junction with the wall - this area will be closed by the ceiling plinth, so uneven edges will not be visible. Skirting boards are mounted on the same adhesive composition as the tiles. But before installing the moldings, you need to go through the tile seams with a sealant. The seal is made quickly, the mixture is smeared with a finger so that no bumps and lumps stand out.
Knowing how to properly glue the ceiling tiles, there will be no problems with work. It is only important to prepare all the materials, tools and you can get to work. But as for determining the number of elements, the formula is useful here: divide the area of \u200b\u200bthe ceiling by the area of one tile. The final figure plus 10% will be the desired amount. The stock is necessary for trimming the lamellas, replacing them in case of defects.
Styrofoam ceiling tiles are an inexpensive and quick way to give your ceiling surface an aesthetic and attractive look. Ceiling tiles can be glued to several types of adhesive mixtures, but there are also adhesives that are completely unsuitable for this, because they destroy the foam. We will tell you how to choose the right adhesive for gluing ceiling tiles. Before finishing work, the ceiling must be prepared so that significant defects do not interfere with the even fastening of the tiles and are not visible through the coating.
If you know how to properly glue ceiling tiles, you can make a beautiful and durable ceiling covering yourself.
Choosing an Adhesive for Styrofoam Ceiling Tile
Before gluing foam ceiling tiles, you need to choose the right adhesive.
When choosing an adhesive mixture, it should be borne in mind that it must meet the following characteristics:
- the adhesive composition should give a strong and reliable adhesion of the coating to the base;
- he must quickly seize;
- adhere well to the base ceiling;
- high viscosity of the adhesive will ensure quick fixation of the product;
- be safe for humans, that is, do not emit toxic fumes;
- it is good if the glue can be applied in a thin and thick layer (this will smooth out minor irregularities in the base).
Foam products are usually glued to a concrete surface, drywall base, plywood or chipboard rough ceiling. It is worth remembering that the adhesive mixture should not dissolve the foam, so give preference to mixtures without solvents such as white spirit, acetone and toluene.

The level of adhesion to the surface and the drying speed of the adhesive mixture are equally important. If the adhesion time is more than 30 seconds, then the adhesive is not suitable, because it is not very convenient to stand with your hands up and press the tile for a long time. But too fast coupling can be impractical, because then it will not be possible to correct the position of the element.
Important! Choose the adhesive and primer for the base ceiling based on the same components. They give a better grip to each other.
Styrofoam ceiling tiles can be glued using the following adhesive mixtures:
- PVA glue;
- universal mixtures without aggressive solvents;
- acrylic putty;
- melt;
- liquid Nails;
- mixtures based on gentle chemical solvents;
- compound.
Preparing the ceiling surface for gluing
Before gluing tiles to the ceiling, the base surface must be properly prepared. The beauty of the coating, its evenness and strength of adhesion to the base depend on this. You need to fasten the finish to an even and solid base without the old finish, so wallpaper, paint and other finishing materials will have to be removed from the ceiling. It is forbidden to stick the tile to the whitewash, so it is washed off.

Depending on the variety of the previous finishing material, different technologies for cleaning the base surface are used. Old chalk or lime whitewash is washed off with soapy water or water. Water-based paint or other interior paints are cleaned with a spatula. If the paint adheres very firmly to the ceiling, then special washes are used. To remove old wallpaper, the ceiling is moistened with water, and then the wallpaper is cleaned with a spatula.
After removing the finish, the surface must be primed. For this, deep penetration soil is used. If the ceiling is sufficiently even, then the preparatory work ends there. Otherwise, additional leveling is carried out with a putty mortar. After that, the surface is ground and again opened with a primer.
Separately, it is worth mentioning the mold. If there are areas affected by the fungus on the ceiling, then they must be additionally treated with copper sulphate (solution) or a special antiseptic composition. This treatment is repeated several times in order to protect against the formation of mold in the future, which can spoil the health of all the inhabitants of an apartment or house.
Tools and materials for work
For work, purchase the following materials and stock up on some tools.
You will need:
- ladder or small platform;
- tape measure, pencil, ruler;
- paint cord;
- primer for the base ceiling (antiseptic composition, if there is mold);
- a spatula will be needed if acrylic putty or glue for plasterboard is used for gluing (stock up on a wide and narrow notched trowel);
- stationery knife for cutting tiles;
- mounting gun, if you use liquid nails for gluing;
- ceiling tiles and skirting boards for it;
- suitable tile adhesive;
- white sealant.
Tiling schemes
If you are interested in how to glue ceiling tiles, there are different ways of laying on the ceiling.

The ceiling foam coating is laid in the following ways:
- The easiest way to glue foam products in parallel rows along the walls. This method is used with even walls and the correct geometry of the room. The gluing of elements begins to lead from the center of the room, and the products in the extreme rows are cut in length and width.
- Sticking with rhombuses suitable for rooms with irregular geometry. Diagonal gluing hides this lack of room. Before starting work, the layout of the room must be made. Find the center of the room by drawing diagonal lines from the corners on the ceiling. In some cases, it is better to find the central parts of the walls and get the center of the ceiling at the intersection of the lines.
- Styrofoam products without a pattern can be glued with a seam offset. In this case, the end seam is shifted by half the width of the element of the previous row. Patterned tiles are not glued in this way, because there will be a mismatch of the pattern on the surface.
Ceiling markings
Before gluing the ceiling tiles, we mark the base surface. The breakdown is done taking into account that the dimensions of one element are 500x500 mm. Tiles can be started from the center of the room or from one of the walls. The first method is suitable if there is a chandelier in the center of the room. If the markup starts from one of the walls, then they usually choose the wall opposite the window.

To find the center of the room, a masking cord is pulled from the corners of the room and two diagonals are beaten off on the ceiling. The point where they intersect will be the center. Another way involves finding the midline of the walls. Then these marks are connected by lines on the ceiling and a center point is obtained at the point of their intersection.
Advice! Finding the center along the diagonal axes is more suitable for rooms with a regular square or rectangular shape. In rooms with an irregular or complex configuration, it is better to find the central points of the walls, and then connect them.
If the corners of the tiles converge in the center of the ceiling, then this markup is enough. Sometimes it is planned to glue a whole element in the center of the ceiling, that is, the central part of the ceiling surface will fall on the center of one tile. In this case, from the point obtained on the ceiling, 25 cm (half of one element) are laid in two directions and lines are drawn. Within these lines, the first tile is glued.
Tile sticking
Now let's talk about how to glue the tiles on the ceiling. The method of applying tile adhesive depends on the choice of adhesive mixture. When using putty or cement mortar, the glue is applied pointwise so as not to additionally weigh down the coating. When using liquid nails or Titanium glue, the mixture is applied around the perimeter of the product and in the central part. Then the adhesive mixture is leveled with a spatula over the entire surface.
The sequence of gluing the foam board:
- To begin with, close all windows and doors in the room to exclude drafts, which may not have the best effect on bond strength.
- Then we apply the selected tile adhesive to one element and wait a couple of minutes to thicken the adhesive mixture. This will speed up the bonding time, which will save you from having to stand with your hands up for a long time.
- After that, we apply the element smeared with glue to the ceiling and press it well over the entire surface.
- Before gluing the next product, it is applied to the ceiling dry to see how well and correctly it will lie, and how its edges will fit with the adjacent plate.
- The elements in the extreme rows are cut to the desired length and width and also glued.
- After that, the seams between the individual plates are filled with white sealant. Then you can glue the ceiling plinths. If you planned to paint the ceiling, then after all these works, you can start applying interior paint.
When you know how to stick tiles on the ceiling, all that remains is to purchase all the necessary materials, stock up on tools and make a beautiful ceiling covering with your own hands. Pasting the ceiling does not take much time and does not require large expenses for the purchase of materials.
Lightweight styrofoam tiles are the most sought after ceiling covering. With its help, they transform the space in kitchens, hallways, bedrooms and even in the halls for receiving guests. First of all, people choose this finishing material because, in comparison with stretch ceilings, it costs mere pennies.
And, of course, everyone, without exception, likes the fact that even the person who makes repairs with his own hands for the first time in his life can handle such sticking. For such beginners, we will tell you how to properly glue the tiles on the ceiling and by what methods this can be done.
How to properly and beautifully glue foam ceiling tiles: different ways
Scheme No. 1
 Scheme No. 2
 For those who do not know, ceiling tiles are squares with perfectly even sides that have a front and back side. In view of this, when carrying out finishing work, you must carefully watch whether you fix them correctly on the ceiling.
After all, if you glue the tiles without paying attention to this nuance, then in the end you will not be able to lay down the perfect pattern. Also, when planning such work, it is extremely important to decide in advance which way you will glue the tiles. This must be done in order to understand exactly how much material you may need.
Methods for gluing foam to the ceiling:
- parallel to the wall. This method of finishing assumes that the finishing work will begin to be carried out against the wall, which is opposite the window or door openings. The first tile will need to be smeared with glue and laid exactly parallel to the wall, stepping back a little from it.
- Diagonally. If you choose this particular method, then you will need to start finishing the ceiling exactly from the center of the room. In order to determine this place, you will need to stretch the thread through the corners located opposite each other. The place where they intersect will be the center of the room.
- Diamonds. I would immediately like to say that this method is considered the most difficult, so it is better for beginners not to take it. In this case, you will also need to find the center of the room, set aside a few squares from it, and then glue tiles diagonally from them. If you do everything right, then the corner of the tile will look exactly in the center, and one side will coincide with the diagonal on the ceiling.
How to mark the ceiling under the ceiling tiles?

 Recommendations for marking
 As mentioned a little above, in order for the ceiling tile to look perfect, it is necessary to carry out preliminary marking before fixing it. Remember, if you don't want to redo all your work from the beginning, you must do it.
After all, only the markings correctly applied to the ceiling will help you place the first tile as it should, and subsequently create the perfect pattern. If you attach the tiles to the ceiling with diamonds or diagonally, then the markings will help you mask the seams as well as possible, thereby making the canvas visually even.
- To get started, use a measuring tape to measure the approximate distance (diagonally) from one corner of the room to another.
- Next, cut two pieces of rope (their length should correspond to the data received)
- In the next step, you will need to stretch these two blanks from corner to corner so that they intersect in the center of the ceiling
- Next, take, for example, a level and a simple pencil and draw the formed diagonals on the ceiling space, and be sure to mark the center point of the room
- Remove the ropes and draw a square near the center point that the ceiling tile will easily fit into. From this place you will continue to finish the entire ceiling.
Where to start gluing ceiling tiles?
 It is necessary to start finishing the flow from a central point
 If you carefully read our article, you probably understood that you can start gluing the slab to the ceiling from two places. If you are doing this for the first time, it will be better if you prefer the method in which the tiles are glued parallel to the wall. In this case, you will not need to carry out any preliminary measurements, and you can literally immediately proceed to the main stage of work. All you have to do is find the perfect place on the ceiling and fix the first plate on it.
After fixing it, you will need to check whether you have placed it correctly, and you can proceed to fixing the rest of the decorative material. If you want to create a more complex pattern on the ceiling, then you will need to mark it (we told you above how to do it correctly) and after that you can start transforming the living space. In this case, the first tile will need to be placed in the center of the repaired room.
How to apply adhesive to ceiling tiles?

 Glue application scheme
 Most people who make repairs for the first time in their lives think that applying glue to a finishing material does not require any special knowledge. But as practice shows, even such a simple, at first glance, process must be carried out correctly. If you apply glue randomly, then as a result the tile will not fix as it should, and what is most unpleasant, the resulting seams will not ideally adjoin the ceiling covering.
So, to begin with, apply a small amount of glue to the very center of the tile, then place droplets diagonally from this point, and at the very end, apply a line along the entire perimeter of the finishing material. When applying glue to the tile, make sure that the droplets are not very large. If there is a lot of glue, then when the tile is pressed against the ceiling, it will begin to come out and, as a result, you will have to remove the excess, and this can damage the structure of the finishing material.
Yes, and remember, if you want the adhesive to fix the tile on the ceiling as well as possible, you will need to hold it in the air for 1-3 minutes before fixing it. During this time, the adhesive will react with air and this will help the substances that are responsible for adhesion become more active.
What adhesive is best for ceiling tiles?

 Adhesive for ceiling tiles
 As a rule, people think that the more expensive the glue, the better it is. Of course, in most cases, an expensive tool is much better than a cheap one. But still, in the case of ceiling tiles, you need to pay attention to other factors. The most important indicator of the quality of the adhesive is the adhesive strength. The higher this indicator, the more reliably the decorative material will be fixed on the ceiling.
In addition, you should pay attention to how quickly the glue dries. The sooner this happens, the better it will be for you. After all, if it seizes not for 30 seconds, but for 2-3 minutes, then you will simply get tired of holding the tile for such a time and, most importantly, you will definitely not be able to fix it correctly. Also, when buying, be sure to pay attention to the viscosity of the adhesive.
If the glue you have chosen is very liquid, then try to choose another option for finishing work. As practice shows, a too liquid adhesive base will not allow you to securely fix the tiles on the ceiling and it is likely that after a while you will have to redo everything from the very beginning.
Types of adhesive for fixing ceiling tiles:
- Universal
- Titanium
- Adhesive compound (silicone based)
- Acrylic putty
- Liquid Nails
- Polyvinyl acetate adhesive
How to beautifully and correctly stick a ceiling tile diagonally, with a rhombus: description, video
Before proceeding with fixing the tiles, it is imperative to prepare the ceiling space. If you do not do this, then in the end, with all your desire, you will not be able to properly fix the finishing material. For this reason, it will be better if you first carefully inspect the ceiling and repair all defects.
But keep in mind that in order for the tile to fit perfectly, it is not enough to repair all the cracks and pits. If you want the maximum adhesion between the ceiling and the decorative coating, then you will definitely need to sand the surface, and then carefully prime it.
- To get started, measure the area of the ceiling and estimate how many tiles you may need. Please note that if you fix it with a rhombus, then you may need more of it than if you glue it diagonally.
- At the next stage, you will need to mark up and mark the central point of the ceiling, as well as the diagonal lines, which you will follow to lay out the diagonals and rhombuses.
- After the markup is done, you will need to apply glue to the entire tile and fix it at the center point. If you want it to fix instantly, do not forget that it must be held for at least 1 minute.
- In order for the tile to be fixed, it must be pressed against the ceiling covering and held in this position for 30 seconds. After you make sure that it does not move, you can start applying glue to the remaining decorative material.
- Initially, you will need to lay out the tiles diagonally, which were drawn during the markup, and when this is done, you can proceed to filling in the empty space.
- It is necessary to fix the tiles on the ceiling, moving from the central point to the corners, while trying to make sure that they visually fold into a perfectly even line.
How to glue ceiling tiles without seams?

 Seamless tile gluing
 In principle, seamless tiles are glued in the same way that we introduced you a little higher. Therefore, in this case, you will also need to initially measure the area of \u200b\u200bthe ceiling in the room being repaired, apply markings on it, determine the center point, and only after that proceed to gluing the decorative material. But still, if you want to end up with a perfect ceiling covering, then glue the tiles either diagonally or parallel to the wall.
Yes, if you prefer the last method of finishing the ceiling, then start fixing the tiles on the wall opposite the window. Such a little trick will help you make less noticeable those gaps that are formed when finishing with such material. And finally, I would like to say that, although some sources claim that in the case of seamless ceiling tiles it is not necessary to apply glue around its entire perimeter, it still needs to be done.
As practice shows, if this is not done, then after drying, the gap formed during installation is quite striking. And, of course, do not forget that the ceiling tile is made of a very soft material, so you need to hold and smooth it not with your hands, but with a foam rubber sponge or a soft cloth.
How to glue ceiling tiles on an uneven ceiling?

 Ceiling tiles for uneven ceilings
 As a rule, in old houses and apartments, the ceilings are far from ideal. Most often they are covered with cracks and small depressions, which are very striking. If you live in a house with the same ceiling, then you can correct the appearance of the home with ceiling tiles if you wish.
If you don't want to mess around with leveling and sanding the ceiling, then just buy foam tiles and glue it in a way parallel to the wall. True, you must remember that you can do this if the defects on the ceiling are the most minimal. If they are too large, then you will either have to decide to completely tear out the surface or install a special frame.
Usually it is installed slightly below the ceiling itself and this makes it possible to hide even very prominent defects. True, in this case, more expensive tiles, for example, wooden, metal or ceramic, will have to be fixed on it.
How to seal the seams between ceiling tiles?

 Ceiling tile grouting tips
 As mentioned a little above, even the so-called seamless tiles require additional processing of the gaps that form after the ceiling sheet is completely dry. In view of this, when planning such finishing work, immediately include in their cost special tools that will help you make the repaired surface as even as possible.
As for how to do this, in this case it is best to give preference to acrylic sealant. In case you want to seal the seams without too much trouble, then invest in a tube of sealant and a gun that will help you distribute it evenly.
- Attach gun to sealant tube
- Use scissors to cut the tip at a 45 degree angle
- Press the resulting hole to the beginning of the seam
- Gently press on the pistol grip and guide it exactly along the seam
- After filling the joint, carefully move the gun away from the ceiling and allow the sealant to set.
Can ceiling tiles be painted?
 You can paint ceiling tiles
 Sooner or later, the desire to paint a tiled ceiling appears in all people. But as practice shows, only a small part of novice repairmen decide to take this step. Most of these people believe that the paint will simply ruin the ceiling tiles and they will have to spend money on expensive repairs again. In fact, not all tiles can be painted.
For example, in no case should seamless tiles be treated with colorants, as this will necessarily make the seams darker and, as a result, they will stand out quite strongly against the general background of the room space. The rest of the tiles can be painted calmly, though keep in mind that in order for the color of the updated ceiling to be as saturated as possible, it will be necessary to apply paint in at least two layers.
What can be used to paint foam ceiling tiles?
 ceiling painting scheme
 As for the choice of paint for updating the ceiling, when buying it, you need to pay attention not only to color. If you want the ceiling to remain in perfect condition for a long time, you must choose the right coloring matter.
And this means that it must prevent the growth of mold, be moisture resistant and have dust-repellent properties. In addition, it must necessarily have a moderate level of glossy effect. In view of all this, we can definitely say that it is best to paint ceiling tiles with water-based or acrylic paint.
Video: K How to quickly glue the CEILING TILE?
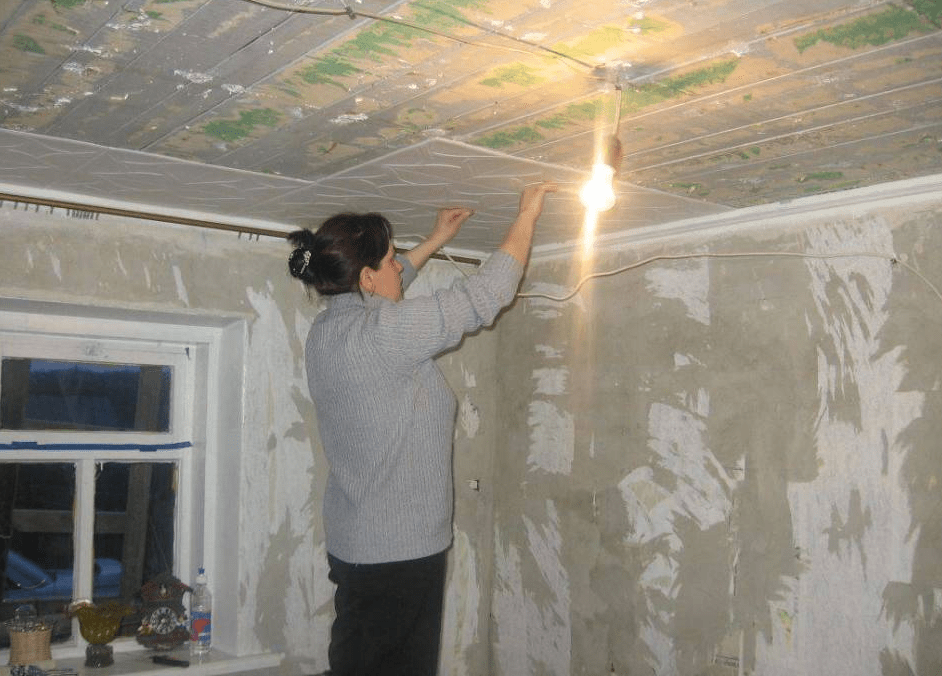
One of the important details of a quality repair is a beautiful and even ceiling. Some are limited to whitewashing, others acquire stretch options. One of the popular ways is to glue the ceiling tiles. How to carry out the installation so that the material holds firmly and decorates the room? A selection of useful tips is presented in this article.
Material characteristic
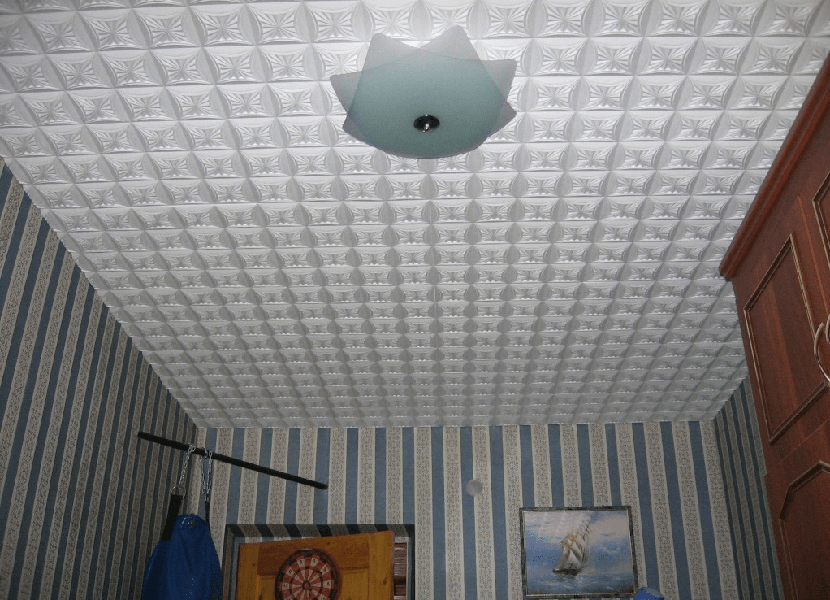
Ceiling tile is a foam plastic finishing material. Usually sold in squares, but there are also rectangular designs. The most common size is 0.5 × 0.5 m. The front side can be smooth and embossed, laminated or without any coating. Tile decor can imitate wood, fabric, ceramics, stucco and other structures.
There are three types of finishing material:
- injection is obtained by sintering and casting polystyrene foam in special forms;
- extruded is pressed from an extruded strip, usually film-coated or painted;
- pressed is made by pressing.
There is a so-called seamless tile. Its advantage is that at the end of the work, the joints are completely invisible. Usually they have a figured edge: when glued, the wavy joints on the ceiling become invisible. Installation of such a coating is carried out with an accuracy of a millimeter and only on a flat surface.

Ceiling tiles are a quick and inexpensive way to decorate a room. When the ceiling is designed in this way, it is called "pasted" or "glue".
Advantages and disadvantages
Why Choose Styrofoam Ceiling Tiles? Material advantages:
- It is environmentally friendly.
- One of the main advantages is accessibility. Expanded polystyrene tiles are inexpensive and are a common material.
- A wide range of reliefs allows you to choose an option for any interior.
- Suitable for finishing most basic surfaces: concrete, brick, wood, plaster and plaster.
- It has soundproof properties.
- Helps keep the room warm.
- Easily and quickly installed by hand.
- Allows you to easily correct the result after a while (for example, re-glue a detached part).
- Aesthetic look.
- Helps to hide minor ceiling defects (potholes, cracks).
- The material is not combustible, so it can be glued near heating systems.
- It is easy to care for such material: it can be cleaned, wiped with a damp cloth. If the coating is not laminated, then it is cleaned with a soft nozzle of a vacuum cleaner or a dry cloth.

The material also has a number of disadvantages:
- It melts at temperatures above +80 degrees, so the lamps should not be located closer than 30 cm.
- Will turn yellow over time from sunlight.
- Some coatings do not tolerate moisture well.
- On an uneven ceiling, it is difficult to achieve uniformity due to the abundance of joints.
- Poorly passes air, which makes the room more stuffy.
- Brittleness: Thin sheets are easily deformed and damaged until they are fixed to the ceiling.
What to glue
To keep the finishing material for a long time, you need to choose a good adhesive for ceiling tiles. The final result and durability of the coating largely depends on the choice.

What to glue polystyrene squares on:
- "Moment"- one of the frequently used compounds. Its advantage is that it dries very quickly, which justifies its name. It is enough to press the tile to the ceiling for a few seconds. Of the minuses, it is worth noting the high cost and high consumption.
- - universal glue on the basis of polymers. It is used for gluing tiles, ceiling plinth and other materials: linoleum, parquet, etc. After drying, it remains transparent, which ensures the preservation of the aesthetic appearance of the coating. It grabs longer than the “Moment”, so you have to hold the tile longer, which is not always convenient.
- "Eco-naset"- glue similar to "Titan". Plus - when working, you can adjust the position of the tile. The minus, like that of Titan, is a relatively long polymerization.
How to properly install
What items will be needed for a successful installation:
- stepladder (or high stable table);
- glue gun;
- stationery knife;
- ruler (roulette);
- pencil;
- putty knife;
- brushes;
- twine;
- rags for wiping;
- protective gloves and mask;
- glue and tiles.

Training:
- First, make sure that each of the tiles is free of dirt.
- Sheets with bent edges and other defects are not used. For this reason, you should buy material with a small margin. A defect can be detected when unpacking the pack, but even during the installation process, the material is easily damaged by careless handling. It is recommended to purchase a ceiling finish 10% more than necessary.
- Before starting repairs, it is better to take out all the furniture from the room. If this is not possible, then large plastic bags will come to the rescue, with which it is worth covering objects.
- Close the vents, windows and doors - ceiling tiles must be glued strictly at room temperature and without drafts.
- Be sure to turn off the power supply in the room.
- Make a draft drawing on a piece of paper to better navigate the number of tiles needed and its location on the ceiling.
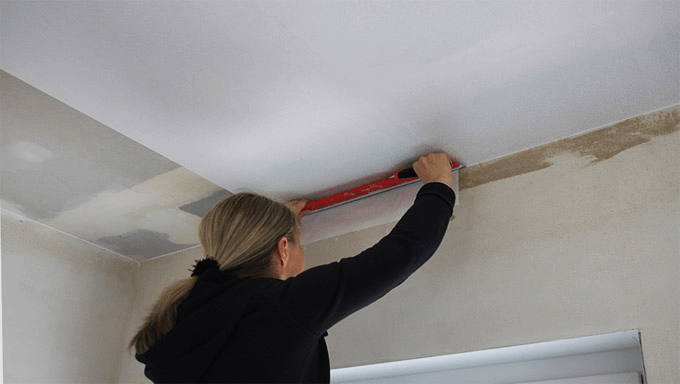
Foundation preparation is one of the most important steps. The surface must be clean and as even as possible. It is recommended to clean the ceiling from old finishes - plaster, whitewash, etc. A spatula will help clean the ceiling. Then, if necessary, re-plaster or putty and cover with a primer. Tiles will hide minor defects, but it is better to eliminate noticeable irregularities.

Advice! Washing off whitewash and primer to concrete is a difficult and long process, and also very dirty. When using glue with good adhesion, it is allowed to wash off only whitewash.
The main ways to install the ceiling plate:
- parallel to the walls - the most convenient;
- diagonally looks very nice, but it will take more material and time to finish the edge of the ceiling (it will lie in triangles or incomplete squares).
How to glue ceiling tiles correctly:
- The first stage is the marking of the ceiling. Squares are glued from the center to the edges. How to quickly determine the middle of the ceiling? Stretch two strings diagonally from the corners. The point of their intersection is the center. She needs to be noted. Further through the point, two perpendicular lines are drawn, which will divide the ceiling into 4 parts. Along these lines, tiles will be attached. To be sure, you can mark the entire ceiling, drawing the place of each detail of the coating.
- The glue is applied to the sheets in a thin layer or dotted with a special gun. The lighter the weight of the material, the less glue is needed to attach it. Pay special attention to the edges and middle.
- The first tile is pressed to the center of the ceiling, guided by the markup. Arrange the first four squares. Their corners should touch at one point, the central one.
- Next, you need to stick other panels, focusing on the layout and position of the previous parts. All joints must be tight, without gaps.
- Remember to remove excess glue with a damp sponge or cloth.
- Tiles placed against the wall are cut to size with a sharp knife, such as a shoe or wallpaper knife, along an iron ruler or square. First, the desired part is cut out, and only then glue is applied.

What to do if the ceiling is uneven? In this case, gaps form between the tiles. The easiest way to wipe the seams is with white acrylic sealant. After grouting, the excess is removed with a damp sponge.
Advice! If the tile covers the fixture for the chandelier, then make a suitable hole in advance, insert the wires into it and stick the tile. Remember to turn off the electricity before this operation.
Finishing the ceiling is completed by gluing the ceiling plinth. The adhesive for this material is the same as for tiles. One condition: the composition must be transparent after drying. Otherwise, if it accidentally hits the front side, it will spoil the view.
A few rules for fixing skirting boards:
- Start on the opposite wall from the door.
- The eaves in the corners are cut at an angle of 45 degrees.
- Glue is applied on both sides: one is in contact with the ceiling, the other is in contact with the wall.
- Gaps and joints in the corners are perfectly masked if they are covered with sealant.

In order for the repair to succeed, you need to take into account many points that not everyone can immediately remember. What you should know about ceiling tiles:
- After purchase and transport, allow the panels to rest at room temperature to avoid deformation during operation.
- Soft tiles at the time of gluing will be properly held with a wooden block. When pressed with fingers, the material is deformed.
- Sometimes tile sizes don't match. This is imperceptible to the naked eye, but appears during the installation process. To avoid inconsistencies in the pattern, attach a square that is not smeared with glue to the glued tile. If the size matches, then the installation continues. If it does not match, you will either have to leave a gap, which will later need to be rubbed with sealant, or (preferably) take another sheet.
- Don't press the styrofoam too hard. This will not speed up the setting of the adhesive, but may leave dents.
Pasting the ceiling is a critical part of the repair. Successful completion of the finish is possible only with the right choice of glue, correct calculations and accuracy during the installation process.
Everyone knows how to glue ceiling tiles, even those who first have to deal with the exciting process of pasting a ceiling with tiled material. The simplest, at first glance, the process will require some skill and skill before you can glue the tiles into a monolithic ceiling surface. And there is something to try for, after a little practice, gluing a ceiling finish made of polystyrene tiles is no more difficult than gluing wallpaper, and the visual effect is an order of magnitude higher and more expressive.
Ceiling tiles: description, characteristics
The raw material for the manufacture of ceiling finishes is foamed and extruded polystyrene or foam. Depending on the technology used, tiles for ceiling decoration are produced in several versions:
- Dense, textured tile with a large number of micropores, with a slightly rough, as if untreated surface. The material is produced with an edge of 20-60 cm, a thickness of 9-14 mm. Thanks to the mixture of polystyrene fibers and balls sintered in an injection mold, the material is quite strong, light, with a porous surface;
- The pressed ceiling board has a smooth, almost glossy surface. The wall thickness is 4-5 mm, the structure of the finishing plate is quite strong and dense, like PVC;
- Ceiling slabs made by hot semi-pressing of blanks from foam or low density polystyrene foam. Instead of a scattering of balls, sheets cut from a block are used in the production process.

The latter method is the simplest, so the ceiling tiles are relatively inexpensive, but not the most durable. Glossy boards are considered the most resistant to dirt and damage; it is enough to simply glue such a lining on the ceiling even without helpers. It is easy to change, if necessary, paint or add new trim elements.

Note! Due to the use of heat pressing, the finishing tiles, even within the same pack, may differ slightly in external dimensions.
Most tiles for finishing the ceiling are made with a small processing allowance, which does not interfere with gluing plates or lamellas. A small spread is not considered a marriage. Before gluing the coating, the plates are sorted and cut exactly according to the template.
When choosing a ceiling tile, more attention should be paid to the presence of chips, cracks and striae in the material. Such plates are immediately rejected and sent for cutting, ceiling surfaces are glued in separate pieces in “blind” corner zones, or a repair adhesive mass based on dichloroethane is made.
Calculation of the number of tiles on the ceiling and the choice of glue
Before gluing foam ceiling tiles, it is necessary to at least calculate the required amount of material. The calculation procedure itself is relatively simple and is performed in three stages:
- We measure the size of the ceiling of the room;
- We count the number of tiles;
- We make an adjustment for the width of the seam.
After measuring the dimensions of the room from wall to wall, we get the size of the ceiling in width and length. Knowing the dimensions of the tile that we will glue, we alternately divide the sides of the ceiling into the leg of one tile. We get the number of pieces of tile material that fits on the ceiling along each of the walls, multiply and find out the total number of pieces.
Note! If the room in which the ceiling tiles are to be glued occupies several hundred squares, for greater accuracy it is necessary to take into account the width of the inter-tile joint.
Calculation features
Calculating the width of the seam is simple. It is enough to take three or four single tiles, lay them in a row with a minimum gap at the seams or even with a slight overlap, approximately as they will be located on the ceiling. It remains to measure the total length of the laid out row with a tape measure and subtract from the result the size of a single tile multiplied by the number of pieces. This determines the installation joint allowance for a certain amount of ceiling cladding. For small rooms, the seam allowance can be neglected.
If the ceiling tiles are supposed to be glued in a wooden house, the material must be laid with a slight overlap of the edges, approximately 1.5-2 mm. In this case, the estimated number of tiles must be increased by 4-5%. Without overlap, the ceiling cladding will separate over time, and thin strips of seam will appear between the plates.
If there is no desire to mess around with such difficulties, you can simply divide the quadrature of the ceiling covering, which is supposed to be pasted over with foam trim, by the area of one tile. The ceiling must be measured with your own hands, the dimensions of the tiled material can be taken from the catalog. With this approach, the material will need to be bought with a margin of 5-7% in order to be able to experiment with ceiling cladding cutouts in more critical areas.
Choosing the right glue
The modern market offers more than two dozen different adhesive compositions and products that can easily be used to glue anything on the ceiling, from wooden laths to plastic and cardboard.

If a base of plasterboard, plywood or fiberboard has already been assembled on the ceiling, then it is best to glue it with polyurethane and acrylic adhesives. They provide a very viscous and durable seam. The only drawback is that such adhesives are always made in opaque form and inconvenient packaging. You can use "Super-Moment", rubber glue, "Globe", but such adhesives are quite expensive.
It is best to glue the tiles with a transparent "Titan" or "Dragon", you can use polypropylene hot melt adhesive, especially with a heating gun it is much more convenient to glue than with a regular tube.

It holds transparent silicone sealant well, over time it becomes whitish-cloudy and can stand out at the seams. Acrylic and methacrylic sealants turn yellow over time, like the popular "liquid nails", so they are used for mounting ceiling cladding in limited quantities.
Ceiling tile options
The manufacturing technology of the ceiling slab is designed in such a way as to make the cladding as adaptable as possible to all irregularities and defects in the ceiling. The use of a soft edge for glue, the rejection of gloss and the application of a relief pattern to the surface of the tile, in addition to purely decorative qualities, helps to glue the tile to the ceiling surface with defects, peeling or a slope to one side.
Ceiling tile layouts
If the ceiling is flat and smooth, like a table, you can glue the ceiling cladding in any order, you just need to choose the right direction for the incidence of daylight and flows from the chandelier. If the ceiling surface has small defects, then it is best to glue the material according to one of the most common schemes:
- Laying material from the far corner or the main window of the room;
- Installation of plates from the geometric center or suspension point of the chandelier;
- The arrangement of the ceiling tiles with a diagonal pattern, snake, chess, with bandaging of rows.
Advice! Masters advise gluing the ceiling decor so that the lower part of the ceiling is primarily illuminated. In this case, the decorative finish will visually look more even.
If the ceiling base has slopes or defects in several places, then it will not be possible to solve the problem by tile orientation alone, it will be necessary to glue the material with a more complex pattern, for example, a snake or diagonal stripes of several colors.
Why glue the ceiling decor from the chandelier
The first and basic rule for installing ceiling tiles is that it is necessary to start gluing the material from the place where the chandelier is suspended. Only in this way can a stable impression of even and symmetrical rows be ensured, even if the tiles are glued with a slight error.
It often happens that, at the whim of electricians or builders, the central ceiling lamp or chandelier is suspended not in the center of the room, but with a shift of half a meter to one side. In this case, it would be correct to move the laying start point from the geometric center of the ceiling to the fixture of the chandelier.
If the room has perfectly even walls, the proportions and dimensions of the ceiling plane correspond to a regular rectangle or square, you can also glue the slab material from a window or corner, but with the obligatory use of marking cords or a laser level.
How to glue ceiling tiles
The quality and durability of the plates directly depends on how well the surface is prepared and the method of fastening the ceiling cladding is chosen correctly. You can glue in two ways:
- Directly on the concrete base of the ceiling;
- With the use of an intermediate sublayer laid on the surface of the ceiling.
The second option allows you to get the best quality of fastening, gluing on a prepared base is easier and easier than on concrete. In addition, the use of a slab base allows you to level the plane of the ceiling and make it as smooth as possible.
The first option is the fastest and easiest, but the quality of the sticker is worse, in addition, it will take a lot of effort to level and clean the concrete surface, otherwise it will not work to stick the tile evenly and beautifully.
Ceiling surface preparation
In any case, the surface of the ceiling must be cleaned of the old decorative finish, the remnants of the primer and the water-based paint layer, wallpaper and adhesive flakes will have to be removed. At first glance, the ceiling plane may seem quite flat, but the impression can be deceiving. In any case, at the end of the stripping, two cords are pulled, one of which is basic, the second is movable.
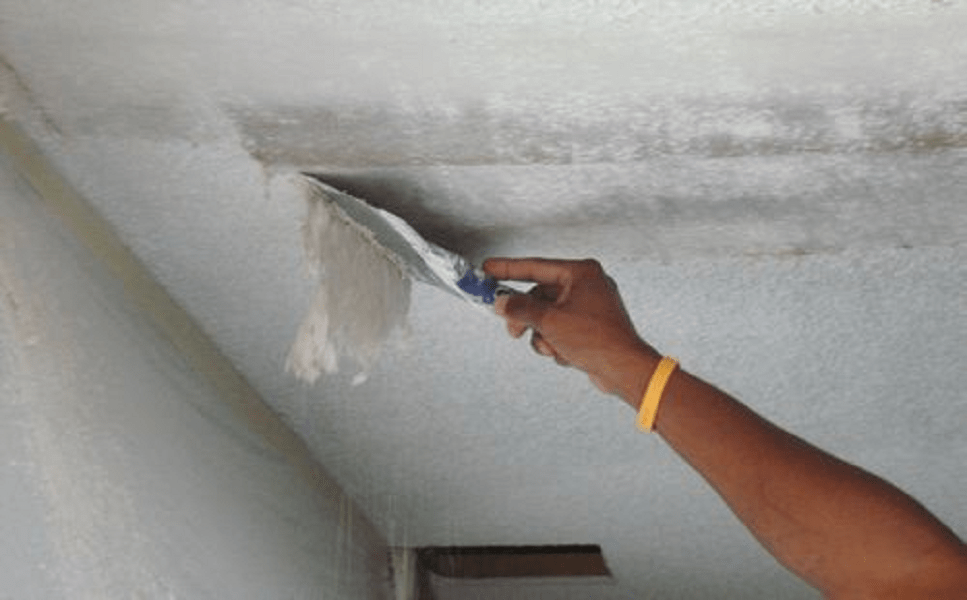
The base cord is pulled along the midline of the room and leveled along the horizon using a building level. A movable cord stretched perpendicular to the base one is sequentially rearranged along the ceiling in increments equal to the width of the tile. By the distance from the ceiling to the cords, the failures of the ceiling surface are determined and eliminated with the help of finishing putty. After drying, the stains are cleaned and primed.
Ceiling markings
To perform marking work, the same two cords are used as when stripping. If the tiles are planned to be glued in the classic row way from the far corner, the cords do not change, the movable cord is transferred to the first line of laying the material. To simplify the work, it is recommended to apply marking lines to the ceiling, along which you can glue the tiles without being distracted by rearranging the marking cords.
If it is supposed to glue the plates diagonally, the cords are pulled along the corners of the room, or with an offset if the initial point does not coincide with the geometric center of the ceiling surface.
How to glue tiles on a flat ceiling
The first tile must be glued in the center of the row. The technology of the sticker is quite simple, the slab is laid in place of the future gluing and risks are applied to the concrete with a pencil, indicating the dimensions of the spot. Glue is applied on the back at five points - in the center and at a distance of 3-4 cm from the corners.
The slab is laid on the spot and leveled according to the previously made risks. To be sure of positioning accuracy, we apply a thin wooden strip 80-100 cm long to the front edge of the tile, and align the position of the slab along it before gluing the next one. It is advisable not to rub the tile to the base, as is usually done with wallpaper, to expel bubbles. Before gluing the next part of the finish, you must wait at least 5-7 minutes.
Uneven ceiling tiles
Often, tiled cladding has to be glued without careful alignment of the ceiling base. In this case, an additional thread is pulled along the row, which determines the lower level of the facing surface. With the help of a thread, you can align the tiles even on a crooked ceiling, but it will take three times as long.
As in the previous case, initially the risks of the border of the spot are applied to the ceiling, on which the tiles will need to be glued. If there is a depression on the ceiling, an increased amount of transparent silicone is applied under the tile, the material is laid on the base. After 30-40 minutes, the plate can be aligned along the thread without pressing and fixed with an invisible pin.
Whitewash ceiling tiles
The answer to the question of whether ceiling tiles can be glued to whitewash sounds simple. You can glue on whitewash, paint or lime, subject to the pasting technology. The ceiling surface is pre-treated:
- Sweep dust, chalk or lime with a damp cloth, rag, sponge;
- It is treated twice with a water-based primer so that the whitewash layer is saturated and saturated with a primer solution to concrete.
After the primer layer dries, the whitewash turns into a strong crust, to which any tile can be glued. Sometimes the dried primed surface is rubbed with coarse-grained emery to increase the adhesion of the adhesive to the ceiling surface.
A more difficult option is to glue the slab on the ceiling, covered with water-based emulsion or lime with soap. The coating must be carefully cleaned with a spatula along the marking lines.
Cleaning and Sealing
No matter how carefully you try to glue the ceiling cladding, there are still remains of the adhesive mass in the seam lines, and sometimes on the edges of the tile. If the cladding material is laid with an overlap, there are usually no problems. It is necessary to carefully remove the protruding traces of glue with a carving knife. We leave everything that got on the front of the foam until the adhesive mass dries completely.

Any attempts to wipe off the adhesive ahead of time and even accidental touching will lead to the appearance of dirty spots, therefore, it is necessary to glue the material only with clean hands, preferably with cotton gloves.
In the event that it is necessary to glue the plates butt-to-butt, the resulting seam must be painted over with a special toner or covered with a plastic edging.
Ceiling tile painting
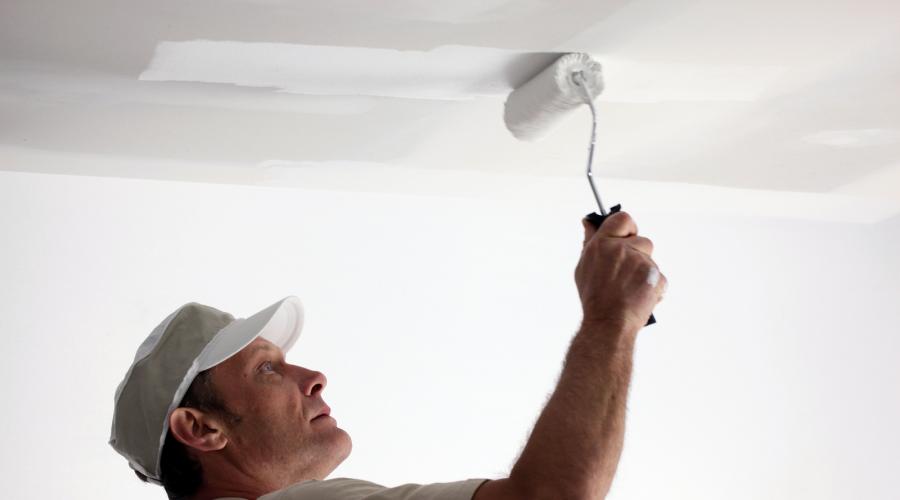
With all the advantages, foam tiles have one significant drawback - the material collects and absorbs, like a sponge, a huge amount of dust and fumes. Instead of gluing new plates every year, it is easier to paint the surface with a quality water-based emulsion or acrylic paint.

It is enough to remove the dust accumulated on the ceiling with a vacuum cleaner, and carefully apply a double layer of paint with a roller or spray gun.
Conclusion
How to glue ceiling tiles, and what is the secret of high quality work, can only be understood after a little independent practice. In each case, any master has to look for his own installation method, the most convenient marking scheme and the best glue option. To glue the ceiling decor with high quality, you do not need to save on two things - on glue and on the time allotted for the job.