How to prepare a ceiling for whitewashing. Proper whitewashing of the ceiling using old whitewash is a proven method. About preparing the room
Read also
- choose what you want, but with all this good old whitewashing never loses popularity. Among the main reasons are low cost, ease of application and environmental friendliness. These qualities are sometimes enough to turn a blind eye to the low durability of the coating. Let's figure out how to whitewash the ceiling and walls with lime and chalk, decide whether water-based paint is a whitewash, and which material performs better.
No. 1. Benefits of whitewashing
Whitewashing ceilings and walls is not the most modern way finishing, and far from the most fashionable. What makes thousands and tens of thousands of people across the country still whitewash in the old fashioned way? Whitewashing has enough advantages:
- low price– this is the main argument in favor of this type of finishing. When the budget is limited and the room needs to be tidied up, the choice falls on whitewashing. For this reason, in hospitals, schools and other government institutions gypsum and chalk are still actively used to decorate ceilings and walls;
- ease of application. A person without special training can handle whitewashing - no special skills, abilities or tools are needed;
- careful appearance . Of course, in terms of intricacy and decorativeness, the whitewashed ceiling is inferior to the tension system, and whitewashed walls– finished Venetian plaster, but if you apply whitewash correctly, you can end up with a fresh white surface with an even matte color. If desired, dye can be added to the whitewash solution;
- harmlessness, environmental friendliness, ability to pass moisture and air. Conventional whitewashing is far ahead in this regard and ceiling tiles made of polystyrene foam, so in some cases it will be even more preferable;
- lime whitewash has bactericidal properties, therefore it will become additional protection from and fungus.
Among cons low durability (1-3 years), uncomplicated appearance and dirt during application.
No. 2. What to whiten with: lime, chalk or water-based paint?
When people talk about whitewashing, they most often mean lime whitewash. Lime (calcium oxide) is slaked with water to obtain a material that is used for finishing.
The main advantages of lime whitewash:
- bactericidal properties of the material, which is why such finishing is used in kindergartens, schools, medical institutions, even in damp areas. The antiseptic qualities of lime also make it possible to actively use it in arranging cellars and chicken coops. For the same reason, tree bark is treated with lime whitewash;
- If mortar was prepared and applied correctly, the coating will last about 3 years or even more;
- resistance to temperature changes and high humidity. That is why lime can be finished if other materials are unaffordable;
- excellent adhesion to almost all materials, including wood, plaster and;
- ability to fill small cracks;
- low price, which is typical for any whitewash.
Despite all its advantages, lime is different and shortcomings. The main one is the possibility of getting burned, so all work must be carried out with gloves. Chalk is much safer in this regard. In addition, there is a possibility of leaving stains and stains. Allergy sufferers are not recommended to use this finish. 
Chalk just like lime, it is inexpensive and environmentally friendly, and among its additional benefits:
- safety at work;
- deeper white, which many people like better than the color obtained by lime whitewashing;
- Possibility of use in rooms where allergy sufferers live.
Chalk, when interacting with water, is capable of accumulating it, which leads to the appearance of cracks on the surface and rapid peeling of the whitewash layer, so chalk whitewash is taboo in bathrooms, kitchens and other wet rooms. If the application technology is violated, you can get not only stains and stains, but also bubbles. In addition, chalk whitewash gets dirty. 
There is such a thing among people as whitewashing with water-based paint. This finish has nothing to do with whitewashing and belongs to. It began to be classified as whitewashing, apparently, due to the composition of the materials used - this lime based paints. Today, painting with mineral water-based paints can be considered the best alternative whitewash Among the main advantages of this option:
- resistance to abrasion, temperature changes;
- bactericidal properties;
- ability to breathe;
- safety for humans;
- ease of operation, high speed drying.
However, the durability of such a coating is also not great, but the price is significantly higher than that of conventional whitewash. 
No. 3. How to determine what was used for whitewashing?
Probably everyone has heard at least once in their life that different whitewashes cannot be mixed. If lime whitewash was applied to the ceiling or wall, then when installing chalk whitewash on top, you will soon be able to see unsightly stains. When preparing a room for finishing and assessing the condition of surfaces, it is very important to determine what whitewashing was done before.
The check is very simple. It is enough to wet a small fragment of the finish with water and observe the reaction. Wet lime will darken a little, and if you rub the surface with your finger, there will be no white marks left on your hands. 
No. 4. How to wash off whitewash and prepare the surface?
Before whitewashing a ceiling or wall, it is necessary to prepare the room and surface for future work. The sequence of actions is as follows:
- If possible, remove all pieces of furniture and decor from the room. What could not be taken out can be covered plastic film and secure it with masking tape;
- It will be easier if you wet it first. It is better to wet the surface in parts so that the moisture does not have time to dry out. Some people recommend adding a little to warm water citric acid or vinegar, others use a mild soap solution. You can moisten the surface with a sponge or brush. It is enough to simply remove the soaked whitewash with a spatula. It is better to try to dump the fragments that fall off into a separate container, minimizing their contact with the floor. Residues are washed off with a damp sponge. Chalk whitewash is much easier to remove;

- if there is visible spots, the surface must be tidied up. Rust stains are washed with water and then treated with a solution copper sulfate(the solution is prepared by adding 50-100 g of vitriol per 1 liter hot water). Oily stains can be removed with a weak solution soda ash: a rag is moistened in a 2% solution and applied to the contaminated surface until the stain completely disappears. Then the treated area is thoroughly washed with water. Treating with a solution can help remove soot hydrochloric acid concentration 2-3%;
- application of an antifungal composition;

- if there are noticeable marks on the surface cracks and dents, then it’s better to get rid of them. If the depth of the unevenness is within 1 cm, then you can use it; if there are cracks up to 3-5 cm, then it is better to use plaster. The putty can be found ready-made, or in dry form; it will need to be mixed with the amount of water indicated on the package. Apply the mixture with a spatula and level it with it. If there are large vertical deviations, you can use building rule. Many experts consider it illogical to apply expensive store-bought putty under cheap whitewash, so prepare the composition yourself. The simplest recipe: mix plaster, chalk and wood glue solution in a ratio of 1:2:2. A glue solution is prepared by adding 30-50 g of glue to 1 liter of water;

- After the putty has dried, it must be rubbed sandpaper to get a flat, smooth surface;
- application . In principle, you can take any ready-made composition, or you can prepare the primer yourself. One of the simplest and most suitable recipes: dissolve 50-100 g of drying oil and 200 g in 3 liters of hot water laundry soap, cut into thin shavings, dilute 3 kg of slaked lime separately in 4 liters of water, then the two solutions are mixed and diluted with water to a volume of 10-11 liters;
- After the primer has dried, you can proceed to whitewashing. It takes about a day to dry.
If your only task is update the whitewashed surface, then if there are small defects, they can be repaired with cement-based putty, and then proceed to applying a new layer of whitewash.
No. 5. Preparation of solution for whitewashing
Since lime is used more often, we’ll start with it. The process of preparing the material is simple, but it still requires care. So, how to dilute lime for whitewashing?

Now let's look at how dilute whitewash based on chalk:

Note that ready-made dry mixtures are also available for sale, where lime or chalk has already been mixed in the required proportions with other components - you just need to pour required quantity water. Such mixtures are more expensive if you take all the ingredients separately, but the difference is small. 
No. 6. How to whitewash the ceiling and walls: brush, roller or spray?
Theoretically, you can apply whitewash:
- brush;
- roller;
- spray gun;
- vacuum cleaner with air blowing function.
Let us immediately note that the first two options are more applicable - using a vacuum cleaner and a spray gun makes sense when large area surface to be whitened. 
Whitewash brush take a special one, made of natural bristles, 15-20 cm wide. After work, the brush can be washed and used again later. For whitewashing brick wall You can use a brush with natural bristles. It is advisable to soak it in water several hours before use. In this case, the wooden handle swells a little and holds the bristles well, which will not fall out during the whitewashing process. 
Before applying the mixture, it is important to mix it well again to ensure an even shade. The first layer is applied perpendicular to the window, the second - parallel to the frames. In this case, the streaks from the brush will be minimally noticeable. Experts recommend slightly moistening the surface of the ceiling and walls before applying the mixture. 
It is better not to use a whitewash roller. When there is only one layer, this tool will still work, but when applying the second layer, the dried first one may fall off. If you act carefully, you can get a beautiful matte surface. 
Sprayer and vacuum cleaner take only when there is a large surface to be finished. The consumption of the solution increases, it is applied in a thicker layer, but it will be possible to mask small defects. If you have a sprayer at your disposal, then no questions arise. 
You can also apply whitewash with a vacuum cleaner if it has an air blowing function. Among the numerous attachments in such models there should be a polyethylene lid with tubes. This cap is the sprayer. It must be put on the can and connected with a hose to the outlet in the vacuum cleaner. It turns out that when you blow out air with a vacuum cleaner, the air enters the sprayer, draws the solution from the can and sprays it through the nozzle. As a rule, there is a special hole on the sprayer, covering which you can obtain the required solution supply pressure. It is better to apply the solution in a circular motion, spraying at a distance of 70-100 cm. 
No. 7. In conclusion about safety precautions
To avoid having to undergo treatment after whitewashing, it is better to take care of safety precautions in advance. Airways Protect with a respirator, wet bandage or protective mask. Hands must be protected with rubber gloves, and eyes with goggles.
Whitewashing is one of the simplest and inexpensive ways ceiling repair. In some cases, you can even whitewash the ceiling old whitewash, but the quality of such finishing will depend on a competent approach to the work.
Is it possible to whitewash over old whitewash?
If whitewash is applied to the ceiling for the first time, then preparing its surface consists only of leveling and applying finishing material. But if there are traces or layers of previous whitewash on the ceiling, then its surface must be carefully inspected and checked, since chalk, lime and water-based paint are a very unreliable basis for any ceiling finishing.
In order to determine whether it is worth whitewashing the ceiling without washing off the old whitewash, you need to determine the following:
- Type of whitewash available. This is necessary in order to prevent the application of one type of whitewash on top of another, which can lead to streaks and unevenness. In addition, if the ceiling was whitewashed with chalk, then you will have to refuse to apply any finishing material to its surface.
- Reliability of the old coating. The new layer will adhere firmly only if the old one is of sufficient thickness.
- Contamination of the old coating. It should be understood that rust stains, fungus and mold on the old whitewash will show through the new coating, so before applying it, all contaminants must be completely removed.
- The presence of cracks and chips on the surface of the ceiling. In some cases, alignment ceiling surface possible only after complete removal layer of whitewash.
Preparing the ceiling for whitewashing
If, after inspecting the ceiling and checking the strength of the existing coating, it was decided to apply whitewash over the old layer, then at the first stage it is necessary to completely clean the surface of all existing contaminants. Dust and cobwebs are removed from the ceiling using a wet cloth. Rust stains are also first wiped with a rag soaked in warm water, and then treated with a 10% solution of copper sulfate. Grease stains on the ceiling can be removed with a solution baking soda, which after removing the stain must be completely washed off with water.
If there are extensive traces of mold on the ceiling, and there is high humidity in the room, then it is better to completely wash off the previous layer of whitewash.
If the fungal contamination is insignificant, then it can be removed with a soap solution or a special antifungal agent, and after drying, treated with an antiseptic.
The final stage of preparing the ceiling surface for whitewashing is priming. It is necessary to ensure that the new layer of coating adheres to the old one as tightly as possible. Priming is carried out both on a clean surface after washing off the whitewash, and on old water-based paint or lime. It is best to use a roller to apply the primer, but a brush or sponge will also work. Before whitewashing, the primed ceiling surface must dry completely within 24 hours.

Selection of material for whitewashing
Whitewashing the ceiling is done using one of three materials: chalk, lime or water-based paint.
- Chalk. This is one of the most popular types of whitewash, the main advantages of which are environmental friendliness and low cost. Chalk whitewash makes the ceiling perfectly white and is easy to apply, but it has a significant drawback - the durability of such a coating is very low. After some time, the chalk gradually begins to crumble, so it is not recommended to apply it over the existing coating.
- Lime. Lime whitewash has the same properties as chalk, but is more durable and resistant to abrasion. Due to its porous structure, lime is capable of allowing water to pass through itself, which makes it more effective in conditions of high humidity. Lime whitewash hides minor imperfections well and is more resistant to mold growth.
- Water-based paint. This type whitewash differs from the previous two in its characteristics, which depend on specific type paints (acrylic, silicate, silicone, acrylic-latex, polyvinyl acetate). One of its main advantages is that there is no need to prepare a solution, since the paint is sold ready-made. Besides, large selection shades allows you to use this type coatings in a wider range of design solutions.
The main disadvantage of water-based paint compared to chalk and lime is that it is more high price and high consumption.

Features of applying whitewash to the old layer
Once the type of whitewash has been chosen, you can begin applying it to the ceiling. At the same time, the quality ceiling covering will depend not only on the material chosen, but also on the tool used. If you have no experience in whitewashing, it is best to use a roller or brush. Using a spray gun or a vacuum cleaner with a special attachment allows you to whitewash the ceiling yourself much faster and make the coating more even, but it requires certain experience and skills.
When using a brush or roller, the first layer must be applied in even strokes perpendicular to the window, and the last layer in parallel, starting from one of the corners of the room. This technology will avoid the appearance of stripes and stains on the ceiling surface. In this case, each subsequent layer of whitewash is applied only after the previous one has completely dried.

The correct preparation of the solution is also important. When preparing whitewash from chalk or lime, it is recommended to add 50-100 grams of adhesive mixture to the solution. This will increase the strength and service life of the ceiling covering. You can also add 20-25 grams of blue to the solution, which will give the whitewash a more saturated, bluish tint.
Water-based paint must be applied in a similar manner in several layers, allowing each layer to dry completely. In this case, for the first layer, a solution is made from paint mixed with water to a liquid consistency. Subsequent layers are applied using undiluted paint.
Despite the existing variety of design options for the ceiling space, one of the most popular methods of processing it is still the good old whitewash. After all, the process is quite simple, requires minimal costs for materials and a little time to study the stages of the work ahead.
How to prepare a ceiling for whitewashing
Very important stage work when whitewashing ceilings, which should not be ignored. The preparation of the ceiling for whitewashing must be carried out in the most thorough manner, otherwise , with a very high degree of probability, the whitewash will soon begin to crumble.If the ceiling was previously whitewashed, then it is necessary to get rid of the old layer, possible dirt and greasy stains.
How to determine the type of whitewash
The old whitewash is wetted. If the surface is easily erased, it is chalk whitewash; if the ceiling is darkened and does not stain your finger, it is lime whitewash. This information is necessary because, when applying a new, opposite type of whitewash, old layer It is necessary to rinse thoroughly to avoid problems.
How to remove whitewash from the ceiling
 If there are cracks in the ceiling, it is recommended to putty them
 - The floor and furniture are covered with polyethylene;
- Prepare a warm soapy solution, sponge or brush;
- Old whitewash is moistened in squares. This is done so that the ceiling does not dry out and does not have to be moistened again;
- The moistened square is processed with a hard spatula. To avoid contamination of the floor, you can place a large tray under the area to be treated;
- The remains of whitewash are washed off with a wet sponge;
After completely removing the old layer, it is necessary to glue the joints ceiling tiles special tape. If there are cracks in the ceiling, it is recommended to putty them. After drying, the putty is rubbed down with sandpaper. The entire ceiling area is primed. Once the primer is dry, you can move on.
Possible whitewash options
In this category, the two most common materials, about which a little has already been said above, are widely considered - chalk or lime. More new material– water-based paint.
Chalk
Suitable for those who value maximum whiteness and constant freshness. To prepare chalk whitewash for 10 square meters square needed:
- Pour 30 g of glue (PVA, carpentry) into warm water (about five liters). Instead of glue, you can dissolve 30 g of finely chopped laundry soap in water;
- Stir very well, gradually adding sifted chalk - you will need about three kilograms;
- To enhance whiteness and to avoid possible yellowing over time, it is recommended to pour 20 grams of blue into the solution;
Lime
This material is chosen because of its ability to fix small cracks, as well as because of its increased bactericidal properties. Whitewashing the ceiling with lime requires 10 square meters:
- Dilute 1.7 kg of lime in five liters of water. The water should be warm;
- Add 40 g blue;
- The finished solution should not be too liquid;
Water-based paints
 When purchasing water-based paint, consider the application environment and the paint's ability to hide dark background
These paints are based on non-aqueous compounds such as varnish, resin, drying oil, as well as water and emulsion. These paints are non-toxic, so they are perfect for whitewashing. Upon purchase finished paint Attention must be paid to concealability (the ability of paint to cover a dark background). The application environment is also important. For example, in damp room For the ceiling you should choose washable paint.
Possible tool
There are several different ways whitewashing the ceiling. For some, tiles and a roller are suitable, while others require the use of vacuum cleaners with an air blowing function. So, the process of whitewashing the ceiling can be carried out with a brush, roller, vacuum cleaner, or sprayer.
Brush
Whitewashing the ceiling with a brush is the longest and most painstaking method. Strokes are applied perpendicular to natural source Sveta. The final layer is applied parallel to the windows. When using this paint scheme, no streaks will be visible after drying.
It is better to buy a brush made of natural bristles, about 15-20 cm in size. Before use, it should be soaked in warm water for several hours. This will help wooden handle allow the brushes to swell and secure the bristles properly so that they do not remain on the surface during the whitewashing process. After finishing the work, the brush should be washed well.
Roller
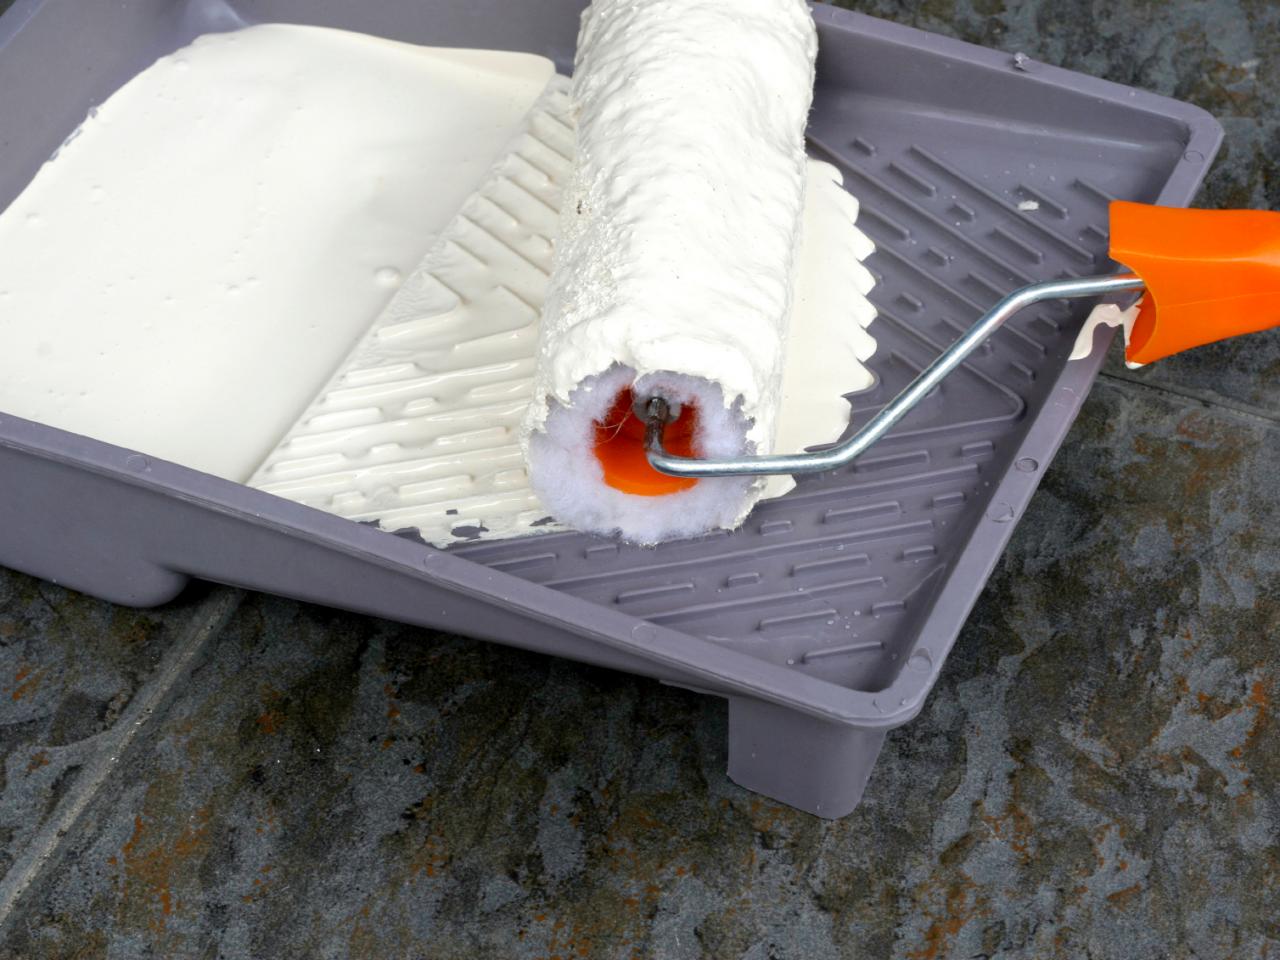
 When buying a roller in a store, do not forget about the pallet
 Whitewashing with a roller is less laborious. A whitewash solution or paint is poured into the pallet. The roller is dipped into it and rolled along the slope of the pallet. This is done so that the solution or paint is evenly distributed over the entire surface of the roller, while the excess drains off. The layers of whitewash are directed with a roller in the same way as a brush. The overlap between layers should be about 5 cm. This will avoid the occurrence of unpainted areas. In hard-to-reach places, for example, at the junction of walls and ceilings, it is better to use a brush.
Vacuum cleaner
Whitewashing the ceiling with a vacuum cleaner is perhaps one of the most common methods, and also the fastest. The solution must be filtered through cheesecloth or a sieve. Pour 3/4 of its volume into the bottom of a half-liter jar, which must be closed with a plastic lid from a spray bottle. The can is connected to the vacuum cleaner hose. The spray gun is directed at the ceiling at an angle and the vacuum cleaner is turned on. You should move along the surface in a circular motion, moving the tool very smoothly. You should also constantly monitor the even distribution of saturation. It is necessary to apply several layers to the ceiling.
Experts do not recommend using a vacuum cleaner in small spaces, because splashes can settle not only on the ceiling.
Spray
This special device, which is sold in construction stores. Its use will help you cope with whitewashing the ceiling yourself not only faster, but also to hide small cracks more reliably.
 Whitewashing must be carried out wearing a hat, respirator and gloves.
 - During the process of drying the whitewash on the ceiling in the room there should be no drafts or direct sunlight. Otherwise, there is a high probability that the new whitewash will crumble;
- When whitewashing, safety precautions are important. You need to buy special protective gloves, glasses and a hat;
If whitewashing is carried out correctly, regardless of the choice of specific material for it and the method of application, it will last from three to five years. This ceiling repair option remains the most economical and affordable to this day.
Repair of an apartment or private house on our own- an interesting activity. The first thing you need to do when performing work is to whitewash the ceiling. How to do the job correctly for an inexperienced builder? We will tell you how to whitewash a ceiling and what you will need for this in this article.
This is the first and important stage in the work; a lot depends on it. And if you neglect it, the newly whitened surface will soon peel off. If previously the surface was whitewashed with chalk, and today there is a decision to cover the ceiling with water-based paint, then you should definitely carry out preliminary work. No less important is the question of how to whitewash the ceiling using old whitewash. It is worth noting that whitewashing the ceiling using old paint or over chalk will not give a good result.
To determine what was previously applied to the ceiling surface, it is recommended to wet it. If a darkish stain appears on the ceiling, and your hand does not get dirty from it, then this means that lime whitewash has been applied to the ceiling. But if with light contact your hands get dirty, then this is chalk whitewash.
When using water-based coating no changes are observed. Next, you need to consider the principles of how to prepare the ceiling for whitewashing.
Step by step washing off the old layer
Work carried out even at low altitude requires special care. You cannot be distracted and think about other problems. To protect your eyes and respiratory system from accidental splashes and chalk dust, you should use safety glasses and respirators. You must wear a hat on your head, otherwise it will be difficult to wash your hair later.

Surface preparation steps:
1. First, you need to close all the furniture that, for some reason, has not been removed from the room. The floor should also be covered with waterproof materials, for example, plastic film or oilcloth. It is recommended to close it with an overlap, so that there are no gaps, otherwise if paint or chalk gets on the surface of the furniture or floor, it will be difficult to clean.

2. It is necessary to prepare a soap solution in warm water, a round or swing brush or brush. Soap dissolves better in warm water, and if it accidentally gets into certain areas of the body, there will be no unpleasant sensations.

3. You need to wet the old whitewash one at a time, mentally dividing the surface into small squares so as not to miss even small area. If you start randomly wetting the entire ceiling, it will soon dry out and you will have to repeat the procedure again.

4. If the surface of the ceiling is saturated with moisture, then you can start scraping off the old layer with a spatula. To ensure that as little chalk or lime gets on the floor as possible, you should place a container underneath.


The ceiling needs to be moistened in any case, even if the old coating is not dirty. This is necessary for the best adhesion over the layer of new whitewash.
The next step will be to prepare a surface cleared of old whitewash or to repair the ceiling. For high-quality execution this work you need to do the following:
- Carry out visual inspection surfaces for cracks, potholes and integrity of seams between slabs. Identified defects can be noted using a piece of chalk to prevent omissions during preparation.
- It is recommended to glue the joints of rustications with serpyanka. What is serpyanka? This is a special mesh tape that is used in painting work. Previously, rustications were sealed using cement-lime mortar, but practice has shown that dry plaster under the influence external factors tends to fall out, and this process is labor-intensive and can only be performed by a specialist.
- Identified cracks and irregularities must be filled with putty; for this, a tool is used - a spatula.
- After the surface has dried, it is necessary to eliminate the unevenness formed after puttying using sandpaper.
- The surface is primed with a product purchased from a specialized store. The choice of primer must be made depending on the material in which the ceiling will be painted or whitened, but universal ones are more common.

On video: method of removing whitewash.
How to whiten the ceiling surface
You can whitewash the ceiling in a room using lime or chalk. Let's consider two options for preparing a solution for whitewashing, and also find out how to whitewash the ceiling in an apartment.
Preparation of whitewash
Chalk is a frequently used material for preparing whitewash solutions. You need:
- Pour some warm water into a container and add 30 g of casein glue to it, you can use Bustilat or PVA.
- Separately, grate a pack of laundry soap and then add it to the same container.
- Stir everything until a liquid homogeneous mixture is obtained.
- Sift 3 kg of chalk and gradually add it to the prepared solution, remembering to stir.

Advice! To avoid a yellowish tint on the whitened surface, it is recommended to add 20 g of blue (per 10 square meters).

Lime is also widely used. To prepare the solution, you need to dilute 1 kg and 700 g of lime in water, add 40 g of blue and mix everything thoroughly. Lime coating or whitewashing the ceiling with lime protects the surface from harmful microorganisms and helps eliminate small cracks in the ceiling. The best way to whitewash the ceiling is up to everyone to decide for themselves. But to create whiteness and freshness in the room, it is recommended to use chalk.

Before whitewashing the ceiling with lime, you need to check the consistency of the prepared mixture. To do this, it is recommended to lower any metal product into the prepared solution, and after removing it, evaluate whether the surface coverage is sufficient.
If the whitewash flows off the metal without leaving a trace, then it is very liquid. You should add chalk or lime in small portions, stirring and checking until you get it. desired result. Lime whitening should be done with extreme caution.

Which tool to use
Whitewashing at home can be done with a spray gun, vacuum cleaner, roller or brush. But, it should be taken into account that the splashes left by the spray gun and vacuum cleaner will spread throughout the entire room, and not just settle on the ceiling. Therefore, you should either cover everything well enough, or choose to apply it with a brush or roller.

To choose the right brush, you need to follow the recommendations:
- the bristles should be natural;
- The width of the pile should be at least 15-20 cm.

Before direct use, it is recommended to soak the brush in warm water for a couple of hours so that the wood swells and the bristles do not remain on the ceiling. After the work is completed, the brush must be rinsed with running water.
Whitewashing with a roller is accessible to everyone. How to choose a roller for whitewashing the ceiling? There are no special recommendations for choosing this tool. The main thing is to purchase an additional tray for wetting the roller with whitewash, and it doesn’t matter which roller you use to do the work.
Whitewashing technology
How to whitewash a ceiling correctly? When using a brush, you need to know the following rules:
- Initially, apply the layer perpendicular to the windows and to another light source.
- The final result is achieved by applying a layer parallel to the incident light.
A simpler option for performing the work is provided by using a roller. The technology is simple:
- The prepared solution must be poured into the pan.
- Dip the roller into liquid whitewash and roll the ditch along the slope so that the excess liquid drains away and the whitewash is evenly absorbed into the “coat” of the roller.
When whitewashing the ceiling with a roller, you should take into account that the first time the work must be done perpendicular to the light source, and then parallel to it on top, just like when working with a brush. When working with a roller, you should whitewash the surface overlapping the previously applied layer. This is done in order to prevent unpainted areas.
It is impossible to whiten with a roller hard to reach places, angles between the ceiling and wall, as well as junction points heating system to the ceiling. In these cases the best solution will use a brush. Whitewashed ceiling will look uniform.

Whitewashing with water-based composition
When choosing what to whitewash the ceiling with, you should not rule out painting. To avoid problems with chalk or lime whitewash, alternative solution is painting water-based compositions over the existing covering. The painted ceiling will look aesthetically pleasing; this paint can be used to paint the ceiling evenly.

But preparing the ceiling for whitewashing has certain nuances, and therefore must be done more carefully. The new coating will adhere better to the old whitewash and will not settle in the future.
To avoid visible streaks and marks from a roller or brush, the second layer should be applied perpendicular to the previously applied one. Whitewashing with water-based paint should be done 2 times, but before that you need to ensure complete drying first layer.

Experienced builders know how to whitewash the ceiling themselves and correctly estimate the costs of the work. For beginners, it can be difficult to determine how much time and cash they will use up. There are some tips to help beginners:
- It is necessary to calculate the cost of materials for whitewashing, including brushes, rollers and other means. First you need to calculate the amount of chalk, lime or water-based paint consumed. Then decide what tools are needed for the job, and then calculate how much they cost. Add the two resulting sums.
- During work, avoid drafts or exposure to sun rays. As a result of this, the whitewash will soon peel off.
- During the actual work of painting or whitewashing the flow, it is important to ensure that no sagging or streaks form. To do this, you need to paint slowly, carefully and carefully.
Important! You need to prepare for work morally and psychologically, so that the effect of the work done and the whitewashed ceiling will please you for a long time.

Painting the ceiling with a roller (1 video)