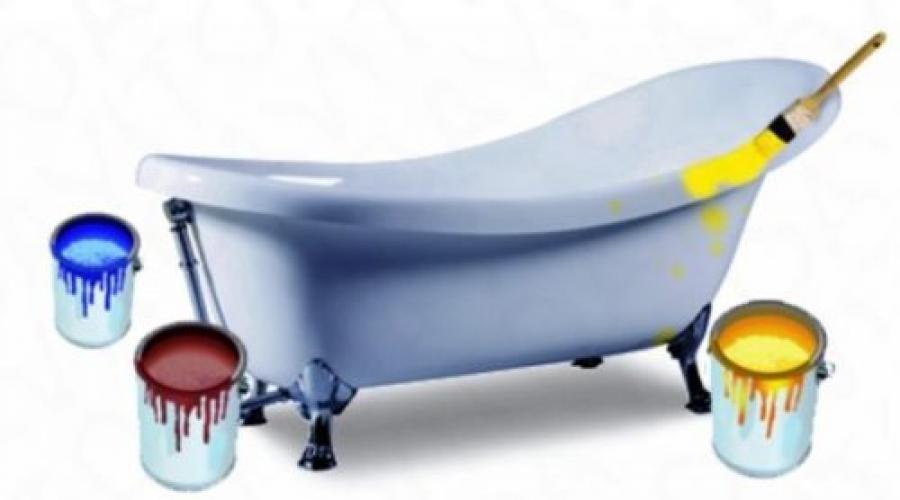
How to renew a bathtub cover. Restoring the coating of cast iron bathtubs. How does liquid acrylic work?
Read also
Bathroom renovation is a process that needs to be approached with the utmost seriousness. Comfort and cleanliness should always reign in it. First of all, you need to pay attention to the condition of your bathtub. At a minimum, it may require restoration, and at maximum, purchasing a new one. However, not everyone may be able to purchase new bath and how to update the owner's bath old bath restoration would be the only option. There are many simple and effective methods, with which you can update an old bathtub. Moreover, after the restoration cast iron bath may look even better than when purchased, and there will be no trace of stains or yellowing left.
Signs of wear
A cast iron bathtub has many advantages over other options. It holds heat well and does not create noise when drawing water. Although it is not subject to various deformations that may appear on other bathtubs over the years, it still has an expiration date. After prolonged use it deteriorates appearance, functionality.
There are several signs that indicate that the bathtub needs to be updated or restored:
- The enamel becomes rough and unpleasant to the touch;
- Dirt and rust collect on the enamel, which is very difficult to remove or impossible to remove at all;
- Cracks have appeared on the surface of the bathtub, into which dirt is also clogged.
If you notice any of these symptoms, you should renew your bathtub.
Why is it necessary to restore a bathtub?
Each method has its positive and negative qualities. Therefore, before you begin restoration, carefully read each of them to choose the option specifically for your problem. There are several reasons why restoring an old bathtub has advantages over buying a new one:

Ways to update a bath
You can update a cast iron bathtub using one of 3 main methods:
- Cover the surface with new enamel;
- Cover the bathtub with liquid acrylic;
- Place acrylic on the surface.
Each of these methods has features that should be discussed in more detail.
Enamel coating
One of the oldest methods for restoring a bathtub is to cover it with new enamel. Many still prefer this method. He is very similar to regular painting, only special enamel is used for coating. There are two types of such enamel on the market:
- Professional. It is very liquid and needs to be applied in several layers. This process can take a long time and requires special skills from the person doing it;
- for home use. The consistency of this enamel is thicker, and therefore the procedure is much easier and faster.
Before applying enamel, you must prepare and degrease the surface. Then apply the liquid with a brush. You can also use a roller for this.
Positive qualities of this method:
- This is one of the most economical options, with which you can update your bath with your own hands;
- No need to connect drain and overflow. Also, no installation work will be required;
- This method is used not only for the restoration of cast iron bathtubs, but also steel ones;

Negative qualities of this method:
- Enamel requires regular renewal. After 5 years, the procedure will need to be repeated;
- The coating takes a very long time to dry. The enamel will dry completely only after a week;
- The coating is very fragile. Therefore, when using the bathroom you need to be very careful. It is very sensitive to shocks and after some time chips may appear on the surface of the bathtub;
- Such enamel cannot remove dents and large chips, since it is applied in a very thin layer;
- Over time, the coating may yellow or crack.
The process of painting a bathtub with enamel
In order to paint a bathtub with enamel, you need to carefully prepare for this. First, clean the enamel with an abrasive, then remove all crumbs that might remain on the surface. Before applying enamel, it is necessary to degrease the surface, then rinse and dry the bath. The enamel must be applied in several layers. Between applying layers you need to take breaks of about 15 minutes so that the previous layer can dry.

Also remember that the new enamel coating has significant differences from the one used in production. Therefore, after application you need to follow a few simple rules:
- Do not use abrasive products to clean the bathtub. detergents. The new enamel is more fragile and not as hard as the original. It is better to use liquid detergents;
- Protect the bathtub from mechanical damage. Try not to drop objects into it, which could cause damage to the surface;
- After applying the enamel, do not pour too much into it. hot water. Before opening the tap with hot water, pour some cold water into the bath.
It's comparative new method, however, it has proven itself well and is now very popular among owners cast iron bathtubs. The renovation process involves pouring an acrylic solution onto the surface of the bathtub.

Positive aspects of the method:
- Coating a bathtub with acrylic is much easier than with enamel. In this case, the bath will have glossy look. Acrylic has a thick consistency, which is why it spreads quickly, the liquid fills all the chips and unevenness. The bath will then be smooth and even to the touch;
- Acrylic has long term services. If the coating was applied with high quality, it will last you up to 15 years. This is due to both the material and the thickness of the applied coating - up to 6 mm;
- Acrylic coating does not require any professional skills;
- Applying acrylic to the bathtub will not take you much time. Acrylic dries much faster than enamel and you can use the bathtub after just three days;
- When applying acrylic you will not feel discomfort. This material does not have a specific odor. You can update the bathtub using this method even if there are children or allergy sufferers in the house;
- With this method, there is no need to disconnect and connect the drain and overflow.
Disadvantages of this method:
- Although acrylic hardens faster than enamel, you must be extremely careful when applying it. It is important that there are no extraneous influences on the surface of the bathtub. Even a speck of dust or water can completely ruin the applied coating;
- The cost of this method is very expensive. However, it's worth the results you'll get; no other bath upgrade can last as long.
How to update a bathtub using acrylic?
First, the surface of the bathtub must be cleaned of various contaminants. After this, clean with an abrasive agent. Before applying acrylic, the bathtub must be degreased, rinsed and dried. You need to pour the solution in a layer of up to 5 centimeters. Most often, acrylic is applied in two stages. First, pour it onto the sides from the top, and then from the middle. The layer on the bottom of the bath is easily leveled with a brush.

When caring for a bathtub that is covered with liquid acrylic, you need to follow the rules:
- Do not use abrasive products for cleaning;
- Do not use solvent for cleaning as this may dull and stain the finish;
Do not use objects in the bathroom that can scratch the surface; - Pets can scratch the coating with their claws and it is better to refrain from bathing them in it.
Upgrade with acrylic liner
Having decided to restore the bathtub, many also ask how to update the seams in the bathroom. However, this is not so easy to do. An option in this case would be to install an acrylic liner on the surface. It completely follows the curves of the bathtub, this method is called “Bathtub in a bathtub”. The bathtub is mounted on a special foam.

Positive aspects of the liner:
- The insert has a very long term operation. It can last you up to 15 years, just like acrylic coating;
- The liner is very durable and reliable. Not affected mechanical damage;
- The insert has a very flat surface. With its help you can get rid of even very serious defects;
- Over time, the liner does not turn yellow or crack and retains its attractiveness even after many years.
Disadvantages of this method:
- Finding a liner that fits your bathtub model can be quite problematic;
- To install the liner, you will have to disconnect the drain and overflow, and connect it back only after installation;
- If you have a thin bathroom, installing a liner may not be an option for you. Thin-walled bathtubs sag over time and can ruin the layer of foam on which the liner was attached;
- All materials and liner must be made of high quality and durable materials. If any of the components are of poor quality, the entire procedure may be ruined.
But the main disadvantage of this method is still its price. Like acrylic, it is significantly more expensive than enamel.
How to install the liner
First you need to clean the surface from dirt and various entities. Afterwards, you need to check whether the liner matches your bathroom geometrically. Before installation, you need to position the liner evenly and trim it along the walls. The next step is to apply the foam that will hold the liner in place. After this, you can proceed with the installation. To enhance the result, you need to pour water into the bath.

The rules for caring for the liner are the same as for acrylic coating. If you adhere to them, such a restoration will look great throughout its entire lifespan.
After carefully analyzing each of the presented methods, the cost of materials, as well as the condition of your bathroom - the number of chips, dents and other nuances, you will be able to make a choice just for you. Any of the proposed methods can be performed independently, without having any special or professional skills.
Over time, cast iron or steel bathtubs, even covered with durable enamel, lose their original appearance, and the need arises to find out how to update a bathtub with your own hands, the enamel of which has cracked, yellowed and become covered with a layer of rust and deposits.
Methods for renewing enamel
There is no need to rush to get rid of an old, but strong cast-iron bathtub that has served faithfully long years. You can renew the enamel coating, fill up the chips and use the restored bathtub for several more years, and in the case where the bathtub is embedded in the walls, restoration of the coating is the only way to repair, without expensive dismantling works. Updating the font, as reviews show, is affordable in terms of price and availability of materials, and not very complicated technological process allows you to do the work yourself.
Renewal of a coating that does not have significant damage

If the enamel of the bathtub is not deeply damaged, but has simply become cloudy and covered with deposits, you can restore its original appearance by bleaching and polishing. The thickness of the coating allows you to painlessly renew the bathroom coating two, and in some cases, three times.
Please note: Exposed to temperature changes and aggressive chemicals The enamel of the bathtub becomes covered with scratches and microcracks, in which dirt, rust and calcareous deposits. The color of the bath becomes yellowish or gray and the surface loses its appearance.
- Before cleaning the enamel of the bathtub, it is necessary to select a suitable product available in a nearby trading network. Lemon or lemon juice is often used for cleaning. oxalic acid, table vinegar and oxygen or chlorine-containing bleach, in a concentration slightly higher than when bleaching fabrics. Good results can be obtained by using car cleaners, but they must be used very carefully.
- Before bleaching the darkened enamel of the bathtub, we put on gloves and wash off all possible contaminants with a cleaning powder, and then dilute the selected product and apply it to the surface of the enamel in strict accordance with the instructions.
- After waiting the required time, wash off the product. big amount water. When using acid-containing preparations, it must be remembered that neutralization of any acid can be done with a weak solution baking soda. For minor contamination, one treatment is sufficient to obtain a satisfactory result. If local foci of contamination remain on the enamel surface, the treatment can be repeated in these areas.
- When the dirt has been removed, the surface must be polished. Renovating the bathroom in this case requires the use of a rotary or vibration sander.

Help: Grinding begins with waterproof abrasive materials with a grain size of 800-1000 units. As the surface is leveled, the grit is reduced to 1500 and sanded until smooth. matte surface. Final polishing is carried out with abrasive pastes used when repairing the paint surface of a car.
Before updating an old bathroom by polishing, you should try to do the work on a small, most contaminated area, and if after polishing there remains visible network microcracks, which means that the enamel coating has worn out and requires restoration or complete replacement.
If the enamel is worn...

If the old enamel is damaged and cracked, how to renew an enamel bathtub to extend its service life by several years.
Tip: Significant chips and damage can be filled with putty. liquid glass(stationery glue) with required quantity nitro enamels white, most suitable for the color of the main bathtub coating. As a repair composition, you can also use automotive nitrocellulose putty or compositions based on epoxy based. The difference lies in the preparation of the working mass and application technology, which are described in detail in the instructions.
After repairing cracks and chips, you can use several methods to repair the old coating:
- It is impossible to renew a bathtub with enamel using factory technology at home, so the repair consists of applying special nitrocellulose and epoxy enamels, both in regular and aerosol packaging. The application technology does not require special skills and can be easily done independently. Before updating an old bathtub, you must carefully study the instructions included with the selected materials and try to apply the coating to any small surface installed vertically. If you can avoid drips, you can safely begin work. But it should be taken into account that such a coating will last no more than five to seven years, depending on the intensity of use.
- How can you renew an old bathtub for a longer period of time? This is where a bulk composition based on acrylic resin. Special composition applied to a cleaned, degreased and sanded bath surface by evenly pouring the composition onto the sides of the bath. Under the influence of its own weight, the resin flows down the walls to the bottom and forms a rather thick and durable coating with superior acrylic gloss and durability metal bath. Renewing an old bathtub in this way gives acceptable results without major damage to the base coating.
- How can you update a bathtub when the old coating is significantly damaged. If this steel bath, then it is better to replace it, and if it is an old cast-iron bathtub with a large wall thickness, then using it as a basis, you can order an acrylic liner from a specialized company, made in the shape of the old bathtub and glued to the prepared surface special glue. It is impossible to do such a bathtub renovation with your own hands, and it costs more than enameling, but the service life of the liner without loss of appearance is about fifteen years.
How to update an acrylic bathtub

To update modern acrylic bathtubs, which are also subject to wear and tear and are not immune to damage, only specialized compounds are used. Renewing old bathtubs, where the acrylic coating has lost its shine, can be done using abrasive polishing compounds and independently, but there is a danger of local overheating of the surface and irreversible loss of the appearance of the product, so it is better to entrust this work to professionals.
There are many ways to best update a bathtub, but the possibility of their use depends on its initial condition, the economic feasibility of the repair and the possibility of obtaining the desired result.
Any, even the most reliable and quality bath, over time may become covered with cracks and roughness, turn yellow or rust. It is almost impossible to avoid this - even the mildest detergents and household chemicals lead to thinning and wear of the surface coating. In this case, the bath owner is faced with the question of purchasing and installing a new bowl. However, this is a rather expensive solution, which, moreover, entails the need for repairs to the premises. Therefore, it is better to restore the bathtub - it will not require high costs, and the work can be done independently.
There are three main methods that allow you to restore the appearance of old plumbing: applying a new enamel coating, restoration with self-leveling acrylic and using a special liner. It is better to choose a specific method taking into account your own financial capabilities, the materials from which the bowl is made, as well as its condition.
In addition, it should be taken into account that such a solution has a number of disadvantages, since a bowl with a new coating will not have such performance characteristics, like one that was manufactured in an industrial setting.
- The materials that are used to restore plumbing fixtures are less durable and not as strong, so the surface requires more careful and gentle care.
- When enameling a bathtub or restoring it using liquid acrylic, you may encounter the following problem: the original color of the bowl will shine through the new coating (especially if the layer is too thin), changing its shade.
- During use and cleaning, the color of the bathtub may change under the influence of chemicals.
- Sharp or bulky objects will cause damage to the new coating even if they fall from a small height, and coloring matter(eg hair dyes) may leave permanent stains.
- Those who like to smoke in the bathroom will have to give up their habit, as a cigarette can leave an unsightly burn on the surface.
However, restored plumbing fixtures are repairable, and their properties directly depend on the quality of materials and the accuracy of the work.
Despite the growing popularity of modern polymer compositions, steel and cast iron plumbing fixtures with enamel coating are often found in modern houses and apartments. The metal is strong and reliable material, but the enamel coating wears out quite quickly. Restoring an enamel coating is a fairly simple process that does not require special knowledge or skills.
True, this method of restoring the appearance of bathtubs has one significant drawback. Cracks that appear on the surface grow very quickly, the enamel begins to peel off, water accumulates under it, which leads to the appearance unpleasant odor, dampness and mold. In addition, this method is not suitable for bathtubs with a large number of small defects - they can be noticeable even after applying the coating.
How to choose a composition for restoring enamel?
To ensure that the new coating is strong and reliable, you need to choose a composition for restoring bathtubs. There are not many options, so to make the right choice you need to know the basic characteristics and properties of the compositions.
| Name | Manufacturer | Durability of the coating | Features of work |
|---|---|---|---|
| Russia, Germany | On average 5 years (subject to the conditions of application and operation, the figure can reach 7-9 years) | A two-component enamel with a hardener that hardens completely in 48 hours. Fills everything well minor defects bath surfaces. It is quite difficult to work with the solution, since it is very thick and “sets” in about 60 minutes | |
| Russia | 6-8 years | Two-component solution with epoxy resin. It can be used when there are no noticeable defects or damage on the bathroom. Requires fast work, as it hardens in about 70 minutes. In liquid form it is toxic and can cause allergies | |
| Tikkurila Company (Russia, Finland) | 10-15 years | One of the highest quality but most expensive compounds for restoring plumbing fixtures. Working with the solution is quite simple, but the bath will be able to be used for its intended purpose in at least a week | |
| Random House Company, Russia | 6-8 years | Bathtub restoration kits, which include a two-component bowl coating, hardener and surface preparation products |
reflex 50
Step-by-step instructions for restoring a bathtub with enamel
Stage one. Preparation of available tools and materials
To enamel baths you will need the following tools:

The enamel that will be used to restore the bathtub must come complete with all the necessary components. To give the coating the desired shade, you can purchase a special tinting paste (unless prohibited by the manufacturer). In addition, it is very important to protect your mouth and nose with a respirator, your hands with gloves, and carry out all work only in a well-ventilated or ventilated area.
Stage two. Preparation for applying enamel coating
Before you start enameling the bowl, you need to thoroughly clean the surface, since the quality and aesthetic appearance of the coating depends on this.
| Step, no. | Description |
|---|---|
| Sprinkle the bathtub with an abrasive agent and clean it with coarse sandpaper. You can also use the grinding attachment of an electric drill, and also remove old enamel by sandblasting or hydrochloric acid, diluted with water in a ratio of 1 to 4. | |
| Treat areas with rust stains with a rust converter, wait 30 minutes and sand well. If there are deep cracks or chips on the surface, it is better to use automotive putty - there is a risk that the composition will not be able to fill them, and the enamel layer will turn out uneven | |
| Remove any remaining old coating and wipe the bath well using a rag or lint-free cloth. | |
| Fill the bowl with hot water, leave it for 10 minutes to warm the surface, drain the liquid and dry the surface. Make sure there are no crumbs, lint or debris left on the bathtub. |
The preparation of the bath must be done in exactly this sequence, without skipping a single step, otherwise the enamel will quickly come off. As clean as possible smooth surface bathtubs are a guarantee that the new coating will be durable and reliable.
Stage three. Application of enamel coating
Combine all enamel components as indicated in the instructions, mix the composition well. Divide it into two parts - for the basic and finishing coating. Apply the first layer with a wide brush - it should be thin, but as even as possible, without changes. It is better to start from the edges of the bowl, gradually moving down. The composition must be spread very well so that it fills all the pores of the material. After applying the first layer you need to leave it for 10-15 minutes, but completely dry You shouldn’t wait, otherwise the enamel may become dusty, and then the work will be ruined. Next, apply a second layer with the same brush, the direction of the strokes is from the middle to the edges. Leave the bath for another 15 minutes and eliminate defects (even experienced craftsmen), using the brush in exactly the same way. You can perform this procedure until the enamel becomes too viscous.
Sometimes containers with a spray bottle are used to apply the mixture, but experts recommend avoiding this method, as bubbles and streaks may appear on the surface, causing the enamel to peel off. Instead of a spray bottle, it is better to use a compressor - it will allow you to evenly distribute the composition over the walls of the bath and create a coating of the same thickness.
It is better not to use the bath for a week - this is exactly how long it takes for the enamel to completely harden. The room temperature should be maintained at 23 degrees.
Video - restoration of a bathtub using the enameling method
Method No. 2. Filling bath
This method of restoring plumbing consists of the following: pour liquid acrylic, which subsequently hardens and forms a new coating. Compared with the surface enameling described above, it has whole line benefits.
- Acrylic is a thick and viscous substance, thanks to which it lays on the surface in a thick, even layer, hiding all the defects and unevenness of the bathtub.
- The composition does not leave smudges, streaks or bubbles on the surface.
- To restore the bathtub, you do not need to remove the tiles or dismantle the bowl.
- The process takes less time than enameling or restoration using an inlay.
- Acrylic creates a film on the surface that repels dirt and plaque.
- Applying the mixture does not require special knowledge and skills.
- Most materials used for bathtub restoration have virtually no unpleasant odor.
The result of this restoration method will be smooth, glossy surface, which perfectly retains heat and does not retain dirt. As with enameling a bathtub, before you begin, you need to think about the choice of material. It is important to note that neither for the sake of economy nor for any other purpose can you use ordinary acrylic, which is sold in hardware stores, for the restoration of bathtubs. Its characteristics differ from sanitary acrylic, which is used specifically for the restoration of plumbing fixtures, so you can completely ruin your bathtub and harm your health. Choice in in this case done between glass and liquid acrylic.
Glass or liquid acrylic?
Today, two types of materials are used for the restoration of bathtubs: glass acrylic and poured acrylic (the market leader in the production of such materials is the Plastall company, which is why liquid acrylic is often called plastol). Many consumers believe that they are no different from each other, but in fact this is not the case.
Glasscryl appeared in stores about 10 years ago and has already proven itself well. It fits well on any surface and is cheaper than plastol, however, restoring bathtubs with its help can be quite difficult for beginners, since the composition sets quite quickly. Working with plastol is much easier, since it is less demanding to use and does not have a pungent odor. In addition, this material retains its properties even after freezing.
The Plastall company offers consumers who want to restore their bathtubs themselves a whole line of materials.
| Name | Drying time | Peculiarities |
|---|---|---|
| "Plastol" classic | 36-48 hours | An easy-to-work material that spreads well, has increased ductility and good adhesion. It has no pungent odor, does not require the addition of thinners or other substances, and forms a smooth and fade-resistant film. The mixture retains its properties for 90 minutes |
| "Plastol-24" | 24 hours | A new material based on an improved classic formula. Applied in one layer, the surface does not turn yellow, does not crack or peel, and is resistant to mechanical damage and abrasion |
| "Plastol-M" | 36-48 hours | A budget solution with an optimized formula, so the result of using the material is no different from restoring bathtubs using more expensive products. Does not have a strong odor, does not cause allergies, the mixture retains its characteristics for 90 minutes |
| "Plastol-Super" | 16 hours | The “fastest” liquid acrylic that hardens in a matter of hours. Does not form bubbles or streaks, does not require the addition of solvents or other components, but the mixture is “viable” for only 45 minutes |
When choosing a material, it is important to pay attention to the price - a good product cannot cost less than indicated on the manufacturer’s website, and counterfeits are not provided required quality finished coating. For those who do not yet have experience in restoring bathtubs, it is recommended to buy acrylic with a reserve so that it is enough to cover the entire surface.
Step-by-step instructions for restoring bathtubs with self-leveling acrylic
Stage one. Preparing to pour acrylic
Surface preparation for restoration is practically no different from preparatory stage when enameling a bathtub. You need to clean off the old coating and sand the bowl so that its surface becomes matte, warm it up and dry it. After this, you need to disconnect the siphon designed for draining water and place a container under the bathtub into which excess acrylic will drain (it is necessary to avoid getting the material into the sewer - this can lead to serious problems with water flow).
Stage two. Filling a bathtub with acrylic
Prepare the mixture as indicated in the instructions, pour into a convenient container and place next to it rubber spatula. If you need a material of a specific color, you can use a tinting paste, but first make sure that this is allowed by the manufacturer. Its amount should not exceed 3% of the total volume of acrylic.
Take a container with acrylic and pour the composition in a thin stream onto the sides of the bowl, pushing it with a spatula under the edges of the tile. There is no need to pour too quickly and forcefully - you need to act so that you get a layer 4-6 mm thick, and the material slowly flows down to about the middle.
Move the container evenly around the perimeter of the bowl, without taking long breaks, until the circle is closed.
Move the jet closer to the middle of the bath and do the same to cover the entire surface. You should not try to smooth out streaks or unevenness - this will only worsen the situation, and all defects will disappear during the drying process. The time for complete hardening of the acrylic is indicated in the instructions, but it is better not to use the bathtub for three days.
During the entire period while the material dries, it is better not to touch the bathtub or even get close to it, since the entry of the slightest particles of dust or debris can spoil the appearance of the restored plumbing fixtures.
Video - Instructions for restoring bathtubs with Stakryl
Method No. 3. Restoration using an inlay
Restoring bathtubs using acrylic liners is also called the “bath-to-bath” method. The liner is a structure made of acrylic, plastic or silicone, which represents exact copy bowls. You can buy it in a specialized store, having previously taken all the necessary measurements of the bathtub, and then glued it to the old bowl.
The most popular today are acrylic inserts - they are much more aesthetically pleasing and durable than plastic or silicone ones. This design is ideal for old bathtubs that cannot be restored with a new layer of enamel or liquid acrylic. In addition, the surface of the liners retains heat perfectly, its surface is absolutely smooth, but at the same time does not slip at all.
This is the most reliable way restore a bathtub (the service life of a high-quality acrylic liner is approximately 15-20 years) and, contrary to popular belief, it does not reduce inner space bathroom
However, this method of bathtub restoration also has its drawbacks.
- Difficult to install. Installation of an acrylic liner is a rather complex and time-consuming process. The liner is placed so that it covers the edges of the bathtub, and if the bowl is installed close to the wall, you will have to additionally remove the side and break the tiles.
- Possibility of water getting between two baths. If installation has not been carried out correctly, or due to wear or use low-quality materials, water may get between the liner and the bottom of the bowl. This will lead to dampness, mold and an unpleasant odor.
- Inconveniences during operation. Sometimes manufacturers make liners that are too thin, which is why they can sag underfoot and eventually become deformed or burst.
- Inserts are manufactured only for standard baths. As a rule, bathtubs are divided into two types - 1.5 m and 1.7 m, and if the bowl has non-standard sizes or shape, choosing an insert will be very difficult, and sometimes impossible.
- Enough high price. Compared to new acrylic bathtubs, liners are inexpensive, but for the same price you can buy a new steel bathtub.
How to choose an insert?
To avoid making mistakes when purchasing an insert, you need to take the following measurements:
- bowl width inner surface, and measurements should be taken on both sides;
- length along the inner and outer surfaces;
- depth of the bowl at the drainage point.
To avoid making a mistake that will entail hassle and additional costs, you can invite a professional measurer.
How to choose a bath liner
It should be noted that most modern stores sell products with a thickness of 3 and sometimes 2 mm - such liners are very short-lived, and it is not recommended to use them for the restoration of bathtubs. In the best case, the structure will last about 5 years, after which it will have to be dismantled and replaced.
Step-by-step instructions for restoring a bathtub with a liner
Stage one. Preparing the bath and available products
To install acrylic liners, polyurethane foam and silicone sealant. It should be noted that to perform the work you need to use only tools specifically designed for these purposes. Plain foam, which is used in repair work, will not work in this case - it has a low density and expands too much. To improve these characteristics, additional components are added to the foam - this is the material used for installing acrylic liners. In addition, in this case, a plumbing sealant is used, which is waterproof and mold resistant.
Preparing a bathtub for restoration with a liner– a rather long and labor-intensive process, which, in the absence of appropriate skills, is best left to specialists.
Stage two. Installing the liner
The basic rule that should be remembered when installing an acrylic liner is that all work should be done quickly enough (in about 4-5 minutes), otherwise the adhesive will harden and will not “grab” the materials well.
| Step, no. | Description |
|---|---|
| Apply to the bottom and sides of the bathtub polyurethane foam. Its quantity also depends on the tightness of the structure, but usually it is applied in stripes with an interval of 4-5 cm, and on the sides the stripes should be vertical and stretch from the bottom to the very top | |
| Install liner | |
| It’s good to press down the sides of the liner with your hands, then stand with your bare feet in the place where the drain is located and move towards the opposite edge - this way the liner will fall into place and press firmly against the surface of the bowl. After this, press down the walls of the structure well with your hands. It is not recommended to put pressure on the liner with any hard objects or hit it, otherwise you can damage the acrylic during installation |
Just a few years ago, restoration of a bathtub was carried out in only one way - re-applying a layer of enamel.

Liquid acrylic coating is effective and easy option for restoration of steel and cast iron bathtubs.
Today, upgrading a bathtub with acrylic is becoming increasingly popular, as this method has many advantages.
Restoring a bathtub with liquid acrylic also deserves attention because doing this process with your own hands does not seem difficult; thanks to it, you can update old plumbing fixtures within a few hours at home without much difficulty. And then the appearance of the bathroom will be much more attractive, and there is no doubt that visiting such a room will always be accompanied by only the most positive emotions.
Painting tools: brush, roller, soft sponge, spatula.
A bathtub that has been refinished with acrylic looks like new and it is safe to say that its service life can be extended by at least 15 years. So how to update a bathtub with acrylic with your own hands, what will you need for this? The following tools are needed:
- brush;
- roller;
- soft sponge;
- putty knife.
If done properly, the old bathtub will look as good or better than the new one, which is an important factor in this room.
Liquid acrylic - its properties and why it is chosen for the bathroom
A material such as liquid acrylic is a coating with unique properties that can “replace” an old bathtub with a new one, without the need to dismantle the tiles and the bathtub itself.

Acrylic is resistant to mechanical stress and has excellent decorative qualities.
This material is highly resistant to mechanical and chemical influences and has excellent decorative qualities. The surface coated with acrylic is never too slippery. When planning to renovate a bathroom, liquid self-leveling acrylic is most often used; before starting to restore the bathtub, you need to treat the surface with high-density two-component enamel, which consists of a base and a hardener. This liquid acrylic perfectly copes with its purpose; it has a whole set of positive qualities:
- The smoothness of the material is such that it exceeds the smoothness of the surface of the bath when factory casting is carried out, thus providing increased resistance to external influences.
- Due to the low thermal conductivity, the bathtub maintains the water temperature longer, so if you plan to restore the bathtub with acrylic, then taking a bath in the future will become much more comfortable. You can make a comparison - in an ordinary cast-iron bathtub, the water loses 1° in about 3 minutes, and in a bathtub that has been updated with acrylic, the water cools down for at least 30 minutes.
- Ease of maintenance is also an undoubted advantage of this finish, so you won’t have to spend a lot of time washing the bathtub. It is enough to simply wipe the acrylic bathtub with a soft sponge and soapy water; there is no need to use abrasives.
- Among the advantages of acrylic, one should also note its high strength, since it is practically not subject to wear, so the appearance of the bathroom will always be like new.
Preparing to apply liquid acrylic
Before the restoration of the old bathtub begins, you need to get rid of the old coating and prepare the surface. This is done as follows:
Entrenched rust and deep scratches are removed using a drill with a grinding attachment.
- If there are minor scratches and yellow spots, then it will be enough to treat the surface sandpaper. If on old enamel There are deep scratches and ingrained rust, then the coating is removed using a drill with a grinding attachment. It is necessary to take into account the fact that cleaning with a drill will cause a large number of dust in the bathroom, so when doing such work you must wear a protective mask.
- The dirt remaining after cleaning is washed off.
- The surface of the bath needs to be degreased with a solvent; you can use baking soda for this purpose. In this case, the soda is diluted to a paste, and when the treatment is completed, everything needs to be washed off with hot water.
- If there are cracks and chips on the surface, then you need to treat them with auto putty, which dries instantly.
- Restoring a bathtub with liquid acrylic requires the presence of a warm surface, otherwise the enamel will not lie flat. The bath bowl is filled with hot water, then left for 5 minutes and drained. After this, the surface must be dried (only very quickly), using a cloth that does not leave lint.
- The upper and lower drains are dismantled, this is done to ensure that acrylic residues do not fall into the sewer. Installed under them under the bath special dishes. If dismantling is not possible (this happens if the bathtub is tiled), then the bottom drain is sealed with tape or adhesive tape, and the bottom is inserted on top plastic cup so that acrylic residues fall into it.
- After all this is done, you can proceed directly to updating the bathtub.
Filling bath technology
One of the most common technologies for restoring an old bathtub is the “fill-in bathtub”; this technology is carried out as follows.
In accordance with the instructions, you need to prepare a mixture (it is two-component), a small part of this mixture is poured into a container, from which the acrylic will be “poured”.

The mixture is poured in a stream until a layer of 4–6 cm is formed.
- A thin strip is poured onto the side, and the substance is pushed under the edge of the tile with a spatula.
- The mixture is poured in a gentle stream onto the edge of the side so that a layer of 4 to 6 cm is formed, and the liquid should drain approximately to the middle of the bath.
- After this, the stream is mixed along the side and moves around the perimeter of the bath until the ring is closed. There is no point in stopping for a long time. If during this process there are losses and influxes, then there is no need to try to correct them, then they will disappear on their own.
- Now you need to pour acrylic into the middle of the bathtub, the entire surface should be covered, and you need to move in a spiral.
This technology is very economical when compared to purchasing new plumbing. To update a bathtub with acrylic standard size, you will need approximately 3.4 kg of acrylic. Restoring a bathtub with acrylic is not a quick process; a professional master spends an average of 2 hours on it, and a person who does not have such skills can spend 2 times more time on it.
After all work is completed, the bathtub must be left until completely dry, this can take from 1 to 4 days, much in this regard depends on the specific properties of acrylic.
If you need the restoration to be completed in a short time, it is recommended to use quick-drying acrylic, then the bathroom can be used within a day. There is also long-drying acrylic, it can dry for 4 days, but it forms a stronger surface, so it is recommended to opt for this material. As for the warranty: if you carefully follow all the instructions for restoring a bathtub with your own hands, then such updated plumbing fixtures can last at least 15 years, and if you provide proper care, then all 20 years. So updating your old bathtub is worth the effort.
Today, the method of restoring a bathtub with acrylic is gaining great popularity. It allows you to independently update old plumbing within a short period of time. This will give the bathroom a pleasant appearance. Many people are interested in the answer to the question: how to update a bathtub in this way?
Advantage acrylic bathtub is that it is durable, has light weight, retains the heat of water long time.
Benefits of Upgrading
This material has many advantages. completely transforms it: the yellowed bathing tank becomes new, shining, free of defects. After acrylic surface:
- becomes smooth;
- does not slip;
- is not afraid of mechanical or chemical influence, all kinds of bacteria.

Thanks to acrylic, it becomes resistant to external influences. Updating a bathtub using this method helps save a decent amount of time and money, since there is no need to dismantle the tiles and the old bathtub. Caring for it is simple and easy, just use the usual gentle products, soap, a soft sponge, and it will shine all the time.
It can be said with a high degree of confidence that a bathtub updated with acrylic will last at least 15 years, and with proper care - 20. The presence of low thermal conductivity in it allows the water temperature to be maintained for a longer time.
For example, water in regular bath made of cast iron loses 1° C in 3 minutes, and in a restored one it takes approximately 30 minutes to cool down.
Return to contents
Tools
Before you start updating your bathtub with your own hands, you need to prepare the following tools:
- roller;
- brush;
- putty knife;
- soft sponge.
If the restoration is done properly, it is possible that the old bathtub will look better than the new one.
Return to contents
Preparation for repair
The process should begin with getting rid of the previous coating and preparing the surface.
Necessary:
- Remove penetrated rust and serious scratches using a drill with a grinding attachment. This work should be carried out wearing a protective mask, as there will be a lot of dust.
- If there are only yellowed spots and minor scratches, you just need to clean the surface with sandpaper.
- Degrease the bath using baking soda. It is applied in the form of a paste. At the end of the work, wash off with hot water. Also available at hardware store any degreaser: acetone, alcohol, purified gasoline.
- If there are chips and cracks on the surface of the old bathtub, treat them with instantly drying automotive putty.
- Dismantle the lower and upper drains. This must be done so that the acrylic does not end up in the sewer. To do this, place a special container under the bathtub. If the bathtub is surrounded by tiles and dismantling is impossible, the drain from below is sealed with adhesive tape or tape. Place the bottom of a plastic glass on top, into which the acrylic will fall.
The enamel does not lie flat if the bath is cold when restoring with liquid acrylic, so you need to fill it with hot water for 5 minutes and then drain it. Dry very quickly using lint-free cloth. After completing this work, they begin to update the bathtub with their own hands.
Return to contents

Bathtub restoration acrylic paint carried out by pouring method.
The easy method and very high quality. Updating a bathtub with liquid acrylic can be easily completed from start to finish. After carrying out the above preparatory work The restoration of the bathtub itself begins. This process thin, requires caution and concentration.
It is necessary, strictly following the instructions, to prepare liquid acrylic and begin pouring it into the bath. In order for it to have time to flow down and fill the entire surface well, acrylic must be poured slowly, in a gentle stream, in a layer of 4-6 cm. It should drain approximately to the middle of the bathtub.
Those places in the old bathtub where it did not reach (this leads to gaps) also need to be watered, otherwise a defect will appear. Then acrylic is poured into the middle of the bathtub, moving in a spiral.
It should be remembered that restoration of old bathtubs in this case prohibits the use special tools(roller or brush). Liquid acrylic itself will form the necessary layer on the surface of the bathtub and form a fresh layer of enamel excellent quality. Updating a bathtub in this way is more economical than purchasing a new one. The update will require approximately 3.4 kg of acrylic.
After completing the work, the bath is left to dry for 1-4 days.
If you need to make a restoration in short period, it is recommended to use quick-drying acrylic. In this case, the bath will be ready for use after 24 hours.
Long-drying acrylic is also available for sale. It takes longer to dry (4 days). However, it contributes to the formation of a more durable surface, as a result of which experts advise giving preference to this material. All these recommendations are the answer to the question of how to update a bathtub with liquid acrylic.