DIY wooden box. What will you need for work?
Read also
Let's try to make an object such as a wooden box with our own hands. How is this accessory useful? Carved wood boxes are perfect for storing small souvenirs and small collectibles such as stamps or coins. They will decorate the interior and give it a touch of originality.
Master Class. DIY wooden boxes
We will make the box from a sheet of plywood 8 mm thick as the most available material. We must first make sure that the plywood we are going to use has a smooth surface and does not contain peeling, marks from knots, etc. minor defects. The texture pattern should be uniform, then the sheet can be easily cut without fear that pieces of veneer will break off during the work.
Well, let's begin. First of all, a drawing of our future product must be applied to the prepared surface - a diagram of a wooden box. To do this, take a pencil and simple drawing tools such as a ruler and compass. If you have a finished drawing that needs to be scaled, take care to accurately draw every angle and line. Correct and neatly executed drawing of a wooden box - necessary condition success.
Elements rectangular shape allow you to use plywood sheets most economically. If the layout is successful, there will be almost no unnecessary scraps.
Cutting it out correctly
Then, using a jigsaw, we begin the procedure of carefully cutting out all the main parts - the lid, bottom and walls. The smoother our thread, the more accurate the contour of the part we will get, as a result of which the time spent working with a file will be reduced.
Particular care should be taken when cutting along the boundary line of adjacent parts. If it goes askew, then both parts will be damaged at once, or both will have to be aligned later.
After this, the most critical stage begins, associated with the most delicate work. It's about about sawing joints in the form of tenons. For our small box, small square spikes of a simple shape are suitable. Their height should correspond to the thickness plywood sheet, that is, in our case, equal to 8 millimeters.
Which tool to choose
As a rule, they are cut out. But we can also take a jigsaw or its blade is excellent for working with wood, since it almost does not bend.
If you choose a jigsaw, you should use it to cut almost along the intended line. The indentation towards the cut area should not exceed one or two millimeters in size. Small excess wood can be removed later with a file.
Thus, we made straight cuts. To connect them, bring the jigsaw to the edge and carefully turn it 90 degrees. At the same time, its movement up and down does not stop.
In the same way, we cut out and remove all unnecessary fragments. From the quality of execution this stage work depends on how durable and reliable our future product will be. If at this stage we inadvertently spoil the workpiece, all the work will have to start all over again.

Now you're screwed
Now let's move on to cutting out the lid for our box. Undoubtedly, such work is much easier to do than cutting out tenons. But let's not relax. Do not forget to maintain the evenness of the cut and maintain a right angle between the planes of our saw and the surface of the plywood sheet. This is done so that subsequently there are no gaps between the sawn parts of the lid and walls.
This completes the most difficult stage of the work. The next task in order is to assemble a wooden box with your own hands into a single whole from individual elements. If the thorns have difficulty entering the nest or do not enter at all, do not be discouraged. It's worse when they fall through there.
Subtleties of technology
Excess material is easily filed off. It is best to choose one that has a square cross-section. Such grinding should be carried out in small portions with constant fitting of the parts relative to each other.
To make the adjustment as accurate as possible, it should be done on a table or other flat surface. For greater reliability, the walls should be glued. The parts must be pressed together at least for a short period of time.
The most convenient way to do this is with a vice or clamp. At the same time, do not forget to insert a small wooden spacer between the product and the steel surface of the tool.

DIY wooden box: attach the lid
Having secured the walls of the box, we will begin adjusting and gluing the bottom, as well as the lid. The lid of our box will be attached to the body using small metal hinges, which are easy to buy at any hardware store. You can purchase small hinges in quantities of 2 or 3 pieces or one long hinge for furniture.
When working with hinges, you need to make sure that they do not stick out above the surface of the product body. Therefore, in the place where each of them is attached, the wood should be lightly selected. For this we take a jigsaw or a small saw along with a straight chisel.
To screw the hinges, you should select small screws, the size of which will correspond to the diameter of the hole in the hinges. So that they are carefully screwed exactly in the intended place, and the plywood does not end up splintered, the hole should be drilled with a size slightly smaller than the diameter of the screw. This difference should be no more than one or two millimeters.
Don't forget about the castle
WITH outside It is advisable to equip the box with some kind of locking mechanism in the form of, for example, a lock, hook or latch. This will help preserve the contents and prevent the box from opening at the most unexpected moment.
All such parts are fastened similarly to hinges using small screws in pre-drilled holes for them. If the material of the box is wood and not plywood, even inserting a small furniture lock is allowed.
The product is basically ready. We hope that our project: “Wooden boxes” was successful, and the product turned out neat and visually attractive. If this is not the case, don't be upset. A beginner who takes on the creation of such a masterpiece for the first time rarely succeeds in everything right away.

About possible disadvantages
A DIY wooden box does not have to turn out perfect the first time. More often than not, the final version shows us unexpected omissions. Most noticeable are the annoying gaps between elements that do not fit tightly enough. Having discovered something like this, do not give in to the first impulse - to get rid of the unsuccessful craft. It would be wiser to carefully examine the product, analyze where the mistake was made, and take into account this useful experience.
As for future fate our product, then a lot can be corrected here. For example, cracks may well be sealed and masked. After all, there are many cunning tricks.
The easiest option is to take ready-made wood putty and cover up unwanted cracks with it. You can independently prepare the so-called glue, which will be based on the glue used in the work. This option is also suitable if we want to veneer our box.
In addition, the product can be coated with drying oil or painted. In the latter case, after filling the parts, we additionally prime them before painting.

Decorating our craft
But making a rectangular box and calling it a box is not all. The product must be decorated, and it is best to do this with carvings.
The carved box is a real work of art. Exist different types wooden boxes. In former times, many of them were carefully kept in every home. After all, people have been fascinated by wood carving with the creation of a wide variety of geometric patterns for a long time.
In Russian villages the majority wooden products, from furniture to dishes, was decorated with elaborate carvings. The basis of such decor was always a simple geometric pattern, and the aesthetic effect exceeded all expectations. Boxes carved from wood were created by real masters of their craft, they were strong and durable.
Learning to work with wood
If you don't know the techniques yet geometric carving- it's time to learn. It's not that difficult at all. And in order not to spoil our finished, so carefully made box, we will first practice on a separate piece of wood - for example, on a cutting board.
The tools required for this procedure are the simplest. You and I will be able to get by with just two knives: the so-called feather knife and the jamb knife. triangular shape, as well as a ruler, pencil and compass.

A pen knife is used when you need to cut out an elongated element, for example, a petal or a fairly long groove. It is also used for small-width slots.
The second tool is used to cut through various geometric shapes, mostly triangular in shape, but also long straight lines. Each knife must be sharp and have a comfortable handle.
Geometric carving technology
Immediately before starting work, you should draw a sketch of the future pattern on the board. You can draw it with a pencil, using a ruler and compass. Or you can use a ready-made stencil, transferring the drawing onto the board using carbon paper.
Let's say our ornament contains plant motifs. This is where you should start working. The technology is simple: the thumb is pressed against the board as tightly as possible, and the index finger lightly touches it in the area of the upper joint. This is how you hold the knife, you have the opportunity to control and change the angle of its inclination and the depth of immersion into the wood. By using thumb The blade moves smoothly and accurately.
Having cut through one side of the element, the board should be turned over and a similar operation should be done on the opposite side. Please note: if the shavings from under the knife curl like a rope, it means that the tools are sharpened quite well.

How to cut out geometric shapes
Elements in the form of triangles and other similar figures are cut out using a jamb knife. We cut its heel into the wood at an angle of about 45 degrees, but do not bring it to the edge of the pattern. We repeat the operation with different sides geometric element.
We join all the slots on the sides. As a result, the cut piece of wood falls out of the board. The remaining wood that could not be cut with a knife is cleaned evenly and carefully.
Using the same principle, we cut out all the other elements of the picture. At the end of the process, take sandpaper and sand everything thoroughly. Can be carried out additional processing natural impregnation.
So we learned the simplest wood carving techniques. In the future, with an increase in the number of crafts and, accordingly, experience, our skill will increase. We will be able to make wooden boxes, not only varnished or painted various colors, but also decorated with extraordinary fantasy ornaments that will look simply luxurious.
Today in the master class I will show you how to make a box that will last forever, so that it can be passed on to the inheritance. The whole process will be shown from creating the wooden box itself to decorating it.
I make almost all the blanks for my work myself and people often ask me questions regarding the blanks specifically. Therefore, I want to divide my MK into two parts.
Part No. 1 - blank.
Part No. 2 - decor.
So, I'm starting part #1.
We will need:
- Plywood 8 mm,
- Wooden block 2*4 cm,
- Nails,
- Glue moment "Crystal"
- Jigsaw,
- Screwdriver with grinding attachment,
- Hammer,
- Blowtorch (gas cylinder)
- Stain on water based(Oak color)
- Sandpaper (various thicknesses)
In this photo, I have already cut the plywood into pieces of the required length.

Before I start making a blank, I sketch out a drawing on a piece of paper. Here, I share with you my “drawings”.
To understand what we will collect.
The box will be rectangular in shape (front view). Inside (top view) the box will be divided into three parts. The middle part will be covered with a lid, and on the left side there will be a separately made small box. As planned, this is for the first tooth.

This is a “drawing” of the lids, which will be located alone inside the large box, in the middle compartment. And the second one is on a small box for a tooth (only it will be square shape).
The lids will consist of two parts. I labeled them as: Lid and Inner Lid.

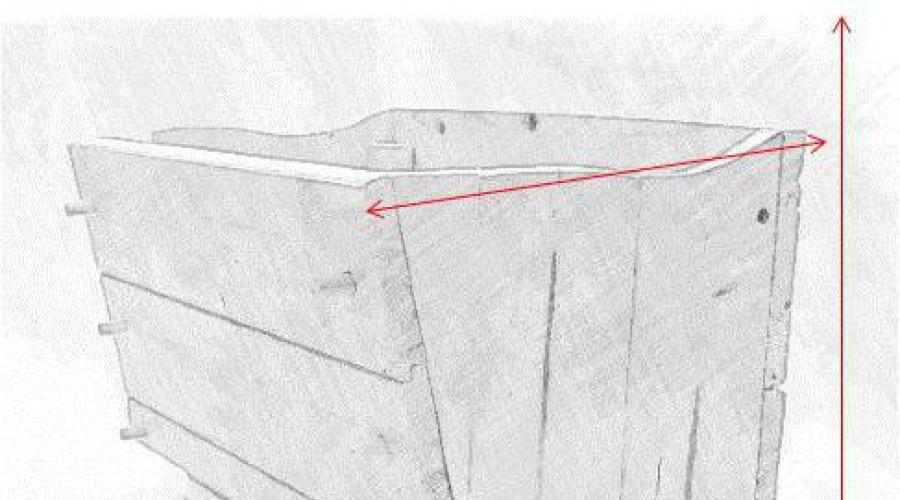
And these are all the dimensions that we need for a large box.
Naturally, these are inaccurate numbers (since our plywood is 0.8 cm thick), so you will have to sand some pieces.

These are the dimensions for a “tooth” box.

I’ll say right away, because I have to answer this question most often. People ask why they can’t cut plywood straight with a jigsaw?
And I can't do it! Then, after cutting, I carefully polish each end of the piece. An ideal cut is only possible on a machine with a jigsaw, no matter how you look at it, you won’t be able to cut it straight.
I'm lucky, our friends have theirs furniture manufacturing. Of course, I won’t go to them just for one box (so as not to bother me), but when I need to cut a lot of plywood, I go to them and they will cut everything for me in 10 minutes. Thank them very much for this!
I lay out all the pieces of plywood (after having thoroughly sanded all the walls that will be inside the box, otherwise it will be inconvenient to do this later) and, armed with glue, I begin to assemble the box.

When the glue “sets”, I knock everything down with nails. The length of the nails is 2 cm.

Little by little the outlines of the future box are already visible.
I always assemble the boxes in this order. First the bottom, then the ends, and then the front sides.

This is how the tray turned out.

As we see, side walls stick out a little. We carefully sand all such places.

The first cap is ready. The lid is on the middle compartment inside the box.
Just glue and knock together two rectangular pieces.
Of course, with inside the carnations are visible, but we will cover them later with decorative nails.

The middle cap took its rightful place. And the small “tooth” box is ready.

Here it is, but closer.

Next, you need to put a lid on a large box. For this we need wooden block(2*2 cm is good, but I didn’t find that, I only found 2*4 cm).
In general, I had to saw it lengthwise to get the dimensions I needed. This is where a jigsaw comes in handy.

Cover in progress. I glue the bars with glue and knock them down (on top) with nails.

The preparation is ready! You can start firing.

Attention! Dangerous! Work with blowtorch, requires special care. Do not handle it for children! Adults should take it only in the presence of a bucket of water!
I have been working with stain for a long time, but I like the way stain looks after firing. The result is a flow of colors. That’s why I always “resort” to firing.
I saw a lot of works (by other masters) with firing. I don’t want to offend anyone, but sometimes I just want to scream: “Why are you burning plywood like that?” Plywood is not wood, it does not require strong firing. Moreover, she is AFRAID of strong fire. The plywood begins to burn layer by layer and unsightly burnt chips form.
In general, we lightly burn the workpiece, and we burn it so that the “pattern” of the scorch marks is initially beautiful.

I cover it with stain three times (this is optional, depending on how intense you want the final color).

Then we take sandpaper (of varying hardness) and begin to rub all the ends, giving the plywood an old, centuries-old look.
You can see in the photo that the small box has already been sanded.

And this is the lid from a large box. BEFORE and AFTER view.
Perhaps this is where I will finish part one. And I will move on to the second stage.

We will need:
- Trafatters,
- Putty,
- PVA glue,
- Acrylic paints,
- Acrylic enamel,
- Construction paper tape,
- Felling,
- Microbeads, rhinestones, beads,
- Claim flowers (paper, plastic),
- Various metal fittings and other small items for decoration (your choice).
We will only decorate the lids, and if you remember, we have 3 of them.

As always, I mix the putty (finishing putty, construction putty) with water and PVA glue. This is the consistency.
There is about half a cup of putty, 1 teaspoon of pva and 1 teaspoon of water.

I'm making the stencils more comfortable.

And I transfer the drawing to the workpiece.

To prevent the design on the lids from looking monotonous, I use two different stencils.

The stencils are applied, we are waiting for complete drying.
After drying the fine sandpaper I carefully polish all the inscriptions.

I will paint all these decors black acrylic paint. Some I will paint with a brush, some with a sponge, and some full immersion in a glass in which black paint was diluted in water.

While it looks a little gloomy, I even felt sad at that moment. It looks like the box should be “Mom’s Treasures,” but here the flowers are black. I continue to work.

I also paint the lids black.

Then, while the black color is still wet, I touch it a little with a sponge and here and there with green paint (also acrylic). We wait until it dries.
While I wait, I decide to varnish all my boxes. I use nitro varnish. I varnish 5-6 times, carefully sanding each layer of varnish so that the final surface is smooth.

I return to the lids when the first (black layer) has dried.

I mix greens with white and apply paint to the surface with a wide brush. As if highlighting the relief.

I apply the paint like this: the first layer, for example, along. The second layer of paint, the one that will be lighter, across. And then it’s the other way around again.

Each time I add a little more white.

In the end, I settled on this color.

It looks like it’s already a good color, but I want to add a little mother-of-pearl. Acrylic enamel is quite suitable for this role. I dip the sponge a little into the enamel and walk over the surface of the lids.

It's hard to see in the photo, but the shine has appeared. Exactly what is needed!

At this stage, I thoroughly coat all the covers (on top, where there is a stencil) with aerosol varnish.
I'm waiting for it to dry.

When the varnish has dried, using “Crystal” moment glue, I glue previously painted decors onto the large lid: flowers, filigree, twigs, etc.

I use the same paints that were used to paint the lids to paint the glued decors. In the same order - first dark green, then more, more and more white.

I add a little gold. And again I carefully varnish the entire lid (on top) with aerosol varnish.

When the varnish on our flowers has dried, I begin to decorate the composition using all kinds of beads, seed beads, microbeads and rhinestones (mostly Green colour, in order to maintain the style of the boxes).

I divided the metal fittings into two parts. I paint the fittings that will not be attached to the lids in the color of the lids, and vice versa, I leave the fittings that will be attached to the lids in their native bronze color.
I didn’t remove how to “install” the fittings onto the screws, I think everything is clear here. I put on the loops, screwed on the legs and corners, and glued the cutting.

There you go!

I really like the way moderately burnt plywood looks.

I varnished everything so that now, it seems to me, I can sit on this composition.

The photo is closer so that you can see all the stitches.

By the way, here (in these corners) you can insert a photo of the first ultrasound. I specially curved the corners so that the photo could be easily inserted there.
It’s better, of course, to laminate the ultrasound photo, so it will be more durable.

Almost all metal fittings are also trimmed with green rhinestones.


Wooden boxes are a universal item that can serve for many purposes. Do you need a gift for your birthday, in honor of your promotion? career ladder, for housewarming or New Year? A man, or maybe a woman? Do you have nowhere to put decorations or nowhere to store gift cards? Purchasing a box will help you. However, if you don’t want to spend a lot or are wondering how to make a box out of wood, this article will come in handy.
History of the boxes
Such a luxury item as a box appeared in the world quite a long time ago, several millennia BC. However, not everyone could afford them. They were designed to store jewelry and precious stones and were often made of gold, silver or bronze. The poorer owners had cheaper wooden boxes, covered with fabric or others inexpensive material. Regardless of the cost and quality of the casket, it became a family treasure and was passed on to descendants.
With the development of industrialization and the transition to machine production, purchasing a casket has become much more accessible. Now it occupies an honorable place in the lives of modern people.
Types of boxes
Making a box self made- this is a creative process, and therefore there are many different types of them. First of all, they differ in the material of manufacture. For example it could be:
- Tree;
- Expensive metals (gold, silver)
- Cheaper metals (iron);
- Glass;
- Ivory;
- Cardboard.
Any box can be simple or elaborately decorated. The following techniques are most often used to decorate a casket:
- Inlay with precious and semi-precious stones;
- Thread;
- Engraving;
- Covering with leather, velvet or similar materials.
How to make a box
Since buying a high-quality casket can cost you a pretty penny, it is much more profitable to create a wooden casket with your own hands.
To do this you will need:
- Wood (preferably boards about 1-1.5 cm thick);
- Cardboard;
- Manual frezer;
- Hand saw;
- Wood glue;
- Hinges for the lid of the box;
- Decor.
- Step 1. Draw on cardboard a template for the lower and upper parts of the box, its bottom and lid.
- Step 2. Take two prepared boards of the specified thickness and trace the templates on them.
- Step 3. Using a router, cut out the required form parts of the casket. This should be done slowly and vigilantly. If you do not know how to do this, refer to the appropriate master class.
- Step 4 To finish off the bottom and lid, sand them down. It is best to use a sandpaper mounted on a wooden disk. Working on a box is a creative process, so any other sanding method will do. The bottom and lid are ready!
- Step 5. Take three boards of the same thickness (approximately the thickness of the bottom or slightly less) and height. The length of one of the sides may differ; this will be the back wall. Sawing the boards at an angle of 45° at the junction, using a miter saw.
- Step 6. Glue the boards to the bottom, forming our little chest.
- Step 7. We cut out two small boards for the front side of the casket with the expectation that they should fit together, but not tightly. You can glue another thin board onto the boards (twice or three times thicker) for beauty, and later we will attach a handle to it.
- Step 8. We firmly glue one board on top, and fasten the second to a box (with a bottom) of boards about 0.5 cm thick, which will fit freely into the lower hole under it.
- Step 9. Making partitions for the drawer. To do this, we take boards as thick as the walls of the box and glue them in as we see fit.
- Step 10. Insert the drawer into the chest. If it enters with difficulty, its side walls should be sanded.
- Step 11. Make and glue the bottom and partitions for the top drawer.
- Step 12. Fasten the lid and back wall boxes using hinges.
- Step 13. Decorate the box at your discretion. Now we know from start to finish how to make a wooden box with our own hands.

Carved boxes
Carvings have been used to decorate chests since ancient times, which is why carved wooden boxes are very popular. This technique will look quite harmonious on the chest we created.
If you are a beginner and wood carving is new or new to you, then use a geometric and large pattern as it is easier. You should stock up on a chisel, knives and a drill. More detailed lessons you can find it in a separate master class. If you consider yourself a professional in the field of carving, then you can choose openwork or sculptural carving - it looks much more elegant.
Making a wooden box
Develop, create, create. Success in creative work!
Any woodworking activity is very exciting, because here you can show your imagination and create a thing that fully corresponds to your own tastes and wishes. After all, it’s always nice to have a homemade item in your home.
So, for example, a do-it-yourself wooden box will be an excellent and useful accessory. You can store small jewelry, collectible coins, and any other items in them. small items. Also, unusual and carved boxes are often used to decorate the interior. How is a wooden box made?
How to make a wooden box
A do-it-yourself wooden box can be made in different ways.
For a method that is suitable even for beginners, you will need a sheet of plywood, which must be treated for various defects and completely leveled. When the surface is completely prepared, it is necessary to apply drawings of the future product to it. To do this you will need a pencil, a compass and a ruler. The layout of the future box must be precisely worked out, because from it correct application the end result depends.
The most common type of box is classic.
In order for the material to be used as economically as possible, the elements of the future product must be rectangular in shape, in which case there is practically no excess left.
After making sure that the drawing of the box has been applied correctly, you will need to use a jigsaw to cut out all the applied parts - the lid, the bottom and the walls. This work must be done very carefully so that all contours are as smooth as possible. It is important to keep this in mind when cutting is done at the boundary of individual elements. So that in the future you don’t have to replace damaged parts.
For a small box, you can use regular square spikes. Their height should be equal to the thickness of the plywood.
After all the blanks are cut out and all unnecessary fragments are removed with a file, the most labor-intensive part of the work is completed. Next, you need to make a box from all the received elements. To build a wooden box, you will need to hammer the spikes into the nest. If they do not fit, you will have to file off the excess material, remembering to do regular fittings so as not to remove more than necessary. For a more reliable result, the walls are lubricated with glue, and then the parts are firmly attached to each other. For this, a vice is usually used.

When the walls are ready, it's time to start attaching the lid and bottom.
In order to secure the bottom, you will need to place it on glue along the edges, around the entire perimeter, and firmly pressing the parts together, wait a while. To attach the lid, you will need special metal hinges, small size. You can use either one long box, the length of the box, or several small ones. It is best to screw them in with small screws so that they do not stick out from the lid and match the diameter of the holes in the hinges. This is how the boxes are made. Now all that remains is to decorate your product.
Decoration of wooden boxes
The finished product can be painted or simply varnished. Some people like carved boxes (as shown in the photo), or those made using the decoupage technique. Here everything will depend on imagination and creativity masters
Carved box
For this type of woodwork, you will need:
- Pencil
- Ruler
- Compass
- Knife feather
- Oblique knife.
If oblong elements are to be cut, then a feather knife will be required for them, and for straight lines and geometric shapes, an oblique knife will work well.

Carved wooden box.
The required pattern is first applied to the board using a stencil, or a compass and ruler. Cut out elements from both one and the opposite side. Those pieces of wood that could not be cut with a knife will need to be cleaned. After completion of the work, the resulting product is sanded with sandpaper.
Wooden boxes today are very popular among the fair sex. After all, they are very practical and roomy. In addition, such a box fits perfectly into the interior and is a real decoration of any room. However, prices for such products in stores are quite high. But you can make a wooden box yourself. This does not require special knowledge or skills. All you need is your desire and patience. This article presents a master class on making a simple wooden box in a home environment.
Will need
Materials needed to make a wooden box with your own hands:- 1. Board (width – 16 cm, length – 36 cm) – 2 pcs.
- Wooden plank (width – 7 cm, length – 36 cm) – 2 pcs.
- Wooden plank (width – 7 cm, length – 16 cm) – 5 pcs.
- Wooden plank (width – 7 cm, length – 18 cm) – 1 pc.
- Rail (width – 1 cm, thickness – 1 cm, length – 36 cm) – 1 pc.
- Self-tapping screws (length – 1 cm) – 8 pcs.
- Loops (width – 1.4 cm, length – 1.7 cm) – 2 pcs.
- Small thin nails – 35 pcs.
- PVA glue – 1 b.
Tools
Tools needed to make a wooden box at home:- Sander.
- Screwdriver.
- Hacksaw or jigsaw.
- Hammer.
- Thin brush for applying PVA glue.
Step-by-step making of a wooden box with your own hands:
1. First prepare the bottom and lid of the box. Pick up a board required sizes very difficult, so choose a board initially required thickness and using a hacksaw, cut out 2 planks 16 cm wide and 36 cm long. Remember that the thinner the boards, the neater the box will look. Ideally, the thickness of the board should not exceed 0.5 cm. To get rid of possible unevenness, go over the prepared boards with a sanding machine.
2. Make long side bars caskets. Their length should be 36 cm and width 7 cm. Cut out the planks using a hacksaw or jigsaw, and then sand them with a grinder.

3. Start preparing the short side walls of the box and partitions. IN in this case 2 planks 16 cm long and 7 cm wide are side walls, the remaining 3 planks of similar sizes are vertical partitions, and 1 plank 18 cm long and 7 cm wide is a horizontal partition. Be sure to sand all parts.

4. You will also need a thin strip 36 cm long. It is best to use a window glazing bead. The lid of your box will be attached to it. It also needs to be sanded.

5. Start assembling the frame of the box. Using thin nails, attach the short sides of the box to the bottom first, and then the long ones.

6. Next, prepare the partitions of the box. Do not touch two planks 7 cm long and 16 cm wide, but on the plank 7 cm long and 18 cm wide and the third plank 7 cm long and 16 cm wide, make small cuts in the center. Notches are best done using a jigsaw. The length of each notch should be 3.5 cm, and the width should match the thickness of the partitions. Fasten the 2 planks using the notches you made.


7. Insert the partitions into the previously assembled bottom of the box and secure them with nails. It is best to carefully glue the crosspiece to the bottom using PVA glue.

8. Next, using thin nails and a hammer, nail a thin strip to the long side of the box where the lid will be attached. Using a screwdriver, screw the hinges to the bar, and then secure the lid of the box.
decoupage In this case, it all depends on your imagination and your skills.