mstar chipset. Portable LCD TVs based on MStar MST726A TV processor. Characteristics of the new Lexand GPS navigators
Read also
At work, even quality technology there are various failures and malfunctions. Therefore, each user must be prepared to have to repair the equipment with their own hands, because you can go broke on paying for the services of service centers.
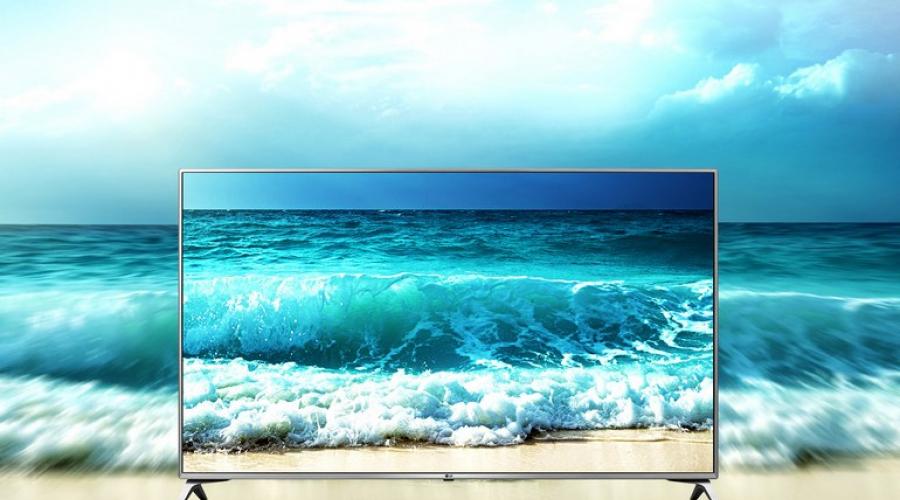
Today we will talk about the most popular breakdown - a malfunction of the LED backlight on LG TVs. It is with this problem that ordinary users most often turn to service centers. Few people know that you can normalize the operation of the device on your own. Special skills are not required, the main thing is to follow the instructions.
Before you start repairing the LG TV backlight, you should first figure out how this component works, what are its functions and why is it needed at all?
What is LED backlight?
The abbreviation LED stands for Light Emitting Diode, which translates from English as a diode that emits light. Speaking specifically in the context of the television equipment manufacturing industry, this abbreviation refers to the type of liquid crystal matrix and light emitting diode backlighting.
After being presented new type backlight LCD monitors, manufacturers began to replace the abbreviation LCD with the designation LED in the name of the models. Of course, LG TVs are no exception to this rule.
In fact, the motive for such changes was more marketing objectives than real need. The fact is that LED backlighting of matrices is not fundamentally new technology production of screens for television equipment. It's just an updated way of lighting. However, the trend took root harmoniously, so the term Light Emitting Diode is actively used today.
The most common TV matrices are based on the use of a cold cathode lamp, in fact they are all the same fluorescent lamps. As for the LCD and LED models, they are characterized by emitting light diodes.
It's no secret that LCD screens are made up of pixels with liquid crystals. The position of the crystal in the pixel determines whether the cell transmits light. Actually, this is how the screen glows.
The quality of the screen matrix determines a huge number of parameters, in particular: the level of dark shades, viewing angle, static contrast, image refresh rate, and even response time. Liquid crystal matrices are produced using several technologies. We list the most popular: TN, IPS, PLS.
As for the backlight itself, it affects the brightness, color reproduction, coverage, dynamic contrast. However, it is still worth evaluating the parameters in the complex, taking into account the type of matrix and backlight.
Thus, buying a TV with LED backlight, the user receives:
- balanced contrast;
- saturated brightness;
- high definition picture;
- color palette.
In addition, LEDs consume much less electricity, by about 40%, than their counterparts. directly lamps daylight, which are also used in the production of television equipment, contain mercury, which negatively affects the environment. In this regard, the advantages of LED are obvious.
There is no point in arguing that modern TV devices with backlighting consisting of LEDs provide the broadcast of the brightest image. Dynamic contrast appears - regulation of the brightness of the diodes for different parts of the monitor. The image becomes more realistic. 
Adjusting the glow of the diodes directly in the process of watching TV has a positive effect on the black level. When they appear dark shades, the backlight level decreases, resulting in darker screen.
Causes of backlight failure
High-quality television equipment is able to work for a long time, so backlight problems appear after an impressive period of time. Unfortunately, the same cannot be said about Chinese manufacturers.
Why is there no backlight? There are several reasons for the appearance of a malfunction, we will analyze each of them:
- A certain line of diodes burned out. LEDs are characterized by a serial connection type, which means that if one element stops working, then the entire component fails. However, the voltage (about 200 volts) continues to flow to the light bulbs.
- Problems with the LED driver. The image disappears on the LG TV due to the fact that, on the contrary, voltage is not supplied to the LEDs, respectively, they do not light up.
- Manufacturing defects. Sometimes only one LED does not work, but the screen of the TV device does not light up.
- The user sets the maximum brightness of the image, which leads to an increase in voltage, as a result, the diodes do not withstand and burn out.
- Sometimes incorrect settings for the voltage supplied to the LEDs are the fault of the store where you purchase the TV. They try to attract buyers with a bright picture.
Now you know why the LED backlight of the TV fails. This breakdown is quite common, but if you follow the manufacturer's recommendations, you can significantly extend the life of the device.
Professional repairmen using special equipment determine which module has failed. How can an ordinary user understand that the backlight of the LG TV screen is not working? Now let's look at the basics of diagnostics.
TV Diagnostics
How to determine that it is the backlight that has failed? It all depends on the symptoms. For example, an LCD TV is started from the remote control remote control, but there is no image on the screen. Point a flashlight at the screen, as a result you will see a dim picture. In fact, the flashlight performs the functions of forced illumination.
Based on this, we conclude that either LED driver or backlight. To specify the source of the problem, you should disassemble the TV and carefully examine the elements of the hardware component.
Remember that you should only disassemble the TV case if you previously had similar experience. If there are no skills, then it is better to contact the service center. Once again, it's better not to risk it. Since there is always a chance to make things worse, that is, to aggravate the initial breakdown.
To dismantle the back panel of the LG TV device, simply unscrew the special bolts that provide fixation. It's easy to do. First disconnect the supply and dismantle the fasteners. If the cover still does not come off, then you need to find the blocking bolt.
When the back panel is removed, you should check the backlight and the output voltage. For example, if the backlight voltage is 100 volts, then the component is out of order.
In most cases, LG TVs are equipped with an LED lens array that sits around the entire perimeter of the screen to provide clear illumination. To get to this part and fix it, you must first dismantle the matrix.
Now you know what to do if the TV turns on, but there is no image.
Product disassembly
Regardless of the model, television equipment is equipped with three key boards: main, T-con and power adapter. Immediately after removing the cover, you will see them.
Disassembling an LG LCD TV is an extremely difficult and time-consuming process, be very careful as there is a risk of damage to other hardware elements. To carefully disassemble the TV, follow these guidelines:
- prepare in advance working area and two tables standing close to each other, on which components will be placed: a matrix, led strip, bar;
- Before starting disassembly, wash your hands to avoid contaminating the filters or the matrix. In the future, this will negatively affect the quality of the image;
- special attention should be paid to decoders, if you are not careful, you will simply cut off the cable.
Step-by-step instructions for disassembling television equipment:
- Disconnect the cables and unscrew the bolts located between them to disconnect and remove the T-con board.
- Remove metal protective elements from decoders. To do this, unscrew the fasteners located on the sides and the bolts. As a result, the decoders will be held solely on rubber mounts.
- It's time to remove the front bezel of the device. Unscrew the screws around the perimeter and place the product on the back panel. Remove the frame.
- Flip the screen while holding the matrix. The decoders should be on top, you can disconnect the rubber fasteners that hold them, the main thing is to do everything very carefully.
- We disconnect the matrix and put it on a pre-prepared table so that it does not interfere with the backlight repair.
In principle, anyone can disassemble a TV device, the main thing is to be as accurate as possible.
Determination of non-working LEDs
Previously, we examined the process of disassembling the TV, now we will proceed directly to the repair. To replace the LEDs in the backlight, carefully snap off all fasteners, and then dismantle the plastic frame. We remove scattering films in order to open access to faulty elements.
The structure of the LED backlight directly depends on which model of television equipment in question. For example, for LG 32LB582V there are three rows of LEDs for 6 pieces. Model 32LN541U has one more diode per row.
Television equipment using this lighting technology is characterized by serial connection diodes, so if only one element burns out, then absolutely the entire system will fail.
In the event of a driver failure, voltage will cease to flow to the entire system. If only one diode burns out, then there will be voltage, but there is no proper lighting. The circuit is open. Therefore, you need to change the faulty LEDs of the LG TV for correct viewing.
Approximately the backlight system has about 18 diodes, voltage measurements showed that 140 V is supplied without loading, which means that each element individually accounts for approximately 7.8 V.
What are all these calculations for? The voltage level of each bar and the total load allow you to calculate the power of the LEDs used. find defective element systems are extremely difficult. If the mounts are not burnt, then you will have to double-check absolutely all the diodes one by one.
Replacing LEDs
It is extremely difficult to replace the backlight of an LG TV on your own, it is possible that you will have some difficulties. Suppose that during the diagnostic process you were able to identify a couple of damaged diodes. Buying a bar of new light bulbs is very problematic. Service centres do not supply these parts, so the only way out is to purchase from the manufacturer. It is clear that the delivery will have to wait a very long time, not to mention the cost.
In order not to buy a bar, you should replace the LEDs in LG LED TVs one by one. You can buy on the market. Mostly already soldered parts are sold, but it's okay, the main thing is that they work.
Remember that absolutely all slats are fixed with double-sided tape. Therefore, they need to be heated with a soldering dryer to loosen the fixation of the adhesive tape. Fix the LED strip in a special holder. Heat it with a hair dryer from below, as a result, the tin will be melted. So the broken part is removed. Soldering is carried out in a similar way, the only way to change the part, while not damaging it.
Remember that in the factory, absolutely all lenses are attached with a compound, therefore, in the process of dismantling them, be extremely careful. Each of them will have to be installed in its place. To keep focus.
There is one more subtlety: it is possible that you will come across LEDs with a negative pad big size, therefore, the positive will be less. Cut the contact point to solder the diode.
In the event that the paint is slightly damaged - it's okay. The remaining structural elements are soldered according to a similar principle. As for the lenses, they need to be glued with superglue.
Note.
Without such a backlight, not a single LCD TV can work normally, regardless of its brand. We will tell you how you can repair Led TV backlight at home using the example of a device from Lg, and what you need for this.
How to determine that the backlight is broken? Let's assume that the malfunction of the LCD TV is as follows: it turns on from the remote control, but the screen does not light up (if your TV does not turn on even from the remote control, read about). When facing the display light from a flashlight(i.e. forced backlighting is performed), then the image is displayed. Verdict - the ice driver or a similar backlight does not work, maybe due to the fact that special lines with soldered LEDs have burned out. It is necessary to disassemble the TV and visually inspect the parts in search of a malfunction.
Attention! Opening the cabinet of the LCD TV should only be done if you have the skills to work with complex devices and little experience, otherwise it's better not to risk it.
Remove back cover for any TV brand LG - it's a simple matter, only you need to do everything carefully and without haste: disconnect the legs of the stand and unscrew the mount around the entire perimeter of the product. If the cover cannot be removed, it means that there is a blocking bolt, you should not make an effort, you need to find it and unscrew it.

After removing the back cover, check the output voltage.
If it's ok, check it out. voltage ice backlight the screen itself. Its value is only 100V, which indicates a malfunction of the LCD TV backlight.
In such TVs, a special LED set with lenses is used as a quality, which is installed over the entire area of \u200b\u200bthe screen to provide clear illumination. To get to them and repair the LG TV backlight, you must first remove the matrix.
Product disassembly
The TV has three main boards - main, T-con and power supply, all of which are clearly visible in the photo.

Removal and disassembly of the matrix with your own hands - the work is very painstaking, one careless movement, and you can buy a new TV set, so it’s better not to take on repairs without experience. Experts highlight the following main points when disassembling the matrix:
- it is necessary to prepare a place of work and two tables on which to lay matrices and scattering films;
- before starting this work, you should thoroughly wash your hands so as not to accidentally leave traces of dirty fingers on the filters and the matrix itself - this can harm the image quality later;
- special attention should be paid to decoders - one inaccurate movement can lead to a break in the loop.
Subsequent dismantling is carried out in several stages.

Troubleshooting
Now the direct repair of the Led TV backlight begins: for this, you need to carefully snap off all the latches along the contour, remove the plastic frame and remove the diffusing films to open the LEDs.


At different models LG TVs will have their own set of LED backlights: for LG 32LN541U - these are three rows of 7 LEDs, and for LG 32LB582V - three of 6 LEDs.

In all TVs that use such a backlight, the LEDs are connected in series, so if one of them burns out, the entire system stops working. If the LED driver is faulty, then no voltage is supplied to the entire system, and when one of the LEDs burns out, then the voltage goes on, but all the efforts of the device to illuminate the system are in vain: at least apply 200 volts, the circuit is open.

As you can see from the photo, the backlight consists of 18 LEDs, when measuring the voltage without load was 140 V, that is, each accounted for 7.8 V. When we take into account the voltage drop on each bar and the total load, the conclusion will be as follows: in this model, 6V LEDs.
Finding a burned-out LED is not easy: if there is no burning at the attachment point, then you need to check each element individually.

Replacing LEDs
Replacing the backlight of an Lg TV can cause some difficulties. Let's say that the results of the audit revealed several faulty LEDs. It is quite difficult to buy a replacement bar - these parts are not supplied to service centers, you can order them on the manufacturer's website, but this is long and very expensive. So there is only one way - replace individual diodes, although it will not be easy to find them on the radio market. Experts assure that you can buy already soldered, but serviceable ones, after a long search, these were purchased.
Users should be aware that all planks are glued with double sided tape, so you need to warm them up with a special soldering dryer so that the adhesive tape comes off. To do this, the bar is fixed in the holder and heated from below with a hairdryer, the tin is melted, and the defective part is removed. Solder should be exactly the same method, so as not to damage the LED.
Important! All lenses are fixed at the factory with a compound, so when removing them, you must act very carefully, while each one must then be installed in its original place so as not to disturb the original focus.
Another caveat: you may come across LEDs that have a slightly negative area bigger size than positive, so you need to cut the contact point in order to solder the diode. This is what the soldered LED looks like:

The fact that the paint is damaged a little is not a problem. We solder the rest of the LEDs in the same way, and glue lenses with superglue. And this is a refurbished view assembled and ready for further exploitation backlight panels:

As we see in practice, under repair led backlight matrix TV LG has many specific nuances, and without knowing them, it is impossible to achieve a positive result.
Final works
When the repair of the Led system of LG brand TVs was carried out completely, before final assembly, connect the voltage to the strips and check the glow of all LEDs. If everything is fine, then we assemble the TV, performing all operations sequentially and with care, as in dismantling.
After the end, it is better not to bring the brightness of the backlight to the maximum, but to limit it to 75% - in this mode, the LEDs work in normal mode and, according to experts, will last much longer.
We install the TV in its original place, turn it on and enjoy the quality: if there are no extraneous spots of light or dark color anywhere on the screen, then the repair was done correctly, in compliance with all recommendations. And you can get the most out of your TV by learning how to
The Most Reliable LG TVs of 2018
TV LG 22LH450V
TV LG 49UJ651V
LG OLED55C8 TV
TV LG 55LJ622V
TV LG 55UK6100
MStar Semiconductor processors use external Flash memory to store program code. In computer monitors, budget TVs, video recorders and set-top boxes for receiving digital TV, as a rule, a cheap 8-pin SPI-Flash IC is used as external memory. Of course, such a microcircuit can also be written by a conventional programmer. However, the question arises of obtaining the original dump, which was written to the chip before the damage, and repeated rewriting in order to select the most suitable option firmware. For example, the source of the original dump may be a device that cannot be opened (is under warranty, etc.). In this case, the Postal hardware and software system provides an opportunity to work in-circuit through the available external VGA or HDMI connectors without opening the device.
General information
MStar Semiconductor produces a large number of specialized chips (System-On-Chip) for video signal processing. The purpose and internal composition of these chips can be very different, but there are common features, allowing to unify the approach during repair (meaning the loading of a workable software in flash memory). In the following material, for simplicity, all these complex chips will be referred to as processor.
Rice. one. Appearance monitor boards (TSUM processor same as MStar)
Despite storing code in external memory, MStar processors have an internal read-only memory (ROM) containing debug routines. In this sense, MStar chips are somewhat similar to MediaTek chips (MStar on this moment taken over by MediaTek). However, between debug modes of processors
MediaTek and MStar have a difference. MediaTek's proprietary chips have access to debug mode via the UART (standard low voltage serial port) interface, while MStar chips, which originally had a simpler architecture, use UART as an extension of the earlier debug mode based on the I2C protocol. In fact, the inclusion of the debug mode of MStar processors always occurs via the I2C protocol, and if necessary, UART is used later, and the same microcircuit pins are used for it (for some reason it seemed convenient to the developers), so the debug connector pins, if available, may be labeled Rx-Tx", although they also have the functions of the SCL-SDA buses of the I2C interface.
Rice. 2. VGA connector on the TV board (MStar processor under the heatsink)
For in-circuit access to an external (connected to the processor) SPI-Flash memory, it is enough to work using the I2C protocol, which is what our programmer uses. The processor for debug mode has two addresses on the I2C bus, usually B2 and 92. The first address (B2) is for accessing registers and is used to stop the executable code and set high level on the WP output of the SPI-Flash IC for the possibility of further recording. The second address (92) is used exclusively for accessing the SPI-Flash. Through the first debug address, access to all internal processor registers is possible, including setting the desired level on any pin, in fact, this is a kind of analogue of the JTAG interface. However, for repair purposes, it is only the removal of the write lock in the Flash memory that matters, sometimes this is not possible due to the closeness of the protocol and differences in connecting the WP SPI-Flash output to the processor. Nevertheless, reading the memory is always possible, which allows you to easily read the dumps necessary for repair from devices whose opening is unacceptable.
Rice. 3. TV board based on the MStar processor, also with a VGA connector
To prevent accidental entry into debug mode, use special words, sent to the debug address first. The word is SERDB" for debugging and MSTAR" for enabling the SPI-Flash interface. If one uses a protocol analyzer, the presence of these words in the data stream uniquely identifies an MStar processor.
The I2C protocol used by MStar processors in debug mode has implementation errors, which requires special hardware support, otherwise error-free in-circuit reading is almost impossible. The USB version of the programmer has a special Soft I2C mode adapted for MStar, which provides unique reading accuracy. The LPT version of the programmer initially has automatic adaptation of the I2C protocol for MStar chips.
For most MStar processors, the programmer's daemon automatically initiates debug mode by signature, or uses the standard method for unknown processors. In general, it is enough to know: if the processor is of MStar origin, then the programmer will work with it.
On sale are unique models of the Lexand SA5 series with the ability to access the Internet via an external 3G modem, powerful processors, advanced cartography and ... a technical assistance card from All Tow Trucks of Russia for 290 rubles!
LEXAND Laboratory, a supplier of car navigators, car tablets, car recorders, car accessories, readers, smartphones, carbon monoxide mini-phones, routers and tablets presents a new line of classic GPS navigators - Lexand SA5.
The line includes four 5-inch models (SA5, SA5+, SA5 HD and SA5 HD+). Among the main features of the new products is the ability to download traffic data via Bluetooth (in the case of SA5 + and SA5 HD + models) and even a 3G modem connected via a special adapter with USB interface. Lexand SA5. These are the first on Russian market classic Windows CE navigators that are officially compatible with 3G modems. Also among the advantages of the new products are the Navitel navigation program with maps of 9 countries and the MStar processor with a frequency of 800 MHz, which provides a 25% increase in speed compared to the previous generation models.
A bonus to all Lexand SA5 buyers is a 40% discount on a technical assistance card from the All Tow Trucks of Russia service.
The Russian company "Laboratory "LEXAND" relies only on unique products that differ from competing solutions. Living proof of this is the completely carbon monoxide super-megahit Lexand Mini - the smallest mobile phone in Russia, which at the same time differs in enviable functionality (camera, two SIM-cards, Bluetooth, FM radio, audio player, etc.).
Today "Laboratory" LEXAND "announces the start of sales of a whole line of navigators unique for the domestic market - Lexand SA5. Before talking about them, we suggest a little delve into the history.
 "Laboratory" LEXAND "entered the market of portable automotive electronics in 2008. Initially, the company specialized in the production and supply of satellite GPS navigators under the Lexand brand. In May 2011, she was the first to bring to Russia a "two-system" navigator (with GLONASS / GPS support) - Lexand SG-555. In the spring of 2013, Lexand was one of the first in Russia to bring to the market a line of GPS navigators running the Android operating system - Lexand STA, which could also act as tablet computers. One of the devices of this line - Lexand STA-5.0 - became the best car navigator of 2013 according to the visitors http://hi-tech.mail.ru/gadget/2013/gadgets/ " target="_blank" > [email protected]. The same model was recognized as the best navigator in 2014 as part of the Product of the Year award.
Over the past 3 years, Lexand has consistently been in the TOP-5 of the largest suppliers of car GPS navigators in Russia. The market share of Lexand, according to the SmartMarketing analytical group, reaches 11%. In the period from the end of 2008 to the beginning of 2014, more than 1 million Lexand 74 brand navigators were sold in our country various models. As of mid-2014, the brand's lineup includes 38 current navigators.
 Meanwhile, the market for satellite navigators in 2014 decreased by approximately 30% compared to the previous 2013 (SmartMarketing data). The reason is the preference of a certain number of users of smartphones and tablets with GPS receivers: this allows you to reduce the number of devices used on a daily basis, and therefore save money. However, smartphones and tablets have whole line shortcomings that are absent from classic navigators. In particular, for devices of the two indicated types, it is necessary to purchase a navigation program (about 1,000 rubles), as well as Charger and car holder (about another 1,000 rubles). And this is not counting the time losses for searching, buying, installing and studying the issue. In the case of a classic navigator, the buyer receives a complete solution, which is ready to perform its direct duties immediately after purchase.
Unlike dozens of Russian brands that have practically abandoned the "navigation" direction, Lexand continues to work in this area, improving its devices and offering products with unique functionality.
Today Lexand introduces the SA5 – new series classic GPS-navigators on Windows CE 6.0 with 5-inch screens. The line includes four models - SA5, SA5+, SA5 HD and SA5 HD+ - with the following advantages:
All models of the SA5 series can access the Internet for browsing, downloading traffic data and working with online services built into navigation programs using an external 3G modem connected via a USB host. Today, this is especially true, given that the vast majority of navigation packages have various Internet-related features. Lexand SA5 - the first classic navigators in Russia on operating system Windows CE, officially supporting external 3G modems. The drivers required for whistle modems to work are designed specifically for Lexand's new products - this option is not available in competing devices.
MStar processor with a frequency of 800 MHz - versus 600 MHz for classic GPS navigators of the previous generation. As a result, the novelties of the SA5 series work at least 25% faster.
What's more, Lexand SA5+ and SA5 HD+ can also surf the Web using a phone/smartphone connected via Bluetooth and acting as a wireless modem.
Extended cartography from Navitel. All previous Lexand navigators came only with maps of Russia, and the new ones are equipped with maps of Russia, Ukraine, Belarus, Kazakhstan, Finland, Sweden, Norway, Denmark and Iceland with a lifetime update.
Sales of Lexand SA5, SA5+, SA5 HD and SA5 HD+ have already begun. The recommended retail prices of the models are 2,799, 2,899, 2,899 and 2,999 rubles, respectively.
Characteristics of the new Lexand GPS navigators:
Lexand SA5 | LexandSA5+ | Lexand SA5 HD | Lexand SA5 HD+ |
|
Screen | 5 inches 480 x 272 dots | 5 inches 480 x 272 dots | 5 inches 800 x 480 dots | 5 inches 800 x 480 dots |
CPU | MStar MSB2531 800 MHz | MStar MSB2531 800 MHz | MStar MSB2531 800 MHz | MStar MSB2531 800 MHz |
GPS receiver | SiRF Atlas V, 64 channels | SiRF Atlas V, 64 channels | SiRF Atlas V, 64 channels | SiRF Atlas V, 64 channels |
RAM / ROM | 128 MB / 4 GB | 128 MB / 4 GB | 128 MB / 4 GB | 128 MB / 4 GB |
Memory cards | microSD | microSD | microSD | microSD |
Bluetooth | ||||
3G modem via OTG | ||||
Battery | 1 100 mAh | 1 100 mAh | 1 100 mAh | 1 100 mAh |
Operating system | Windows CE 6.0 | Windows CE 6.0 | Windows CE 6.0 | Windows CE 6.0 |
Multimedia | Music player Video player Photo album FM transmitter | Music player Video player Photo album FM transmitter | Music player Video player Photo album FM transmitter | Music player Video player Photo album FM transmitter |
Cartography | "Navitel Navigator" 8.7 Russia Ukraine Belarus Kazakhstan Finland Sweden Norway Denmark Iceland | "Navitel Navigator" 8.7 Russia Ukraine Belarus Kazakhstan Finland Sweden Norway Denmark Iceland | "Navitel Navigator" 8.7 Russia Ukraine Belarus Kazakhstan Finland Sweden Norway Denmark Iceland | "Navitel Navigator" 8.7 Russia Ukraine Belarus Kazakhstan Finland Sweden Norway Denmark Iceland |
Price | 2 799 rubles | 2 899 rubles | 2 899 rubles | 2 999 rubles |