Android distributes the Internet via wifi. How to distribute mobile Internet from Android phone via Wi-Fi. Connecting the phone as a Bluetooth modem

Read also
Every modern person has a phone, laptop or tablet connected to the global Internet and all mobile devices have wireless access. There are situations when you urgently need the Internet, but the router was not available, then it is possible to distribute Wi-Fi from a laptop. Produced modern laptops are equipped with a Wi-Fi module by default, and modern operating systems allow you to do this without the use of third-party software.
How to distribute WiFi from a laptop
This method allows you to distribute Wi-Fi from a computer, if you have cards or adapters that support wireless network technology.
Please note that by default, Wi-Fi distribution is possible only from a laptop; in order to launch Wi-Fi from a computer, special devices are needed.
Step 1. First you need to go to the "Network and Sharing Center".
There are several ways to do this:
- Going to "Start" - "Control Panel" - "Network and Sharing Center"
- Or by right-clicking on the "Network Connections" icon in the system tray, the part of the screen where the clock is located and notifications pop up.
In this window, in the "Change network settings" column, select "Set up a new connection". 

Step 3. The next window displays warnings and other information about the network and under what conditions it will operate. You can't stop at this window. Press "Next" again.

This dialog box prompts you to enter your wireless network settings. Here you need to enter the "Name" of the network that you want to create, by this name other devices will determine the network; "Security type" - WPA2 by default, it is recommended to leave it as it is one of the most modern and reliable; The "security key" is required so that only those users who know the key can connect. When the network is configured, after entering the key, all data that will be broadcast between computers and the access point will be encrypted. Check the box "Save settings for this network" and follow "Next".

Step 4 Now you just need to click "Turn on Internet Connection Sharing".
Everything, now the Wi-Fi network is available for connection.

If you want to implement the ability to exchange files and documents, for example, between a computer and a phone, you need to edit the sharing settings. To do this, return to the "Network and Sharing Center" and look for the item "Change advanced sharing settings" in the left half of the window, click.
 In the window that opens, check the boxes "Turn on network discovery" so that the computer can discover other devices on the network and be visible, and "Turn on file and printer sharing" to make sharing possible. We save the changes. Ready.
Now the laptop functions as a full-fledged Wi-Fi access point, can combine devices into a single network and exchange files with devices within the network.
Sharing WiFi Using the Command Line
To call the command line, you must click "Start" - "Run", or use the hot keys "Win + R" to open the "Run" dialog box, and enter "cmd" in the field that appears, then confirm the input. You can also simply select it in the Start menu - Accessories. 
Then write on the command line:
netsh wlan set hostednetwork mode=allow ssid="TESTWIFINETWORK" key="password" keyUsage=persistent
The ssid field is a field for the network ID, i.e. her name, the key field is for the password.
Next, you need to go to the "Network and Sharing Center", select the network through which you connect to the Internet, click "Properties" and check the box "Allow other network users to connect to the Internet", and select "Wireless network" from the drop-down list. connection 2", which we just created thanks to the console. 
netsh wlan start hostednetwork– After entering this line, it will be possible to start working with the network.
netsh wlan show hostednetwork– By entering this string, you can view the status of a functioning network.
netsh wlan stop hostednetwork- After entering this line, the network will stop working.
 Managing connections using the console has its advantages, the main of which is that you do not need to work with windows and navigate through numerous tabs, just enter one line, and the network is running, entering another - it turns off. Windows does everything for you.
How to distribute WiFi from an Android phone
There are situations when you need Internet access, but you are far from Wi-Fi points. It is possible to access the Internet using an Android phone as a router. Please note that in order to access the Internet, it is necessary that the phone is connected to 3G Internet, otherwise the data exchange speed will be unacceptably low.
Step 1. First of all, you need to activate the WiFI module on your phone or tablet. 
Step 2 As soon as the Wi-Fi module was activated, we proceed to the "Settings"

"Modem and hotspot"

"Wi-Fi hotspot"

Step 3 Then check the box "Portable hotspot", and go to "Configure hotspot" 
Step 4. Set the access point settings by typing Network SSID and network security password.
Leave the security type WPA2 as one of the most reliable. 
Step 5 Click save, and now you can see the newly created network in the list of available connections. It is important to remember that creating and using a Wi-Fi hotspot begins to consume the battery of a mobile device intensively. 
Modern mobile gadgets combine the capabilities of a computer and a network router, and it seems possible to use the device as a router, as a PC, or both at the same time. The mobile Internet coverage area is quite a large area, and there are practically no “blind spots” within the city, so using a smartphone as a personal hotspot seems to be a good idea.
If you have any questions, ask in the comments, we will definitely help.
Many people perceive Android devices only as a client of a Wi-Fi network, i.e. a device that uses a wireless network to access the Internet. But in fact, any Android device can be made active equipment, a mini-router (mini- because the number of clients is usually limited to 5), capable of "distributing" the Internet (if the Android device has a 3G \ 4G module) or simply connecting devices into a network. To do this, it is not at all necessary to install additional applications, you can get by with built-in tools. In this article, I will describe step by step how to share Wi-Fi Internet using an Android tablet or smartphone.
It is worth noting that the screenshots below will differ from what you will see on your smartphone or tablet, but most of the steps are identical, so having caught the essence, you can easily set up Internet distribution on any Android gadget.
First of all, you need to insert a SIM card into your tablet / smartphone and set up the Internet (to set up the Internet, I recommend contacting your operator to provide you with the necessary settings). After the Internet is working, you can start setting up its distribution over Wi-Fi. To do this, press the Main Menu button on the tablet/smartphone.
Find and press the button Settings".

In the Wireless networks field, click "More" - "Modem mode".

Switch the slider in the Wi-Fi access point field to " On".

Now when Wi-Fi distribution is enabled, you need to configure access to the created access point, to do this, click " Setting up an access point".

Change, if you wish, the name of the Wi-Fi network (SSID), protection (I recommend leaving the one that will be WPA2PSK by default) and specify a password to connect to your Android device, I recommend using a complex password consisting of at least 8 characters with capital letters , numbers and special characters (@#$&%). At the end press " Save".

Now your device distributes the Internet, then you need to connect to it, in this example I will connect from a laptop with the Windows 7 operating system. In the notification area, located at the right edge of the taskbar, find the Wi-Fi icon and click on it. A list of all visible Wi-Fi networks will appear, find the previously created one, select it and click the " Connection".
In this short tutorial, I will show you how you can distribute the Internet via Wi-Fi from a Samsung phone. I had the opportunity to write instructions using the example of a Samsung Galaxy J5 smartphone, with the new Android 7.0 Nougat system already installed. Same as on Samsung Galaxy S8 and other models. I think this article will be relevant for a long time and will be useful to many. In fact, setting up Hotspot & Tethering on Android 7.0 is very simple, just like on other versions and devices. But many users still have questions about this feature.
We will distribute mobile Internet via Wi-Fi network to other devices. It will be possible to connect other smartphones, laptops, TVs and other devices. We will have a Samsung phone as a router. In the "Access Point and Modem" settings, you can also distribute the Internet via Bluetooth and even via a USB cable. Bluetooth is not very relevant now, but cable can come in handy. For example, if you need the Internet on a desktop computer that does not have . You can use your phone as a wired modem to access the Internet through a mobile operator.
Note! Since we will be distributing mobile Internet, I advise you to clarify the conditions of your tariff plan. What is your megabyte limit and what is the charge over the limit. Devices connected to the access point may siphon all traffic and additional charges may apply.
Some operators block the distribution of the Internet to other devices. Therefore, there is an option that it may not work to share the Internet.
Let's start setting up the access point.
Internet distribution via Wi-Fi from a Samsung phone
Open the top curtain. If you have disabled mobile Internet, then turn on "Mobile data" and go to settings. In the settings, open the "Connections" section.
Next, open the "Access Point and Modem" section. We turn on the distribution of Wi-Fi with the switch opposite the "Mobile hotspot" item. The status "Enabled" should appear. If you have Wi-Fi enabled, your phone will prompt you to turn it off.

If you notice, then there is an opportunity to activate a Bluetooth modem and a USB modem.
Our Samsung is already distributing a Wi-Fi network to which we can connect our devices. By default, the smartphone itself sets the network name (AndroidAP) and password. To view and change them, as well as see a list of connected devices, simply click on the "Mobile hotspot" item itself.

The network name and password can be changed if desired. Just click on them and change. The password must be at least 8 characters, and the network name must be in English letters.

I connected my laptop on Windows 10 to the Wi-Fi network that the Samsung Galaxy J5 distributes. The device immediately appeared in the list of connected devices. If you click on it, you can see some information, or change the name of the device.

In my case, the Internet on a laptop through a Samsung smartphone worked immediately and without problems. In the screenshots above, you probably noticed that I only catch 2G (EDGE). Of course, using such an Internet on a computer is not very pleasant. But now 3G / 4G coverage is very good, and everything flies there. Even if you distribute the Internet to several devices at the same time.
If you plan to use the mobile hotspot function somewhere in nature, then I advise you to take a power bank with you, since mobile Internet paired with an access point will drain the battery of your smartphone very quickly. I also advise you to disable this feature when you do not need it. Well, keep track of traffic consumption and the conditions of your tariff plan. In order not to get a "terrible" bill for mobile Internet later.
Leave all questions and wishes in the comments. Good luck!
A modern telephone can perform a wide variety of functions, thereby replacing a large number of other devices. For example, a phone can replace a Wi-Fi hotspot. To do this, you just need to configure the distribution of Wi-Fi from your phone to other devices.
How to share Wi-Fi from an Android phone
In order for you to open the Android settings. You can do this by launching the Settings app from the list of all installed apps. You can also open settings using the top curtain or desktop icon.
After opening the settings, you need to go to the "Other networks" section. It should be noted that this section may have a slightly different name on your phone. If you cannot find this section, look through all the settings sections that are next to the Wi-Fi and Bluetooth settings.

Next, open the subsection with the name "Modem and access point". Again, on your device, the name of this section may be slightly different. It may be called "Modem", "Tethering Mode", "Access Point Connection", or simply "Access Point".

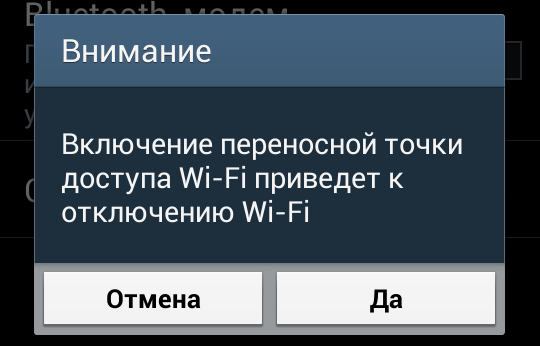
After that, you must activate the "Portable Hotspot" feature. To do this, move the switch to the "On" position.

After activating the portable hotspot, you will see a pop-up window warning you to turn off Wi-Fi. In this window, click on the "Yes" button.
This completes the setup, now your phone is distributing Wi-Fi. You just have to see the password to access the Wi-Fi network created by your phone. To do this, open the "Portable hotspot" section.

After that, a window with information about the access point will open in front of you. Here you can view and change the hotspot name and password.

How to share wifi from ios phone
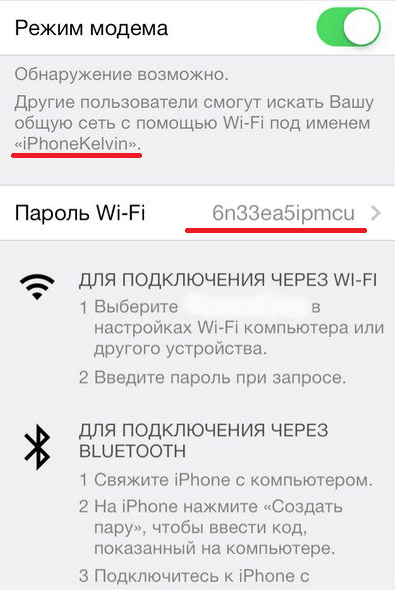
If you have an iPhone, then in order to set up the distribution of Wi-Fi, you need to enter the settings and open the "Modem Mode" section. If this section is missing, then this may mean that mobile Internet is not enabled or configured on your phone.

In this section, you need to activate the "Modem mode" function. To do this, move the switch to the on position.

In the same settings section, you can see the password that you need to use to connect to Wi-Fi.
This completes the iPhone setup. Now you can connect to the created Wi-Fi network.
How to share wifi from phone to windows phone 8
If you have a phone based on the Windows Phone operating system, then in order to distribute Wi-Fi you need to open the Settings application.

After that, you need to open the "General Internet" section.


This completes the Windows Phone setup. Wi-Fi network is working and you can connect to it.
24.11.2017 18:21:00

In the same menu, you can assign the maximum number of users who can connect to your access point. Each new connection will be displayed in the notification bar. In the receiver smartphone, all that remains is to turn on Wi-Fi and find your connection.
Important!
Please note that the quality of the received signal will directly depend on the standard of your Internet connection. So we recommend distributing Wi-Fi when connecting to the Internet at least 3G.
Also keep track of your mobile traffic. If it dries up on your smartphone, the user connected to you will remain without the Internet
How to share Wi-Fi from phone to PC
In order to turn your phone into a Wi-Fi router for a personal computer or laptop, there are two simple ways:
- Set up your phone as a USB tethering
- Establish a wireless connection
Both methods also involve connecting the phone to 3G or 4G mobile Internet.
Method 1. USB modem
- Connect smartphone and computer with USB cable
- Go to android settings
- Select the "Wireless networks" section
- Click on "More".
- Select modem mode.
- Click USB Tethering

After that, the computer will recognize the phone as a modem through which the connection to the Internet will be made. Of course, this type of connection cannot be compared with the speed of cable Internet. However, for web browsing and e-mail speed should be enough.
Method 2. Setting up a smartphone as a Wi-Fi router
This method is similar to what we described for distributing Wi-Fi from phone to phone. To distribute the Internet to a tablet, laptop or PC with a special Wi-Fi module, turn on the mobile network in your smartphone and start the access point.
Detailed instructions for an Internet connection between a PC and a smartphone are described in the article "How to connect the Internet to a computer using a mobile phone".
Which smartphone is better to use for distributing Wi-Fi
As we wrote above, for a stable and high-speed Wi-Fi connection, you need a smartphone that supports the high-speed communication standard, best of all - 4G. It is also desirable that the Android operating system not older than version 6 be installed on the mobile device.
The fact is that before the 4th version, it was not possible to create an access point in a smartphone at all. And in the next versions, the setup includes a significant number of configuration steps.

By distributing Wi-Fi, the smartphone operates under a double energy load. On the one hand, the battery charge is consumed by the operation of the high-speed communication module, on the other hand, the battery is loaded by the access point itself, which emits a signal. Therefore, you need a gadget that can work in such an enhanced mode for more than one hour.
The next lesson will be devoted to how to remotely control a smartphone on Android. Do not miss!