DIY bathroom replacement. Installing a new bathtub: dismantling the old one and do-it-yourself installation features Dismantling an acrylic bathtub
Please note that installing a bathtub and connecting it is not an easy task. This is mainly due to the fact that the bathtub is an object that should be handled very carefully. After all, there is nothing easier than accidentally chipping the enamel of the coating - but restoration will be quite labor-intensive.
Note! When purchasing an acrylic bathtub, you need to take into account the possibility of its delivery to the installation site, because if it does not fit freely into the doorway, then excessive efforts can lead to a crack in the product.

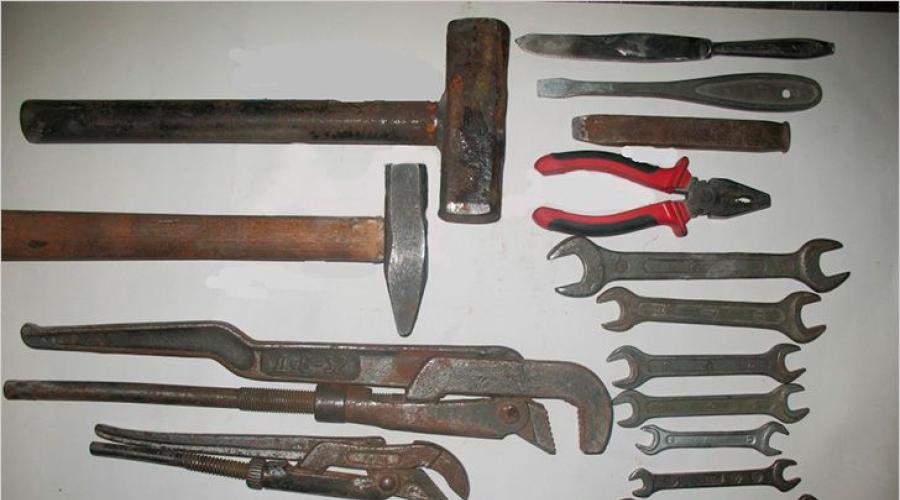
When working you will need certain tools:
- The main one is a pipe wrench for plumbing work;
- a screwdriver, a hammer, a chisel, a crowbar, pliers - all of this, with a high degree of probability, may also be needed.
Note! Dismantling old bath, you can see that a ground has been connected to it. It's best to save it. And if it’s not there, think about how to install a new one.
Installation work

We are gradually figuring out what to do and in what order:
- We are preparing a place for installation work. The best solution will renovate the entire floor area under the new bathroom. And you shouldn’t think that no one will see anything - the accumulation of dirt must be eliminated first of all for yourself.
- We install a new bathtub, adjusting the legs in height. Remember that it should always be possible to get to the siphon under the bathtub if the need arises.
- The legs should be adjusted so that all the water drains from the bathtub.
- Having completed the installation, we begin the installation of new trim elements. However, given the fragility of the materials, tighten the nuts without excessive force so as not to damage the connections.
- We connect the drain siphon. As a rule, it is mounted to the riser using a rubber cuff. The corrugated hose should be shaped in such a way that blockages do not form in it in the future.

- Another type of work is sealing joints. In this case, silicone sealant has proven itself to be excellent. Its consumption is quite high, so you will have to buy it with a reserve.
- If there is a large seam between the bathtub and the walls, it can be sealed sufficiently in a known way which is described.
In a word - the eyes are afraid, but the hands do. Having all the tools, some experience in home repairs and a savvy assistant, you can completely carry out the entire complex yourself necessary measures in a fairly short time.
Note! There are a lot of options for new bathtubs on sale today, but cast iron is a durable and practical product.
Video
This video shows the entire process of installing a new bathtub, starting with leveling the floor:
If you, like us, have a problem - removing the old cast-iron bathtub and replacing it with something else, then the question immediately arises: what is better to replace the old cast-iron bathtub. There are several options, the main ones: a new bathtub modern design, low bathtub, tray, shower cabin.
How to replace an old cast iron bathtub
If the bathroom is small, then it is best to purchase shower cabin.
 Compact shower cabins 90*90 cm, as well as other sizes, can be bought cheaplyin various online stores. You can purchase shower cabins from the most popular brands according to the most low prices with delivery to different regions RF. The bestseller is the Mirwell shower cabin.
Many people have probably seen, while traveling, staying in hotels, boarding houses, etc., that there are installed in the bathroom simple pallets without cabins. And to prevent water from splashing, simple, moisture-proof curtains are used. This option is also very suitable for a small bathroom. But taking a closer look at the price, you can see that the cost of pallets is practically no different from the cost of cabins.
Due to the small size of the bathtub, it is worth refusing to install a new one standard bath. For those who like to soak in the bathroom, you can install a low corner bathtub, small-sized bathtubs, right-sided, left-sided.
Photo from the site nir-vanna.ru
Maybe, cast iron bath it will still be possible to add fresh look. To do this, first of all you need clean. There are many suitable cleaning products available. Such as "Sanox" - gel, "Cif", "Comet", "Deboucher", etc.
But it is very difficult to clean a heavily soiled bathtub. Simple remedies: baking soda, laundry soap Suitable mainly for continuous cleaning of the bathtub. Large deposits can be cleaned with vinegar (advice from the forum): fill the bathtub with warm soapy water, add 3-4 capfuls acetic acid(200 ml of vinegar essence), leave for 2 hours (3 hours). Drain, rinse warm water. But this advice is suitable for a bathroom with smooth surface. What to do if the bathtub already has cracks?
You can paint the bathtub. There are many tips for painting a bathtub yourself. You can seek the help of specialists. But I remember well the advice from my relatives who went through this procedure - never do this, but it is better to immediately replace the bathtub with a new one. Replacing an old bathtub with a new one is something many people living in old houses have to do.
Examples of installing shower cabins with and without trays, just trays in the bathroom


Replacing old plumbing fixtures with new ones yourself is quite a troublesome and responsible task. But if you understand all the nuances and installation features in advance, installation baths will not cause any particular difficulties even for a person without relevant experience.
Bathroom renovations are done infrequently, but when the time comes, everything changes, as a rule, from the finishing to the plumbing. And if tiling work requires some experience, then dismantling and installing a bathtub with your own hands (acrylic, steel or even cast iron) can be done without the help of professionals. It is only important to prepare in advance for the work and find out about possible nuances, which you will have to face before installing acrylic bath or a jacuzzi in a new renovated bathroom.
At what stage of renovation is a new bathtub installed?
With the dismantling of old plumbing fixtures, everything is extremely simple; they are removed before the renovation begins. When it comes to installing a new bathtub, a lot depends on individual characteristics premises and type of plumbing. Acrylic bathtubs and Jacuzzis are often installed after tiling the room with tiles or other finishing materials. As a rule, the dimensions of the plumbing fixtures are known in advance; this makes it possible to lay out the tiles in such a way that expensive tiles are not laid under the bathtub and on the walls that it covers.

In some cases, it happens that the final dimensions of the room almost completely coincide with the size of the bathtub itself, and after laying the tiles, it will be impossible to install the plumbing in place. In this case, installation acrylic or other bathtubs are done before tiling, and the tiles are then carefully laid around its perimeter, trying not to damage it. In the case of installing a cast-iron bathtub, it is also preferable to install it before the cladding, so as not to damage the newly laid tiles during transportation to the installation site. The screen under the bathtub is always installed after all repair work, unless it is made of brickwork.
Bathtub dismantling: preparatory work
Before starting dismantling work, you need to remove all unnecessary things from the room. And this applies not only to furniture and household appliances, also remove the sink and toilet if the bathroom is combined. Sometimes, in order to remove the bathtub from the room, you have to remove the doors, separately or together with the frame. The next stage, or the initial one if you are only replacing the bathtub, will be to disconnect the plumbing from the sewer. After for long years operation, it can be almost impossible to unscrew the siphon; you have to cut it down with a grinder, and for this you do not need instructions.

The perimeter of the bathtub is lined with tiled or plastic rim, which also needs to be dismantled. Filming protective screen under the bathroom. And only now can the bathtub be slightly moved away from the wall.
Dismantling a cast iron bathtub
Important! Dismantling the bathtub can be done in several ways, but before you begin, you should determine whether the legs are securely fastened. If they are weakly fixed, and in the process dismantling works half a ton will fall, you won’t be able to avoid injuries.
Dismantling a one-piece bathtub
After everything is done preparatory work, and the plumbing is no longer fixed in place, dismantling can begin baths. She is turned over on her side and transported through the doorway. It is worth considering that the weight of cast iron plumbing fluctuates around 400-500 kg, and there is not much room in the bathroom for maneuvers, so the work will require fairly strong assistants who can carry it not only into the corridor, but also outside. However, standard elevators are not designed to transport such large cargo. Further fate The bathroom depends entirely on the imagination of the owners.
Break a bathtub with a sledgehammer
Sometimes it is impossible or not necessary to remove a cast-iron bathtub from the room as a whole, then the question of breaking it up and removing it in parts is decided. Works in in this case performed with a sledgehammer. To make it easier to break the bathtub, a cut is made on its sides, after which they hit the bottom and it breaks. But in practice, it is not always possible to obtain a beautiful, even fracture; more often, brittle cast iron shatters into shapeless pieces with many chips and fragments. It is very important to follow safety rules during such work; thick clothing should not leave open areas body, and the eyes are hidden with protective glasses.

strikes on a cast iron bathtub should be made from the side
When breaking a bathtub, do not lay it bottom up. Thus, it will not be easier to break it, but the neighbor below will definitely be covered with plaster. All impacts on cast iron plumbing must be done from the side. Breaking it is not as easy as it might seem at first glance, and the speed of flight and the size of the fragments are impressive.
Cut into several pieces with a grinder
Cutting cast iron plumbing with a grinder using a metal disc is much easier than breaking it. They start sawing the bathtub from the side, then turning it upside down. A lot of dust is generated during such work, so it is important to protect Airways respirator. Before dismantling cast iron plumbing in this way, it is important to decide whether it is really necessary complete replacement baths or old enamel can still be restored. This will not only save money, but also eliminate labor-intensive work.
Removing a steel bathtub
Preparatory work for dismantling metal bath similar to those carried out for cast iron plumbing. The weight of a metal bowl is much less and it is usually dismantled in its entirety. The bathtub will be cut down if it does not fit into the doorway or will be taken to a scrap metal collection point, and a jacuzzi will take its place.

Steel and acrylic bathtubs, usually taken out entirely
Removing an acrylic bathtub
The advantage of acrylic plumbing, first of all, is its light weight, which greatly simplifies the dismantling process. Acrylic plumbing rarely needs to be sawed. Dismantling bathtubs made of acrylic can be difficult to make yourself, only if it hydromassage bath, which will be installed a second time, and it is important not to damage its additional equipment.
Advice! In order not to damage the box, trim and walls, when transporting plumbing fixtures, it is recommended to cover it with a soft cloth. You need to worry in advance about how to dispose of bulky waste.
Installing a bathtub (in the bathroom) with your own hands: general recommendations
Regardless of what materials the bathtub is made of and how it will be installed, there are several general rules and recommendations for installation.
- The area on which acrylic or other bathtubs are installed must be level and dry, and the bathtub must be prepared for connecting the drain.
- Installation new plumbing in the bathroom it is always done strictly according to the level. The design itself already assumes the presence of a drain, so there is no need to install it on a slope.
- The distance between the bathtub and the wall is filled polyurethane foam.
- The junction of the bathtub with the wall is sealed using silicone, on top of which a decorative plinth is glued.
- The side of the bath should not be more than 0.7 meters above the floor.
- It is necessary to decide in advance which protective screen will be installed, and whether it is necessary to rely on its dimensions during installation.
This installation method is most suitable for a cast iron bathtub. First, the location of the plumbing is determined, and I make markings along which parallel bases of bricks will be laid. Usually they are laid out 2-3-4 bricks high, and to form a recess for the bottom of the bathtub, another half brick is laid along the edges of the last row on each side. Masonry is carried out on sand-cement mortar(4:1). A bath is placed on the prepared surface. At the joints with the wall it is fixed with tile adhesive.


In cases where there is a small distance between the rear end of the bath and the wall, it is filled with brick, thus providing support for the bowl. Similarly on brickwork install a steel bath. As a rule, it is not used for acrylics.
Installation of a bathtub on a metal corner
This support design is not the main one, but only supports the bathtub. Used for cast iron or metal plumbing fixtures and only if the bathtub is installed flush against the wall on three sides. Metal corners They are fastened with self-tapping screws on concrete in increments of 10-15 cm. The bathtub is placed on a corner.
Installing a bathtub on a metal factory frame
Before you install acrylic bathtub finished frame, its guides must be secured to the bottom of the bowl. Make the necessary measurements and markings in advance. The guides are positioned strictly parallel to each other. The factory design usually comes with instructions step-by-step assembly, and all the coordinates are already marked on the bathtub and frame. In the marking areas, drill holes 5-6 mm deep to avoid drilling the bottom using a depth limiter. The guides are fixed to the bathtub with screws, and the legs are screwed to them. Depending on the design, they can rest on them or pass through and rest against inner surface sides The bathtub is installed in place and each leg is unscrewed to the required length, positioning the bowl strictly horizontally.
A metal bathtub is also installed on the frame. If it is not provided for a specific model, and there is no desire to buy the structure, it can be made from a metal profile or wooden beam and sheathe finishing material having completed homemade screen under the bath. It is important to take into account that wood is not the most suitable for use in rooms with high humidity.
Installing a clawfoot bathtub
Bathtubs made of any material can be installed on four supports, which, as a rule, come complete with plumbing fixtures. The legs are attached to the cast iron bowl using wedges or bolted together. If a large bathtub is installed on a floor with low hardness, a metal plate with a diameter of at least 5 cm and a thickness of no more than 5 mm is placed under the legs.


Installation of acrylic or steel baths on legs differ in the installation method. The guides are attached to the bowl with screws and the mounting feet are screwed onto them, which are presented on the market in wide range, from simple standard ones to original designer ones.
Installing a whirlpool bath
The hydromassage bathtub is always installed only on the frame, which is included in the kit according to the instructions. This is due to the presence of complex pumping equipment, which actually ensures water circulation.
Installing new plumbing in the bathroom if the screen is tiled
In this case, the seam between the edge last tile and the side of the bathtub should clearly coincide with the seam located on the wall. To do this, it is important to install the bath at a certain height. But sometimes standard length the legs do not allow this to be achieved and under each of them you have to put required amount, pre-cut squares from the same, tiles. They are fixed to the floor, to each other and to the sole of the installation leg using silicone.
Insulation of a new bath
Unlike cast iron, acrylic or steel bathtubs do not retain heat well. And in order to maintain the water temperature longer, before installing the bathtub, it is insulated. The simplest and most economical affordable way– insulation with polyurethane foam.
The bath is turned upside down, and the surface is generously moistened with water. This will ensure better adhesion of the material. The area prepared in this way is blown with foam. Start work from the bottom. The composition is applied according to the snake principle in a thin stream. Next move on to the side parts. Be sure to save free space around the siphon and overflow. The bath is left until completely dry for 8-12 hours. It is recommended to use non-expanding foam.
Connecting a bathtub to communications is not a complicated process. But in order for the system to function correctly, a number of important points must be taken into account. To connect the drain and overflow to the sewer system, it is recommended to use special bath siphons. They can be made of plastic, brass or of stainless steel, come in white or chrome. Is different simple installation and efficient drainage.

Connecting the bathtub to the sewer system, drain-overflow system
Important! When choosing a siphon for a bath, it is better to give preference to devices that do not have corrugated tubes in their design, since they have high hydraulic resistance and quickly become dirty.
Before connecting the bathtub to sewer system, a siphon is assembled and installed on the plumbing fixtures. Ready-made devices must be accompanied by instructions. Next, it is connected to the sewer outlet, maintaining the required height difference. The joints are hermetically sealed. After this, the overflow is assembled, installed in place and connected to the siphon.
Most often the old ones are replaced cast iron baths And steel baths, less often acrylic, since they are the most modern.
Let's take a step-by-step look at how to change an old bathroom and what you need to do it.
1) Choosing a bath
First, you need to decide which bathtub you want to replace. You can read how to choose a bath in. The most common types of baths:
- Cast iron. Traditional baths of the Soviet era. Currently, from a design point of view, modern cast iron baths have nothing in common with Soviet ones. Main disadvantage— cast iron absorbs a lot of heat from the water, as well as the weight of the bath and the complexity of installation.
- Steel. Lighter and easier to install. The disadvantages include the fact that the bathtub does not retain heat very well, as well as the susceptibility of the coating to scratches and chips.

— Acrylic (plastic). Acrylic is a very strong material. The bathtub, in turn, is strong, warm, and the paint does not deteriorate. These baths are various forms and flowers, therefore they are the most popular at present. We recommend choosing acrylic bathtubs.
2) Dismantling the old bathtub
Dismantling must be done using a dismantling tool: crowbar, chisel, hammer, screwdriver.
If the bathtub is attached to the side with tiles, the tiles must be chipped using a hammer and chisel.
The final step is to remove the bathtub legs from the floor covering. At best, you need to knock out the fasteners. In the worst case, you will have to knock out the legs from the concrete floor with a crowbar.
3) Preparing the floor for installing a new bathtub
It is necessary to completely clean the coating and level it. If you wish, you can tile the floor. We have already written about how to lay tiles in the bathroom.
After the tiles have dried, you can begin to final stage— assembly and installation of a new bathtub.
4) Assembly and installation of a new bathtub
— Assembling the bathtub frame / screwing the legs to the bathtub. Depending on what type of bathtub you have chosen, you need to assemble the frame (acrylic bathtubs) or screw the legs (steel and cast iron bathtubs).

— Installation of outlet connection and Installation of drain-overflow. Comes with the bath drain pipes and connections. They must be attached to the bathtub according to the assembly instructions. It is worth paying attention to the fact that the connections must be tightened tightly, but at the same time do not overdo it so as not to break the thread.
— Bath installation. It is necessary to install the bathtub in place, level the slope of the bathtub by adjusting the legs.
— Checking the bath. Turn on the water, increasing the water pressure little by little to check the tightness of the connections.
— Screen installation. The screen should only be installed when you have ensured that all connections are waterproof.

As an example, we suggest watching the video: how to change a bathtub with your own hands
Quality replacement old bath, for a new improved model - not hard work, which can be handled by an attentive person who has held the tools in his hands and knows several recommendations that must be followed.
The bath is your small pool where you relax after a hard day and fill vital energy body before a hard day at work.
The bathroom is a place for relaxation at home and restoration of the body useful herbs And sea salt. Thanks to additional features such as hydromassage, your well-being improves and your mood skyrockets.
Is it better to replace the bathtub or restore it?
Bathrooms from the past, made of wood, marble, silver, durable copper and even cast in gold, have been replaced by modern, more interesting and comfortable models made of steel, cast iron and, of course, high-quality and irreplaceable acrylic.
But, no matter how high-quality and reliable the bowls are, each product has its own service life, so after 10-20 years it must be replaced. Instead of gluing in a new liner, which, although of high quality, is appearance bathtubs will not change, because every year manufacturers offer newer and more improved bathtub models that can satisfy the taste of the most picky consumer.
Today it is possible to choose a new bathtub, taking into account the characteristics of the room where it will be located. At the same time, it’s worth choosing a replacement bowl good quality, interesting shape, comfortable and cozy, capable of turning the bathing procedure into a real pleasure. You will not need to expend additional effort to dismantle the old product and install the new one, and a large number of time, as opposed to choice.
How to choose a new bowl model?

- Bathtubs made of cast iron are durable and reliable; in addition, they are traditional models. But simple classics do not hold water temperature well.
- Vessels made of steel are strong, but much lighter than previous products, but at the same time they have some negative sides: a small selection, which limits consumers to certain limits in their choice. Without additional insulation Doesn't hold heat well. From small impacts, the enamel easily comes off the surface. But they are easy to install; for this you need to put the legs in special fasteners and secure them with metal wedges and place the bowl on top, and you're all set.
A little advice! For stability of the product, place rubber plates under the legs.
- Products made from acrylic are unusually light, retain heat well, are different and diversified design solution and graceful lines. In addition, they are popular among users due to their ease of installation: the kit includes all necessary fastenings. But such models do not tolerate mechanical stress: therefore, large wrench may damage the surface during installation.
How to dismantle old plumbing?
Replacing a bowl in a bathroom begins with dismantling the old product:
- We disconnect the bathing vessel from the water supply and sewerage system. This can be done easily without the help of specialists, just to remove the bathtub from the room and install new model You will need an assistant: bathtubs made of steel and cast iron are inconvenient to install, as they are heavy.
- A siphon made of cast iron can be tightly walled up. But after the bowl is unscrewed and moves, it will fall off on its own. When replacing an old product with a new one, it is better to change the water supply.

What tools do we need for this:
- several screwdrivers;
- adjustable plumbing wrench;
- strong pliers;
- chisel for removing old coating;
- a reliable crowbar to move the old vessel from its place.
Important point! Save the wire used for grounding located on the bowl leg: electrical devices It is very dangerous to use without grounding!
Installation of new plumbing
Preparing the installation site
Before proceeding with the installation of a new bowl, you should prepare the floor surface located under the bathtub: clean it well and eliminate existing shortcomings, so as not to think that the appearance of the bathroom before was different from the ideal and to avoid problems in the future.
Dust trapped in cracked concrete, old crumbling paint and brick crumbs will settle on furniture, appliances, floors and walls.
Mounting the legs

When installing a new bowl, you should not remove the height of the legs: in the event of a leak and replacement of communications located under the product, this is much easier to do when there is free, comfortable space.
The legs must be adjusted in such a way that the water drains gradually by gravity.
Making a new harness
Now we move on to the stage of installing fresh trim. Remember that modern communications are made from polyethylene or plastic. Therefore, the nuts must be lightly tightened to the first resistance.
Next, we connect the siphon with sewer riser using a rubber cuff. Gorfro pipe connecting the siphon and sewer pipe We form it in such a way as to prevent blockages from occurring; to do this, we make the bend very small.
Installing a release

The outlet is quite difficult to install, as it is located at the very bottom, which makes installation of the siphon difficult. To correct this situation a little, first we connect the siphon to the sewerage system, and only then we install a bathing loan, in the event that it is not made of cast iron - it is difficult to install it immediately Right place. We place the coupling in the pipe socket, then insert the coupler from the siphon. But first of all, we coat the rubber coupling well with a reliable sealant on the outside and inside.
Plumbing connection
After the installation of the siphon is completed, we install a new bathtub. Despite the lightness of the model, you will need an assistant: one to press the siphon at the bottom to the bowl drain, and the second to insert and carefully tighten the neck.
But before that, we put a gasket on the outside between the siphon outlet and the bottom of the bowl. Silicone sealant will securely fix the joints.
Overflow installation
- We connect the overflow neck and the hose: fasten a plastic nut over the hose, then put on a wedge-shaped gasket, with the narrow part facing the edge of the hose.
- We insert the hose into a small diameter pipe and tighten the nut securely, which will fix the hose and push the gasket into the pipe.
- We connect the other end of the overflow to the already mounted siphon.
- We connect the overflow to the hole and screw in the threaded neck. Next, we place a washer, pre-treated with sealant, between the body of our overflow and the product.

Take note! When installing the bathtub, we tighten all existing connections by hand. Use pliers to tighten the throat of the overflow and main outlet.
At the end of installation, we line the bathtub, at your discretion.
Checking the operation of the system
We fill the bath with water, then drain it and carefully observe whether there are any. If you see water leaking somewhere, tighten the existing connections. After installation is completed, the bathtub can be used only after 6 hours so that the silicone hardens well.
As you can see, you can replace an old product with your own hands, and you will not need to spend a lot of effort and time, if you have already dealt with plumbing before!