What can you make with your own hands from old things? Wonderful homemade crafts from scrap materials
Read also
If you find a lot of different unnecessary things in your house, then it’s time to turn them into household items. And to do this, you just need to invite your imagination and arm yourself with certain tools. We are sure that you will definitely enjoy the process of such creative work. Well, to make it easier for you to start transforming the “trinkets” at your disposal into extremely useful things, in this article we will talk about various options similar creativity.
We use metal forks and spoons
If you have an idea to throw away aluminum forks and spoons that are absolutely unnecessary in the house, then it’s time to stop and use them as raw material for quite practical and fun crafts.
The principle of working with such items is that you first need to flatten the forks and spoons with a hammer, and then give them - again with the same hammer - the required shape. Small nails or super-powerful glue also come to the rescue.
Please note that for some crafts spoons and forks made of aluminum are perfect, but for some you need to use cutlery made only from more durable materials. So, if you want to make hooks out of forks and spoons, placed on old wooden cutting boards, then aluminum is quite suitable here, but to create a clothes hanger from forks, choose something more practical.
Of course, wall hooks and others original crafts made with your own hands from old spoons and forks are not suitable for classic interior, but for the interior in high-tech style and in the present rural style, for example, in the country, would be quite appropriate.
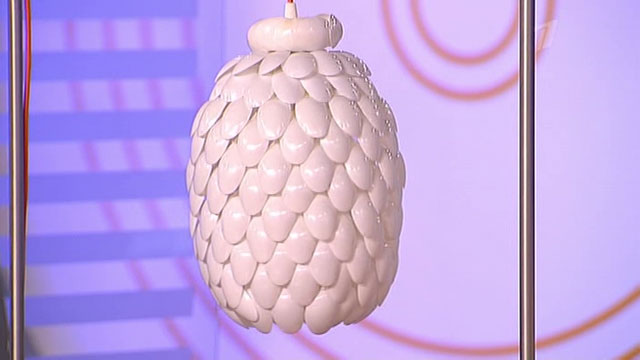
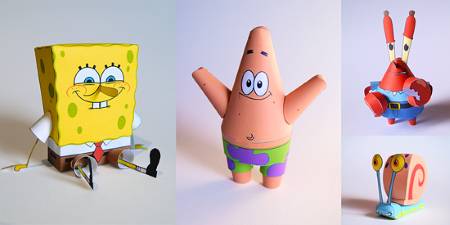
Decorative items made from plastic spoons and forks
For creative people With a rich imagination and fantasy, there are no limits, so they are able to make wonderful decorative things from literally any “thrown” material. Well, how can you go past the bright and stylishly shaped plastic spoons and forks!
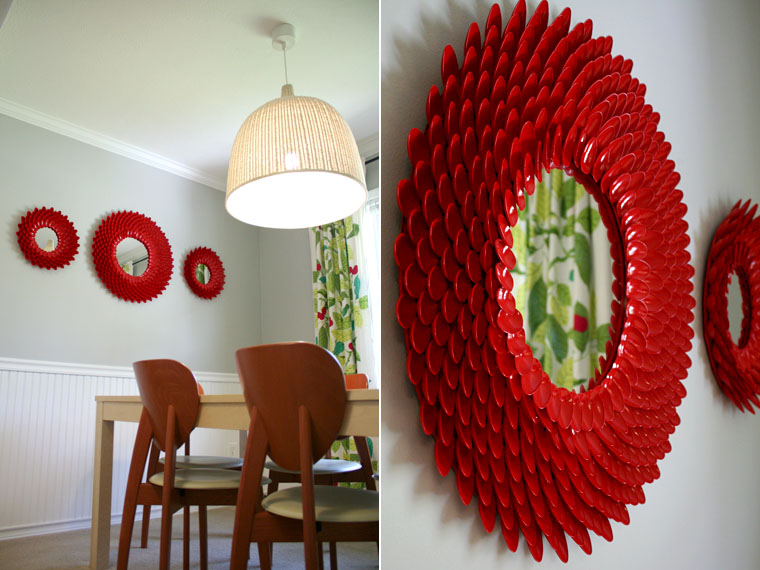
It would seem that the only purpose of plastic spoons and forks is to help people eat, and only once. But that was not the case: it turns out that the scope of their application is much wider and more interesting. As can be seen from the presented samples, craftsmen are able to create wonderful crafts from this waste material.

Arm yourself with enough plastic spoons and forks, think about the composition you want to create, and then use powerful glue, paints and other additional materials start creating.
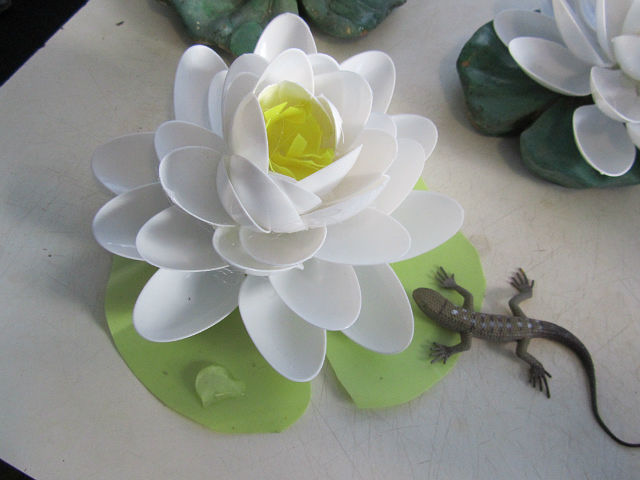
In this case, you can start with the simplest, for example, with a rose or ladybug, and then move on to more complex things. For example, on a watch, mirror frame or lamp shade. And let our selection serve as an inspiration for you!
Crafts from plastic bottles
Beautiful and useful things can be made from almost nothing, including plastic bottles. We are sure that they will be found in abundance in any home, where they usually accumulate like useless trash. Let's give them a second life! We’ll start by looking at how you can use plastic bottles to turn an ordinary playground into a fairy-tale world.
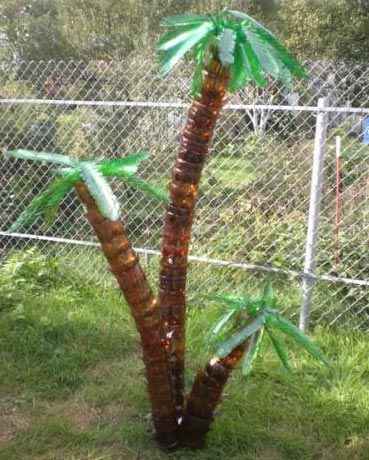
For example, a palm tree from plastic bottles can be made as follows. Its middle and lower parts are made from dark bottles, and the leaves are cut from green bottles. In this case, fastenings are made with glue or a furniture stapler. With a little imagination and colors, using the same principle, you can create animals and fairy-tale characters on the site.
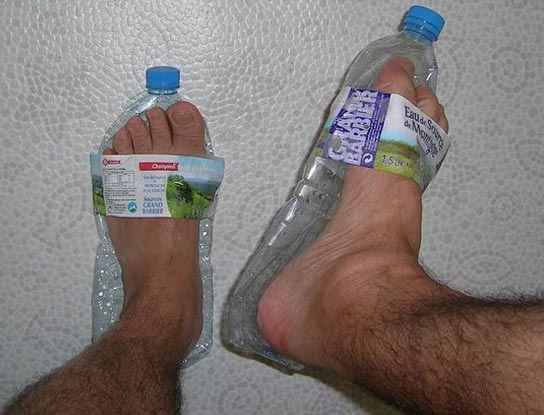
And how original do slippers made from plastic bottles look! In such light summer slippers it is very comfortable to walk on damp ground at the dacha. Moreover, they can be made very quickly and at virtually no cost. First you need to select two identical bottles, which are suitable in size for the foot of the person you are wearing. For example, for an adult you need to take two-liter bottles, and for children, 0.5-liter containers are also suitable. At the same time, if we cut off the bottom and half of the middle part, then we will get closed-toe slippers, and if we cut the bottle exactly in half and attach a strip of plastic or fabric, we will get flip-flops.
You can also make spectacular and weightless curtains from ordinary plastic bottles. To do this, we cut off the bottoms of the bottles low and fasten them together with fishing line or wire. If desired, you can paint the colorless bottoms with paints, or you can initially take bottles different colors and sizes. Decorative curtains Making plastic bottles from plastic bottles is, of course, a labor-intensive process, but it can protect your dacha window from rain and give the interior exclusive beauty.
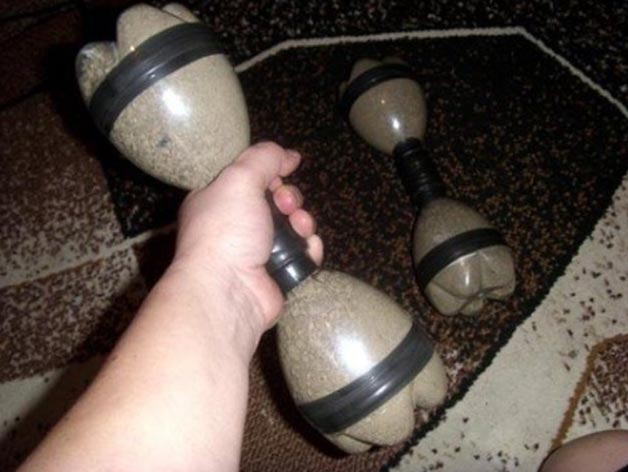
Very often dumbbells are made from plastic bottles. Working with them is a pleasure: they are very comfortable, practical and even superior to iron ones. To create them you need to use 2 liter or 0.5 bottles. We cut out the middle part, and fasten the bottoms and necks with electrical tape. You can also think about other mounting options - there are many of them. Then we fill the containers with sand or cereal and you can start training. In addition, we will tell you that you can increase the level of weight in dumbbells in the following way: you can fill the sand with water or fill the dumbbells with ordinary coins.
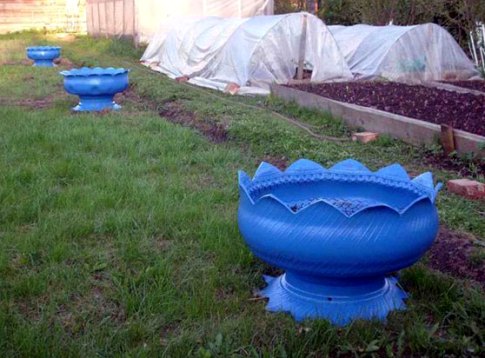
New life for old tires
Every month, a huge number of old tires are thrown away all over the world. But to make them practical and beautiful crafts everyone can do it! The most important thing is to find a tool that can be used to process (cut) this strong material: a grinder is most often used. Otherwise, you only need to use your imagination, paints and other available materials.
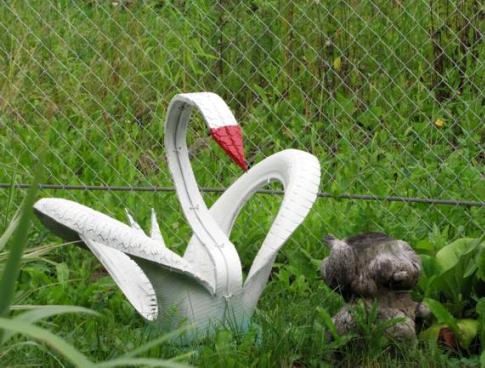
At the same time, crafts made from tires fit perfectly into any house plot, for example, in the country or in cottage village. In addition, the service life of tires is very long, and it tolerates dampness and temperature changes well. In addition, such material is easy to process and the most bizarre shapes can be created from it.
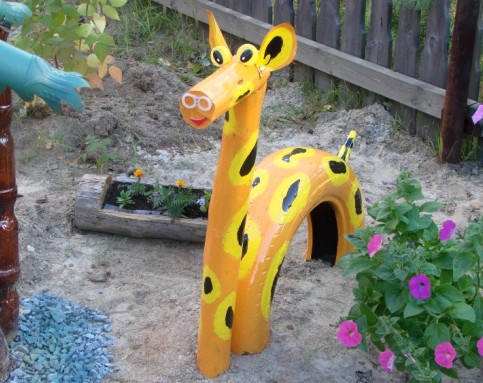
A few years ago, tires were mainly used in painted form for fencing flower beds and playgrounds, but today they are used to create various stylish flowerpots, flower beds and swings. Tires are also very popular for creating figures of various animals and birds.
We can already safely say that swans made of tires on the site are becoming classics of the genre. In addition, they begin to successfully coexist with parrots, hares, elephants, turtles and the like. And how convenient it is to use bicycle parking made from tires that would otherwise be simply thrown into a landfill.
DIY crafts can help not only while away free time and enjoy creating useful or beautiful things. Those who have achieved a certain skill in their hobby will be able to make good money from it. Products self made are valued all over the world, and being able to offer them for sale online will help you find many clients and get a fair price for your work.
What do you need for handmade?
To make handmade items you will need various natural and artificial materials, special tools, varied decor, as well as a lot of time and patience. Almost any hobby requires glue and scissors. Any needlewoman will find where to use scraps of fabric, colored paper, paints.
What can you do at home with your own hands?
At home, you can make unique decorations, toys, panels and exclusive, but at the same time useful everyday little things (vases, shelves, stands, lamps, rugs, covers, etc.). Not all things made with your own hands are worthy of admiration, but those that are successful can be presented to loved ones or sold at a profit to those who are interested in works of art that are available in a single copy.
Decorations
Jewelry making is a very popular hobby. Beautiful and stylish jewelry can be created from ordinary beads. Simply fantastic jewelry comes from polymer clay. You can also use natural precious and semiprecious stones, beads, buttons, laces, threads and other materials. In order to create a unique decoration, it is enough to show at least a little imagination: scraps of leather and scraps of fabric can turn into beautiful flowers in a hairpin or necklace, and an unusual combination of beads - in a spectacular accessory.
If you decide to make jewelry making your hobby, you will need to master several techniques for working with various materials and purchase accessories from specialized stores that you cannot do without when creating bracelets, earrings, necklaces and rings. You can study the techniques used to create jewelry and find ideas that will lead to the creation of unique products on the Internet on a variety of handmade websites.
Quilling is the art of creating compositions from multi-colored strips of paper twisted into spirals. Using this technique, you can create postcards, paintings, jewelry, photo frames and even voluminous interior decorations.
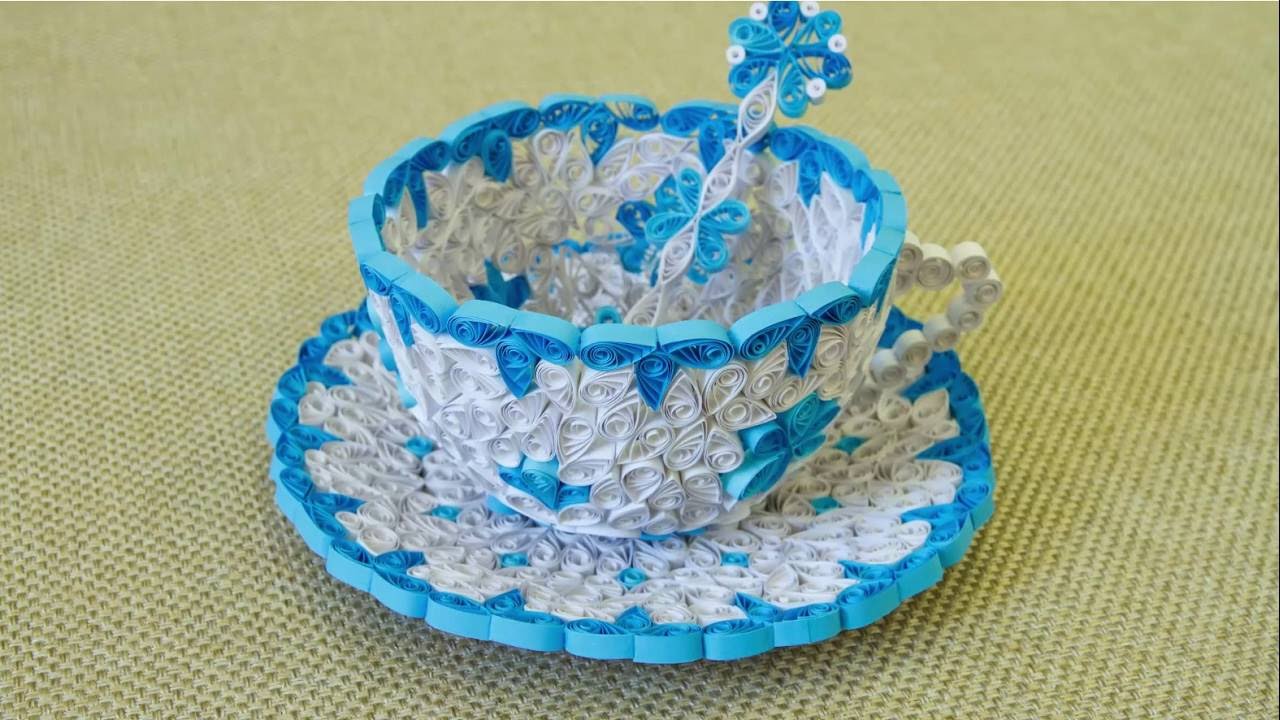
It is noteworthy that this hobby does not require spending a lot of money to purchase Supplies(besides strips of colored paper, you will need glue, scissors, tweezers and special device for twisting ribbons). Mastering the quilling technique is not difficult, but creating truly unique pieces will require a lot of time, patience and especially perseverance.
All products made using paper rolling consist of basic elements (modules), such as a tight and loose spiral, curl, triangle, square, heart, eye, leaf and others. To quickly understand how to make them, you should carefully look at the photos of the modules or several videos with master classes on quilling.
Decoupage is the name of a decoration technique that involves attaching a design to an object and coating the resulting product with varnish. At the same time, the product looks as if the picture was originally drawn on it. You can decorate in this way not only surfaces made of glass, plastic, ceramics or wood, but also leather or fabric.
For decoupage, you will need an object to transfer the design to (this could be a vase, cutting board, chair or even a whole cabinet), glue, scissors, varnish and the picture itself (depicted on a napkin or cut out from a magazine). The surface of the object to be decorated must be thoroughly cleaned of dirt and degreased. The picture is cut out using scissors, on it reverse side glue is applied, then it is placed on the surface of the product. After the glue has dried, the item is coated with clear varnish.
Cardmaking is the name given to making postcards. In order to engage in cardmaking, you do not need to spend a lot of money on special paper or decor. You can make beautiful greeting cards from cardboard, foil, colored paper, beads, buttons, lace, ribbons and feathers. For this you will definitely need glue, scissors, double-sided tape and imagination.
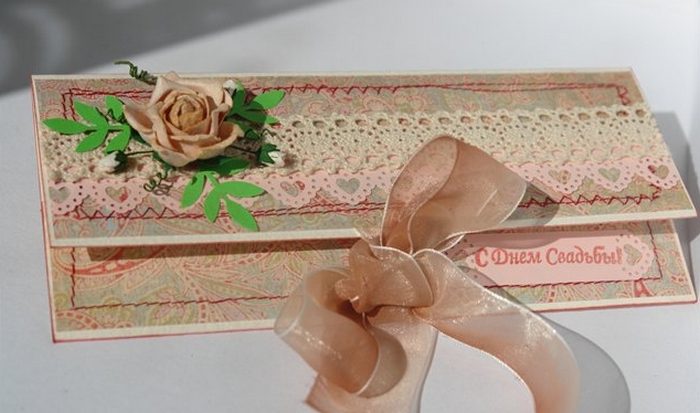
Each handmade postcard is a real work of art. This hobby will allow you to always have a beautiful birthday gift on hand for your relatives and friends. If you are seriously interested in this type applied arts, then making original postcards can be a good source of income.
Scrapbooking is the name given to the design of photo albums. This includes family photographs, drawings, newspaper clippings and notes. Each page of such a photo album contains a collage that expresses a certain thought or covers certain events in the life of the whole family: wedding day, birthday, family vacation, etc.
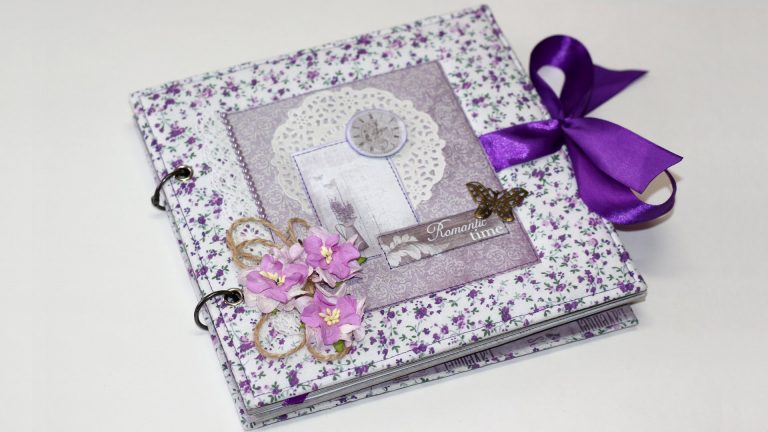
Since digital photographs, which can be stored almost forever on special media, have become firmly established in our lives, paper photo albums have begun to become a thing of the past. But scrapbooking has simply evolved into a new quality: various computer applications have appeared that allow you to process photos, insert them into various frames, make collages from them, place various signatures, audio and video files in them.
Felting is the name given to felting wool. Using this technique you can make very original jewelry and beautiful toys, slippers, bags, scarves. To master this method you will need unspun wool. various colors and special needles designed for felting.
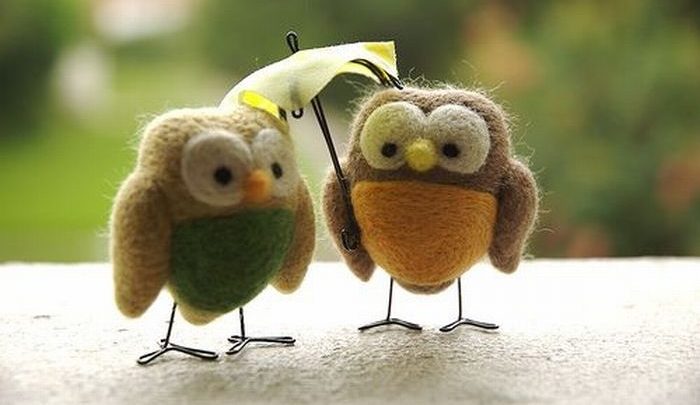
Anyone can master felting. To make a three-dimensional product, wool is placed on foam rubber, which is then tangled with needles. Needles are applied first big size, then, as the product becomes denser, they are replaced with thinner ones. Creating things from unspun wool is a very exciting activity that brings real pleasure.
Patchwork is a technique in which a fabric with a unique pattern is created from scraps. This technique is used to make blankets, bags, rugs, toys and panels. To create a work of art using the patchwork technique, you will need scraps of fabric, scissors, a ruler and thread.
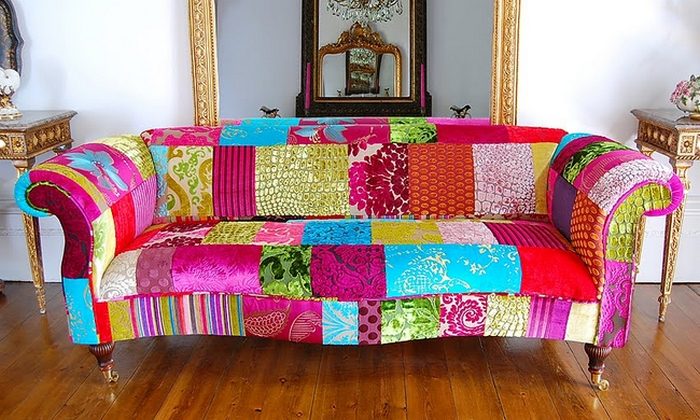
Cutting in patchwork is done using templates, which are simple geometric figures. The product is assembled from small parts to larger ones. There are many successful schemes, using which novice needlewomen can create unique works. Once the basics of patchwork have been mastered, you can begin to develop your own patterns.
Fusing is a technology that allows you to make real stained glass windows from colored glass and exclusive decorations at home. For this purpose, special furnaces are used in which glass is sintered at a temperature of about a thousand degrees.
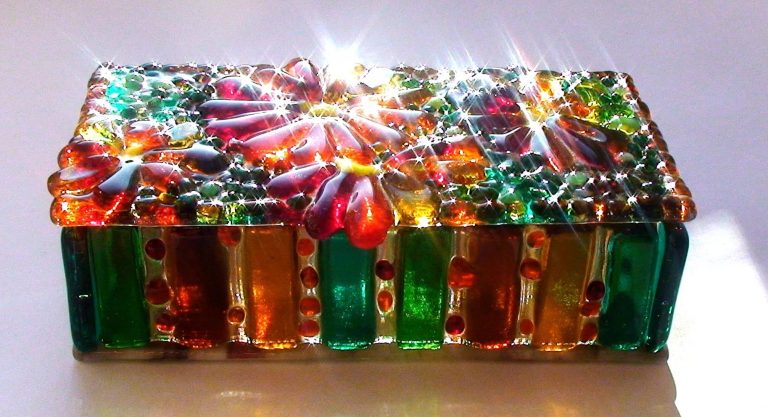
For creating original product You will need multi-colored glasses, safety glasses, glass granules, a glass cutter, special gloves, and heat-resistant paper. First, a sketch of the future product is invented and drawn, then the glass is cut. A mosaic of cut multi-colored glass is laid out on thermal paper, and the gaps between the glasses are filled with granules. The resulting pattern is placed in an oven and baked at a very high temperature.
Important: After baking, you need to wait several hours until the product has completely cooled down.
Author's ideas
A real handmade product must be based on original idea. Having mastered several techniques for making crafts, everyone will be able to come up with and bring to life their own original ideas, combining various techniques and embodying your vision of the world.
This will allow you to express yourself, decorate the interior of your home, present Original gifts friends, earn money by selling their works, and even (if a particularly fortunate set of circumstances) receive recognition, become a respected person who creates real works of art.
Many famous artists and sculptors started small, first creating their creations at home for themselves or to order for clients. So why don’t you start reproducing works of art, embodying your own ideas, and presenting them to the public?
How and where to sell your products?
You can exhibit and sell your products through pages on social networks or through popular thematic platforms on the Internet (you can even create your own online store). You can also make beautiful crafts with your own hands and put them up for sale in specialized offline souvenir stores.
Save the article in 2 clicks:
Each of the considered methods has its own advantages and disadvantages. Therefore, when selling your handmade products, it is worth trying each of them to choose the most suitable one for yourself. If you are not ready to exhibit your work to a wide audience, then your relatives and friends are unlikely to be against having a beautiful trinket or aesthetically useful thing you made at home.
If you are drawn to doing something unusual, creating original things with your own hands, first you should choose a creative path that best suits you.
Use childhood memories when choosing creative activity. Remember what made you happy as a child, what creative clubs you could attend. Perhaps, even many years later, you will again feel the joy of your childhood hobbies.
If there was no place for creativity in your childhood, turn to your subconscious. Imagine that nothing bothers you, you don’t have to go to work and you have a lot of free time. What would you do in this case, what creative process first comes to your mind - that’s what you should do.
Keep a special notebook and write down all the things that interest you; later, based on this list, you can decide on your future hobby.
How and where to make money from your talent
The most popular options for selling hand-made products:
- trade fairs;
- specialized flea market communities on social networks;
- online stores;
- handicraft stores.
Every city hosts various fairs dedicated to handicrafts. At such events you can take master classes from famous craftswomen, buy various souvenirs, and also sell your own creations.
Register in advance for the fair and you will be given your own stall for your items, but you will have to pay a percentage for the stall.
Social media - perfect place for sale of any products. Find a thematic community of interests. By posting your ad in such a flea market community, you will not need to pay for advertising space or give anyone a percentage of the profit.
If you like selling in online stores, you can create your own online resource on free hosting or buy yourself a place on a ready-made website.
There are also a large number of stores dedicated to handicrafts and materials for them, and most often they offer for sale not only a variety of accessories and fabrics, but also finished products.
Having previously discussed the terms of the deal with the administration and gone through a kind of “casting,” you will be able to exhibit your products there. The store will also require a percentage, but the chances that you can make a profit will increase.
Using unnecessary things
Every person has pretty boring things that it’s a pity to get rid of for certain reasons.
Inhale new life into old, unnecessary items easily, with a minimum of effort and a little imagination.
Decorative pillows from old clothes
If a stain appears on your favorite T-shirt or shirt, and stain removers are powerless, it’s very easy to use old clothes to make beautiful pillow with your own hands.
In addition to a piece of fabric, you will need thread with a needle and filling, which can be easily bought at any specialty store or taken from an old pillow.
When choosing clothes that will serve as material, remember that the fabric should be natural and hypoallergenic.
- Get rid of the buttons if you are using a shirt, and the zipper if you are using a jacket.
- Having cut two identical pieces of fabric, sew them, wrong side out, using threads or sewing machine, leaving a small hole through which you will stuff the pillow.
- Turn the product inside out and fill the pillow tightly with the filling, avoiding any gaps.
- Carefully sew up the hole using small stitches.
Ideas in pictures. 


If you still haven’t decided what you can do at home with your own hands, the video will tell you:
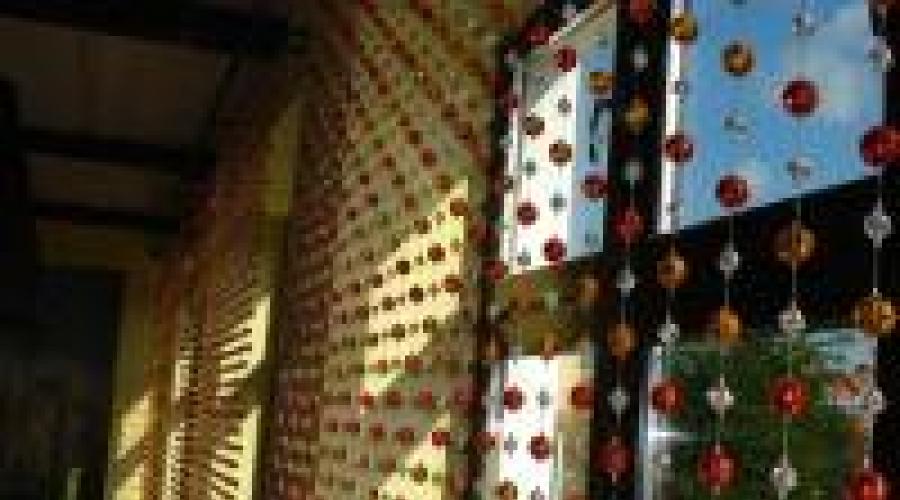
Original and functional curtains made from old beads
If you have accumulated a large number of boring or damaged beads or simply unnecessary beads, it’s easy to make an original curtain from this stuff.
You will need a wooden strip, a large number of large and small beads, a skein of nylon or silk thread or fishing line of any color. And if you use transparent fishing line, it will create the feeling that the beads are floating in the air.
- Drill small holes in wooden plank. The number of holes depends only on your artistic idea.
- Secure the threads in the holes, leaving one long end on which you will string the beads.
- String the beads according to the designed pattern.
This curtain can be easily fixed in any doorway, it can also be fixed on the door itself as decoration. Such a product will perfectly highlight an interior in the Art Deco or Provence style.
Unusual and bright crafts for your baby
With your own hands you can make not only interior decor, but also original toys for your child of any age.
For the youngest children, toys that develop fine motor skills are suitable.
You can cut several holes in a large shoe box, and insert bottles into the box itself so that the neck with the lid looks out of the holes. The box itself should be sealed with tape.
Do not tighten the plugs too tightly so that a child can unscrew them. This simulator is suitable for children from 6–7 months.
To develop fingers, a homemade fabric snake stuffed with cereals or balls will also be useful. You need to sew a long “stocking” from bright colored fabric and stuff it tightly. The child will feel the stuffing, and such a toy will give your baby a kind of finger massage.
For children from one year of age who are already more actively beginning to study the world You can make a set of “sensory cards”. On square pieces of thick cardboard or wooden planks you need to stick on a variety of materials and small things. The child will enjoy exploring different fabrics and materials that differ in texture.
For such a craft, you can use different fabrics, seeds (beans, peas), twigs and leaves (herbarium), buttons, paper clips and anything else you like.
Edible and simple chocolate creative
 If you have a chocolate bar stuck in your refrigerator, you can also use it to make a creative, and even tasty, product with your own hands. Chocolate can be used not only as the main ingredient of products, but also as unusual decor already prepared desserts.
A bar of milk chocolate is perfect for melting, unlike black chocolate, which is too fatty. Melt 150 grams of chocolate in a water bath, dip strawberries into the prepared mixture, holding them by the tail, and dry on a clean sheet of parchment.
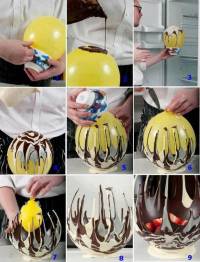
You can surprise guests and family members with an original dessert presentation, having only a bar of chocolate and a set of small balloons. Clean inflated balloon You need to dip it halfway into melted chocolate and let it dry. Then you should pierce the ball with a knife and carefully pull it out by the top.
This chocolate cup can be filled with fruit or whipped cream and decorated with chocolate chips.
A quick and unusual dessert can be made from bananas, chopped nuts and a bar of dessert chocolate. Cut the fruit into several small pieces and dip into melted chocolate, and finally sprinkle with nut crumbs.
You can also make it from chocolate original decoration for homemade cake. To make a bow you will need a rectangle cut from a thick file, a spatula and clothespins.
Melt the chocolate and carefully brush one side of the cut out rectangle. Bring the ends of the files together so that the chocolate side is on the inside, not the outside, and secure with a clothespin. Let the product cool for about half an hour.
Then you should carefully remove the clothespin and separate the file from the chocolate petal. You need to make at least seven such petals, and then put a beautiful voluminous bow out of them on the cake.
We have looked at everything that you can do with your own hands at home, but maybe you will have your own ideas. Create!