Leveling walls with plaster and usually a thin layer yourself: options and techniques, how to plaster with your own hands, tips. Plastering without beacons is difficult, but possible! Plaster with gypsum plaster without beacons
Read also
You can plaster the walls well without using beacons. Now we are considering the flat surface of the wall, but not the position of the wall in the plane. Plastering walls without beacons is a labor-intensive process that you can do yourself. This job requires experience in construction, so it's best to seek advice from professionals. Before abandoning the beacons, check the wall with a level.
Plaster on walls without beacons is thinner, so this method will help you save cash. It is used for residential premises, but before carrying out work, use a building level to make sure the walls are level. Deviations should not exceed 2 cm.
Construction materials and tools for work
 In order to finish every square meter of the wall, you will need the following tools:
- Bucket for solution.
- Water jar.
- Putty knife.
- Construction trowel.
- Grater for construction.
- Shovel
- Large sieve.
- Paint brush.
You will also need the following building materials:
- Sand.
- Cement.
- PVA glue.
- Primer.
We make the plaster mortar ourselves. Take cement and sand in a ratio of 1:3. Add PVA glue for plasticity and good adhesion to the surface.
The use of gypsum mixture for construction is popular, because it will allow your plaster to adhere firmly to the surface of the walls and ceiling. You can make plaster with cement mortar.
We prepare the surface for construction work
 Plaster is applied exclusively to the clean surface of walls and ceilings. Concrete wall should be smooth. Make notches on it using a chisel. There should be about 35 pieces per 1 sq. m. This method will allow the plaster to better adhere to the surface. After this, the walls and ceiling should be well treated with a primer. Let the primer dry for 24 hours. After this, start plastering the surface.
Making the solution step by step
Using a sieve, sift the sand to remove excess garbage and large parts. Pour cement and sand into the required proportion and mix the mixture with a shovel. Add a small amount of water and mix again. The main thing is not to overdo it with water, because you may end up with a liquid mixture that is not suitable for work. Add PVA to the water. For 1 bucket of solution you need to add 1 construction bucket glue.
Make a solution and check how it adheres to the wall. If it falls off, add water. For the ceiling, use a thick mixture
Let's start applying the solution
Wet the wall with water to help the mixture apply better. Using a trowel, apply the solution to the surface. Let's take it  construction grater and level the mixture along the entire perimeter of 1 square. m. The layer thickness should be at least 4 cm and no more than 8 cm. Select a long grater (about 50 cm) so that the mixture is applied evenly. It is necessary to move the grater in different directions(e.g. top to bottom, left to right).
Then the next one is aligned square meter(you can use a rotband). We are slowly plastering the entire wall. This needs to be done from the bottom up. Don't do it perfectly straight, because rough surface will help the second layer of plaster stick. After this, let the wall dry for 4 hours.
After the first layer of the mixture has dried, apply the rule over the entire wall. Using this tool you will remove excess plaster. Place the rule close to the wall and move it until all the irregularities disappear. After this we proceed to the second layer. It is necessary to smooth it out as much as possible. Using a trowel, spread the mixture onto a float and apply it to the wall. Move the grater in different directions. Let the wall dry for 3 hours, and then check if the surface is even. Apply the rule to the wall to reveal all the depressions and bumps. Next, you need to remove the bumps with a grater in a circular motion. Wet the tool with water so that excess parts can easily come off the surface. The depressions must be filled with the mixture.
 A construction float will help us correct all the unevenness. At this stage of work there should be no noticeable defects. We wait until the plaster dries. After 3 hours you can make the third layer. This layer is considered the thinnest and is applied to ensure that the wall is smooth. Make a liquid mixture. Using a ladle, pour this mixture over each surface area. Next, smooth the surface.
Checking the plaster
You need to wait 6 hours for the last layer to dry. After this, we begin grouting. This process will make the surface velvety. Pour water over the wall and rub it. Do this over the entire area.
To learn more about this type of work, watch the training video.
How to plaster without beacons is of interest to many, because not everyone understands how to make a landmark and bring the plane to zero. In this article we will consider the question of how to plaster walls without beacons and at the same time do everything efficiently. You will also be presented with photos and videos in this article on the rules of work and you can do everything yourself, then the final price will be much lower.
Plaster without beacons is not as easy a question as it seems, and therefore is immediately divided into three other questions: what does it mean? ready plaster what the mixture for such work is, and what the plastering work itself is like. The questions will be answered in order.
Plaster as a cladding can be a fully prepared finish, and also serve as a basis for painting, cladding, wallpapering (see Wall decoration with wallpaper in the correct form) or future cladding.
Depending on their purpose, they are classified into several others:
| Priming | Ideally smooth, but sometimes the surface has roughness for future finishing or cladding. Smoothness, uniformity, wear resistance and strength come first; maintaining the tone is not necessary. |
| Finishing work, or in other words, covering | Custom look finishing works. A prerequisite is that it must adhere firmly to the ground and create the necessary tone. Its absolute smoothness is necessary for painting with mirror paints, that is, enamel. |
| Protective work | IN construction work Various types of protective plasters are often used. There are cases when protection is required from the possible penetration of radiation into the house, but often it is necessary to protect the basements of houses from the penetration of moisture and the formation of dampness. This is easy to do with a special solution, besides, the walls of home basements are usually made of bricks, so it stays there Wonderful. Important Requirements– resistance to water and hardness, in this case the smoothness of the surface does not play a special role. |
| Outdoor work | In this situation, greater resilience is required than in previous situations. It is customary to carry out such work using mixtures made with cement with foreign additives. An affordable cost will be obtained when such work is performed by experienced plasterers by machine (see Machine plastering: how to do it right), so there is no point in considering further. |
Indispensable equipment for work
I would like to warn you right away that the most common “gentleman’s set”, that is, inexpensive tools at reasonable prices, will serve as an excellent example.
Firstly, in order to plaster the surface of a wall without existing beacons, we need this:
- Large vessel for preparing and stirring the solution. The word “large” means that it can fit at least 4 buckets of the finished mixture.
Attention: If you don’t find a suitable vessel for stirring the solution, then it’s easy to do it yourself, because it doesn’t require any special effort or knowledge. You will need one simple galvanized sheet, 4 clean boards and self-tapping screws. We measure out a small rectangular corner on the sheet and remove all excess with a self-tapping screw. Next, we turn the edges of the sheet up 10-20 cm and screw the boards to them - these, as you understand, are the sides of the future trough. It is convenient to use such utensils in the future.
- Two types of shovels: regular shovel and American shovel. To make things easier, you can use ordinary hoes from the garden, rather than just the shovels we are used to. These hoes make the work process much easier. This also affects the quality of the product, since there will be no solid lumps in the solution, while it can be more difficult to achieve an ideal homogeneous mass with a shovel.
- Trowel, plastering ladle and a pair of spacious buckets.
- A couple of foam floats for rubbing the surface. If plastering will be done without guides, then you should try to get longer and more voluminous floats. Their price will not be much higher than the price of ordinary such graters, but the finished surface will thus turn out much more beautiful and smoother.
Start of plastering work
The first step is to prepare a place for work. Just on a stool or ladder nothing can be done. If you need to plaster a large surface, then it is better to immediately purchase or rent scaffolding.
Attention: Be sure to remember that at the end of the next stage of work, all tools must be cleaned of dirt and dust in clean water. Never use residue left over from washing instruments. dirty water, for mixing the future mixture, because it is no longer suitable for action. It needs to be isolated in a hole, but not in a sink, as debris can clog in the sewer pipe.
Surface preparation
The process of preparing the surface for plastering has three stages:
- Complete surface cleaning.
- Restoration of small nuances.
- Creation of a surface ready for plastering.
Plaster is the most popular and time-tested method of leveling walls, capable of creating a continuous monolithic surface, ready for finishing.
More high quality plaster is obtained by leveling the surface using metal or wooden beacons previously glued to the solution.
Plastering walls without beacons is a process that requires high professional skill.
Plastering walls without beacons is performed during leveling small areas, if deviations do not exceed 1-1.5 cm. You can plaster production, warehouse or Technical buildings, for the quality of finishing of which there are no increased requirements.
Leveling walls with plaster with your own hands without beacons is done using a rule and a trowel.
 To make plastering walls easier large area, it is recommended to level the surfaces using beacons made of plaster mixture. The solution is applied in the form of three horizontal lines at the top, bottom and middle of the wall, carefully leveled. After the solution has dried, the plaster is applied between the guides. Excess mixture is removed by rule.
When plastering without beacons, it is difficult to achieve perfectly smooth walls.
Advantages
Plaster without beacons allows you to level the walls quickly, with minimal financial investment:
- due to the application of thinner layers of plaster, plaster mixtures are saved;
- reducing time and labor costs by eliminating the gluing and subsequent removal of beacons from the process.
Tools and materials
For execution plastering works you need a container for mixing the solution, scaffolding or scaffolding with a width of at least 1500 mm, tools and accessories:
- shovel or construction mixer for mixing the plaster mixture;
- grater and trowel for leveling and grouting plaster;
- construction bucket for throwing mortar onto the wall;
- trowel or trowel, for smoothing and mixing the solution;
- falcon and spatulas different widths for applying and smoothing the plaster mixture;
- rule and building level to control the evenness of surfaces;
- water bucket;
- brush or roller for wetting the surface and applying primer;
- sieve for sifting cement, sand and dry mixtures.
 Materials required for surface preparation and production of plaster mixture:
- acrylic primer;
- construction sand;
- cement;
- alabaster;
- PVA glue.
It is possible to use ready-made dry plaster compositions.
It is necessary to stock up on respirators for protection respiratory tract and rubber gloves to protect your hands.
Preparation surfaces
Before plastering the walls with your own hands without beacons, you need to prepare the surfaces by removing nails, protruding mortar and wall defects.
 Wooden walls need to be covered with wooden shingles or thin slats. On concrete - secure plaster mesh or make notches. Before plastering without beacons painted oil paints walls, you need to thoroughly clean them of paint using a solvent or spatula. Or, before plastering, make frequent notches and furrows with an ax.
The prepared surfaces are moistened with a primer, carefully following the instructions in the instructions. If the primer is applied too much, a film is formed that prevents the solution from adhering to the surface. You can start plastering no earlier than 12 hours after priming.
Preparation of the solution
For self-made plaster mortar You need to take three or four buckets of sand for one bucket of cement. Sift all components through a sieve to remove large particles and debris and mix until smooth. Then, stirring constantly, add water in small portions. Upon reaching optimal density and homogeneity, you need to add a small amount of PVA glue to the solution, for the plasticity of the solution and better adhesion to the surface to be plastered.
 You can use ready-made dry plaster mixtures. The components in them are selected in optimal proportions. You just need to mix them with water, according to the recommendations indicated on the package.
How to plaster walls without beacons
The technology of plastering without beacons consists of sequential application of three layers of plaster:
- rough or spray;
- priming;
- finishing grout.
It is possible to properly level walls without beacons if you follow the technology and have basic plastering skills.
The first step is to check the state of evenness using a long rule and using a pencil to mark areas with gaps where additional marking is required.
Plastering of walls is carried out in compliance with all stages of work according to technology.
Laying the first layer
Leveling walls without beacons begins with the installation of a preparatory or rough layer, which serves to adhere the surface to subsequent layers of plaster.
Before starting, you need to wet the wall with water. Then, using a trowel (trowel) or a plaster ladle, apply even portions of the mortar onto the surface with sharp movements, starting from the floor.
Check the level of the wall. If there is a skew in one place, apply more thick layer plaster.
Using a grater, lightly level the solution, without achieving excessive evenness.
Second layer
The application of primer begins after the rough layer has set, without waiting for it to dry out. At this stage of plastering without beacons with your own hands, a smooth surface is achieved. The solution is applied with a spatula to a trowel or trowel and applied to the wall, spreading in all directions.
During the work process, constant monitoring is carried out using building level and rules.
Unevenness is eliminated by adding solution to the depressions and cutting off the bumps with a circular motion of the grater.
Finishing layer
After grouting the primer layer, small irregularities, stripes and roughness may remain on the surface. Defects are eliminated by finishing grouting.
This stage is started when the previous layer has set, but has not completely hardened.
The semi-liquid solution is gradually applied to the entire wall in a layer of up to two millimeters, and carefully rubbed into the surface with a grater in a circular motion.
Particular attention must be paid to the uniformity of the plaster mixture, since large particles of sand or debris can leave grooves and stripes when grouting.
Grouting plaster
 After 6-8 hours, when the third layer has set, we begin grouting the plaster. To do this, the surface is poured with water from a ladle. Using a grater and circular movements, rub the surface until it is velvety.
The surface intended for tile or stone cladding does not need to be rubbed down.
During the drying process of the plaster, it is necessary to exclude the possibility of drafts and ensure constant humidity and temperature in the room. IN hot weather To prevent cracking, it is recommended to periodically wet the entire wall with water. After a few days, the plastered surface is ready for finishing.
Plastering walls is perhaps the most common way to level them and prepare them for final finishing. The technology is highly versatile and makes it possible to tidy up both fairly smooth surfaces and those with significant defects and curvatures. In addition, the plaster layer is always also additional protection wall material from negative impact external environment.
The “classic” of plastering work is the use of tiles, which set the plane of the future surface. However, in some cases, a perfectly even wall condition is not the main priority, and the procedure for setting beacon profiles can be omitted. How to plaster walls without beacons with your own hands - we will try to answer this question in this publication.
It should immediately be noted that despite the lack of need for one of the operations - precise installation lighthouses, the process of such plastering as a whole is a very difficult task, and in order to get a truly high-quality result, you need to have well-developed finishing skills. If you take on such work without having any experience at all in plastering walls, then the initial results may be very far from what was intended.
Where and why can you apply plastering technology without beacons?
It is clear that any conscientious homeowner strives for the ideal plane of walls during construction and finishing. However, there are often cases when such an approach still does not seem justified.
Agree, for example, that when building a utility room (workshop, barn, poultry house and other outbuildings), which are located in the “backyard,” perfectly laid out walls are simply useless. It is enough to ensure that they are visually smooth, have no obvious surface defects, and the material from which they are constructed receives reliable plaster protection. Moreover, if the masonry was carried out carefully, with constant monitoring of the verticality of the wall and the straightness of the rows.

There doesn’t seem to be much point in complicating the work when plastering the utility rooms of the house, internal surfaces walls in a garage, workshop, boiler room. A thin layer of plaster will hide visible flaws and prepare the surfaces for, for example, painting or whitewashing, but checking their perfect evenness as a rule is unlikely to occur to anyone.
However, many professional craftsmen prefer to use home-made plaster solutions, the “recipe” of which has long been known to them and has proven itself in practice. Owners often resort to this approach. country houses, especially when plastering external walls or when finishing non-residential premises.
For such purposes, conventional cement-sand, lime, cement-lime, and even clay mortars, which are still in demand, are used. Of course, their composition must be optimally balanced in terms of components - in a word, you need to know correct proportions preparation of plaster solutions.
Below is a calculator that will help you decide total number plaster mortar for wall finishing a certain area. In addition, the program will calculate required amount ingredients for preparing this volume of plaster in two versions (with approximately the same strength indicator - M-75):
— cement-lime mortar is one of the most popular, with excellent plasticity and increased versatility, that is, suitable also for interior decoration premises.
- ordinary cement-sand mortar, well suited for external works, including for the basement part of the walls, and for finishing rooms with increased level humidity.
Leveling walls with plaster without beacons, which was widely used 30 years ago, differs from performing work using them in the following:
- saving time, as there is no need to wait for the solution fixing the position of the beacons to harden;
- installing beacons necessarily increases the thickness of the plaster, which leads to increased consumption of the solution;
- Without installing guide beacons, it is almost impossible to level the surface of the walls with high quality, which is the main and defining disadvantage.
Plaster without beacons according to the technology involves applying the solution and leveling it using the “by eye” rule. Therefore, plastering walls with your own hands without beacons is carried out in rooms where it is not required high quality(storerooms and utility rooms) or as a rough layer for subsequent finishing that can hide minor irregularities. Professional plasterers use this technology in warehouses, finishing of small surfaces (pillars, boxes, etc.), temporary change houses and with sufficient smooth walls that do not have large differences, sagging or bumps. Let's consider the option of how to level a wall with plaster without beacons.
Step-by-step technology
- Surface preparation. Cleaning the walls from the old finish, and those without coating are prepared for applying plaster:
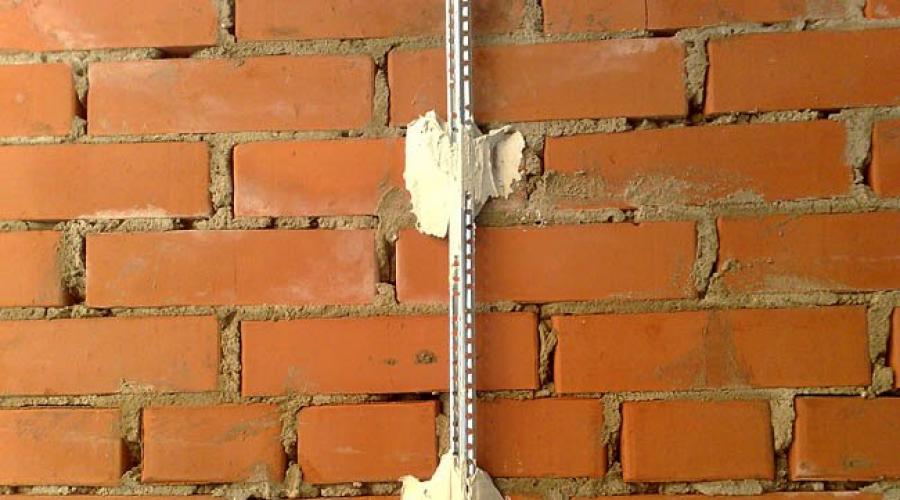
- in brick, remove excess mortar and unstitch seams;
- on concrete or slag concrete, apply notches and cut down large irregularities;
- on wooden ones, fix a plaster mesh with cells ≤ 4 cm or sew wooden shingles at an angle, remove traces of mold using antiseptics;
- Regardless of the material, remove dirt, oil stains, dust and prime with special primers;
- remove all debris on the floor around the perimeter where the walls adjoin, which will allow you to collect fallen mortar for its reuse;
- close electrical switches and sockets.
- Checking the levelness of the walls. Fulfilled by a long rule. It is placed against the wall and areas with gaps are marked with a pencil or chalk.
- The solution is prepared by mixing one part of M500 cement with three parts of fine-grained washed sand and a small amount of PVA glue or use ready-made mixtures. You need to mix the mixture with a drill with a special attachment. The consistency is like thick sour cream.
- Primary layer. The solution is applied in separate vertical strips up to 1 m wide. The sketch is done with a plaster ladle or a wide spatula in the direction from the floor to the ceiling. The applied solution is leveled using a rule, holding it vertically. The movements are short, zigzag. The alignment of the corners is especially important; there should be no gaps under the rule. By removing the protruding tubercles and adding the solution to the pits, we achieve flat surface. The check is performed by the same rule.
- The second layer is applied with a more liquid solution after the first has slightly set. Also, moving in narrow strips, we level the wall with a float.
- After about two hours, the wall is brought to its final finish, the surface is moistened with water and small irregularities are smoothed out using a trowel in a circular motion.
Plastering without beacons is highly labor-intensive with the likelihood of repeated rework, so it is better to choose a proven and reliable method -