Leveling the floor in the apartment. Is it possible to level the floor with a rotating band? Leveling the floor with your own hands is the cheapest method
If you are making major repairs, both in the room and throughout the apartment, then you probably cannot do without the floor leveling procedure. Leveling the floor is an integral part overhaul, because it is unlikely that the floor in your apartment will be level, especially if the house was built a very long time ago. Also, without leveling the floor, lay a new flooring illogical. That is why we want to dwell in more detail on the issue of floor leveling.
The content of the article:
Floor leveling methods
Leveling the floor is the very first procedure during repairs, of course, after all the preparatory steps. Thus, it is necessary to level the floor before leveling the ceiling and walls. There are several ways to level the floor, each of which has its own advantages and disadvantages, and we will describe them so that you can choose the leveling option that is most suitable for your room.So, today there are three ways to level the floor:
- Leveling using self-leveling floor;
- Leveling by building up the floor.
Leveling the floor according to beacons
This leveling option received this name due to the fact that for leveling, beacons are initially laid and fixed on the floor - metal slats, at the level of which the screed is leveled. Leveling the floor using beacons is the most common leveling method; it is most often used to level the floor large rooms: living room, bedroom and kitchen. The advantage of this leveling method is high-quality, durable and Smooth surface which can be achieved even with large uneven floor surfaces. The disadvantage is that the screed can take from 10 to 30 days to dry, everything will depend on the temperature and humidity in the room, as well as on the layer of the screed. If you want to make repairs as quickly as possible, then this method is not particularly suitable for you.
Leveling the floor according to beacons best way leveling for laying laminate and linoleum, since laying these floor coverings requires a perfectly flat surface.

Leveling the floor surface using a leveling solution is the simplest and most quick way level the floor. The essence of this leveling is that using a rare special cement-based mortar you fill the floor; thanks to the specific feature of such a mixture, it will spread evenly over the floor, which will ultimately create a flat surface. Unlike the previous method, leveling with a self-leveling floor occurs faster in time: both in the leveling process and in the drying time of the screed, since its layer is several times smaller than the screed layer when leveling the floor using beacons.
It is worth noting that the layer of self-leveling floor must be at least 3 millimeters. Maximum height The layer of self-leveling floor should not exceed 35 millimeters. Therefore, if the level of unevenness is very large, that is, the plane of the floor slab goes to one side, and from the top level of the floor to the bottom is more than 35 mm, then in this case this method doesn't fit.
The undeniable advantage of leveling the floor using a self-spreading mixture is speed, since it does not require much time. This is an excellent way to level out minor unevenness in the floor surface, as well as for pouring heated floors. In addition, this method is the cheapest, which makes it, in fact, the most optimal. The self-leveling floor has one drawback - it cannot be used for large uneven floors.
The last way to level the floor is to build it up. The essence of this method is that wooden logs are mounted on the floor, with the help of which a flat plane is created, after which boards or sheets of plywood are fixed onto the logs.
This method of leveling the floor is most in the best possible way Suitable for the first floors of buildings, as well as for dachas and cottages. The advantage of this method is that when building up the floor, the empty space can be filled thermal insulation material, which will allow you to insulate the floor. Also this great option, if you need to carry out any communications along the floor, for example pipes autonomous heating. The method is more painstaking even compared to leveling using beacons, but it will allow you to raise the floor level to the required height.
Leveling the floor when laying tiles
In addition to the listed leveling methods, mention should also be made of leveling the floor when laying tiles. This method, in fact, is not a full-fledged method, which is why we did not mention it above, but it cannot be ignored. It is used when the floor surface is uneven, but not flat.
The essence of leveling the floor when laying tiles is that if there is a slight slope or uneven surface of the floor, you can level it when laying tiles by adding large quantity solution on its base. To do this, you just need to find the lowest area of the floor and the highest one, then you need to calculate to what height it will be necessary to raise the level of the tiles in a particular area of the floor in relation to the highest point.

Measuring the floor level and preparing for leveling
In order to choose a floor leveling method and calculate required amount material, you need to measure the floor level. In order to take measurements, you need to dismantle the old floor covering, otherwise the measurements will be of no use. When the floor is ready, we check it for unevenness.It is worth noting that the floor can be uneven for two reasons: due to unevenness of the floor slab or if it was laid incorrectly (crooked) during the construction of the house. Most often, both types of irregularities occur. That is, in most houses the surface of the floor slab itself is uneven and it is laid crookedly.
To measure the floor level, you will need a long level, with which you need to check the level of all areas of the floor. First, check for unevenness on the slab itself, then check its flatness. Mark the highest point of the floor level and the lowest.
If the slope of the slab or its surface has minor unevenness, the maximum amplitude of the differences or slope of which does not exceed 35 mm, then we recommend leveling the floor using a self-leveling floor. If the unevenness is significant or the slab “goes” strongly to one side, then the only way that will help solve the problem is alignment with beacons. When you have determined to what height the floor level will be raised, check whether this is possible, since as a result the balcony or door to the room may not open, or the radiator of the battery will need to be raised up. Therefore, before taking any actions to level the floor, think through and decide all the nuances.
In some cases, if the floor plane itself is flat, but there are, for example, unevenness in the joints of floor slabs due to the fact that the seam is not sealed carefully, then the unevenness can be knocked down with a hammer drill and then this part can be leveled with cement.
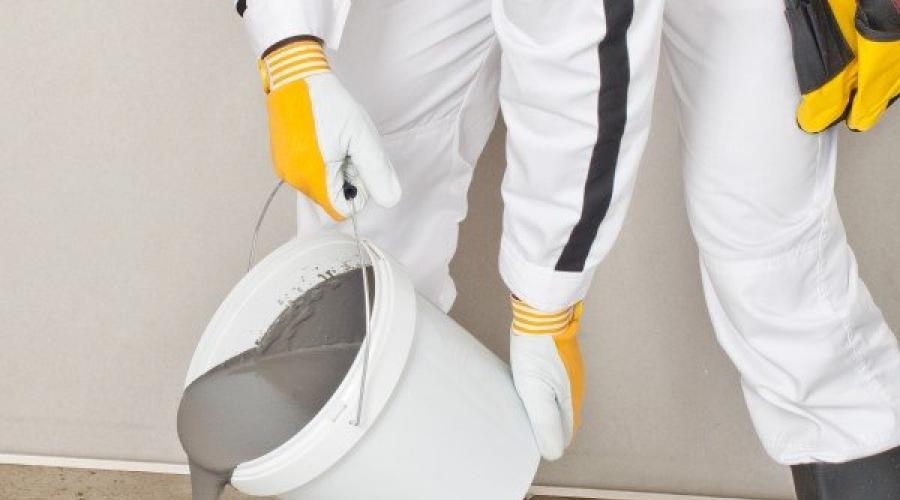
As a mixture for leveling the floor, you can use either ordinary cement, mixing it in the required proportions with sand, or special mixtures that are specifically designed for leveling floors.

How to level a concrete floor
How to level the floor according to beaconsBefore leveling the floor, it must be thoroughly swept and then treated with a layer of primer. In order to level the floor along the beacons, we will need metal perforated corners. Beacons are laid along the room. The first beacon is placed at a distance of 30 cm from the wall, the subsequent ones - at a distance of 100 cm from each other. The last beacon should also be placed at a distance of 30cm from the wall. To fix the beacons we will need cement or gypsum mortar.
So, lay the beacons along the room, adjusting them to size if necessary. Then, using slap movements, we apply the solution in parts, in increments of 20-25 cm. Beacons are placed on the solution and leveled. As soon as the beacons have set a little, the voids between the floor and the beacons are also filled with solution. When the beacons are leveled, let them fix firmly and then proceed to leveling the floor.
To level a concrete floor, you need to prepare a cement-based mortar, dilute the mixture to the so-called thickness of sour cream, keep in mind that the mixture should not be too thin, as it will be difficult to level, and it will take even longer to dry. It is also unnecessary to make the mixture too thick, since it will be very difficult for you to smooth the surface of the screed - it will be loose.
We begin leveling the floor from the far corner, moving towards the exit. We fill the first and second rows at the same time, in view of the fact that the first row is only 30 cm, and at the end we do the same with the last and penultimate sectors. The finished part of the mixture is distributed throughout the sector and evenly distributed with a trowel in order to prevent the formation of voids inside the screed. After this, using the rule, placing it edgewise, leading along the beacons, we align the part of the sector filled with solution. First, we move the rule towards you, from side to side, and when you have achieved a flat surface, then last time We carry out the rule for beacons exactly. Use the same method to further level the concrete floor. It is important to note that each subsequent pouring is carried out very carefully, since due to the different consistency of the cement mortar, unevenness may form in places of sagging, this must be monitored.
When the floor is level, let the screed dry, and we can begin further repair work. To make the floor dry faster winter time, you can turn on the heater. In general, this procedure is best carried out in the summer; the screed will dry completely in a couple of days.

Leveling with self-leveling floor
Leveling the floor with a self-leveling mixture begins with cleaning its surface. When the concrete base is cleaned, you need to carefully prime the floor surface, using a special primer used for self-leveling floors.
Then we dilute the self-leveling mixture in the proportions as indicated on the package. Despite the fact that the consistency of the mixture allows it to spread on its own across the floor, it must be rolled with a needle roller to remove any possible air bubbles inside the mixture. The height of the needles of this roller should be greater than the height of the leveling mixture layer. The filled space must be carefully rolled with a roller in different directions. After this, we let the floor dry, as a rule, this takes several hours.

Leveling with floor extensions
If you want to insulate the floor, or raise its level, then the most the best option– floor extension using wooden logs, also called leveling the floor with plywood. The advantage of this method is obvious, since it is the only easy way raise the level of the floor at which you can insulate its base, as well as conduct communications inside it.
In order to level the floor using this method, you must first inspect its surface. If there are any cracks or holes, for example in the corners, they must be sealed. Then you need to prime the floor surface. After the primer has dried, begin installation. vapor barrier film, which must be laid with an allowance to the wall with a height equal to the height of the extended floor. The sheets of film must be glued together with tape. After this, proceed to laying the lag.
To lay the joists, you need to know the level of floor deviation, and also determine to what height the floor will be raised. The logs can be attached either to anchors or to special metal plates - the method of attachment is up to you. To fix the level of the logs and to prevent them from bending, it is necessary to place wooden or plastic wedges under them, to which the logs are fixed with self-tapping screws. Lay the logs along the room, at a distance of 5 cm from the wall, in increments of 50 cm. When the logs are laid, they must be secured to the floor.
The next stage of work is laying insulation in the sectors between the joists. Use glass wool sheets as insulation. Sheets of glass wool must be cut to the size of the sectors, leaving a few extra centimeters of allowance so that they fit closely into the sector. After this, either wooden boards, or plywood, fixing them with screws.
In the first video you can visually familiarize yourself with the procedure for leveling the floor using beacon leveling.
If you want to level the floor with a self-leveling mixture, then this method is described in this video.
And finally, the third way to level the floor is by building it up. This method is somewhat different from the one we proposed and is more suitable for leveling a balcony floor, but you can borrow some basic points for yourself.
The renovation of every room begins with the floor. A flat floor is not only an aesthetically pleasing floor covering, but also a prevention of injury. Leaning furniture on a curved surface can simply collapse, thereby causing considerable harm to a person. This leads to a number of rules and specifics for leveling the floor surface.
Leveling the floor in an apartment, garage, etc.
Concrete floors are characterized by increased strength and durability, resistance to gasoline, acids and solvents, resistance to mechanical damage, moisture and temperature conditions. For these reasons, they are suitable for use not only in residential premises, but also in garages, barns, bathhouses and other domestic premises.
In an apartment, concrete is usually a rough material and serves as the basis for further insulation and laying of all kinds of coatings. In other buildings, bare concrete floors are usually left, sometimes ceramic tiles are laid on top.
When improving the floor in the garage, it is worth considering that the coating must be at least 10 cm thick to support the weight of the car. And also prevent alignment along one wall to prevent a sloping surface and further accumulation of moisture.
To extend their service life, such floors are treated special compounds, so-called toppings. The algorithm of actions is suitable as for a typical cement-sand screed.
The opposite situation occurs in a bathhouse, when the concrete base is made at an angle of 10° for better drain water.
Types of screeds
There are several ways to level the coating, applicable to each room. These include: dry screed, semi-dry screed, cement-sand screed, self-leveling mixture.
The choice of material and leveling method depends on the difference in floor height and the finished floor covering. If the floor level is different parts the room differs by more than 3 cm, then coarse cement mortars are used.
When the base is more or less even, but riddled with cracks, it is more advisable to opt for self-leveling mixtures.

Advantages and disadvantages of screeds
Dry screed
One of the most simple ways leveling that even a non-professional can handle. Its advantages:
- Cost savings – costs less than its competitors.
- Saves working time on the installation process, and also does not require additional drying time.
- It insulates living space, so it is mainly suitable for use in an apartment or residential building.
- Has soundproofing properties.
- Does not require preparation of a solution.
- The installation process can be carried out in parts, unlike competitors, when the process affects the entire space of the room.
- Possible communications are easier to lay.
This type of leveling is equally suitable for reinforced concrete and wooden floors. Materials for dry screed: expanded clay, quartz sand.
Cement-sand screed
Or the so called wet screed – classical method surface leveling, proven among many builders. A rather labor-intensive process that requires additional skills and tools. The result is a durable, perfectly flat surface for the finishing coat.
The secret to a durable floor is pouring concrete to a thickness of at least 3 cm.
There are also disadvantages, for example, a concrete floor is a dust-generating coating and cannot be removed from it. various spots and oils. But these problems arise more often in non-residential premises, because In the apartment, finishing coatings are laid on a reinforced concrete base.

Semi-dry screed
A distinctive feature of this material, in comparison with wet method, is the reduced amount of liquid used in the solution.
This led to a difference in technology and filling, and also introduced some positive qualities:
- Increased material density. Due to the lack excess moisture, there is no excess evaporation, and as a result, fewer voids, cavities and pores are formed. The result is high strength.
- The shrinkage process is eliminated.
- Setting time is reduced significantly.
- Less dirt and dampness at the work site.
Self-leveling mixture
Leveling mixture or self-leveling floors, different names one group modern means For final leveling floor. They are a fluid solution that, when poured over the floor, forms a smooth horizontal surface.
The advantages of this material are:
- Short drying time – the top coat can be applied within 10 – 12 hours after pouring.
- Possibility of spontaneous spreading.
- Low layer thickness - suitable for use in rooms with low ceilings.
A self-leveling mixture is used for floor differences of no more than 3 cm, otherwise the base may crack.
It is worth noting that such mixtures necessarily require finishing coating, due to low strength.
The disadvantage of this leveling method is that the work must be carried out quickly, because the solution tends to dry quickly.
Leveling the floor for different coverings
Laminate
With differences of more than 3 mm, you will never get an even and aesthetic laminate coating. Even the use of a special soft substrate will not help. To level the base under a laminate floor, any of the above methods is suitable, the main condition is to obtain a perfectly flat surface.
Linoleum
A less capricious material is linoleum. When laying it, it is not so much the evenness that is important, but the smoothness of the surface. Any protruding element can tear soft material. In noticeable irregularities, linoleum will lie smoothly, bringing with it only an unaesthetic appearance.
You can level the floor under linoleum using any available method.
Ceramic tile
For installation floor tiles a cement-sand base is required, with preliminary laying of a waterproofing layer. The use of semi-dry screed is allowed. In this case, the surface is further leveled tile adhesive. The basic principle of operation is the absence of floor differences.
Under any of the light coverings, large differences in the surface can be leveled using plywood sheets installed on the logs. This method is especially used to raise the floor level.

Required materials and tools
For fruitful work, it is worth stocking up on the following list of tools and materials, which may vary depending on the chosen type of leveling:
- Portland cement grade 400D20, M500.
- Sifted construction sand.
- Filtered water.
- Synthetic fiber fibre.
- Dry mixture for self-leveling.
- Bulk ingredient for dry screed.
- Construction beacons. They can be metal, plaster, or made in the form of a stretched thread.
- Building level. Many progressive builders today use laser levels.
- Container for mixing the solution. It is more convenient and expedient to use a concrete mixer.
- Mixer for preparing the solution.
- Typically, a trowel, all kinds of spatulas, rollers and other accessories for leveling.
DIY floor leveling technology
Each type of floor leveling has its own technology. The first step for everyone is preparing the subfloor, cleaning and removing old flooring, repairing possible cracks and dilapidated areas.
Detailed step-by-step instructions
Dry method:
- Primer of the concrete surface to increase the strength of the base.
- Laying polyethylene film with a 20 cm overlap for waterproofing. Sheets of film are held together with tape. Allowances for hems of 15 cm remain along the walls of the room, then they are sealed with damper tape.
- In the absence of leveling experience, it is recommended to install U-shaped profile metal beacons.
- Filling the resulting cells with granular mixture. Layer thickness – 5 – 7 cm. Leveled by the rule.
- Flooring sheet material. Plywood, fiberboard, chipboard, etc. can be used here. In this case, the joints of the material are glued with PVA glue and tightened with self-tapping screws.
Cement-sand method:
- Primer and dry the surface.
- Laying waterproofing material.
- Installation of beacons. The work is done using a level. Metal profiles, pipes, boards, beams are used as beacons - they are fixed to a dried solution at a distance of no more than 1 m from each other.
- Reinforcement with metal fittings or reinforcing mesh.
- Filling with mortar, gradually from the far edge of the room, and quickly leveling with the rule. It is necessary to move not only along the beacons, but also in a circular motion to strongly compact the material. Do not delay the process of pouring the cement-sand layer to avoid the formation of “cold joints”.
- Cutting shrinkage joints every 3 m is recommended to prevent the appearance of cracks in finished screed.
- Wetting with water during the drying process. The first time every other day, then on the second day and then throughout the week.
If on the second day you can already walk on the screed, then the beacons are removed from it and the resulting gaps are sealed with concrete mortar. This floor base is covered with a film to prevent rapid drying and cracking. Continue renovation work allowed only after completely dry after 1 month.
For the semi-dry method, polyethylene or roofing material hydroisol can be used as waterproofing. The production technology is similar to cement-sand screed with a slight difference: instead of concrete mortar A semi-dry mixture is used and it is laid in two layers.
The first layer is compacted tightly, the second layer is leveled and immediately sanded. A day later, they are cut on the finished screed expansion joints 3 mm wide. The covering is covered with film for a period of a week.
Application of self-leveling mixture
For convenience, using construction mixer The solution for filling is prepared according to the instructions on the package. The solution is poured quickly onto the primed surface and leveled with a spatula or a special roller in order to expel air bubbles.
The solution hardens within half an hour, however, at least 3 days must pass before it dries completely.

To prepare a reliable cement-sand screed solution, the following is used: M500 cement, sifted sand without any contaminants, water. Water is added at the rate of 1 liter per 1 kg of cement.
It is allowed to use ready-made construction mixtures for pouring - M150, M200, M400. The larger the number in the abbreviation of the name, the stronger the base.
To properly prepare a semi-dry mixture you will need cement, sand and water and the addition of fiber fibers. Fibers in in this case best way to replace reinforcing mesh:
- Cement and sand are mixed dry in a ratio of 1:3.
- A mixture of water and fiber fibers is added portionwise, in an amount of 80 g per layer of screed with an area of 1 m2 and a thickness of 1 cm.
- Mixing continues until the consistency of sandy loam, i.e. resemble clay sand; when squeezed by hand, no water should come out of the lump.
Deciding this way important question in repairs, it is worthwhile to carefully consider the choice of materials and leveling method, taking into account humidity and temperature conditions indoors, the slope of the base, as well as the expected operating load on the floor.
Today, there are several techniques that tell you how to level the floor, even if it has huge unevenness. They are all tested in practice. What methods are most often used?
These include self-leveling floors using self-leveling mixtures, classic screed using cement-sand mortar. The choice of one or another method of leveling the floor depends on the unevenness of the surface, changes in height, and its slope.
Eg If there are differences in height on the floor of about 50 mm or more, it is advisable to use a screed. It allows you to make the floor even, even with very strong unevenness.
If a “dry” base is needed, raised floors made of plywood sheets on joists or chipboards are suitable. This method has an advantage. It lies in the fact that there is no need to wait for the floors to dry completely, and only then proceed to the final finishing, namely laying the underlay and the laminate itself.
In other words, this method is the most suitable and clean among all those associated with leveling floors.
Naturally, each type of mixture has its own characteristics, which should be taken into account when studying their properties. If you plan to level a floor that has a wooden base, you will need mixtures that contain fiberglass.
Helpful advice ! In case of concrete base, it is better to buy quick-drying mixtures that include various additives.
A special case is made up of mixtures that are used to eliminate small defects in the base. They allow you to smooth out small irregularities, but it also happens that you have to fill cracks and recesses, the depth of which reaches 20-30 mm.
Be that as it may, the advantage of self-leveling mixtures is that they harden quickly. If the area of the room whose floors you will level is greater than 8 m2, you will have to buy limiters and use them to divide the area into sectors.
This will make pouring the mixture easier.
Floor leveling methods
The base is cleaned of putty, paint and dust that could accidentally fall on it. Having purchased an unplaned board, build logs on the base. The board should have a size of 100*40 mm. The logs are secured using anchors at intervals of 300 mm.
Helpful advice! As often as possible, measure the surface with a level in the horizontal plane to determine how level it is. If you notice a drop or slope, it can be removed by placing wooden wedges under the boards.
You can begin to create the sheathing: the logs should have crossbars that are attached using self-tapping screws. The interval is equal to the size of the sheets. Sheets of chipboard or plywood, previously treated, are laid on the logs antiseptic. Seal the seams with caulk.
« Wet" or self-leveling floor

It is advisable to use it if the height differences are insignificant (up to approximately 30 mm). In the same way, you can level the self-leveling mixture. The mixture is sold in the form of a dry powder, packaged in 25 kg bags.
It is intended for dilution with water in a certain proportion. Each manufacturer indicates the proportions on the bag, which are important not to “overdo” and not to pour more water than required. The “viability” of the solution is a maximum of 10 minutes.
Important! First of all, clean the surface from dust and other elements, apply a primer layer. If you see cracks, uneven surfaces and imperfections, seal them.
When the floor preparation is completed, you can begin mixing the self-leveling mortar, which is then poured onto the surface in parts and leveled using the rule. These actions must be carried out simultaneously, so make sure that someone will help you.
The self-leveling floor dries in about a day, but this time may be shorter. The main thing is to monitor the level of temperature and humidity in the room in which you have installed the self-leveling floor.
If you are thinking about how to level the floor with a leveler, consider the working conditions in which it can be used. Let's say that the presence of a draft and a change in temperature in the room are unacceptable, otherwise the floor may crack.
Leveling wooden floors
We suggest considering a method for leveling floors on which laminate or linoleum will be laid without removing the boards. If there are no cracks on the floor, there is no extraneous sound in the form of a squeak when walking, and it is durable, only the boards are peeling, it is easy to repair.
The main thing is to understand the quality of your flooring and joists.

So, the repair itself is as follows:
- First of all, the floor is leveled - putty work is carried out, OSB boards or plywood, a screed is constructed.
- Then the final finishing is carried out - the floor covering is laid.
- To clarify how uneven the floor is, marks are made on the walls, corners and the middle of the walls.
- If during measurements you notice a difference in height of about 5 mm, you can assume that the floor of your room is ideal. There is no need for additional alignment.
You can only do one type of work- putty the floor surface acrylic sealant, which has good ductility. But before you do this, prime the surface.
If, after leveling work, you want to lay linoleum or carpets on the floor, it is best to sand the putty surface.
Not applicable in every case acrylic putty. Sometimes you will have to apply a layer of putty, which contains PVA glue. In truth, there is one drawback expressed by the strong adhesion of the putty, which will make it difficult to apply an even layer.
Remember The more layer of putty you apply, the longer it will take to dry.
Then, a sheet of plywood with a thickness of up to 20 mm (possibly gypsum fiber board) is laid on the prepared floor surface. If GVL is used, the top of the profile will act as lags for the floor. If the width of the board is about 200 mm and the profile is distributed evenly, plywood with a thickness of 8-10 mm is quite enough.

If the difference in floor height of 2 mm does not please you, you will need to build a support for a new base, which will have the same level. You can do this as follows:
- The tape support will be logs made of beams. This method suitable if the difference in floor level is in the range of 30-100 mm.
- At the same time, “shabashkas” - linings made of pieces of timber, having different thickness.
- The gap between this type of joist depends on the thickness of the materials you choose: for example, if it is plywood, the thickness of which is 14 mm, or fiberboard sheets 18 mm thick, the gap will be 350 mm. If the sheets are thicker, the distance can be increased to 500 mm.
- They can be fastened both crosswise and lengthwise. The main thing is to ensure accurate marking of the sheets for drilling holes.
- “Shabashki”, they are also point supports. This method is acceptable in cases of small differences, since the point support is less reliable compared to tape fastening.
- Point supports are installed more often - using a 350 * 350 mm mesh type (if the plywood is 14 mm thick, chipboard is 16 mm) or a 450 * 450 mm mesh (if the chipboard is 24 mm thick, plywood is 18 mm.
On last stage a screed is constructed, it is made on the base of a wooden floor. Often, many people use the well-known cement-sand screed, it is applied only in cases where the wooden floor has reinforced concrete floor.
In other cases, it is better to use a dry self-leveling mixture, which contains special additives - plasticizers. They will make your screed plastic and elastic. These types of screeds should be applied at a thickness of about 1 cm.
Important! The surface you will work with must be pre-reinforced and primed. There should also be a layer of waterproofing material on it.
You can now begin laying or laying the final surface. Don't forget about such a thing as underground ventilation. If available ventilation grille, even though it is old, do not cover it up or cover it with wallpaper. It will come in handy. You ask what?
It's simple, it will allow the floor under the finishing to be ventilated, therefore, it will not rot.
Leveling for laying laminate flooring

There are several ways to level the floor for laying laminate - they are all similar, the principle is the same. To begin with, the difference in floor height is determined, the base surface is prepared for leveling, all irregularities are sanded and removed (cracks and depressions are sealed, the surface is sanded).
It may be that the surface distortion is slight (about 20 mm), in which case a leveling mixture is poured.
Helpful information ! If the floor in your apartment has significant differences in height, more effort will be required: remove the old floor covering, clean the base of dirt, and prime it. Only after priming and drying the soil should you start pouring the self-leveling mixture.
After taking measurements and receiving disappointing results, which indicate that it will be necessary to good alignment floor under the laminate, install the beacons at the level required to create a flat floor (plasterboard guides are not a bad option, since they are initially flat).
The beacons are installed in such a way that they coincide with the mark along the perimeter of the room, and the interval should be 600-800 mm. It is best to fasten the beacons with self-tapping screws. You can fill.
Construction mixture poured between the beacons, if necessary, level it. After the screed has dried, begin finishing work.
I want to note, that not in all cases it is necessary to use a screed to level the floor. In some, you can use a method such as leveling the floor under laminate or linoleum using cement particle boards, they are also DSP.
The base is prepared according to the same principle as in the case of a screed. Only instead of using beacons, they serve as the basis for the future floor construction boards. They are aligned on a plane building level and are attached to the base of the floor. And they are already stacked on them DSP sheets, fastened with self-tapping screws.
The gaps between them are filled with sealant. At each stage, measure the surface with a building level. That’s it, the surface leveling is complete and you can start laying the laminate. Leveling for laying linoleum
Not in all cases it is necessary to level the floor using the “wet” method, that is, using cement screed. In some cases, it is enough to use a leveling method called “dry”.
The basis of this method is plywood sheets, the thickness of which is from 12 mm. They have sufficient strength and moisture-resistant properties - this option is more acceptable if the base of your floors consists of a wooden structure.
Plywood provides excellent resistance to deflections and bends that can occur when walking on the floor, installing furniture and creating a general interior.
And the price of this material is lower compared to others. Plywood sheets have proven themselves as a material for leveling uneven boards.
Rocking, crooked standing furniture, bouncing washing machine- all this is a consequence of an unevenly laid floor. Its alignment should be the very first procedure when carrying out repairs.
Leveling the wooden base
The procedure for replacing a wooden floor is as follows:1. Using a crowbar and an ax, remove the baseboards and old flooring. All construction debris located under the floor is removed. Before laying new floors, be sure to seal cement mortar All cracks and crevices in concrete screed.
Old rotten floors are removed
2. Rotten old ones lags (wooden beams cross-section from 110 mm, used as a base for flooring) and destroyed over time floorboards are thrown away.
3. For replacement, the lag is selected timber with rectangular cross-section . In this case, the height of the logs should be 1.5 times greater than their width. The cross-sectional size of the bars depends on the width of the room in which they will be installed.

Calculation of the lag section
4. Before laying the logs, they should be treated with an antiseptic and waterproofing: drying oil or bitumen. A cheaper option would be impregnation used machine oil.
5. Wood absorbs moisture very quickly, so you should not install logs directly on concrete. They are laid on waterproofing layer(roofing felt, film or bitumen mastic).
6. To ensure ventilation, logs must be laid at a distance of 5 cm to the concrete floor or floor beams. Bricks or wooden blocks are used as linings for the joists.

Laying joists on bricks

Laying joists on wooden blocks
Important! To prevent the logs from absorbing moisture from the walls, a gap of 2-3 cm must be left between them and the wall.
7. If necessary, a layer is laid between the lags heat or sound insulation. Polystyrene foam or expanded polystyrene are excellent thermal insulators, but penetration extraneous sounds they will not protect the apartment. As soundproofing material It is better to use mineral wool.

Laying mineral wool between joists
8. To lay the logs perfectly evenly, apply along the walls using a water or laser level. horizontal markings.

Marking the walls
9. When laying out joists, you should also control their location building level. If necessary, the logs are adjusted to the required height. Distortions can also be corrected linings made of wood or fiberboard. To protect them from displacement during the operation of the floor, they must be attached to the base.
10. Floorboards are used as a subfloor. Their thickness depends on the distance between the logs.

Choosing floorboards
11. When laying floor slats, their horizontal position is also checked with a level.
Important! You should not purchase undried material. Humidity of boards prepared for flooring should be 12%. An overdried lath may crack, while a wet lath will gradually dry out and cracks will appear in the floor.
Leveling with concrete screed
Bulk mixtures are quite expensive materials, so they are used only to level out small differences. If there is a significant difference in floor height, use concrete screed.1. If present in an old screed large influxes they are removed with a jackhammer or sledgehammer. If they are left, the floor will have to be raised to a height equal to the height of the overhang.
2. Before starting to pour a new layer, old floors are cleaned of dust and debris. To prevent moisture from the solution from being absorbed into the floor, the following is laid in front of the screed layer: plastic film or roofing felt, which are placed with a slight overlap on the walls. If waterproofing is not provided, you can moisten old concrete a small amount of water.

Waterproofing concrete screed
3. To obtain a flat horizontal surface, the floors are leveled according to lighthouses: metal profiles, laid out strictly horizontally on the floor. They are placed on " stamps"(slaps of thick solution). The height of the “marks” is adjusted by level.

Beacon placement
4. Since the solution is leveled special tool– construction rule, – the distance between two beacons (guides) must be equal to its length. (The rule is a strong 1-3 meter strip of metal, narrowed along its entire length).

Alignment by beacons using the rule
5. To strengthen the screed when applying too large a layer of mortar, it is reinforced metal mesh.

Screed reinforcement
Leveling with bulk mixtures
To rough level the floor you will need a cement-based filling mixture. Gypsum mixture, capable of absorbing moisture, is mainly used for laying parquet. Expensive translucent or colored polymer solutions (« liquid linoleum") is used as finishing and are poured only onto a previously leveled surface.
Mixture for rough floor leveling
1. The technology for applying a bulk mixture of any composition is approximately the same. “Liquid” floors are poured only onto a carefully prepared surface, cleared of debris and treated primer deep penetration. They can be laid on concrete plates or cement screed. The mixture can be poured onto wooden floors or ceramic tiles.

Primer treatment of floors
2. If there is excess or lack of water, the distribution of the mixture over the surface will be uneven, so you should strictly follow dilution proportions specified by the manufacturer on the packaging. The solution should be mixed as thoroughly as possible until the lumps are completely dissolved. For these purposes, it is more convenient to use a drill with an attachment or a construction mixer.

The solution should be mixed thoroughly
3. Acceptable temperature in the room where the mixture will be used is indicated by the manufacturer.
4. The mixture begins to be poured from the farthest wall, located opposite the entrance. In order to avoid height differences, its installation should be continuous.

Pouring the mixture
5. To distribute self-leveling floors evenly, use a wide spatula or rule, mounted on the handle. In order to remove air bubbles, the solution is additionally processed needle roller.

Leveling self-leveling floors

Processing with a needle roller
Important! Rolling and leveling of floors must be done before the mortar sets. Otherwise, the drying mixture will warp.
6. Drying time liquid mixtures- 2-3 days. In order for the floors to dry evenly, there should not be too large temperature changes or drafts in the room.
One of the primary tasks when carrying out major renovations in an apartment is leveling the floors. This is especially true for housing in houses old building, which was purchased on the secondary real estate market. A typical situation is when floor slabs not only have differences within one room, but are also located at different levels in adjacent rooms. To level the floors throughout the apartment in one horizontal plane under the flooring of linoleum, laminate and other modern flooring materials, there are several technologies, most of which, after studying the nuances, are quite doable with your own hands. Which floor leveling method to choose in a particular case, based on the complexity of the process, and how much it costs, you will understand by reading the article.
How to measure the floor level?

The method of leveling the floor surface directly depends on the degree of its unevenness. It is impossible to notice unevenness with the naked eye, much less clearly mark the level of the future coating; for this you need to use special measuring tools:
- Water linear level. This is a normal bubble level long length in the form of a ruler. In order to measure irregularities on large areas, used building code or an even strip of the required length on which the level is placed. This measurement method has large errors over large areas; it is used to measure irregularities over an area of up to 2 square meters.
- Hydraulic level.
- This device is in the form of a transparent hose filled with water and having two flasks with plugs at the ends. This device allows you to accurately mark the horizon around the perimeter of the room and make marks on the walls. It cannot measure irregularities on a plane. Laser level. It's modern and, extremely easy to use. The device produces laser beams in several planes. It is enough to install it in the center of the room, and it will mark the level along the perimeter with a maximum error of 1 mm.
- Level. It is highly accurate optical instrument, which allows you to calculate the difference between two given points on a conventional plane. Such levels are used in large-scale construction to work with huge areas.
To work within one room, it is enough to use laser level. If it is necessary to establish a single floor level in several rooms, then use a hydraulic level with the required hose length.