Do-it-yourself cast-iron bath restoration. Bath restoration: which method is better, people's reviews and expert opinion. Three restoration options. Liquid acrylic: new enamel, as from production
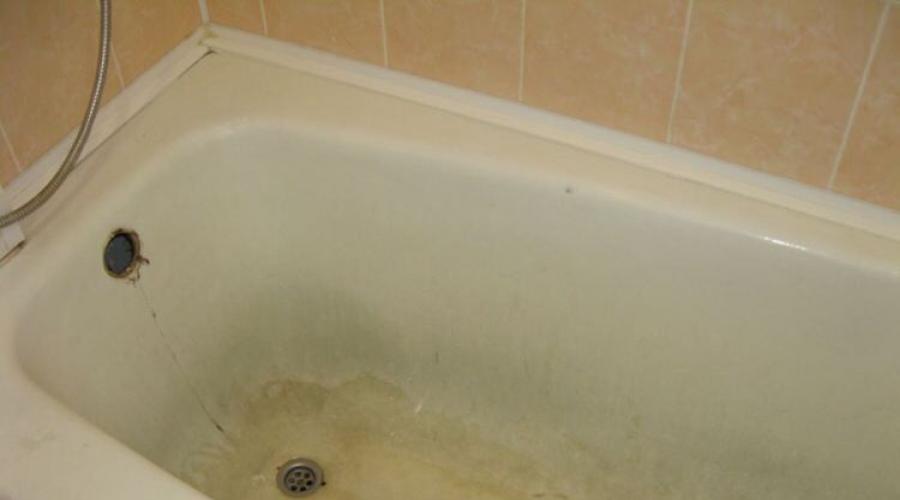
During the repair, you want to restore order everywhere, including in the bathroom. A new wall covering, a beautiful ceiling, fresh plumbing… There is only one important nuance - an old bathtub with a terrible yellowed and cracked coating, on the surface of which there can be quite terrible black chips. This element of convenience in an apartment is not so easy to change as it seems, and it is an expensive pleasure. But there is a way out. A coating that has lost its appearance can be restored, and quite quickly and cheaply. In this case, it will be easy to cope without the help of professionals. Restoring the enamel coating of a bathroom with your own hands is quite realistic and does not require a huge amount of money.
Why "save" the bath?
Before you know how to revive the old bathroom flooring without completely replacing it, you need to figure out why restore it at all. Why not just buy and install a new one?

A new bathroom costs a lot of money, and especially a high-quality, cast-iron one. Of course, you can buy an ordinary metal one, but it gives a certain discomfort to the residents living in the apartment: filling with water is accompanied by a loud sound that even neighbors hear in thin-walled houses.
You still need to manage to install a new bath, while dismantling the old one. And it's not as easy as it seems. Such work will entail a large amount of garbage, besides heavy. At the same time, women will not be able to cope with it - in any case, strong male hands are needed and those who dismantle everything will endure. And just apply a new enamel coating can, probably, everyone.

Fortunately, the factory enamel in the bathtub is quite durable, and some apartment owners do not even have to deal with such a procedure as its restoration. This can be achieved thanks to a special technology by which the application takes place. The blank of the bath is subjected to strong heating and only then is covered with a protective coating, that is, enamel. In theory, it can last for centuries, but due to the constant cleaning and treatment of the bath, this does not happen. On the contrary, the bath slowly but surely loses its appearance, the enamel turns yellow and becomes not smooth to the touch, but rough.
Yes, enamel is needed not only for beauty - it also protects the bath from the effects of various aggressive factors (for example, cleaning products, water of different temperatures). Without enamel, the metal loses some of its qualities - for example, at the site of damage, the cast iron will begin to rust, and the rust will spread further and further, destroying the product.

Attention! If damage to the enamel is not repaired in a timely manner, then rust can destroy the entire product or drastically change the appearance of the bath.
Of course, it is impossible to create factory conditions in an apartment and ideally restore the enamel, too. But it can still be reapplied, which will help return the bath to a beautiful and neat appearance. And this is without unnecessary financial and physical costs.
Note! , applied at home on its own, will not be able to serve as long as the factory one, but it is still capable of turning your old bath into a new one for quite a long time. But you need to handle it with care - it is less resistant to mechanical / chemical influences and can even change color due to contact with certain substances.

In general, now there are the following methods for restoring the appearance of the bathroom.
- acrylic coating- the so-called bulk bath. The inner part of the structure is filled with liquid acrylic.
- Acrylic liner- sold in hardware stores or made to order. Placed in the bath.
- Replacing an old bathtub with a new one.
- enamel coating- simply put, applying special paint to the inner surface of the bowl.

What will be needed?
In order to carry out restoration work, you will need certain materials and tools:
- respirator;
- brush, roller for applying enamel;
- old clothes or apron;
- rubber gloves;
- grinder or sandpaper;
- old rags;
- primer;
- acetone;
- bath restoration kit - in other words, bath enamel.

Now on the construction market there is a large selection of different enamels for bathtubs, aimed at both professionals and home craftsmen. At the same time, if you are a beginner, then it is better to purchase the simplest option - it does not require special skills to use. Such enamels are sold both in aerosol cans and in cans (applied with a brush or a small roller).

Note! It is best to use the composition that is intended for application with a brush - it perfectly covers the old coating, it is easy to work with. Aerosol products are chosen when it is necessary to restore a small chip - the enamel in this case lies unevenly.
A bathtub restoration kit usually consists of two components - a hardener and the enamel itself. There should also be a preparation that will help prepare the bath itself for painting. By the way, replacing the enamel is a great option for choosing a new bath color. The latter can be painted in blue, red, green and other colors using special colors.

Table. Bath restoration kits.
| Name | Description |
|---|---|
"Reaflex-50" | This set is aimed at professionals, it is very liquid, so it will be difficult for a beginner to work with it. To close the old coating, you will need to apply the composition several times. Restoration of the bath will take at least a week, as each layer must be thoroughly dried. But the coverage is excellent. |
"Svetlana and Fantasy" | These are enamels of medium density, they are easy to apply, without much spreading, which is optimal for an inexperienced restorer. Easy to apply with a brush. The kit also includes a preparation that treats the surface of the bath before starting work. You can use special colors. |
"Epoksin-51" | Thick, rather viscous enamel, which is applied with a brush - in the density lies the whole complexity of the work. At the same time, the enamel spreads perfectly, leaving no streaks. Does not require pre-spackling. Dry for at least 2 days. |
| A group of drugs that are not inherently enamel. They cover the surface well, are applied easily - just pour the bath with this product. |


Preparing the bath for the procedure
Before proceeding with the coating of the bathtub with new enamel, it is imperative to prepare the surface to be treated. It should become smooth and as light as possible.
Step 1. The bath is cleaned of rust. This will help special preparations based on acids. Many of them are quite effective. For example, a preparation based on hydrochloric acid will remove red spots in just 10 minutes, but it will also destroy all the remaining enamel in whole pieces. It is also important to rinse this product well from the surface of the bath and be sure to follow the instructions for use. There are also more gentle preparations that are not so fast, but still effectively cope with rust. Oxalic acid-based products work well, acting more accurately than hydrochloric acid-based preparations. Preparations of the latter type are washed off with water after 30-40 minutes.

Step 2 Next, you need to make the surface of the bath rough from the inside - either sandpaper or a grinder is used for this. The latter will greatly speed up the work. It is important to clean all chips and cracks well.

Step 3 After working with a grinder, it is necessary to wash off all dust and dirt from the surface of the bath. After that, the surface is degreased with acetone.

Step 4 The next stage is the application of a primer, for example, GF-020. The layer of this substance should be well dried for about two days.

Advice! A reflector will help speed up the drying process. And by the way, it is not necessary to apply a primer.
Step 5 Now you should warm up the bath well - hot water is drawn into it. But you can also use a building hair dryer - in this case, you do not need to additionally dry the bath.

The bathtub is now ready for resurfacing.
Enamel bath
We continue restoration work. Now we move on to coating the bathtub with enamel from the inside.
Step 1. The restoration kit is prepared for use in accordance with the instructions. The enamel should be well mixed to a homogeneous mass.

Step 2 Using a brush, the enamel is applied in long or short strokes. Long top down and bottom up, and then right-left or short bottom-up-right-left. Corners, areas near drain holes are carefully stained.

Step 3 Thus, the enamel is applied several times. Each of the layers must be thoroughly dried in accordance with the instructions.
Bath enamel prices
bath enamel
Video - Enamel bath
Chips and scratches
To restore the former beauty of the enamel, it is not always necessary to resort to drastic measures and paint the entire bath. Sometimes it's enough just to repair chips and scratches. To do this is not so difficult.

For example, a mixture of dry white with BF-2 glue will help get rid of small scratches. It is simply applied to those places where there is little damage. At the same time, it should be applied in several layers so that the latter does not protrude above the surface of the main enamel coating. It is convenient to apply the substance with a regular brush.
For deeper chips, a preparation based on nitro enamel is suitable, to which "Supercement" is added - a special construction adhesive. The mixture is prepared in a ratio of 1:1. The resulting substance is also applied in layers, each of which is given time to dry (approximately 24 hours).

Also, a mixture of zinc white with epoxy (1: 2) will help to cope with severe damage. After mixing the epoxy according to the rules, the remaining components are added to it. Zinc white can be easily replaced with fragments of porcelain. Such a mixture applied to the cleavage site will dry for at least 5 days, but it will serve for many years.
When carrying out these works, it is worth making sure that the color of the enamel and paint with which the scratch will be restored match. Otherwise, the bath will be spotty.

And finally - a few valuable and useful tips.


Attention! All chemicals used in restoration work are poisonous and hazardous to health, so personal safety measures cannot be neglected. If the work is done incorrectly, there is a high risk of getting to the hospital.
Restoration of a bathtub with the replacement of old enamel with a new one is a completely independently feasible way to restore the product to its former beauty. At the same time, the new coating will serve for at least 5 years with a careful attitude towards itself. Of course, later you will have to paint the bath again, but considering how much cheaper this type of work is than all the others, it is definitely worth it. By the way, an important factor affecting the long service life of enamel is the chemical composition of water. It is also desirable to take this into account when choosing a method for restoring a bathtub.
Restoration is a great chance to change the color of the bath
A cast-iron bathtub is a solid, durable plumbing fixture with an almost inexhaustible repair potential. If a small crack or chip appears on the surface of the enamel, it is not at all necessary to buy a new product that costs at least 10-12 thousand rubles, it is quite possible to restore the appearance and functionality of the bowl by repairing the cast-iron bath with your own hands. In this article, we will talk about 3 effective ways to restore cast iron plumbing fixtures.

Preparation for repair
If a crack, chip, abrasions appear on the enamel, and the bath itself turns yellow and becomes rough, there is no need to postpone repairs. In order for the restoration result to last longer and withstand mechanical stress, contact with water and temperature changes, it is necessary to carefully prepare the surface for work. The preparatory stage, as a rule, takes more than half of the time and effort spent on do-it-yourself enamel restoration. It consists of the following operations:
- Purification from pollution. The surface of the bath is cleaned of dust and dirt with an ordinary alkaline detergent, and then rinsed abundantly with running water.


Important! Before starting work on the repair of plumbing equipment, it is necessary to assess the feasibility of the event. If the damage is single, then you can repair the bath with your own hands. In case of extensive damage and the presence of through holes, it is better to contact a professional.
chip repair
A small chip with a diameter of up to 2 cm or a crack is the result of mechanical impacts or point impacts, it is the most common damage that can be easily repaired locally with your own hands. It is better to repair such damage immediately after they are discovered using a special putty and enamel. The technology for sealing chips is as follows:
- The area around the chip is cleaned of dirt with a detergent. It is better not to use abrasive products, as they aggravate the destruction of the enamel.


Please note that local repair of chips on the surface of the enamel gives a temporary effect, only pushing back the time of more global events. Aerosol enamels hold worse, but they are much easier to use.
If there are a lot of chips and cracks on the surface of the enamel, and rusty and limescale deposits are added to them, it will not be possible to repair the bath with a patch with your own hands. To restore the original appearance of an old, badly damaged cast iron bath, staining is applied. Before applying dyes, the bowl is cleaned of dirt, the enamel coating is removed, degreased, and then thoroughly dried. For painting use the following tools:
- liquid acrylic. A mixture for painting a cast-iron bath with your own hands consists of two components: liquid acrylic and a hardener. A compound with a thick, but plastic, fluid consistency is applied to the inner surface of the bowl by pouring or using a roller. The painted bath dries for 3-5 days, during which it cannot be wetted with water or touched. The coating is even, smooth and glossy, it serves for at least 8-15 years without turning yellow, since the thickness of its layer is at least 6 mm.


Note! To paint the bath with your own hands, it is better to use liquid acrylic, as it is applied much easier and more evenly than epoxy enamel. The disadvantage of this method is the high cost and long drying time.
Mounting the acrylic liner
If there is not one small crack on the surface of the old bath, but multiple chips and deformations, it can be repaired using a special acrylic insert. Acrylic liner in shape exactly repeats the geometry of the old bowl, it is inserted inside it, and then fixed with adhesive mounting foam and sealant. The disadvantages of this method are:
- High price. A high-quality acrylic liner is expensive, the price of an insert is more than half the cost of a cast-iron bathtub.
- Limited range. It can be difficult to choose an insert for a specific cast iron bath model, especially if it is not one of the standard ones.

The main advantage of restoring cast iron bathtubs using an acrylic liner is the effectiveness of the method, because bowls are restored with it, even if they have through holes. Such an insert will last at least 15 years, for which it will definitely pay off.
Do-it-yourself cast-iron bath repair, how to repair chips and cracks (photo, video)
How can I repair a cast-iron bath with my own hands? Preparation for repair, repair of chips, painting and installation of an acrylic liner.
Cast iron bath repair: three ways to restore
A cast iron bath is a long-term item. But over time, even the highest quality coating loses its visual appeal. Changing a cast iron bath is troublesome, so the question arises, how to repair a cast iron bath?
Of course, bathroom renovation is a rather time-consuming task and requires patience. However, many choose to refurbish rather than upgrade their bathtub to a new model. There are three main ways to restore the appearance of the bath. Let's consider each of them.

Application of new enamel

Preparing a cast iron bath for repair
To complete the work you will need:
- Drill with a nozzle for removing the old coating.
- Oxalic acid.
- Composition for degreasing the surface.
- Enamel.
- Enamel brush.
The work is performed in the following sequence.
- The surface of the bath is cleaned of the layer of the old enamel. The easiest way to do this is with a drill with the appropriate nozzle.
- If there is a water stone on the surface, it should be removed with oxalic acid.
- The surface is thoroughly cleaned of dust and degreased.
To make it easier to collect dust, you should cover all surfaces in the bathroom with old newspapers or sheets.
- Hot water should be drawn into the prepared bath and kept for ten minutes. After that, drain the water, and wipe the surface thoroughly and allow it to dry well.
- Prepare the enamel by mixing the main component with the hardener.
- Apply the first layer of enamel on a dry bath surface. Allow 20-30 minutes to dry.
- Apply the second and third coat, remembering to allow time to dry.
- The last fourth layer is reinforcing. After its application, the repair can be considered complete.
It will be possible to use the bathroom after applying the enamel no earlier than three days later.

Bathtub refinishing and refinishing
What is good about this method?
- It allows you to change the color of the bath at your discretion, choosing the bath enamel of the desired shade.
- The work can be successfully completed independently, even with modest experience in construction.
The disadvantages of this restoration method are much greater:
- The method is laborious, in the process of cleaning the enamel a lot of dust is generated.
- The resulting coating cannot be compared in terms of strength with enameling in the factory. A refurbished bathroom will need to be handled with extreme care, but even in this case, the new coating will last no more than 20 months.
Using an Acrylic Liner

Bathtub renovation with acrylic liner
To complete this work you will need:
- Inlay made of sanitary acrylic according to the size of the bathtub.
- Mounting two-component foam or special mastic.
- Silicone sealant.
This recovery method is one of the simplest and most effective. To implement it, you should purchase an acrylic bath liner.
You can achieve a good result only if the acrylic liner is of high quality. Therefore, when buying, you should definitely require the presentation of a certificate.
Repair procedure:
- First you need to prepare the liner by making holes in it for draining and overflowing.
- The space near the holes made is lubricated with sealant.
- The liner is fixed in place with two-component foam or special mastic.
- The foam should be applied evenly over the entire surface of the liner, otherwise voids will occur in which the acrylic will sag.
The consequence of such a flaw will be the rapid appearance of cracks.
Advantages of this method:
- Restoration of the bath can be carried out without much labor and quickly enough.
- Provided that a high quality liner has been used, the bath will last a long time.
- The surface of the acrylic liner is smooth and shiny, it is resistant to wear and does not lose color during operation.
The disadvantages include the need to carry out work before finishing the walls in the room. Otherwise, you will have to beat off the tiles located around the perimeter of the bath.
Using Liquid Acrylic or the "Pouring Bath" Method

Bathroom renovation with liquid acrylic
To perform restoration in this way, you will need a special composition - liquid acrylic, which is sold under the brand name Stakryl. In fact, this method is similar to enameling a bath, but the material consumption is an order of magnitude greater, which means that the layer of the new coating will be thicker. Due to the use of a modern hardener, the material spreads evenly over the surface, so it does not need to be distributed manually.
When using this method, as when applying enamel, careful surface preparation will be required. It will be necessary to thoroughly clean the bath from the old coating, degrease, wash and dry it.
Acrylic coating, unlike enamel, is not applied with a brush, but is poured over the surface (hence the name of the method). Filling begins from the upper sides, then the walls are processed in the lower part and, last but not least, the bottom.
When performing this work, it is required to disconnect the bathroom drain and place a container under the drain hole into which excess material will drain. This ensures that the acrylic is applied evenly.
The coating layer will be about 6 mm. It will be possible to use the bathroom 3-4 days after the completion of the work, as the new coating should have time to dry well.
The disadvantages of this method is its laboriousness, but the coating is better and more durable than when using enamel. This coating is more resistant to mechanical damage, and the large range of colors of the Stakryl material allows you to choose the shade of the bath to your taste.
By applying one of the methods described above, you can successfully repair an old cast-iron bathtub. Of course, if you plan to carry out repairs on your own, then this work will require time and significant labor costs. However, restoration is still cheaper and easier than replacing a bathtub.
After all, cast iron is a very heavy metal, and it is extremely difficult to transport and install bathtubs from this material. If there is no desire or opportunity to carry out restoration work on your own, you can place an order in companies that are engaged in the restoration of the enamel of old bathtubs.
Restoration of old bathtubs: enamelling, acrylic, insert

Over time, the bath loses its attractive appearance. Smudges and traces of rust appear, gloss disappears, it becomes rough to the touch. Everything says that it's time to change the old bath. And these are not small expenses. In addition, when replacing a bathtub, you cannot do without renovating the entire bathroom, and small expenses will turn into medium, or even large ones. But there is an alternative - do-it-yourself bath restoration. There are a large number of materials on the market with which you can independently update your bath with proper quality.
Bath restoration methods
Now there are three methods for restoring old bathtubs:
1. Restoration of the enameled surface of the bath.
2. Restoration with liquid acrylic.
3. Restoration by insertion.
Method 1: ordinary enameling
Cast iron and steel enameled bathtubs are the most common types of bathtubs in our apartments. They are produced in accordance with GOST 18297-96, which has been in force since 1997. According to this GOST, the guarantee for bathtubs is 2 years. But as practice shows, the enamel on them lasts no more than 10 years of use.
Enamel on baths in the factory is applied quite simply. First, the outer surface is red-hot, then the enamel powder is sifted onto the inner surface and held for some time to sinter the powder with the metal. Heat the outer surface again until the powder is melted. The result is a smooth, glossy enamel finish. It is clear that at home this method of restoring a cast-iron bath, as well as a steel one, is not suitable.
Why does enamel usually wear out?
The wear of the enameled surface occurs as a result of two factors:
- The use of cleaning products containing abrasive powders or substances with chlorine inclusions.
- The use of chemical reagents in the cleaning of water supply networks.
As a result of many years of exposure to these factors, the enameled surface of the bath becomes thinner, rougher and begins to rust.

Restoration of the enameled surface
Do-it-yourself enamel restoration is a fairly simple process. It consists of two stages: surface preparation and application of a new layer of enamel.
What will be needed for work?
You will need the following tools and materials:
- electric drill with a nozzle in the form of a grinding wheel;
- abrasive powder;
- sandpaper;
- rust converter (for example, "Tsinkar");
- degreaser (for example, "Nefras");
- lint-free napkin;
- natural bristle brushes or spray;
- respirator and gloves;
- enamel, preferably two-component (enamel plus hardener).
Preliminary step: surface preparation
A very important step. The more thoroughly the surface of the bathtub is cleaned, the better the new enamel layer will be.
- sprinkle the old enamel with abrasive powder and clean it off with sandpaper or a grinding wheel mounted on an electric drill;
- treat areas affected by corrosion with a rust converter, hold for half an hour, then clean with sandpaper;
- wash off the enamel and crumbs with water;
- thoroughly treat the bath with a degreaser using a lint-free cloth;
- fill the bath with hot water and let it warm up for 10 minutes;
- drain the water and wipe dry with a lint-free cloth; make sure that there are no lint or other foreign elements on the surface.
The main stage: applying enamel
- according to the manufacturer's instructions, mix enamel and hardener in a certain proportion and mix thoroughly;
- apply the first layer of enamel with a brush or spray;
- withstand a certain period of time according to the instructions;
- apply a second layer of enamel.
This completes the process of restoring an enameled bath with your own hands. It is advisable to withstand at least a week before the start of the operation of the bath. This is how long it takes for the enamel to fully polymerize.
The service life of the new enamel will be about 6-8 years.
Method 2: bathtub restoration with liquid acrylic
This method of bath restoration appeared relatively recently, thanks to the emergence of a special material - glass.
What do we restore?
Glass acrylic is a two-component acrylic material designed specifically for bathroom renovations. It is acrylic itself and a separately supplied hardener. When acrylic and hardener are combined, the polymerization process begins, and when applied to the surface, the composition turns into a high-quality acrylic film with a thickness of 4 to 6 mm.
Advantages of glass
Stakryl has three remarkable properties that help it quickly and effectively restore the bath:
Optimally matched coefficient of viscosity of glass helps to make an acrylic coating with a thickness of 4 mm on the walls of the bath and 6 mm on its bottom without much effort.
The fluidity effect allows glass to independently envelop the surface of the bath and lay down in an even layer.
3. Delayed polymerization
Thanks to this quality, you can calmly and relatively comfortably carry out work on the restoration of the bath, without fear that the acrylic will harden too quickly.
After curing, the acrylic surface has mechanical and impact strength far superior to the acrylic liner or enamel layer.

Work performance technology
The technology for restoring bathtubs with liquid acrylic is even simpler than the enameling process and is as follows:
1: Surface preparation
This stage does not differ from the restoration of the enameled surface. Repeat the same steps. Then disconnect the siphon and place a container under the bathtub drain, where excess acrylic will drain.
2: Apply liquid acrylic
- prepare the acrylic mixture according to the manufacturer's instructions;
- slowly pour the finished mixture onto the upper edge of the bath, as soon as the jet reaches the middle, we begin to smoothly move the jet of glass along the perimeter of the bath;
- when the circle closes, repeat the procedure, starting from the middle.
The poured restoration process must be continuous, for this you need to take a glass container of a suitable size. It’s not worth saving - it’s better to pour out a little more acrylic than it will be lacking, the excess will go into the container under the drain hole.
Acrylic is polymerized, depending on the type, from one to four days. Choose a glass with a long drying time, in which case the acrylic surface will be of better quality.
The service life of the restored bath will be about 20 years.
Method 3: bathtub restoration with an insert
The simplest, but also the most expensive way of restoration is the installation of an insert. In addition, it is impossible to completely restore the bathtub with your own hands using this method, since the liner is made in the factory.
There is an option to order the manufacture of an insert for a specific bath at the enterprise, and install it yourself.
Insert installation technology is as follows:
- thoroughly clean and degrease the surface of the bath;
- insert the manufactured liner into the bath;
- check the correctness of the docking of the drain holes;
- cut the liner along the wall tile line;
- apply special glue to the inner surface of the bath and the outer side of the liner and dock them;
- joints are additionally sealed with silicone.
After installing the liner, cold water is poured into the bath and kept for a day. After that, the restored bath is ready for use.
The insert will serve you up to 10 years.
How much will a bathroom renovation cost?
In conclusion, we will conduct a comparative analysis of the cost of bath restoration, based on the methods discussed above.
Bathtub enameling
The cost of high-quality enamel "Reaflex 50" produced by the Finnish company "Tikkurila" is 550 rubles per 1 kg. The Russian set for restoration "Svetlana" costs 750 rubles. As a result, you will have to pay 1300 rubles.
Cast restoration
Acrylic liner
The cost of the insert itself and polymer glue ranges from 2800 to 3000 rubles.
The best option is the method of bulk restoration, in which you will get a beautiful and durable coating for little money. Moreover, any of these methods is several times cheaper than buying and installing a new bathtub.
Do-it-yourself restoration of cast-iron and steel bathtubs
Restoration of old bathtubs: enamelling, acrylic, insert Over time, the bathtub loses its attractive appearance. Smudges and traces of rust appear, the gloss disappears, it feels
Several ways to repair a cast-iron bath with your own hands
A cast-iron bathtub is a plumbing item that has been serving us for more than a decade. And, despite many surface defects, it can serve the next generation.
As soon as the first signs appear in the form of rust, cracks, roughness and loss of gloss, you need to decide something. Complete replacement of the bath is a costly and troublesome business, so it is better to try to repair the cast-iron bath on your own.
Just think, replacing a bathtub entails refinishing the floor, walls, buying a new bathtub and installing it. The minimum cost is 15,000 rubles. And these are the costs only for the bath, its purchase, transportation and installation.
Most of the troubles that can befall a cast-iron bath are not as terrible as they seem, so armed with a cast-iron plumbing restoration kit, you can fix any defect.
The question of how to repair a cast-iron bathtub will be answered by three restoration options.
You can do the following with your own hands:
- applying a new layer of enamel to the surface of the cast-iron bowl;
- restoration of the enamel surface with liquid acrylic;
- installation of a new acrylic liner in the bath bowl.
First, two options are fully accessible and will not require the participation of third parties. But the last method will require the help of specialists who make their acrylic liner, although you can install it yourself.

Cast iron bowl enameling
The guarantee for a cast-iron bath is slightly higher than the life of its enamel. We often use abrasive powders and other chemicals that adversely affect the coating of the bowl.
Therefore, the most well-known method of restoration - enamelling, is the simplest and most affordable. It is he who can quickly and easily hide the yellow spots and roughness that have appeared.
- the lowest cost of the necessary materials and substances;
- the bath does not need to be dismantled;
- you can change the color of the bath by adding color to the enamel;
- subsequent repair work is not necessary;
- the method is good for both cast iron and steel.
Unfortunately, the advantages of self-enamelling are not as many as the disadvantages.
- new enamel will last no more than 5 years;
- the composition applied to the surface of the cast-iron bath dries for a long time - at least 7 days;
- the new coating is hard, therefore sensitive to impacts, which leads to the appearance of chips;
- the substance is applied in a thin layer, so the new enamel is not able to hide bumps, dents and serious chips;
- after a short period of time, the enamel will turn yellow.
If you are satisfied with the properties of the epoxy coating, it will not be difficult for you to apply it.
Prepare the necessary tools:
- a drill with an appropriate attachment such as a grinding wheel;
- sandpaper;
- abrasive powder;
- degreaser;
- natural napkin without lint;
- tassel;
- two-component enamel.
Perform all work in a respirator and rubber gloves.
Do-it-yourself enamelling:
- Thorough cleaning of the old surface: sprinkle the tub with abrasive powder and clean it with sandpaper or a drill.
- Rinse the enamel and crumbs with water.
- Treat the tub with a degreaser and wipe dry with a lint-free cloth.
- Fill the bowl with hot water and soak for at least 10 minutes.
- After the time has elapsed, drain the water and wipe the bowl again with a dry cloth. Be sure to check that there are no threads or lint left in the bathroom.
- Prepare the enamel according to the instructions: mix the enamel and hardener in the appropriate proportion (as indicated by the manufacturer).
- Apply the first layer of enamel to the surface of the bathtub with a brush. Leave to dry for the time indicated in the instructions. Often it takes no more than 30 minutes.
- Apply the second and third layers of enamel, not forgetting to allow time for drying. As experts say, you can also apply a fourth layer - a fixing one. However, it is optional. You can use the renovated bathroom no earlier than in a week. Please note that all work can be done by hand.
Liquid acrylic: new enamel, as from production
The method of restoring cast-iron bathtubs using liquid acrylic has appeared quite recently, but has already gained some confidence in professional circles.
A new substance, called stacryl, allows you to get the perfect surface that hides all the flaws of a cast-iron bath. The layer thickness ranges from 4 mm to 6 mm.

- the viscosity of the substance provides a durable layer of new enamel;
- easy fluidity provides a perfectly even layer;
- strength and high impact resistance;
- high service life, reaching two decades;
- affordable cost.
Liquid acrylic is a fairly strong and durable material, which makes it incredibly popular.
- laborious process;
- higher cost than conventional enamel.
Before you get started, remember that you can change the color of the bathtub by adding color to the acrylic. You will need the same tools as for enamelling.

- Prepare the cast iron bowl thoroughly (repeat steps 1 to 5 as for enamelling).
- Disconnect the siphon, put any vessel under the drain into which excess acrylic will drain.
- Prepare liquid acrylic according to the instructions: mix the substance with the hardener in the appropriate proportions.
- Start pouring acrylic, from any container convenient for you, onto the side of the bath. As soon as the jet reaches the middle, move the acrylic around the perimeter of the bowl.
- When you reach the starting point, repeat the procedure from the middle of the walls and again around the entire perimeter.
- The bottom is processed last.
You need to pour acrylic on the bath continuously, so take a container that is convenient and not small. While working with your own hands, do not save the liquid substance, the excess will go into the container under the drain, but the surface will be perfect, even and smooth, hiding all defects.
The time for acrylic to harden depends on the manufacturer, it often takes from one day to four days. When choosing a liquid substance, give preference to the option with the longest drying time - the quality of the new enamel will be higher.
A similar option for repairing cast-iron bathtubs is the most popular, so the price and quality are in a reasonable ratio.
Acrylic liner: brand new bathtub
This method is the most expensive, but it offers you a completely new bath without buying another product.
Unfortunately, do-it-yourself restoration is almost impossible, since the insert is made at the appropriate production facility. However, you can install it yourself.

- the restoration process is fast, without extra costs;
- high service life of a new bath;
- the surface is smooth, even and attractive;
- The new bowl is wear resistant.
Having spent a certain amount, you will receive a completely new bath without dismantling the old one.
- the high cost of manufacturing a new acrylic bowl;
- the installation of the liner must be carried out before the walls are finished, otherwise, you will have to tear off the tiles around the bathtub and mount a new one.
If the bathroom is still in the process of renovation - this option is just for you. During the installation process, you will need silicone sealant, two-component mounting foam and the liner itself.

- You order the insert from the appropriate company, which will make an exact copy of your bathroom. If the liner does not have holes for draining and overflowing, do it.
- Make a thorough cleaning of the old bowl, degrease it.
- Insert the liner into the bathtub, check the dimensions, cut the sides if necessary.
- Apply mounting foam over the entire surface of the acrylic liner and on the inside of the cast iron bath.
- Insert the acrylic liner, seal all joints with sealant.
- Once the liner is in place, fill the tub with cold water. Keep it for at least a day.
After the specified time, the bath can be used for its intended purpose.
Based on their available funds and all the advantages of each option, choose the best way out for yourself.
Do-it-yourself cast-iron bath repair
How to restore a cast iron bath? How to repair a cast iron bath with your own hands? How to restore the enamel coating of a cast-iron bath?
Over time, even a very high-quality bath coating becomes inappropriate. Unremovable stains, stains, rust, as well as chips, scratches and other damage appear on the surface. And every owner has the idea of replacing equipment. But this process is very complicated and expensive. In addition, often the old bathtubs were made of cast iron, which makes it very heavy, therefore, even the removal process will not be the easiest. Therefore, many are trying to restore old bathtubs.
Fortunately, even a very damaged bathtub enamel coating can be restored, because the bathtub retains its performance characteristics completely. Thanks to modern technology, it is possible to restore the old enamel coating. But is it worth it?
Does it make sense to restore old bathtubs?
Before starting the restoration, calculate how much a new bath will cost
To understand whether it makes sense to repair your old bath, you need to estimate how much it will cost to replace old equipment and, accordingly, draw a conclusion about the feasibility. To do this, you will have to add to the cost of the bath the cost of dismantling old equipment and delivering new equipment, as well as going up and down from the floor, in the case of living in an apartment. In addition, installing a new bathtub also costs money, but often, in addition to installing equipment, it is necessary to repair the old wall and floor covering, partially or completely.
Based on the procedures described above, it turns out that the replacement of the bathtub will entail a partial or complete renovation of the bathroom. Therefore, the replacement of the bath makes sense during the renovation of the apartment. Otherwise, it will be much more profitable to reanimate the old bath.
Often, not everyone can afford the impressive replacement costs, so we will consider options for restoring an old bathtub. At the moment, there are only three recovery methods:
- renewal of the enamel coating by manual application;
- applying liquid acrylic (glass);
- installation of the finished acrylic liner.
Before you repair an old bath, you should consider each process separately, because they have their own characteristics. But first you need to understand the cause of enamel wear.
What are the causes of enamel wear?

The cause of enamel wear is considered to be poor water and poor bathroom maintenance.
Over time, the enamel coating is affected by various factors that contribute to premature wear, but the main reasons are:
- poor quality of tap water, the content of aggressive substances and untreated abrasive particles in it;
- the use of abrasive and chlorine-containing substances and materials during the cleaning of the bath;
- if chemical reagents are often used to clean water pipes, this also negatively affects the enamel.
All these conditions, of course, do not act immediately, but over time, the enamel coating becomes thinner, rust appears from under it, and the surface becomes rough and unpleasant to the touch.
From this it is easy to conclude how to delay (alas, inevitable) enamel wear as late as possible.
Restoration methods
When the moment when the bath cover became unusable nevertheless came, and the complete replacement of the font was deemed inappropriate, it's time to choose one of the restoration methods.
Enamel application

Applying enamel to the surface with a brush
Among all the methods of restoration, the application of enamel is the oldest and most used method. This method is very similar to painting, except for the material used, because special enamel is used during the restoration. Among the enamel paints for restoring baths, there are two types:
- professional enamels for industrial application - they are very liquid and are most often applied by spraying in several layers;
- simple enamels for manual application - are used for independent use and have a thicker structure, which allows it to be applied with a roller or brush in 1-2 layers.
Among the advantages of this method of restoring damaged coatings are:
- low cost of application and material;
- during repair, dismantling of equipment, drain and overflow hoses is not required;
- It doesn’t matter which bath is cast iron or steel, the enamel is suitable for both types.

Enamel in cans is used for local restoration
Unfortunately, in this type of restoration there are more disadvantages than advantages, among them are:
- the post-repair period of operation of the renewed coating does not exceed 5-8 years;
- due to the increased fragility of the new coating, it does not withstand impacts that can lead to chipping;
- the drying time of the updated coating of the old bath is 5-7 days;
- over time, yellow spots appear on the coating or the entire surface becomes yellow;
- since the enamel is not applied in thick layers, it is impossible to hide defects such as dents, chips, bumps, etc.
Do-it-yourself repair of an old bathtub with enamel paint is the cheapest and least quality, since the updated coating is much softer than the factory one. Therefore, surface care must be gentle.
Tip: Instead of using abrasive and chemical cleaners, as well as hard sponges, use a mild soap solution. In addition, it is strictly forbidden to hit the surface with any metal objects and fill the bath with very hot water. A set of water should start with cold and gradually add hot.
Restoration with liquid acrylic

Liquid acrylic has a long service life
Restoring an old bathtub with two-component acrylic is the newest and easiest method.
Reference: Stacryl is used as a restoring liquid, which is a two-component acrylic filler used directly for bathtubs. The composition of the liquid includes acrylic and a special hardener, during mixing of which the polymerization of the material occurs.
The application process is quite simple. Diluted stacryl is gradually poured onto the previously prepared surface in an even layer, which forms a reliable coating on the surface. This recovery method has the following advantages:
- Coating durability. If the procedure for applying and operating conditions of a new coating is competent and thorough, then the service life can be 15-20 years;
- Elimination of defects. Due to the application of a new coating with a sufficiently thick layer, which is 4-6 mm, the main part of surface defects is eliminated. For example, chips, dents, pores, etc.;
- Perfectly smooth glossy finish. Since stacryl is inherently a rather thick material, it fills and eliminates various defects when spreading, an almost perfect glossy coating is formed on the surface;
- The speed of the operation. Liquid acrylic is very easily and quickly applied to the surface due to the extreme simplicity of the technology;
- Absolute security. Stakryl does not have sharp unpleasant odors, which allows it to be used even in places with poor ventilation. Using this material, you can not be afraid for the health of relatives, even if there are allergy sufferers, the elderly and children in the house.
The disadvantages of this method of restoration include:
- Finishing an old bath in this way has a long drying time, which is about 3 days. During this period, it is forbidden to touch the bath and, in general, come close so as not to bring various debris to the surface in the form of dust, water, hair, etc.;
- Another disadvantage is the high cost of finishing compared to enamelling. Although these costs are justified by a long service life and a more wear-resistant coating.
Installing the acrylic repair liner

Acrylic liner is stronger than liquid acrylic
Old bathtubs are also repaired according to the “bath to bath” method using a special acrylic insert, which is glued inside the old equipment. For the operation, a special adhesive foam is used, it is applied to the surface of the old bath, after which the liner is installed. If all preparatory and repair procedures are performed correctly, then the service life can be 15 years.
Among the positive qualities of this restoration method are:
- the strength of the acrylic liner is much higher than that of the enamel coating;
- the new surface completely hides all possible coating defects;
- yellow spots do not appear on the acrylic liner over time;
- this method of restoration allows you to combine all the positive qualities of cast iron and acrylic bathtubs.
Despite all the advantages of this method, there are also disadvantages:
- before installing the acrylic insert, you need to disconnect the bathtub from the siphon, which is quite difficult to do with old products;
- in the case when the bath is made of “thin cast iron”, which can bend, the installation of the liner is prohibited, since during the bending of the equipment the integrity of the adhesive composition may be violated and the liner may fall off;
A few words about preparations

In all restoration options, a preliminary cleaning of the surface is necessary.
Although all restoration methods differ from each other, the preliminary preparation of surfaces is almost the same. So how to make an old bath new and what is required for this:
- First of all, before the start of restoration, a complete cleaning of the surface of the bath is carried out, that is, all complex contaminants are removed;
- Then all surface defects are smoothed out, namely scratches, tubercles of the fossa, and the entire surface is polished. This procedure is performed using fine-grained sandpaper;
- Immediately before application, the resulting dust and debris is cleaned, and then everything is degreased.
Important! Grinding and degreasing increases the adhesion of the material to the surface, and, consequently, the quality and durability of the finish.
How to care for the restored surface?

Use non-abrasive detergents
During the care of the bathroom, the use of various materials is strictly prohibited, which include:
- Use of any abrasive substances, such as cleaning powders. After all, scratches form on the surface, and the coating quickly loses its original appearance;
- The ban includes household chemicals, which include: technical alcohol, ammonia, acetone, formaldehydes, solvents and strong acids;
- Cigarette stains and small scratches (up to 2 mm) are removed with “zero” sandpaper, that is, the smallest;
- Cleaning with metal brushes and dry cleaning is also prohibited.
- It is highly undesirable in restored baths to wash pets, dye hair and get mousses and varnishes on the surface.
To the question "How to make a bath new?" we can responsibly say that everything depends on care, restoration is already a consequence of improper cleaning that has been going on for many years. Therefore, in order for the bath to be like new, you need:
- The bath is cleaned only with a soft cloth or sponge, which will help keep the glossy surface perfect for as long as possible;
- Rust stains are removed with a solution of vinegar or lemon juice;
- For cleaning, a mild cleaning agent is used, which is applied for 7-10 minutes, after which it is removed with a soft cloth and a stream of water;
- In hydromassage systems, cleaning is a little different. The bath is filled with water with the addition of a cleaning agent and turned on for 5-10 minutes, after which it is left with liquid for another 10-15 minutes. Then the liquid is drained and everything is washed with a jet of water and with a soft cloth.
We draw conclusions: restoration or replacement?

Use a soft cloth or sponge to clean the tub
If you still have doubts about how best to cover the old bath, then you should seek the advice of specialists or study their reports. Of course, the choice is up to the owner. If the repair is required as a cosmetic and for a short period of time in order to make a replacement during the repair, then you should choose the cheapest option, that is, manual enamelling. But when you need a budget, but durable coating, it is best to use stacryl. The latter method is the most expensive and is not suitable for temporary repairs.
So that the question of how to restore an old bathtub does not arise for a very long time, only high-quality and proven materials must be used for repairs and strictly adhere to the processing technology. You can see the nuances of technology in the video.
What to do if the bathtub is no longer presentable, and there is no possibility or desire to install a new one (a major overhaul during replacement is almost inevitable)? There are several technologies that allow you to make a new one out of an old bath - to renew the coating. Restoration of the bath is possible with your own hands, you just need to choose which specific method you will use.
Ways to restore the bath, their advantages and disadvantages
Do-it-yourself bath restoration can be done in three ways:
- painting with special enamel;
- liquid (bulk acrylic);
- insertion of an acrylic liner (bathtub in the bathroom).
If we talk about independent work, then most often they restore the coating of the bath with the help of painting or self-leveling acrylic. It's just that the cost of an acrylic liner is about 80% of the total amount that firms charge for this procedure, so rarely does anyone want to understand the intricacies. In addition, if you install it yourself, you will void the warranty. However, by this method, you can update the bath with your own hands.
Enamel painting
Now for the pros and cons of each method. Enamel painting is the cheapest option, but also the most short-lived. Such a coating lasts for several years - from 3 to 5. The specific figure depends on the thoroughness of the preliminary surface preparation and the quality of the paint.
The painting process is not the easiest - to get a good result, you need to apply several (at least three), and each of them has to be "earned", removing sags, streaks, smoothing out bumps. All this takes time and patience. But, as a budget option, the method is not bad. After the paint begins to peel off, it is removed (heated with a building hair dryer, removed with a spatula) and, after surface treatment, the bath can be painted.

The composition of the enamel has a very sharp persistent smell that lasts for a long time. It is better to work in a respirator, but it is advisable not to open the doors - the paint will dry faster, it will be more difficult to fix.
By brand of paint that is used to paint the bathroom. First of all, this is Tikkurila REAFLEX 50 (Tikkurila Reaflex). Bi-component enamel. Not cheap, but high quality. Feedback on its use is positive. In principle, the quality of the coating depends on how accurately the proportions are observed when mixing the components. You can't pour less or more. It will only get worse.
There are other enamels - organosilicon, which says "for baths." Others cannot be used, as they can release harmful substances when in contact with warm water.
Bulk bath
Restoration of a bathtub with the help of self-leveling acrylic is becoming more and more popular. This is a two-component composition that is mixed immediately before use. The cost of the kit is about $ 50 (more or less depends on the size of the bowl). As in the previous version, the durability of the coating depends on the quality of the surface preparation. And it should not have any pollution, greasy stains, and the surface itself needs to be even and rough. The process of applying the composition is simple - it is simply poured in a thin stream from a small container, and it levels itself. On the walls, the layer is thinner, on the bottom - thicker. The ideal state of affairs for operation. If everything is done correctly, such a coating will last up to 5-7 years, although manufacturers say that the service life is more than 10 years, some even say 15 years.

Bulk bath - so they say for good reason. Acrylic is simply poured onto the boards
In addition to durability, this material also pleases with the absence of smell. Rather, there is a smell, but very weak, almost imperceptible, so it is comfortable to work with it.
About the materials that can be used to restore the bath at home. Basically there are reviews about two brands: Stakril (Stakril) and Plastall (PlastAll). Both materials have a good reputation (if done right). There are a large number of cheaper brands of liquid acrylic on the market, but they rarely have hygiene certificates. And without documents it is better not to take risks.
bath insert
The plus of the “bath in bath” option is the durability of the coating - up to 15 years, but the guarantee is usually given for 2-3 years. However, this method is not so simple either. Installing an acrylic liner is both easier and more difficult at the same time. Firstly, there are so many liners for standard bathrooms, but not everyone has them. Secondly, they cannot be placed on thin-walled metal or “light” cast iron - the metal is thin, walks under load, which is why the liner quickly separates from the base and bursts. Since it is these specimens that most often have to be restored, firms simply “forget” about this moment.

There are three other downsides to using the bath-in-tub method. They are not necessarily present, but can be and lead to damage to the liner, so it is desirable to know about them. So, what can adversely affect the life of the acrylic liner in the bathroom:
- The molded liner has an ideal geometry, and the baths, most often, have deviations. In places of these inconsistencies, cracks usually form.
- Acrylic sits on a special two-component foam. Although it holds the load better than the construction one, it can still be crushed. In these places, voids form, and they lead to the appearance of cracks.
- At the installation sites of the siphon and overflow, two containers are connected. It is very important to carefully seal this joint. Firstly, because the water will flow to the floor, and secondly, it can flow into the voids, bloom there and spread the corresponding “aromas”.
In addition to all the nuances of installation, it is important to choose a quality liner. And this is very difficult. Sanitary acrylic is expensive. Therefore, the liners are sometimes made very thin or made of cheap porous and brittle acrylic, sometimes made of coated fiberglass.

The essence of the bath in the bath method
The thicker the acrylic layer in the liner, the higher the price. In cheap liners, the thickness is very small - 0.5-1 mm, in medium-quality ones it is 2-3 mm, and it is very difficult to find an insert with 4 mm acrylic, but they are the most durable. When calling firms, be interested in the thickness of the liner at the bottom. If they say that 5-6 mm or even more, they are deceiving you. They just don't do that and there's nothing more to talk about. The second thing you need to ask is the availability of a hygiene certificate. Sometimes the liners are molded from counterfeit material, and it is very short-lived - it cracks after a few months. Such a product does not have documents, although the “leftists” can give it. But still... The next stage of quality control is visual. When visiting a company from which you plan to purchase a plastic bathroom liner, inspect a few pieces. They should be perfectly even, and the color should be snow white. Not greyish, not greenish or yellowish. Snow white. No shades. In this case, we can hope that the bathroom restored by him will serve for a long time.
Training
Preparing a bathtub for restoration is important in any case. Even if you are going to put an insert. Good adhesion (adhesion) with foam is also necessary there. And in the case of using enamel or acrylic, preparation plays a very important role.
If you look at the description of the work of companies involved in the restoration of bathtubs, then they have a preparatory stage - this is to remove the drain and overflow, walk well over the entire surface with sandpaper with abrasive powder, wash and dry. If there is, repair the chips with automotive putty. Sometimes they add that it is necessary to degrease the surface with a solvent. That's all, then enamel is applied or acrylic is poured. All work takes a maximum of 3-4 hours.
When studying reviews of self-restoration, a different picture emerges - there are much more stages and preparation is often delayed for a day. There are two ways. The first is to remove the top layer with a grinder and petal sandpaper (remove the top layer of enamel, and not clean to the metal). After removal of dust it is possible to paint.

The second way is to remove contaminants with acids, alkalis, solvents. Both methods have been tried and work equally well. You choose what is best - dust and sound when processed with a grinder, or smells when processed with chemistry.
Here's what to do before restoring enamel using a chemical cleaning method:

Application of poured acrylic
Restoring a bath with bulk acrylic is perhaps the easiest way to update it (although not the cheapest), you just need to know a few subtleties.
The first point concerns the density and temperature of the material. A normal polymerization process requires a temperature of 22-26°C. In order for liquid acrylic to spread normally, it must stand for at least a day in a warm room. During this time, the composition will reach the required temperature. There is another option - put in a bucket or basin with warm water (not hot, but warm). Only in this case there is a possibility of overheating. Then it will be too fluid, the layer on the bath will be much thinner than required. So we try to bring it to the right temperature.
The second point is the absence of any drafts. Good craftsmen work indoors. They even sand the enamel with a grinder or treat it with acid. They do it in respirators, which we advise you. But they need to hurry, because for them time is money, and the owner has nowhere to hurry. If you are doing the restoration of the bathroom cover for yourself, you can do all the dusty or “odorous” work with the doors open and the ventilation turned on, then close the doors and wait until the temperature reaches the desired limit of 22 ° C or a little higher.

The third point is the exclusion of water droplets and dust. While the room is heating, it is necessary to wrap all the taps with polyethylene, completely eliminating the possibility of water ingress. In addition, it is necessary to wrap the shelves, heated towel rail or other devices and objects that are above the bathtub with a cloth. This is necessary to prevent the formation of condensate, drops of which can damage the surface of an uncured filling bath. Also: during operation and polymerization (from two to five days), the doors must be kept closed. So you keep the required temperature, and also reduce the possibility of dust, debris and insects on the surface. It is very disappointing when a midge or a fly sits on a beautiful white surface. It is almost impossible to remove it without a trace. After complete solidification, you will have to sand and fill again, but a trace usually remains - there is not enough qualification.
When the temperature in the bath has risen to 22 ° C, a film or paper is placed under the outer rim of the bath, a clean container is placed under the drain hole, into which excess material will be drained. If the bathroom is tiled along the edge, so as not to get dirty, it is pasted over with masking tape, making sure that the edge is even.
For further work, you need a regular or rubber spatula about 10 cm wide, a plastic container with a volume of 500-600 ml (a beer glass will do). A jar with acrylic heated to the desired temperature is opened, the remains of acrylic from the lid are carefully removed with a spatula and sent to the jar. Then the material is also cleaned from the walls. All walls must be clean so that no acrylic remains on them that have not been mixed with a hardener.
The hardener that comes with acrylic is poured into the jar, mixed for 15 minutes. You can interfere with a planed wooden stick or a nozzle on a drill at low speeds. It's safer with a stick - guaranteed not to damage the jar or splatter the material. If you decide to use a drill, the nozzle should not have a burr or sharp protrusions, the speed should be the lowest. When stirring, work well on the bottom and edges.

Leave the mixed naive bath acrylic for 10 minutes, then stir again for 5 minutes. It is necessary to work either without a shirt or in clothes that will not touch the edges of the bathroom.
We put the jar in the bath, take a container, pour the composition from the jar into it. From the glass we begin to pour onto the side from the far edge of the bathroom, bypassing it on three sides. The composition slowly flows down, enveloping the surface, distributed in an even layer.

It is impossible to pour onto the side exactly under the wall, and the edge looks ugly. We take a spatula, carefully distribute the composition, covering the entire surface. He straightens himself out.

Having spilled three sides along the side, we begin to pour just above the place where the old coating is visible. We pass again on three sides. Usually two or three passes are enough to cover the entire surface, in some places you can touch up a little with a spatula, directing the material to the right place.

The last to fill in the near side. It starts to drip, so work carefully. The process is the same. First on top, then a couple of times a little lower.
Final touches. We draw along the bottom of the bathroom with the angle of the spatula in a zigzag motion. This will help to evenly distribute the composition, to avoid sagging. Finally, with a spatula, remove the drops that hung there from the outer edge of the side (just draw the blade of the spatula along the side).

The bath is left for 48 hours. After that, you can remove the adhesive tape, film, paper, which is laid out around. Everything, the restoration of the bath with your own hands is completed, but it will be possible to use it in another three days.

This is a bath "before" and "after" restoration with bulk acrylic
Bathtub enameling at home
Good compositions for enameling were described above, so it is advisable to use them. There are instructions for use on the can, but the rules are practically the same as for ordinary painting. Only the preparation is unusual, but it has already been written about.
Some firms offer to prime the surface before applying enamel to the bath. If there is such an opportunity, it should be done. The primer is applied in the same way as enamel, after drying (the period is indicated on the can), polished to smoothness, then cleaned of dust, washed, dried. Next, the enamel is applied.
To distribute the composition, you can use a good natural bristle brush or a small foam roller. So that the bristles do not come out of the brush, soak it for a day in water and take out everything that comes out with your hands. There are no problems with the roller.

A hardener is poured into the main composition. Measure exactly as recommended, no more, no less. Stir well, paying special attention to the bottom and walls. When using a roller, some of the enamel is poured onto the bottom of the tub - it's easier to work with. With a brush, the composition is taken from the can. They try to apply enamel or primer evenly, without leaving unpainted spots or streaks.
After priming, grinding is required, followed by dust removal, and after applying the enamel, you need to look at the results. If everything is smooth, you can stop there. If the appearance does not suit you, you need to process the sandpaper again. leveling the bumps and repainting. Sometimes up to 4 layers are needed.
Self-installation of acrylic liner (inserts)
Restoration of a bathroom using this technology has its own peculiarity: if the edge of the bathtub is tiled, it must be removed. Not the most pleasant moment. You can do without removing the tile if the edge of the bathroom comes out from under it by at least 1 cm. Then the liner along the edge can be cut. Cut it with a grinder or a jigsaw along the marked line
When removing a tile, it is cut along the wall with a grinder with a diamond disc. Then, with a perforator, the edging is gradually beaten off. Next, remove the siphon, clean the drain and overflow hole from dirt. We measure their position in the bathroom - the location must be transferred to the insert. The match must be perfect. In the marked places, holes are drilled using a crown of the appropriate diameter, put on a drill.
We proceed directly to the installation of the acrylic liner:
- In the bathtub, around the drain and overflow holes, we apply a solid strip of acrylic sealant. We do not regret the sealant - it will prevent leaks.

- With a special foam (FOME-PRO) we apply strips on the surface of the bath. At the bottom - 4-5 pieces along and with a step of 5-7 cm transverse stripes. On the side surfaces, with entry to the side - three strips in the corners, and on the sidewalls they make a cage with a step of 5-7 cm. Two strips are laid on the side. In general, the foam should be evenly distributed.

At the bottom we make a "grid" of special foam


- We insert the liner from above, trying not to shift the foam on the sides. It is necessary to lower it in the center, carefully.

- We smooth the liner along the entire length of the sides, and on the walls and at the bottom. The bottom must be pressed especially carefully.
- Silicone will come out of the drain holes. We delete it.
- Special grilles are placed on the drain and overflow - they have a special fastening, since the thickness of the bath has become much larger.
- We fill the bath with cold water, leave for 8-12 hours - the time of polymerization of the foam.

- Installing the boards. They are placed on mounting foam, the joints are sealed with sealant.
- The bath is ready.
Liquid acrylic is a modern material with which you can qualitatively restore the bathtub with your own hands. It consists of a base having a sufficiently high density and a hardener. Can be used to restore steel, cast iron and acrylic bathtubs.

Materials and tools
To restore the bath, you will need bulk liquid acrylic, plumbing cleaners and degreasers, soda. Please note that liquid acrylic is sold in containers designed for bath sizes - 1.2, 1.5 or 1.7 m.
You need to prepare a tool for work:
- grinder;
- drill;
- whisk nozzle;
- pliers;
- sandpaper of various grain sizes;
- rubber spatula;
- respirator;
- a vacuum cleaner;
- sponge
- gloves;
- torch.

When using a drill to grind the surface of the bath, you will need a special nozzle.
Note: a building hair dryer and a clerical knife will come in handy for removing non-factory enamel if the bathtub has already been restored to it.
You also need polyethylene to protect the floor and walls (you can use rags or newspapers).
Bath preparation
The appearance and service life of the applied coating will depend on the quality of the preparation. First, the overflow and drain are removed. A grinder or a drill with a grinding nozzle must carefully treat the surface of the bath. For this, sandpaper for rough work 40-N or 32-N (according to GOST 3647-80) is used. Emery will help remove the resulting water deposits. The surface after sanding should be rough to ensure good adhesion of liquid acrylic.

Note: non-factory enamel, applied earlier for the restoration of the bath, is removed with a clerical knife after heating with a hair dryer.


The bathtub needs to be cleaned and washed off the remnants of debris. Then the surface is treated with a sanitary ware cleaner - the poured agent must be spread with a sponge over the entire surface of the bath, including the installation site of the removed overflow.


The bath is washed again and left to dry. After drying, proceed to the next important stage of work - degreasing. Soda is poured into the bath and carefully rubbed with coarse sandpaper over the entire surface.

Maybe degreasing will need to be done not once, but two or three times. You have to work with gloves. Then the bath is thoroughly washed with a jet of water from the shower.

Before starting the next step, you need to remove the siphon.

The installation site of the siphon must be cleaned, degreased and rinsed from soda residues.

The faucet and shower are covered with a bag and fixed with adhesive tape - water should not get on the applied layer of bulk liquid acrylic until it dries completely. Tiles and shelves above the bathroom rag are cleaned of dust particles. Sanding dust must not be allowed to get on acrylic.


After completing this stage, the bath must be thoroughly dried with a hairdryer. Particular attention is paid to places where water can collect: the joints of the tiles and the bathtub, under the side, which is installed at the junction of the tiles and the bathtub. It is better to remove the side and restore the bath without it. The cement seams at the junction with the bathroom are well dried with a hair dryer.


To eliminate defects in factory enamel (cracks, chips), a quick-drying automotive putty is used.

The composition is stirred and applied with a rubber spatula to the damaged areas, after which it is allowed to dry.


While the putty dries, cover the floor under the bathroom and the tiles at the joints with polyethylene or newspapers, which are fixed with adhesive tape.

So when pouring, liquid acrylic will not spoil the floor and wall tiles.
After the putty dries, these places are covered with fine sandpaper. A vacuum cleaner removes dust particles from the bath.

With a degreaser (acetone) wipe the places of putty cracks and chips. It is also necessary to wipe with acetone the places where the overflow and siphon are installed. A container is placed under the drain hole (you can use a cut plastic bottle). Excess liquid acrylic will drain into this container.

Coating
After completion of the preparatory work, they begin to prepare liquid acrylic. The hardener is added to the material in parts and thoroughly mixed with a drill with a whisk attachment.
It is necessary to achieve complete mixing of the two components, not forgetting about the material in the corners and at the bottom of the jar with liquid acrylic. Otherwise, the layer of applied acrylic will dry unevenly. Stir the composition for 10 minutes.
Important! Do not forget about the pot life of the finished mixture, which is indicated on the package. During this time, you need to complete the work.
Before pouring, the composition is allowed to stand for 5-10 minutes. To work, you need a plastic container into which acrylic is poured. You can use a cut and well-wiped hardener bottle. Work is performed in medical gloves.
Note: adding color paste will allow you to get the desired color of the composition. Color paste by weight should not exceed 3% of the total mass of the composition.
The composition is poured around the perimeter of the bath from top to bottom.


Going down, they help themselves with a rubber spatula, with which acrylic is rubbed into the surface of the bath. Having achieved full coverage with liquid acrylic, a spatula makes zigzag movements along the bottom of the bath. Then the composition is leveled with even movements from the wall towards the drain.


The bath is left for 5 minutes. The light is turned off and using a flashlight, the surface of the bathtub is checked for defects or irregularities (streaks) that need to be leveled with a spatula.


Important! When mixing the composition, air bubbles could form. To remove these bubbles, the surface of the bath is blown with a hair dryer at low speed with quick movements.
After 10 minutes, the surface is checked again with a flashlight. The bath can be used 24-48 hours after complete drying. Until then, the bathroom must be closed. The drying time of the composition depends on the technical characteristics of the material and the temperature regime in the room.
Note: Some modern liquid acrylics take 12-16 hours to dry.
Summary of work
As a result of the work done, you will receive a completely restored bathtub with a beautiful appearance, which is guaranteed to last at least 10 years. After each use, the bath should be washed with special acrylic care products, dishwashing detergents or liquid soap.
Pros and cons
Advantages of bathtub restoration with liquid acrylic:- long service life;
- beautiful appearance;
- smooth surface;
- excellent performance characteristics, primarily mechanical strength;
- possibility of restoration in the future.
The disadvantages of this technology include:
- long time required for complete drying of the surface;
- specific smell when applying and drying liquid acrylic;
- the need to purchase bathroom care products.