Do-it-yourself water supply from polyethylene pipes. Step-by-step instructions and useful tips. Installation of polyethylene pipes: detailed instructions Laying polyethylene pipes snip
For laying water pipes on personal plots Polyethylene multilayer pipes are often used. Pipes are produced using a method without using high pressure, due to which the pipes become flexible and durable.
The abbreviation "pnd" stands for polyethylene low pressure. This marking indicates that the pipes were manufactured without the use of high pressure. Suitable for laying water pipes drinking water and serve cold.
What are HDPE pipes made of:
- There are several layers, the first one is the inner or cross-linked polyethylene layer. Formed by stitching the edges of the workpiece under the influence of high temperature;
- adhesive: the layer is strong, designed to withstand water pressure, so the pipes can be installed in summer cottages and garden plots for organizing irrigation, etc.;
- Between the adhesive layers there is an air cushion or oxygen barrier. Pipes can be called durable, but subject to the presence of a protective layer. Then you can install an external water supply system (in an open way);
- the outer layer of polyethylene is a durable layer that provides reliable protection. From the information indicated on the front of the pipe, you can learn about the stitching method and the type of pipe (marking: numbers, letters).
Selection of polyethylene pipes
To install a pipeline according to all the rules, you need to start with choosing polyethylene pipes. There have been cases when everything was done correctly, but the pipes began to leak after just a couple of years of operation. Although such water pipelines must cope with loads for several decades. What is the reason? It turns out that you need to know how to choose the right pipe. There are pipes on sale that are made from plastic waste through recycling. Such pipes will be 2 times cheaper, but there is not much benefit from them: the strength is low, and the water flowing from such pipes “catches” the pungent smell of plastic. You should not hope that the smell will disappear over time.
That's why. Before you begin installing the water supply system, you need to understand and find out how to choose pipes:
- We inspect the pipe: if the product is not marked (there are no letters and numbers), there are inclusions and stripes, there is a strong unpleasant odor, they are unsuitable for laying a pipeline. Such materials are used only for supplying process water.
- Polyethylene pipes intended for supplying drinking water are painted only black, with a blue stripe (one or more) running along the top of the pipe. The color is rich, uniform, the surface of the pipe is smooth, without dents or bulges. Wall thickness - according to GOST (18599-2001), the diameter of the product, information about the manufacturer and the strength of the product must be indicated.
- Marking 100 - pipes are strong and dense, withstand higher pressure than pipes marked PE-80.

Using HDPE pipes
According to regulations and standards, polyethylene pipes are used:
- for supplying drinking water up to 40 degrees;
- for transporting technical water, up to 40 degrees;
- for gaseous liquid medium(transportation), provided that the temperature of the substances will not be higher than +40 degrees and that the medium is inert to the substance from which the pipes are made;
- for insulation or for laying electrical cables.
If all standards are observed, polyethylene products will last about 50 years.
Advantages and technology of connecting HDPE pipes
HDPE pipes intended for supplying cold water, compare favorably with cast iron and steel pipes, they are not subject to corrosion, do not change the taste and quality of drinking water.
Advantages of HDPE pipes:
- long service life - about 50 years;
- affordable price - this is due to low cost, because the production of pipes does not require expensive equipment and the purchase of raw materials;
- low thermal conductivity;
- no condensation forms on the surface;
- pipes do not corrode;
- HDPE pipes are plastic, so they can be laid not only in a trench, but also on the surface;
- subsidence of buildings and structures, as well as low temperatures, are not a problem for such pipes;
- installation of water supply systems in closed and open ways is carried out in any weather;
- pipes do not pollute the environment and do not emit harmful substances;
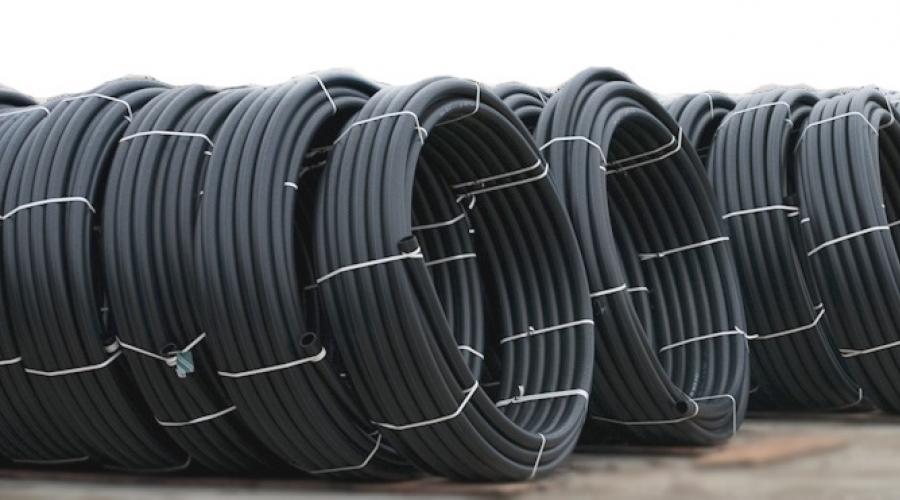
- weight is minimal, sold in coils, which greatly simplifies not only installation, but also transportation.

What are the disadvantages of HDPE pipes
Each material has not only advantages, but also disadvantages, which it is advisable to know about before everything is purchased and a water supply installation plan is drawn up.
Flaws:
- when the temperature rises above the permissible norm, the material becomes fusible;
- When exposed to direct sunlight, pipes age faster.
This disadvantage is compensated for in this way: a special coating is applied to the surface by thin spraying.
HDPE pipe connection technology
You will need the following tool:
- a hacksaw or a special tool for cutting polyethylene pipes;
- a cone-shaped knife to process the cut edge;
- if you use fittings, then you won’t need anything else, but some craftsmen advise having an adjustable wrench so that when tightening the connections, you don’t have to tighten the nut too tightly. Otherwise, the clamps may not hold up and will burst, or the gasket-seal will be damaged. If the nuts are not sufficiently secured, then the tightness of each joint will suffer.
Compression fittings for HDPE pipes. Installation features
When installing a water supply system, you cannot do without special connections or fittings. They can be straight to connect 2 pieces of pipe and transitional when you need to connect pipes of different diameters. In addition, fittings will help connect the pipeline in several directions, make desired bend or angle, reduce or, conversely, increase the diameter of the pipes.
Installation of a pipeline with fittings is carried out in several stages. The work is not difficult, so even a beginner can do it, and no special tools are required.
How to install:
- Prepare the pipes, calculate in advance how many meters of pipe will be needed to lay the pipeline.
- Unscrew the fittings 1-2 times.
- Perform markup on work surface, lubricate the joint with soapy water (or just plain water).
- Insert the pipe into the fastener to the mark. Make sure that the pipe section rests against the ring. To achieve this, you need to apply a little more force.
- If you don’t try hard at this stage, the connection will not be 100% tight.
- Tighten the nut until it stops so that there are no loose threads left on the threads.

Flange connections for HDPE pipes are one of the methods for installing a water supply system from HDPE pipes, in which, if necessary, the assembled unit can be disassembled. The flange connection is used for joining control and shut-off valves. For installation you will need a polyethylene pipe, a metal sleeve and a free flange.

To obtain reliable connection pipes, another method is used: permanent or welded connection for HDPE pipes.
Performed in 2 ways:
- Joint to joint.
- Connection using an electrical coupling.
Butt welding is performed using a special welding machine. If you really want to, you can master the joining technique in order to lay the water supply yourself, without the involvement of specialists.
How to connect pipes butt to butt using a welding machine:
- The ends of the pipes (provided that the diameter of the pipes exceeds 50 mm) must be secured in special clamps of the welding machine.
- Bring a heating plate to the cut site.
- Wait until the plastic warms up and reaches its melting temperature.
- After this, you need to remove the slab, and immediately connect the pipes to each other, applying force.
- Wait a few seconds for the seams to cool, after which you can remove the clamps and remove the device.
What is important with this method:
- Materials are used only of one diameter, otherwise nothing will work.
- Wall thickness – no more than 5 mm.
- You can work on outdoors, at a temperature not lower than +15 degrees and not higher than 45 degrees.
- The welding machine operates from the mains, it does not consume a lot of energy, so this method can safely be called the most economical. Even though the cost of the device is very high, in order to install the water supply system yourself, the device can be rented.

Hydraulic testing of HDPE pipes
Any pipeline, even one made by experienced specialists, must be tested. The first launch is the most important; it will show all the weak points.
Work progress:
- External inspection of the water supply system, removal of air from the system.
- The inspection is carried out one day after completion of installation.
- Before starting work, you need to clean the pipe cavity from dirt and open the valves to bleed air.
- Install water drainage at the lowest points (drains).
- Connect pressure gauges on both sides.
- Connect the pipeline to the water supply or sediment to create pressure and fill the system.
- With the air vents closed, you need to gradually increase the pressure and hold it for a quarter of an hour. For the test to be successful, water must be gradually pumped in to stabilize the pressure.
- Then reduce the pressure to the working norm and leave for half an hour. During this time, it is necessary to have time to perform a visual inspection of the pipeline, especially paying attention to all joints.
- The water supply passed the test if no leaks or ruptures of the connecting elements were detected.

Errors when installing polyethylene pipes
Installing HDPE pipes is not a difficult task, it is difficult to make a mistake and do something wrong, but mistakes are no exception.
Common mistakes:
- if the pipes used are different. Beginners may get confused and buy different pipes. And each type of plastic has its own standards, so the tightness at the junction may be compromised. Result: leaks and cracks at the joint;
- Over-tightening the nuts can cause microcracks to appear. During the initial inspection of the finished work, they will not show themselves in any way, but under pressure the crack may increase and then there will be a water leak;
- a weak puff, like a strong puff, is also not good;
- uneven joining edges: if you use a welding machine, you need to carefully adjust the edges. A trimmer is used for these purposes.
Video instructions for installing HDPE pipes with your own hands:
The DVN-Stroy company carries out work on laying polyethylene pipes of various diameters, from 50 to 630 mm.
Polyethylene pipes found wide application in construction. They are used when laying water supply networks, gas distribution systems, pressure and gravity sewer networks, as protective cases for electrical and telephone cables. Pipe laying is carried out using the traditional open method or trenchless method. The production of PE pipes is carried out by continuous extrusion from low-density polyethylene.
The DVN-Stroy company uses only. For pipes with a diameter of up to 315 mm, the Italian machine GF Omicron 315 is used. For pipes 315-630 mm - Ritmo Delta 630. Socket welding is performed using a Hurner HST300 machine.
Methods for installing polyethylene pipes.
Polyethylene pipes are installed mainly in three ways: using butt welding, electrofusion welding with embedded heaters and using compression fittings. Pipe turns and branches are made using welded or cast fittings: bends, crosses, tees, bushings for flanges.
Remoteness of the object;
Availability or absence of electricity, etc.
The cost of the work is estimated after reviewing the design documentation or visiting the site by a specialist.
You can also send drawings or a pipe laying diagram to email [email protected] This will allow us to more accurately estimate the cost of work and materials (polyethylene pipes, bends, fittings, tees, valves or Ball Valves, bushings, flanges, electric couplings), estimate the time frame for completing the work.
An example of installation of polyethylene water pipes.
Most city utilities built during the Soviet era are worn out by 70% or more. Almost all water supply pipelines were made of steel pipes which are most susceptible to corrosion. The deterioration of these pipes is expressed in constant emergency situations - pipe breaks, a decrease in the cross-section of the pipe and its throughput, water pollution according to biological parameters.
The figure below clearly shows the condition of a steel water pipe after a long period of use.

One of the options for reconstructing worn-out ones is laying polyethylene pipes. Replacement of pipes can be carried out along an old pipe that has been destroyed, or laid next to an existing pipe, without stopping the water supply to residential buildings and other consumers. Wells and chambers, depending on their condition, are subject to replacement, complete or partial reconstruction (for example, replacement of necks, ladders and hatches).
At the first stage, after completing earthworks When digging trenches and pits, polyethylene pipes are welded into a string using butt welding, in a trench or on the surface of the earth.


Installation of polyethylene pipes each other is performed in the following sequence.
1. The pipes are aligned and centered relative to each other as much as possible. The surfaces of the pipes are prepared for installation: they are cleaned of dirt and degreased.
2. Insertion into the main pipe can be done in several ways, for example using a flange cast iron tee TF or plastic tee. The figure below shows an option for inserting using a saddle. HDPE bushings with boring flanges are mounted at the ends of the pipes using electric couplings.
It is very important to correctly install the unit on a free pipe. The distance between the flanges should be such that later, when installing the valve and tightening the bolts, the connection would be sufficiently watertight. In the future, the connection must withstand hydraulic tests of 8-12 atm, while the polyethylene pipes should not experience unnecessary tensile stresses, which will ensure a long service life of the laid water supply pipes.


3. Next, the flange valve is installed. All work is carried out in the existing chamber. After switching the water supply to the new main, old worn-out water pipes must be dismantled and washed with cement-sand mortar.


Water supply made from polyethylene pipes has high performance characteristics. Polyethylene has high chemical resistance, is not subject to corrosion and low temperatures. Due to the high smoothness of the pipe walls, their throughput is 25-30% higher than that of steel pipes.
The service life of polyethylene pipelines is at least 50 years.
Rules for laying and installing polyethylene pipes.
When installing polyethylene pipes underground, you must remember and follow the following rules. The depth of pipe laying should be 0.2 meters greater than the freezing depth of the ground (in the Moscow region this is 1.5 meters). The width of the trench along the bottom should be 40 centimeters greater than the diameter of the pipe being laid. If HDPE pipes are butt welded in a trench, its width should allow the welding machine to be placed there.
Before installing pipes, to avoid damage to them, the bottom of the trench must be carefully leveled. If the base of the trench has solid inclusions, it is necessary to arrange a sand cushion of sand 10-15 centimeters thick. If there is a need for foundation and backfilling, there is no need for it.
After laying the pipes, backfilling is carried out. The initial sprinkling is done with sand, to a height of 15-30 centimeters above the top of the pipe. Further backfilling to the top of the trench can be done with local soil of stones or construction waste larger than 20 mm in size. Under the designed roads and driveways, the trench is backfilled exclusively with sand with layer-by-layer compaction.
Advantages of polyethylene pipes.
Modern polyethylene pipes are made from polyethylene grade PE80 m PE100 according to GOST 18599-2001 and have many advantages over other types of pipes:
The cost of polyethylene pipes is lower than steel pipes;
Service life of at least 50 years;
HDPE pipes are not subject to corrosion and are also resistant to aggressive environments;
In mind light weight installation of polyethylene pipes is carried out without the use of heavy-duty equipment;
Installation of polyethylene pipes by butt or electrofusion welding is simple and reliable;
When water freezes inside a pipe, it does not collapse;
These undeniable properties of polyethylene pipes have allowed them to be widely used in all areas of engineering communications construction.
In order to form and install water supply and drainage networks, it is necessary, first of all, to use water flows made from polyethylene pipes, taking into account all the advantages of such water flows over steel or cast iron products. A significant drawback of pipes made of metal, especially for steel products, is their short service life due to exposure to corrosive processes.
When installing any pipeline system, its operational characteristics will be determined by how scrupulously and carefully the workers adhered to the installation technique of the drains, no matter what material they were made of - metal or plastic. Each type of pipe has its own rules and installation technologies. Laying pipelines from polyethylene pipes has its significant differences. First, you need to measure the width of the trench. It should provide excellent convenience during installation and installation of the pipeline. The main thing to take into account is that the width of the ditch should be approximately 40-50 cm greater than the diameter of the pipes. Such conditions must be met both when laying sewer pipes and when laying water pipes. If laying gutters is carried out in hard or dense soil, then be sure to build a sand embankment approximately 10 centimeters wide.
It is imperative that any stones are removed from the bottom of the trench and the bottom must be made smooth and level. You should ensure that the soil at the bottom is not frozen. If the soil for laying a pipeline made of polyethylene pipes is loose, then it may be necessary to use technologies to create the effect of strengthening the ground. If there is a possibility of soil displacement, then in order to ensure a static position of water flows in the ground, geotextiles are laid out at the bottom of the ditch.
Most often, the installation of a pipeline made of polyethylene pipes begins with laying a special cushion, which is a certain material, namely gravel or sand. The thickness of such a pillow can vary depending on the characteristics of the soil, but on average it is 10-15 centimeters. It is necessary to seal the pillow only in the vicinity of manhole. Workers make pits in places where water flows are connected to each other. When soil analysis reveals its ability to strongly internal friction, in this case, you don’t have to lay the pillow. Then, at the base of the track, the hardened soil is removed, and earth that is softer in structure is laid out in its place. The excavated soil can later be used to backfill the pipeline, but it must first be ensured that it does not contain large rocks. You can also fill the water supply pipe with sand or fine gravel. First, the pipe is backfilled along the entire perimeter, at a height of more than 15 cm from it. extreme point. If the soil has to be made more dense, then backfilling is done in small layers of 20 centimeters. Under no circumstances should you compact the soil directly above the drain.
After installation pipelines made of polyethylene pipes backfilling is most often carried out with seized earth, but it must first be cleared of stones if they exceed 6 cm in size, and if there are boulders, then 30 cm.
PVC pipes are most often attached to each other using glue in the socket. However, it must be taken into account that for gluing it is necessary to thoroughly clean the surfaces and apply adhesive base very neat. The joint edges should not be allowed to bend. In recent years, socket joints, which are sealed using rubber cuffs of various profiles, have become very popular for the installation and fastening of drains made of polyethylene materials to each other. In this case, gutters are made with sockets that contain circular grooves inside. If necessary, attach polyethylene pipe to steel or cast iron, then you need to use flange connections. Where they are laid sewer systems from polyethylene drains through the walls of wells; fastening couplings with a single rubber ring are used as sleeves.
Welding is carried out mainly by the contact method, it is carried out in a socket or butt with shaped compartments. When welding polyethylene pipes It is necessary to very accurately observe and monitor the diameters of the drain and their circumference.
For laying pipelines of water supply and sewerage systems, pipes are mainly used from low-pressure polyethylene (HDPE), high-pressure polyethylene (HDPE) and polyvinyl chloride (PVC), and for water supply purposes polyethylene pipes are used.
When laying external water pipes from HDPE and LDPE, the main method of connecting pipes is to butt weld them with a heating tool. When installing gravity sewer pipelines, HDPE pipes are connected in the same way.
PVC pipes are connected mainly with socket glue. However, given that careful cleaning of the surfaces to be bonded and careful application of glue are required, recently socket joints sealed with rubber cuffs of various profiles, as well as O-rings, have been widely used to connect PVC pipes.
Welding of polyethylene pipes, most often contact welding, is carried out end-to-end (butt welding), into a socket with cast fittings, and into a molded socket (socket welding). When welding pipes, special attention should be paid to outside diameter pipes and their ellipse (ovality). When butt welding, the maximum discrepancy between the edges should not exceed 10% of the wall thickness. The ends of the pipes when socket welding must have an outer chamfer at an angle of 45°.
Welding of plastic pipes under installation conditions is carried out, as a rule, on welding installations that provide mechanization of the main welding processes and control of the technological regime. In inconvenient places (trenches, channels, wells, etc.), pipes are welded manually using devices for trimming and centering, as well as heating tools. The latter must be electric with the ability to maintain a constant temperature on the working surface of the heater by a thermostat and an autotransformer. To prevent adhesion of the molten pipe material, the heater should be covered with a cover made of a heat-resistant anti-adhesive coating (glass cloth impregnated with polytetrafluoroethylene), a film of this material or silicone varnish.
Contact welding of pipes is carried out in the following sequence: installation and centering of pipes in a clamping centering device; pipe trimming and degreasing of ends; heating and melting of welded surfaces; removing the welding heater; connection of heated welded ends of pipes under pressure (sediment); cooling of the weld under axial load. To obtain strong and high-quality pipe joints, it is necessary to strictly observe the basic welding parameters - temperature and heating duration, melting depth, contact pressure during melting and upsetting. The basic requirements that must be observed when welding pipes are given in Appendix 3.
Bonding of polyvinyl chloride (vinyl plastic) pipes is carried out mainly in a socket. The process of gluing PVC pipes and fittings consists of the following operations: preparing the ends of pipes and sockets for gluing, gluing and curing the joints. The bonded surfaces of pipes and sockets are degreased with methylene chloride. After this, the glue is applied in a thin layer to the socket and in a thick layer to the end of the pipe. Pipes and fittings can be glued at an outside temperature of at least 5 °C. Glued joints within 5 minutes. should not be subjected to any mechanical stress. Before installation, glued lashes and knots must be kept for at least 24 hours after gluing.
Connection of PVC pipes on sockets with rubber rings. Pressure socket pipes in the trench are connected in the following order. First, the smooth end and socket of the pipes being connected are cleaned of dirt and oils, after which the depth of insertion into the socket is marked on the smooth end with a pencil or chalk. Then insert a rubber ring into the groove of the socket, lubricate it and the smooth end with liquid soap, and then push it into the socket to the mark. When connecting free-flow sewer pipes made of PVC, couplings are used along with the socket, and the technology for connecting them using rubber rings is similar to that described above. Tensioners are used to assemble socket connections of pressure and sewer pipes.
Equipment for welding and installation of plastic pipelines. Mobile installations and installation devices have been developed and produced for welding polyethylene pipes. Three types of installations are used for welding pipes with a diameter of 160 - 315, 355 - 630 and 710 - 1200 mm. A mobile installation for welding pipes with a diameter of 160 -315 mm (Fig. 6.18, a, b) includes movable and stationary clamps for clamping pipes, a mechanism for processing pipe ends before welding, an electric heating disk for melting pipe ends, a mechanical power system for creating pressure in the process melting and precipitation, as well as a control panel.
Rice. 6.18 – Installation and equipment for welding plastic (polyethylene) pipes: a – installation for welding pipes with a diameter of 160 – 315 mm, b – detail of the welding unit, c – installation for welding pipes with a diameter of 355 – 630 mm, d – the same, with a diameter of 710 – 1200 mm, d, f, g – kit for welding pipes with a diameter of 710 – 800 mm (d – centralizer, f – facing device, g – electric heater with power source); 1 – fixed clamps, 2 – electric heating disk, 3 – end mechanism, 4 – movable clamps, 5 – switch, 6 – welded pipe, 7 – roller, 8 – pressure gauge for force control, 9 – switching system, 10 – clamp, 11 – end mechanism drive, 12 – trolley, 13 – control panel, 14 – mounted station, 15 – pipe-laying bulldozer, 16 – welding installation, 17 – guide tracks, 18 – hydraulic cylinders, 19 – guides
The installation for welding pipes with a diameter of 355 - 630 mm is shown in Fig. 6.18, c. It consists of lifting and lowering hydraulic cylinders, mechanisms for processing pipe ends, roller supports and a tent. The installation for welding pipes with a diameter of 710 - 1200 mm (Fig. 6.18, d) consists of the welding installation itself, portable guides on supports, a basic lifting and power supply machine (pipe layer - bulldozer, equipped with an electric generator).
The laying of plastic pipelines in a trench is carried out according to two main schemes for organizing welding and installation work- basic and route. At basic scheme Pipe welding is carried out near the facility warehouse with preliminary connection of pipes into sections up to 18 - 24 m long or more, which are delivered to the route and there welded into a strand or a continuous thread for laying in a trench. In the route scheme, pipes are laid out along the trench and welded using mobile welding units into a continuous thread using the extension method.
Laying pipelines with separate pipes. Before laying, pipes are carefully inspected and rejected. The pipes on the trench berm are often welded into sections or strands, which are then lowered into the trench on soft towels. In production conditions, especially in winter, pipelines are installed from separate pipes and connected in a trench by gluing or on rubber rings using the extension method.
Laying in links (sections) and lashes allows you to significantly reduce the number of welded joints on the route, increase labor productivity, the pace of pipeline laying and the quality of work.
The sections are delivered to the track and laid out along the trench, and then laid in the trench and connected there. Sometimes sections are pre-connected on a berm into a lash 100 - 200 m long, after which they are lowered into a trench. The prepared lash is lowered into the trench manually (if the pipe diameter is small) or using cranes. It is allowed to lay the whip in the trench no earlier than 2 hours after welding the last joint. Lower it into the trench smoothly using hemp ropes, soft towels or belts, located at a distance of 5 - 10 m from each other, avoiding sharp bends of the whip. Throwing welded lashes to the bottom of the trench is not allowed.
The laying of plastic pipelines of large diameters (1000 mm or more) is carried out by pulling a string along the bottom of a trench or lowering pipes suspended from a tap. The pulling method is used to lay pipelines in dry soil conditions. In this case, a stationary welding installation and guides are placed in a trench, after which the pipe is sequentially connected into a continuous thread. The trimmed pipes are lowered into the trench and placed on the clamps of the welding installation, then they are welded, after which the pipeline is pulled forward with a winch or other mechanisms.
In dense and hard soils, before laying pipes at the bottom of the trench, it is necessary to make a bed of bulk soil with a layer of 10 cm, and when laying PVC pipes on an artificial (concrete) base, make a sand bed. When filling these pipes, be sure to arrange a protective layer from sandy or local soil 80 cm thick. To reduce stress in the plastic pipeline or its deformation in the summer, it is recommended to fill it with water before backfilling, and backfilling should be done in the coldest time of the day.