Construction and installation of a typical flat roof: a thorough overview of technological subtleties. Repairing an old slab roof in a workshop. Are roof posts installed on the floor slabs?
Read also
That warm air rises up, every schoolchild knows. Based on this, it can be assumed that a significant part of the heat that the house “loses” evaporates through the roof.
Therefore, reducing heat loss must begin with roof insulation.
The type, quantity and method of installation of insulation depends on the type of roof and on how the attic space is used - residential or not.
Requirements for residential insulation attic space, is certainly higher than for a non-residential one, so in this article we will focus on the insulation of a residential attic. Non-residential attic it is easier to insulate - from the ceiling or along the floor. At the same time, we will focus on two types of roofing – pitched and flat.
 It is easier to insulate a pitched roof from the inside of the roof, since access to the rafters is open. Plus, the requirements for thermal insulation materials are lower.
First you need to choose the type of insulation that will combine optimal properties - cost, efficiency and reliability.
Popular modern materials for insulating roof slabs
1. Soft insulation – mineral or basalt wool
 If such a material is chosen for roof insulation, then mineral wool of the required thickness is selected.
Manufacturers provide the buyer with a wide choice various materials, which have different densities and geometric dimensions. Choose the one that suits you specifically in terms of price and parameters. The only drawback of cotton wool is its hygroscopicity.
This means that cotton wool absorbs water, and therefore its quality is greatly reduced. Therefore, cotton wool must be protected from water from above and from steam from below. This necessitates the use of two types of film - a vapor barrier and a hydrobarrier. They can be replaced with a universal superdiffusion membrane.
Technology of roof insulation with mineral wool
- If a water barrier is installed on the rafter system, then sheets of mineral wool are laid between the rafters, which are covered from below with a vapor barrier.
- If there is no water barrier, then first, a water barrier film is nailed to the rafter part with a stapler. It is important to attach it with an overlap; for this purpose there is a marking on the roll.
- Then it is stuffed onto the rafter leg wooden beam thickness equal to the thickness of the insulation.
- Insulation is placed in the resulting cells. Mineral wool should be laid tightly, but not knocked down. After all, insulation occurs, including due to the air gap, which is obtained due to the structure of the wool. And if you lay it tightly, there will be less air and the properties of the wool will deteriorate.
- It is convenient to attach cotton wool to wood using a nylon cord or thin wooden slats. Next, the cotton wool is covered with a vapor barrier film.
The roofing pie is shown schematically in the figure.

Tip: You can save time and money if you install rigid insulation instead of a moisture barrier. And then you mount the cotton wool on it, with the obligatory use of a vapor barrier film. However, this approach is only possible if the roof is well installed. Otherwise, any leakage will negate all savings.
2. Rigid insulation - polystyrene foam or polystyrene foam
 This material is used more often, not because its thermal insulation characteristics are higher, but because it is easier to work with. After all, it is light, cheap, easy to cut and does not absorb water at all. This means there are no costs for protective films.
When choosing polystyrene foam or expanded polystyrene as roof insulation, it is worth remembering that these materials are fire hazards and emit acrid smoke when burned.
Polystyrene foam is installed by laying slabs in the gaps between the rafters. In this case, the sheets are stacked tightly, and the cracks are blown in polyurethane foam.
Tip: If you want to improve the quality of your work, give preference to thinner and denser foam. However, lay the sheets in two layers in a checkerboard pattern.
3. Liquid insulation – liquid penoizol
 Liquid penoizol is relatively new thermal insulation material, which has already been appreciated by professionals. Insulation with penoizol, with a competent approach, guarantees a high protective effect for many years.
Processing with foam takes little time, while the efficiency is incredibly high. Penoizol liquid insulation is sprayed (applied) onto the inner surface of the roof using a special installation.
The thickness of the applied layer can vary as desired. Penoizol does not need additional protection. And most importantly, it is not flammable, does not get wet and is lightweight.
Using these materials, you can also insulate the attic floor.
Helpful advice: When choosing insulation, do not put price at the forefront. In this type of work characteristics are more important material and quality of installation.
It is important to choose not only the type of insulation, but also to correctly calculate its thickness. Which should be optimal. On the one hand, sufficient to ensure heat retention. On the other hand, so as not to overpay too much.
To do this, carefully read the characteristics and properties of the material and take into account the characteristics structural elements buildings, temperature in winter period, wind strength and direction, amount of precipitation in the region.
 Many houses are built in a style traditional to Western European countries. Namely, with the arrangement of a flat roof. Which, most often, is reserved for leisure areas (for example, for a device or).
However, a flat roof also needs insulation, just like a pitched roof. But its insulation has some nuances. The most important of them is creating a slope.
On a completely flat roof, water will have nowhere to go except to evaporate or seep down. But a slope of 1.5 - 4 o will not create any inconvenience for roof users.
 Lean away flat roof performed using expanded clay. The direction of the slope should lead to water flow to the funnels of the drainage system.
When laying, it is important to ensure that there are no breaks in the film.
The insulation is selected and installed. At the same time, it must not absorb water, withstand point loads, and not lose its qualities due to temperature changes.
- soft insulation. The most popular is high-density Rockwool. It can withstand high temperatures and significant point loads, while being easy to install and providing the ability to fuse the roof.
- rigid insulation. Even the density of polystyrene foam is not enough to withstand heavy loads. At the same time, rigid insulation materials are flammable.
- liquid insulation. Withstands high temperatures, loads, is resistant to ultraviolet radiation and biocorrosion.
It is more convenient to insulate the roof slab of a flat roof from the outside. To do this, heat-insulating material is laid on top of the floor slab or corrugated sheet (example in the photo).


 After completing the insulation, you can thus plant lawns on the roof and arrange elements landscape design or equip cafes and recreation areas.
Insulation of roof and attic floors - mistakes and ways to eliminate them
| Error | Elimination |
| Wrong choice of insulation | Involvement of a specialist at the material selection stage |
| Incorrect calculation of insulation thickness | Taking into account all factors that affect heat loss in the house. |
| Actually lower percentage of heat loss than calculated | Presence of cold bridges. Concrete elements structures, window and door openings, metal parts of dowels - these are the causes of cold bridges through which a significant part of the heat escapes. |
| The appearance of mold, mildew | Poor quality installation of the hydrobarrier or vapor barrier film. No counter racks. |
Conclusion
High quality and proper insulation covering the roof will reduce heat loss in the house, or even use the attic as a used (warm and residential) room.
Today, a flat roof is not the most obvious solution to the roofing issue. But in Switzerland and Germany, this particular type of roof began to gain increasing popularity. It is possible that in the near future European fashion will come to us.
The following factors contribute to the increasing popularity of flat roofing:
- Ease of installation roofing pie. All materials are placed on flat surface right under your feet.
- A flat roof has better heat transfer. The roof area is evenly heated throughout the sunny day.
- Opportunity beneficial use space. You can do it on the roof summer terrace, install a small pool, etc.
But there are also disadvantages:
- A flat roof wears out faster. It will have to be repaired more often, although this is not difficult.
- Accumulates on a flat roof in winter a large number of snow. Firstly, it creates unnecessary power load. Secondly, if it is not removed, over time it will begin to melt, and there may be so much water that it will somehow find its way through the roof.
- There is an opinion that a flat roof is cheaper than a pitched roof. This is not so, and if you calculate all the costs, which include: floor slabs; slope-forming screed; insulation that experiences high compressive loads, and is therefore more expensive than on a pitched roof; waterproofing; installation of parapets - it becomes clear that a flat roof will cost more.
Traditional or inversion roofing
Before you make a flat roof with your own hands, you need to choose the type of roofing pie. It can be traditional or inversion.
The fundamental difference lies only in the order in which the flat roof elements are laid.
The traditional type involves first installing a vapor barrier, then thermal insulation, and only then waterproofing. This allows you to protect the insulation, but puts the waterproofing material at risk. The inversion type involves the installation of waterproofing, followed by thermal insulation. Thus, the waterproofing material is protected from temperature changes and excessive pressure.
The installation of a flat roof in a private house most often involves the use of a traditional type, and that is what we will consider in this article.

Preparing the base
Preparation of the foundation begins immediately after the construction of load-bearing walls. It directly depends on whether the roof will be used or not. Can be made from:
- Reinforced concrete slabs, subject to the construction of walls made of bricks, blocks or concrete panels.
- If the roof is not in use, it is possible to install a base made of corrugated sheets on iron beams. Profiled sheets must have sufficient wave height, type N-153.
- Flat roof in a private home the device is allowed wooden slabs ceilings on wooden beams. They are used only on unused small-area roofs. They are laid with a gap of two millimeters, which is subsequently compensated by thermal expansion.
- Can be used wooden boards minimum thickness 40 mm and a maximum width of 180 mm. They are also laid with a small gap. Suitable for used roofs.
When using wood, do not forget to treat it with antiseptics and fire retardants to increase durability and fire resistance.

Deflection device
The next stage is the deflection device. Necessary for draining water to gutters.
- A screed is poured over reinforced concrete slabs with an approximate slope of 2-5 degrees. This is approximately 2 centimeters of slope per 1 meter. It is possible that the screed will be preceded by a backfill of expanded clay. Also, a slope can be created using a special wedge-shaped insulation.
- The construction of a flat roof using corrugated sheets involves the implementation of a slope at the stage of installation of the base. That is, profiled sheets are initially laid with a slope of 2 centimeters per meter. If this was not done, it was permissible to use wedge-shaped insulation or make a slope-forming screed made of polystyrene concrete.
- Wooden slabs are also initially laid with a slope. In its absence, wedge-shaped insulation is used.
When constructing a roof base from corrugated sheets or wooden slabs, the box walls are initially made with a slope in the desired direction to facilitate the subsequent installation of floor slabs.
Let us note that using wedge-shaped insulation will cost you more than arranging a slope using a screed, and even more expensive than installing a slope at the stage of installing floor slabs.
Vapor barrier
Vapor barrier is used only in the construction of a traditional type of flat roof. It is necessary to prevent the penetration of vapors from the room to the insulation. For vapor barrier, specialized films are used. They are laid with an overlap of 10 cm. The joints are carefully taped with adhesive tape. The film is glued no less carefully in places adjacent to various kinds protrusions (parapet, steps, etc.). It is attached to the base using construction stapler or special galvanized nails.
Bitumen-containing materials, such as roofing felt, can be used as a vapor barrier. They are attached to the base using gas burner, the joints are glued in the same way. Also, modern market building materials offers self-adhesive films, the installation of which does not require additional materials.
Please note that ballast roofing does not require mechanical fastening of the vapor barrier to the base.
In turn, ballast roofing is a roof for finishing coating which use weighting materials - paving slabs or bulk washed gravel.

Thermal insulation
Do not forget that before making a flat roof for a house, you need to decide on the slope-forming layer. The type of insulation will depend on this.
The insulation is laid in several layers. To prevent the formation of cold bridges, each subsequent layer must overlap the joints of the lower one. Polyurethane glue is used to glue the layers one to one. In its absence, the use of polyurethane foam is allowed. Also, all possible holes and cavities are sealed with polyurethane foam.
Before installing the thermal insulation layer, you must ensure that there is no moisture on the vapor barrier. It is better to carry out the installation itself in parts. That is, lay several squares of thermal insulation, followed immediately by waterproofing on top. This is necessary so that in case of rain the insulation does not get wet.
Waterproofing
One of the most important stages Do-it-yourself flat roof installations - waterproofing. Can be made from:
- Bituminous materials, roofing felt.
- Bitumen-polymer materials, euroroofing felt.
- PVC films.
- Liquid rubber.
Let's take a closer look at each of the materials.
Ruberoid is the simplest, cheapest, but also the most short-lived of all. Placed on a concrete base or insulation resistant to high temperatures. Its service life is only 5-10 years. To install it you will need: a gas burner, a painting knife, a spatula, a brush and a primer for roofing felt. The work order is as follows:
- Primer treatment.
- After it has completely dried, the roofing material is rolled out and allowed to rest for 24 hours.
- They glue it with mastic. Don’t forget to carefully apply the waterproofing to the protrusions.
- The joints (minimum overlap of 7 cm) are processed with a torch.
- After the first layer, lay the second one. The sequence of actions is the same, with the exception of primer treatment. The lower the slope, the more layers, up to four.
Bitumen-polymer waterproofing will last an order of magnitude longer. The installation procedure is as follows:
- Cleaning the base from dust, dirt and moisture.
- Primer treatment.
- Installation of material using a gas burner. If the roofing felt was glued with mastic, then there is no need to do this here. The burner heats the entire width of the roll, but it is very important not to overmelt the material, otherwise it will become too brittle. Especially for this purpose, a pattern is applied to the rolls; as soon as it begins to deform, it can be rolled out further. The waterproofing is attached to the base using a wooden mop. Minimum overlap 8 mm.
- In some cases, when installing a flat roof with your own hands, installing the first layer using a burner is difficult to accomplish. Then use mechanical fastening in increments of 50 cm.
Due to the need to use highly specialized tools PVC installation membranes and liquid rubber becomes almost impossible without the involvement of specialists. Therefore, it makes no sense to consider these materials in detail. We only note that both types of waterproofing are quite durable.

Drainage system
A flat roof in a private house can have several types of drainage systems:
- Interior.
- External controlled.
- External uncontrolled.
We’ll immediately discard the last option, since it is used mainly for outbuildings.
External controlled drainage involves collecting and draining water using gutters located on the outside. To drain water, special holes are made in the parapet.
The internal one is mounted directly into the roofing system, even before the roofing cake has been assembled. Due to this, its installation is more complicated, but in this case the drain can be hidden inside the building. In this regard, the issue of water drainage must be resolved before making a flat roof.
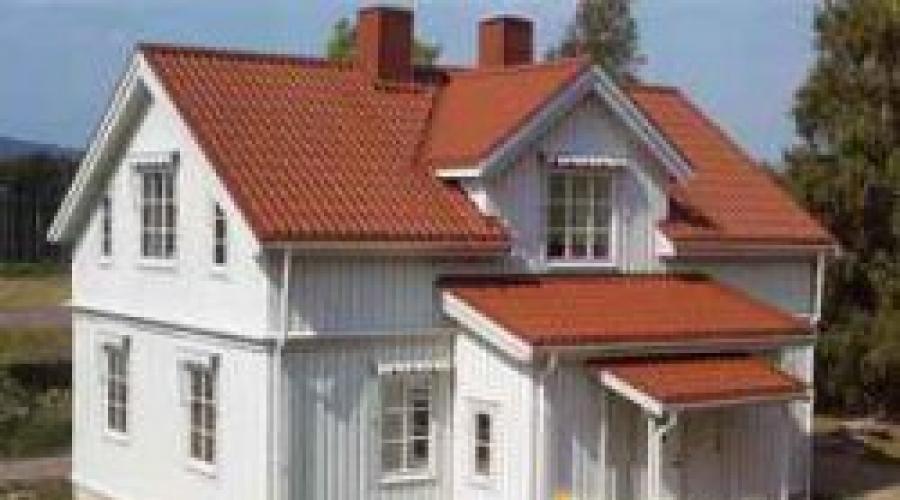
The roof is one of the main components of any structure. It serves not only to protect against precipitation and thermal insulation, but also to give the building a completed shape. Currently, roofing technology depends on its type (flat, pitched), materials and equipment used.
The minimum slope of a metal roof should be 14 degrees.
Flat roof

The traditional arrangement of layers in a flat roof structure.
This type of roofing is widely used both in residential and industrial buildings. It is good because it has simple installation, affordable cost and additional usable space that can be used to set up a cafe, sports ground, parking lots, growing green spaces, etc. The drainage is usually internal to the house, and the edge is delineated by a parapet. Roof slope up to 3% to ensure better drain rain and melt water.
There are two ways to construct the base of a flat roof: concrete floor(monolith or concrete slabs) and beam (as with pitched design, nose minimum angle tilt).
The concrete floor must have thermal insulation in the form of sheets stone wool or foam, which are laid on top of the roof base. The next layer is a reinforcement screed. The structure is completed with a waterproofing coating.
This type of flat roof is very reliable and durable, it can be used as a terrace, but the disadvantage is heavy weight, which implies strong foundation and strong load-bearing walls of the building.
The beam method of constructing flat roofs has rafters at the base ( wooden beams or I-beams made of metal), and on top the flooring is made of plywood or OSB. Insulation is placed between the beams.
Compared to a concrete roof, beam floor less reliable and over time can cause deflection, leading to deformation of the roof.
Waterproofing coating for flat roofs

The structure of waterproofing a flat roof on a concrete floor.
Among the varieties waterproofing coating flat roof can be distinguished membrane system. PVC membrane is made from plasticized polyvinyl chloride and a number of other components that reduce the flammability of the material, protect it from ultraviolet radiation and oxidation during high temperatures environment. It consists of two layers: the top one contains dyes that give it light color, reflecting Sun rays, as well as fire retardants, stabilizers, plasticizers and filler. The bottom layer is darker, without fire retardants and stabilizers. To make the membrane stronger, it is reinforced with fiberglass or polyester mesh.
The following tools and equipment are used to cover the roof with a PVC membrane:
- Automatic welding machine for joining seams of panels.
- Manual welding gun (used when welding membrane joints in hard to reach places, at the junctions).
- An electric drill if you need to screw in screws or other fasteners to secure the membrane.
- Hammer (for mechanical fastening membranes if the base of the roof is a cement-sand screed).
- A construction gun used for installing membranes when working at height from ropes or scaffolding, since in this case working with a hammer drill is impractical.
- Electrical extension cords for automatic welding machines.
- Consumables and auxiliary materials (construction knife, gloves, screwdriver, etc.).
The technology for attaching a PVC membrane can be carried out in several ways: heat welding, adhesive, ballast and mechanical.

The heat-welded method of joining sheets is made using welding machine, which produces a stream of air with heating of 400-600 degrees. The recommended welding seam width is from 20 to 100 mm.
Advantages: high-quality sealed roof surface, UV rays do not affect welds.
Disadvantages: the complexity of the process, which should only be trusted to specialists.
Fastening PVC membranes with adhesive is used in cases where other methods are unacceptable for some reason.
Special adhesive mixtures are used and applied to the canvas. To save money Money, it is possible to make a connection with an adhesive composition only in the most key places (the perimeter of the roof, the junction of the membrane with chimneys, in-house storm drains and other protruding places).

The roofing membrane, used as waterproofing, is reliably protected from exposure to ultraviolet, high and low temperatures gravel ballast.
Advantages: adhesive technology for installing PVC membranes is good for roofs with complex structures.
Disadvantages: possibility of poorly glued seam, high price glue mixture.
The ballast type of installation of PVC membrane sheets is the easiest, permissible with a roof slope of up to 15 degrees. The fastening technology consists of the following stages:
- Uniform laying of membranes on the roof surface, fastening along the perimeter in places adjacent to vertical elements by welding or glue.
- Laying ballast (crushed stone, gravel or medium-fraction pebbles) weighing from 50 kg/m2.
- Protection membrane material obscenities or non-woven fabric from mechanical damage(the action is performed before adding ballast if it has sharp edges).
Advantages: simple and economical installation.
Disadvantages: The roof must be strong to support the weight of the ballast.
Technology mechanical installation membranes involve attaching the sheets to the base of the roof with fasteners - self-tapping screws with a plastic umbrella. They are screwed in in areas where one membrane sheet overlaps another with a pitch of 200 mm. Along the perimeter of the roof, the membrane is attached to the protruding elements with edge strips.
Pitched roof

The most popular roofing solution is gable roof, whose attic space is not heated.
The name itself suggests that the roof has a slope (with a minimum angle of 10°). The size of the angle depends on the architectural design of the building, the roofing material and the amount of snowfall in the area being built.
Classification:
- Shed - one slope between parallel walls.
- Gable - two rectangular slopes having a common connection.
- Four-slope (tent, hip) - four triangular slopes connected by vertices at one point or two trapezoidal and two triangular parallel to each other.
- Broken (attic), conical and other complex-slope structures.
Pitched roofs can be made in two versions: with a warm or cold attic. The base of the device (supporting structure) consists of rafters (wood or metal) or reinforced concrete slabs.

Design of two pitched roof: rafter legs, tightening, purlin, stand, bench, mauerlat.
The main element of a pitched wooden or metal-wood roof is rafter system. It is calculated from the weight of the roofing material, the load of precipitation and wind.
Rafters. Rafters can be layered or hanging. Wooden rafters made from timber are mainly used coniferous species, because they are easier to process than reinforced concrete or metal.
Mauerlat. The beam on which the legs of the rafters rest is called the mauerlat. It serves as a support and is mounted along the entire length of the building. Between the Mauerlat and inner surface A waterproofing layer is laid on the walls.
In order for the roof of a building to have high resistance to wind loads, the mauerlat and rafters must be well fastened to the walls with anchors and metal corners.
Runs. They are attached parallel to the Mauerlat. There are ridge ones (connecting the ends of the rafter legs) and side ones (mounted in the middle of the rafters).
Racks. Wooden beams located perpendicular to the ridge of a pitched roof. They provide support for the rafter legs and transfer the weight to the tie.
Puff. A beam installed perpendicular to the mauerlat along the base of the rafter system. Serves to enhance rigidity.
Sill. It is an additional stiffener and is installed if rafters are installed on two spans at the same time.
Struts. Another component of the rafter system to increase its rigidity. They can be transverse and longitudinal.
Lathing. The boards or beams that are laid across the rafters are called sheathing. The roof covering is attached to the sheathing.
The construction of a pitched roof made of reinforced concrete slabs consists of individual elements that are manufactured at the factory and assembled into a single whole at the construction site. This type of roof is mainly used in the construction of industrial buildings.

Classification of roofs by type of roofing materials
Soft bitumen roofing
Materials that serve as a protective and decorative coating, called " soft roof", have high consumer demand thanks to wide choice colors, light weight, flexibility, resistance to precipitation, although the cost of such a coating is quite high. These include bitumen shingles, rolled materials(polymer, bitumen), roofing felt, membranes. Service life is at least 20 years.
Types of hard roofs
To rigid materials pitched roof include different types of metals (steel, copper, aluminum), mineral materials(tiles, slate, slate tiles), wooden (tips, shavings, shingles).
Regardless of which roofing device you choose, you must approach each stage of construction competently and efficiently: from the drawing to the final. Each installation technology has its own advantages and disadvantages, but as a result correct application will give good results for many years.
A garage is not only a place where you can leave your car without fear of it being damaged by the weather, but also a workshop, in other words, a man’s refuge. This structure, first of all, must be invulnerable to precipitation, that is, there should be no leaks, so garage owners have to periodically cover and repair their roofs.
a - gable; b - attic; c - single-pitched; g - uneven gable.
The simplest and cheapest roof for a garage is a pitched roof.
The most minimal set of building materials needed to create such a garage roof are floor slabs and the roofing felt with which they are covered. But there are other ways to cover a roof with your own hands, without using floor slabs. They require a larger investment of time and money, but in this case you will do without the use of heavy construction equipment (crane).
What is a floor slab?

This is a flat rectangular block made of concrete or reinforced concrete. Reinforced concrete slabs can be hollow or solid. In private construction, the former are the most popular. This is explained by the fact that a hollow reinforced concrete slab can be laid on your own, without the participation of a professional construction crew. In addition, longitudinal voids in the slab play the role of thermal insulation.
There are a great variety of slabs; they differ in size, types of reinforcement used in the manufacture of slabs and grades of concrete. Therefore, choosing slabs for your garage project will not be difficult for you. You need to choose their length, taking into account that they should rest at least 12-15 cm on a brick wall, and 7 cm on a concrete wall.
Return to contents
How to lay a floor slab?

Scheme for laying floor slabs: 1 - slab, 2 - box with mortar, 3 - shovel, 4 - box with tools, 5 - crowbar.
In order to lay such slabs, you need a crane and two or three people. They are placed directly on the supporting walls, on which a layer of mortar has previously been placed. The solution must be sufficiently liquid; its task is to evenly transfer the load from the slabs to the supporting walls. Therefore, it is very important to monitor its quality.
The crane lifts the slab and holds it suspended. If she didn't stand exactly above necessary place laying, then using a crowbar or metal pipe, acting as levers, its location is regulated on its own. The slabs are adjusted to each other along the bottom side. To avoid horizontal displacement of the floor slabs, they are secured with a ring anchor to the support. After all the slabs have been installed, it is necessary to seal the joints and places of mounting loops with concrete mortar. Next, the ends of the slabs are laid with bricks. If this is not possible, then all the cracks are clogged with crushed stone and concreted. It is very good to fill the hollow holes in the slabs with crushed stone or expanded clay, not so much for additional thermal insulation, but to prevent the screed mortar from flowing there.
Return to contents
Concrete slab garage roof repair

A concrete screed is needed to prevent moisture from condensation and precipitation from accumulating in the uneven areas of the slab.
If you are planning to repair the roof of a garage covered concrete slabs, then first of all determine: the slabs have already been covered with bitumen or they are new, waterproofing materials have been used or not yet.
If the roof is new, but without waterproofing, you need to make a concrete screed. This is done to prevent moisture from condensation and precipitation from accumulating in the uneven surfaces of the slab. From quality concrete screed will depend on how durable and strong the coating installed by yourself will be.
If the slabs have already been covered with roofing felt, then it is necessary to remove pieces of the fallen off coating. If there are bubbles, they need to be cut crosswise, the corners should be unfolded and all water and dirt should be removed from the voids. The roof is then inspected for cracks and, if any, carefully cleared.
After the analysis has been carried out and the roof surface has been cleared of dust and debris, you can begin priming it. For these purposes it is used bitumen mastic. It is better to cover the roof twice: the first with liquid mastic, the second with a thicker one. A new layer is applied after the previous one has absorbed and dried. The joints of the slabs, cracks, as well as the remains of the old coating, if any, are especially carefully coated with mastic. The second layer of mastic should not exceed 5 mm, so as not to be torn during frost.
After the primer has dried, you can begin to cover the roof with roofing felt, starting from the lowest edge of the roof. It is optimal to lay three layers of this material, each of which will be perpendicular to the next or simply offset relative to the joints (to cover the joints of the previous layer). In order to lay a strip of roofing felt, you need to roll out the material, leaving at least 10 cm to overlap with the other strip and 15 cm at the edges to wrap it under the roof visor. Next, the strip is rolled up again and they begin to heat its lower side with a gasoline burner and gradually unroll it, straightening it with their hands or stamping it down so that no voids form. After the first layer of roofing felt has been laid, the roof is coated with mastic and they begin to lay the second layer of roofing felt using the same technology, and then the third.

Tools you will need:
- level;
- metal brush;
- Master OK;
- spatulas;
- shovel;
- several rules, of different lengths;
- hard brushes for applying mastic;
- containers for preparing or pouring mastic, for concrete mortar;
- an industrial hair dryer or a gas or gasoline burner.
Return to contents
How to cover a garage without using floor slabs?
If you do not have the opportunity to purchase floor slabs or you expect difficulties with their installation, then you can cover the garage with your own hands without them. There are several methods that are almost as popular: a timber roof and the use of I-beams.
Return to contents
Roof installation technology using I-beams
Steel I-beams with a height of 100-120 mm are laid across the garage on a long wall. They need to be chosen 20-25 cm longer than the width of your garage. They should be mounted in such a way that at least 10 cm of the beam extends into the wall and follows its slope. The distance between the two beams should not exceed 80 cm. After installation, boards 40 mm wide are laid along their lower shelves. They should be placed as tightly as possible, moving them with your hands if necessary. It must be remembered that in front and behind the garage there must be 20 cm canopies, which are also made from 40 mm boards, nailing an additional board perpendicular to them along the edge. The canopies are secured under the top flange of the outer beams. Before laying, the beams should be painted, and the boards should be treated with an antiseptic and also covered with paint.

The beams are located at the same distance and filling elements are laid on them, which perform an enclosing function.
After all the boards are laid and the ceilings are sewn up, roofing material is rolled out across the garage on top of them. The amount of roofing felt must be calculated in such a way that there is 10 cm left on each edge, bent upward. Next, the entire space, level with the top of the beams, is covered with slag, expanded clay, or laid mineral slabs. The roof canopy is also insulated, trying to equalize the level of the perpendicularly nailed board with the rest of the roof plane.
On top of the insulation layer is made cement strainer thickness from 20 mm, but 30-35 mm is considered the most optimal. The screed should be smooth, without strong depressions or humps. If you place a 2 m lath anywhere on the roof, the space under it should not exceed 5-7 cm. At this stage, the garage roof is ready, but if it is left in this form, then after rain it will begin to absorb water and will leak.
The same roofing material that was placed after the sheathing, or its analogues, for example, rubemast and bikrost, are used as waterproof protective materials. The basis of these modern materials is fiberglass, which increases their service life. They are glued to the roof in one of two ways: with bitumen mastic or by fusing.
Bitumen mastic, which is sometimes called a primer, can be purchased or made with your own hands from molten bitumen and diesel fuel or used motor oil. This is done in this way: one part of molten bitumen is poured into three parts of diesel fuel or oil. It is very important to pour bitumen into diesel fuel, and not vice versa. After preparing the primer, it is used to process a well-dried screed and, rolling out the roofing material, glue it so that the overlaps are at least 10 cm.
It is very convenient to do this together: one person coats the roof with bitumen mastic, the second rolls out the roofing felt, straightening it with his hands so that no bubbles form. If you use the fusing method, then an assistant will not be superfluous. In this case, one person warms up roofing material using an industrial hair dryer or torch, and the second one unfolds and presses it to the base.

1 — I-beam No. 14; 2 - concrete; 3 - floor; 4 - slag concrete screed (2-3 cm); 5 - slabs of sawdust concrete (8.5 cm, roofing cardboard AB-004 on the bottom); 6 - reinforced slag concrete slabs (6.5 cm); 7 - lime-cement plaster (1 cm).
The most optimal method is considered to be the directional method or a combination of both methods (coat the roof with bitumen mastic as a primer, and then fuse roofing material), since bitumen mastic cracks over time and the waterproofing of the roof is damaged. Roofing felt should be applied starting from the lowest edge of the roof. Moving up the slope, you need to glue strips across the roof. From both ends of the roof, the roofing material must be overlapped onto the end board of the canopy.
Required tools:
- level;
- metal rod for checking straight lines;
- wood hacksaw;
- electric jigsaw;
- hammer;
- brushes for paint, antiseptic and bitumen mastic;
- shovel;
- roofing or other sharp knife;
- containers for concrete mixture and bitumen mastic;
- rules of different lengths;
- a gasoline or gas burner or an industrial hair dryer.
Return to contents
Wooden garage roof

The use of wooden beams is strictly regulated building codes and is limited by the span width.
Such a roof is built from wooden rafters and lathing. How rafters are used metallic profile, but this greatly complicates the process of installing the roof with your own hands and is economically unprofitable. A wooden roof can be single-pitch or gable, where you can arrange a warehouse or mini-workshop in the attic.
For rafters, take a board of at least 150x40 mm. If the roof slope angle is small, then it is better to take a 150x60 mm beam and install it vertically. For the sheathing, a beam of 50x50 mm or more, depending on the bevel angle, or a board of 150x25 mm is suitable. Be sure to consider that the smaller the angle of inclination pitched roof, the greater the snow pressure will be in winter, so you should choose more durable materials. After the rafter system and sheathing are completed, the garage roof should be vapor-proofed and insulated. All wooden parts must be treated with an antiseptic.
Reinforced polyethylene is suitable as a vapor barrier material; it is laid with an overlap between strips of 10 cm, which are additionally glued with adhesive tape. Lay on top of it mineral wool in slabs, which acts as insulation. It is laid in 2-3 layers between the rafters so that there are no gaps left.

a - wooden floor beams: 1 - beam with one cranial beam (outermost); 2 — beam with two cranial bars (middle); 3 - cranial bars; 4 - nails K4x100 with a pitch of 20 cm; b — wooden shield ceilings: 1 - flooring boards; 2 — transverse strips; 3 — linings; 4 - nails K3.5x90.
The last layer is laid roof covering, for example, corrugated sheeting, which you can simply install with your own hands. It is necessary to align each profile sheet along the lower edge of the roof with an allowance of 20 cm, gradually moving upward. If, as a result, there are irregularities in the upper part of the roof along the profile, this will hide the visor.
To install such a roof you will need the following tools:
- wood hacksaw;
- electric jigsaw;
- Circular Saw;
- screwdriver;
- hammer;
- screwdriver;
- level;
- long staff for checking straight lines;
- roofing or other sharp knife;
- metal scissors;
- punch;
- ticks different types for bending metal;
- files for grinding cuts.
When constructing urban high-rise buildings and industrial facilities, the basis of a flat roof usually becomes reinforced concrete slab. But for private houses, especially frame and wooden ones, such a choice is most often unacceptable. In this case, a flat roof is built on wooden beams. Its main advantage is its light weight, which reduces the load on the walls and foundation.
The installation of such a roof is simpler and cheaper than using heavy reinforced concrete slabs. But the functionality is the same. Therefore, this option for a flat roof is often chosen by those who want to build it themselves.
The main share of such roofs falls on private houses and cottages, whose owners value futuristic style, convenience and practicality. Also - for covering verandas, terraces, balconies, garages. As a rule, all these buildings are wooden or frame, requiring lightweight design roofs. But this is not a mandatory rule. The wall material can be anything - brick, aerated concrete, foam concrete, etc. In this case, wooden beams often crash into the mauerlat - a wooden beam that runs along the perimeter of the walls and is connected to them using anchor bolts or studs.
Flat roofing is especially attractive to developers because its horizontal surface can be used as usable area. Moreover, this is possible even for a roof with wooden beams at its base.
Of course, you shouldn’t use the freed up meters for a parking lot, swimming pool or tennis court. Still, such projects require a more monumental foundation. And here open terrace, observation deck, home greenhouse, wooden beams can easily withstand. The main thing is to make the calculation correctly and not skimp on the thickness of the lumber.
Types of flat roofs on beams
On wooden floors You can build the following types of flat roofs:
- unexploited;
- exploited;
- inversion
That is everything possible types- no limits.

Unused roof– ordinary, completed with a waterproofing finishing coating. It is intended solely to protect the premises from environmental conditions and has no other purpose. Use it as a resting place, move around big companies, installing terrace furniture and flowerpots is prohibited. The covering of such a roof is designed for the fact that 1-2 people will periodically climb onto it, solely for maintenance of the structure.
Operable roof- already more interesting and more complex. In addition to immediate protective functions, such a roof plays the role of additional usable space for the homeowner. The design pie ends not with waterproofing (prone to damage), but protective coating– paving stones, decking, wooden flooring, paving slabs, turf layer, crushed stone or gravel.
Inversion roof– inverted roofing, a qualitatively different option. It can be either exploited or unexploited. Its peculiarity is the inverted order of placing layers in the pie. If in ordinary roof The waterproofing is laid on top of the insulation, whereas in an inversion roof the opposite is true. The waterproofing lies under the insulation, and the vapor barrier is completely excluded from the structure of the cake. Due to this, the waterproofing is protected from the street environment and its service life is increased.
However, under the influence of unfavorable street conditions, insulation appears, so in the composition of inversion roofs the choice of this type isolation is limited. Only EPS (extruded polystyrene foam) and nothing more! This material has almost zero water absorption, high density and strength. On top of the EPS in inversion roofs is loaded with washed gravel, paving stones, paving slabs or a turf layer.
An interesting option for exploited roofs (including inversion ones) is green roof . It can also be supported on wooden beams. The pie of such a roof ends with a soil layer on which plants are planted. There are other elements that are not used for other types of roofs: a drainage layer (gravel, expanded clay, crushed pumice or geomats), a filtration layer (geotextile).
Flat roof frame on a wooden base
The frame of the described roofs is made of wooden beams laid like an interfloor ceiling. Full size can be used wood lumber or composed of several elements (glued). Often beams are made from boards with a section of 100x150 mm.
The beams are laid with support on the walls, similar to interfloor ceilings. If the building is wooden or frame, then the beams rest on the upper crown of logs or top harness. If it is brick or block, then on a pre-fixed Mauerlat. A timber with a cross section of 150x150 mm or 150x100 mm is usually used as a Mauerlat. It is mounted on the upper chord of the walls using anchors or studs. To protect the wooden Mauerlat from the wall material, 1-2 layers of waterproofing (roofing felt) are laid between them.
Cuts are made on the beams for the Mauerlat, they are laid and secured with metal corners or nails. The pitch between the beams is maintained at 50-120 mm (depending on the calculated load).
When installing beams, it is important to ensure a roof slope of 1-6°. Despite the fact that the roof is called flat, it is not absolutely horizontal. A slight slope is necessary to ensure that water moves towards the drain and thus prevents it from stagnating.
You can create the required slope in the following ways:
- Immediately lay the beams with the desired slope. Then, if there is supposed to be a device under the roof in the room horizontal ceiling, it is made suspended or sewn onto a horizontal sheathing.
- Lay the beams horizontally, and nail wooden plates of different heights to them to maintain the required angle.
- Lay the beams horizontally and form the angle using different thicknesses thermal insulation laid on top of the frame.
- Use beams with unequal allowance in height.
Most often, the first option is used, that is, the beams are immediately laid with a slope. The easiest way to do this is to fasten along the top load-bearing wall a strong purlin made of timber or boards that will lift the frame (beams) on one side. Instead of a transverse purlin, you can also install short radial beams extending from the central double diagonal beam.

Flat roof pie: what's inside?
A flat roof pie on a wooden frame can have a different structure. There are many design options, many of them are posted on the Internet. And they will all work!
Option 1. Roof with insulation over beams
Flat roof insulation layers can be laid over the beams. For example, a proven working option ( classic roofing with insulation):
- floor beams;
- vapor barrier;
- waterproofing material – polymer membrane.
When using EPPS insulation and PVC membranes simultaneously in the structure, a separating layer (geotextile, fiberglass) must be laid between them. The fact is that these two materials are incompatible and when they come into direct contact, the PVC is destroyed.

The polymer membrane is fixed to the insulation mechanical method or loaded with ballast. Crushed stone or gravel (for all types of roofs), paving stones (for maintained roofs), and soil (for green maintained roofs) are used as ballast. However, when choosing ballast, you should soberly assess the reliability of the wooden frame and its maximum load.
If the final coating is to use a weld-on waterproofing or an EPDM membrane with adhesive fixation, a change is made to the scheme discussed above. It consists in laying sheets of plywood, OSB or DSP between the insulation and waterproofing.
This results in the following diagram:
- floor beams;
- lathing (if necessary);
- continuous cladding made of plywood, CBPB, OSB;
- vapor barrier;
- insulation – EPPS, mineral wool;
- plywood sheets, OSB, DSP;
- waterproofing material.
Installation of a built-up roof traditionally requires the use of a gas burner, therefore, according to existing fire standards, it is not allowed wooden structures. Therefore, they act as follows. The first layer of waterproofing is nailed or glued to wooden base, and the second layer is fused as it should be. It is also convenient to use euroroofing felt with a special adhesive base, for which it is recommended cold installation without heating with a burner.
The installation of a membrane roof on a wooden base is shown in the video:
Option #2. Roof with interbeam insulation
Another principle of assembling a flat roof pie is associated with laying insulation in the space between the beams. This option is more convenient than the first if EPDM membranes with adhesive fixation or fused roofing are used as waterproofing.
The following roofing pie scheme is often used:
- floor beams;
- vapor barrier (between beams);
- insulation (between beams);
- lathing (if necessary);
- continuous cladding made of plywood, CBPB, OSB;
- waterproofing.
Basically, similar system used in the formation of classic pitched roofs.

Option #3. Roof with internal insulation
In this case, on load-bearing structure(beams) are sewn on sheets of plywood, OSB or DSP, and waterproofing is laid on them. The remaining insulating layers of the roofing pie are sewn on the side of the room.
A rough ceiling (made of boards or sheet materials), to it, perpendicular load-bearing beams, screw the planks in increments of 40 cm. Polystyrene foam boards are placed between the planks, gluing them to mastic or glue. Hemmed to the insulating layer vapor barrier film. Cover the insulation cake with a finished ceiling.
Or you can go against all “traditional” solutions and build an inversion roof on beams. Due to the fact that the waterproofing will be covered with insulation, that is, protected from loads, exposure to oxygen, UV rays and precipitation, its service life is significantly increased.
During construction inversion roof You can use the following diagram (from bottom to top):
- beams;
- continuous sheathing;
- waterproofing;
- separating layer (when using PVC membrane as waterproofing);
- EPPS insulation;
- separating layer – geotextile;
- ballast, paving slabs, decking, etc.
The principle of inversion roofing is often used to install green roofs. For example, you can do this:

What topcoat should I use?
The wooden base of a flat roof, along with its advantages, also has features with a minus sign. This is an increased fire hazard and low load bearing capacity(compared to reinforced concrete slabs).
To waterproof such a roof, it is advisable to use materials that do not require hot installation. Ideally - polymer membranes. When choosing built-up bitumen-polymer coatings (from the Euroroofing felt series), the first layer of material is installed mechanically, and the second - by fusing. In order to minimize the possibility of fire in structures during installation, it is recommended to use non-combustible CBPB boards as continuous cladding (on which the waterproofing is laid).
During the construction of exploited and ballast roofs, it should also be remembered that excessive load for wooden base can be fatal. Therefore, if the load-bearing capacity of the beams used is small, lightweight materials should be selected for the finishing coating - decking, deck board, rubber paving slabs(rubber mats), etc.