Installation of windows in a house made of timber. Windows in a timber house: selection rules and installation technology Install a plastic window in a timber house
Read also
Installation of windows in wooden house differs significantly from installing windows in brick and stone houses. For example, the openings of buildings made of logs and beams, as a rule, have a quarter, but not from the inside, but from the outside.
Shrinkage
But the most important difference between houses made of wood (does not apply to frame-panel houses) is the ability to shrink as a result of drying of the wall material (logs, timber). And this point is decisive in installing plastic windows in a wooden house, because if you install a window, as usual, in a bare opening, it will inevitably be crushed and deformed by the shrinkage process.

There is an opinion that the first two are the most active period of wood drying. But that's not true. After the construction of the house, the shrinkage of the walls continues for decades. But that is not all. Wood not only gives off moisture, but also absorbs it. Therefore, rigid fastening when installing windows in a wooden house is impossible in principle!
- Shrinkage in a log house is about 10 - 15 mm per log D = 250-300 mm
- Shrinkage in a house made of timber is about 7 - 10 mm per beam with a section of 150x150 mm
- Glued laminated timber - unknown.

There are other ways to calculate the shrinkage height of log houses as a percentage: approximately 10-15% of the original height. But in fact, the shrinkage of houses made of timber and logs depends on many factors:
- on the material (log, rounded log, timber, laminated timber);
- from the time of material procurement ( winter harvesting or summer);
- depending on the time of day(morning, evening) Yes-Yes!!! Don't be surprised - we explored this too!
- from where the forest grew (swamp, field);on the degree of resinity and density of the tree;
- on the size of the material - both its length and thickness;
- from the moisture content of the material;
- on the size of the building;on construction technology (dowel, type of felling, etc.);
- from the material of inter-crown insulation;from the type of wood;
- depending on the time of year when construction is carried out.
The most severe shrinkage occurs in log houses made of ordinary logs, followed by rounded logs, profiled beams, timber, and laminated veneer lumber.
Even if the house is more than a dozen years old, it is still necessary when installing windows in a wooden house to take into account the vertical movements of the walls as a result of an increase and or decrease in humidity and air temperature at different times of the year.

Wooden house - Living
A wooden house is a constantly moving structure, compared to buildings made of stone and concrete. Therefore, the installation of windows in a wooden house is carried out not in the opening itself, but in a special wooden box, which acts as a connecting link between the window and the wall. This box is called differently: casing, frame, deck, pigtail, linden.
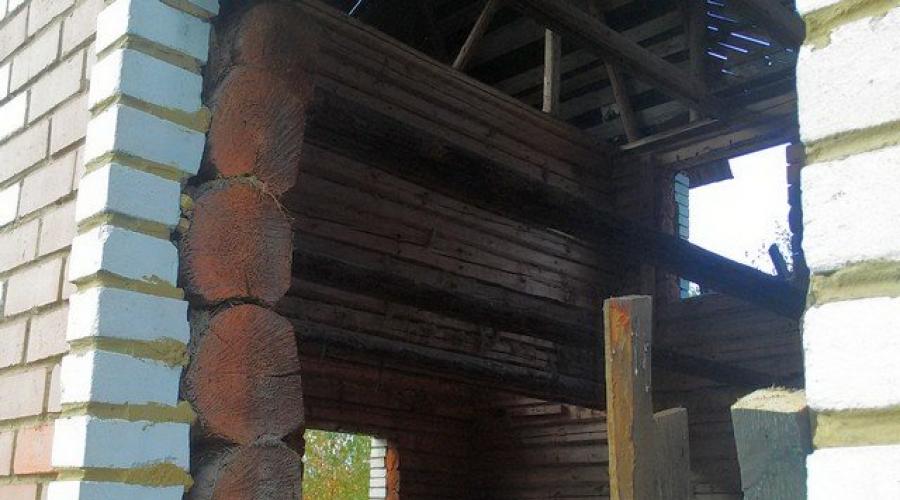
As can be seen from the photo, the casing is ordinary window box, made of four, sometimes three (sides and top) thick boards, installed inside the opening.

The meaning of this design is that it is independent of vertical movements of the wall and moves freely in the opening, since it is not attached to the logs (beams) with nails, screws, or other fasteners, and is held in place by grooves in the side posts mounted on spikes at the ends of the logs. Even foam is not used to seal the gaps around the window frame - only tow, jute (flax batting) and other soft insulation.
Shrinkage gap
Please note: a large gap is specially left above the jamb, the size of which is designed for the maximum possible amount of shrinkage of the logs (beams). During the first years after the construction of the house, this compensation gap will gradually decrease to a minimum, but the upper log (timber) of the opening correct calculation will not press down or deform the pigtail. Thus, the shrinkage of the house will not in any way affect the size and shape of the window frame, and, accordingly, will not damage the plastic window located inside it.
Shrinkage gap size

If you decide to install windows in an old wooden house that has long gone through the process of shrinkage, then, disassembling window blocks, you will probably notice: they are made according to the same principle as the casing design described here, i.e. are not nailed to the logs of the opening, but are fixed in it using a simple “mortise and tenon” system on the sides.

This suggests that the technology of installing windows and doors in a wooden house in frames was invented a very long time ago, and is used successfully to this day. We will not invent anything new and will follow the same path.
There are several ways to install the pigtail (more details at the link):
- T-shaped frame - a groove is made at the ends of the opening logs, and a T-shaped profile is placed into it;
- U-shaped - the tenon is cut out at the ends of the opening logs, and the groove is made in the side casing posts).
We do both options, since they provide maximum strength and stability of the opening, because the frame not only protects the window from shrinkage of the walls, but also ensures the stability of the wall at the place where the opening is cut.
Briefly, the sequence of our actions will be as follows:We cut out an opening in the wall, the dimensions of which are slightly larger than the dimensions of the inserted plastic window;

We form a groove for the T-shaped pigtail;

We form a spike for a U-shaped pigtail;

We make the parts of the pigtail;

We install the window frame in the finished opening;

We install a window in a wooden house into a frame, aligning it flush along the front edge (we fasten it with self-tapping screws of such length that they do not pierce through the frame and do not go into the logs);

We blow foam into the gap between the frame of the plastic window and the frame, not forgetting about the installation of waterproofing (outside) and vapor barrier (inside - suitable for rough frame under cladding, for finishing it is not required since the window rests on the quarter) of the foam seam;

we install external platbands (we attach them to the casing);

we carry out the interior finishing of the window (window sill, slopes - not required for finishing the frame, since it is the slopes and window sill).

We use foam only inside the pigtail. We insulate the gaps around it with traditional flax fiber or jute fabric.

Over the next 5 years (if the house is newly built), we will have to periodically remove the platbands and gradually reduce the amount of insulation put in there. If this is not done, the upper parts may bend.

Even after the house has completely settled, the gaps around the casing should under no circumstances be sealed with foam.
Preparing the opening for installing a window in a wooden house
Before cutting, we mark the window opening using a level, because the plastic window will be installed strictly level in all planes, therefore the frame must also be installed in the opening as accurately as possible according to the level initially.

Lower crown You need to saw through the opening so that you get a flat horizontal platform.

We determine the dimensions of the opening based on the size of the plastic window, the thickness of the casing bars and the size of the required gaps.
We perform all calculations visually. Here is an example of a diagram for calculating the size of the opening for a rough T-shaped frame:

Accordingly, we take a beam with a cross-section of 100x150 mm and cut out a T-shaped profile.

Here is a diagram for calculating the details of a p-type finishing socket:

For a U-shaped pigtail made of solid timber cut out a U-shaped profile.
The size of the shrinkage gap (H shrinkage) is not easy to determine, since the amount of shrinkage of the house, as mentioned above, depends on many factors. If we, for example, roughly calculate, taking everything to the maximum, then for the window standard height 1400 mm (plus the thickness of the casing crossbars, plus installation gaps of ~ 245 mm) with 15% shrinkage, the top gap will be 24.5 cm - a huge hole, the height of which will most likely end up being too large.
To simplify the task and avoid mistakes, you should not rack your brains over GOSTs that regulate the shrinkage values of various building materials tree species, comparing this with local climatic conditions, etc.
You can do it simpler, namely:
If you are building new house, then start installing windows in it no earlier than a year after the construction of the log house in order to wait out the period of the most active shrinkage. Then, when manufacturing and installing the pigtail, the size of the shrinkage gap (H shrinkage) can be safely made 60-50 mm for log house, 50-40 mm for timber and 40 mm for a house made of laminated veneer lumber;
If your house has stood for more than five years, then the shrinkage gap (H shrinkage) can be made minimal - 40 millimeters, just to compensate for possible seasonal changes geometric dimensions of the opening;
So, we calculated the size of the opening, marked it and cut it out. Now you need to cut out a tenon at the ends of the logs (beams) on the sides of the opening. The tenon is also marked using a level in the center of the log (beam).

We make the tenon size 60 mm - width and 40 mm height.

We cover the sides and bottom of the opening with linen or jute using a stapler.

Making a pigtail
First, you need to decide on the width of the frame bars: it should either be equal to the thickness of the wall, or be a little larger, so that later, when installing external trims, they (the trims) fit tightly and unhindered on the frame, and not on the wall. There is another option in a log house - a groove around the opening along the width of the groove.
Secondly, to make a pigtail you need to take well-dried material, otherwise assembled structure It will soon become deformed when it dries.
First we cut out the bottom part (window sill), making it 10 cm longer than the width of the opening. At the ends of the window sill we cut a groove for a tenon 65 mm wide and 40 mm deep.

We also make small 20 mm recesses at the ends of both window sills for joining the crossbars with the side posts - the so-called locks.
We make the side posts 70 mm higher than the height of the plastic window frame. On downsides of the racks, using a circular saw, we cut out a groove for the tenon 60 mm wide and 40 mm deep. We immediately make a lock in the side posts for the upper part.

Lastly, we make the top part of the pigtail. Based on the dimensions obtained between the two installed side parts.
Installation of the pigtail
We begin installing the frame into the opening from the bottom crossbar (window sill). Then the top is inserted into the opening, under which we place the side posts one by one, placing them with grooves on the tenons.

We fasten the elements of the frame together with self-tapping screws and, if desired (not obligatory), coat the joints with sealant. We caulk the gaps around the casing with ordinary tow, but without much fanaticism, so that the parts do not bend.
We close the upper shrinkage gap with soft insulation such as Rocwool or holofiber. This operation is best done after installing windows and external trim. More details in the article ""
>
Now you can begin installing the window.
Installing a window in a wooden house
We install a wooden or plastic window, aligning it with the front edge of the frame. Place the window inside by a third of the wall thickness, as is done in a panel or brick house, there is no need here due to the lower thermal conductivity coefficient of wood (smaller freezing depth).
Especially with small wall thicknesses wooden house, by recessing the window into the opening, we will be forced to trim the already narrow window sill. And the ledge that is formed as a result on the outside of the opening will have to be additionally closed and sealed. And as measurements taken with a thermal imager show, the main conductor of cold is the profile itself. For more details, see the photo report made from photographs from a thermal imager here.

Rough frame for cladding
If you have calculated the dimensions of the opening and the frame as described above, then the installation gaps around the window frame when installing in a wooden house should be 15 mm on the sides, 15 mm on the top and 15 mm on the bottom (we do not make the bottom gap larger because stand profile makes it possible to later install a plastic window sill under the frame, the thickness of which is 30 mm).
It is more convenient to attach the frame to the frame with the help of self-tapping screws of such a size that they fit into the body of the frame, but do not penetrate the wall. We drill holes in the frame with a drill with a diameter of 5-6 mm. Using self-tapping screws longer than the thickness of the frame is dangerous because they will pass through the frame and screw into the logs (timber), which is unacceptable.

Provided that all preparatory work has been done using a level, the window frame should fit exactly along the frame, i.e. Front edge The frames should be parallel to the plane of the window, without noticeable distortions.
Waterproofing a window from the outside
Before foaming the gap between the window and the frame, we need to decide what material we will use to waterproof the installation seam on the street side. As you know, the two main enemies of foam are sunlight and water. If from sun rays We can simply cover the installation seam with platbands or flashings, but with waterproofing the situation is more complicated, because it must meet two basic conditions: not let water in and at the same time not prevent moisture vapor from escaping from the inside to the outside. Well, and, of course, waterproofing must be resistant to prolonged weathering.
All these conditions are met by materials such as PSUL, waterproofing vapor-permeable tape and special sealant “STIZ-A”.
Sealant "STIZ-A" - one-component, vapor-permeable acrylic sealant white for sealing the outer layer - characterized by good adhesion to the base building materials: plastic, concrete, polymer concrete, foam concrete, plaster, brick and wood, among others.
It is also resistant to UV radiation, precipitation, temperature deformation and can be applied even in negative temperature up to -20 degrees. The only disadvantage of this material is that it is difficult to find in small containers, and buying a whole bucket makes sense when you are installing a lot of windows. If you choose “STIZ-A” as external waterproofing, then the procedure will be as follows: first we foam the window, then, after completely dry, cut off the foam sticking out from the outside and after that, using a spatula, apply sealant to the cut.
Waterproofing vapor-permeable tape (self-adhesive butyl rubber tape consisting of a vapor diffusion membrane with an adhesive layer of sealant on one or both sides) sold in rolls different widths. In our case, a tape with a width of 70 mm is suitable. When using this tape as waterproofing, ensure it is oriented correctly when gluing.

You can determine this by blowing into it from one side and the other (don’t forget to remove the paper first). Since there is a membrane inside the tape, air passage is only possible in one direction. The side from which it is impossible to “blow through” the tape is the outer (street) side.
The sequence of actions (first tape, then foam or first foam, then tape) does not have of great importance, but you need to take into account that the foam, expanding as it dries, not only stretches the tape with a bubble (it will interfere with the installation of trim later), but can also tear it off the window or frame.

Therefore, if you first stick the tape, then screw the platbands or hard strips on top of it immediately, and only then foam it. Or foam it first, wait for the foam to dry, cut off the excess and stick the tape on the same day so as not to expose the foam cut to prolonged weathering.
PSUL - pre-compressed self-expanding sealing tape (similar to foam rubber), impregnated special composition, thanks to which it is waterproofing and vapor permeable. Supplied compressed, rolled into rollers.
If you choose PSUL tape, then buy one that expands more than 30 mm. The PSUL will have to be glued not to the outer side of the frame profile, but to the end next to the front edge. This should be done after fixing the frame in the opening, but before foaming. Of course, it is more convenient to cover the frame with PSUL before installation, when it lies on the floor, but then the installation will have to be done at an accelerated pace, because after a few minutes the tape will expand and interfere with work.
The installation seam should be foamed only after the PSUL has completely expanded and covered installation gap. But here the same problem is quite possible as with the waterproofing tape: the foam expanding as it dries can squeeze the PSUL out. This can be avoided by pressing the PSUL on the street side with platbands or flashings.
Internal vapor barrier of windows
WITH inside The foam should also not remain open to prevent moisture from getting into it from the air in the room. To install an internal vapor barrier, you can use vapor barrier tape, which has already been discussed in the main section of this site, or use acrylic sealant SAZILAST-11 (“STIZ-B”).
The vapor barrier tape is glued to the end of the frame with a thin adhesive strip before foaming. Immediately after foaming, the protective paper is removed from the wide adhesive strip, and the tape is glued to the pigtail. Before the foam under the tape hardens, it is advisable to immediately install the window sill and screw the starting profile to the edges of the frame, otherwise later the tape “bloated” with foam will interfere with this.
Sazilast is applied to the hardened foam, or more precisely, to its cut. In this case, it is no longer necessary to rush to install window sills and starting profile, as when using tape. Nothing will prevent you from doing this later, when it is convenient.
Interior decoration
The interior decoration of a window in a wooden house (window sills, slopes) is not much different from the decoration in a panel or brick house. It’s even a little simpler here: you don’t need to drill holes to install the slopes - we fasten everything with self-tapping screws into the wood (into the frame).
There is also no need to additionally insulate the slopes from the inside with foam plastic or other material. To be on the safe side, it is enough to foam the slopes before installing them. inner surface casing in a narrow strip next to assembly seam. This will be enough, because wood does not freeze as deeply as concrete or brick.
Like a window sill and slopes
This method of installing a window in a wooden house allows you to save on slopes and window sills, gain time and achieve, in my opinion, a greater aesthetic effect, but for this you will need a good woodworking machine to evenly cut out the so-called reverse quarter on the casing elements, which will be install a plastic window.

What a reverse quarter is can be easily understood from the figure. This is the recess into which the window frame will be installed on the street side. Quarter depth - 20 mm. The width is made exactly corresponding to the thickness of the frame, for example: a 5-chamber VEKA has a profile thickness of 70 mm, therefore the width of the reverse quarter should be 70 mm.

Important exact calculation sizes of the frame and window, careful assembly of the frame and installation of the frame in the opening exactly at the level - the internal clearance should have the shape of a regular rectangle, and all edges of the outer edge should be located in the same plane without distortion. In order not to make a mistake in the dimensions, it is better to first make and install the window frame, and only then accurately measure and order the plastic window locally.
Let's assume that the window frame is already installed in the opening. The size of the plastic window is made such that it is slightly larger than the “clearance” of the casing, or more precisely: 10 mm more in width and the same amount in height. Such a window will not fit into the frame from the inside, but it will easily fit into the reverse quarter from the street side. In this case, the edges of the frame will “hide” behind a quarter of 5 mm on each side (this is no longer possible - the sash hinges will interfere), and an installation gap will remain around the frame, which will later be filled with foam.
The frame is attached to the frame with self-tapping screws, as already described above. To ensure a beautiful tight connection between the frame and the casing on the room side, you can use a D-shaped door seal. It is glued before installing the frame with the adhesive side on the edge of the quarter. Accordingly, the dimensions of the quarter must be adjusted for the seal.
But as practice shows, when high-quality manufacturing pigtails there is no need for such an addition. The window is placed directly into the quarter and the meringue of the gaps is pressed tightly against the frame.

When attaching the frame, we press it tightly against the quarter, squeezing the seal, and screw in the screws, fixing the window in this position. The installed window is foamed from the street. Then, after the foam has dried, its excess is cut off, the seam is sealed with waterproofing tape or sealed with “STIZ-A” sealant, and the trim is installed.
Of course, since we refuse interior decoration any casing additional elements, then they must ennoble it, i.e. give it a look that matches interior design premises.
First of all, you need to give the bottom crossbar the shape of a window sill so that its inner edge protrudes slightly from the wall and is slightly wider than the opening.

Secondly, we “dawn” the internal surfaces of the racks and the top, i.e. we abandon the primitive rectangular (in cross-section) shape of these elements and create a large chamfer, simulating a reversal of the slopes.
Next, we process the inner surface of the casing elements. There are many options here: texture, color - the choice is yours. You can simply sand the surface and coat it with varnish. You can cover the wood with stain desired color so that the surface of the casing is in harmony with the color of the window and/or the color of the walls.
There is also, in my opinion, an interesting, but more expensive option - brushing the surface, i.e. antiqued treatment.
Artificial aging of antique wood is now very popular in various design styles. The essence of brushing technology is to remove soft fibers from the surface of wood using a metal brush (along the fibers), while the surface turns from smooth to embossed. After giving the relief texture, the wood is cleaned of lint and fibers, then the final gloss is given.

You can immediately coat the wood with varnish, but “aged” wood will look much more impressive after treating it with stain of the color you want. However, there is an even more effective way of painting - patting - creating a contrast between dark wood pores and a lighter surface.
This is achieved using paint of the desired color: it covers the entire front surface of the casing, and then upper layer removed with a cloth before the paint has had time to dry. Final stage artificial aging- varnish coating. It is applied in two or three layers. You can then rub the surface with a soft cloth to add shine.
A wooden house means comfort, warmth and a special aroma. Today, when the frantic rhythm big city boring, like the abundance of reinforced concrete, wooden buildings regaining their former popularity. In exchange for numerous advantages and logs, you have to put up with their features. For example, select the first available plastic windows and it won’t be possible to install them using standard technology - a special approach is needed here, otherwise there is a risk of having to replace the windows in a couple of years, no matter how high quality they are. We'll figure out which windows to choose for a wooden house and how to install them so that they last for the period stated by the manufacturer.
No. 1. What kind of windows are installed in wooden houses?
Previously, in wooden houses, as in all others, only wooden windows were installed - there were no other options, but their quality was very different. If in the house good condition If the old wooden windows have been preserved and it would be a pity to dismantle them, then it makes sense to restore them. However, in most cases, the most logical thing to do would be to replace the old windows with new double-glazed windows, and here great difficulties await us. The issue for a wooden house is acute for those who deal with it. You will also have to pay a lot of attention to the correct installation of the window.
The following windows are suitable for a wooden house:
- ordinary wooden;
- wooden euro windows;
- plastic windows.
Windows with a decorative layout look impressive in a wooden house.
No. 6. Features of installing windows in a wooden house
When it comes to a wooden house, window installation is somewhat more complicated compared to concrete and other houses. The reason is strong tree shrinkage, especially in the first years after the construction of the building. Shrinkage occurs due to the wood losing stored moisture, and the worse the wood has been dried, the more volume it will lose. Over the course of a year, shrinkage can be up to 1.5 cm per meter of height; this process is most active in the first 5 years, then the tree can also change volume, absorbing and releasing moisture. If you install the window according to traditional technology, then in the first year you may not notice any problems, because the layer will compress under the weight of the tree, but then the structure itself will begin to deform, and eventually the glass will crack.
Whatever design is chosen, you will need casing, or pigtail. This required element modern wooden house, which allows you to make the window structure independent of the movement of the walls. The siege does not allow the logs to move in vertical plane in the area where the window opening is located, but does not interfere with the shrinkage and normal breathing of the tree. In addition, the pigtail allows you to further strengthen the wall. 
If installed window in wooden frame , then installation can be carried out using simplified technology. It is enough to make a vertical groove in the ends of the logs measuring 5 * 5 cm, insert the corresponding sizes into this groove wooden beam, this will be the casing.
Second option somewhat more complicated, can be used for any type of window. It consists of cutting out a ridge in a log, on which they install vertical beam with a groove, called a carriage. You can make a groove in the log, and a ridge on the carriage. The tongue-and-groove design will allow the log to slide freely without moving vertically. Installation in this case is performed in the following sequence:

Installing a window in a prepared frame comes down to the following steps:
- preparing small (5-10 mm) grooves for attaching the window sill;
- installing the window sill using a level and fastening it with self-tapping screws. Plastic window sill requires the use of a rubber washer. Holes are made in those places that will eventually be covered by the window;
- leveling the window frame and fixing it with anchors, followed by foaming;
- checking the frame for verticality and horizontality, installing double-glazed windows;
- installation of glazing beads, foaming of cracks.
Of course, it is best to entrust the installation of a window in a wooden house to a professional - here you will need knowledge of the intricacies and details on which the durability of the installed structure will depend.
You can install windows in a house made of timber on your own, without calling in specialists. It is important to strictly follow the instructions. Even minor mistakes can lead to serious consequences and the need re-installation. Before starting work, you should clearly determine which windows will be installed and where.
Peculiarities
The main nuance regarding the installation of windows in a house made of timber is the gradual deformation of the walls. Over time, the material changes its geometry and dimensions - a phenomenon called shrinkage. For this reason, some owners prefer to make the final installation of windows and doors 12-24 months after the construction of the house. This is how many years it takes for shrinkage to occur.
There is no need to wait that long. Firstly, the phenomenon may be relevant even 5 years after construction. Secondly, windows in houses are placed in a special box, which protects them from possible deformation. To reduce the effect of shrinkage on the structure, it is worth leaving a small gap between it and the opening, the width of which does not exceed 5–7 cm. After installation, it will need to be filled by special means.
When installing PVC windows, you will need to use reflective foil tape. It will maintain quality polyurethane foam, which could be negatively affected by wood fumes. An important nuance is the selection of the window sill. It must be selected taking into account possible installation heating radiators. If the window sill completely covers it, the heating of the room will worsen, and the material itself will suffer significantly. The window should be several centimeters smaller than the opening prepared for it.
Important! Special attention should be given to the surface of the window opening. If there is mold or moisture remains, then it is strictly not recommended to install the box with a window until the wood is completely cleaned and dried.
Types of windows
For the purpose of installation in a timber building, wooden windows are most often used, although if desired, you can choose plastic ones. Both designs will last long years, and the installation is almost the same. However, they have their differences.
Wooden windows are different high level environmental friendliness They blend beautifully with the overall appearance of the house and fit into any interior. They are quite attractive in price. The disadvantages include the need for regular additional processing using special means after 5 years of operation. This will prevent deterioration in the appearance of the material and its rotting. For the manufacture of frames, pine, oak or larch (in the form of laminated veneer lumber) are usually used.
Plastic windows let in less cold winter time years, have good thermal insulation and tightness. They are presented in many models on the market, which makes it difficult to choose perfect option it will be quite simple. Plastic is easy to maintain, resistant to impacts and does not lose its properties when used in unfavorable conditions. climatic conditions. The main disadvantage is considered to be low compatibility with the appearance of a house made of timber. And a low-quality design can retain heat poorly, significantly transmit sound from the street and have a short service life.
Windows also differ in their design. The installation process for them is identical, but operation can differ radically. The issue of choice should be approached as seriously as possible.
Single leaf
The smallest of classic windows are considered single-leaf. They are ideal for a hallway or kitchen, but for other rooms the amount of light transmitted will be insufficient. Therefore, they should be inserted only in small areas.
Bivalve
Standard windows that are used in most apartments and private houses. They have two doors, one of which opens in both planes. They are distinguished by practicality and the highest levels of convenience.
Tricuspid
Ideal for large rooms. Fits best in the living room and bedroom. Windows let in a lot of light and make the interior more beautiful. Two of the three doors can be opened completely or at a certain angle.
Deaf
Fixed windows have the simplest design and are very small in size. They are designed for installation in basements or attics. The design does not imply opening, and its shape can be triangular, rectangular or round.
Required Tools
Before installing windows yourself, you should think in advance about having all the necessary tools.
- perforator;
- drill-driver;
- hammer;
- mallet;
- chisel;
- anchor plates;
- pliers;
- hexagon;
- level;
- polyurethane foam;
- spray bottle with water.
When replacing a tool with its analogue, special care should be taken, since the process of performing the same action in this case may vary significantly. You need to try not to make mistakes.
Installation steps
Installation of plastic windows in timber house It is carried out only in calm and dry weather. It should be at least -10 °C outside. Materials must be kept dry and undamaged. The same applies to wooden structures. The whole procedure takes place in several stages.
Preparing the opening
At the very beginning you need to prepare the window opening. The main task will ensure that the surface is even on all edges, which will need to be verified using a level. If the house is old, the existing windows should be removed.
Before proceeding to active actions, calculations should be made. Bottom part the window should be at a level of 80–90 cm from the floor. The dimensions of the opening must be calculated taking into account the dimensions of the window structure. They should be increased by 220 mm in width and 245 mm in height. This is necessary for installing the casing, the thickness of which on each side will be about 100 mm, gaps for insulation and gradual shrinkage.
To prepare the opening, you need to outline it with a pencil and then cut it out with a chain saw. After making sure that the surface is even, you need to apply a protective impregnation that will prevent the wood from deteriorating from moisture.
Casing
You can make the casing yourself. It is needed even in cases where the house is old and the likelihood of shrinkage is minimal. Its main purpose is to fix the opening and the entire structure. The casing is created from embedded or monolithic timber and installed using the tongue-and-groove system. When installing it, you need to take into account the gap at the top, the size of which should be about 15 mm for each meter of wall height.
- Apply markings to the walls and prepared opening.
- Make grooves 50 mm wide and deep in the side edges of the opening.
- Place a special tourniquet inside the grooves.
- Lay the bottom board, placing insulation underneath it.
- Insert a 50 mm thick tenon into the groove.
- Screw the board to the tenon with self-tapping screws (thickness 50 mm, width equal to that of the wall beam).
- Install the top board into the grooves, placing it on the vertical elements.
- Fill the upper gap with insulation and cover it with a special film.
- Secure the entire box with self-tapping screws and fill the remaining cracks with sealant.
If you follow the instructions casing structure it will turn out to be reliable. It is important that the boards used in it are dry at the time of installation.
Reference! It is possible to install plastic windows “in the deck” using carriages with grooves. However, the tongue-and-groove method is more universal and reliable.
Installation
The last step is installing the windows. It is important to make sure that the casing is level before starting work. To carry out the installation, it is best to invite an assistant, since it will be difficult for one person to cope.
- Install the frame inside the window opening, securing it with special wedges.
- Level the frame using a level and secure with self-tapping screws.
- Fill all remaining gaps with foam.
- Install ebb and flow with slopes.
- Cash out by attaching the platbands to the boards of the frame.
- Insert the double-glazed windows into the frame and align them with glazing beads.
- Hang the doors on their hinges and make sure they are working properly.
The window can be used. If the curvature of the structure is later discovered, it can only be eliminated by complete reinstallation. It is recommended to ensure evenness during the installation process.
To get the maximum beautiful window and simplification of work should be taken advantage of simple tips and recommendations:
- It is not recommended to install windows immediately after building a house; even the casing does not guarantee one hundred percent protection against shrinkage;
- connections for the window structure must be sliding, which will prevent the window from deforming in the future;
- finishing should be done only after complete installation windows and checking the evenness of its location;
- Before starting work, it is recommended to calculate everything before the smallest details and prepare the corresponding drawing.
If you have any doubts about whether it will be possible to install a window, it is better to seek the help of a specialist. If there is a lack of experience, there is a high risk of injury or structural damage, which will lead to large financial costs. To install a window in a log house, you need to perform all steps carefully and follow the instructions.
Correct installation of a plastic window in a timber house
During construction wooden buildings, in particular timber houses, when it comes to window openings Many craftsmen who have not previously encountered the installation of plastic windows in them have a logical question: “How to install them?”
The specifics of wooden houses require a certain approach to the installation of window blocks. Therefore, without knowing the nuances, install a plastic window in timber house Not sure it's going to happen.
Let's take a closer look at what needs to be taken into account when performing work, and how, in fact, to do it correctly yourself.
Necessary preparatory actions.

Before planning the installation of windows, you need to consider what type of material? building erected. This is very important, because if profiled or sawn timber was used during construction, then such a building must “settle.” The need for such “sludge” at home is dictated, first of all, by the high level of moisture in the wood. Optimal time is usually 2-4 years. It is because of this that plastic windows are not installed in such houses immediately while shrinkage is taking place. Instead of them, temporary ones made of wood are installed.
Important! In all cases, light-transmitting structures should not be installed on a layer (both above and below) made with polyurethane foam, otherwise there is a high probability of misalignment of the mounted products.
It’s another matter if the building was erected using laminated veneer lumber. The moisture content of such material is low, and therefore, immediately after covering it with a roof, you can begin work related to the installation of PVC structures.
It should be remembered that even such timber, due to the properties of wood, is prone to slight deformations. The changes are especially pronounced after rain and in winter period: in the first case it swells, in the second, on the contrary, it contracts.
Double-glazed windows in a log house immediately after its construction. Is it possible?

It happens that there is simply no time to wait for the completed building to shrink completely, and it is necessary to glaze the openings immediately. In this case you will have to install temporary plastic windows, and smaller in size than the existing opening.
Any gaps that appear on the sides of the light-transmitting structure are sealed with mounting foam, and the upper compensation gap is filled wooden planks small thickness (they will need to be removed one by one as the house shrinks). To prevent gusts of wind and precipitation from entering the premises, the planks are puttied with tow.
Of course, this option for fastening windows is temporary and is intended only to help create warm contour. After the final shrinkage of the building, the structures installed in this way will need to be dismantled, and new ones installed in their place, already “in a standard manner.”
Option for using windows with casing.

Casing boards used for tightly fixing installed windows. Their goal is to prevent the timber from moving vertically, that is, in essence, to protect light-transmitting structures from loads that arise when the house moves. Installation of plastic windows in a timber house using casing is possible immediately after its construction, without the tedious wait for the completion of the shrinkage process.

A characteristic feature of the installation of windows with casing is the non-standard fastening of the platbands. In this case, they are fixed not to the walls of the house, but to the casing connections. Of course, there is a real danger of damage to the platbands during the shrinkage of the building, however, the costs of dismantling the old ones and installing new ones will cost the owner significantly less than replacing a broken double-glazed window.
Sequence of installation work.

To install a plastic window in a log house, you need to follow these steps.
As a rule, when building a house, workers do it themselves grooves in window opening , intended for installation of a sliding block in them. If there are no such recesses, then you need to make them yourself, exactly in the middle of the end side of the opening. In this case, pre-prepared sliding bars are mounted in the grooves in such a way that they do not jump out when the shrinking walls move. In this case, certain gaps for shrinkage should be provided in the upper and lower parts of the window opening.

The next stage of forming a window in a house made of timber is to work with insulation - it is laid over the entire surface of the opening. Next, the casing boards are fixed in such a way that the nails hit exactly the sliding bar, otherwise, if they hit the bar itself, over time there is a high probability of deformation of the entire window structure. When attaching the casing board, it is necessary to leave a certain distance (about 5 cm) between it and the beam in order to avoid pressure from the upper element of the opening on the glass unit when the house shrinks. After the operations have been completed, the window block itself is installed in the prepared opening.
To have a more complete understanding of how to install plastic windows in a log house, check out the following video.
Possible cracks are plugged with insulation and foamed with polyurethane foam. The upper gap, left for the safety of the glass unit in case of shrinkage of the house, is insulated without using foam. Platbands are installed on top of the timber along the perimeter of the opening. Then the ebb is installed.
Technology for installing plastic windows in a wooden house
Korovin Sergey Dmitrievich
Master of Architecture, graduated from Samara State University of Architecture and Civil Engineering. 11 years of experience in design and construction.
Thanks to your operational characteristics Double-glazed windows made of PVC material have gained particular popularity among the population. They are installed in buildings and structures made of concrete, brick, and wood. Installing plastic windows in a wooden house requires following certain rules.
Important installation details
When starting the installation, you need to prepare the equipment you will need: building level and plumb line, and also know how to insert a plastic window. It is necessary to install a PVC window strictly observing the placement in a level plane. This will ensure correct work all elements, the doors will not open or close spontaneously.
 The technology for installing a PVC window involves its correct placement in a level plane
When purchasing plastic structures, you need to buy additional special fasteners for installation. The frame is fixed in the frame of a wooden structure using self-tapping screws and special fasteners. Observing technological process and by correctly installing plastic windows in a wooden house, you are guaranteed to receive window units that will last for a long time.
 The window frame is secured using anchor plates
If you dismantle the sashes, the structure will become much lighter and it will be easier to move it, however, installing metal-plastic windows in a wooden house alone is still not recommended. To remove the doors, you need to remove the pins from the hinges.
How to install PVC double-glazed windows
Do-it-yourself installation of plastic windows in a wooden house is carried out in stages:
- preparatory activities before installation;
- installation of PVC windows;
- control and verification of location in space;
- blowing with foam.
To understand how to install plastic windows both in a wooden house and in a timber or log house, let’s look at each stage in more detail.
Carrying out preparatory work
First of all, you need to remove exact dimensions, measuring the opening, and order a window structure from a trusted manufacturer. To do this, most often they invite a representative of a company that produces plastic frames. You can take measurements yourself. After this, they determine the color of the structure and the completeness of the fittings necessary for the functioning of the window.

When the manufacturer delivers the product to the site, the following steps must be completed:
- if the decision is made to replace installed windows in the old opening, first of all, it is necessary to dismantle the structure;
- after which they clean dust, dirt and remove debris that got into the opening from dismantling;
- It is worth aligning the opening if its geometry is broken.
Having completed the preparation, they insert a plastic window into a wooden house with their own hands.
Fastening the window structure into the prepared opening
We install the window sill first; it will be the base for the double-glazed windows, so it needs to be placed strictly level (horizontally). For fastening strength, notches are made on the sides of the box approximately 8 mm deep. Adjustment is made using plastic plates or planks. Fastening occurs with self-tapping screws to the bottom of the box. When screwing in, you should place washers under the screw head; this will prevent damage to the surface.
The next step will be correct installation pens. The film that protects the structures should not be removed; it protects them from damage when the windows are installed. When attaching, the handle must be placed horizontally. When all the fittings have been assembled, the installation of metal-plastic windows begins.
First you need to level the PVC frame. A frame is placed on two-centimeter bars and leveled horizontally, using a water level. After this, they move on to vertical alignment.
Having obtained ideal parameters at the water level, they fix the frame with self-tapping screws to the frame, using mounting fasteners that were specially purchased in the store. It is important not to get the self-tapping screw into the ridge of the log where the socket is installed.
After attaching the window element, we get 2-centimeter gaps around it for the mounting foam.
Before using polyurethane foam, you need to hang the shutters so that after foaming the frame profile does not bend and damage the window. It is important to remember that foam can only be used when the sash is closed..
Control and foaming of the structure
After hanging the sashes, you need to check how the double-glazed window opens and closes. If a window that is half open does not close or move further, then the frame is considered to be installed correctly and the alignment is correct. After closing the sash, foam it with installation foam and leave it for complete fixation for a day.
Why is casing made for plastic windows in a timber house?
To obtain quality windows PVC in a wooden house, you must strictly observe the installation features, that is, install it to a special frame (base). The need for such a design is due to the characteristics of wooden buildings. Unlike a building made of stone (concrete or brick), a wooden panel house unstable over a long period.
 The casing prevents frame deformation when the house shrinks
The building will be completed within the first five years after its construction. In this case, the walls dry out up to 6 cm. This important nuance must be taken into account when installing a plastic window in a frame house. It is clear that you cannot simply insert a plastic window into a wooden house; you need to create a structure for the opening, which is called a casing, or they also say a window frame. Its direct purpose is to prevent the frame from being affected by wall shrinkage, so the socket:
- strengthens the opening;
- bears the load;
- prevents the effects of shrinkage.
The pigtail looks like a box made from thick boards. The structure is attached to the side rack on a groove, no fasteners are used. There is a gap left above the jamb to compensate for shrinkage for a wooden house. There are several options for installing it:
- A groove is cut in the log into which the block is placed. Self-tapping screws are screwed into the last element of the embedded beam;
- a groove is cut out in the racks on the sides of the structure, a tenon is cut out from the end of the log in the opening;
- A groove is made at the end of the logs, and a tenon is placed on the side posts of the box.
 Casing options
To get a high-quality design, you need to follow the technology for installing plastic windows in a wooden house. To begin with, cover the ridges of the logs with insulation and secure it with staples or small nails. This stage is necessary to insulate the house and eliminate creaks. Then the lower crossbar of the casing is mounted, and carriages (side posts of the frame) are stuffed onto the ridges, and the upper jumper is placed in the upper groove of the posts. After collecting the box, carefully connect it with self-tapping screws, it is important that they do not get into the logs.

The gaps that are visible in the opening after installing the casing must be filled with tow or insulation. Then it happens standard installation plastic windows in a frame house or log house.
 The cracks are sealed with insulation or tow.
The compensation gap is filled with flat boards pre-wrapped with tow. As the walls shrink, they are gradually knocked out. To do this, remove the top casing and, having knocked out the board, put it back.
The final stage when glazing a wooden structure
Finishing after PVC installations Windows in a log house are made in the same way as wooden ones, that is, after installing the frame structure and insulation, wooden trim is installed. When ordering PVC windows in wooden structure It’s worth taking a closer look at the option with a wood texture, this will allow them to look harmonious against the background of the felled building.
Many manufacturers of PVC structures offer not only the classic white color option for frames. You can order any shade that the customer desires. Colored plastic frames will cost a little more, but will become more suitable option for a home made of natural materials.
When ordering, it is important to take the correct measurements of the opening and not make a mistake in the width of the window sill. Self-installation PVC windows in a wooden house are not such a complicated process if you know all the nuances. You can do it yourself, without resorting to the help of expensive installers.
Do-it-yourself technology for installing plastic windows in a timber house

A wooden house made of timber or logs inevitably shrinks in the first years of operation. The wood dries out, the height of the walls decreases - at the same time, a huge load is placed on window frames. To window designs made of PVC were not damaged due to this natural process, the installation of plastic windows in a log house with your own hands must be done with strict adherence to the instructions.
Windows are installed 1–2 years after completion of construction, if the material used is logs or regular timber. It is during this period that the most active shrinkage occurs. If glued laminated timber is used, installation can begin immediately, since this material has little moisture and practically does not shrink. But in any case, installing a window will have a number of features, and the main one is installation not directly into the opening, but into a special casing. So, how to install plastic windows in a log or timber house correctly?
For our readers, we have also collected consumer reviews, which you can view at http://oknanagoda.com/okna/plastik/profili/okna-brugmann-otzyvy.html.
Read more about choosing fittings for PVC windows in our material “Choosing a fitting mechanism for plastic windows”.
Preparing the window opening
Sawing an opening
The main thing when forming an opening is to maintain the evenness of all its edges. To do this, you need to use not only a plumb line, but also a water level.
Marking windows begins with measuring the distance from the floor to the bottom edge of the opening. It can be anything, but optimal parameter- 80–90 cm, so the window sill will not interfere with either the radiator or desk or other furniture.
The size of the windows in a timber house is selected as follows:
- height - 13 cm more than the plastic structure;
- width - 12–14 cm more;
- additionally 3 cm is taken into account in both planes for polyurethane foam.
The opening is cut with a chain saw so that half of the log is captured from below and from above. The saw cuts must be treated with protective impregnations.

The main stage of installing double-glazed windows in a wooden house is fixing the frame in the window opening.
Casing (casing)
The most critical stage of work is the installation of the casing. It is made from timber, which is not simply nailed to the walls, but is attached using a tongue-and-groove system. This box is needed in order to make the windows in a house made of timber independent from the walls and to protect the structures from shrinkage of a private house - using fasteners instead of grooves would not allow this task to be completed.

The second protective barrier is the expansion gap above the box. Its height is calculated based on the maximum shrinkage, which is usually 15 mm for each meter of wall height. Window casing in a log house is usually done using embedded or monolithic timber:
- On the side edges of the opening using chain saw or cutters make grooves 50 mm wide and deep.
- Jute is placed inside the grooves.
- The bottom board is laid, which will not only be an element of the casing, but also a window sill. Insulation is laid between it and the wall beam.
- A tenon - a block 50 mm thick - is inserted into the groove. You cannot fix it with fasteners - the wall will slide along it like on a rail.
- A well-dried board 50 mm thick and a width equal to the thickness of the wall beam is screwed to the beam with self-tapping screws.
- The top board is inserted into the grooves, laying on the vertical elements and becoming a spacer for them. The gap at the top is filled with a sealant (moss, tow).
- The elements of the box are fastened together with self-tapping screws.
- The cracks are filled with sealant.
The seal in the upper gap must be protected from moisture and steam using a special film, since plastic windows can be installed in a log house for a long time only by ensuring their complete protection.
There is another way to install the casing of plastic windows in a log house - “in the deck”. Instead of boards and beams, carriages with grooves are used, and the tenon is cut out on the logs themselves. In this case, no fasteners will be required at all. It is important not to forget about sealing the joint with jute.

Installation of plastic or wooden windows in a log house must be carried out in compliance with technology. This is due to the fact that the procedure for installing double-glazed windows in buildings of this type has its own characteristics, which only professionals in their field know about. Independent installation of window units in a house made of timber can lead to disastrous consequences. In the best case, after some time the window sashes will simply stop opening.
When is the best time to start installing windows?
Installation of windows and doors in a house made of timber, as well as work on insulation and finishing of the building should begin only after the end of the shrinkage period of the building, which, depending on design features at home can last from 8 months to one year.
Work for high-quality window installation
The process of installing plastic windows in a log house can be divided into the following stages:
- Waiting for the house to shrink;
- Making a pigtail. IN in this case such an element is made from a block of hardwood. In this case, you should carefully measure the dimensions of the entire structure;
- Fastening the bars into pre-cut vertical grooves;
- Installation of window blocks;
- Carrying out finishing work.
The craftsmen of our company will carry out all types of work related to the manufacture and installation of plastic windows in houses made of timber. We guarantee high quality services provided, as well as the reliability and durability of the products we sell.
Windows in a log house are usually inserted after the house shrinks, which occurs within 1-2 years after the construction of the box and can reach 15 - 20 cm when building a house from simple timber natural humidity and 1-2 cm when building a house from laminated veneer lumber.
If windows in a log house built from lumber of natural moisture are installed immediately after the construction of the frame, then after 1-2 years they may jam, or, even worse, simply fly out of the opening when the window sash is wedged. This occurs due to the fact that the window cannot withstand the heavy load, which is directed vertically when the wooden house shrinks, the fastenings move and come off.
Windows in a timber house
Therefore, it is recommended to install windows in a log house only 1-2 years after its construction. Or install windows in a special way, which consists of making a special casing, which gives the windows the opportunity not to take the load during shrinkage.
Casing in a timber house
professional casing in a timber house Casing in a timber house performs several functions:
1. protective – protects windows from the effects of shrinkage,
3. replaces slopes.
The casing for the window of a wooden house is a deck that is attached to the walls of the house in the window opening, and the window, in turn, is attached to it. An opening of several centimeters, usually 5-7 cm, is left between the upper wall of the window opening and the window, which is filled with compressible insulation. This allows you to level out the effect of shrinkage on the window, because the window is attached to the side parts of the casing, and the house falls horizontally under the influence of shrinkage.
As a result of the shrinkage of the house, this gap will gradually decrease, which means that it must be filled with some kind of elastic sealant that can shrink, otherwise cracks will form. Such sealants include PPE and tow.
The casing deck is installed in the window opening on special skids, which makes it independent of the entire building and prevents deformation. When the house sinks due to shrinkage, the casing moves freely, but the window remains independent. The gap between the window and the casing is usually mounted using polyurethane foam, and then covered with material from exposure to direct sunlight.
Thus, windows installed in a timber or other wooden house will not deform, jam and will serve well.
when to install windows in a log house Assembly of a log house by a construction company. Assembling a log house in a construction company usually includes installing windows and doors. Normally functioning windows and doors, especially in winter, are an indicator of the construction of a normal foundation, high-quality and competent insulation of any house. Each construction company cares about the quality of services provided and builds as efficiently as possible timber houses. Therefore, you should not be afraid of any problems with the installation of windows and doors by a good construction company.
The problem of the impact of house shrinkage on windows is not so relevant when building houses from profiled dry, glued and insulated laminated veneer lumber. Because the percentage of shrinkage of such houses is minimal and does not cause noticeable deformations, including when installing windows. For such houses there is no rule according to which it is necessary to maintain a time interval between construction and finishing.
Decorative finishing of the casing deck involves painting it to match the color of the window, or carved elements. The casing deck does not impair in any way appearance home, but on the contrary, makes it stylish and of high quality.
If after building a house from timber using construction company If any problems arise with opening the window, it is better to immediately seek advice on the issue warranty obligations. Because, regardless of the type of house, the window must open and close freely after its installation and during operation.