Installation of a wall hung toilet. Toilet installation installation: we do the work ourselves. Installation without installation
Read also
When arranging a bathroom in a house or apartment, owners often face the problem of how to “hide” unaesthetic utility connections. In addition, they are interested in the question of how to rationally manage useful space. There is an excellent option - installing a toilet installation that solves both problems.
Mounting design wall hung toilet makes it possible to hide all communications and functional parts, including the drain tank. The use of the installation visually increases the volume of the room. We will tell you how to install it, how decorative camouflage is performed, and how the plumbing bowl is then hung.
We have described in detail the process of installing support frames for wall-hung toilets and attaching them to the walls and floor. laid out step by step guides for installation different types installations. The information presented for consideration has been supplemented visual diagrams, photo collections, video instructions.
Modern market construction and related equipment offers two types of installation systems. Both options are convenient and practical, and the choice depends on which walls the structure will be attached to and which parts of it will bear the main operational load.
Block installation– the simplest, a budget option, however, certain conditions are required for its installation. The structure can only be used on a main wall, having previously prepared a niche in it to accommodate the tank and connections to the sewerage system with water supply.
The second option involves lining the system with bricks, masking it with plasterboard or other sheet materials followed by decorative cladding. These actions are carried out only after all installation activities are completed.
Strong anchors are required for fastening. They bear the main operational load. The main advantages of the model include a reasonable price and the ability to use the installation not only in conjunction with wall-hung toilets, but also with stationary floor-standing toilets.
A block installation can be “recessed” into a niche made in the main wall, and in this way save useful space in the bathroom
Frame installation belongs to more complex type structure, but makes it possible to fix the toilet on thin hollow partitions or plasterboard walls. It is considered very reliable system and has all the characteristics to hold both the plumbing module and itself.
Placed on the floor or foundation. Allows several mounting options: with special elements to four points on the wall, to two points on the floor and two -on the wall, or only to the base of the floor using stable paws. The main load goes to bottom part grounds.
The main advantage frame installation are adjustable legs. They can be set to any desired and comfortable height. Design suitable for indoor installation non-standard shape, easily fits into the most unexpected design and can even be located in a corner without hiding usable space bathroom.

Frame installation allows you to place the toilet in any place most convenient for you and does not require a permanent wall for installation
The dimensions of block systems are always standard. Their width is 50 centimeters, their depth ranges from 10 to 15 cm, and their height does not exceed 1 meter. Frame installations have a width basic basis from 50 to 60 cm, depth - from 15 to 30 cm, and height (due to adjustable legs) - from 80 cm to 1.4 meters.
For wooden houses or non-permanent buildings, experts recommend purchasing the widest and lowest systems possible. This makes it possible to reduce the load on the walls and ensures the normal functioning of the module for a long time.
Image gallery
Anton Tsugunov
Reading time: 5 minutes
Wall-hung toilets are a fairly new trend in bathroom design. They occupy less space than conventional ones, and allow you to hide all the drain fittings in the wall. But before installing them, it is necessary to carry out installation installation - secure all elements of the system to the wall. This is easy to do yourself, you just need to choose the right place.
Types of installations
Manufacturers offer two types:
- Block. This is a design made from plastic tank, to which it is attached drain fittings and fasteners. This is the simplest and cheap option. In this case, the toilet bowl can be either wall-hung or floor-mounted. This option is only suitable for mounting to a solid wall.
- Frame. This is a metal frame that holds the bowl itself and the sewer pipes. In this case, the wall bears practically no load; the structure only presses on the floor. This option is more reliable, as it can withstand weight up to 400 kg.
Most often, frame installations are installed. They do not require complex repair work, you don’t need to break the walls of your apartment to get to communications.
How to choose the right place?
Remember that if you choose a block system, it can only be installed in a solid wall, so the choice of mounting locations is immediately reduced.
The frame structure can be installed anywhere. Consider the location options:
- Standard - near the wall, design dimensions - 50 × 112 cm.
- Angular – great option to save space, allowing you to install the toilet in the corner.
- Low – suitable for placing the system under a window.
- Double-sided - usually used in public spaces.
- Linear - combining a toilet and a bidet into one design.
Before purchasing an installation, decide on its type and location in the toilet. You should have the installation diagram ready before going to the store.
Required materials for installation
For correct execution installation of the toilet installation you must prepare following materials and tools:
- Level.
- Keys that match the size of the fasteners.
- Pencil.
- Hammer.
- Roulette.
- Installation with all fasteners.
Don’t be lazy to immediately prepare everything you need so as not to be distracted while installing the installation system for the toilet.
Installation of a block installation with a wall-hung toilet
If you choose a more difficult option, study everything first available instructions, including do-it-yourself installation on video.
Stages of work:
- First you need to mark the wall and floor in the place where the structure will be suspended. The axis of the toilet must coincide with the axis of the room, if it has small sizes. In a large bathroom, when determining the position of the toilet axis, you need to focus on the axis of the sewer drain.
- The installation height of the system depends on its size. Usually it is approximately 1 meter from the floor. The width is usually indicated in the manufacturer's instructions; it may vary from company to company. Don't forget that the axis should be exactly in the center. Mark the mounting points on the wall.
- Drill holes and insert dowels. It is most reliable to hang the installation on dowel nails, only they will withstand such a load.
- Screw on the drain tank.
- Remove the drain button and check that all gaskets are in place. For more information on how to do this, read the installation instructions from the manufacturer.
- Connect the pipes to the tank.
- Drill holes for the bowl mounts. Usually it is hung so that the distance from the floor to the seat is 40–50 cm. Focus on your convenience when choosing the installation height.
- Insert the toilet pins. It can be hung as a last resort.
- Secure the drain hose.
- Check the system for leaks.
- If everything is in order, seal the wall with tiles or other finishing materials.
Installation of a block installation with a floor-mounted toilet
This design allows you to hide the tank and communications, but at the same time reduces the load on the wall, because there is no need to hang the bowl. Do-it-yourself toilet installation with a floor-mounted toilet is much easier than the previous option.
Installation of a frame installation with a wall-hung toilet
This option is good because it allows you to place the toilet far from the walls, anywhere in the bathroom. After you choose appropriate place, you can start working.
Installing a toilet installation includes the following steps:
At the first stage, a metal frame with fasteners is assembled. These frames are usually sold separately and fit different types toilets. Next, the drain tank is installed on the frame. Its position can be adjusted using brackets. Please observe the following standard dimensions:
- The height from the floor to the drain button is 1 meter.
- The distance between the fastening units coincides with the distance between the bowl lugs.
- The height from the floor to the sewer pipe is 22 cm.
- The distance from the floor to the toilet seat is 40 cm.
Important! Between the wall and cistern There should be at least one centimeter left.
Now you need to attach the entire structure to the wall.
- Use a level to check strict adherence to verticals and horizontals. Mark holes on the wall and floor, drill them and install fasteners. Screw the frame securely to the floor and wall.
- After installing the frame, you need to connect the water pipe. It is better to opt for a plastic pipe than a flexible hose. The latter will not last as long as the toilet. And changing hoses hidden in the wall is problematic, so they are most often used plastic pipes– they can be connected to the tank from above or from the side. Connect the drain corrugation to the sewer and check installed system for tightness.
- Install the pins on which you will then hang the toilet. Assemble a frame from metal profiles for the wall that will cover the installation.
- Take moisture resistant drywall at least 1 cm thick, cut it to the size of the false wall. Secure to metal profiles. Don't forget to make drain holes and buttons. You can make a tiled pattern on top.
It is best to carry out 1.5–2 weeks after completion of work.
A frame installation for a wall-hung toilet is more expensive and more difficult to install than a block installation, but it leaves a lot of room for creativity.
Installation errors
If you have never worked with plumbing, then installing an installation under the toilet with your own hands may cause you difficulties. Fortunately, the wizard can easily correct all mistakes.
Problems you may encounter:
- . Check that the gaskets are installed correctly. Turn off the water, unscrew the fasteners and adjust the seals if necessary.
- The floor-mounted toilet is leaking. It is necessary to seal the joints with the corrugation under the toilet with silicone.
- Water stagnates in the bowl. Check the angle of the drain corrugation. It should be equal to 45 degrees.
- The toilet is rocking. Tighten all fasteners. The same should be done with the swinging tank.

Conventional floor-mounted toilets have been replaced by wall-hung structures that do not take up floor space and look more modern. It is not surprising that wall-mounted models have begun to push traditional products out of the market. Installation suspended structure It’s more complicated, takes more time and costs more, but you can save money if you consider an option such as installing a wall-hung toilet yourself.
Internal structure and principle of operation of the design
If you look into design features products, it becomes clear how to install wall-mounted toilet.
The design of the wall product is such that visible element is only the toilet bowl
The first element is a strong steel frame, which is the base to which the visible part of the structure is attached - the toilet bowl. It is with its installation that the installation of a wall-hung toilet begins. The frame is securely fixed to the wall and also fixed to the floor - as a result, it must withstand the weight of a heavy person.
Accordingly, to weak walls (for example, made of plasterboard) this design installation is unacceptable, since the wall simply will not hold up. The frame is equipped with a device that allows you to adjust the height (400-430 mm) at which the product bowl is mounted. It is suspended from the frame using special pins - this is the main fastening of the wall-hung toilet.

Often two installations are installed simultaneously - for the toilet and for the bidet
The second element is a plastic cistern hidden in the wall. Its shape differs from the traditional one, since the container must fit into narrow design. It is mounted in a steel frame and insulated special material, eliminating the appearance of condensation - styropol. The front wall of the tank is equipped with a cutout for mounting a release button device. In case of repair, this cutout is also used. Almost all modern tanks require dosing of drainage: for example, the volume of water discharged can be 3 liters or 6 liters, depending on the purpose.

Flush tanks of a flat configuration are fixed inside the installation
The third element is the toilet bowl, the only visible and actively used structural part. Its shape is traditional, oval, although designer models come in both round and rectangular configurations.

The toilet bowl can be rectangular, or even round shape- it all depends on the designer’s imagination and the client’s desires
There should be no problems with fasteners, since the product comes with a set of necessary details and tools and installation instructions. Sometimes it is necessary to additionally purchase Teflon tape, a polyethylene outlet, a flexible hose, and studs.
Installation technology
Installing a wall-hung toilet using a special frame installed in the wall is more expensive, but more reliable and faster.

The installation must be mounted to the floor and main wall
Installation steps:
- Installation steel frame– through special holes it is attached to the main wall and floor using dowels. At the installation site, sewerage and water pipe. The frame (installation) should be checked for evenness using a level. It must be clearly parallel to the wall to which it is attached. At this stage, the installation height of the wall-hung toilet is also set - 40-43 cm. It depends on the height of the apartment owners.

The height of the toilet bowl is adjustable during installation
- Water supply to the tank. It can be flexible or rigid. Experts insist on the hard version, as it lasts much longer. While the liner is being installed, the valve in the tank is closed.

During work, the water drain from the tank should be shut off.
- Connection of the toilet to the sewerage system. The toilet outlet is inserted into sewer outlet, secure the connection using corrugations. After installation, it is necessary to test the system - do a test drain. To do this, the toilet bowl is temporarily completely screwed to the frame. It is then removed again, as it is usually installed at the final stage.

Many installation kits are connected to a sewer pipe without the use of corrugations
- Covering the work area with sheets of plasterboard. For plumbing unit choose sheets of waterproof double plasterboard, which is stronger than regular plasterboard. The panels are mounted to the frame and metal profile, which is mounted on the wall. The instructions included with the product include detailed diagram cutting material with cutout points required holes. There can be two options for covering: for the entire wall area or just to cover the installation. In the second case, an improvised shelf will appear above the toilet bowl.

An improvised shelf above the toilet and bidet can be used for decoration or necessary things
- Partition cladding ceramic tiles or panels similar finishing material bathroom.

The wall cladding behind the toilet should be in harmony with the rest of the room’s decoration
- The final stage is the installation of a wall-mounted toilet, specifically its bowl. It is hung on a designated part of the steel frame using two pins.

Sheets of plasterboard with lining cover the installation and the flush cistern, leaving the toilet bowl and flush button
Particular attention should be paid correct installation installation, since the correct execution of subsequent work depends on it.
Installation of a toilet without installation, on a concrete base
Sometimes people are interested in how to install a wall-hung toilet without installation. Of course, installing a toilet on a frame can be replaced with a cheaper option - installing it on a self-made concrete base.
The flush cistern is installed in two ways: either mounted in the wall with flush buttons, or placed in a standard manner above the toilet bowl in a manufactured base.

Wall-mounted toilet mounting diagram: 1 - 2 rods mounted in the wall; 2 - monolithic concrete base; 3 - drain pipe
Let's consider the most economical option.
To install you need to prepare:
- about 40 liters of M200 concrete;
- boards for formwork;
- nuts, washers, wood screws;
- 2 threaded rods 2 cm thick (length from 50 to 80 cm);
- a piece of plastic pipe (length – 8 cm or more, diameter – 11 cm);
- drain coupling;
- silicone sealant.
Procedure:
They start by securing the rods in the main wall. In the future, the toilet bowl will be “planted” on the outlets of the rods. It will turn out pretty stable design, which can withstand a weight of 400-500 kg.

Dimensions concrete base calculated taking into account further dismantling of the formwork
Install the formwork. Calculate the distance between the holes for fasteners and mark the fastening points on the formwork.
Calculate the length of the rods: sum up the thickness of the recess (about 15 cm), the distance from the toilet bowl to the wall. To fix the rods in the wall, use a chemical anchor - special glue for concrete.
After installing the pins and installing the formwork, try on the toilet bowl. The holes for fastening must coincide with the outlets, the outlet hole must coincide with the outlet of the coupling.

The concrete base will finally harden only after 2-3 weeks.
Begin concreting, maintaining drainer polystyrene foam. The result is a monolithic block with a fixed open coupling and protruding pins.

The concrete base should include pins for the toilet bowl, a coupling outlet for the flush and space at the top for mounting a cistern.
There is no need to think about how to install a wall-mounted toilet on a prepared base - the subsequent steps are no different from installing a conventional one floor-standing toilet: connect the drain, seal the connections, install the bowl on the pins, tighten the nuts. The flush cistern is fixed above the toilet bowl.

The concrete base and drain pipe can be covered with sheets of plasterboard, leaving an opening for access to the drain tank
Installing a wall-hung toilet like this yourself will save family budget, since expensive installation is not required.
If you have chosen a wall-mounted toilet for your bathroom, you should remember that the process of installing it is very different from traditional options. It is much more complicated, and the work requires much more time. But it should be noted that even inexperienced craftsmen can do the work, provided that they know all the basic features of the work process and perform all technological actions in the correct sequence.
Main elements of the system
First, let's figure out what the structure consists of and what parts you will have to install during the work process:
| Basic structure | It is durable metal carcass, which experts call installation for the simple reason that it is on this frame that the toilet is placed. When choosing, pay special attention to strength, since this unit will bear the main load. It is also important to have a system that allows you to adjust the height of the bowl, since the floor level in the room may be different |
| Tank | It is made of plastic and has a shape that allows it to be placed inside the installation. There is a button on the front that is connected to the drain mechanism, through which access to the inside of the system is provided for maintenance and repair, so it is better if its size is large. It’s good if the design is two-button, this saves water |
| Toilet bowl | It can have a variety of configurations and colors; you choose the option that will suit the interior. It is also important that the design ensures ease of use, so it is better not to buy outlandish shapes. The manufacturing material is most often earthenware or porcelain; the second option is more expensive, but its performance qualities are much higher |
| Fasteners | It should be included in the kit, you need to check the presence of all the necessary components, their number is stated in the accompanying documentation. If the fasteners raise doubts about their strength, then it is better to purchase more reliable options with the same configuration |
Important!
In addition to everything described above, you will need a branch to connect to the sewer pipe, as well as a water supply in.
These are the basic elements, although anything else may be used depending on the specifics of the object.

Description of work
Now let’s figure out how to properly install a wall-hung toilet; the whole process can be divided into two parts - installation supporting frame and work on finishing and fastening the outer part of the structure.
Installation installation
If everything required is at hand, you can begin to carry out the work; they are carried out in the following sequence:
- First of all, the location of the structure is determined, it is important that all communications can be brought there without problems, and that the structure does not interfere with movement. The system can be hidden behind a flat wall surface when the walls are made of plasterboard, or can be in the form of a protrusion if you do not want to reduce the space in small room. Marks are made on the surface that will serve as a guide for further work;

- Next, you need to bring the water supply and sewer pipe . If they go through the wall and screed, then take care of this issue in advance so that later you do not have to make the grooves with a hammer drill. The sewer outlet requires special attention; it must be positioned as accurately as possible, so when installing the liner, place the frame against the surface to make sure that everything is clear;

- Then the frame is set and an inspection is carried out to determine whether it fits tightly to the surface, and whether there are any obstacles that need to be removed (mortar sagging, screed unevenness, etc.). After this, the holes that will need to be drilled to attach the structure to the wall are marked; accuracy and precision are important here;

- Drilling is done with a hammer drill, holes are made in the floor and wall according to the previously applied markings. The diameter of the drill must match the size of the dowels or anchor bolts used. When working, try to always hold the tool so that the drill is positioned strictly perpendicular to the surface of the wall or floor, otherwise the fasteners will be positioned crookedly;

- After drilling, you need to attach the frame and make sure everything is fine. Next, fasteners are taken and the structure is carefully fixed to the surface of the wall and floor. Before final fixation, it is important to check the position of all planes using building level so that you don’t have to redo the work later;

- Do not forget to fix the tank and other components on it before attaching the installation., since it is much more difficult to do this later. At the end of the work, make sure that all connections are reliable and there are no backlashes;
- Next you need to set the corrugation correctly, which will connect the toilet to the sewer; for this, all the necessary measurements are taken and the element is placed at the required height. You shouldn’t fix it right away, as you need to make sure that everything is correct. You put the toilet bowl on the studs, and if all the elements fit together exactly, then the bowl can be removed and the liner can be fixed in the desired position;

- Naturally, before installing a wall-hung toilet, you need to supply water to the tank. If for floor options optimal solution is flexible liner, then for wall systems experts recommend using the hard option. It is much stronger and more durable, which is very important, because the system will be hidden behind the finishing, and problems that arise may lead to the need to disassemble part of the wall.

Finishing and fastening of the bowl
Installing a wall-hung toilet is a time-consuming process, mainly due to the fact that you need to finish the structure and close it.
Let's describe the workflow step by step:
- First of all, you need to build a frame from a plasterboard profile around the structure, this process is simple, it is important to use reliable elements, carry out accurate measurements and securely fasten them both to the wall and to each other. If the space is not wide, then the entire surface is sewn up; the photo below shows exactly this option for carrying out the work;

- After installing the frame, you can begin to cover it; for this, take moisture-resistant plasterboard 12 mm thick; this is a durable material that serves well in rooms with high humidity. Measurements are taken and the sheet is cut into pieces of the desired configuration, Special attention pay attention to cutting out the hole for the button, it is better to do this in a single sheet than to combine several pieces around it, the fewer seams the better;
- Fastening is done using special self-tapping screws with fine pitch; they are located at a distance of 20 cm from each other, thus ensuring high reliability of the structure. Do not press the fasteners into the surface too much - you will simply push through the drywall;

- Further work depends on which finishing option you have chosen. If the option is to be painted, then the base is puttied until a perfectly flat plane is obtained, if applied decorative plaster, then again you need to putty the surface, and then apply one or another composition. If you decide to do tiling, then there is no need for leveling; you can simply seal the seams and prime the structure;
Important!
To make the tiles stick better, some experts recommend drilling holes in the drywall, glue will get into them, and the ceramics will stick much better.

- When the finishing is complete, you need to install the button, or rather its decorative top part, in place and attach the bowl. This is done very simply: it is carefully hung on the studs, after which you need to combine and fix the sewer outlet and the water supply for flushing - everything is quite simple, accuracy and precision are important here. After making sure that all joints are secure, you can attach the toilet;

- The last stage is to turn on the water and test flush; it is important to check whether there are any leaks and whether the system as a whole is working normally. If everything is as it should be, then the work can be considered successfully completed.
Conclusion
It’s not enough to choose a high-quality wall-hung toilet - how to install it will take much longer to figure out, but you’ll get excellent result. The video in this article will help you understand the issue even better, but if you still have questions on the topic, then ask them in the comments.
By understanding the technology for installing a toilet, you can save on plumbing services and get the job done to the highest possible quality. The toilet can be mounted traditional way or more modern method- with installation. In the second case, the cistern will be hidden in the wall, which will have a positive effect on the interior of the room.
You are provided with instructions for completing each of the listed installation options.


| H | h | h1 | L | l | l1 | B | b | |
|---|---|---|---|---|---|---|---|---|
| With a solid cast shelf, mm | 370 and 400 | 320 and 350 | 150 | Not less than 605 (by agreement between the consumer and the manufacturer, it is allowed to manufacture toilets with a length of 575 mm) | 330 | 435 | 340 and 360 | 260 |
| Without solid cast shelf, mm | 370 and 400 | 320 and 350 | 150 | 460 | 330 | 435 | 340 and 360 | 260 |
| Children's | 335 | 285 | 130 | 405 | 280 | 380 | 290 | 210 |

Set for work
- Hammer.
- Roulette.
- Adjustable wrench.
- Fan pipe.
- Flexible hose.
- FUM tape.
- Fasteners.
- Sealant.
In the case of installing a toilet on an installation, the listed list will be expanded with the corresponding set. Everything you need can be purchased at any plumbing store.
Removing the old toilet

First step . Turn off the water supply and drain all the liquid.

Second step. We unscrew the hose through which the tank is connected to the water supply.

Third step. Unscrew the tank fasteners. If they are rusty, we arm ourselves with a screwdriver or open-end wrench. Press the bolt head with the selected tool and unscrew the nut using adjustable wrench. If that doesn’t work, pre-soak the nut with kerosene. We remove the tank.
Fourth step. We dismantle the toilet mountings.
Fifth step. Disconnect the toilet flush from the sewer.

In older buildings, drains are usually secured using cement plastering. To destroy it we use a hammer and chisel. We need to crack the cement and carefully rock the toilet to the sides. The drain should turn and become loose. We tilt the product, allowing the remaining water to drain into the sewer.


 If the toilet had an outlet to the floor, it is necessary to clean off the wax ring
 Sixth step. We close the sewer hole with a wooden or other suitable plug.

Important! Sewage gases do not have the most pleasant smell. However, they are poisonous and flammable. Be sure to take this point into account as you work.

Getting ready for installation
The base for installing the toilet must be level. There are several options for the development of events, namely:
- if the floor is tiled and does not have differences in level, we do not carry out any preliminary measures to level the base;
- If the floor is tiled and is not level, we install the toilet using choppers. To do this, holes are drilled in the floor, the choppers are driven into them at a level, and then the toilet is attached to the choppers using screws;
- if it is planned to replace the tiles, dismantle the old cladding and fill in a new screed if the old one has differences in level;
- if the toilet is installed in a new house or apartment without any finishing, fill in the screed and lay the tiles.
We pay attention to the pipes. The sewer line is cleared of debris and various deposits; we install a tap on the water supply line (if it was missing before) to shut off the water supply to the tank.
Installation procedure for a regular toilet


As a rule, when selling, the toilet and cistern are disconnected. The internal fittings of the barrel are most often already assembled, which greatly simplifies the installation process.
First step. We put the toilet bowl in its place and make marks at the attachment points.

 Markings on the floor for fasteners
 Second step. We remove the toilet and drill mounting holes in the marked places.

Third step. We hammer the dowels into the mounting holes.
Fourth step. Install the bowl. We insert the fasteners through special sealing gaskets. Tighten the fastenings. You should not pull too hard - you can damage either the fastenings or even the toilet itself. We pull until the sanitary ware is firmly attached to the surface. We close the fasteners with plugs on top.


Fifth step. We install the cover and seat. The instructions for assembling them usually come with the toilet, so look separately at this event we will not.
Sixth step. We connect the toilet to the sewer. The procedure depends on how exactly the toilet outlet is connected.

Video - Installing a Compact toilet with a wall outlet
Prices for components for toilets and urinals
Accessories for toilets and urinals
If the release is made into the wall, we work like this:

If a floor outlet is being installed, do the following:

Helpful advice! If the toilet connection is drain pipe is performed using corrugation; in most cases, sealing can be abandoned, because the design of such an adapter hose itself is capable of providing a sufficiently tight fit.
Seventh step. We are installing the tank. Drain mechanisms, as a rule, are sold already assembled. If the mechanism is disassembled, reassemble it according to the manufacturer's instructions (assembly procedure for different models may vary slightly).


We take the gasket from the kit and install it in the water opening in our toilet. Place the tank on the gasket and tighten the bolts.
The most convenient way to install fasteners is as follows:

Eighth step. We connect the tank to the water supply using a flexible hose. We turn on the water supply and check the quality of the system. If it leaks somewhere, tighten the nuts a little. We adjust the level of filling the tank with water by moving the float lower or higher.

Let the tank fill several times and drain the water. If everything is fine, we accept the toilet for permanent use.

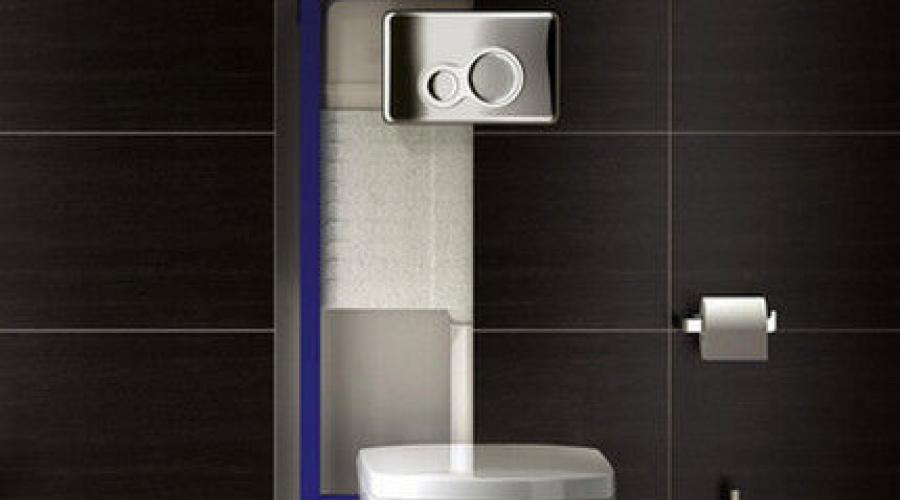
Modern version installations. A special wall installation is used in which the tank mechanism is hidden. As a result, only the toilet bowl and flush button remain visible.
We install a wall-mounted toilet on the installation
Video - How to install a wall-hung toilet on a Geberit Doufix installation
The first stage is installation of the frame

We install a metal frame with fasteners. We attach the tank to the frame. The position of the frame is adjustable using brackets at the top and screws at the bottom. The frames are sold separately, have the same structure and are suitable for use in combination with any toilet bowls.
The assembled structure will have a height of about 1.3-1.4 m. The width should exceed the width of the tank.
Second stage - hanging the tank
The installation is carried out in compliance with the following recommendations:
- drain button place it at approximately a meter distance from the floor;
- between the fastening points we maintain a step equal to the distance between the lugs of our toilet;
- the drain pipe should be located at a height of about 220-230 mm;
- We hang the wall-mounted toilet at a distance of 400-430 mm from the floor. These are average values. In general, focus on the growth of future users;
- between the cistern and the wall we maintain no more than 15 mm distance.
The third stage – we install the finished installation

We first check the evenness of the wall using a plumb line. If deviations are detected, do the following:

Stage four - install the tank
First we connect the tank. The drain can have top and side outlets. Almost everything modern models tanks allow you to choose between these two options.
Important! When installing a toilet on an installation, it is better to refrain from connecting the tank using a flexible hose. will last much longer than a hose. In the near future, will you want to destroy the frame casing in order to replace such a hose in five minutes? That's it!
It is best to use plastic pipes for connections. All necessary fasteners are usually included with the tank. Separately, you only have to buy a panel for the drain buttons, and that’s not always the case.

We connect the outlet of our toilet to the sewer. The most convenient way to do this is with corrugation. We check the tightness of the structure. If everything is fine, turn off the water, temporarily disconnect the toilet from the flush and move the bowl to the side.
Important! The procedure for connecting the tank to the toilet and water supply may vary depending on the product model. We clarify these points separately and follow the manufacturer’s instructions.

Fifth stage – covering the installation
To do this, we use moisture-resistant plasterboard with a thickness of 10 mm. It is recommended to fasten it in a double layer. First we do the following:
- screw the pins into the frame for hanging the toilet (included in the kit);
- We close the drain holes with plugs (also included in the kit) so that they do not become clogged with dust and debris;
- We make holes in the drywall for pins, pipes and a drain button.
We attach the sheathing sheets to the frame using special self-tapping screws. Keep the fastening pitch at 30-40 cm. The structure will be small in size and weight, so there are no strict recommendations regarding the distance between fasteners.
We cover the drywall with tiles or finish it in another way at our discretion.
Helpful advice! Before tiling the box, we install a plug and cuff at the future location of the drain button. Usually they are included in the kit.
Video - Installing a wall-hung toilet
Stage six - installing the toilet

To do this, we connect the outlet of the bowl to the sewer hole and hang the product on pins (we installed them at the previous stages of work). These steps can be done in reverse order, as you prefer. Tighten the fastening nuts.

Important! The tile that will come into contact with the surface must first be covered with a layer of silicone sealant(you can install a gasket instead).
You can turn on the water supply and use the toilet for its intended purpose.

The installation instructions remain the same. Only the order of installation of the toilet bowl changes. Work in the following order.


First step. Keep your knee position firmly in place. Metal fasteners will help you with this.
Second step. Treat the toilet outlet with technical ointment.
Third step. Place the toilet in its designated place. Trace the outline of the plumbing product and mark the holes for the fasteners.
Fourth step. Remove the toilet and install the mounting brackets from the kit according to the markings.
Fifth step. Install the bowl, press its outlet into fan pipe and secure sanitary product using bolts or other fasteners included in the kit.
Sixth step. Connect the tank to the drain. Installation and connection of this element is carried out in the same way as in the case of installation wall model toilet.


Seventh step. We insert the drain button into a pre-prepared hole in the casing, turn on the water supply and check the operation of the toilet. If everything is normal, we accept the product for permanent use.

Read our new article- and also find out what types there are, how to choose and install.
Video - Installing an attached toilet with a hidden cistern
Good luck!
Video - DIY toilet installation