Install the acrylic liner into the cast iron bathtub. How to install an acrylic insert in a bathtub: instructions for installing the liner. Preparing an old bathtub
Read also
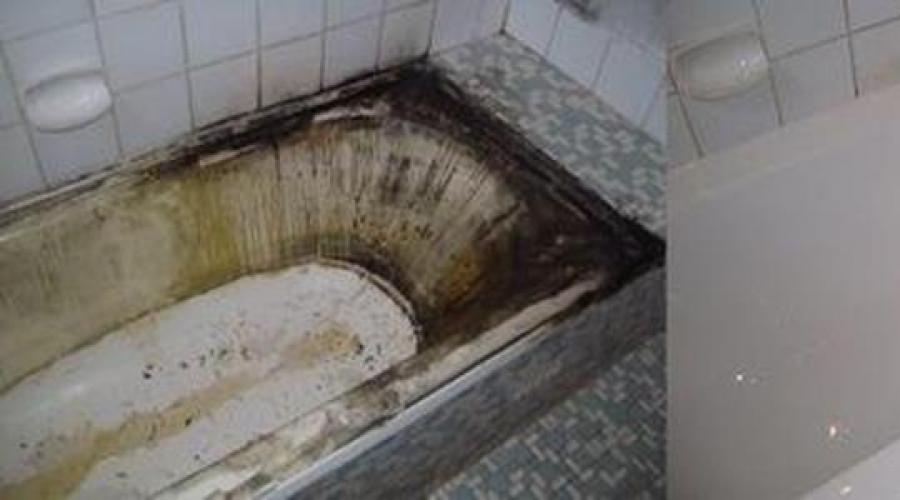
Replacing a bathtub can be considered one of the biggest “renovation shocks”. Especially when general repairs already done. Replacement work will lead to its disruption, so the owners will either have to put up with partially broken tiles on the floor and walls, or undertake a complete renovation of the entire room.
To avoid these difficulties, many people prefer instead of replacing old bath carry out its restoration. This can be done using special paint, liquid acrylic, but most in a quality way"inhale new life“The product includes the installation of an acrylic liner, the features of which we will talk about in this article.
What is an acrylic liner?
Scheme of installation and fastening of the acrylic linerAn acrylic liner is essentially a full-fledged acrylic bathtub. The only difference is that it is installed not on the floor, but in an already existing bath. This technology is often called “bath in bath”, which perfectly reflects the essence of the process.
Advantages and disadvantages
Acrylic liners have many advantages, compared not only to other restoration methods, but also to some new bathtubs.
- Easy to install. This can probably be considered one of the main advantages. The entire installation process takes only a couple of hours, and the existing repairs are virtually undisturbed.
- The advantages of acrylic combined with the strength of cast iron. As a result of installing an acrylic liner, you will receive all the benefits of a full-fledged acrylic bathtub combined with the strength and reliability of a cast iron or steel base.
- Thermos effect. Considering that the bathtub after installing the liner will represent three-layer construction(metal base, adhesive foam, acrylic liner), which acts as a kind of thermos, the water in such a bathtub cools much longer than just an acrylic or metal one.
- Low cost. Despite the fact that the cost of the liner itself is comparable to the cost of an inexpensive acrylic bathtub, the installation work will cost you much less. And considering that as a result you will receive a full acrylic bath, superior in quality cheap analogues, the savings become obvious.
- And, undoubtedly, the main advantage is the ability to perfectly restore even the most “dead” bathtub.
 An acrylic liner will “bring back to life” even the oldest bathtub
 But along with a lot of advantages, acrylic liners also have several disadvantages:
- firstly, acrylic liners do not exist for all types of bathtubs;
There are liners for all “Soviet” bathtub models, with the exception of the so-called “sitting” ones. But for imported bathtubs, finding a suitable liner can be quite problematic.
- secondly, if the installation technology is violated, the liner may begin to creak or even break after some time;
- and finally, this is the most expensive method of restoring an old bathtub that exists today.
Installation technology
The technology for installing an acrylic liner may seem quite simple at first glance. But in case of inaccurate compliance with it, it is possible unpleasant consequences. Therefore, if you decide to install the acrylic liner yourself, we recommend that you adhere to the instructions given as much as possible.
Selecting an Acrylic Liner
In order to determine which of the eight existing types If the insert fits you, you need to take a number of measurements.
 In order to select a suitable liner, it is necessary to take measurements in five places
 For quality implementation Measuring one tape measure is not enough. You will also need a rail made of any rigid material, the length of which is slightly longer than the width of your bathtub.
Five measurements should be taken:
- length of the outer side of the bath;
- length internal space bathtubs over drain;
- width of the bathtub above the drain;
- the width of the bathtub at the narrowing point of the sides opposite the drain;
- height above the drain (this measurement is best taken from a rigid rail installed above the drain).
For greater clarity, we have depicted all the places of necessary measurements in the following figure.
 For clarity, we offer you a bathtub measurement diagram
 Using the data obtained, you can either choose the insert yourself in the supplier’s catalog, or simply provide this information to a representative of the company from which you are going to purchase it.
When purchasing, be sure to pay attention to the bottom. It must have additional fiberglass reinforcement. If it is not there, then such an insert is very unreliable and is not worth purchasing.
Required tools and materials
In addition to the acrylic liner itself, you will need:
- two-component foam. There are several manufacturers of a similar product, but we recommend that you use Purfoam -2K foam from the Dutch company Den Braven to install the liner. It has been repeatedly tested and approved by most acrylic liner installers. It is necessary to use only high-quality two-component foam. It does not shrink or undergo secondary expansion, has excellent grip on enameled surfaces and is highly resistant to mechanical pressure;
Please note that the service life of the acrylic liner depends 80% on the quality of the foam.
 Purfoam -2K foam from the Dutch company Den Braven
 - silicone sealant;
- new drain-overflow siphon;
- decorative screen and sides (if required);
- coarse sandpaper or abrasive attachment for a drill;
- drill bit with a diameter corresponding to the drain and overflow holes;
 The diameter of the crown must match the diameter of the holes plum-overflow
 - a jigsaw with metal files or a small grinder;
- a chisel or chisel for removing tiles along the edge of the bathtub (if required);
- screwdriver, pliers and keys for dismantling and installing the siphon;
 It is best to use clamps to secure the liner
 - clamps for fixing the edge of the bathtub;
- construction pencil for marking.
Preparing the bath
Before installing the liner, the bath must be prepared.
 If tiles are laid along the edge of the bathtub, they must be knocked down
 - Completely free the edges of the bathtub from tiles, decorative edges, hanging shelves etc.
- Remove the drain-overflow siphon.
- Clear inner surface baths. For this purpose, you can use coarse grain sandpaper, wrapped around a small wooden block. But it is better to use a special abrasive attachment for an electric drill.
- Wash the bathtub thoroughly, first removing any dust and debris that may have formed during cleaning.
Since a new siphon will be installed in the future, when dismantling you don’t have to worry too much about the safety of the old one.
Preparing the Liner
Acrylic liners are covered with inside special protective film. During preparatory work It is highly not recommended to remove it.
If one or more sides of the bathtub are adjacent to the wall, the curved edges of the liner will need to be trimmed with a jigsaw or grinder.
 The edges of the liner that interfere with its normal fit are trimmed with a grinder or jigsaw
 If it is possible to move the bathtub a little, thereby allowing the liner to “sit” on all sides, then it is better to do without trimming.
After the liner sits smoothly in the bathtub, it is necessary to mark the locations of the holes for the drain and overflow. There are two ways to do this.
- If there is access to the holes with outside baths, then you can simply make the appropriate marks with a marker or construction pencil through them.
- If there is no access to the holes, then you need to carefully trace their edges with a pencil from the inside of the bathtub and reinstall the liner into it. The remaining marks will be located exactly in those places where the holes need to be made.
Do not attempt to determine hole locations by measuring. Remember that an error of even a few millimeters will lead to damage to the liner.
Using the finished marks, using a crown of the appropriate diameter, holes are made in the liner for drainage and overflow.
 It is better to drill the hole for the drain from the inside of the liner
 When the bathtub and liner are ready, you can proceed directly to installation.
Apply sealant to the edges of the drain and overflow openings, as well as to the areas where the liner was cut. The sealant is applied to the tub, not the liner.
 The sealant is applied generously around the drain and overflow holes
 Apply two-component foam to the entire inner surface of the bathtub as follows: on the upper sides, on the sides from top to bottom, on the bottom of the bathtub along the length. Please note that if the distance between the applied strips of foam on the sides of the bathtub can be 10-15 centimeters, then on its bottom the foam should be laid in a continuous layer. Otherwise, even after the foam disperses a little, voids may form under the liner. This may lead to unpleasant creaking or even product failure.
 The bottom of the bath must be completely covered with foam
 As practice shows, for normal processing standard bath it takes two cylinders of two-component foam. Do not try to save on material, since the deterioration of the liner as a result of the formation of voids will reduce to “no” all the costs of restoring the bathtub.
We install the acrylic liner itself on the foam. We do not remove the protective film from the inside yet.
 After applying the foam, install the liner no later than 10-15 minutes
 Please note that two-component foam hardens much faster than regular foam, so after applying it, the liner should be installed no later than 10–15 minutes. After this, you need to install a new siphon and fix it in the drain and overflow holes.
The edges of the liner and the bathtub are fixed using clamps. The foam that comes out from under them is first removed with a rag. Make sure that there is no foam left on the outside of the liner, since removing it without damaging the acrylic coating will later be very problematic.
To prevent the clamps from damaging the acrylic coating, flat pieces of wood, plastic or acrylic left over from trimming the liner should be placed under them on the outside of the liner.
The final stage is to fill the bath with water in order to ensure a uniform load on its entire surface for normal shrinkage of the liner and hardening of the foam.
 To ensure uniform pressure on the adhesive foam, the bath is filled with water.
 After the foam has completely dried (as practice shows, this takes 24 hours), drain the water from the bathtub, protective film remove and begin installation decorative screen and sides.
You can use acrylic overlays as sides, narrow tiles or special corners for baths on self-adhesive base. Whatever type of sides you choose, before installing them, you should carefully seal the joints between the wall and the bathtub with sealant.
Acrylic liner care
In conclusion, let's say a few words about caring for the acrylic liner.
Since acrylic is a non-porous material, you can use almost any product to wash it, for example, the one you use to wash dishes. The only thing is that you should never wash the bathtub with metal sponges or brushes, since they are quite likely to leave marks on the acrylic.
Also, to avoid scratches, it is not recommended to bathe large pets in an acrylic bathtub without a special mat.
But if damage does appear, you can get rid of it using liquid acrylic, which you can easily find in any modern construction supermarket.
 With the help of liquid acrylic and a special polishing mixture, chips and cracks in an acrylic bathtub can be eliminated without a trace
Installing an acrylic liner (video)
As you can see, installing an acrylic liner is not particularly difficult. The main thing is to use only quality materials and strictly follow installation recommendations. And in this case, we are sure that your old bathtub will really get a “new life” and will serve you for even longer long years. Good luck with your renovation!
Share with your friends!There are several ways to restore the cover of an old bathtub. One of them is the insertion of a special acrylic liner. You can entrust this operation to specialists or tackle the matter yourself if you have the appropriate skills.
Where to start restoring a bathtub
To choose the right acrylic insert for a bathtub, you first need to determine the type of bathtub. To do this, you can call a specialist to take measurements. Some companies provide the opportunity to take measurements yourself via telephone consultation. The dispatcher will be able to determine the type of bath based on two or three parameters provided by the customer, since not many are produced standard types bath If your bathtub was made to special order, good company will be able to offer another option.The acrylic liner can be installed independently. When it's delivered to your home, get your tub ready to go. Clear the sides of the bathtub from extra items. To securely install the liner in the bathtub, you should first try it on. To do this, insert it into the old bathtub and check how tightly it fits. If there is a gap between the acrylic sheet and the surface of the bathtub, it will need to be filled with special bath foam.
It is necessary to shut off the water to install the drain and overflow from inside the liner. If the dimensions of the bathtub and liner are exactly the same, installation is very simple. It is necessary to lubricate both surfaces with sealant, and then press them firmly against each other. You should also lubricate and lubricate the area of the overflow and drain threads with sealant.
Fitting the bathtub liner
If the liner does not quite fit in size, you need to make an adjustment using foam. For this required quantity foam is applied to the gaps, after which acrylic product placed in an old bathtub and pressed against the side by hand. This operation must be performed no later than five minutes after applying the foam. After this, you need to stand in the bathtub with your feet, having first taken off your shoes, and first of all press down the acrylic in the area of the drain. Next, carefully and smoothly press the bottom of the canvas, while moving in the direction from the drain to the opposite side of the bath. You can use your knees and elbows to gently press down the walls of the acrylic liner.
After completing the installation of the drain and overflow, you need to close the drain with a stopper and fill the bath with water. Its level should be slightly behind the overflow hole - about two centimeters. Take cold water. The bath should remain filled for about six hours, after which the water is drained. You can start using the bath in about a day.
Replacing a bathtub, especially a cast iron one, is a labor-intensive and expensive process by financial standards. Firstly, weight of this material is very large, the mass of one such bath can exceed one hundred kilograms, so dismantling it physically will be very difficult to accomplish, secondly, this process is also accompanied by a violation of the masonry decorative tiles, which is also undesirable and leads to an even larger expense item. But there is an alternative to this process - restoration of plumbing. The most optimal and common method is repair cast iron bath acrylic. There are two main ways to update a bathtub product using acrylic: liner in cast iron bath and coating a cast iron bathtub with acrylic.
Methods for restoring a bathtub with acrylic
It is worthwhile to dwell in more detail on each of the methods of restoration of plumbing.
Installation of acrylic liner
An acrylic liner is a plastic lining for a cast-iron bathtub, which has a wall thickness of four to six, and one to two millimeters at the bottom.
Pros of installing a liner:
- You can cover a cast iron bathtub with acrylic very quickly;
- the cost of restoring the product is significantly lower compared to dismantling the bathtub and buying a new one plumbing equipment;
- the acrylic cover for a cast iron bathtub does not darken, is easy to clean, and retains heat well;
- The bathtub cover does not corrode.
However, reviews from people who encountered some problems during the installation of equipment provide a number of arguments against this method of restoring plumbing:
- the liner is almost impossible to install yourself;
- the acrylic insert in a cast iron bathtub gets scratched quickly;
- The acrylic liner in a cast iron bathtub can only be washed with special non-aggressive means;
- the insert reduces the internal volume of the product, which makes it inconvenient to use.
As seen, this method restoration has both its fans and opponents. Therefore, it is worth understanding in more detail the installation process of this equipment.

An acrylic liner in a cast iron bathtub is mounted as follows:
- You can insert an acrylic bathtub into a cast iron one only after making the insert according to individual dimensions;
- After this, the finished acrylic overlay is installed in the bath using an adhesive composition;
- If necessary, the liner is cut in accordance with the level of the tiles adjacent to the bathtub;
- Acrylic lining drain holes and sanitary product docked, after which they are fastened with a special adhesive solution;
- At the final stage of installation drainage system connected to the sewer, after which the joints of the acrylic lining with the tile are filled with silicone to seal.
Important! All work on installing this equipment must be done by knowledgeable people, otherwise the service life of the bath may not meet your expectations, because any violation of the technology can lead to cracks in the liner and the development of fungus.
The installation process itself takes three hours at most, after which the bath is filled cold water and leave it like this for a day. After this, you can safely use the bath for its intended purpose.
How to properly update a cast-iron bathtub with liquid acrylic?

Filling a cast iron bathtub with acrylic - alternative quick way restoration of plumbing equipment. This method is used not only for restoring bathtubs, but also for painting enamel washbasins and other plumbing fixtures.
Advantages of bath restoration technology liquid acrylic:
- lower thermal conductivity, due to which the water in the bath cools more slowly;
- the acrylic coating for a cast iron bathtub is smooth and therefore does not have a yellow coating even with prolonged use of plumbing fixtures;
- high strength and durability acrylic coating;
- coating cast iron bathtubs with acrylic does not imply further special care for plumbing;
But this method of restoring the bathtub coating requires the ideal execution of all stages of work, otherwise, you may find that:
- the bathtub coating is cracking;
- restoration of a cast-iron bathtub with liquid acrylic was not successful due to the appearance of swellings and stripes on the surface;
- peeling of the coating from the walls of the product occurred.
Therefore, you should immediately pay attention to the fact that restoring a cast-iron bathtub with liquid acrylic is a very labor-intensive and responsible process.

Before repairing cast iron bathtubs with liquid acrylic, you need to clean the surface of the plumbing:
- Using a grinder and a metal attachment, remove old layer enamel from sanitary ware;
- After this, you need to degrease the entire internal surface of the plumbing using a rag soaked in acetone;
- The joints between the bathtub and the tiles should be taped with masking tape so as not to stain their surface.
Repairing cast iron bathtubs with acrylic involves strict adherence to all technologies, which in the future will ensure long time operation of plumbing. It is worth noting that the exposure time of liquid acrylic with a hardener depends not only on the manufacturer, but also on the temperature in the room. If the temperature ranges from fifteen to twenty degrees, the exposure will be about twenty minutes; with increasing temperature, the exposure time will decrease.
In order to answer the question of how to update a cast-iron bathtub with acrylic, you need to master the pour-over method of restoring plumbing surfaces. It involves performing several successive stages of work:
- Using a convenient container (a cut-off bottle of hardener), apply acrylic evenly to the sides of the product;
- If liquid composition is distributed unevenly along the walls of the bathtub, you need to use a soft rubber spatula, with which you need to coat the required places with acrylic;
- If bubbles form on the surface, use a brush to remove them;
- After completely filling the bathtub with acrylic, you need to wait for the material to harden for 48 hours.
Conclusion
The described methods for restoring plumbing fixtures are financially accessible, but installing an acrylic liner is almost impossible without the participation of professionals. If you want to make repairs yourself, it is better to use the second method of restoring plumbing equipment. In any case, both methods will be much more financially profitable compared to buying new plumbing of dubious quality.
You can repair an old or damaged bathtub in many ways: by painting, coating it with a restorative composition, or, as a last resort, replacing it entirely.
Meanwhile, there is more rational way not only resurrect the bathtub's former appearance, but give it completely new consumer qualities.
We are talking about installing acrylic liners in an old bathtub which has fallen into disrepair. This liner is an almost complete copy of the bathtub itself, only slightly smaller in size, which allows it to be tightly installed inside.
The acrylic insert is firmly fixed and becomes a design element metal bath , which, due to such modernization, acquires the qualities of acrylic bathtubs.
Advantages, features and benefits
Structurally, the liners consist of two layers: acrylic itself and ABS plastic. They are made two-layer for the following reasons:
- saves expensive acrylic, which makes the liner cheaper;
- thanks to the high strength of ABS plastic the whole structure is very durable. In addition, the plastic is selected to be similar in color to the acrylic color. This means that if you do manage to somehow break off part of the acrylic layer, the damage will be completely invisible to the eye.
Concerning advantages this method restoration of bathtubs, then they can be distinguished so many:
- Firstly, installation of the liner is more attractive in terms of labor costs than even simple painting. If you familiarize yourself with all the installation features in advance and stock up necessary materials, then the entire repair may well take a couple of hours.
- Secondly, a metal bathtub with an acrylic liner is much quieter than without one. Water falling from the tap will fall on the elastic acrylic and the annoying sound will simply have nowhere to be born.
- Third, water treatments will become more pleasant due to the extremely low thermal conductivity of acrylic, i.e. The bath will become warm to the touch. In addition, acrylic will retain heat when poured. hot water, for a long time not allowing it to cool down.
- Fourth, the appearance of bathtubs with an acrylic liner is not only good in itself, but also fits perfectly into any modern interior bathroom. Accordingly, there is no need to change the bathtub to a new one that looks more suitable.
- Fifthly, acrylic is not afraid of water with a high concentration of iron. Therefore, if rust appears, it will only appear on the surface of the acrylic, from where, along with any other contaminants, it can be easily wiped off with a simple soft sponge.
- Finally, the cost of an acrylic liner is several times less than a new bathtub made of this material. Moreover, additional savings are achieved by eliminating the need to dismantle the old bathtub and install a new one.
 The extremely rich assortment of plumbing stores makes it easier to buy an acrylic liner. You can buy an insert almost anywhere both for bathtubs 150 cm and for models 170 cm long.
In this case, the internal shape of the liner can also be either ellipsoidal or straight, which allows you to select the right option absolutely for any metal bathtub with different side heights.
Prices
Acrylic liner cost directly depends on the size of the bath for which it is purchased. If this short bath length 150 cm, then in Moscow an insert for it will cost from 2600 to 4000 rubles, depending on the manufacturer. For baths length 170 cm prices will be higher by 200-500 rubles.
In addition, for self-installation liner will be required and Additional materials : silicone sealant, two-component polyurethane foam And new system plum, that in total will not cost more than a thousand rubles.
Buy acrylic liner there are two ways: or purchase in a traditional plumbing store, or use the services online store.
 Purchase in a regular store interesting because what will happen in this case it is possible to evaluate the appearance and quality Acrylic with my own eyes and fingers. However prices in such stores will be quite high.
Where the purchase option looks more attractive acrylic liner in the online store. First of all, in a few minutes and without getting up from your chair, you will have the opportunity to get acquainted with the offer very large number Moscow plumbing stores.
The next pleasant moment - prices. In any online store they will always be much lower than in traditional retail outlets.
Moreover, the cheapness is explained not by the poor quality of the inserts offered, but by the peculiarities of online trading itself.
Such sellers most often do not incur significant maintenance costs retail space, rent inexpensive premises, and due to the resulting savings, they gain the opportunity to set low price tags.
The optimal sequence of actions when purchasing an acrylic liner in an online store can be considered the following:
- Find time and go to a regular store just see what the acrylic liner is like, evaluate its appearance and quality of finish.
More the best option – visit someone you know who have already installed a similar liner. At the same time, you can find out the details and installation features, and also see what it looks like ready-made solution in a real interior.
- Order an acrylic liner in the online store the model you are interested in and wait for it to be delivered. At the same time, delivery within Moscow in the vast majority of online stores will be free. For the region, the cost of services must be found out directly on the seller’s website.
In addition, even before the stage of direct selection one or another model of bath liner, you will need to make some measurements. You will need three of these measurements:

This information will be needed by store consultants to accurately select the insert of the required size.
Advantages in reviews
Dry listing of the advantages of acrylic liners cannot give a complete picture all the benefits that their owners acquire.
The best thing read people's reviews who have already installed the liners and have the opportunity to give an objective assessment of their choice.
For example, it is interesting review from girl Zhenya Kazan faced with the need cosmetic repairs in the entire apartment, but at that time did not have enough free money.
She says she purchased an acrylic liner for her old cast-iron bathtub and ended up with a high-quality acrylic bathtub that looked exactly like it. Her Small child never ceases to enjoy the warmth and comfort while bathing.
Andrey from Saratov writes that he was also limited in funds, and the old bathtub had fallen into almost complete disrepair. He notes with pleasure that even his initial skills home handyman It was quite enough for self-installation of the liner. Now the whole family has the opportunity to take baths with previously unattainable comfort.
Moskvich Anton shared his impressions of purchasing an acrylic liner in an online store.
According to him, the liner was much cheaper than what he saw in a nearby plumbing store. Plus, he used the services of an online consultant, finding out all the installation features of the liner model he was interested in. The information received was enough for him to quickly cope with the installation himself and now continues to enjoy the new appearance of the bathtub.
And quite it makes sense to trust reviews posted on the Internet.
The psychology of people is such that they will not say a single word of approval if something does not suit them. In the meantime, you can only find online responses of positive emotions possessed by those who purchased and installed an acrylic liner in the bathtub.
How to install it yourself?
Before starting installation, you will need to acquire the following set of tools:
- chisel with hammer, or hammer drill or hammer drill;
- sandpaper and grinder;
- drill with a crown attachment;
- jigsaw, its electric version;
- mounting gun for foam and sealant;
- sealant and polyurethane foam;
- clamps.
 First of all you should prepare the old bathtub to install the liner in it.
To do this, use a hammer drill gets lost old tiles , adjacent to the bathtub, from the sides all skirting boards are removed and other fixtures, including a drain and overflow system.
As a result, you need to get clean and free from foreign objects sides of the bath.
Then sand with a grinder the entire inner surface of the bathtub is treated.
This is done to eliminate any remaining gloss so that the adhesion to the polyurethane foam is as strong and uniform as possible.
Now the acrylic liner needs to be placed inside the bathtub and on it back side draw the boundaries of the sides and drain. Next, follow the resulting markings with a jigsaw excess is cut off.
Using a drill with a 54 mm diameter bit in the previously marked areas holes are cut for drainage and overflow.
The next stage of bathtub renovation is directly installation of the liner. It begins by applying a continuous layer of sealant around the drain and overflow holes. It is extremely undesirable to save money here; this layer should be at least several centimeters wide and as uniform as possible.
 Then on the side of the bathtub, as well as on the entire inner surface a continuous layer of polyurethane foam is applied.
In this case, it should be used exclusively two-component polyurethane foam, which does not shrink as it hardens.
After this you need take a short break required to achieve foam necessary properties. The time of this pause can be found on the foam container.
Finally, you can finally install acrylic liner in bathtub. Follows immediately screw on the drain and overflow system. This will help fix the liner more tightly while the foam hardens and improve the adhesion of the liner to it.
Additional fixation can be achieved by evenly tightening small clamps around the perimeter of the side.
So that the metal of the clamps does not damage acrylic surface, recommended Place either pieces of plastic or thin wooden slats at the contact points.
 Having completed all the work, the bathtub should be filled with cold water and leave her like that for a period of at least one day.
During this time, the sealant will completely dry and the polyurethane foam will finally harden. The bath is now ready for use.
The technology of installing an acrylic liner in a bathtub is a completely reasonable solution and an excellent alternative to an expensive replacement.
Absolutely solid, warm and at the same time great-looking acrylic will give an old bathtub a new life, and its owners - an unprecedented level of comfort. Moreover The service life of acrylic liners can reach 10 years or more, it is enough just to protect them from exposure to chemically aggressive substances and abrasive cleaning agents.
We invite you to watch a video on how to install an acrylic liner in a cast iron bathtub:
Over time, the surface of your bathtub has yellowed and lost its appearance, but you don’t have the financial means to replace the plumbing? Installing an acrylic insert in a bathtub will be an effective, quick and reliable solution to your problem. The liner is perfect for most types of bathtubs (steel, cast iron, acrylic). From us you can order an acrylic bathtub liner cheaply in Moscow in lengths of 1.5m and 1.7m.
Restoration technology using an acrylic liner will allow you to return your plumbing fixtures to their former whiteness and attractive appearance without the need to replace the old one. During the work, our craftsmen use ISKomp liners, which have been produced in Russia since 1997 and have the necessary hygienic certificates. All work is performed by craftsmen with more than 3 years of experience.


ISComp acrylic liners have the following advantages:
- long service life (up to 15 years);
- impact resistance, heat resistance, environmental friendliness;
- simplicity, ease of care (an ordinary sponge with detergent);
- the coating does not turn yellow or crack over time;
- The liner retains heat longer due to low thermal conductivity;
- excellent sound insulation when filling the bathtub;
- presentable appearance;
- high antibacterial and anti-corrosion properties.
For an acrylic bathtub liner, the price indicated together with installation is 4800 and 5100 rubles for a 1.5m and 1.7m bath, respectively. It already includes work on preparing the surface of the bathtub, installing the liner, Consumables, delivery within the Moscow Ring Road, lift to the floor. From us you can order an acrylic bathtub liner in color (blue, light green, pink) or white.
Install a colored acrylic liner in a bathroom inexpensively
 The insert is exact copy bathtub geometry, made of sheet plastic about 6 millimeters thick and coated with high-strength acrylic. It is characterized by high strength characteristics and a long service life (10-15 years). When ordering restoration services from our company, you receive a 3-year guarantee. If necessary, restoration of the coating using this method can be repeated - dismantling and replacing the acrylic liner is carried out strictly in compliance with current requirements.
To carry out the work, all you have to do is leave a request on our website. You can take measurements yourself using our instructions in the order and payment section. And if difficulties arise, you can call a measurer (the visit of a measurer is paid in the amount of 500 rubles). Our craftsmen work every day from 09:00 to 21:00. The earliest departure time is the next day after receipt of the application.
For baths non-standard sizes, With decorative elements, we recommend using liquid acrylic restoration with your hands. Unlike liners, this technology is characterized by simplicity, minimal risk of defects during installation, favorable cost, and versatility. It is not always possible to install an acrylic liner in a bathtub of non-standard models, but acrylic will cope with the task of restoring such a product with an A plus.
Order an acrylic liner for a cast iron bathtub
For the acrylic liner bath cover, the cost is indicated in the pricing section. All installation work carried out at home without the need to dismantle plumbing, the process takes an average of two hours. The plumbing fixtures can be used within 24 hours after restoration work (during this time the polyurethane foam reaches the required characteristics).
The process of installing an acrylic liner in a bathtub consists of the following steps:
- Removal of drain and overflow, old sides, surface preparation.
- Applying two-component foam to the sides and bottom, sealing the technological drain and overflow holes.
- Installing the liner.
- Installation of drain and overflow grates.
- Filling the bath with water to improve adhesion of surfaces.
- Installation of decorative border.
Within a day you will be able to appreciate all the benefits of a new acrylic coating for your plumbing fixtures. An employee of the Akrilsk company can accurately calculate the cost for an acrylic bathtub liner, including installation and other related work (for example, dismantling the old liner). You can order it for your cast iron bathtub today.
Compliance with the rules of care guarantees you preservation appearance acrylic insert for many years:
- When cleaning the surface, do not use aggressive and abrasive cleaning agents or hard brushes, which can damage the acrylic surface.
- Laundry soap and a soft sponge are perfect for washing.
- After washing, rinse the bathtub and wipe with a dry cloth.
- Avoid dropping sharp or heavy objects, exposure to aggressive environments (acids, alkalis, strong dyes, solvents).
- It is not recommended to place stools and basins on the bottom without first laying soft fabric.
How much does it cost to insert an acrylic liner into a bathtub in Moscow and the region? Price with installation
Acrylic bathtub insert for sale, price including installation - the cost of the insert and service depends on the size of the bathtub. The minimum price tag is 4800 rubles.
Do you want to restore your good old bathtub to its flawless appearance? Call us and we will definitely help you!