Profile angle. Types and sizes of profiles for drywall. Profile dimensions for drywall
Read also
To create a strong and reliable plasterboard structure, special profiles are used to ensure the highest quality fastening of plasterboard sheets. Simply put, profiles are truly the basis of the entire plasterboard structure. What types of profiles are there for drywall? According to experts, such profiles are divided into two large varieties - partition and ceiling. Today we will get acquainted with the varieties of these fasteners, find out their characteristics, and also consider application options in the form of step-by-step instructions. But first things first.

Key types of plasterboard profiles

So, according to their purpose, all profiles can be of two types:
- rack-mounted;
- guides.
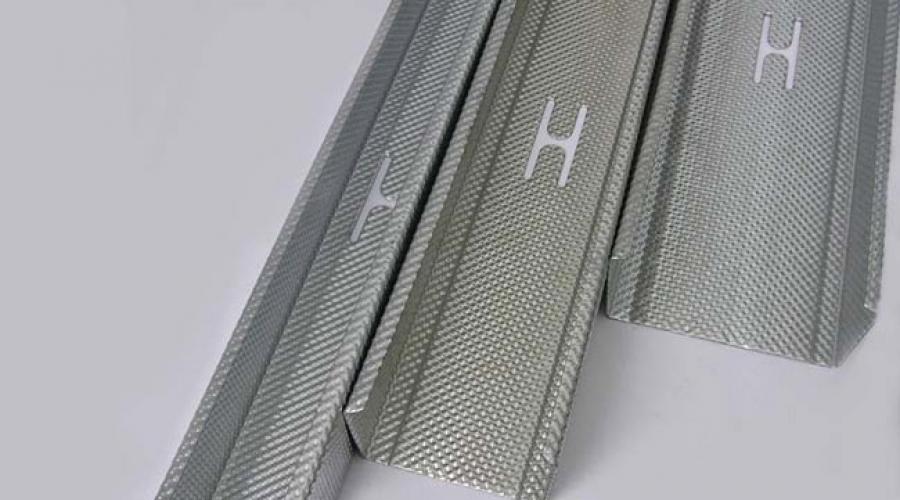
And the representative of each group must perform their specific function. The elements described in the article are marked using Knauf technology; all of them are manufactured in standard sizes:
- UD are ceiling guides;
- CW – partition rack products;
- UW – partition guides;
- CD - ceiling rack.

Figure 1. 1 - UD; 2 - CD; 3 - CW; 4 - UW
Note! If you connect the elements together correctly different types, then you can get various plasterboard structures, including various boxes, partitions, suspended ceilings, etc.

The dimensions and cross-section of these elements are also different.
Variety No. 1. Rack ceiling profiles
Many people know that suspended plasterboard ceilings to mechanical stress. But the profiles must not only be light, but also strong in order to hold the entire structure together with the gypsum board (otherwise, all this may collapse on the heads of the residents). The rigidity of the frame is largely ensured by the ribs of CD profiles.

These types of profiles are rightfully considered the most popular. In most cases, they are used for finishing/construction work. In view of standard sizes There is almost no waste after working with these elements. It is not difficult to guess that these profiles bear the main load of the entire structure. Thanks to them, the reliability and rigidity of the frame is ensured, as well as the quality of fixation of plasterboard sheets. The thickness of such profiles varies, but thin products are less reliable, which is obvious, and require large number fastening elements for installation (we will tell you more about these elements a little later).
As for the length of CD profiles, it can range from 270 to 450 centimeters. But in reality, elements with a length of 300 and 400 centimeters with a cross section of 6x2.7 centimeters are usually used.
Variety No. 2. Guide ceiling profiles
Such profiles are used to create ceilings, walls and various boxes for the purpose of strengthening. The products are installed around the perimeter of walls/ceilings, and rack profiles are also inserted into them.

From the guide ceiling elements, a kind of base is formed for the plane, which will subsequently be sheathed with plasterboard sheets. The length can be 300 or 400 centimeters, while the cross-section is 2.8x2.7 centimeters. All elements are quite thick (thin ones are not used for ceilings), which ensures reliability. The best option and for the construction of wall frames.

Note! If you want, they can make profiles for you according to individual order. In any case, high-quality galvanized steel is used in production, which increases the resistance of elements to exposure environment, temperature changes and other things.
Variety No. 3. Partition profiles for plasterboard
We continue to consider the types of profiles for drywall. So, if we talk about partition products, then, according to experts, there are several varieties, and their use, accordingly, depends on the future thickness of the gypsum plasterboard structure. Thus, UW profiles (in accordance with the same markings of the Knauf company) are used in partitions as guides. Their length varies between 200-400 centimeters, and their width can be 4-15 centimeters.

There are also rack-mount products (or, in other words, CW profiles), which are made with notches that make cable laying easier. They are used in plasterboard partition structures and are load-bearing elements the entire frame.
Such elements are intended for use in vertical structures. The length can range from 276 to 600 centimeters, while the cross-section can be 5x5, 7.5x5 and 10x5 centimeters. By the way, the most popular are profiles whose length is 300 and 400 centimeters.
Separate group – corner, beacon and arched products
As for the arched types of plasterboard profiles, they have holes and cuts necessary to give the profiles flexibility. If we talk about the dimensions, they are the same as those of conventional elements, while the rigidity indicator is much higher. Arched profiles are used to obtain arcs.


It would seem that there is nothing complicated in the formation of arcs, but in reality this is not the case. Although experienced specialists can handle all this with ease.
But with the help of beacon elements, different planes are aligned. For example, when plastering walls/ceilings. The length of such profiles is 300 centimeters. If you plan to create a smooth plane, then you simply cannot do without such an element (for example, to create slopes).

Important information! Beacon profiles for drywall significantly facilitate the difficult work of builders. They are attached to difficult places with the aim of creating flat surface. Thanks to the material from which these profiles are made, their resistance increases various kinds negative external influences.
Finally, there are also corner profiles. They are used, as the name suggests, to level/strengthen corners (for example, to protect the ends of partitions). Each element has holes with a diameter of 0.5 centimeters, which are necessary for better filling during the application of the putty mixture.

Various fasteners and additional elements

In addition to the profiles themselves, other standard elements are used during the installation process, which should also be prepared in advance. Let's take a closer look at each of these elements.

- Direct (regular) suspension. Designed for attaching a rack or ceiling profile to work surface(see picture No. 1).
- Anchor suspension. It is also used to attach ceiling profiles, but exclusively to the ceiling. Each element has a rod and a clamp that allows you to adjust the position of the suspension.
- Extension. It is used to connect strips of metal profiles in a variety of combinations.
- Crab type connector. Designed for a cross-shaped connection (and all types of profiles for drywall), and strictly at right angles, structural elements. As a rule, ceiling profiles are connected using a “crab” (of course, in the same plane) during installation of the sheathing.
- Two-level connectors. As you probably guessed from the name, with the help of these fasteners the profiles are attached at right angles, but at different levels.
- The last elements are self-tapping screws and anchor dowels. Designed to connect frame elements to each other or, alternatively, to the main ceiling in the room.
The illustration below shows all the described elements in the order in which they were presented.

What about work tools?
For ease of working with plasterboard sheets, use special tools, allowing you to create designs of the required parameters, and the work is performed more easily and quickly, and the amount of waste is minimized.
In more detail, these tools include:
- metal scissors;
- divider;
- connecting pliers;
- cutter
Using metal scissors, elements of the required sizes are cut. Pliers, in turn, are intended for connecting segments. By the way, they are in the environment experienced specialists are called staple profiles.


Note! To assemble the structure, the elements in which holes are previously made are connected. This is done using a cutter that punches mounting holes. As for the divider, it is used for corner connection profiles.
Video - What is required to work with drywall?
As you can see, in such a seemingly simple procedure - creating plasterboard structures - literally every little detail is calculated and thought out. All you need is patience and the desire for the result to exceed all your expectations! This concludes the theoretical part and proceeds to practice. First, let's look at how to cut correctly plasterboard profiles.

Master Class. How to cut a drywall profile yourself

So, let's get acquainted with the process of cutting plasterboard profiles. To begin with, we note that many people use metal scissors for these purposes, as they consider using an angle grinder too complicated or time-consuming. However, people who have some experience with plasterboard structures, they don’t think so.

What is the main advantage of using a grinder for cutting metal profiles? First of all, this is that the geometry of the product after cutting remains the same, while after cutting with metal shears the profile is simply deformed (to one degree or another).

Moreover, even if you try to work with metal scissors with the utmost care, the end will end up slightly damaged in any case. This, of course, is not critical, because the defect can always be corrected with the help of pliers. But this will require additional time.

Note! The most unpleasant thing in the cutting procedure is a compressed edge. So, if you crush it, the height of the product will increase, which will cause it to unbend. starting profile when the end is inserted into the groove. This, again, is not critical, but the production culture suffers because of this, which not everyone likes.
Moreover, this way you will cut more slowly. The products will have to be turned over to make cuts on both sides, and then straightened and cut. With the use of an angle grinder, the speed of work increases noticeably, especially if you need many blanks of the same type at once for a particular design.

What should the tool be?
The tool that will be used for cutting the profile deserves special attention. For example, a grinder (angle grinder) with a power of 650 watts will perform well, as well as cutting discs for metal with minimum thickness(from 0.1 to 1.5 centimeters). Thanks to this combination, the metal will go through quickly and without any special effort. Typically, the thinner the disk, the easier it will be for you to cut the product.

However, there is this method and your shortcomings. So, if the work is carried out in an apartment, then nearby objects will have to be protected from hot sawdust and sparks. And in some cases there is simply not enough free space. Finally, “admirers” of the sound of a working grinder - we're talking about about neighbors - they will immediately show up to personally inform you about it.
Note! Once again, it is worth reminding about safety precautions. Use the funds personal protection– work gloves, safety glasses – and handle the tool with extreme care. Try to always stay away from the trajectory of flying sparks. And one more thing - try to always use protective cover for the Bulgarian.
Master Class. How to make a semicircular partition from plasterboard

In yet another step by step instructions we will look at how to make a plasterboard partition with a rounded corner using profiles UW75/CW75. First you need to make markings on the floor, and then transfer them to the ceiling. It is convenient to first mark a right angle (that is, without a fillet as such), and then draw a square (its side is the required radius of the fillet). In order to calculate the length of the profile, you can use the formula:
A = 3.14 x B,
- A is the circumference;
- B is, accordingly, its diameter.
Next, you need to mark the UW profile at 5 centimeters (this parameter will correspond to the width of the side shelf of the CW product). Take a grinder and cut the profile as shown in the image below (that is, you only need to cut the side/bottom flange). By the way, we have already talked about the types of profiles for drywall in the previous sections of this article.

Now you need to align the cut profile in accordance with the pre-marked radius, and in our example, the product is attached to the ceiling using self-tapping screws, and to the floor using dowels. There is no need to skimp on the material - literally every piece should be secured.


When everything is ready, you need to insert a rack profile into each of the five-centimeter sections. In those last elements that will be intended to limit the doorway, it is imperative to insert a beam. Such bars, by the way, can be purchased for all profiles; They are good because they fit closely into the product.


After this, it is necessary to secure all the rack elements to the tex.


After cutting, the plasterboard elements must be placed to the frame and secured with 2.5 centimeter screws. Moreover, fastening should be done in stripes. First of all, the first stripe is completely recorded, then the second, third, fourth, fifth and so on. We recommend starting from the top or bottom, because if you do it from the middle, the profile will sag, making it difficult to tighten the first screw.

To cover all openings in accordance with the technology, L-shaped sheets of plasterboard are used. You must try to ensure that the joints do not fall on those rack profiles that are intended to limit the opening, since here the putty will certainly crack.
The sheet can be pre-cut on the floor, but it is more convenient to do this “on the spot”. It is recommended to take a sheet that faces the opening, screw it, and only then cut through the top with a wood hacksaw or jigsaw. One side is cut through on the side, breaks, then the other side is cut through. This way the work will be more accurate and faster.


How to attach the profile to the walls?
For many this is not a problem. Especially if we are talking about a new premises with enough smooth walls. Fastening is carried out using standard perforated hangers, the algorithm of actions is as follows.
Step one. First you need to secure the hangers to the walls using dowels.
Step two. Then the pendants need to be bent to form the letter “P”.
Step four. The latter has a special hole through which, using fleas, you need to fix the profile.
Step five. First, the profiles are attached, in most cases, to the edges of the walls, then they are leveled and 3 threads are pulled between them. After this, the remaining elements are set and fixed according to the latter.
Video - Arranging a frame for gypsum board
When constructing or renovating a private house, structures made from plasterboard sheets are often used. Depending on the initial conditions and final goals, they can be mounted to structures made of various materials, and one of the possible and most frequently used options is frame construction from metal profiles.
Metal profiles for plasterboard can be used when installing structures of various types and purposes. In private housing construction, plasterboard profiles are usually used for the following purposes:
- forming frames for suspended ceilings;
- wall cladding;
- construction of double-sided partitions;
- arrangement of niches for compartment doors.
On the market building materials there is a wide range of metal profiles various types and sizes shown in Table 1.
Table 1. Types and designation of metal profiles for plasterboard structures

The metal profile for plasterboard is made from rolled galvanized steel 0.4-0.7 mm thick by rolling through a profile bending machine, which forms stiffening ribs and perforates mounting holes simultaneously giving the product the required shape, and the zinc coating provides long-term protection of the product from corrosion.
PN (UW) – guide profile
It has a U-shape and is used in the frames of partitions and cladding as a guide element or a jumper device paired with a rack profile, in compliance with the appropriate standard sizes (the same back width).
Table 2. Guide profile dimensions

 For greater convenience and ease of installation, some manufacturers can make the back perforated for future attachment points.
PS (CW) – rack profile
 It has the shape of a square letter “C” and is used as vertical racks For plasterboard partitions and wall cladding. Mounted in pairs with a PN profile of the appropriate size (same back width). The choice of dimensions should be made based on the width of the structure (affects the width of the backrest) and its height (the length of the profile from floor to ceiling without connections).
Table 3. Rack profile dimensions
There may be holes in the back for engineering communications, and on the shelves there is embossing with stripes or dots for centering the screws when screwing in and marking when installing gypsum boards (depending on the manufacturer).
PP (CD) – ceiling profile
 It is used for installation of suspended ceiling frames and wall cladding. The shelves and back of this profile have longitudinal embossing in the form of three stripes to center the screws and increase rigidity. TO supporting structures fastening is done using hangers, for installation of which the edges of the ceiling profile are bent inward. Installation is carried out in tandem with the ceiling guide profile.
Table 4. Ceiling profile dimensions
PNP (UD) – ceiling guide profile
 Serves as a guide and holding support for the PP ceiling profile both when installing suspended ceilings from gypsum plasterboard, and when covering walls with plasterboard sheets. Mounted in tandem with a ceiling profile.
Table 5. Dimensions of the ceiling guide profile
For convenience, some manufacturers can produce a ceiling guide profile with holes in the back for future mounting points.
PA(CD) – arched profile
 Used to make structures with radial bends. It is made on the basis of a PP profile with the formation of flat sections 150 mm long at both ends. At self-production arched ceiling profile, it is necessary to cut the shelves of the product into sectors, and then bend them in the desired direction with the required radius.
Table 6. Dimensions of the arched profile
UA – reinforced profile
 Used to form the frame of reinforced suspended ceilings. Can also be used as part of structures for fastening door and window boxes, wall decoration, for placing wiring and communication lines, as well as installing partitions with special requirements and increased height. It is distinguished by increased metal thickness in the product and increased shelf height.
Table 7. Reinforced profile dimensions
| Product marking | Metal thickness, mm | Back width, mm | Shelf height, mm | Number of rows of notches in the back, pcs. | Standard product length, m |
| UA – 50×40×2 | 2,0 | 50 | 40 | 1 | 2,6; 3,0 ; 4,0 |
| UA – 75×40×2 | 75 | 2 | |||
| UA – 100×40×2 | 100 | ||||
| UA – 125×40×2 | 125 | ||||
| UA – 150×40×2 | 150 |
 Used for installation of ceilings, partitions, attics, and wall cladding. The U-shaped profile is used in cases where it is necessary to reduce the installation distance to a minimum when attaching plasterboard sheets.
Table 8. U-profile dimensions
Elastic tire
 An elastic tire is used when installing gypsum boards in the space between the ceiling and the roof structure, with a small installation height, when installing cladding along wooden slats or brickwork.
Table 9. Elastic tire dimensions
PU – corner profile
It is designed to protect the outer corners of plasterboard partitions and cladding, the plaster layer from mechanical damage. The profile has sharp corner(85°) and perforation along the entire length of each shelf. Putty penetrates into the holes of the shelves, which ensures strong adhesion to the surface of the corner. Made from galvanized steel or aluminum.
Table 10. Corner profile dimensions

PM – beacon profile
 Used as a support guide when finishing works for leveling surfaces (plastering, puttying, filling floor screed). Fixed to the required level using mortars.
In order for the construction of a plasterboard frame to be strong and stable, you need to think through everything down to the smallest detail. A corner made of plasterboard profiles, which you can make with your own hands, will help strengthen the structure.
 An example of a mounted corner made of metal profiles for gypsum plasterboards
 It’s worth learning how to make a corner with your own hands and on our own arrange fastener. The first thing you need to know is that angles are divided into two types:
- External corners.
- Internal corners.
Each of these types of fasteners has its own assembly features and installation technology. Of course, you should study each of them so that high-quality and durable elements are fixed in the corners of the room.
The corner from the profile for plasterboard is often used in different areas repair work, as well as in the embodiment of other ideas for transforming space. Design in the form of corners from plasterboard sheet, can be used in the following options interior works in a house or apartment:
- assembly of door frames;
 Design door frame from profiles
 - for various items;
- and also the corners are used to fasten the profile, which weighs a lot;
- also requires strengthening the structure with corner elements;
- those who plan to assemble also use angles from profiles;
- to reinforce walls that need to be leveled, corners from profiles are also used;
- when, use corners from profiles that are guides and racks. This allows you to strengthen the structure of the shelving and make the cabinet stable;
 Drywall cabinet frame
 - corners from profiles are applicable when.

Required tools and materials
Before attaching the profile and corners from leftover material, of course, you need to buy the materials required for the mission, as well as. These are:

It is better to give preference to quality and durable materials. This will allow you to perform work on high level, How real professional.
Internal corner
To create an internal corner with your own hands, you will need the following materials:

The process must be carried out sequentially and in in the right order to avoid the slightest error.
Step-by-step instruction

After last stage- reinforcement of corners, that is, strengthening of the frame using corners from profiles, can be considered complete.
Watch the video: installation option internal corner metal frame.
Configuration interior spaces in many buildings it is such that it is impossible to do without the formation of external corners. For example, only one doorway, connecting two rooms, creates external corners on both sides, and there can be quite a lot of them, especially in office premises. One of the main disadvantages of such corners is that when finishing them modern materials(tiles, drywall, etc.) a joint is always formed. It not only spoils the overall appearance, but is also quite vulnerable to damage. To protect such joints to the maximum, we use metallic profile- external corner.
Product Features
It is important not to confuse these products and external corner from a profile for plasterboard. Since the external corner profile is a product designed to protect the ends of tiled surfaces, and at the same time it performs a decorative function. Essentially, he is additional element which will be part of the decor. A outside corner from a profile for plasterboard - this is just a corner made of a metal profile for general construction purposes, two sheets are secured with it of this material at the corner joint. After the corner is completely finished, it will not be visible, since it will be hidden under a layer of primer and external finishing material.
The direction of the company "ArtProfil" is the production and wholesale of products from the metal profile itself for various purposes. And if you need to buy inexpensively this type goods in Moscow or any other city, it is better to purchase products from the manufacturer, that is, from us.
Types, application
If you are interested in a profile - external corner - (in Moscow, for example, or another city) for decorative finishing, then we can offer several types of it:
- external for ceramics;
- anti-vandal;
- overhead.
External corner profiles for ceramics come in several types - L-shaped, rectangular, rounded, C-shaped, corner. Its main task is to hide the ends ceramic tiles ensuring aesthetic appearance. Its installation is carried out while laying the tiles on the wall, since it is held by it, and only on one side. On the other side of the corner, the profile of the tile only covers the end. It is fixed with mounting glue. The external metal corner is made of anodized aluminum, galvanized steel, and brass.
The anti-vandal external corner profile differs from the first in the way of location and installation. When using this type, the tile does not form a corner joint, but simply rests against the profile with its ends. In this case, the corner of the wall is not covered with ceramics, but this is not visible, since it is covered by a profile for external corners. The installation of this type of product is carried out during the laying of the finishing material and it is fixed with mounting adhesive, so the cost of installing this product will be minimal.
If the outer corner is already completely done, but you need to close the tile joints, then you can buy a profile for the outer corners of the invoice. Such products are straight, with rolled edges and rounded. This metal profile is very easy to install and allows you to completely hide the corner joints on walls with already laid tiles. At the same time, it can do a good job of hiding defects on the edges of the finishing material, if any. This external (metal) corner is fixed to the wall using mounting adhesive, which eliminates the need to drill holes in the wall for fasteners.
Why us?
Besides specified types metal profiles, we can make this product to order of any shape or length. At the same time, the price for such a profile will not differ from the already finished products. So, if you need to buy inexpensively, and even wholesale, these products in Moscow or St. Petersburg, contact ArtProfile.
And since the company sells different types metal profiles, then we have many different products made of metal, including external corner profiles for drywall.
And although our production is located in the capital, you can safely contact us even if you live in St. Petersburg or any other city. We will make sure that our products reach you as quickly as possible.
11849 0 1
Types of profiles for drywall and methods of their installation
Greetings, comrades! Today we have to find out what types of drywall profiles there are, for what purposes they can be used and how they are installed. In addition, we will analyze a couple basic designs, which are the basis of almost all types interior decoration premises using gypsum boards.

Why profile
As you know, for the installation of frames and lathing under gypsum boards, not only galvanized profiles are used, but also. Which material is better?
The answer is quite clear: profile. Arguments are at your service:
- Galvanized steel lasts indefinitely, regardless of atmospheric humidity. Of all negative impacts steel profile it is only afraid of corrosion, from which it is reliably protected by a layer of zinc coating;

- Galvanization is not afraid of insect attacks, which in just 10-15 years are quite capable of destroying or rendering a wooden frame unusable;
- The geometry and dimensions of the steel frame elements are unchanged, while the beam will lengthen and warp with each seasonal increase in humidity. Changing the shape of the frame will predictably lead to cracks appearing between the sheathing sheets or even right along them.

GCR, however, can be mounted on even wooden walls without sheathing, thereby reducing inappropriate use usable area rooms. It is also used for leveling walls made of mineral materials on glue beacons. In this case, the sheet is glued to a spot-applied gypsum adhesive or any leveling gypsum mixture.

Announce the entire list
Titles
What types of profiles can be found on sale?
To assemble frames and battens, only 4 types are used:

However, if desired, construction stores You can find two more varieties:
- Arched (flexible). It is capable of arching with a small radius, forming vaults of arches or bending the edges of multi-level ceilings;

- Angular. A perforated galvanized corner is placed under the putty to strengthen the outer corners of walls, door and window openings.

The corner profile is made not only from galvanization, but also from PVC. Plastic reinforcing corners are often supplied with reinforcing mesh.
In the future, we will turn our attention, first of all, to those types of plasterboard profiles that are used for assembling rigid frames and sheathing - CW, UW, CD and UD.
Functionality
How do the types of profiles for drywall and their application compare? To answer this question, just re-read the titles.
- Rack-mounted used for mounting vertical posts when assembling wall frames and. It can also be used as jumpers between posts, reinforcing the rigidity of the frame;

The main element of the wall frame with niches is the UD stud.
- Guide mounted on permanent structures (floor, adjacent walls and ceiling). The edges of the racks are inserted into it;

- Ceiling and ceiling track used in the same way when installing sheathing suspended ceiling. With the same success, they can be used to level walls with large (over 50 mm) blockages, bends and differences.
The racks have sufficient rigidity to withstand bending loads, but the ceiling profile, due to the small height of the side walls, requires additional fixation. For this purpose, suspensions are used - straight and adjustable.

If the ears are not long enough, two straight dewlaps can be connected in series, thereby increasing maximum distance from the capital structure to the cladding.
Dimensions
What are the profile sizes?
First, let's get acquainted with the standard sections of the main varieties:
- All ceiling profiles for plasterboard have the same wall size - 60 and 27 millimeters;

- Ceiling guides are compatible with them - 27 and 28 mm, respectively;

- Rack-mount ones have side walls 50 mm high, but the width (bottom wall) can be 50, 75 or 100 mm;
The wider the post, the greater its rigidity with respect to bending load.
- The height of the side walls of the UW guides is 40 millimeters, the width of the guide corresponds to the width of the racks - 50, 75 or 100 mm.
With length, everything is somewhat more complicated. Theoretically, according to the manufacturers, all varieties are produced with a length from 2.5 to 6 meters inclusive.

In practice, the range of products in stores is much smaller:
- For guides and ceiling guide profiles standard length- 3 meters;
- For rack and ceiling - 3 and 4 meters.
If maximum length ceiling profile is insufficient for your purposes (that is, less than the length of the room or the height of the wall that is supposed to be leveled), so-called straight connectors are used to join products of shorter lengths. In addition to them, you can find cross connectors called “crabs” on sale.

Price
How much do galvanized sheathing and frame elements cost? I will provide the current ones at this moment(November 2016) prices for the Leroy Merlin chain of stores.
The actual cost depends not only on the cross-section and length of the profile, but also on the thickness of the metal from which it is made. Galvanized products with a thickness of 0.55 - 0.6 mm are designated in the company’s price list with the words “premium” or “strong” and cost the buyer approximately one and a half times more expensive than “economy” class profiles (0.4 mm).

Installation
So, we have studied the classification of profiles and their purpose. It's time to move from theory to practice.
General rules
Here are a number of installation rules common to all types of frames and battens:
- Can be used for cutting galvanized steel only metal scissors. Abrasive cutting with a grinder on metal is extremely undesirable. The fact is that heating the cutting area leads to burnout of the anti-corrosion zinc coating, and the edge of the frame element remains defenseless against rust;

- Tracks, guide ceiling profiles and hangers are attached to brick, stone and concrete surfaces dowel-screws. The size of the fastener depends on the strength of the surface: for heavy concrete a size of 40x4 mm is sufficient, and for loose aerated concrete or shell rock it is better to increase it to 80x8;
- When attaching the guides, the wall, ceiling or floor is drilled with a hammer drill directly through the profile pressed against them. Then a dowel-screw is inserted into the drilled hole and tightened with a screwdriver. This fastening scheme will save you from the problem of matching holes in the profile and the capital structure;

- The step between the mounting points of the guides should be about half a meter;
- Suspensions along the profile on the ceiling are attached in increments of 60 cm, and on the wall, where the suspension experiences a minimum load - 80;
- For attaching guides to wet areas It is strictly forbidden to use wooden choppers. In an atmosphere with periodic fluctuations in humidity, they quickly dry out and fall out of the holes;
- To connect the profiles to each other or with hangers, use metal screws 9 mm long. Self-tapping screws can only be screwed in with a screwdriver: it is almost impossible to connect two profiles with your own hands using a screwdriver;

The photo shows a corded screwdriver, which I use to assemble drywall structures.
- The standard step between posts or sheathing elements is 60 centimeters: this is exactly half the width of a sheet of drywall. The pitch is measured not between the edges, but between the axes of the frame elements. In this case, the seam between adjacent sheets will fall exactly in the middle of the profile;

- If the structure will experience significant loads during operation (for example, when it comes to a wall in narrow hallway), the step between the profiles can be reduced to 40 or even 30 cm. The main thing is that the width of the plasterboard remains a multiple of this step;
Strengthening the partition frame can be achieved without increasing the thickness or reducing the pitch of the racks - by inserting a 50x50 block into each of them or by connecting the racks in pairs (putting one CW into the other or simply securing them next to each other).


- For sound insulation, damper tape is placed under the guides. It dampens acoustic vibrations, preventing their transmission from the plasterboard to the permanent structures of the building;
- Door and window units(including metal-plastic) are attached to the side profiles and horizontal jumpers with self-tapping screws 16 - 32 mm long (depending on the thickness of the box), screwed through the profile. As a seal and to strengthen the connection on outer surface block, it is necessary to first apply a strip of polyurethane foam.

Suspended ceiling, wall alignment
How to install profiles under plasterboard when assembling a single-level suspended ceiling?
Step-by-step instructions are at your service:
- Having marked the horizontal line of the ceiling, secure the UD guide along it. You can safely use additional sections of any length, the main thing is that the guide is securely fastened at the junction with the ceiling CD;
- Mark the lines along which the ceiling profiles will be mounted, and fasten the hangers along these lines;
- Trim (or join) the ceiling CDs to length and insert them into the guides;
- Having aligned each CD according to the long rule, pull the hangers to its side walls;
- Bend the ears of the hangers towards the ceiling.

If you are assembling the sheathing to level the wall, all steps are completely identical to those described above, adjusted for the vertical orientation of the frame.

Partition
How to assemble a partition frame?
In general, this is done like this:
- Using a plumb line, mark the axis of the partition on the ceiling, floor and adjacent walls;
- Secure guides along this line;
- Mark the position of the racks on the ceiling and floor, using the same plumb line;
The markings should remain visible even after covering the frame with plasterboard. It will help you secure the sheets to the racks hidden by the sheathing.
- Cut the posts to length and align them according to the marks;
- Secure each post to the rails on both sides.

A special case is the assembly of a noise-insulating partition. In this case, we need to decouple the wall cladding on both sides acoustically. The goal is achieved by assembling two independent frames at a small (within a centimeter) distance from each other.

Conclusion
So, we got acquainted with the types of galvanized profiles for gypsum boards and the technique of their installation. As always, the reader can find Additional materials in the video in this article. I look forward to your comments. Good luck, comrades!
December 7, 2016If you want to express gratitude, add a clarification or objection, or ask the author something - add a comment or say thank you!